Altcraft Docs LogoAltcraft Docs Logo
User guide iconUser guide
Developer guide iconDeveloper guide
Admin guide iconAdmin guide
English
  • Русский
  • English
Login
    User documentationGetting StartedFAQAltcraft glossary
      Profiles and databasesarrow
    • Subscription resourcesManaging databasesSubscriber profileProfiles import and data updateCommon Errors When Importing ProfilesScheduled customer data importManaging Data TablesAutomatic data collectionBulk customers profiles updateDouble opt-in subscriptionSuppression listsProfile relationsProfile history exportProfile exportCreating a static segment based on import resultsHow to open a CSV fileMatchingTypes of fields in the databaseGlobal control groupsSubscription Manager
      Communication channelsarrow
      • Email channelarrow
      • Email: ISP interactions best practices
          First mailingarrow
        • Quick StartEmail
        Email: sending domain configurationEmail: setting up and using postmastersHow email tracking works
        Push Channelarrow
        • Mobile Pusharrow
        • First Mobile Push Mailing
            Mobile Push Providersarrow
          • Firebase Cloud MessagingApple Push Notification ServiceHuawei Mobile ServicesRuStoreYandex.AppMetrica
          Integrate your app with Altcraft
            Deprecated: Manual Push Setuparrow
          • Deprecated: Setup and ConnectionProcessing and adding a subscriptionEvent registrationProviders: push message structure
          Web Pusharrow
        • First Web Push MailingResource and Website Setup
            Web Push Providersarrow
          • Firebase Cloud messagingApple SafariMozilla Services
          Transferring Data to the PlatformWeb Push SDK MethodsPWA and Push Notifications
            Migration and Subscription Transferarrow
          • Migrating push subscriptions from third-party servicesHow to transfer push subscriptions configured for Safari?Migration from OneSignal
        SMS channelarrow
      • SMS
        In-Apparrow
      • First In-App PlacementSDK Setup and Integration
      WhatsAppViber*™
        Telegramarrow
      • Telegram BotTelegram Group
        Maxarrow
      • MAX BotMAX Group
      NotifyCommunication Channels WorkflowРуководство: SMS-рассылка через VK NotifyРуководство: SMS-рассылка через УТШРуководство: push-рассылка через сервис от "Согласие"
      Segmentationarrow
    • Static SegmentsDynamic SegmentsUpdatable Segments
        Segmentation Conditionsarrow
      • Segmentation by Profile dataSegmentation by Interactions with EntitiesSegmentation by Activity of the channel
          Segmentation by external dataarrow
        • Segmentation by external dataSegmentation by external SQL tablesRecommendations for segmentation by external data
        Segmentation by Profile structure
      Best Send Time (BST)Logical operators "AND" and "OR"Recommendations for working with segments
      Message templatesarrow
      • Working with message templatesarrow
      • Working in the editorEmail templateSMS templatePush templateTemplate for In-AppMAX templateTelegram templateWhatsApp templateViber templateNotify template
        Visual editor for email-templatearrow
      • Visual editor interfaceAdding blocksElements and their settingsCustom blocksElement stylesLayer manager
      Template fragmentsImage galleryContent personalizationCreating tables based on array elementsBlock editor for email template
        Altcraft Variables and Functionsarrow
      • Logical expressions in messagesLoops in messagesMarket variables in templatesUsing the JSONPath functionality
        Dynamic content in messagesarrow
      • Dynamic HTML contentDynamic JSON contentContent from SQL database in templatesDynamic API content
      Importing and exporting a message templateImporting a template from a third-party serviceExporting a template from Pixcraft
      Mailingsarrow
    • Broadcast mailingsTrigger mailingRegular mailingMultivariate testingMailing testingMailing schedulePlacementsMailings calendarMailing log — errors and troubleshootingManaging the Sender Queue
      Automation scenariosarrow
    • Managing scenariosScenario NodesClassic marketing scenariosStep-by-step welcome scenario guideScenario for automatic notification of the managerAbandoned cart scenarioCycle Handling in Automation ScenariosHigh-priority scenarios
      Campaignsarrow
    • Working with CampaignsLocal control groups (LCG)Stratification violation error when limit is reachedAudience expansion in campaignsAudience building
      Marketarrow
    • Market settings
        Productsarrow
      • How to create a product manuallyHow to import a product from a fileScheduled product importProduct and SKU SegmentsPreparing the YML file
      OrdersMarket variables in message templateGuide: how to send an order confirmation email
      Loyalty programsarrow
    • Loyalty programsLoyalty integration with external systemsCreating a loyalty program from scratchBasic loyalty program use casesOrder SegmentsPromotion codes
      Reports and analyticsarrow
    • Channel reportTraffic report
        Summary reportarrow
      • Summary report metrics
      Cohorts reportLifetime reportFunnels reportGoals reportAudience growth reportClick map reportLoyalty programs reportBounces reportUndeliveries reportReport on global control groups
      Weblayersarrow
      • Formsarrow
        • Create a formarrow
        • General settingsForm customization with custom codeForm constructorAppearanceActions and form publicationConditional logic in forms and surveys
        Data analyticsBinding data channel and formsNPS testing
        Pixelsarrow
      • Goal customer actions and scoring
        Pop-upsarrow
      • Creating and publishing a pop-upSetting up a popup in the code editorManaging pop-ups manually via scriptPopup analyticsGuide: pop-up for push subscriptionsCase: Creating a pop-up with the "Wheel of Fortune" widgetBasic cases of placing a popup via the Tag Manager
        Tag Managerarrow
      • Configuring and installing Tag ManagerTrigger typesVariable typesLinking a pixel and the Tag manager
      Settingsarrow
    • Account settingsCustom linksVirtual sendersSending policiesAudit journalTags FAQ
        Connectionsarrow
      • Connection to Facebook AdsConnection to Google AdsConnecting to Yandex.Audience™Connection to 360dialogConnection to EdnaConnection to Devino TelecomConnection to SMSTrafficConnection to VK Ads™Connection to MTS OmniChannelConnection via OAuth 2.0Basic Authentication connectionToken Authentication connectionCustom Authentication ConnectionConnecting to MAXConnection to NotifyConnection to Rapporto
        Users, groups and accessarrow
      • Password and login securityTwo-Factor Authentication (2FA)
      Attribute settings
      Integrationsarrow
    • Facebook Ads Manager
        Yandexarrow
      • Yandex AppMetricaYandex.Audience™
      Google Ads AudiencesWhatsAppStatic segment synchronizationViberVK AdsNotifyMAX
        Action hooksarrow
      • Lpgenerator™Tilda™Altcraft Action HooksAction hooks event typesEvent Capture Message StructuresJSON batch request (HTTP POST action hook)Message to RabbitMQ brokerMessage to RabbitMQ exchangerMessage to Kafka brokerTest event
        Integration of third-party services using Albatoarrow
      • Connecting Altcraft to Albato Launching the welcome scenario using AlbatoTransmitting event dataSetting up a trigger mailingEvent registrationGoogle Sheets and Altcraft integration AmoCRM and Altcraft integration
        Additional Informationarrow
      • Integration scopeData Transmitted During Synchronization
      API requests: where to startarrow
    • Import or update a profileTrigger mailing launchEngage profile in scenario
      Changelogarrow
    • v2026.3.79v2026.3.78v2026.2.77v2026.1.76v2025.4.75v2025.4.74v2025.3.73v2025.2.72v2025.1.71v2024.4.70v2024.3.69v2024.2.68.2v2024.1.68
    Documentation archiveEmail Marketer's Library
  • Communication channels
  • In-App
  • First In-App Placement

First In-App Placement

In-App is a communication channel for displaying banners and other content inside a mobile application. Unlike push notifications, In-App content is only shown when the user is in the application. Content is launched through placements.

This guide will help you prepare the platform and organize your first In-App content display.

tip

In-App content is only launched through placements. It is not used in broadcasts, regular, triggered mailings, or A/B/n tests.

Step 1: Prepare S3 Storage​

caution

If you use the cloud solution, skip this step and contact technical support.

If you have installed Altcraft Platform on your own equipment (On-premises), perform the following steps yourself or pass the instructions to your platform administrators.

The platform requires an S3 storage (MinIO) to store In-App content. Preparation consists of three stages:

  1. Installing S3 storage. Instructions for installing MinIO and connecting it to the platform are described in the installation guide.
  2. Creating an In-App storage in the admin panel. Template storage settings for In-App are described in this article.
  3. Binding the storage to an account. Select the created storage in the account settings — the selected S3 storage will contain messages for In-App mailings.

Step 2: Integrate mSDK into the Application​

SDK integration is performed on the application side. Instructions for integrating Altcraft mSDK, setting up authorization, and subscribing to the In-App channel are described in SDK Setup and Integration.

Detailed instructions for each platform are provided in the developer guide: Android, iOS, Flutter, React Native.

Step 3: Create a Resource with an In-App Channel​

Select the Resources section in the main menu, create a new resource or select an existing one. Add the In-App channel to the resource.

In the In-App channel settings, specify:

  • Application versions — versions in which In-App will work.
  • Application screens — pre-prepared places in the application for displaying In-App messages.
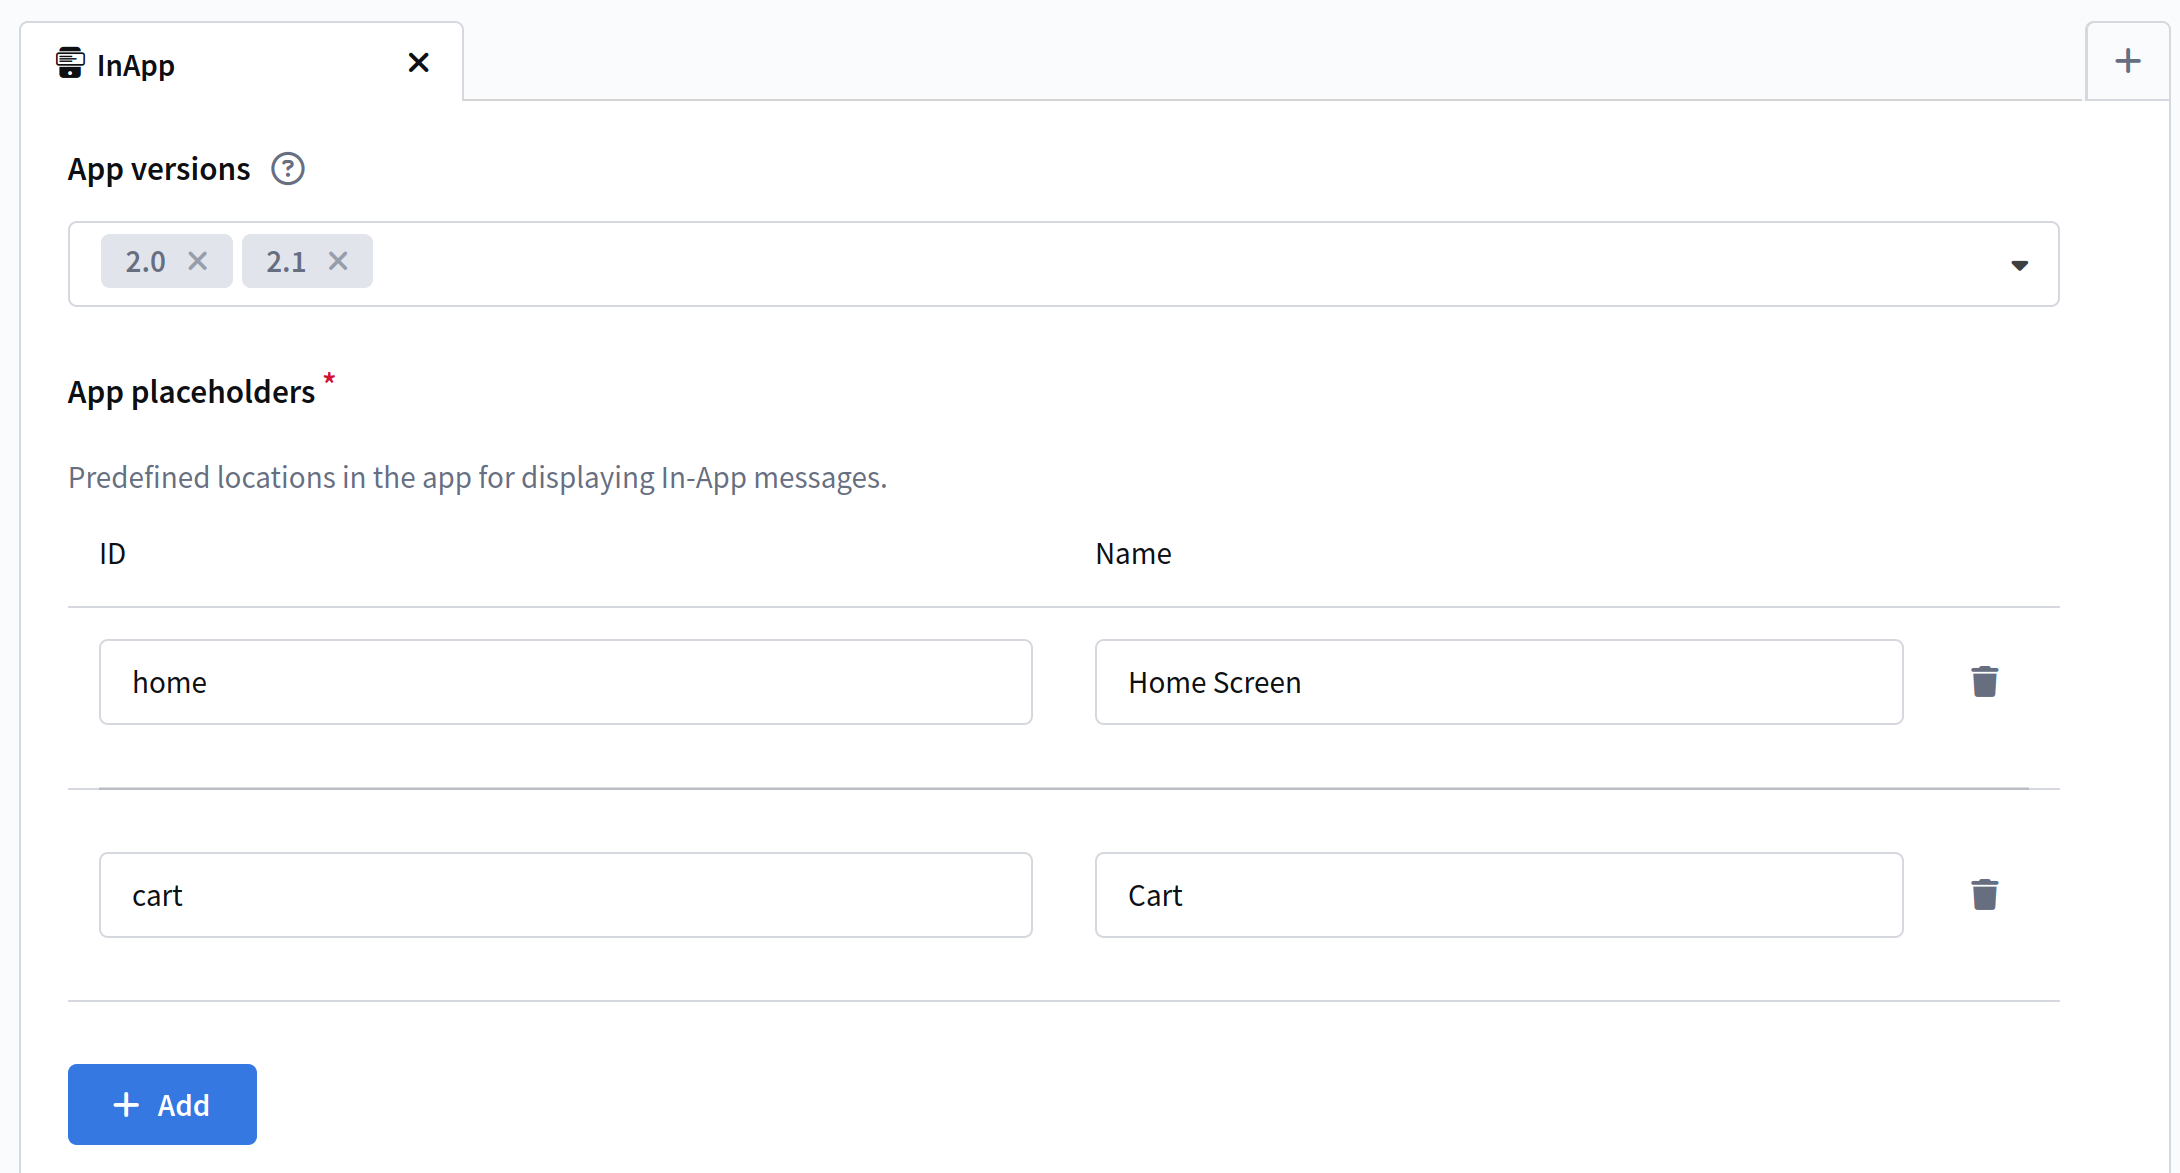
For more information on creating a resource and configuring the channel, see the subscription resources article.

Step 4: Subscribe Clients to the In-App Channel​

Altcraft Platform mailings are received by your subscribers — profiles stored in profile databases. A subscription to the In-App channel links a profile to a resource.

A subscription to the In-App channel is created in one of the following ways:

  • Via mSDK in the application. After user authentication, the SDK calls inAppSubscribe() — the subscription is added automatically.
  • Manually or during profile import. In this case, the profile data must include a Device ID value — the user's device identifier.

If you already have a client profile database, upload the data to the platform and specify a subscription to the resource with the In-App channel during import:

  • import profiles from a file;
  • scheduled import from an external SQL database;
  • platform API integration.
tip

When importing profiles, the search for existing records is performed in matching mode. For In-App channel subscriptions, search by device identifier (device_id) is available.

Step 5: Prepare Content — Create a Template​

Content for In-App is created in Message Templates. When creating a new template, select the In-App channel — the block editor will open.

When creating a template, you need to select an In-App type — the format in which content is displayed in the application:
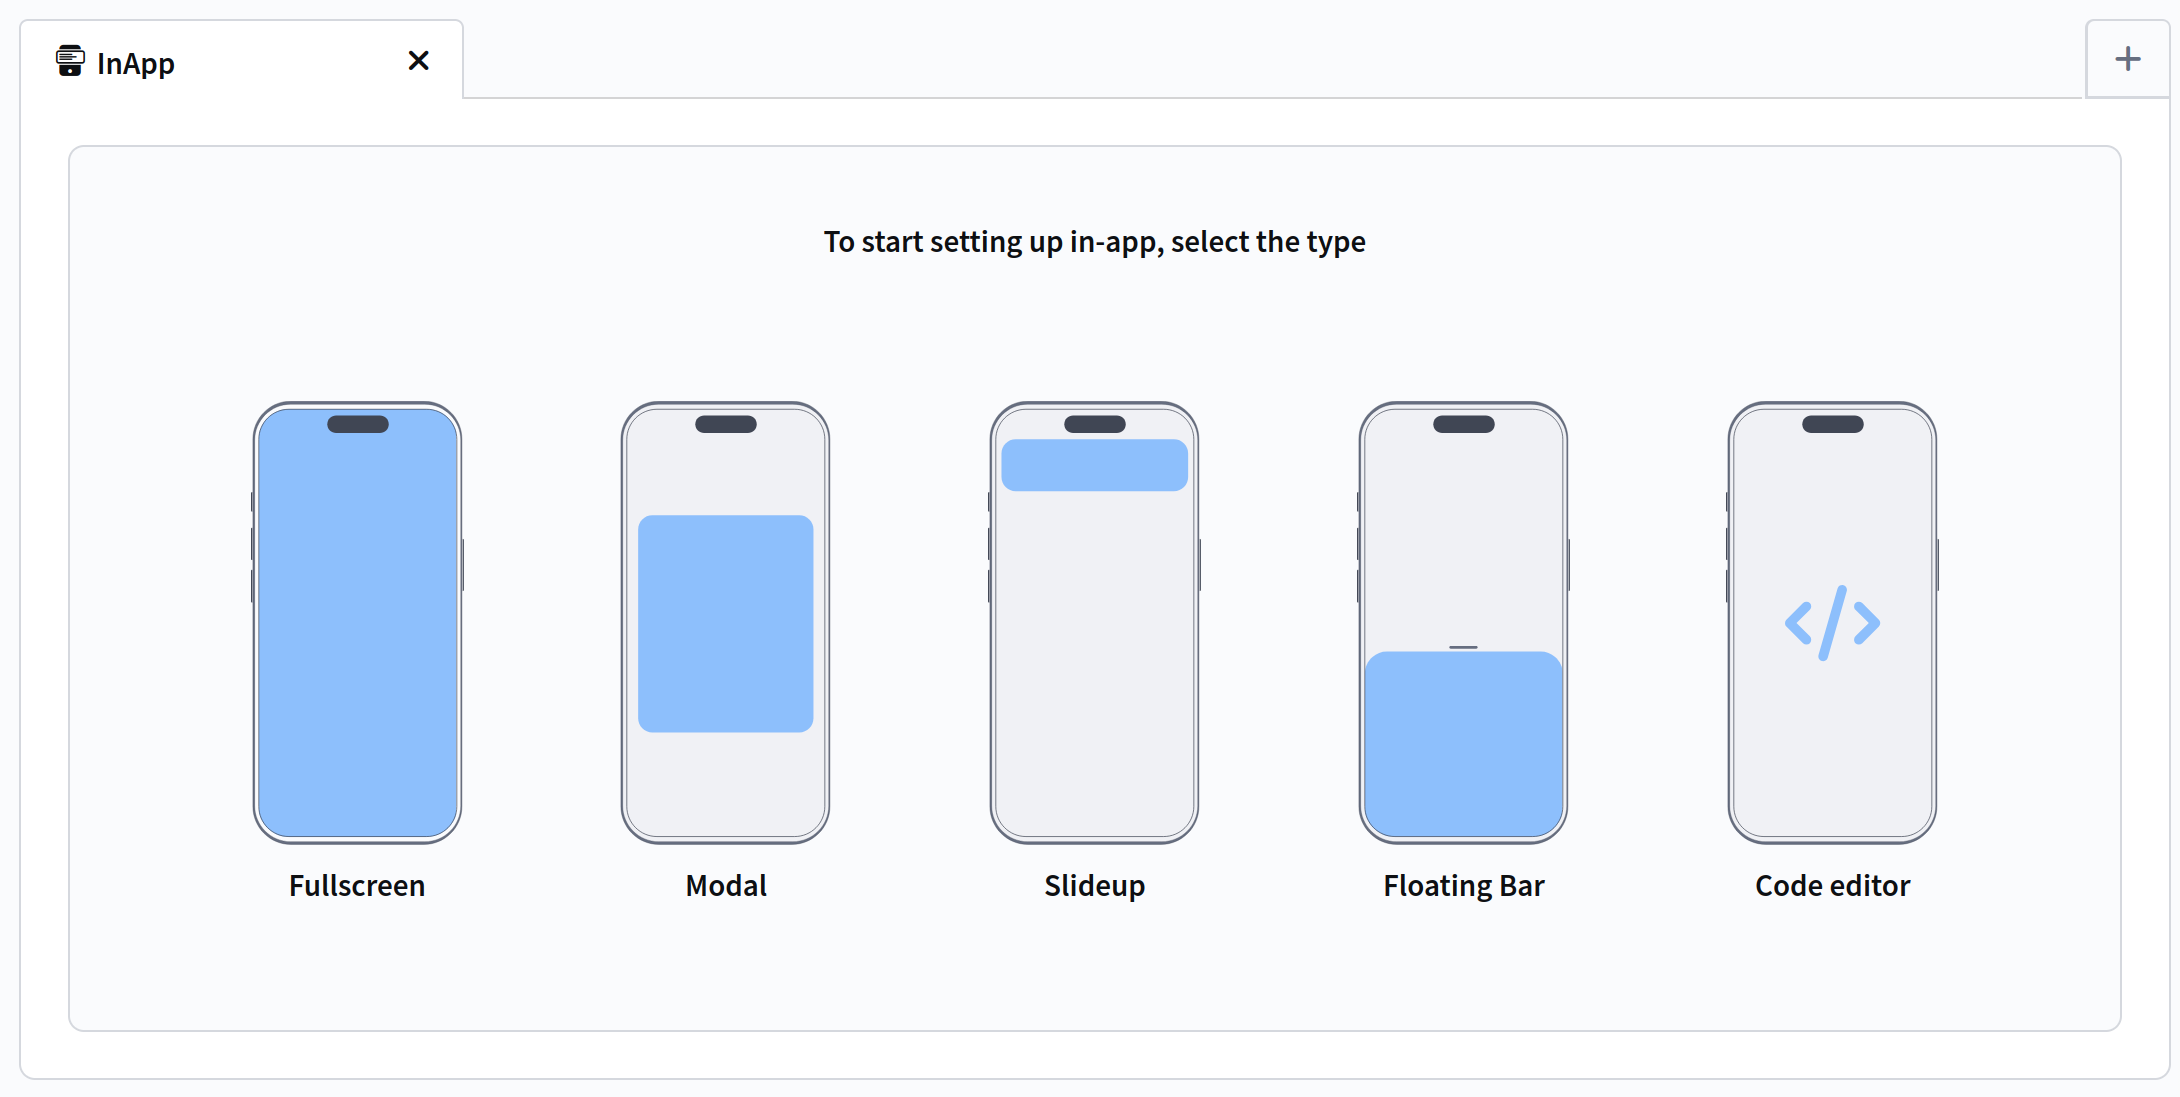
An In-App template can consist of one or more pages, between which the user switches in the application:
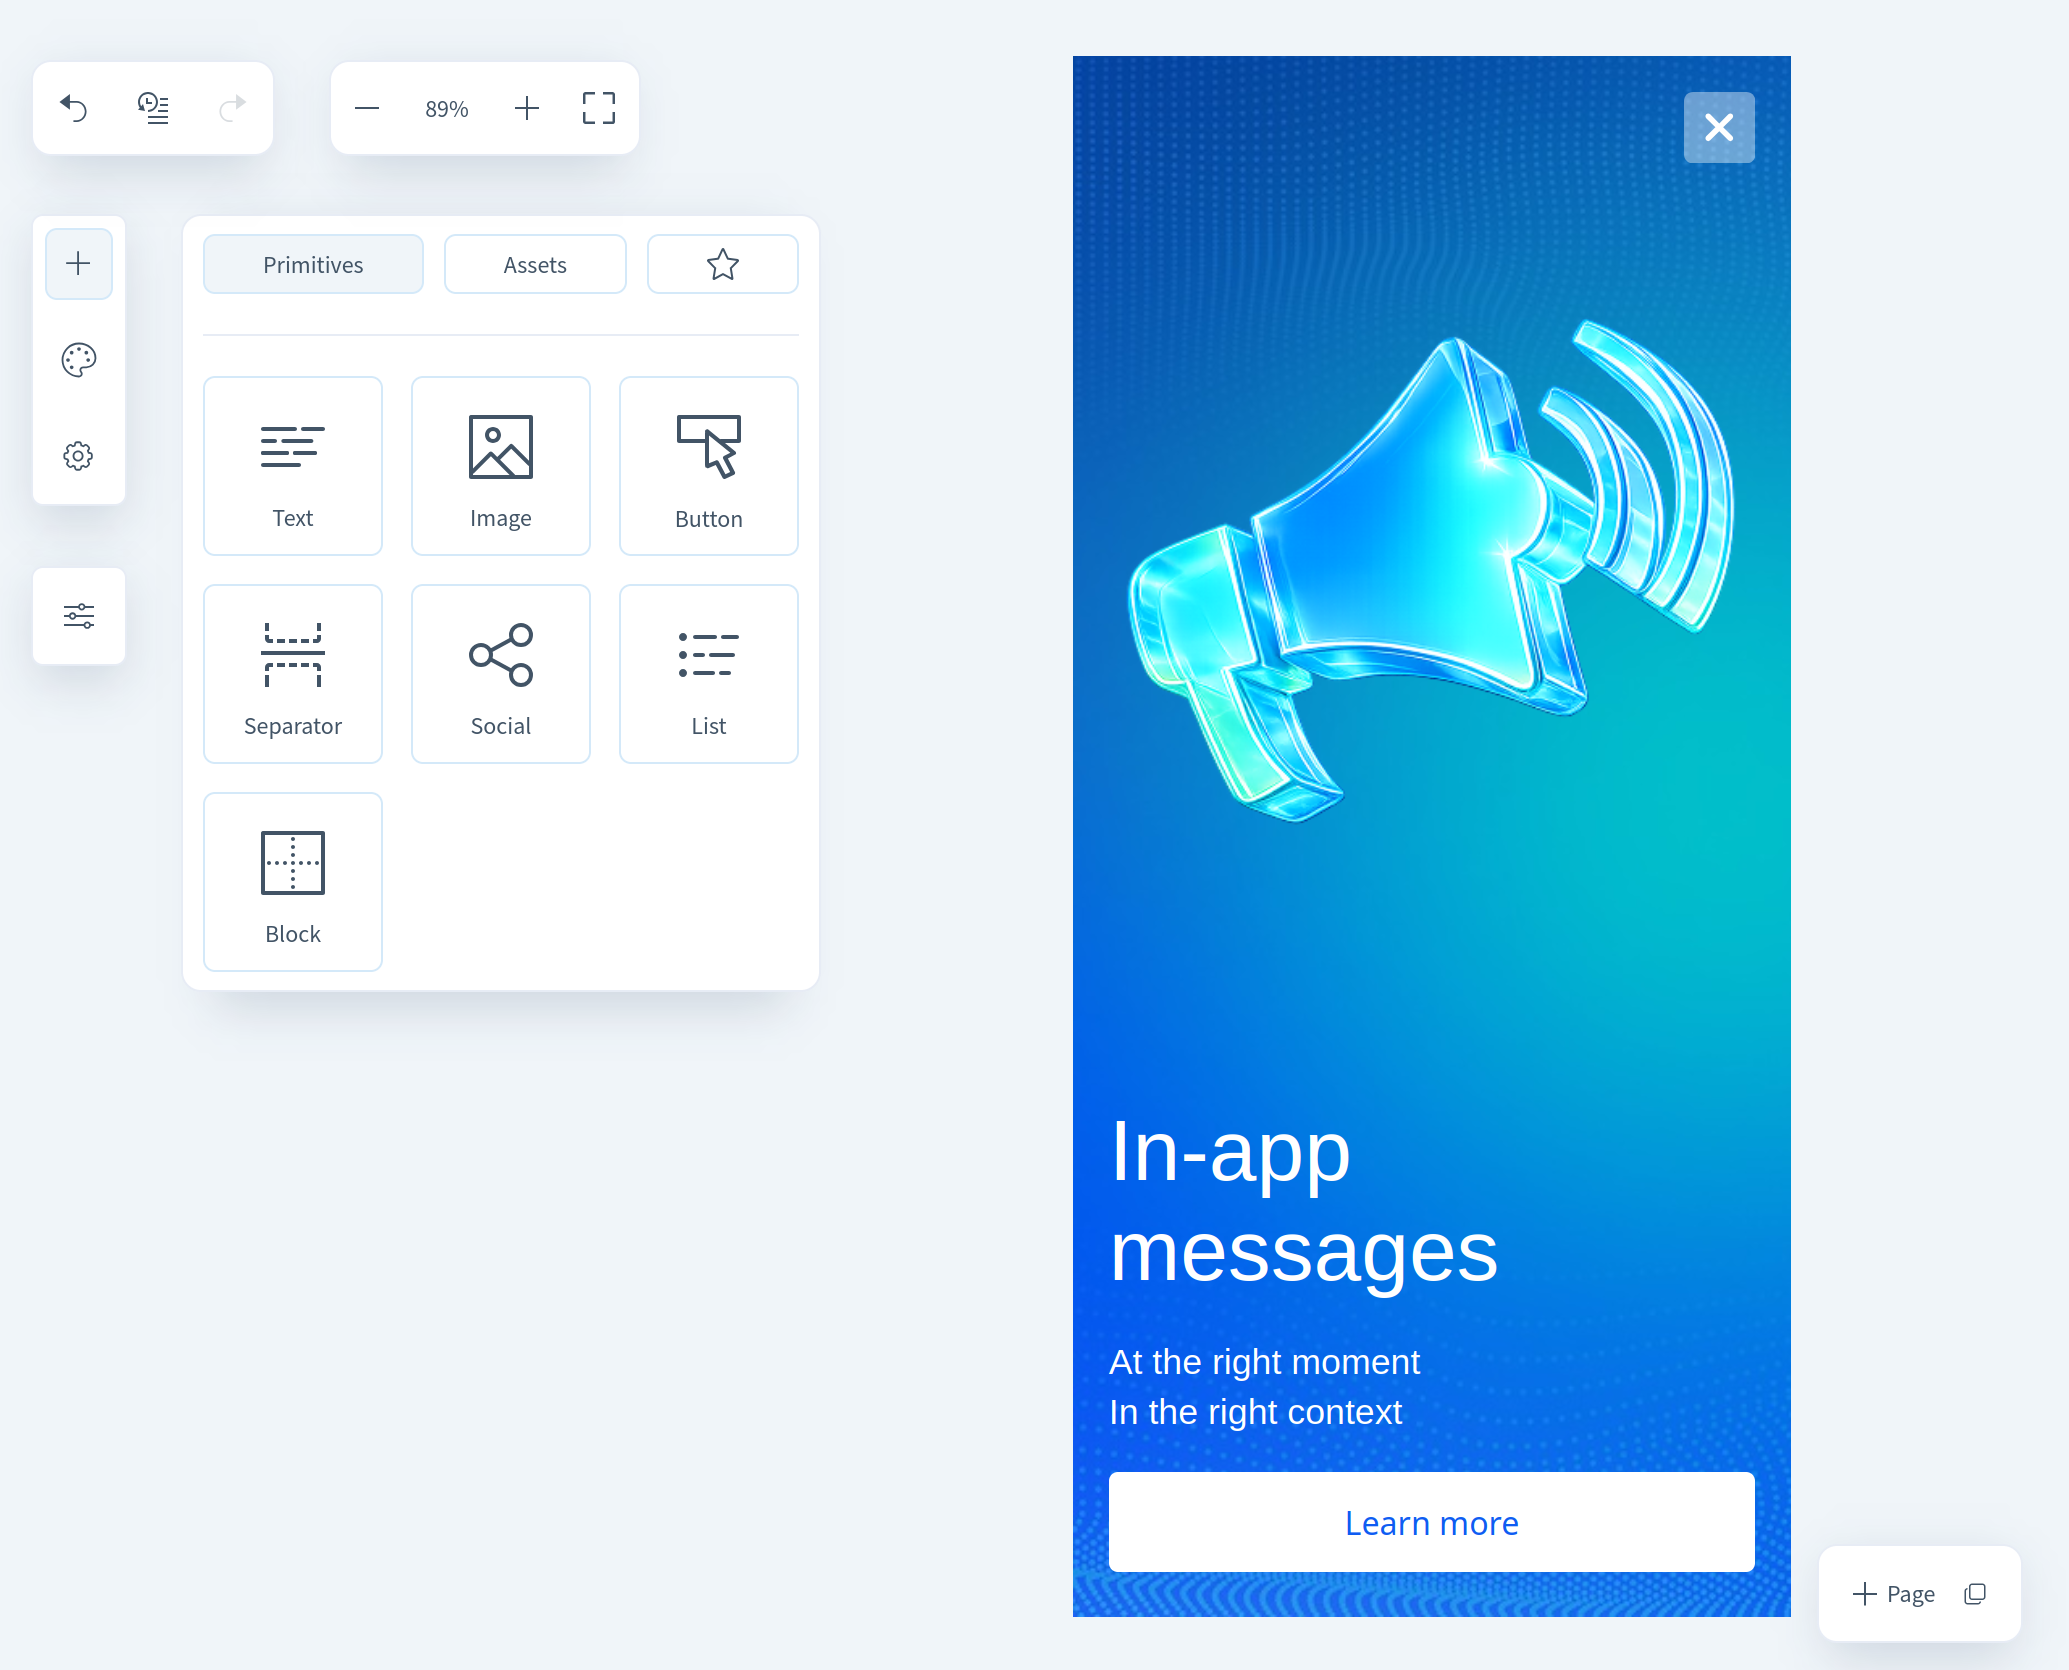
For more information on block editor elements, style and parameter settings, see the In-App Template article.

Step 6: Create a Placement​

To launch In-App content, the Mailings tool is used — a placement. Content is shown to application users who have an active subscription to the resource when they are in the application.


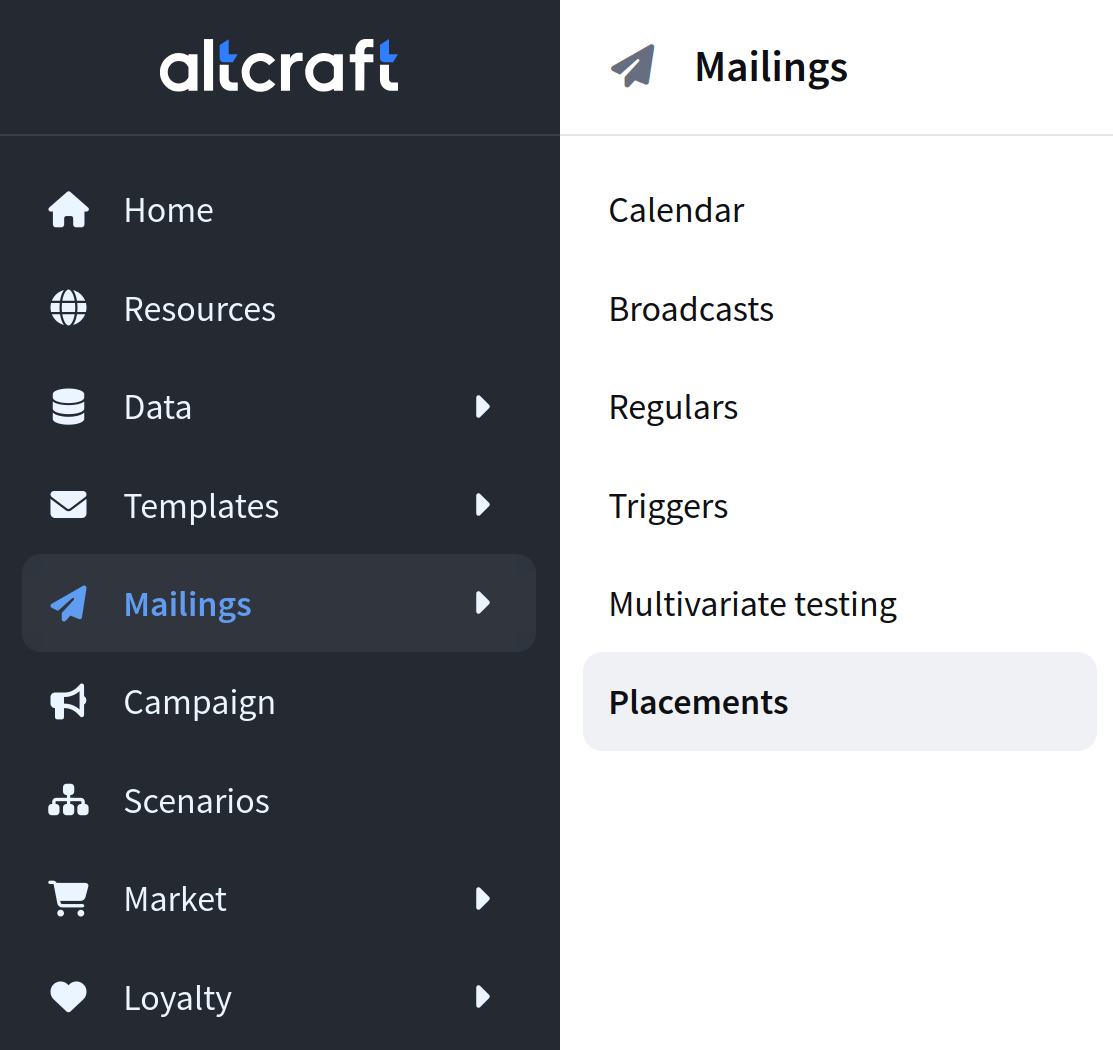
To create a placement, go to the Mailings — Placements section.


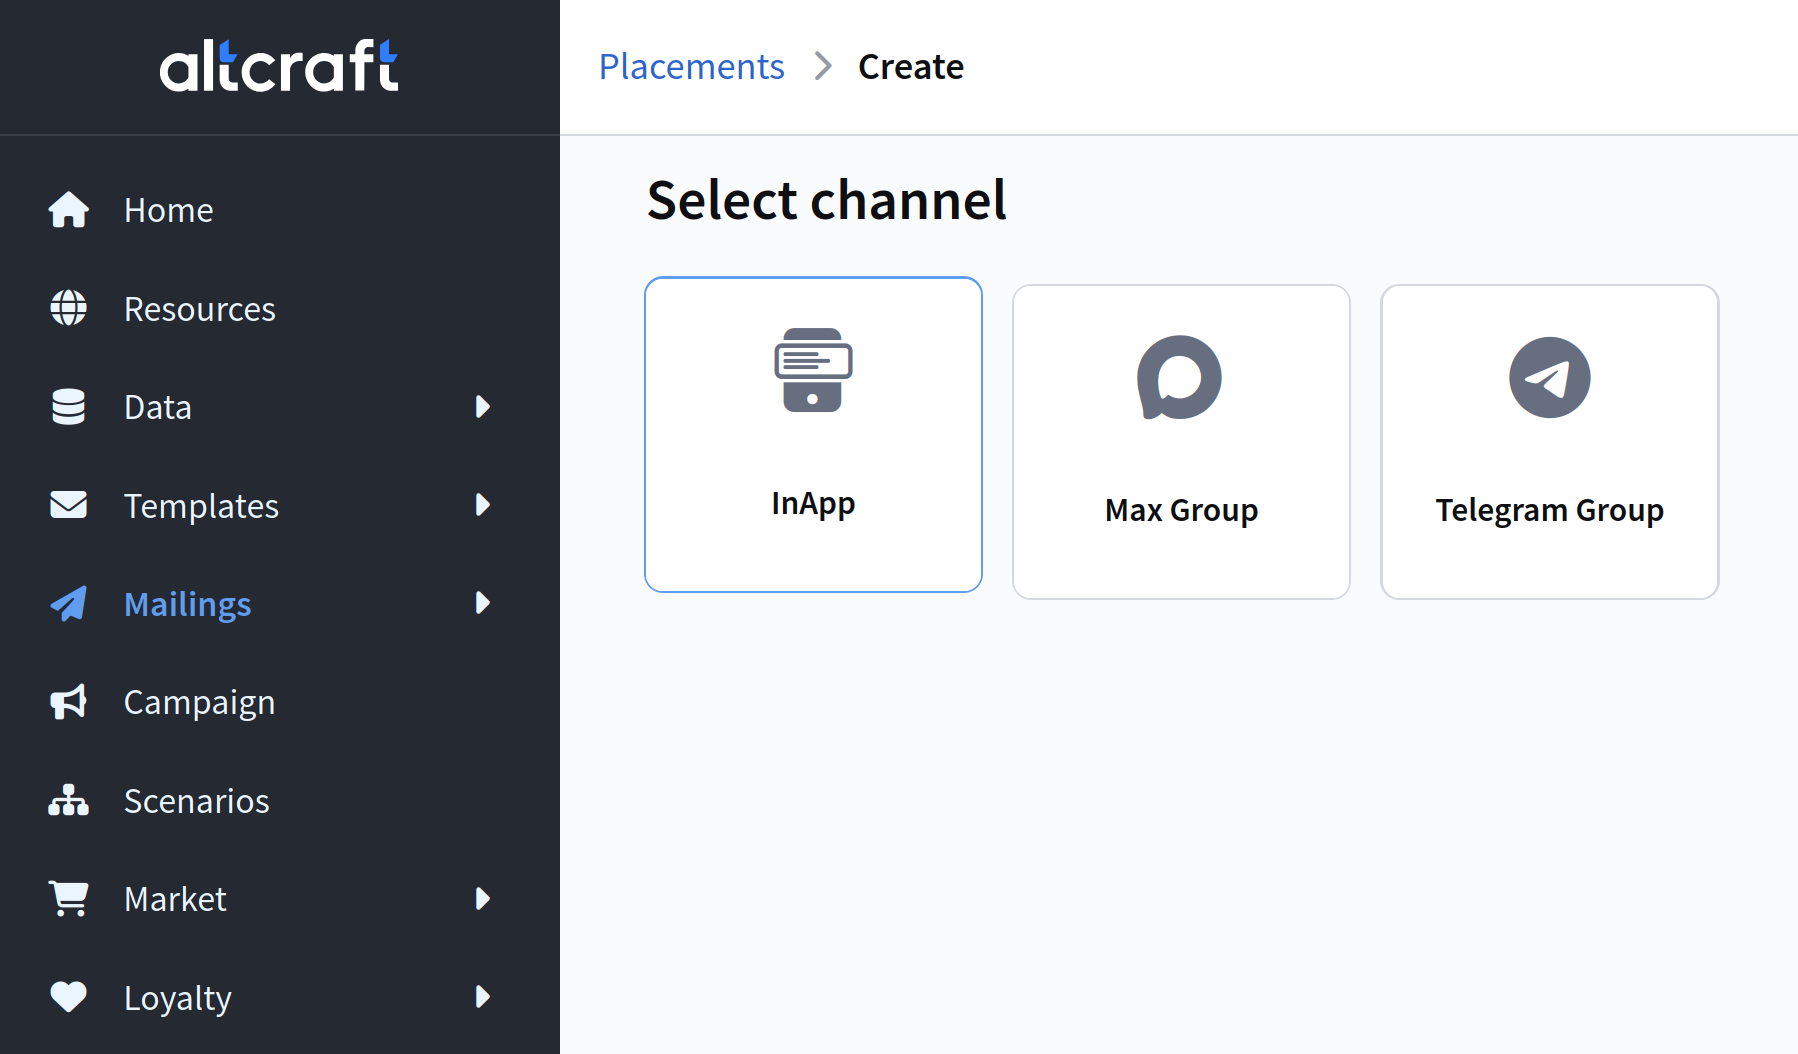
Click the Create button. Select the In-App channel.


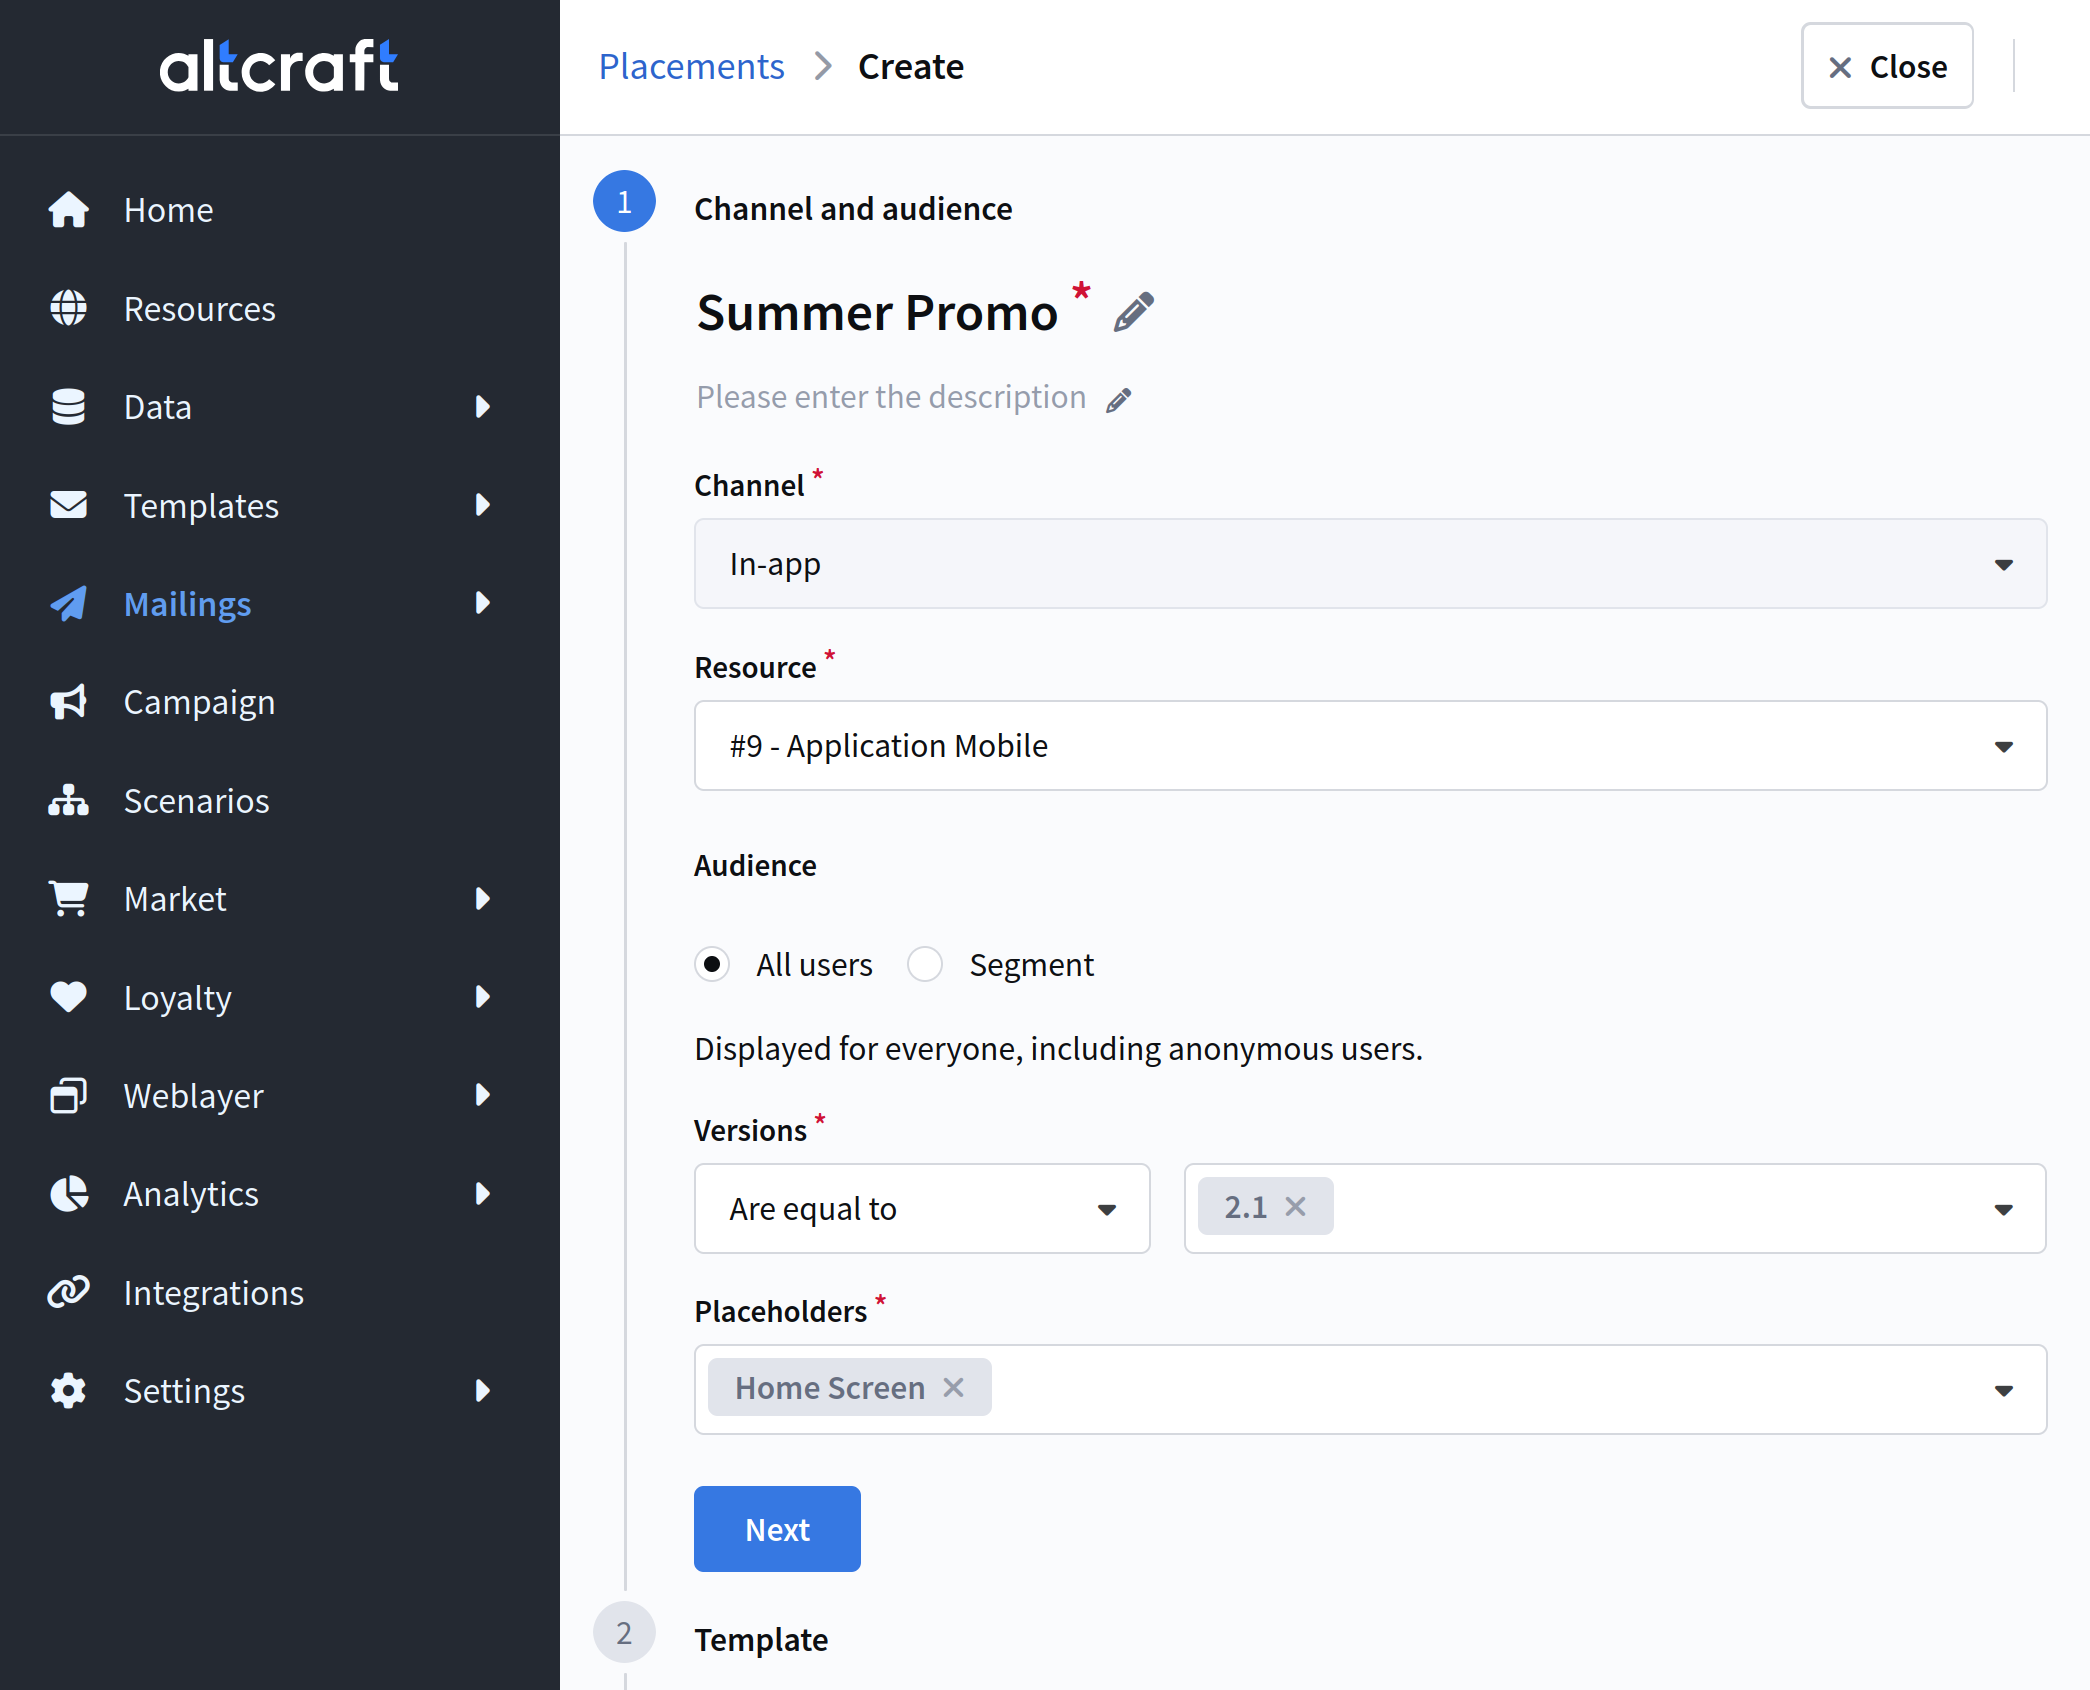
Fill in the basic information: placement name and description, subscription resource, recipient audience, as well as application versions and screens on which the content will be displayed.


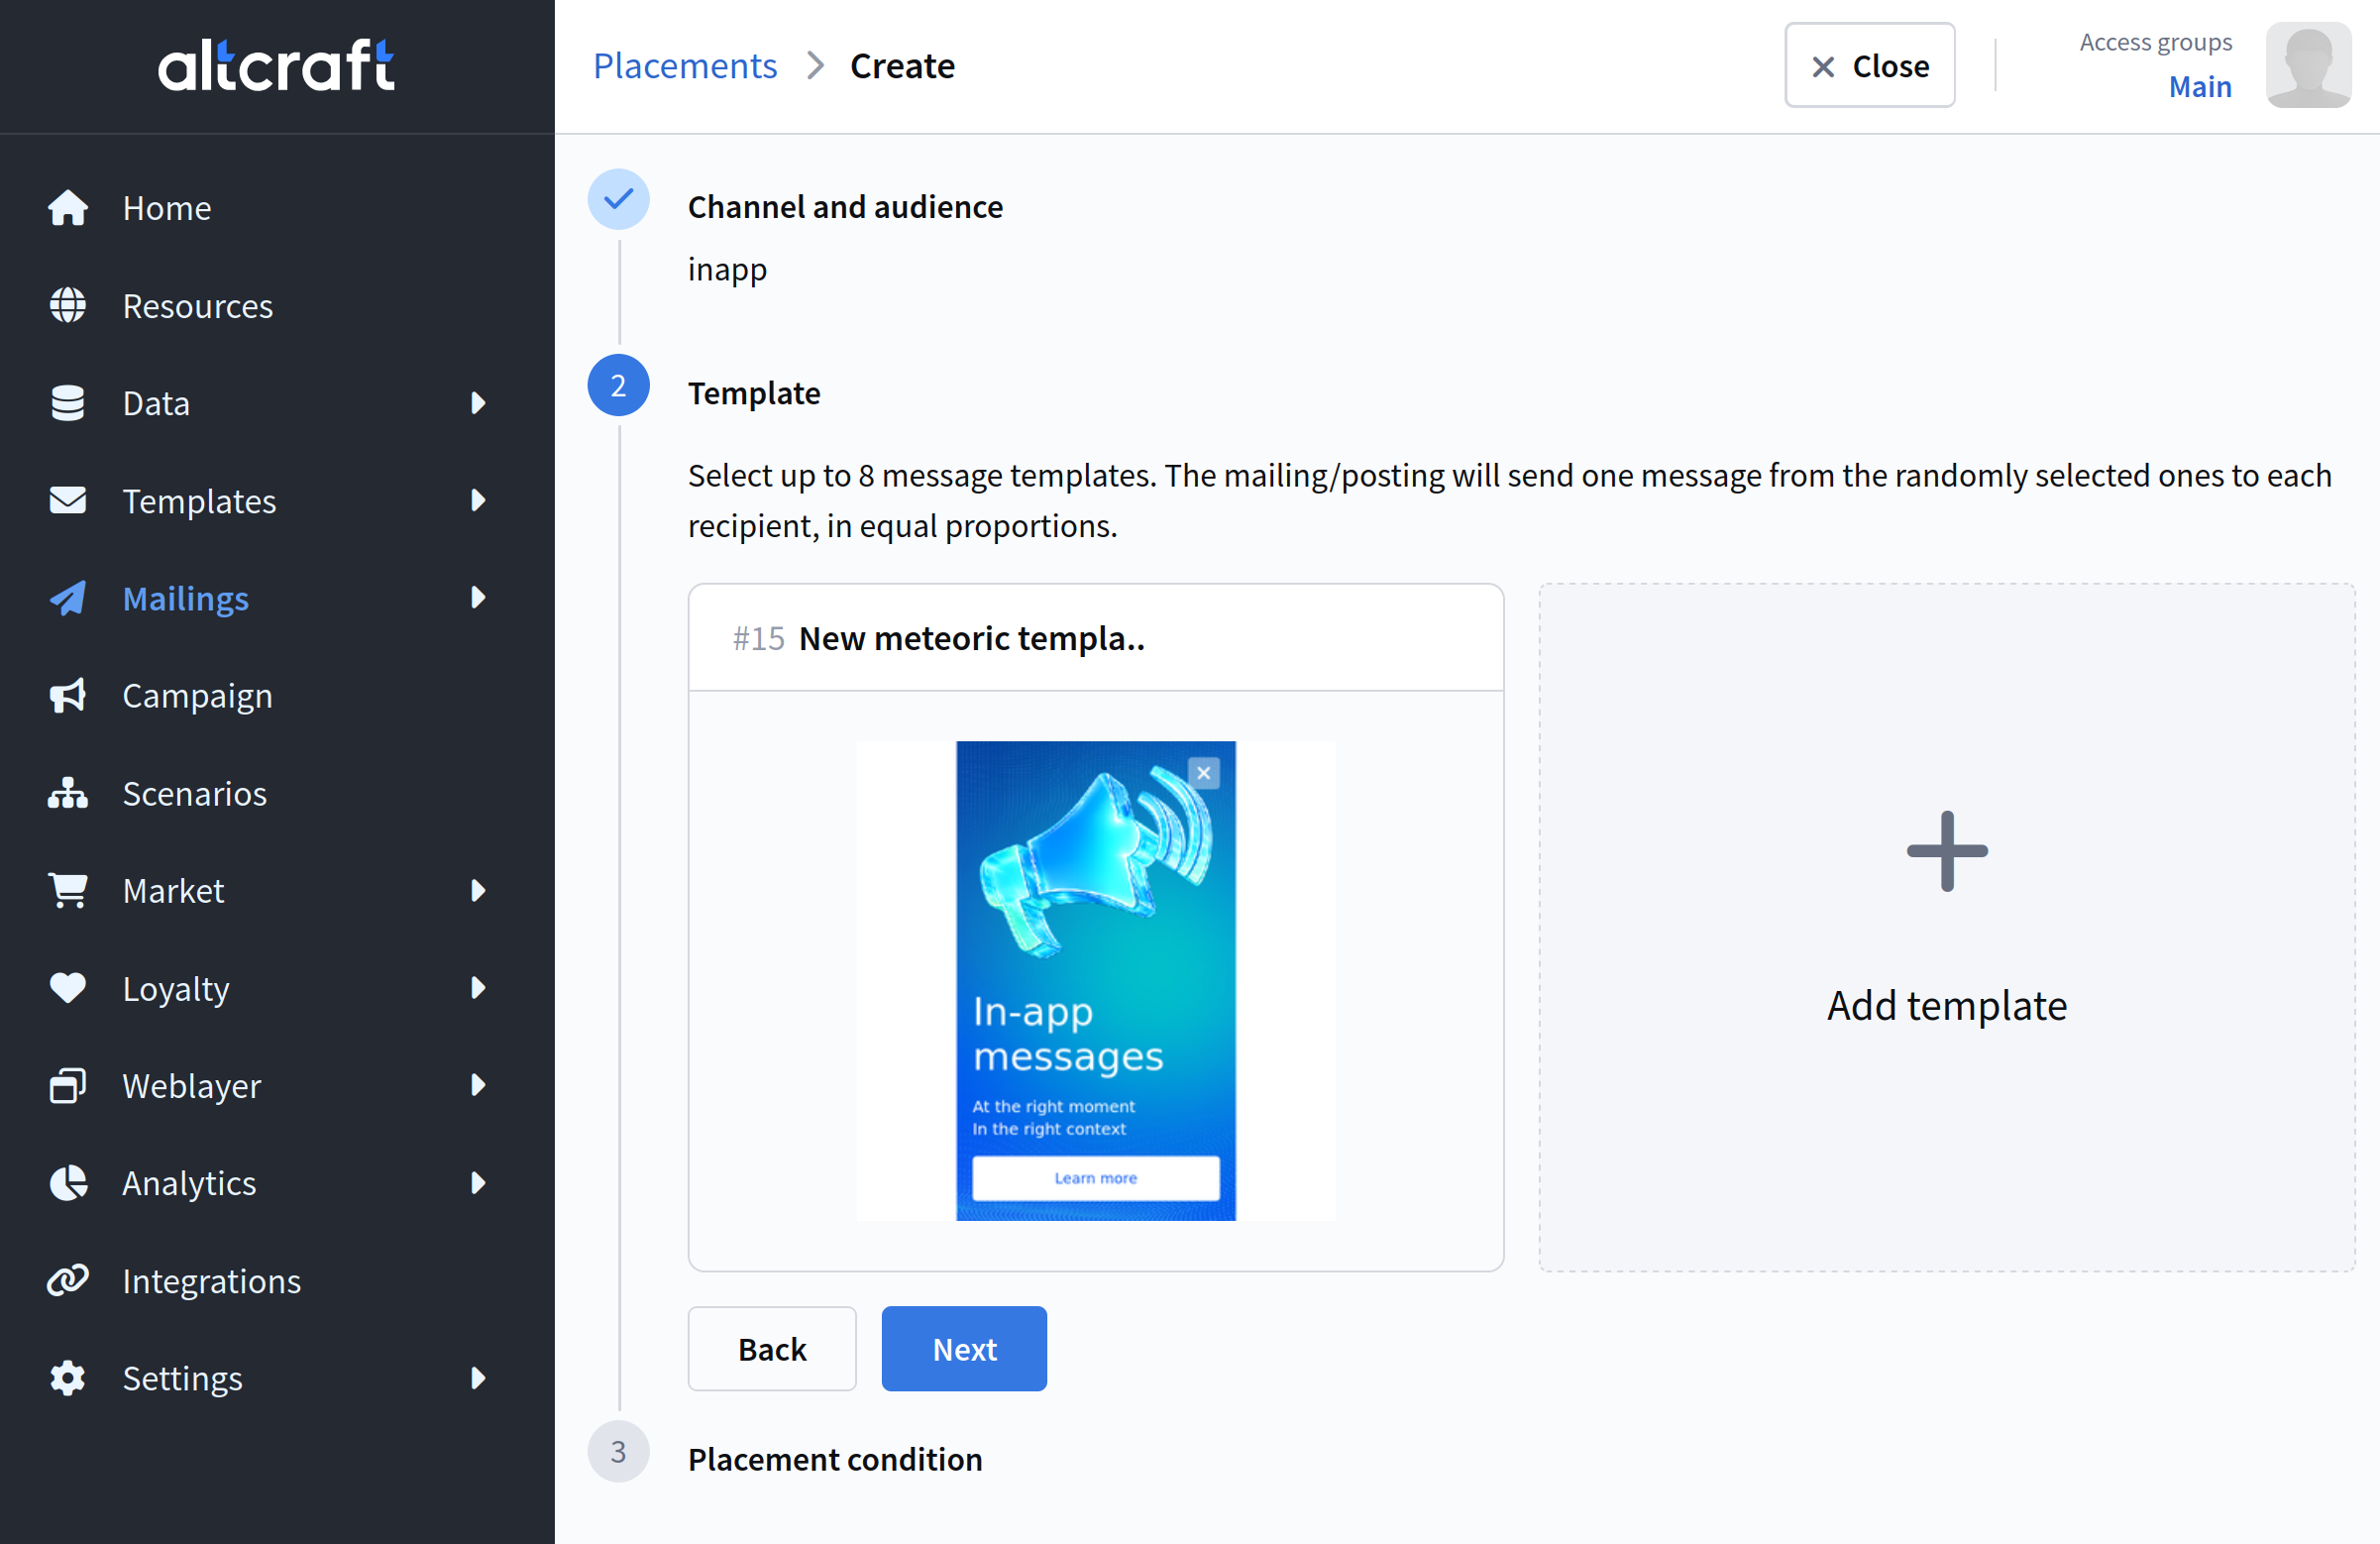
Select the template created in the previous step and click Next.

You can add up to 8 templates to a placement: if multiple are selected, the audience will be divided into equal parts and receive a random message.


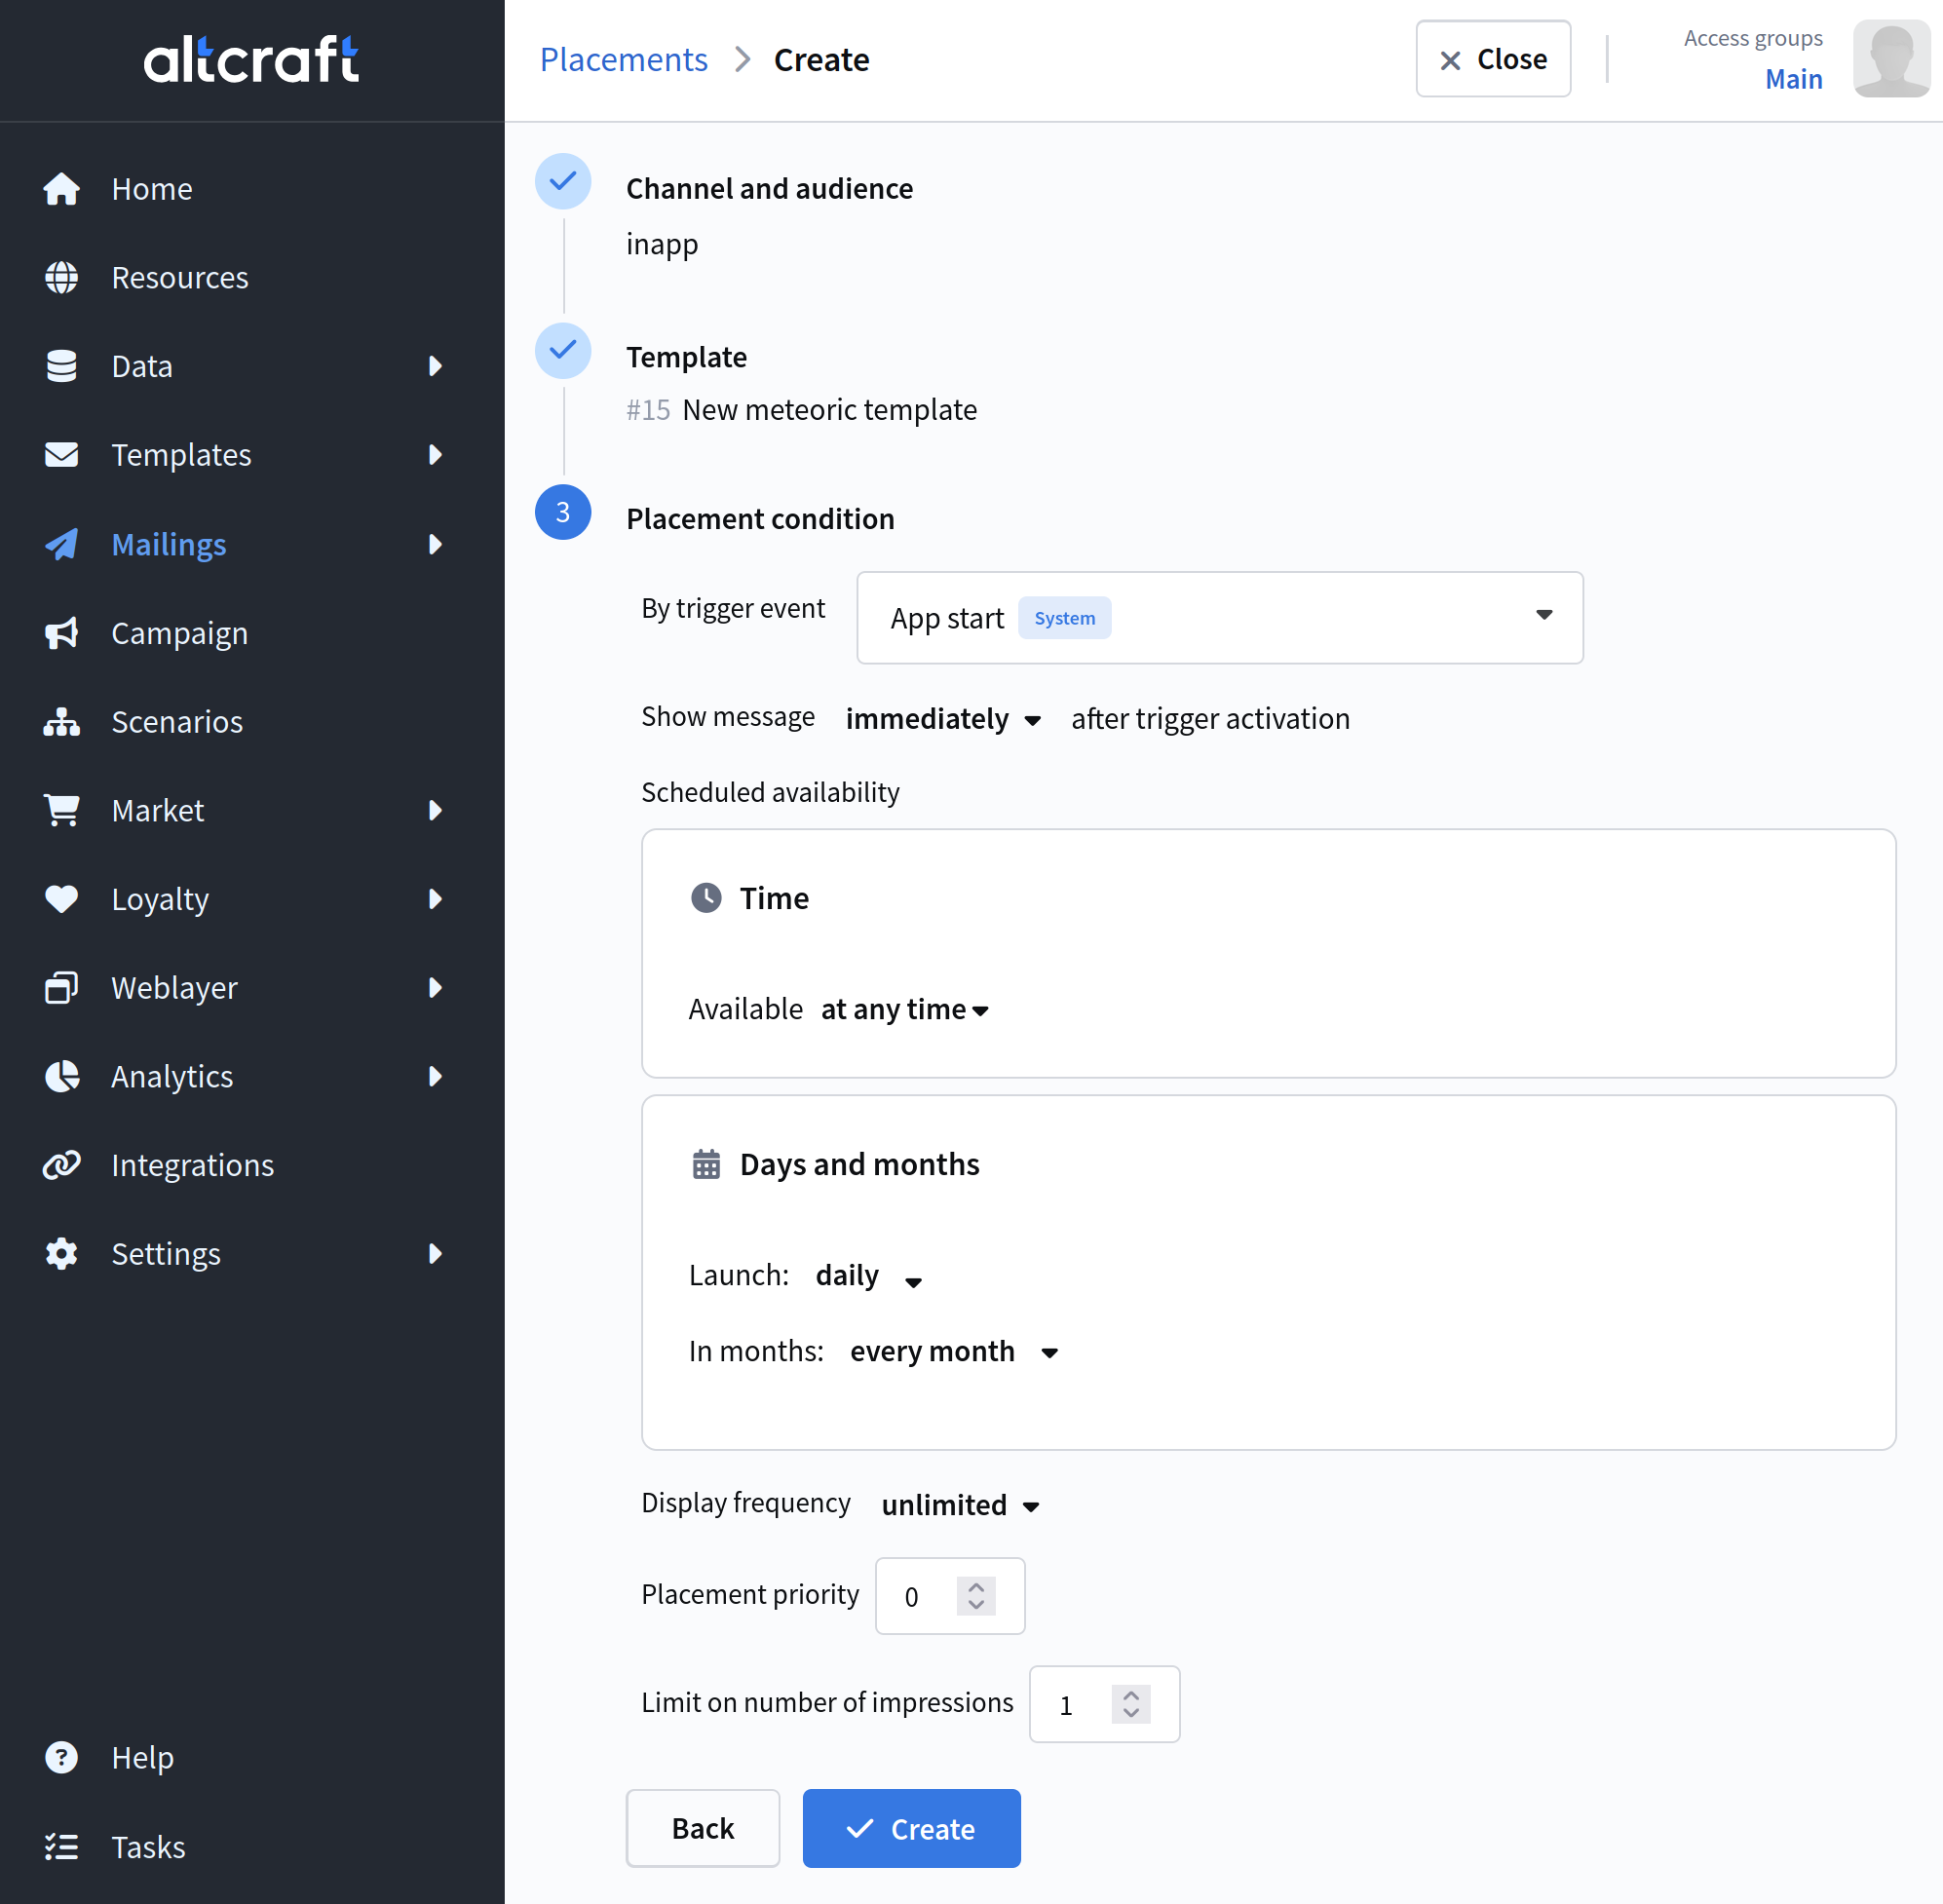
Configure the display conditions: trigger event (application start, transition to a screen from the resource, or user action), display immediately or after a specified time after the trigger, schedule availability, frequency and display limits, as well as placement priority.


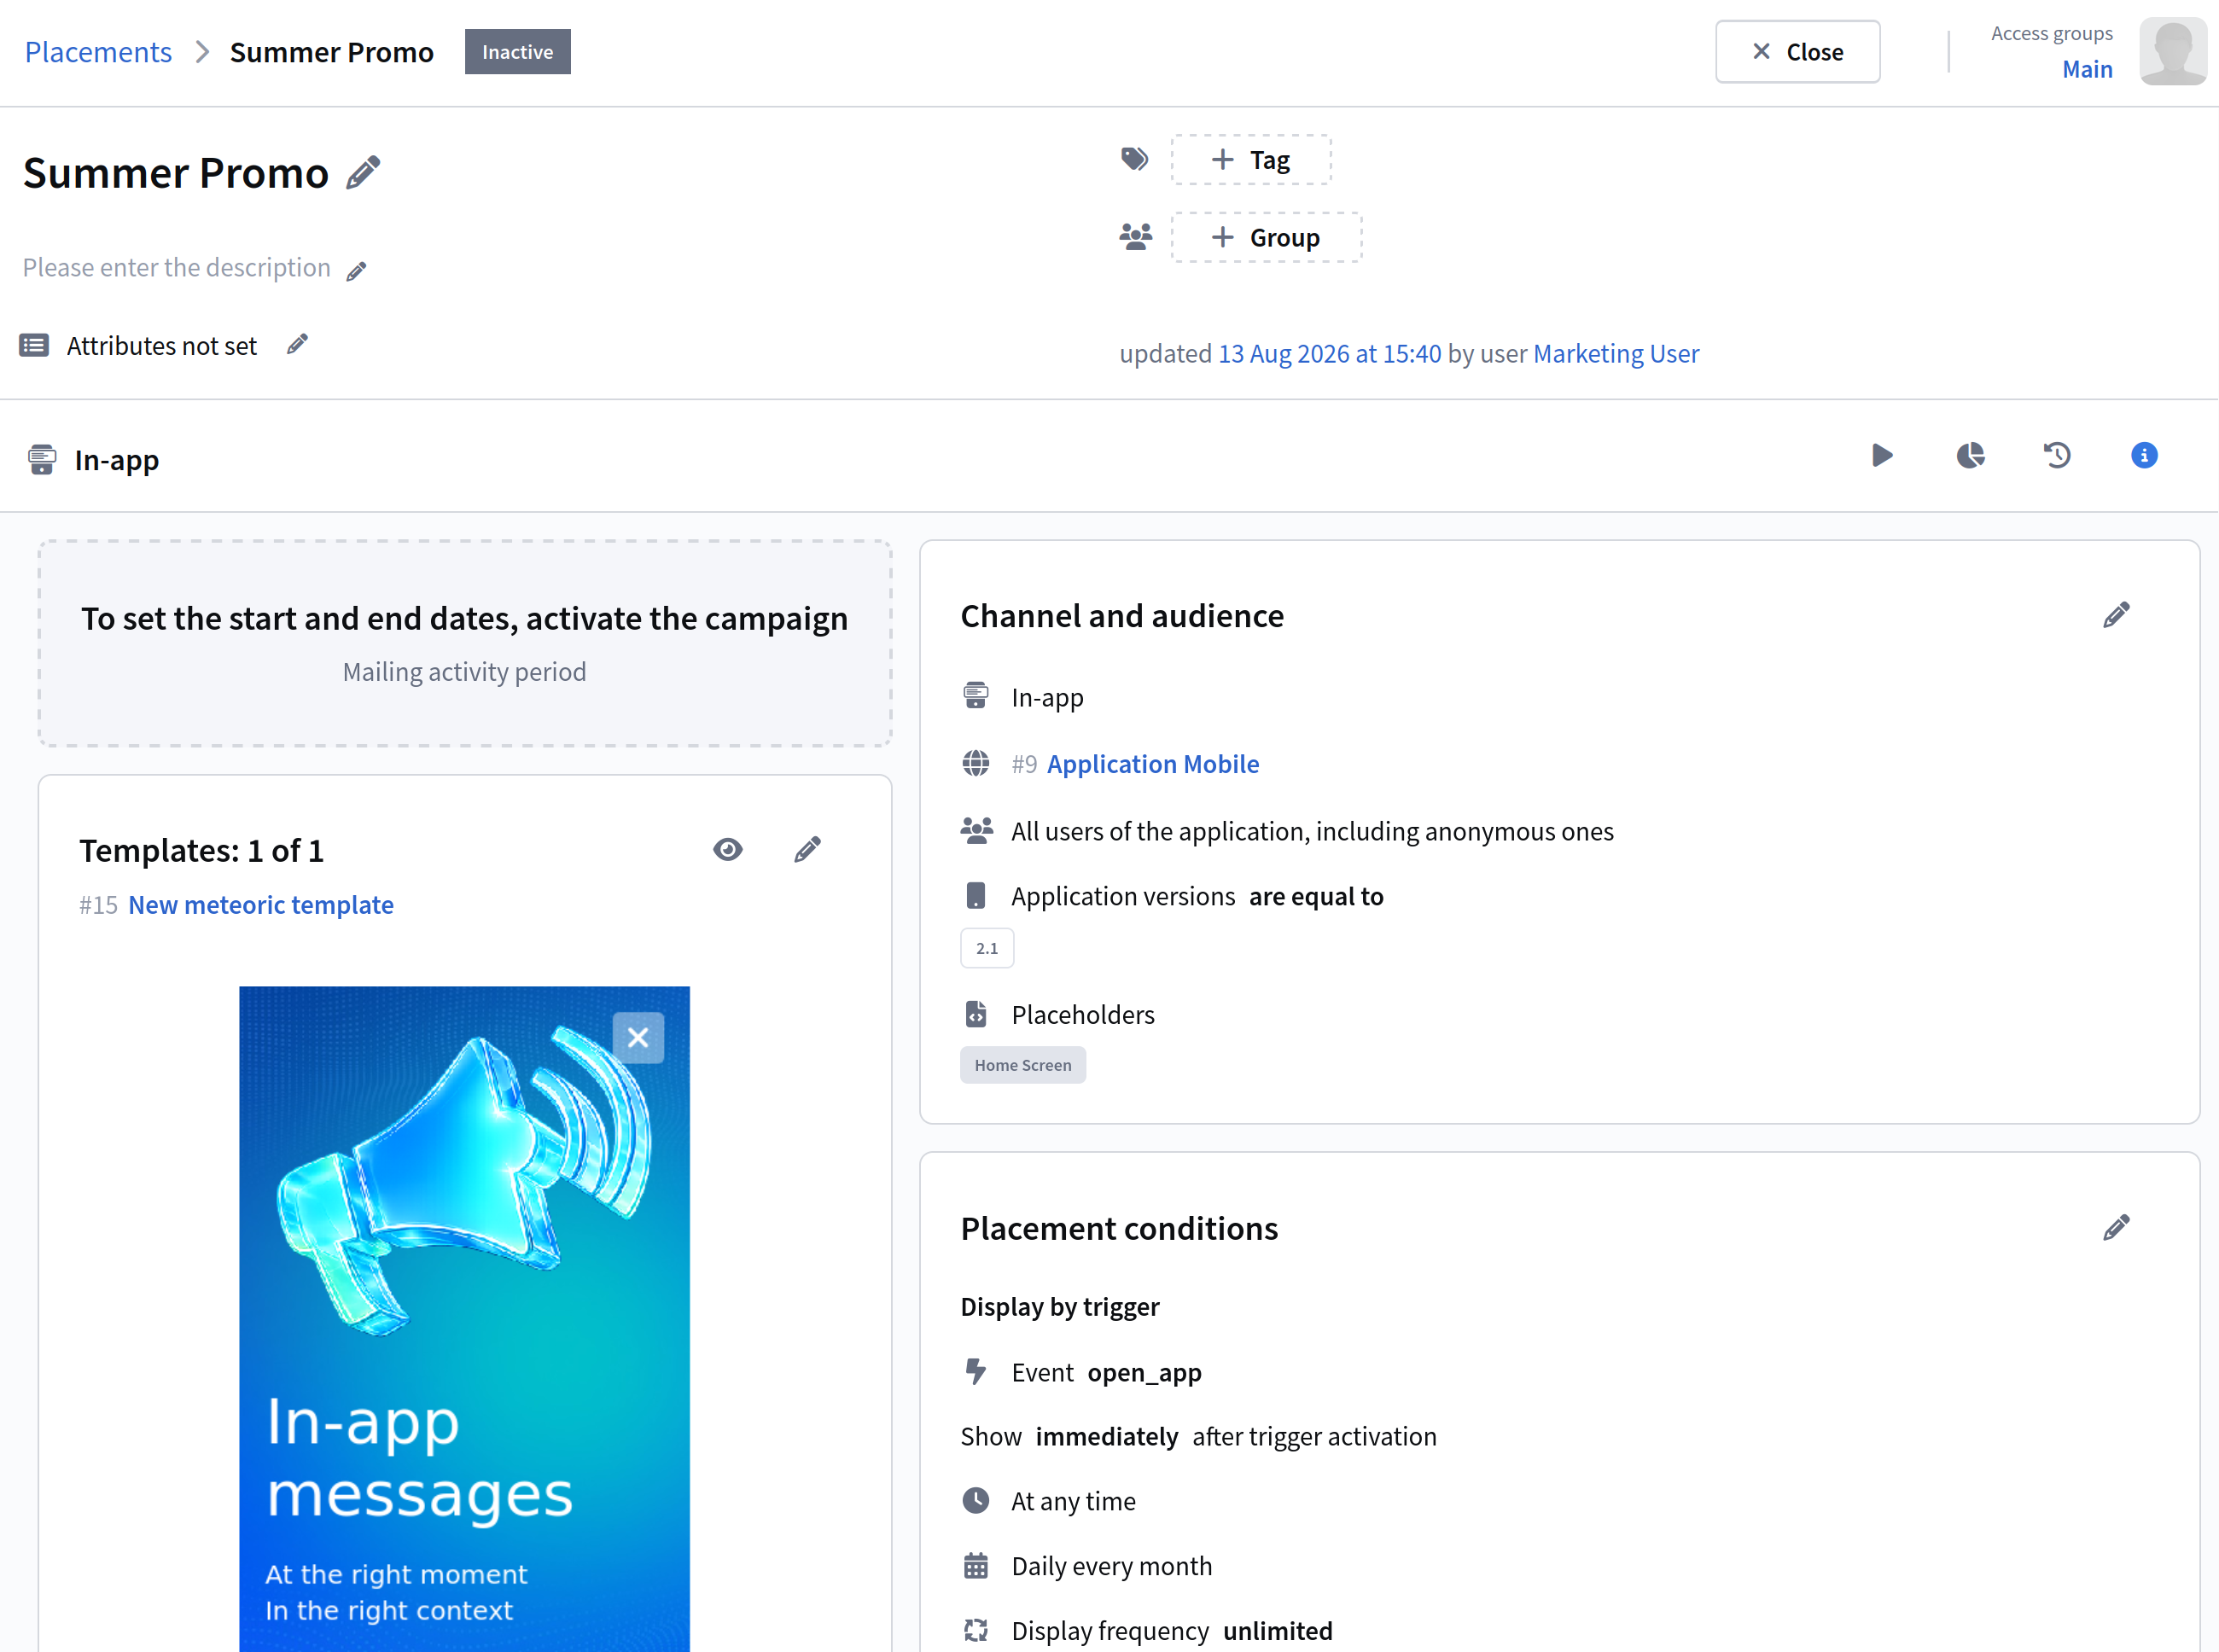
Then click Create — you will be taken to the placement management screen.


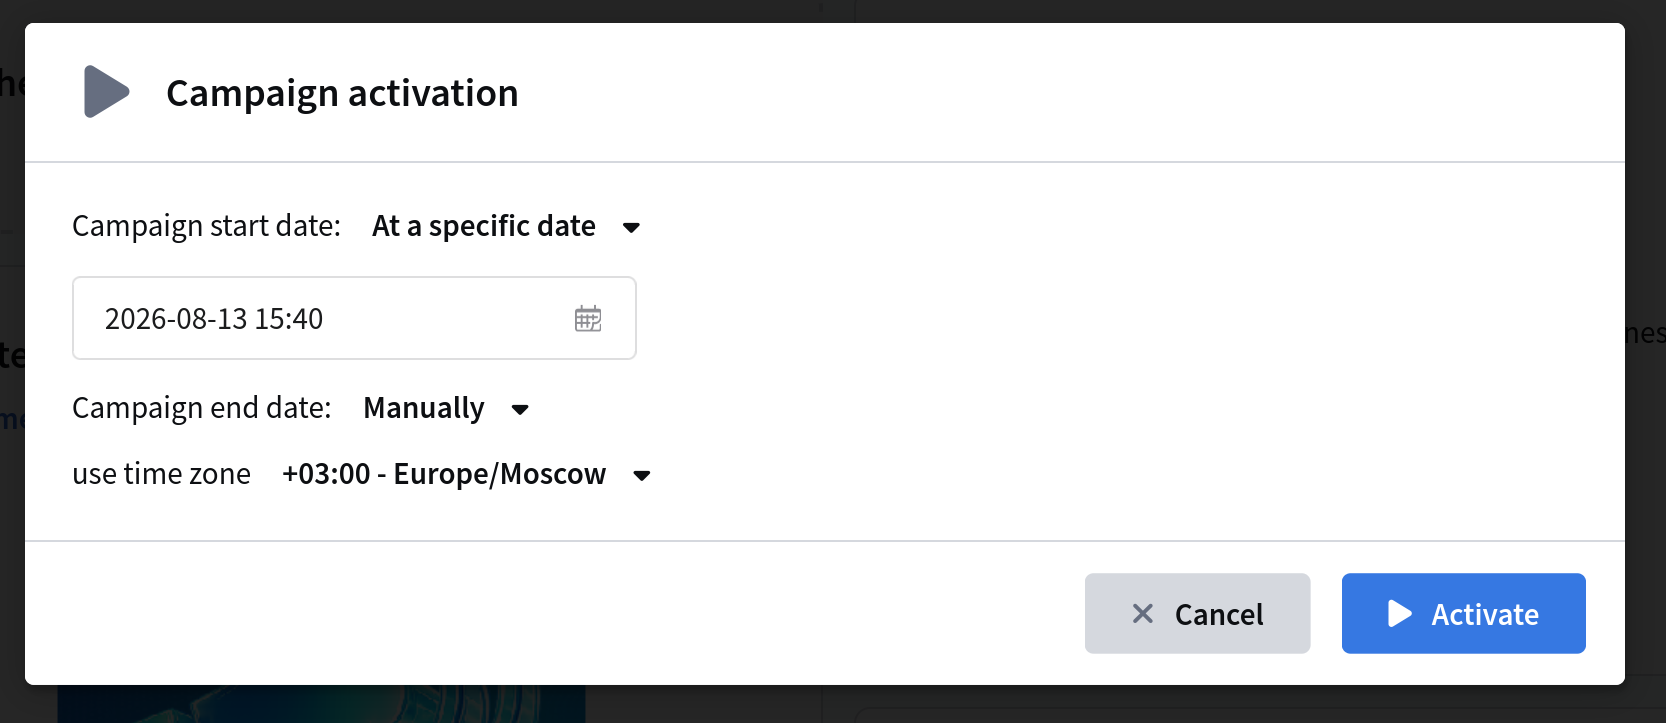
To activate the placement, click the start button and specify the start date and end date.


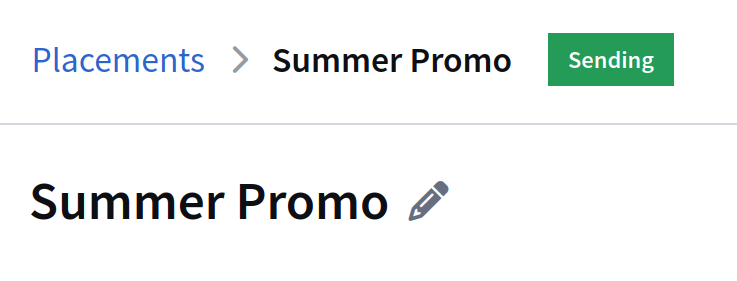
If you activated the placement immediately, the status will change to Sending. If you selected a future date, the placement will have the status Scheduled. You can launch it right now by clicking the button.
slide-0
slide-1
info

A detailed description of each placement setting and option is available in the Placements article.

Step 7: Analyze Results​

Mailing Log​

The mailing log is a tool that provides a brief summary of the placement execution. It records key events, parameters, and statistics, allowing you to identify potential issues.

To open the journal, click the Journal button in the quick actions menu:
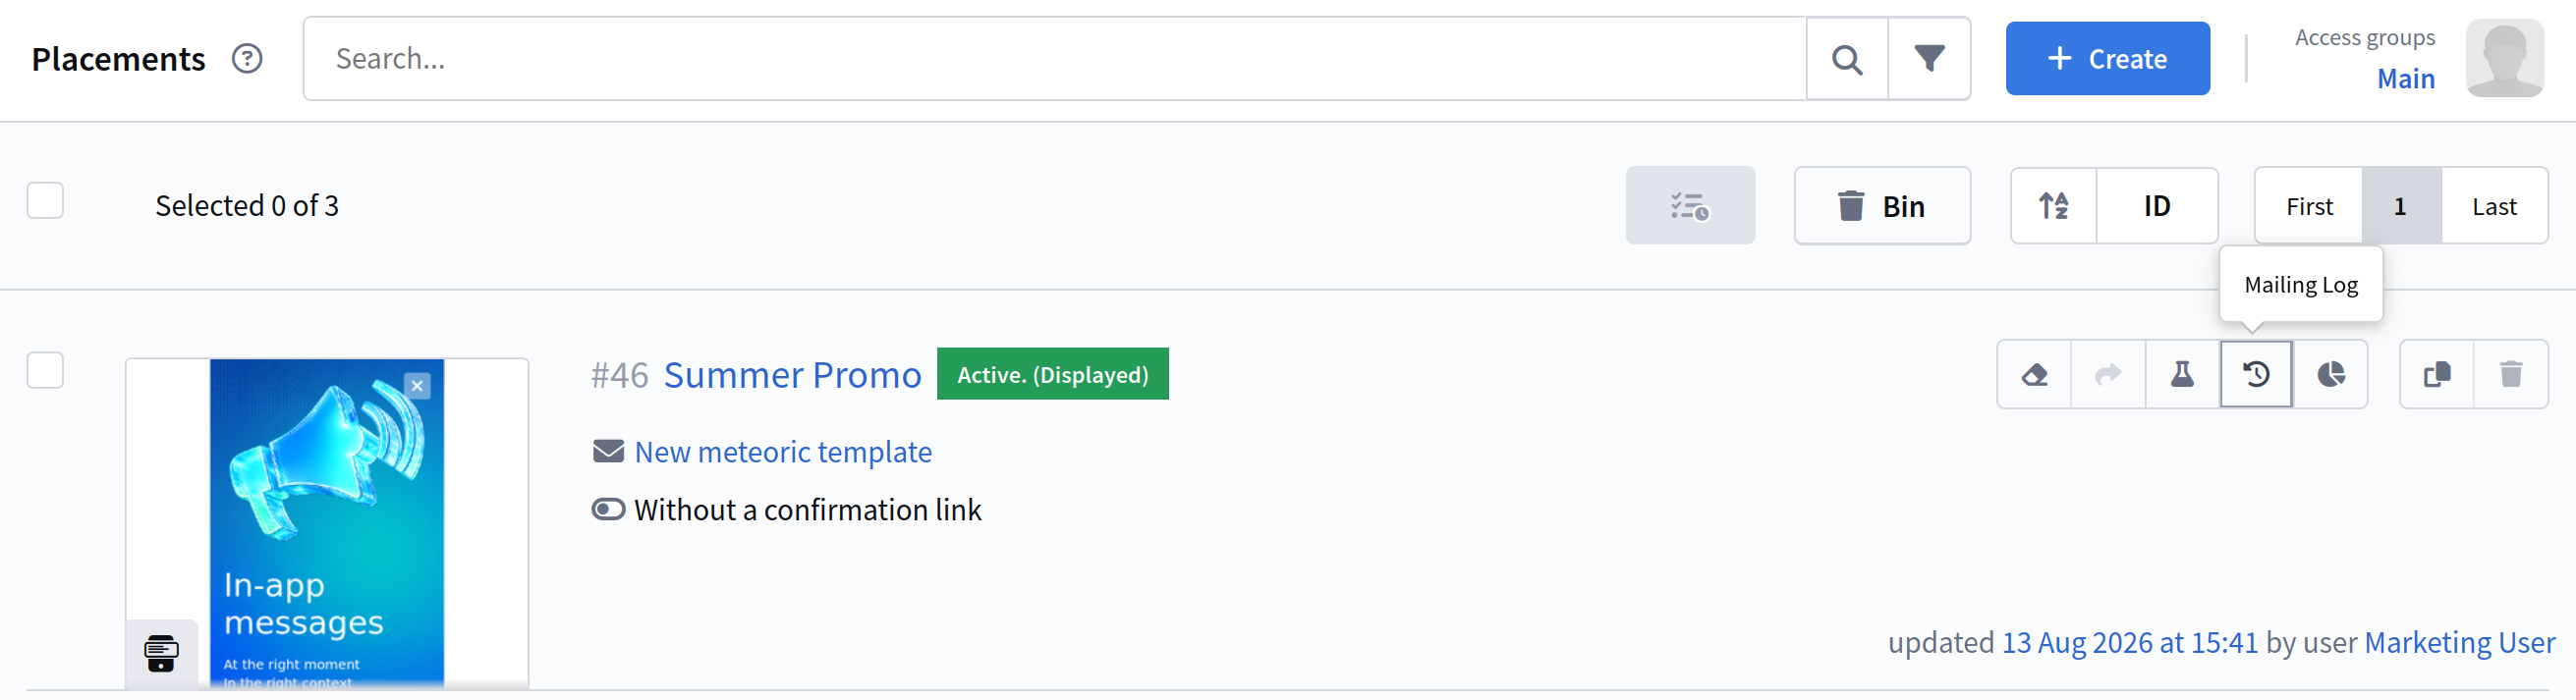
The mailing log contains the following information:

TypeDescription
Mailing startTime when the placement execution began
No limit setShows whether a limit on the number of displays is set
Number of profiles obtained from the sourceTotal number of profiles in the source
Number of subscribers foundNumber of users with an active subscription to the resource
Number of subscribers without inapp channel subscriptionsProfiles without an In-App channel subscription
Number of subscribers with incorrect subscription fields for the inapp channelProfiles with erroneous subscription data
Number of duplicates for the inapp channelDuplicate subscriptions
Number of messages sent for the inapp channelActual number of successful displays
Mailing completedTime when the placement ended
Total time spentTotal duration (ms)

Reports and Analytics​

To evaluate the results of your placements, use the channel report. The report provides analytics for one or more placements and communication channels.
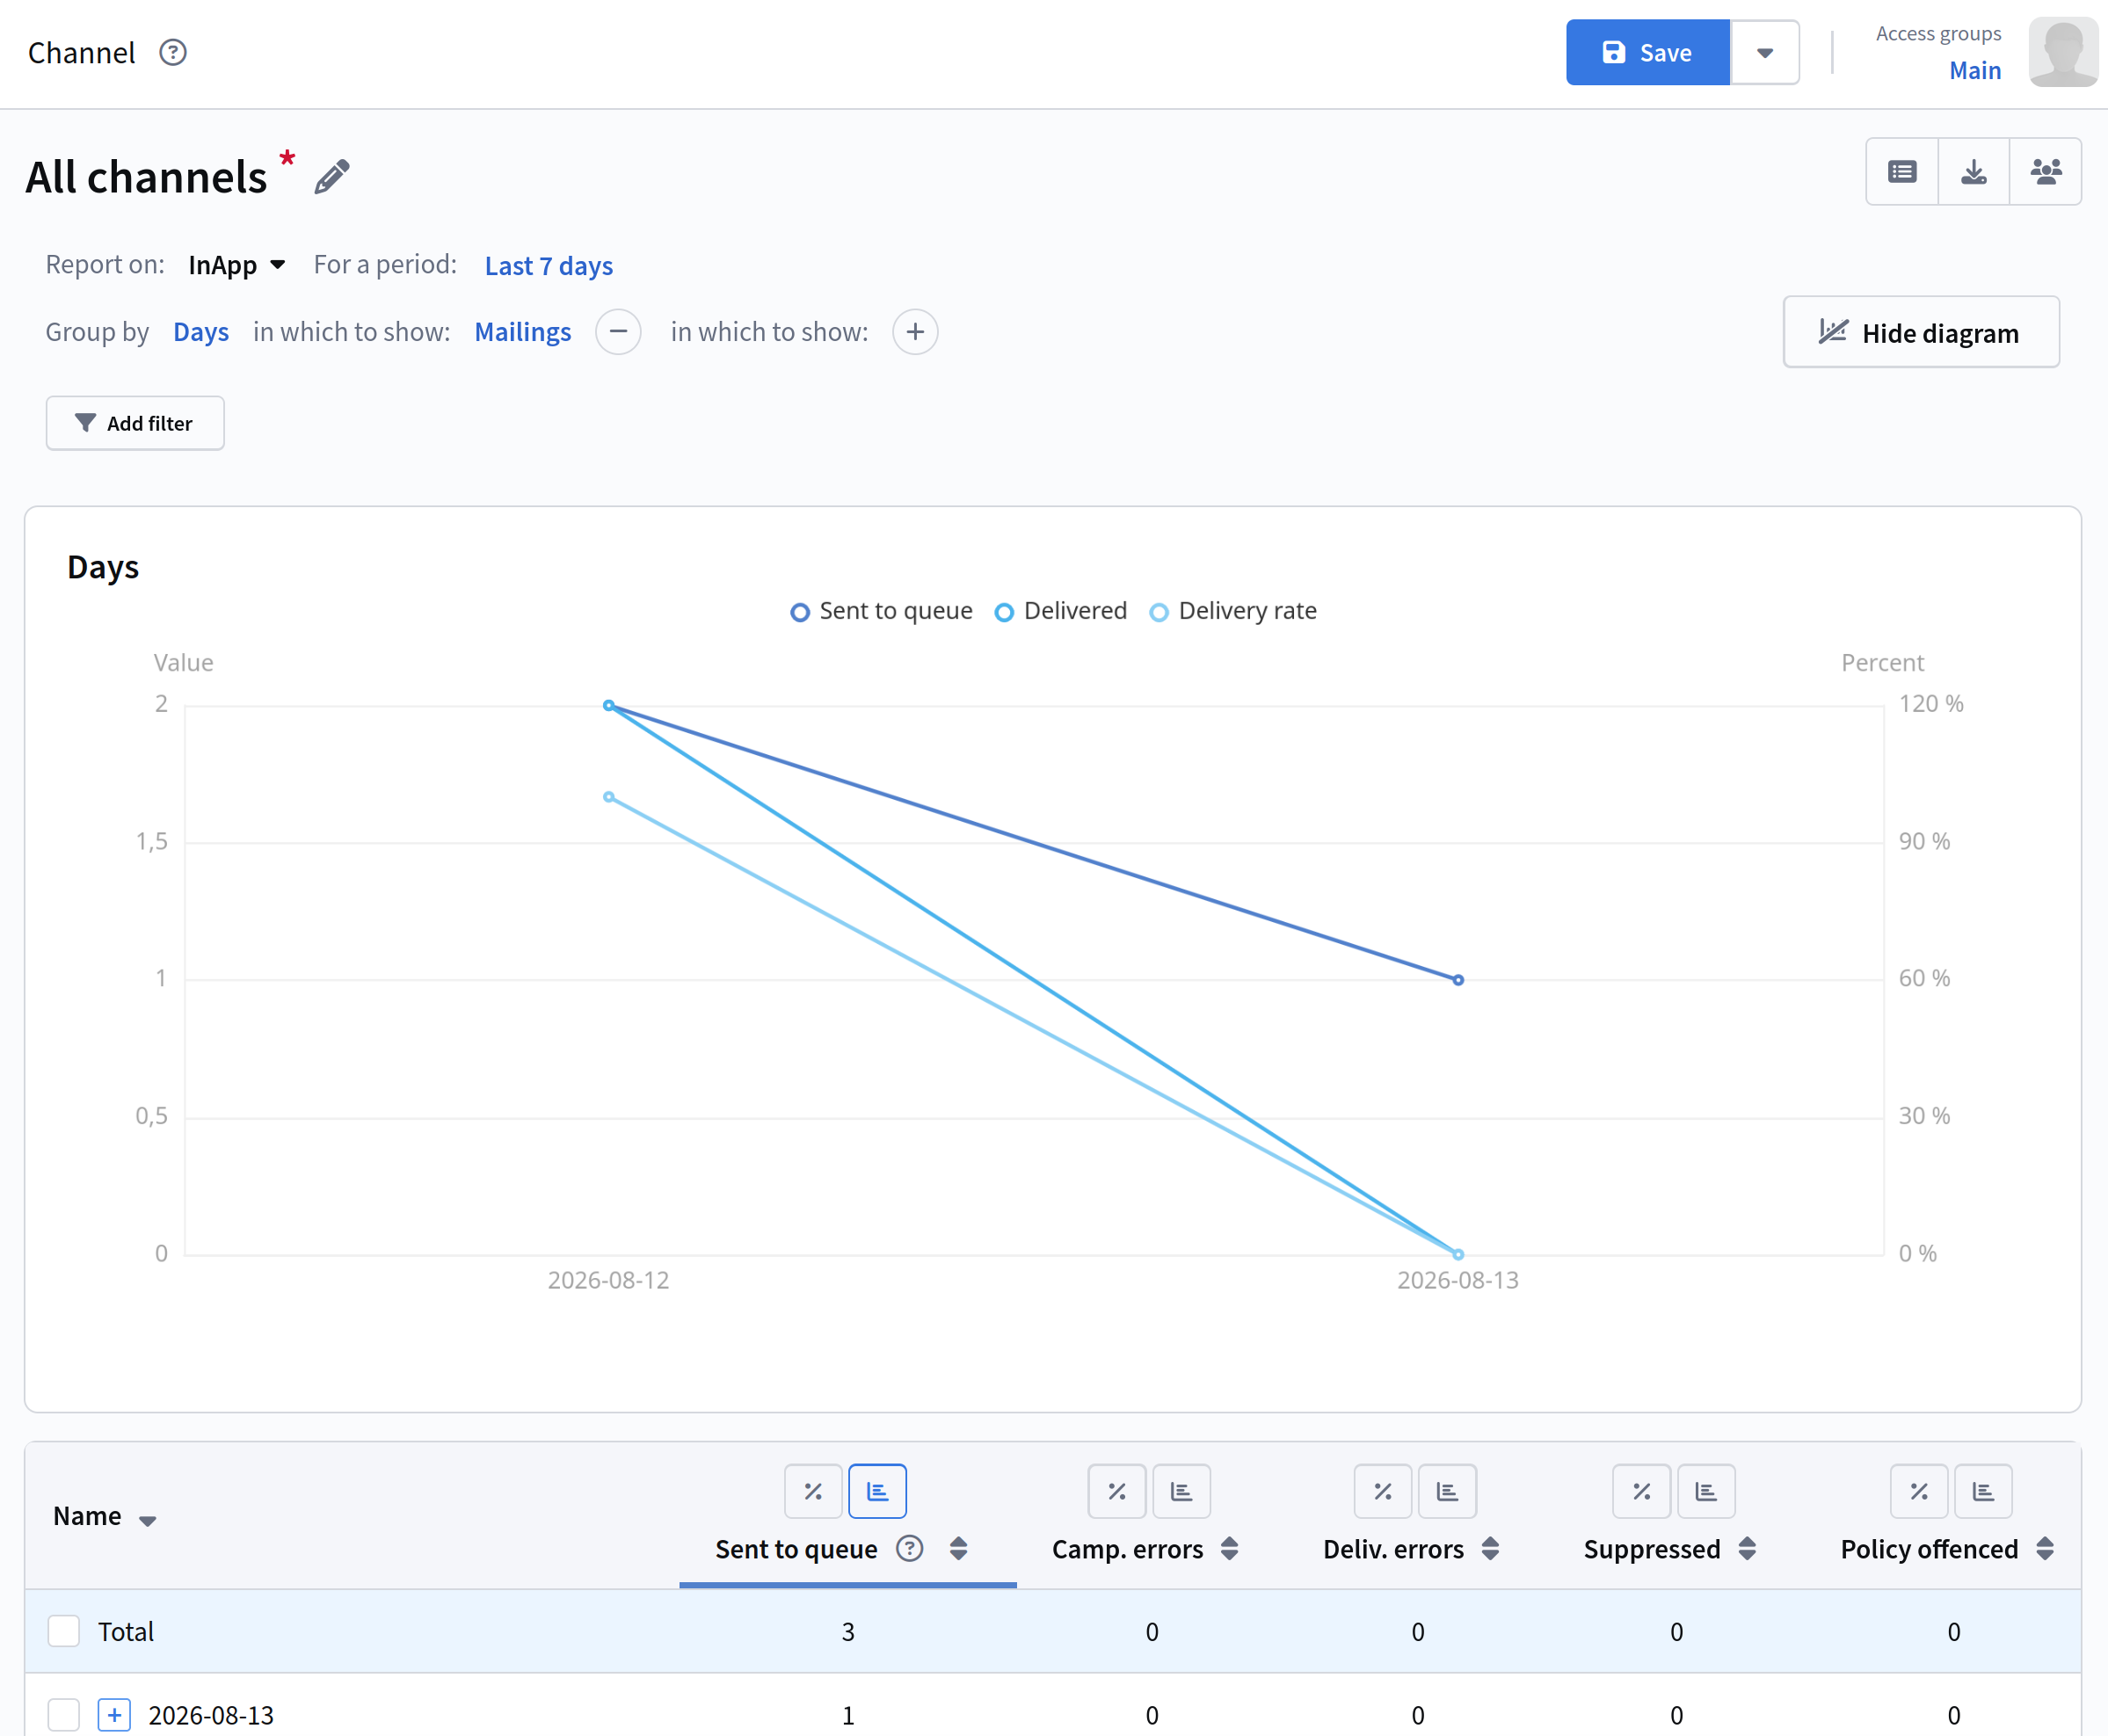
Actions in a placement or template can become steps in an interactive conversion funnel.

Last updated on Sep 28, 2026
Previous
In-App
Next
SDK Setup and Integration
  • Step 1: Prepare S3 Storage
  • Step 2: Integrate mSDK into the Application
  • Step 3: Create a Resource with an In-App Channel
  • Step 4: Subscribe Clients to the In-App Channel
  • Step 5: Prepare Content — Create a Template
  • Step 6: Create a Placement
  • Step 7: Analyze Results
    • Mailing Log
    • Reports and Analytics
© 2015 - 2026 Altcraft, LLC. All rights reserved.