Altcraft Docs LogoAltcraft Docs Logo
User guide iconUser guide
Developer guide iconDeveloper guide
Admin guide iconAdmin guide
English
  • Русский
  • English
Login
    User documentationGetting StartedFAQAltcraft glossary
      Profiles and databasesarrow
    • Subscription resourcesManaging databasesSubscriber profileProfiles import and data updateScheduled customer data importAutomatic data collectionBulk customers profiles updateDouble opt-in subscriptionSuppression listsProfile relationsProfile history exportProfile exportCreating a static segment based on import resultsHow to open a CSV fileMatchingTypes of fields in the databaseGlobal control groupsSubscription Manager
      Communication channelsarrow
      • Email channelarrow
      • Email: ISP interactions best practicesEmail: sending domain configurationEmail: setting up and using postmastersБыстрый старт
        Push channelarrow
        • Mobile Pusharrow
        • Settings & implementation
            Integrate your app with Altcraftarrow
          • Providers: push message structureProcessing and adding a subscriptionEvent registration
          Web pusharrow
        • Preliminary Settings
            Web browser push configurationarrow
          • Firebase Cloud messagingApple SafariMozilla Services
          Connecting Web Push to a WebsiteTransferring Data to the PlatformWeb Push SDK Methods
            Import of subscriptions from third-party push servicesarrow
          • Migrating push subscriptions from third-party servicesHow to transfer push subscriptions configured for Safari?Migration from OneSignal
      SMS channel
        Creating mailing from scratcharrow
      • EmailSMSWeb PushMobile PushWhatsAppViber*™Руководство: SMS-рассылка через VK NotifyMAX BotMAX GroupNotifyTelegram BotTelegram Group
      Communication Channels WorkflowРуководство: SMS-рассылка через УТШРуководство: push-рассылка через сервис от "Согласие"
      Segmentationarrow
    • Static SegmentsDynamic SegmentsUpdatable Segments
        Segmentation Conditionsarrow
      • Segmentation by Profile dataSegmentation by Interactions with EntitiesSegmentation by Activity of the channelSegmentation by external dataSegmentation by external SQL tablesSegmentation by Profile structure
      Best Send Time (BST)Logical operators "AND" and "OR"Recommendations for working with segments
      Message templatesarrow
      • Working with message templatesarrow
      • Working in the editorEmail-templateSMS templatePush templateMAX templateTelegram templateWhatsApp templateViber™ templateNotify template
        Visual editor for email-templatearrow
      • Visual editor interfaceAdding blocksElements and their settingsCustom blocksStyle managerLayer manager
      Template fragmentsImage galleryContent personalizationCreating tables based on array elementsBlock editor for email template
        Altcraft Variables and Functionsarrow
      • Logical expressions in messagesLoops in messagesMarket variables in templatesUsing the JSONPath functionality
        Dynamic content in messagesarrow
      • Dynamic HTML contentDynamic JSON contentContent from SQL database in templatesDynamic API content
      Importing and exporting a message templateImporting a template from a third-party serviceExporting a template from Pixcraft
      Mailingsarrow
    • Mailings calendarBroadcast mailingsRegular mailingTrigger mailingMultivariate testingMailing testingMailing schedulePlacement mailing
      Campaignsarrow
    • Working with CampaignsLocal control groups (LCG)Audience expansionAudience building
      Automation scenariosarrow
    • Managing scenariosNodes of the scenarioClassic marketing scenariosStep-by-step welcome scenario guideScenario for automatic notification of the managerAbandoned cart scenario
      Marketarrow
    • Market settings
        Productsarrow
      • How to create a product manuallyHow to import a product from a fileScheduled product importProduct and SKU SegmentsPreparing the YML file
      OrdersMarket variables in message templateGuide: how to send an order confirmation email
      Loyalty programsarrow
    • Loyalty programsLoyalty integration with external systemsБыстрый стартBasic loyalty program use casesOrder SegmentsPromotion codes
      Reports and analyticsarrow
    • Channel reportTraffic report
        Summary reportarrow
      • Summary report metrics
      Cohorts reportLifetime reportFunnels reportGoals reportAudience growth reportClick map reportLoyalty programs reportBounces reportUndeliveries reportReport on global control groups
      Integrationsarrow
      • Action hooksarrow
      • Altcraft Action HooksAction hooks event typesAction Hook Message StructureJSON batch request (HTTP POST action hook)Message to RabbitMQ brokerMessage to RabbitMQ exchangerMessage to Kafka brokerTest event
        Integration of third-party services using Albatoarrow
      • Connecting Altcraft to Albato Launching the welcome scenario using AlbatoTransmitting event dataSetting app a trigger mailingEvent registrationGoogle Sheets and Altcraft integration AmoCRM and Altcraft integration
      Facebook Ads Manager™Google Ads AudiencesMAXYandex.Audience™VK Ads™Static segment synchronizationYandex AppMetrica™Tilda™Lpgenerator™WhatsAppViber*™ integrationIntegration scopeData Transmitted During SynchronizationNotify
      Weblayersarrow
      • Formsarrow
      • Create a formForm constructorAppearanceActions after form activationData analyticsBinding data channel and formsConditional logic in forms and surveysNPS testing
        Pixelsarrow
      • Goal customer actions and scoring
        Pop-upsarrow
      • Creating and publishing a pop-upSetting up a popup in the code editorManaging pop-ups manually via scriptPopup analyticsGuide: pop-up for push subscriptionsCase: Creating a pop-up with the "Wheel of Fortune" widgetBasic cases of placing a popup via the Tag Manager
        Tag Managerarrow
      • Configuring and installing Tag ManagerTrigger typesVariables typesLinking a pixel and the Tag manager
      Settingsarrow
    • Account settingsCustom linksVirtual sendersSending policiesAudit journalTags FAQ
        Users, groups and accessarrow
      • Two-Factor Authentication (2FA)
        Connectionsarrow
      • Connection to Facebook Ads ManagerConnection to Google AdsConnecting to Yandex.Audience™Connection to 360dialogConnection to EdnaConnection to Devino TelecomConnection to SMSTrafficConnection to VK Ads™Connection to MTS OmniChannelCustom Authentication ConnectionOAuth2 connectionBasic Authentication connectionToken Authentication connectionConnection to RapportoMAX connectionConnection to Notify
      Attribute settings
      API requests: where to startarrow
    • Import or update a profileTrigger mailing launchEngage profile in scenario
      Changelogarrow
    • v2026.1.76v2025.4.75v2025.4.74v2025.3.73v2025.2.72v2025.1.71v2024.4.70v2024.3.69v2024.2.68.2v2024.1.68
    Documentation archivelibrary
  • Market
  • Market settings

Market settings

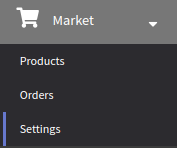
This instruction contains information on such market entities as sales channels, custom fields, order item statuses, regions, categories and currencies. To get started, select the "Market" section, and then "Settings".

Sales channels​

A sales channel is the way customers get to a company to order products they are interested in. It covers platforms and tools used for sale (stores, websites, terminals or cash registers where the order is placed). The key task of the channel is to determine the customer base and touchpoints.

Click "Create" to create a new sales channel. You will see a window, configure the channel in it:

  • type a name and description for the channel
  • additional ID
  • add tags     and access groups  
  • specify the profile database (channel purchasers)
  • select the type of channel (online or retail)

caution

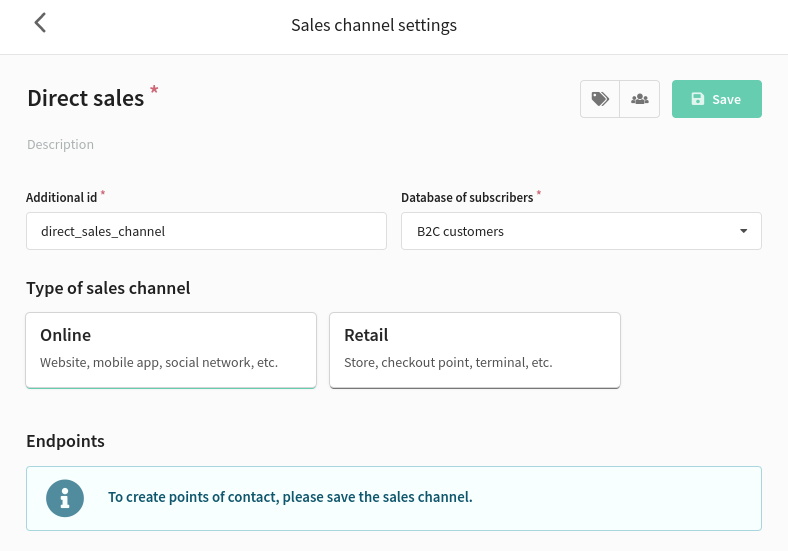
Once the channel has been created, the specified profile database cannot be changed.

Save the channel and then select it from the general list to create a touchpoint.

tip

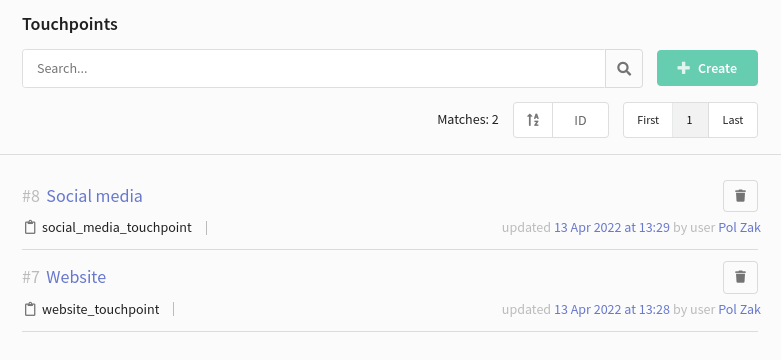
A touchpoint is a specific platform or tool by means of which you sell a product to your customer. Touchpoints connect the sales channel and the order. Some examples of touchpoints: a website, a store, a parcel terminal, a cash register where the order is placed, a social network, a call centre, etc.

Type a name, description and additional ID for the touchpoint. Then click "Save":

Each touchpoint can be linked to only one channel. At the same time, the channel may have several touchpoints:

Custom fields​

Custom fields are set for entities such as order, order item, product and SKU. There you can store information about important product features — colour, size, volume, material, model, weight, etc.

Select the type of entity and specify the type of data that will be stored in the new field:

  • whole number
  • floating-point number
  • line
  • boolean
  • list
  • date

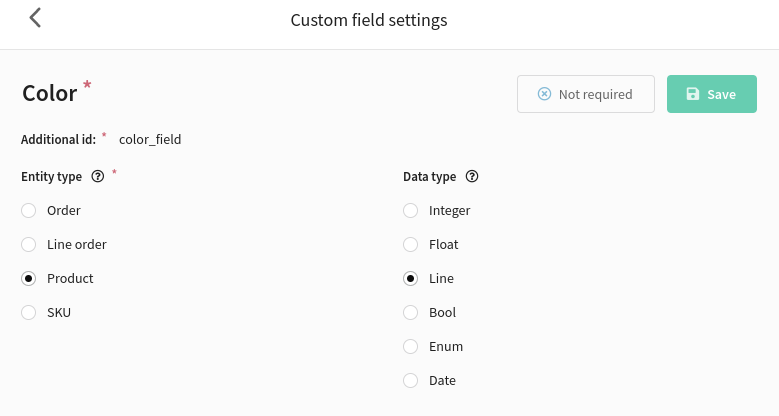
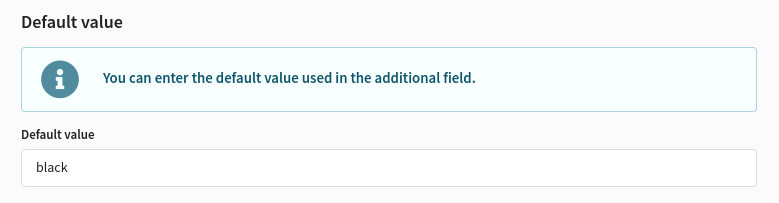
It is possible to set a default data value. It means that the value will be automatically substituted in an custom field of the specified entity.

If you need to make the field required, change "Optional" to "Required":

Order item statuses​

Statuses are available by default:

  • delivering
  • processing
  • new
  • refunded
  • canceled
  • delivered

You can also create your own statuses. For example, if you need to segment the delivery process into several stages:"received by delivery service", "arrived at the pick-up point", "arrived at the local courier facility".

Use the "Create" button to add a new status. Enter a name, ID and type for the status. Four types of statuses are available:

  • delivered
  • cancellation
  • refund
  • in processing

After filling in all the fields, click "Save".

Regions​

Regions are specified when setting up the order. You can set regional data in products and SKUs. For example, availability, price, delivery details, etc.

When creating a region, enter its name and edit the ID if necessary. Then click "Save":

Categories​

A category is a group of products that seem similar to the customer. You can combine products and SKUs in a category.

Click "Create" to create a new category. Type a name for the category and change its ID if necessary. Then save the category:

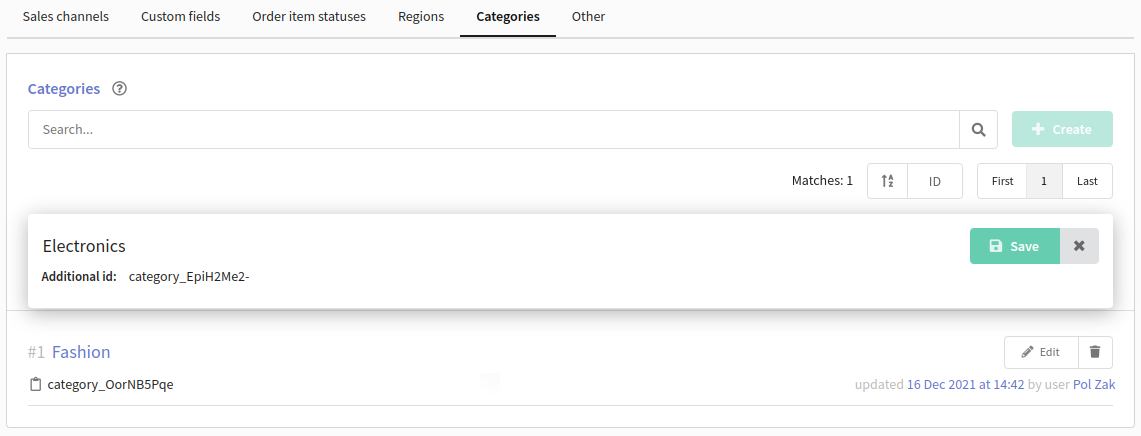
Each category may be divided into several subcategories. Click on the name of the category if you want to create a subcategory. Create and save the object:

Other​

Here you can set currencies used in the market. Select necessary currencies from the drop-down list.

caution

Product or SKU will not be imported through API if its currency is not stated in the "Currencies" field.

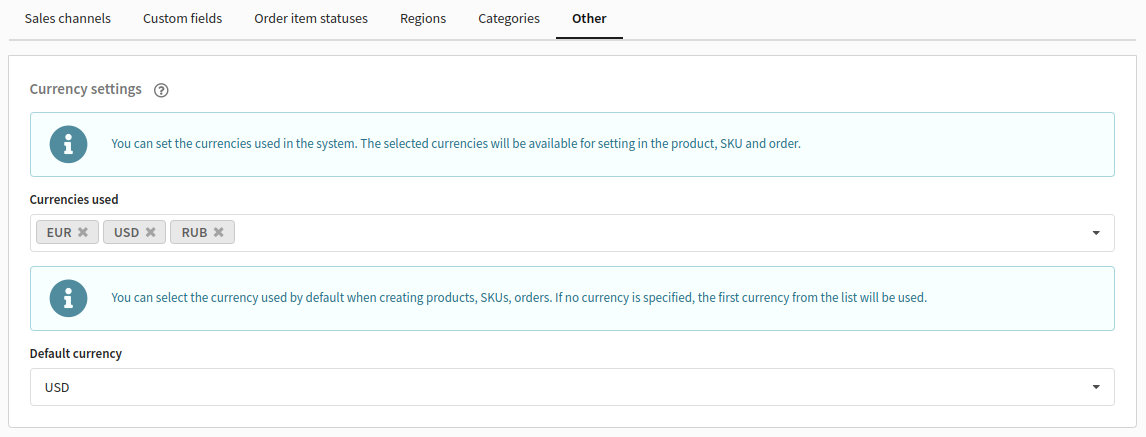
You can select a default currency. It will be automatically set when creating products, SKUs and orders.

Last updated on Aug 2, 2024
Previous
Market
Next
Products
  • Sales channels
  • Custom fields
  • Order item statuses
  • Regions
  • Categories
  • Other
© 2015 - 2026 Altcraft, LLC. All rights reserved.