Transferring Push Subscriptions from a Third-Party Service
This article describes transferring push subscriptions from a third-party service to the Altcraft Platform.
VAPID keys and Application Server keys are the same thing.
Step 1. Obtaining VAPID Keys
Request VAPID keys from the technical support of your current service. Both private and public keys are needed: private key, public key.
Step 2. Importing VAPID Keys into Firebase
Open the project settings in Firebase Console and go to the Cloud Messaging tab. In the Web Configuration section, click import an existing key pair. | 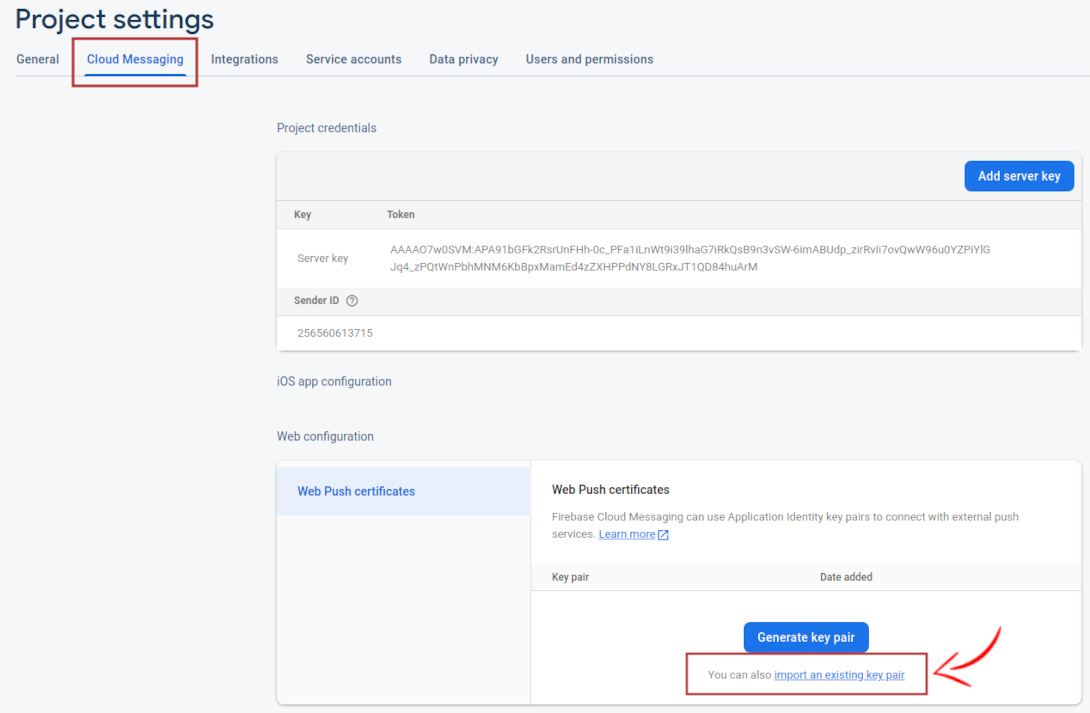 |
In the window that appears, enter the Public key and Private key from your current service. | 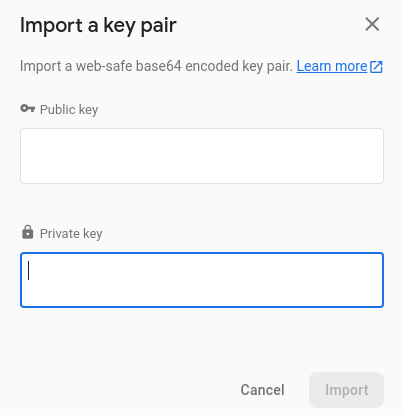 |
Step 3. Setting Up the Resource in the Altcraft Platform
Set up the resource for Web Push notifications. For more details, see the article Resource and Website Setup.
Resource setup differs for different browsers. Make sure the providers are configured correctly.
Step 4. Preparing the CSV File with Subscriptions
When a user subscribes to push notifications, a PushSubscription object is created, which contains the data needed to send notifications:
{
  "endpoint": "https://some.pushservice.com/something-unique",
  "keys": {
    "p256dh": "BIPUL12DLfytvTajnryr2PRdAgXS3HGKiLqndGcJGabyhHheJYlNGCeXl1dn18gSJ1WAkAPIxr4gK0_dQds4yiI=",
    "auth": "FPssNDTKnInHVndSTdbKFw=="
  }
}
Export this data from the third-party service to a CSV file. For each subscription, the fields endpoint, p256dh, auth must be specified.
Transfer the CSV file for processing:
- On-Premise — transfer the file to the platform administrator
- Cloud version — transfer the file to Altcraft support at support@altcraft.com
The administrator (or support team) will convert the data to a format compatible with import. For more details, see the administrator documentation article.
After processing, you will receive a CSV file ready for import.
Step 5. Importing Profiles with Subscriptions
Create or select a suitable database and in the drop-down list, click Import Customer Profiles. | 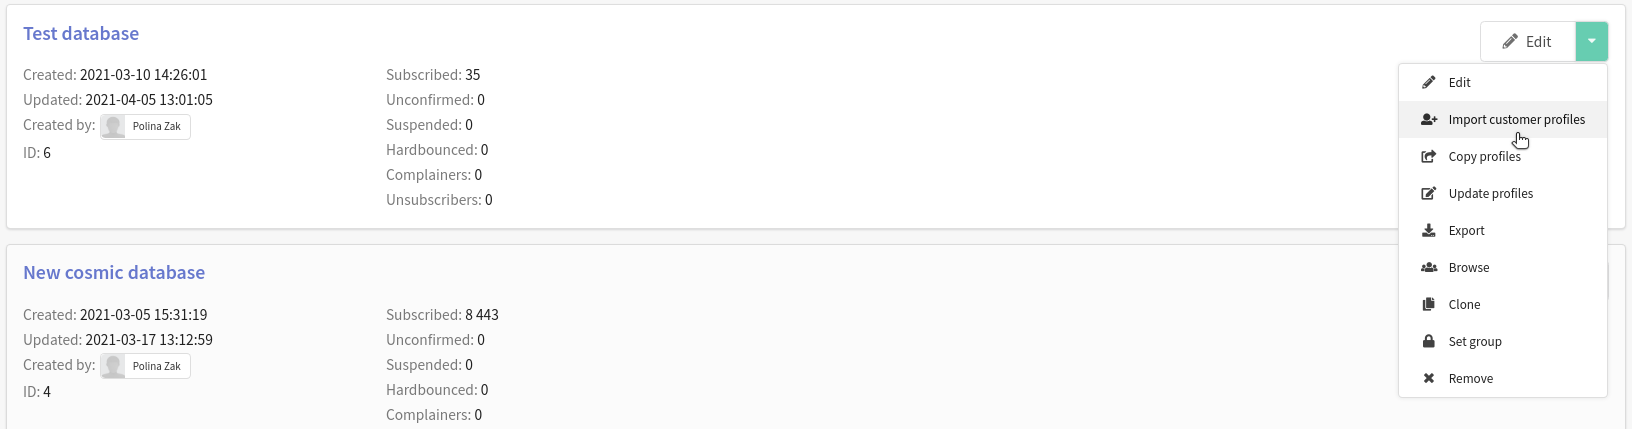 |
Select the import method — File. Upload the CSV file with subscriptions. | 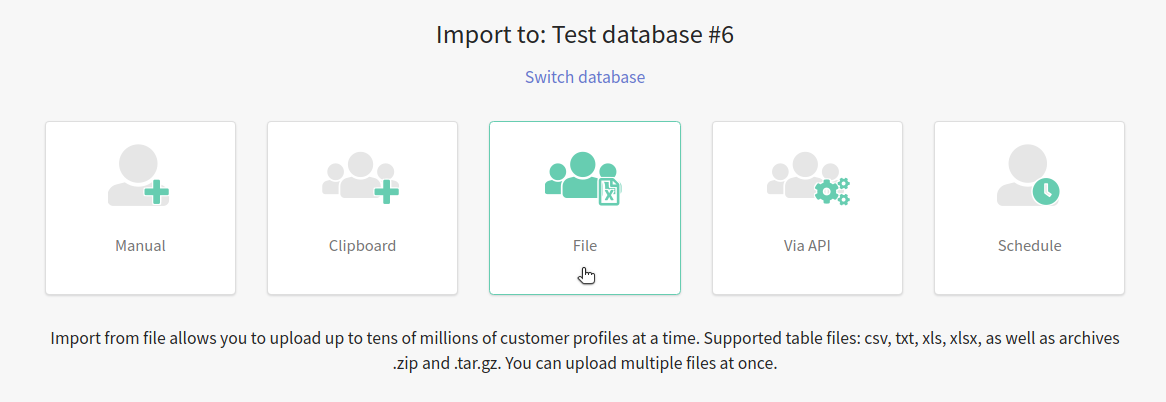 |
Click Subscription Search Mode and select Search by Push Subscription. | 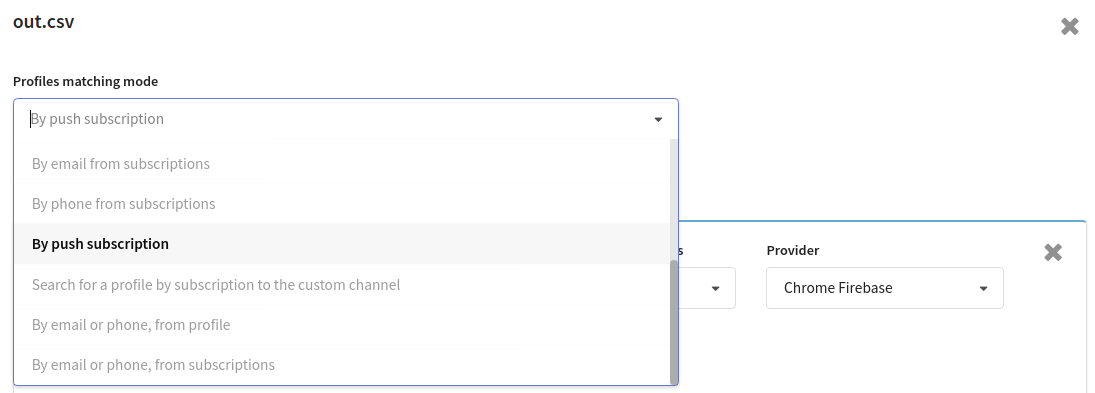 |
If the file contains data for matching existing users (e.g., email, phone), select the corresponding profile search mode.
Click Add Subscription and configure the parameters:
|  |
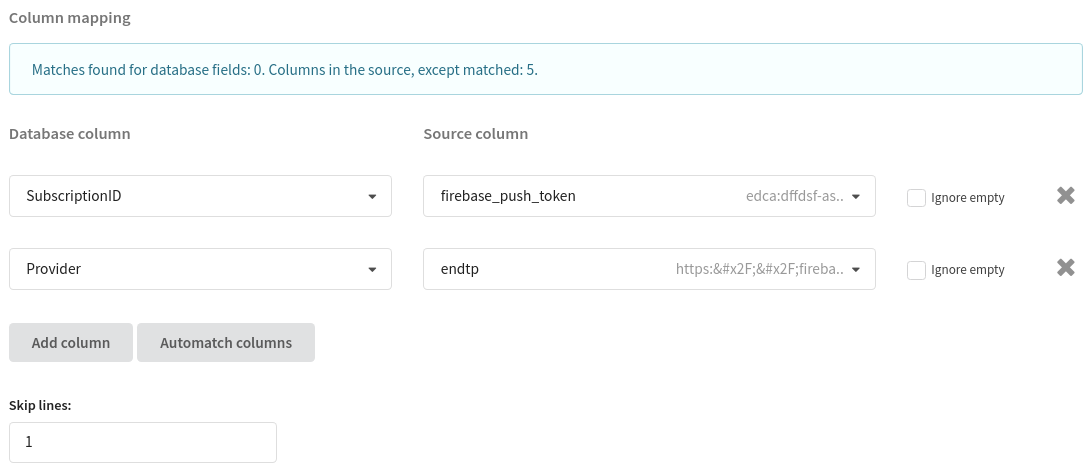
To create a subscription, you need the name of the field where the subscription ID is stored. In the processed CSV file, this field is called firebase_push_token.
Configure column mapping:
|  |
List of Web Provider Identifiers
In the Provider field of the CSV file, specify one of the following identifiers:
| Provider | Identifier |
|---|---|
| Mozilla Firefox | mozilla |
| Safari | safari |
| Firefox Firebase | firefox-firebase |
| Chrome Firebase | chrome-firebase |
| Opera Firebase | opera-firebase |
| Yandex Firebase | yandex-firebase |
| Samsung Firebase | samsung-firebase |
| IOS APNs | ios-apns |
| IOS Huawei Mobile Services | ios-huawei |
In the Skip Lines field, enter 1 if the file contains headers.
Click Import. After the import is complete, open the database and the Subscriptions tab — the new profile subscriptions for push notifications will be displayed there. | 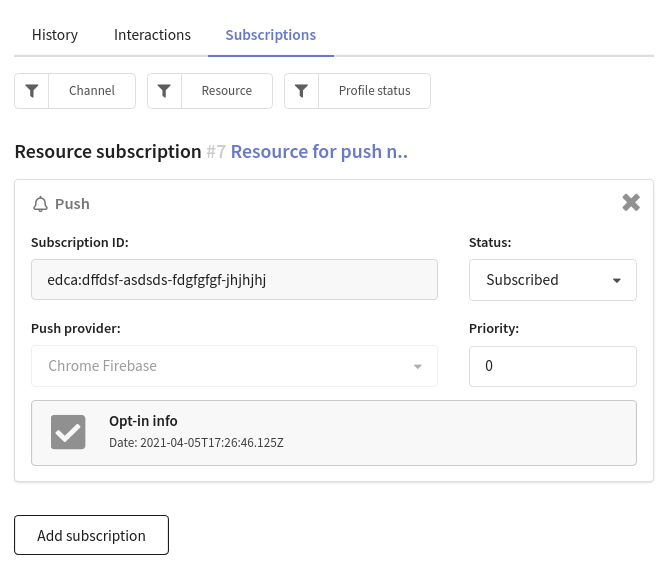 |
If you are transferring subscriptions from OneSignal, see the article Migration from OneSignal.