Trigger mailing launch
In this article, we will show you how to run a trigger mailing through the API. Let's consider two variants of the request:
- Sending a message to a single customer
- Launching a mailing for multiple subscribers
Only active trigger mailings set to the "When using a special API call" event can be run via the API. In this article you can read about how to create a trigger mailing.
Getting an API token
API token is a key to access the platform via API. It is used in any API request.
You can find the token in Altcraft platform settings, in the Tokens section. If you don't have a token yet, create one by clicking on the corresponding button:
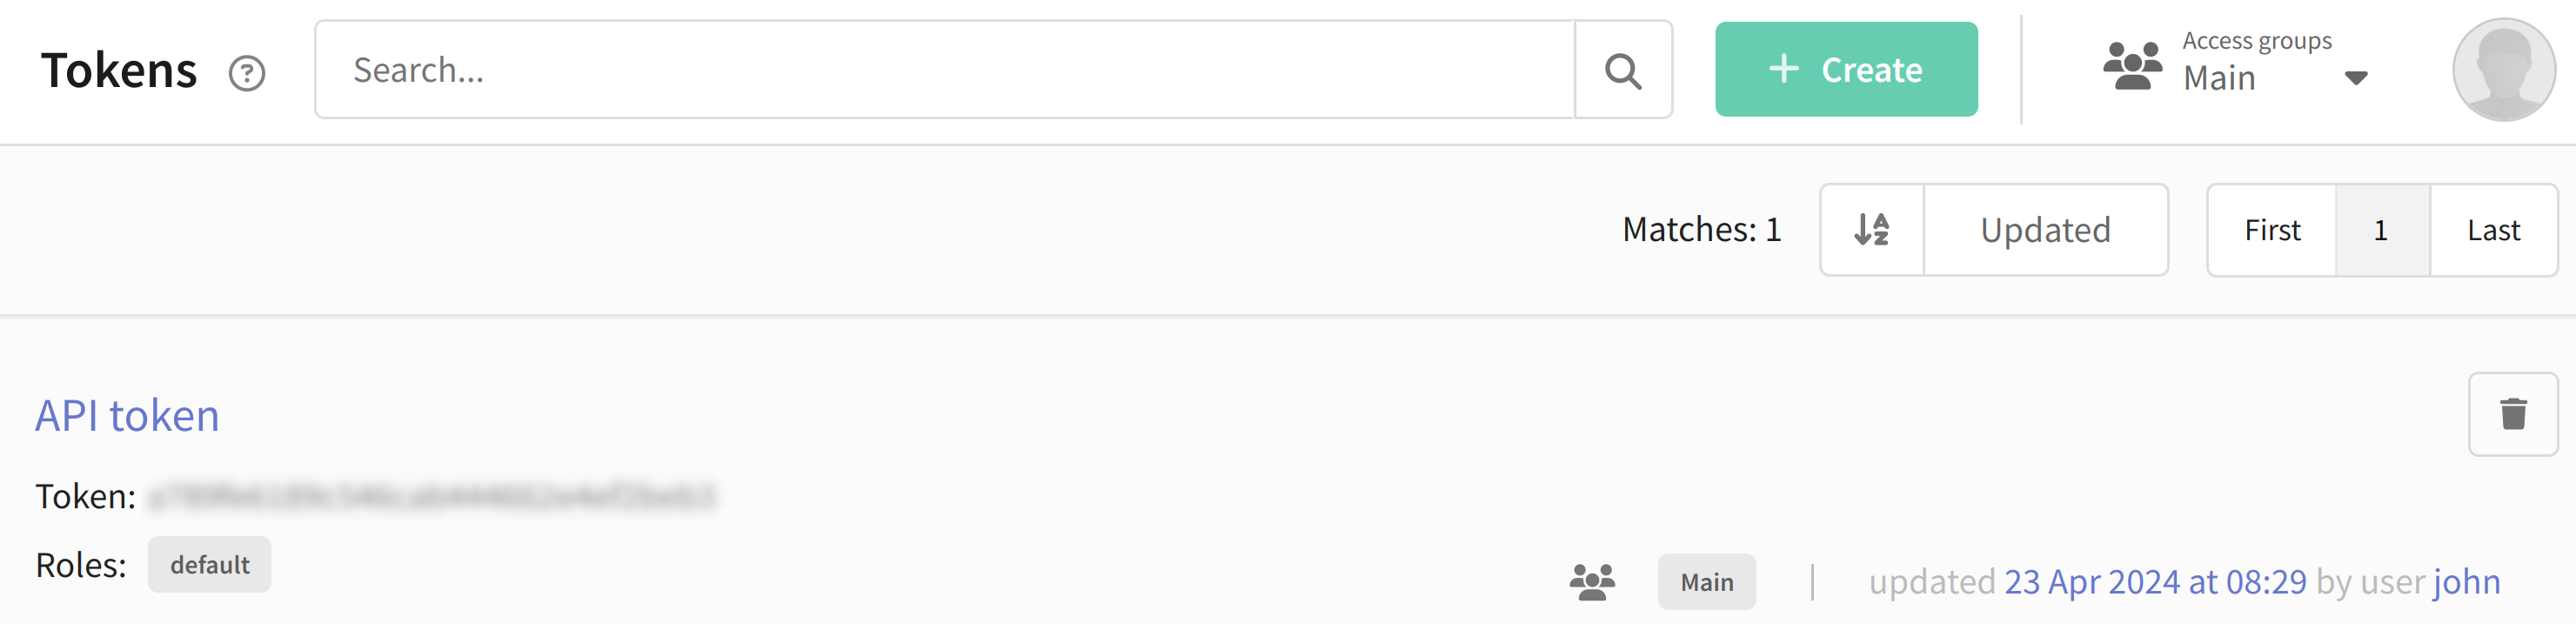
Only master users can create an API token. If you do not have rights to create a token, contact a user with master rights.
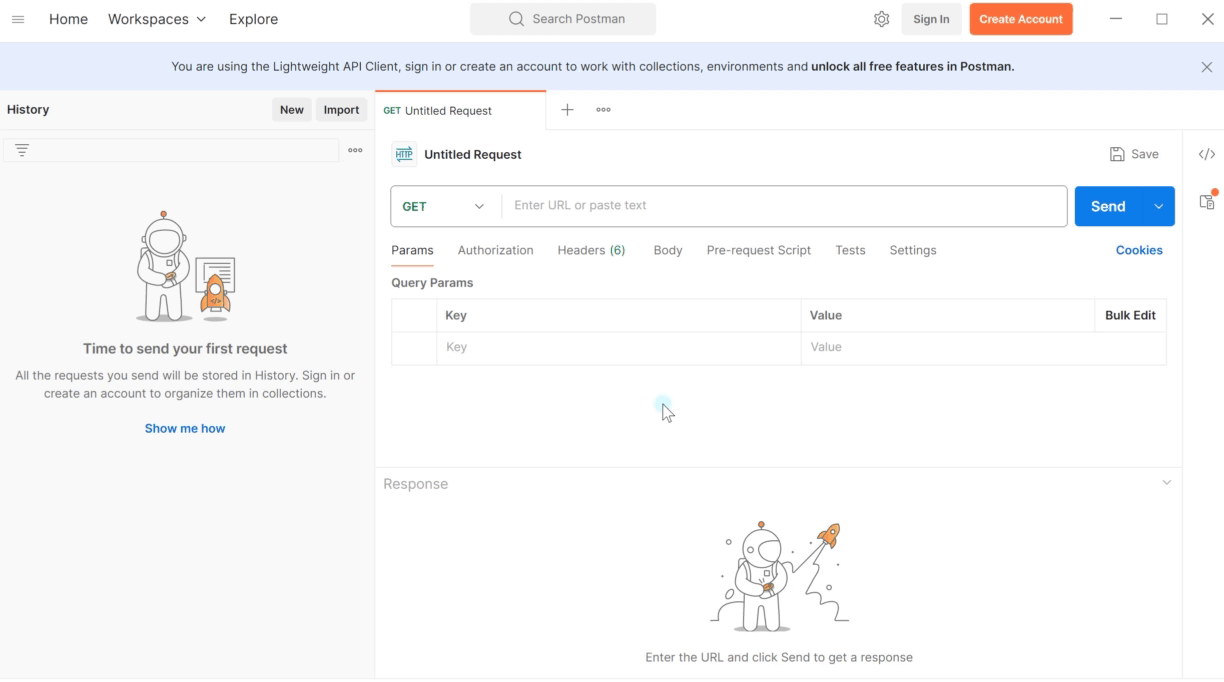
Installing and running Postman
To work with API requests, you need an application that allows you to send and receive them.
1. Download and install the Postman application or open its web version.
2. Select the POST method for your request.
3. Click the Body tab and select raw mode. Make sure the JSON format is selected.
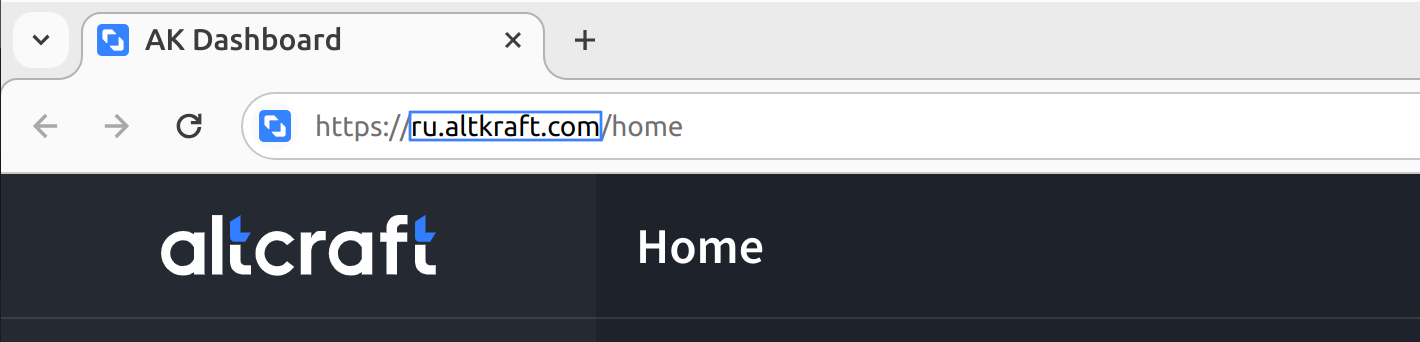
Request URL

To send a request to the server you need to enter its URL. It is individual for each request. For example, for a request to import a profile, the URL would be as follows:
https://example.com/api/v1.1/campaigns/triggers/start.
Instead of example.com you need to specify the address where the platform is located. You can get it directly from the address bar:
Creating a request
Launching a mailing for one user
Let's move on to writing the query. Suppose there is a subscriber with the email address zaycev@example.com in the database. We want to send a message to his email by launching trigger mailing #1. Our query might look like this:
{
  "token": "abcdefghklmnopqrstzxc",
  "id": 1,
  "matching": "email",
  "email": "zaycev@example.com"
}
- token — API token. More details about where you can find it are provided at the beginning of the article.
- id is the number of the trigger mailing. It is shown next to the mailing name to the right of the # sign. The
idof the trigger mailing is always a number, do not confuse it with the name. - matching and email - parameters by which the query will find the required profile in the database. In this case the search by email address of the profile is used.
More details about the matching parameter
The matching parameter defines by which field the profile will be searched in the database. Several search modes are available in the platform, for example, the platform can search for a profile by email address, phone number, system ID or by any value you store in an additional field in the database.
The main thing is that the field by which you launch a search in the database is unique for the profile, i.e. the value of this field should not be the same for different profiles in the same database.
If you want to find a profile by its email, then matching will look like this:
{
     "matching": "email",
     "email": "example@example.com"
}
Search for a profile by phone:
{
     "matching": "phone",
     "phone": "+79000000000"
}
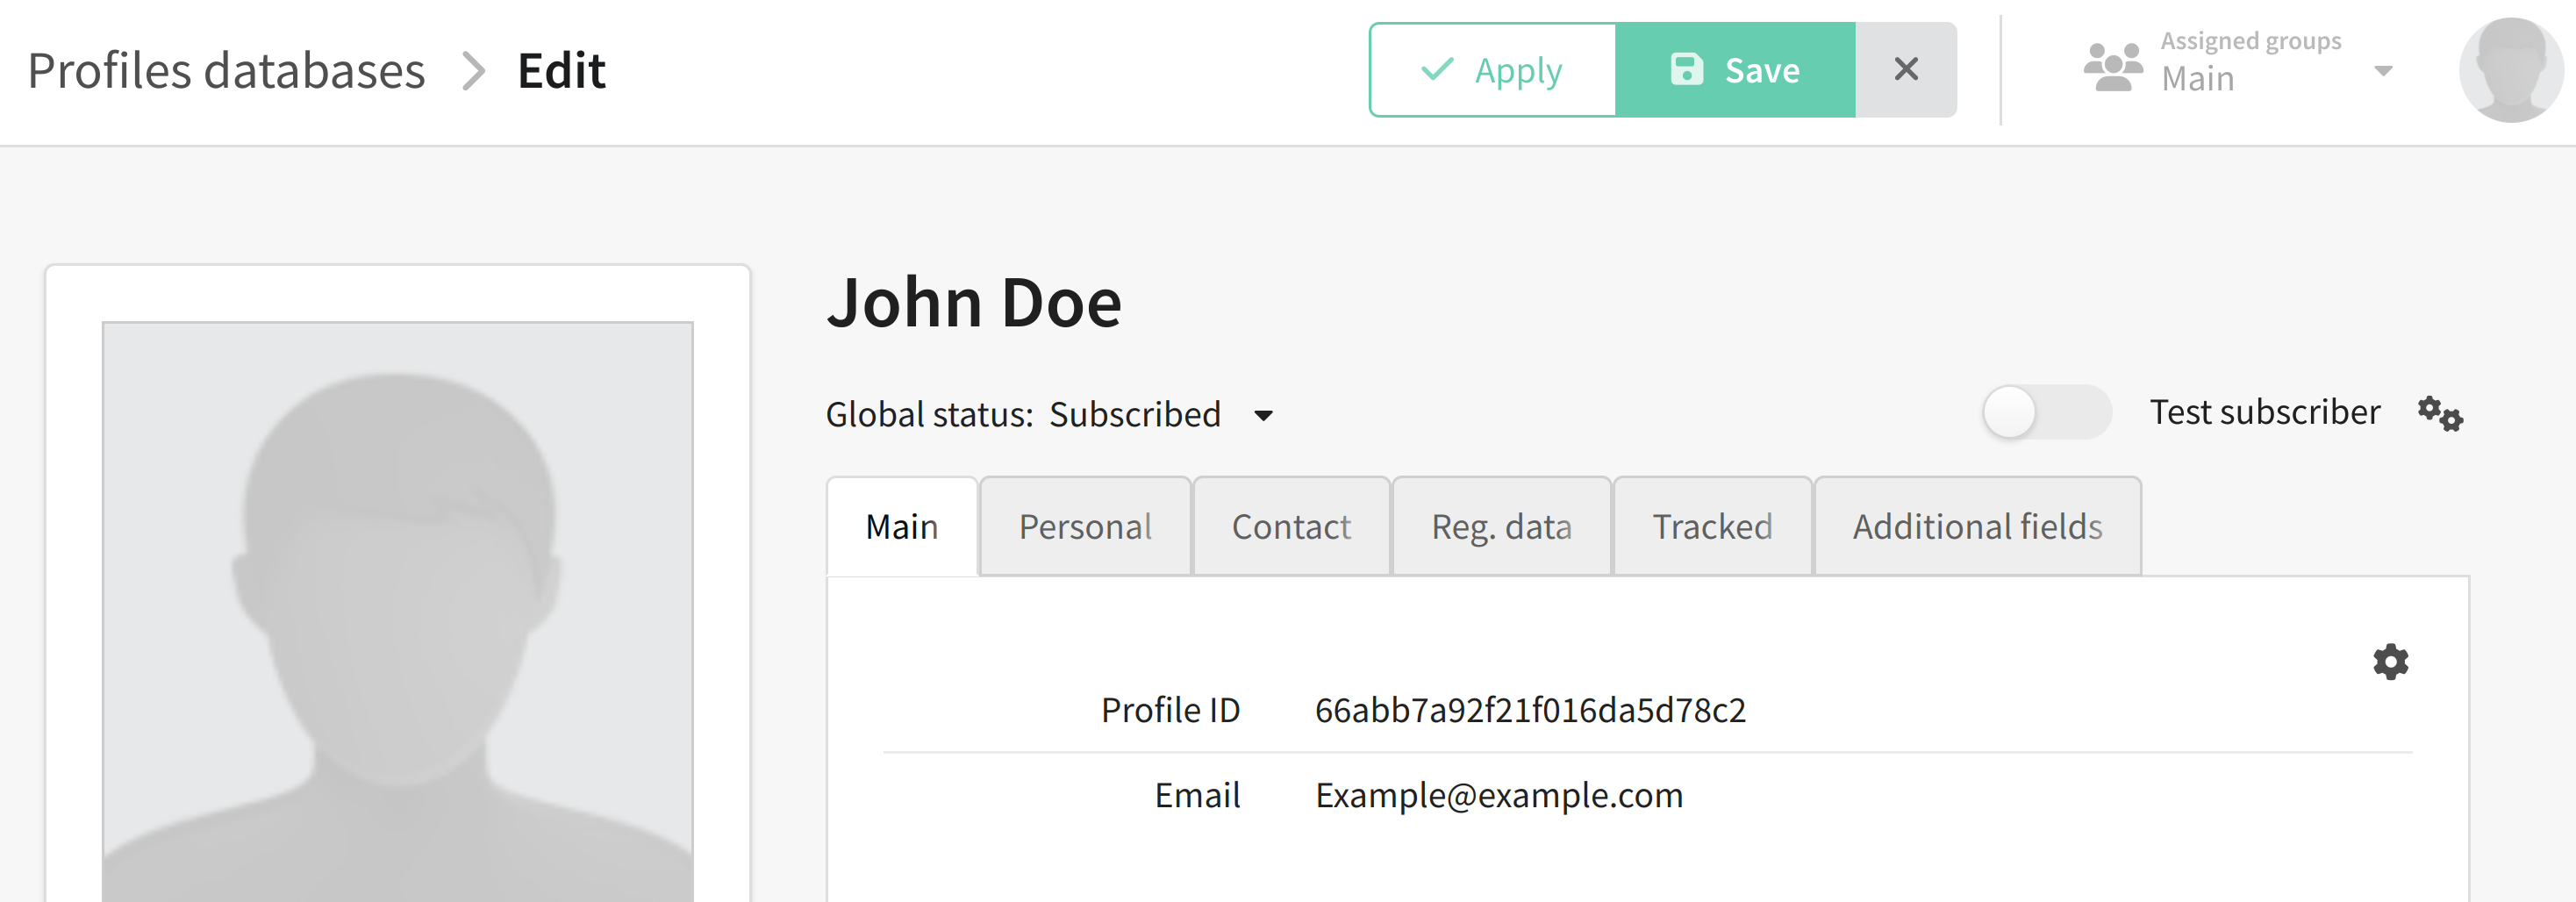
Search for a profile by ID (only when updating a profile):
{
     "matching": "profile_id",
     "profile_id": "012452gf62fcd71fjh8ec0"
}
The profile ID can be found here:
If you use an additional field to search for a profile in the database, your query will look like this:
{
     "matching": "custom",
     "field_name": "CRM_ID",
     "field_value": "12345"
}
where CRM_ID is the name of the field, and 12345 is the value of this field for the profile.
Launching a mailing for subscriber with custom field
Let's say we want to send a message with a new product catalog to the person who liked a VKontakte post. But we don’t know anything about this client except its VK ID, which is recorded in our database in the corresponding field. In this case, the code will look like this:
{
  "token": "abcdefghklmnopqrstzxc",
  "id": 5,
  "matching": "custom",
  "field_name": "vk_id",
  "field_value": "123456"
}
The search for profiles will search for an additional field, since we specified custom in matching. The name of this field and its value are specified in the field_name and field_value parameters. The field value must be unique, otherwise the request will not work. We have indicated the VK ID of the client we are interested in, so the message will be sent only to him.
Pay attention to the syntax of your request. Any extra character, be it a parenthesis, comma or period, can lead to errors when sending a request. Likewise, the query will not work if you do not close any quotes or parentheses.
Sending a request
To send a request, click Send. If the request is successful, the following message will appear:

If something went wrong, the response message will indicate the code of error and its description:

If you are unable to resolve the error yourself, please forward the code of error and its description to Altcraft Support team.
This article describes only some of the possible parameters for this request. The remaining parameters can be found here.