Virtual senders
Overview
A virtual sender is a set of rules for real senders and a powerful tool for fine messaging tuning.
Your delivery rate can greatly depend on it — especially with large amounts of messages to be sent.
These rules specify real sender usage proportions and custom From and Reply-to email fields for messages sent.
Virtual senders can be created and managed only by a master user or an Altcraft platform administrator.
If you need to manage the virtual senders of your account, in the main menu, select Settings —> Virtual senders. Click + New to add a sender.
You can enable virtual senders for mailings if Smart settings are available for your account. If Smart settings are not available, the first valid virtual sender will be used.

General settings
First of all, you need to enter a unique name for each sender:

You can set groups in the bottom of the page. These groups will get access to the virtual sender.

Sending rules for different communication channels
Rules for email senders
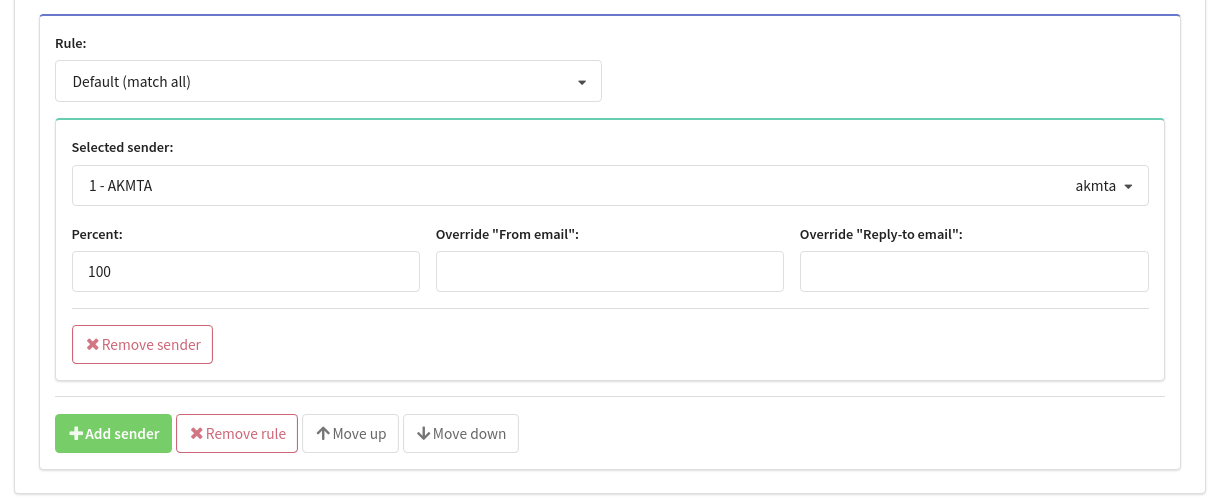
The rules for email senders determine which real senders and in what proportions will be used under certain conditions. To add a rule, click + Add Rule.

Select the appropriate condition from the drop-down menu When the rule is applied:
Match by group — the rule will be applied to mailings within a group specified for matching.
Match by "From domain" — the rule is applied when sending from a specific domain.
Match by "To domain" — the rule is applied when sending to specific email domains.
Match by "From email" — the rule is applied when sending from a specific email address.
Default (match all) — no conditions are required for this rule to be activated. It will be applied by default whenever a current virtual sender is set for a mailing.
You can create multiple rules and sender options. The priority of applying rules is set by their position on the page: from top to bottom. The Default rule (match all) must be the last one in the list. The priority of other rules is set using the Move Up and Move Down buttons.
The Default rule (match all) is not possible to delete or move up in priority, since it handles all cases that do not fall under the other rules.
Using the Add sender and Remove rule buttons, you can add and remove senders within the sending rule. The following fields are configured for each sender:
Selected sender — select a real sender for sending.
Percent — set for the sender the percentage of messages sent within the rule.
Override "From Email" — override the "From email value" for outgoing messages.
Override "Reply-to Email" — override the "Reply-to email" value for outgoing messages.
For one rule the sum of senders usage percent must be 100.
Rules for SMS senders
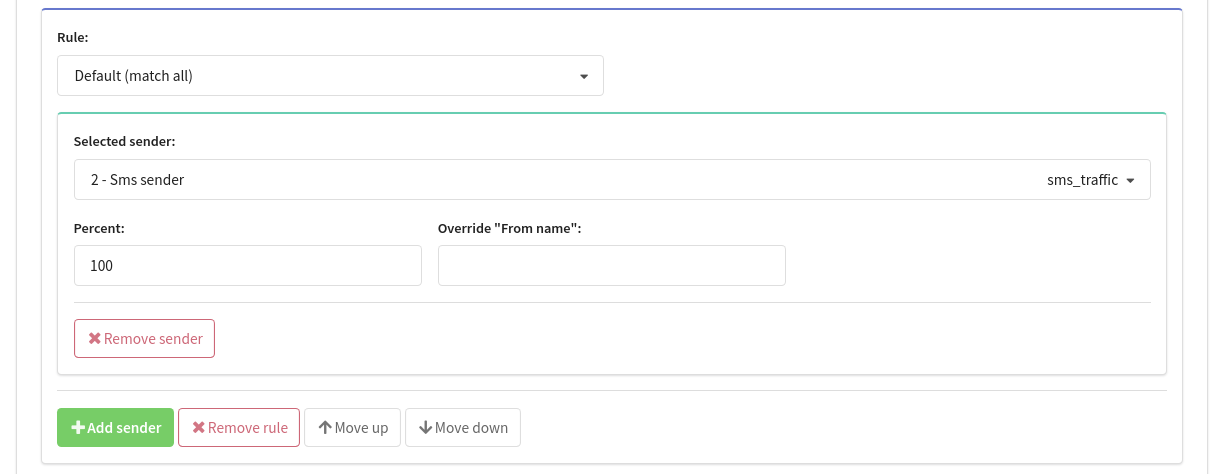
The rules for SMS senders determine which real senders and in what proportions will be used under certain conditions. To add a rule, click + Add Rule.

Select the appropriate condition from the dropdown menu with rules:
Match by group — the rule will be applied to mailings within a group specified for matching.
Default (match all) — no conditions are required for this rule to be activated. It will be applied by default whenever a current virtual sender is set for a mailing.
You can create multiple rules and sender options. The priority of applying rules is set by their position on the page: from top to bottom. The Default rule (match all) must be the last one in the list. The priority of other rules is set using the Move Up and Move Down buttons.
The Default rule (match all) is not possible to delete or move up in priority, since it handles all cases that do not fall under the other rules.
Using the Add sender and Remove rule buttons, you can add and remove senders within the sending rule. The following fields are configured for each sender:
Selected sender — select a real sender for sending.
Percent — set for the sender the percentage of messages sent within the rule.
Override "From name" — override the "Caller_ID" value for outgoing messages.
For one rule the sum of senders usage percent must be 100.
Rules for push senders
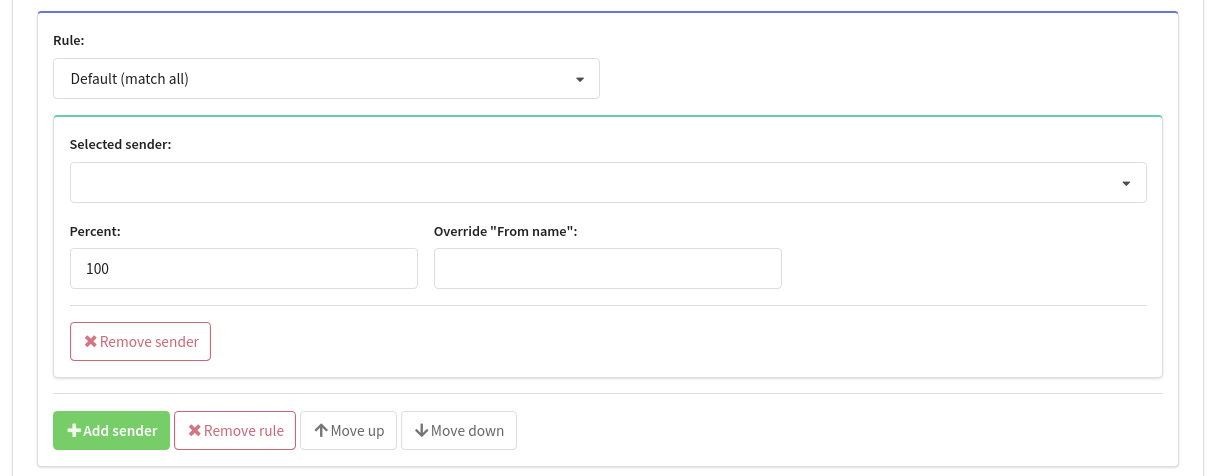
The rules for SMS senders determine which real senders and in what proportions will be used under certain conditions. To add a rule, click + Add Rule.

Select the appropriate condition from the dropdown menu with rules:
Match by group — the rule will be applied to mailings within a group specified for matching.
Default (match all) — no conditions are required for this rule to be activated. It will be applied by default whenever a current virtual sender is set for a mailing.
You can create multiple rules and sender options. The priority of applying rules is set by their position on the page: from top to bottom. The Default rule (match all) must be the last one in the list. The priority of other rules is set using the Move Up and Move Down buttons.
The Default rule (match all) is not possible to delete or move up in priority, since it handles all cases that do not fall under the other rules.
Using the Add sender and Remove rule buttons, you can add and remove senders within the sending rule. The following fields are configured for each sender:
Selected sender — select a real sender for sending.
Percent — set for the sender the percentage of messages sent within the rule.
Override "From name" — override the "From name" value for outgoing messages.
For one rule the sum of senders usage percent must be 100.