Abandoned cart scenario
Visitors to an online store often add items to their carts but do not place an order. However, if you remind them about the abandoned items after a while, the chances of completing the purchase will increase. This guide is here to help you set up a short scenario that will automatically send reminder emails to your customers.
Step 1: Place tracking pixels on website pages
Let's say that a user adds items to the cart, goes to the cart, pays for the purchase and then is redirected to a thank-you page. A subscriber will receive a reminder about the abandoned cart if they visit the cart page, but do not get to a thank-you page afterwards, i.e. do not complete the checkout. Pixels will help you track visits to certain website pages.
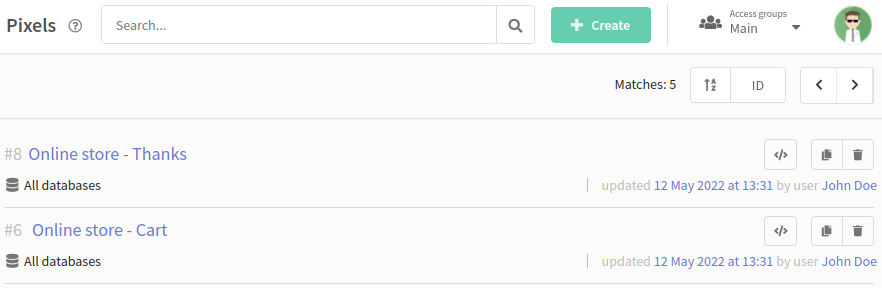
In the Pixels section, create 2 pixels:
Online store - Cart: it tracks visits to the cart page
Online store - Thanks: it tracks visits to a thank-you page
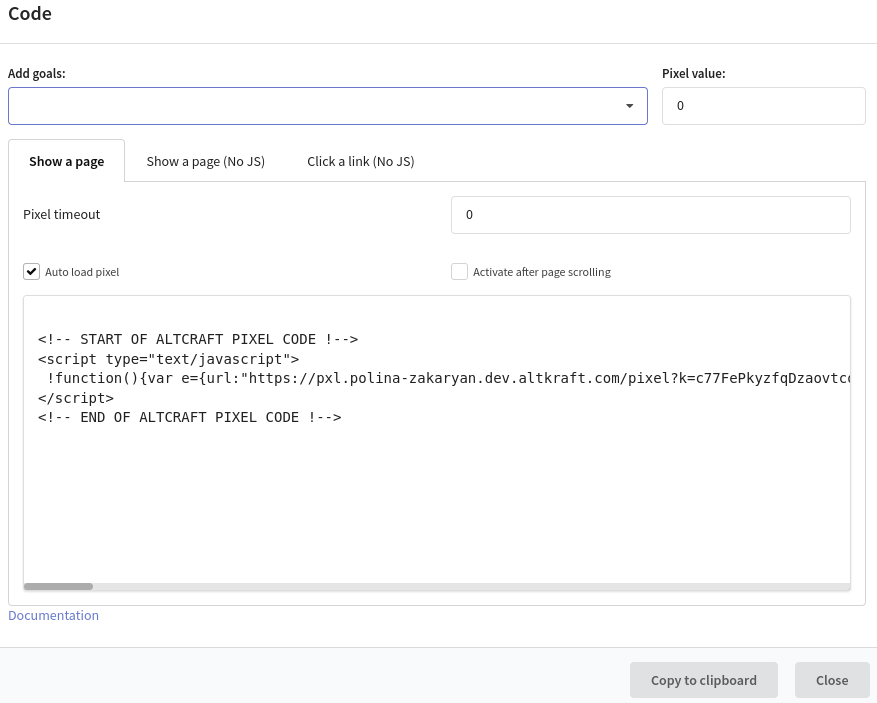
In some situations, a website visitor may open the cart several times. If you don't want to spam your client's email by sending several reminders in one day, block reactivation of the pixel for the cart for 7200 minutes (5 days).
To view the pixel code, click "Get pixel code". Copy the code from the window and place it on the website pages:
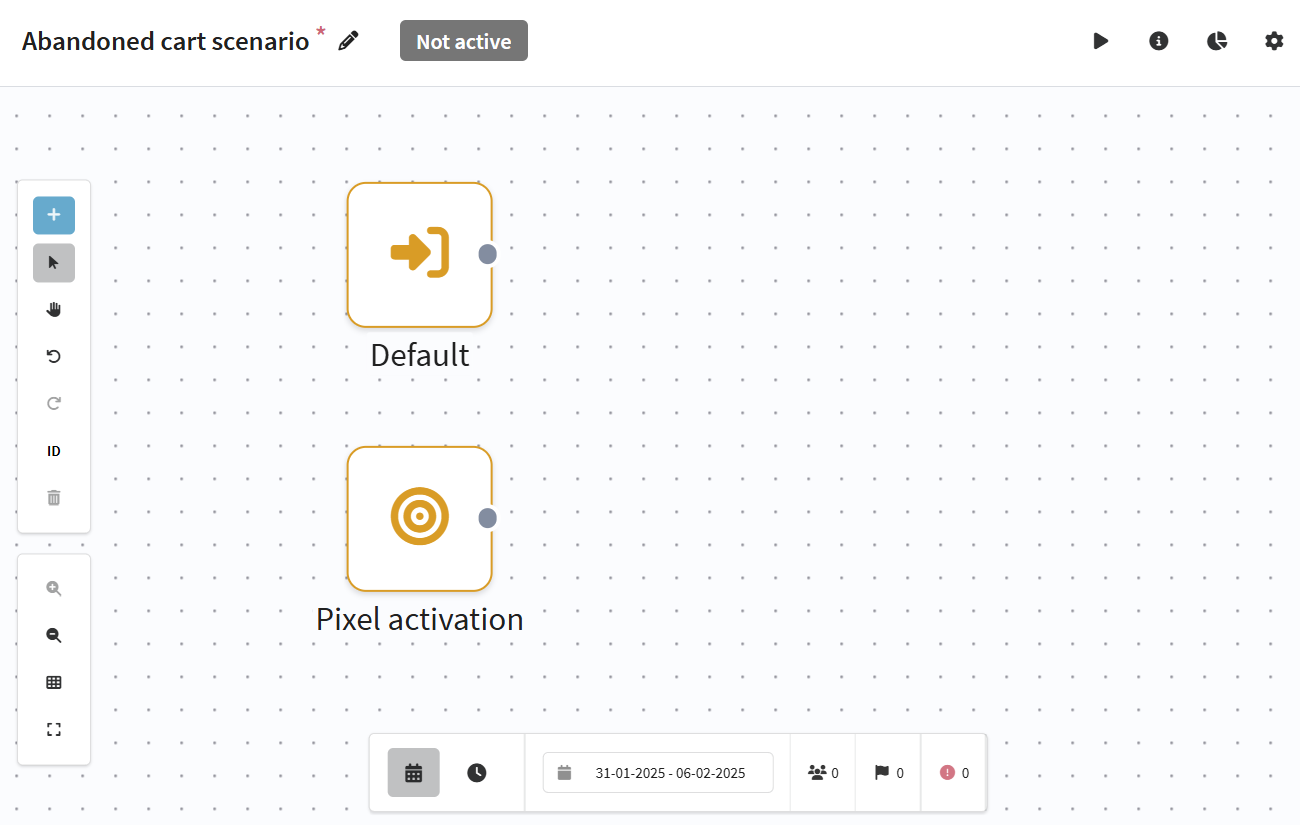
Step 2: Configure customer profile capture
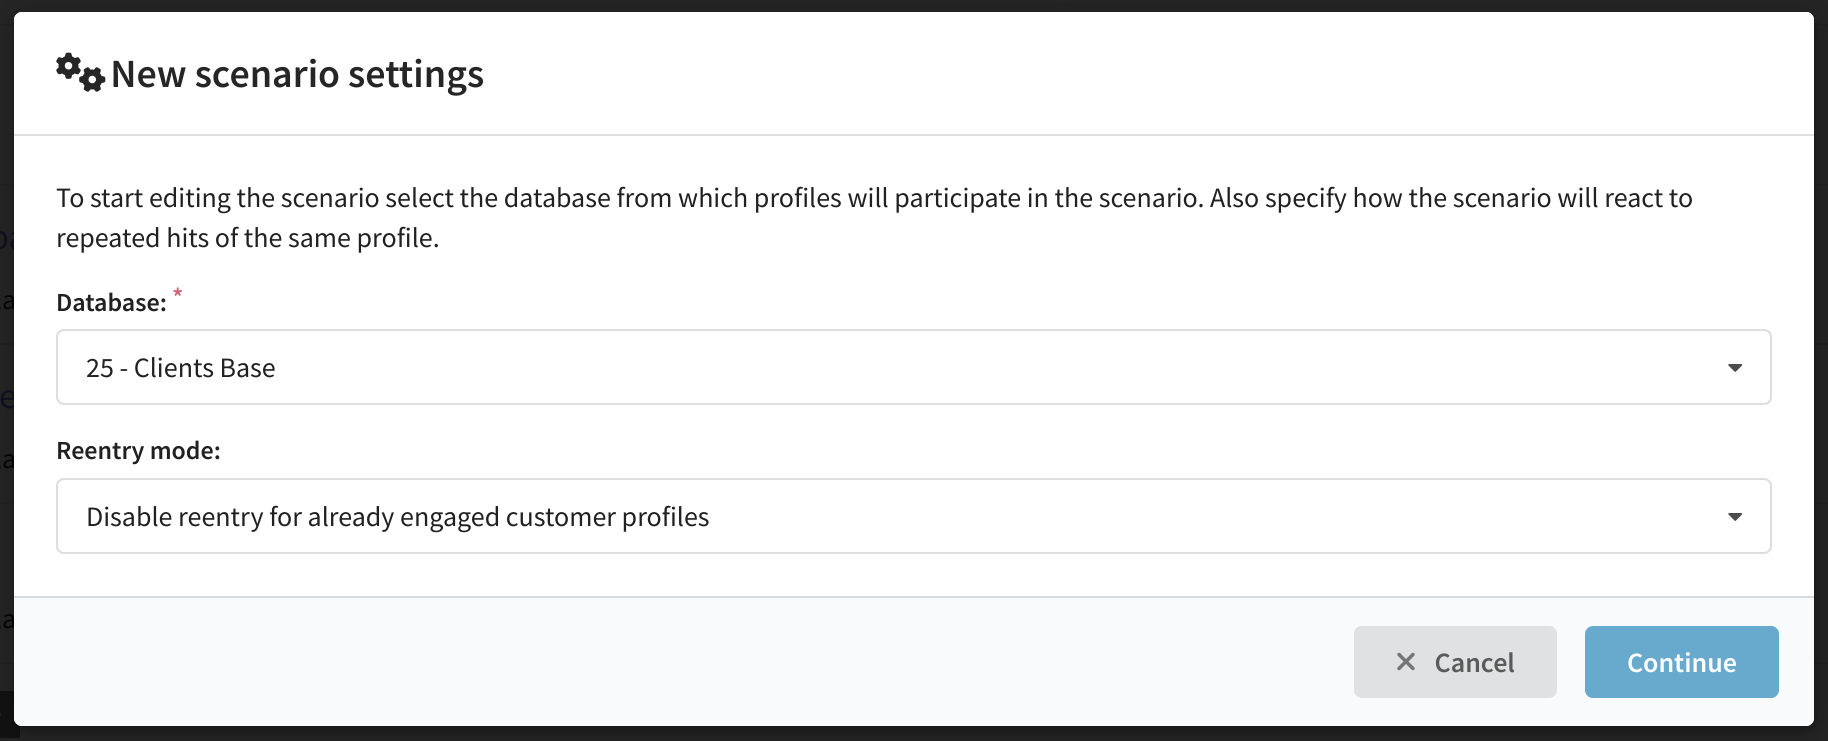
Create a new scenario. Specify the base - the profiles of these clients will be hit in the scenario if the capture condition is met. Select what to do with the profile in case of repeated hits. The option Disable reentry for already engaged customer profiles will work for us. This way the customer will be able to get into it again, but only when he is going to make the next purchase after some time.
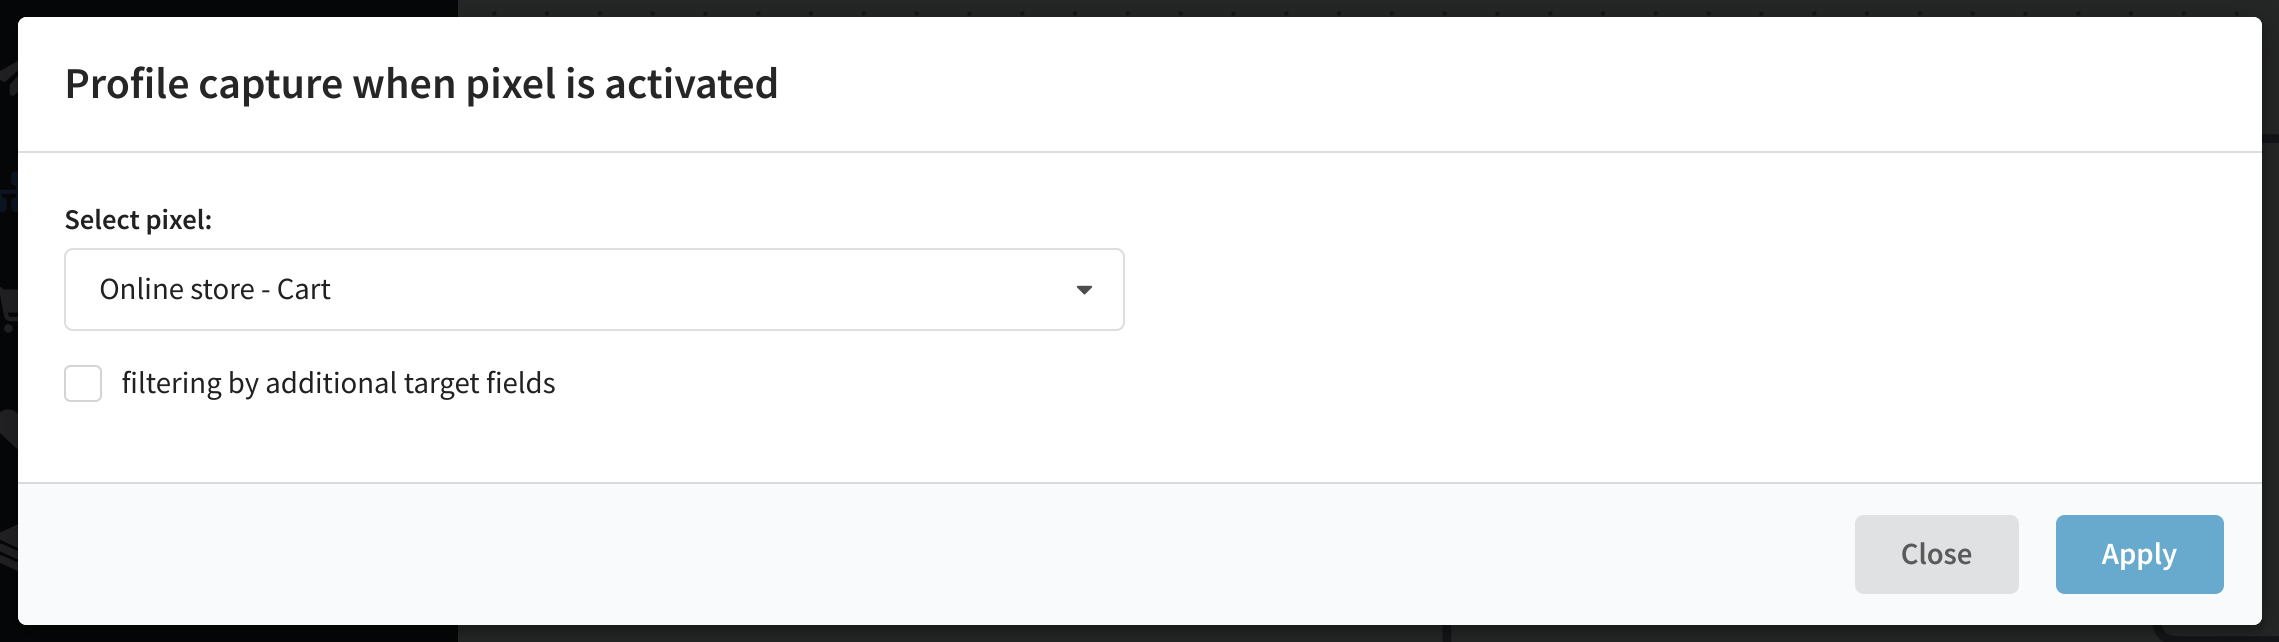
To get users into the scenario, add a trigger element When a pixel is activated. The pixel we placed on the page with the shopping cart (Online store - Cart) should be activated.
In any script, an Default Import element is automatically created. It is required for importing profiles manually, via API and when switching from another script. This is a system element, it is impossible to delete it:
Step 3. Set up a workflow for the profiles that have completed their orders
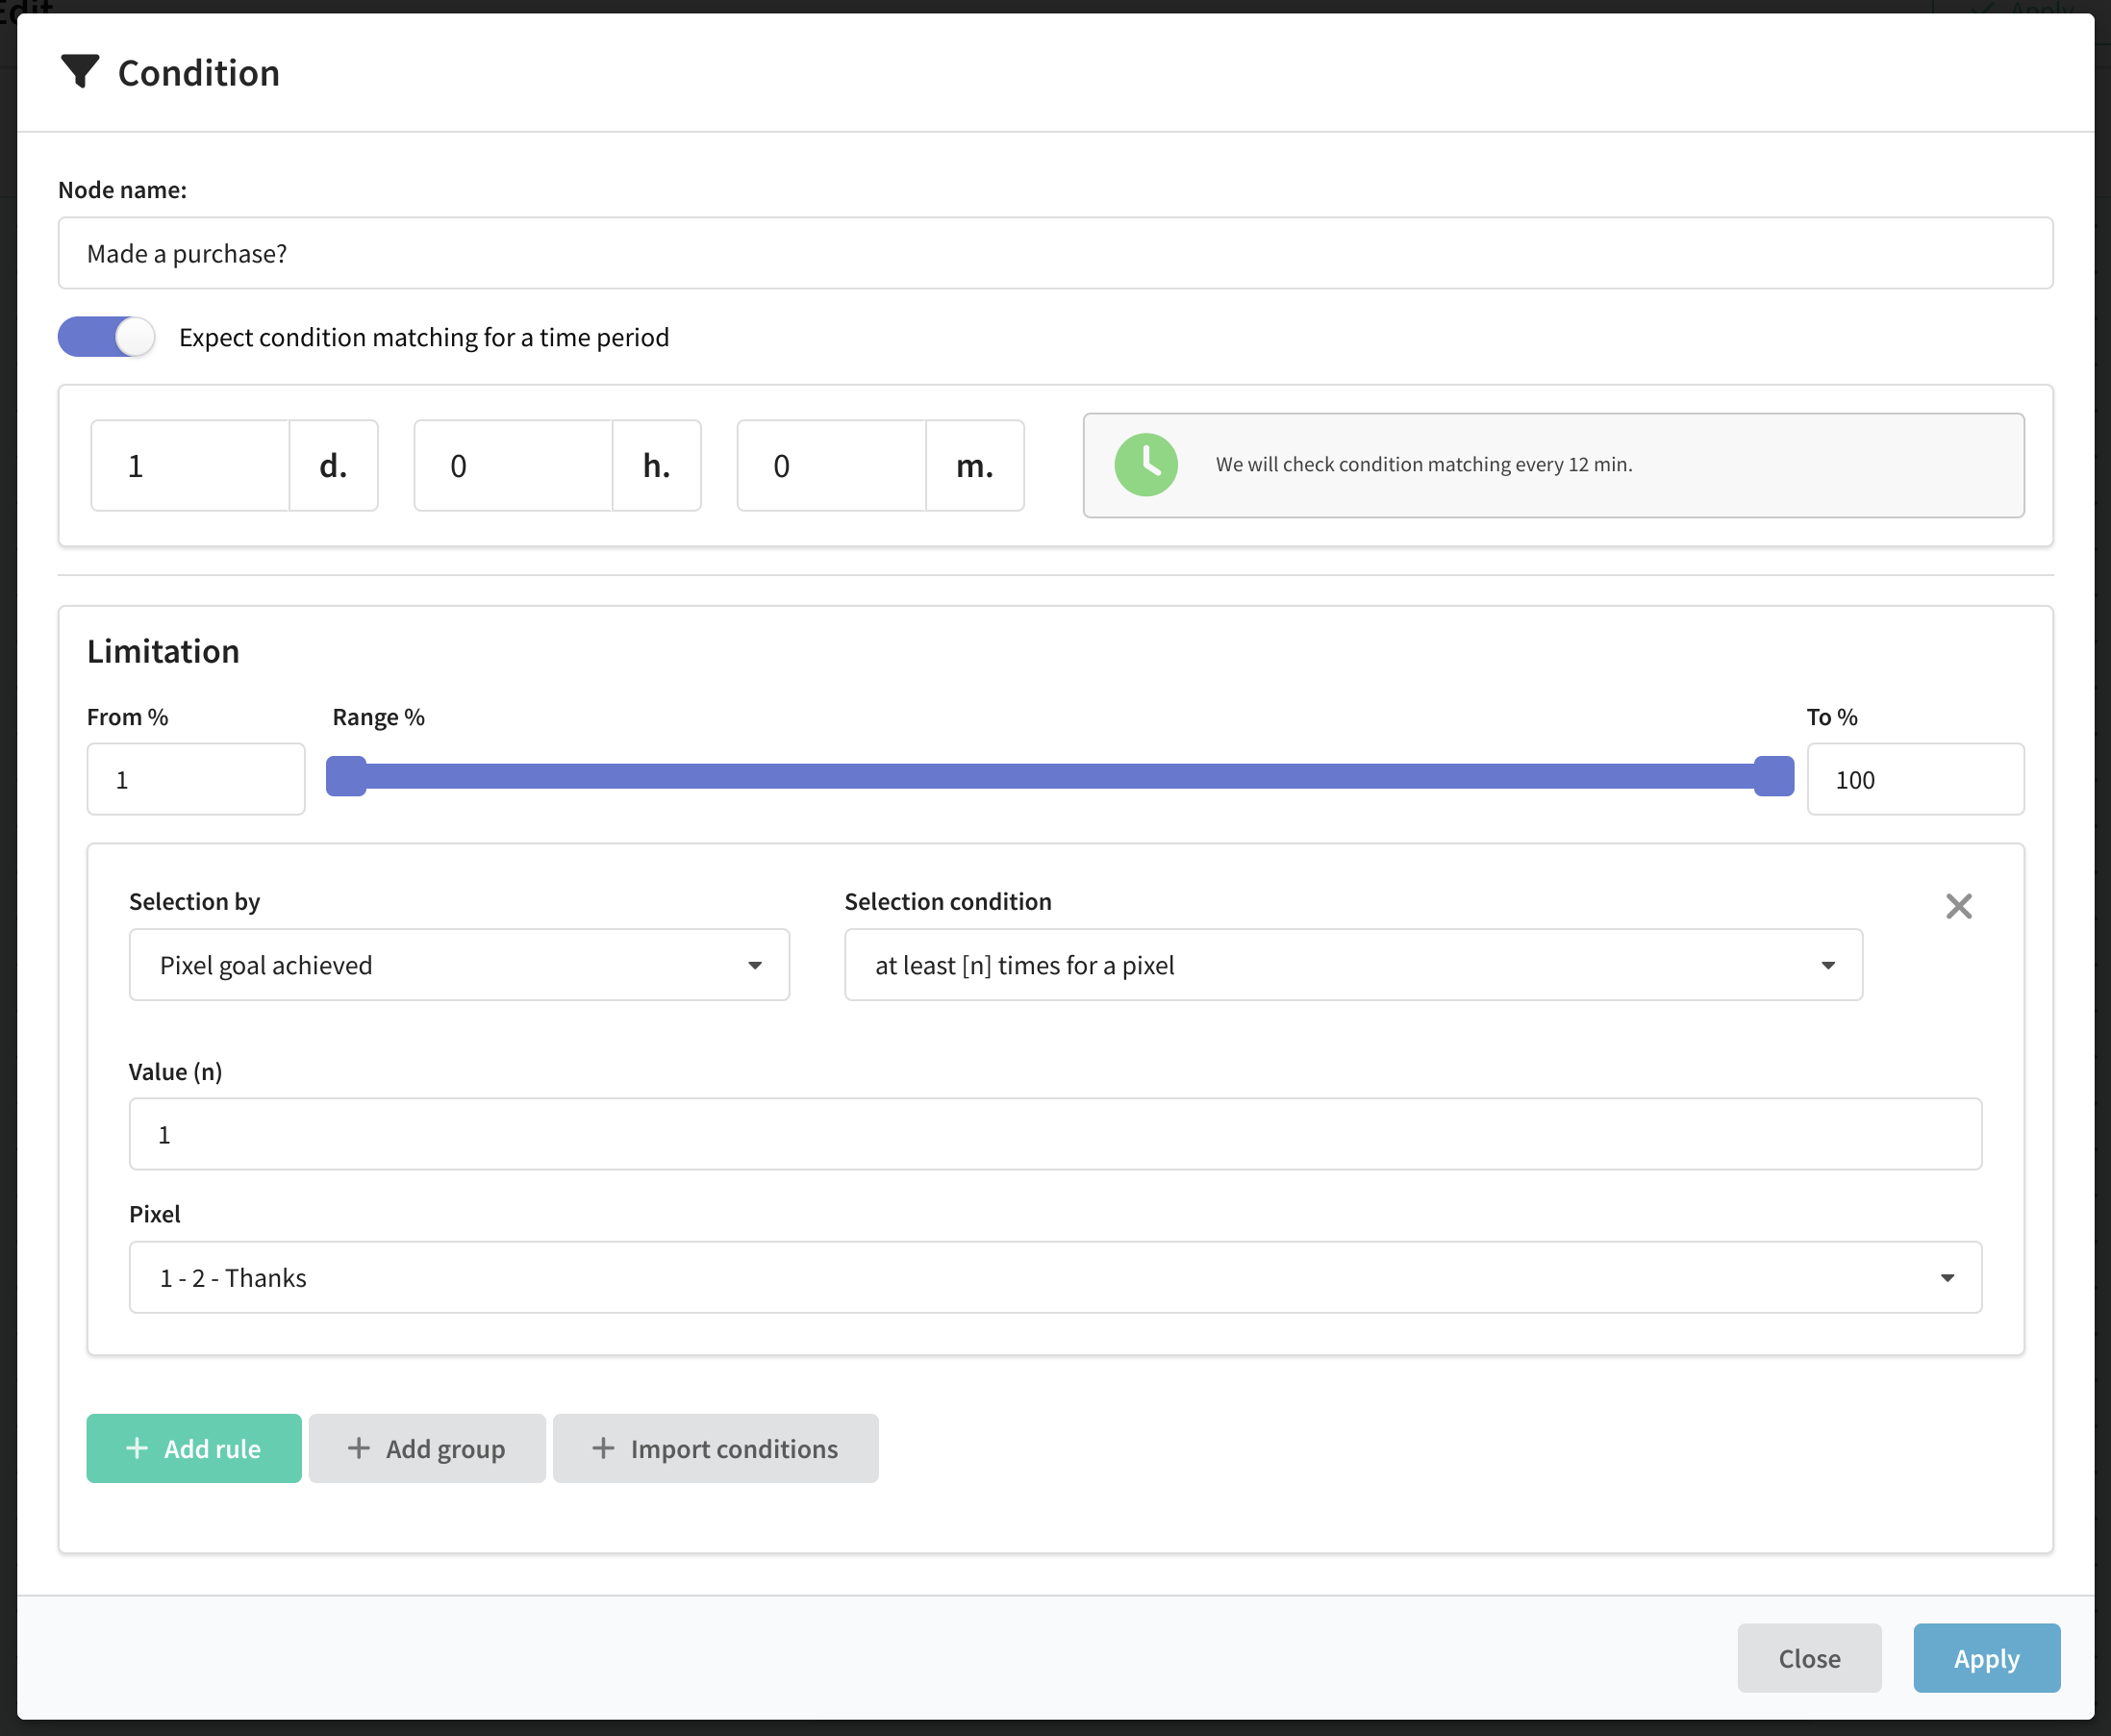
Next, add the Condition element to check whether the user has made a purchase or not. The condition will be fulfilled if a person went to the thank you page, i.e. the Online store - Thanks pixel was activated. When customizing the element, toggle the slider Wait for condition for a specified time and specify the waiting time - 1 day. The platform will check if the customer has made a purchase during this time:
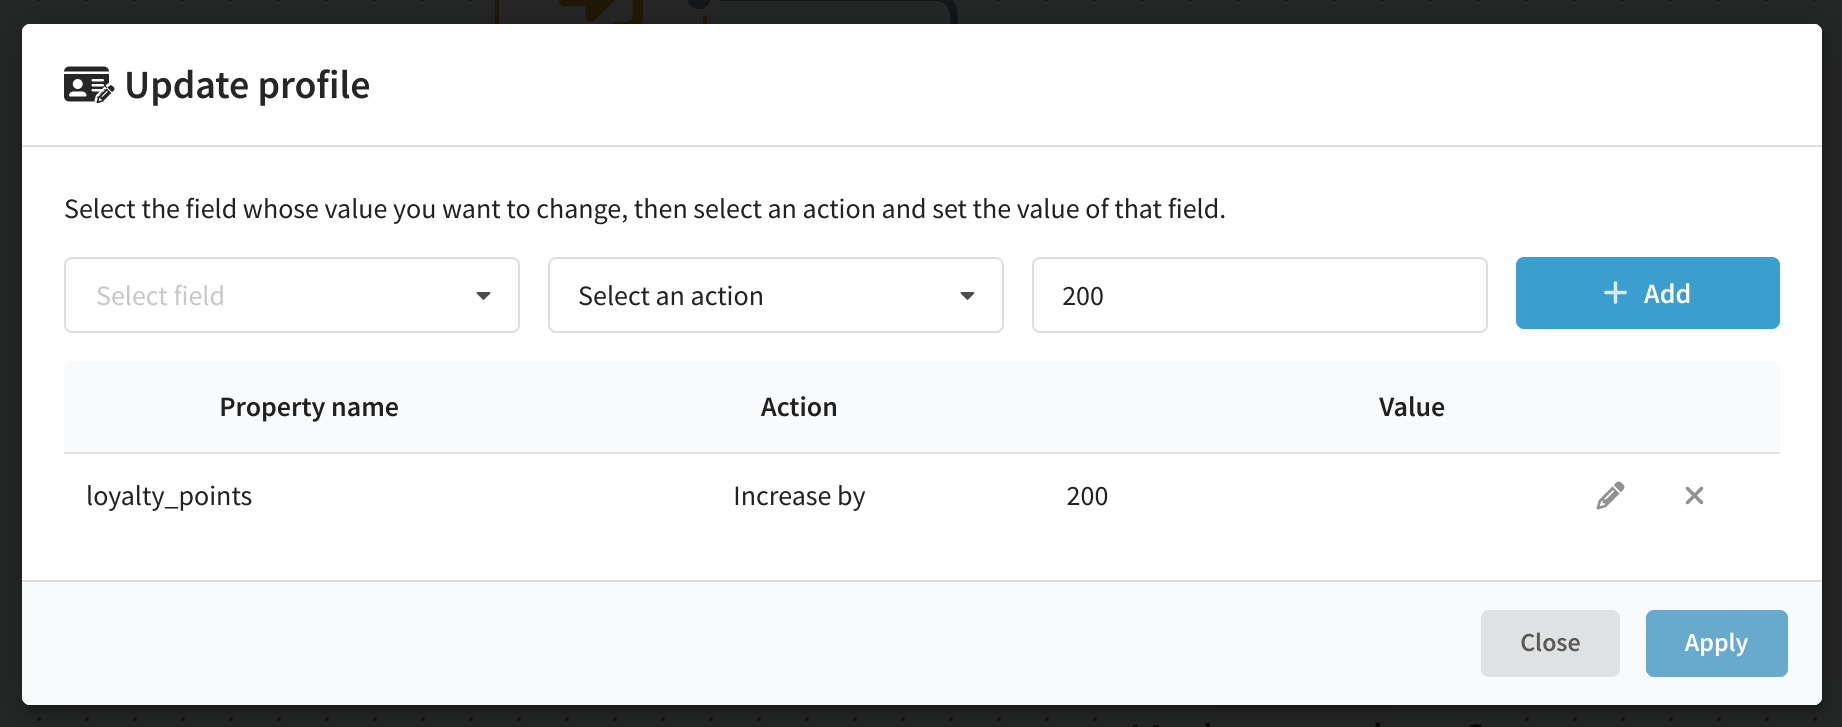
If the customer has made a purchase, award him bonus points. To do this, there should be an additional numeric field in the profile database, such as loyalty_points. Add a Update Data element to the scenario and increment the field value:
If you want to change the number of bonus points depending on the purchase amount, use the "Take value from {apicontent} field‘ action instead of "Increase by". To do this, you need to add the API Request element in the previous step and save the http response with the required data.
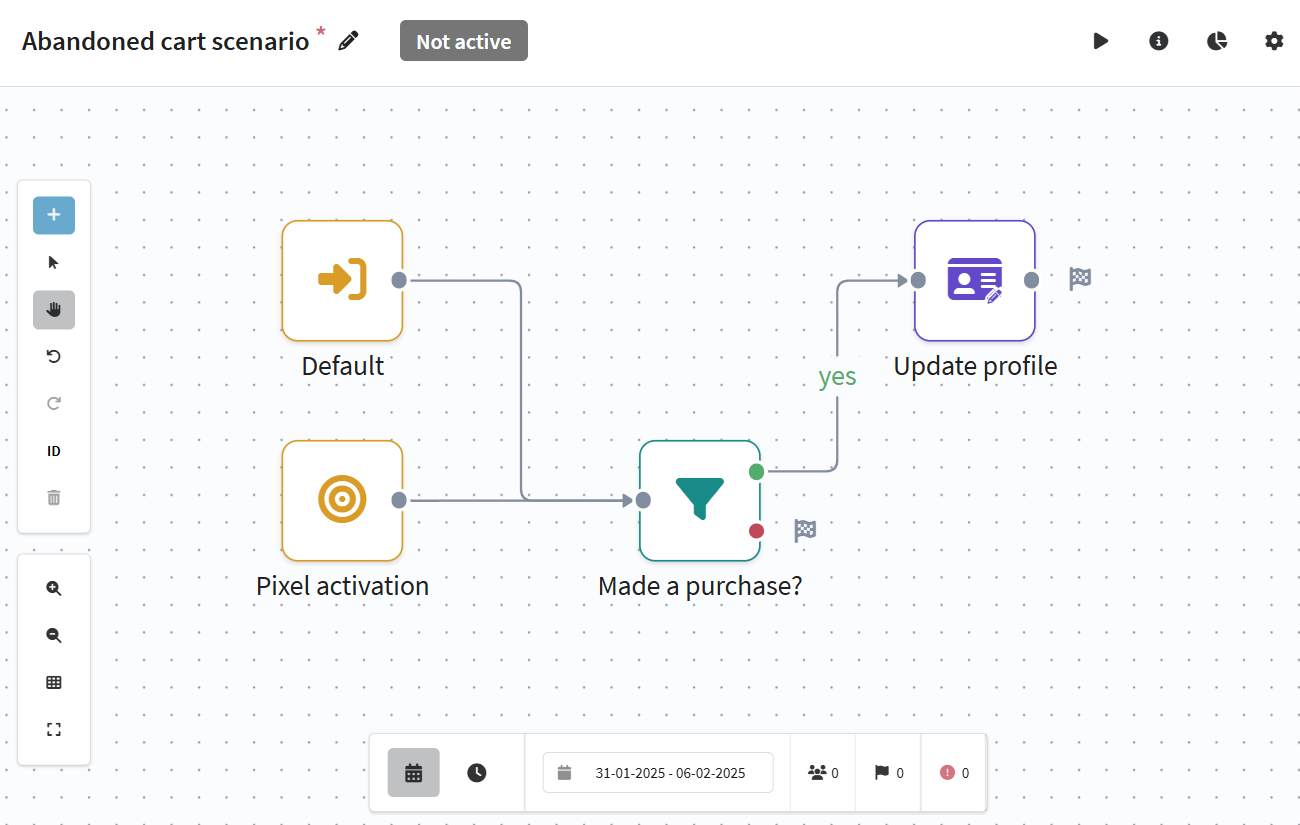
So, the positive branch of scenario is ready:
Step 4. Set up a workflow for the profiles that have left the website
Let's go back to the customers who left the site without completing the checkout. After the condition element, the scenarion will redirect them to the red branch.
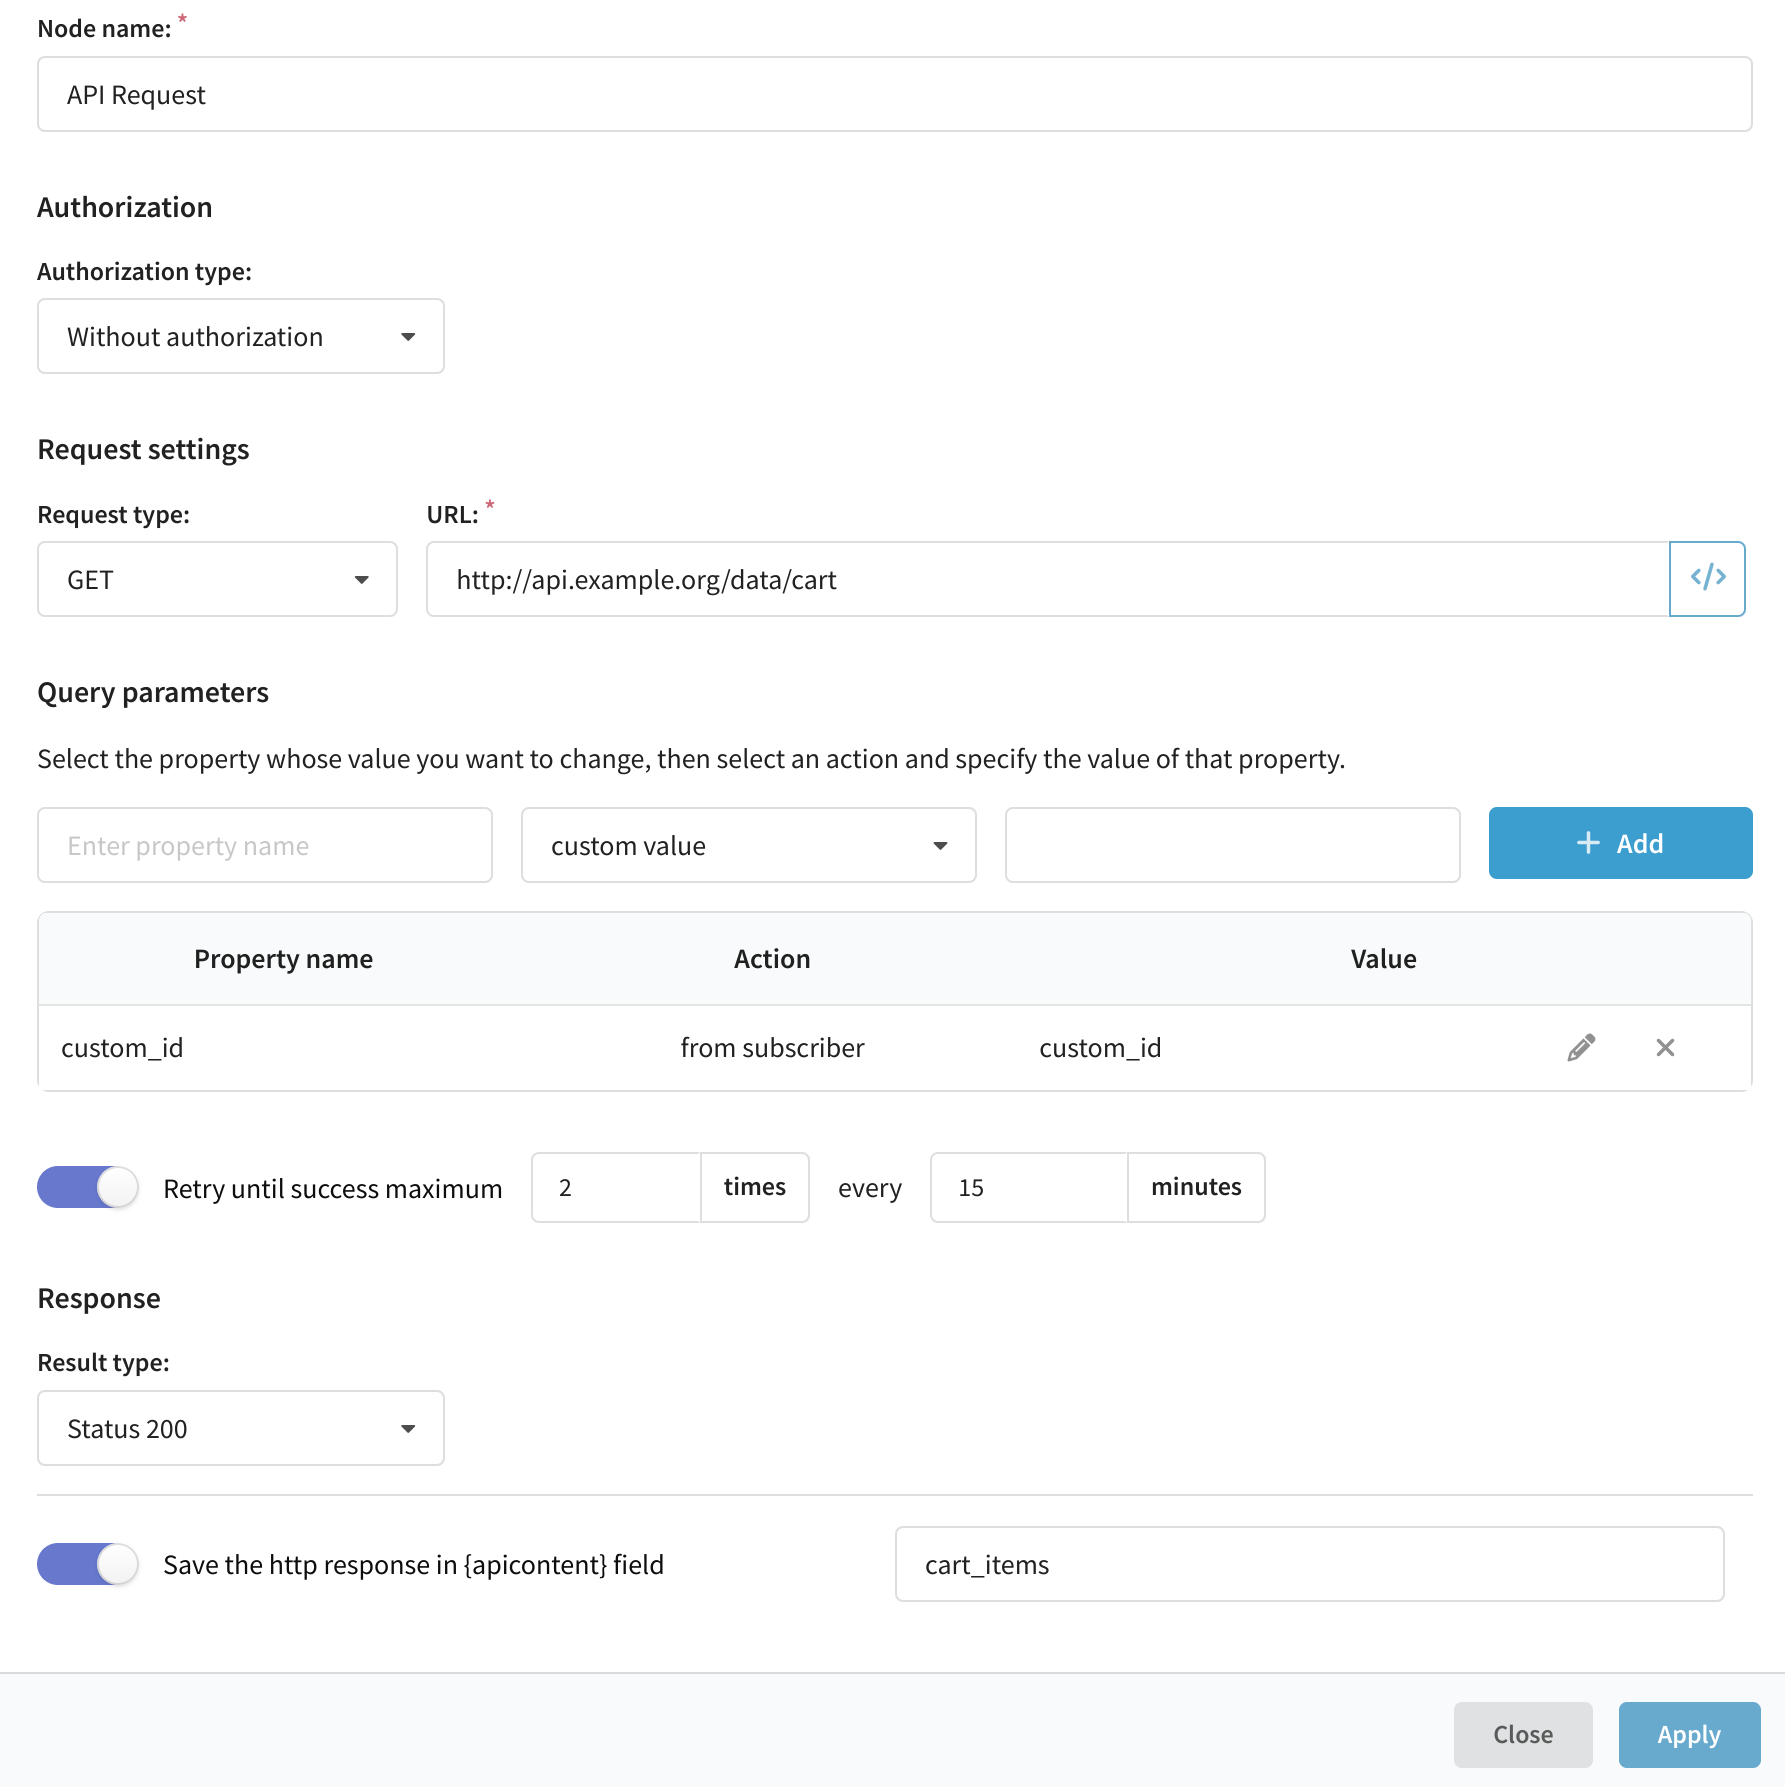
Using the API call, we need to pass the data about the products abandoned in the cart to the platform, and then substitute this data into the email template. Add an API Request element. Specify the URL where the data about the items in the cart is stored. The request type is GET.
Next, activate the field "Save the http response in {apicontent} field" and specify the name of the field where the response will be saved. The name of the field can be arbitrary, for example, cart_items. It is this field that will later be used when substituting the variable into the template. Add the necessary query parameters, such as id or profile email, which will be used to find the desired cart:
Save the scenario at this point. All that remains is to create a message template and add the distribution element to the script.
Step 5: Create an email template
Go to the Templates section and create a new template for the email sending channel:
The content of the email should be dynamically updated depending on the recipient. The {apicontent} variable is used for this. It stores the data that you receive using an API call node. For example, a JSON object with data about products in the purchaser's cart.
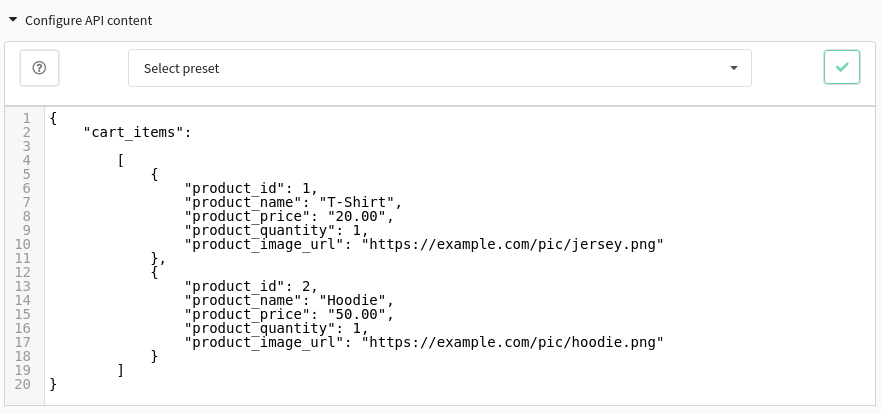
Example of a JSON cart
[
  {
    "product_id": 1,
    "product_name": "T-Shirt",
    "product_price": "20.00",
    "product_quantity": 1,
    "product_image_url": "https://example.com/pic/jersey.png"
  },
  {
    "product_id": 2,
    "product_name": "Hoodie",
    "product_price": "50.00",
    "product_quantity": 1,
    "product_image_url": "https://example.com/pic/hoodie.png"
  }
]
Once you've saved a JSON object in the apicontent field, you'll have access to the elements of this object by key. For example, {apicontent.cart_items.field_name1}. To add a variable,select from the list (</>) Services —> API content.
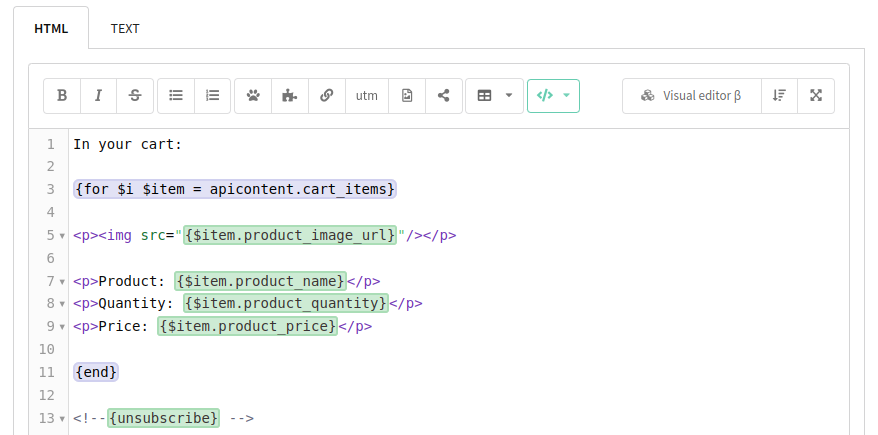
If the product data is in an array, use loops:
In your cart:

{for $i $item = apicontent.cart_items}

<p><img class="img" src="{$item.product_image_url}"/></p>

<p>Name: {$item.product_name}</p>
<p>Quantity: {$item.product_quantity}</p>
<p>Price: {$item.product_price}</p>

{end}

<!--{unsubscribe} -->
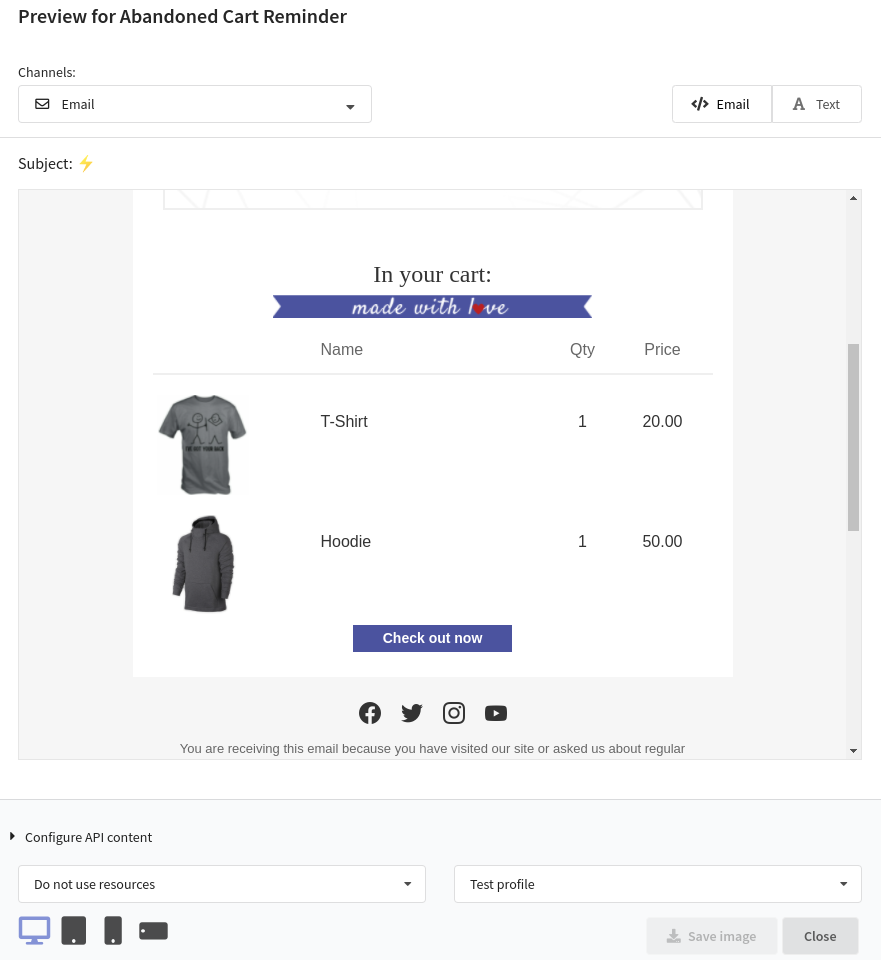
Step 6: Check the preview of the apicontent variable
When adding the apicontent variable, the message preview will not work because the variable doesn't contain any information. If you want to know what message will look like, set up the preview window.
Open the preview mode  and find "Configure API content" below. Add a JSON object similar to what you'll receive after the API request in the scenario.
Please note that the test array of products must be stored in the cart_items field.
Click on the check mark. The values of the field will be added to the template:
Go back to the scenario and add an Email element from Channels category. Select email channel, the resource of subscribers and created template in the settings:

Save the scenario by clicking the appropriate button at the top of the screen.
Step 7. Activate the scenario and evaluate its effectiveness
The finished scenario looks like this:
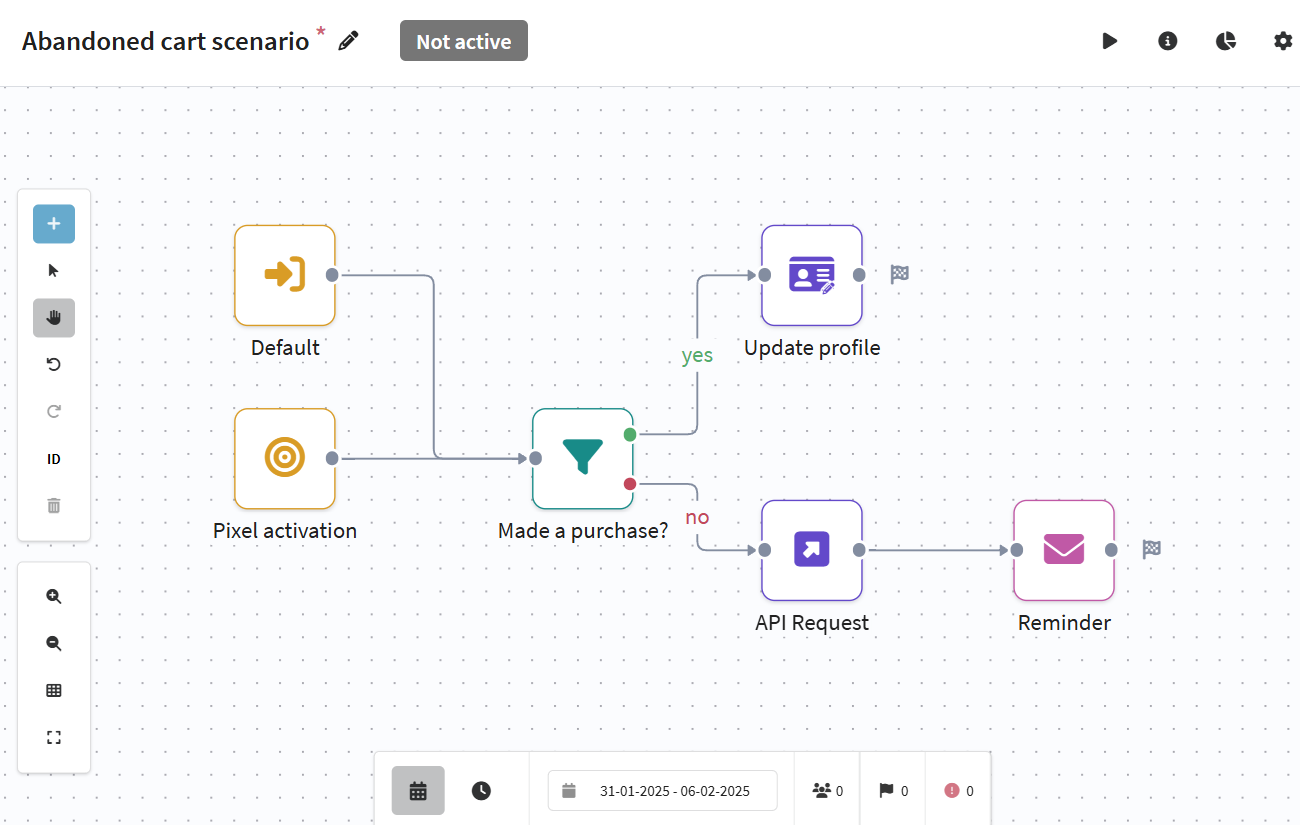
The scenario can be expanded. For example, if the subscriber has not completed the purchase, give them a promo code or send a compilation of related products.
After saving, activate the scenario in the quick actions menu:
You can evaluate the effectiveness of the scenario by clicking on the corresponding icon in the quick actions menu or in the channel report.