Step-by-step welcome scenario guide
This guide will help you set up an automation scenario, managing interactions with new customers - from registration to first promotional mailings and purchases. We give you some basics on how to choose scenario nodes based on the situation at hand or resources used.
Welcome workflow is one of the classic marketing automation scenarios. You can implement it effectively with Altcraft Marketing.
Automation scenario basics are described in this article.
This page will provide you with information about scenario steps - nodes.
Step 0: Create a new scenario
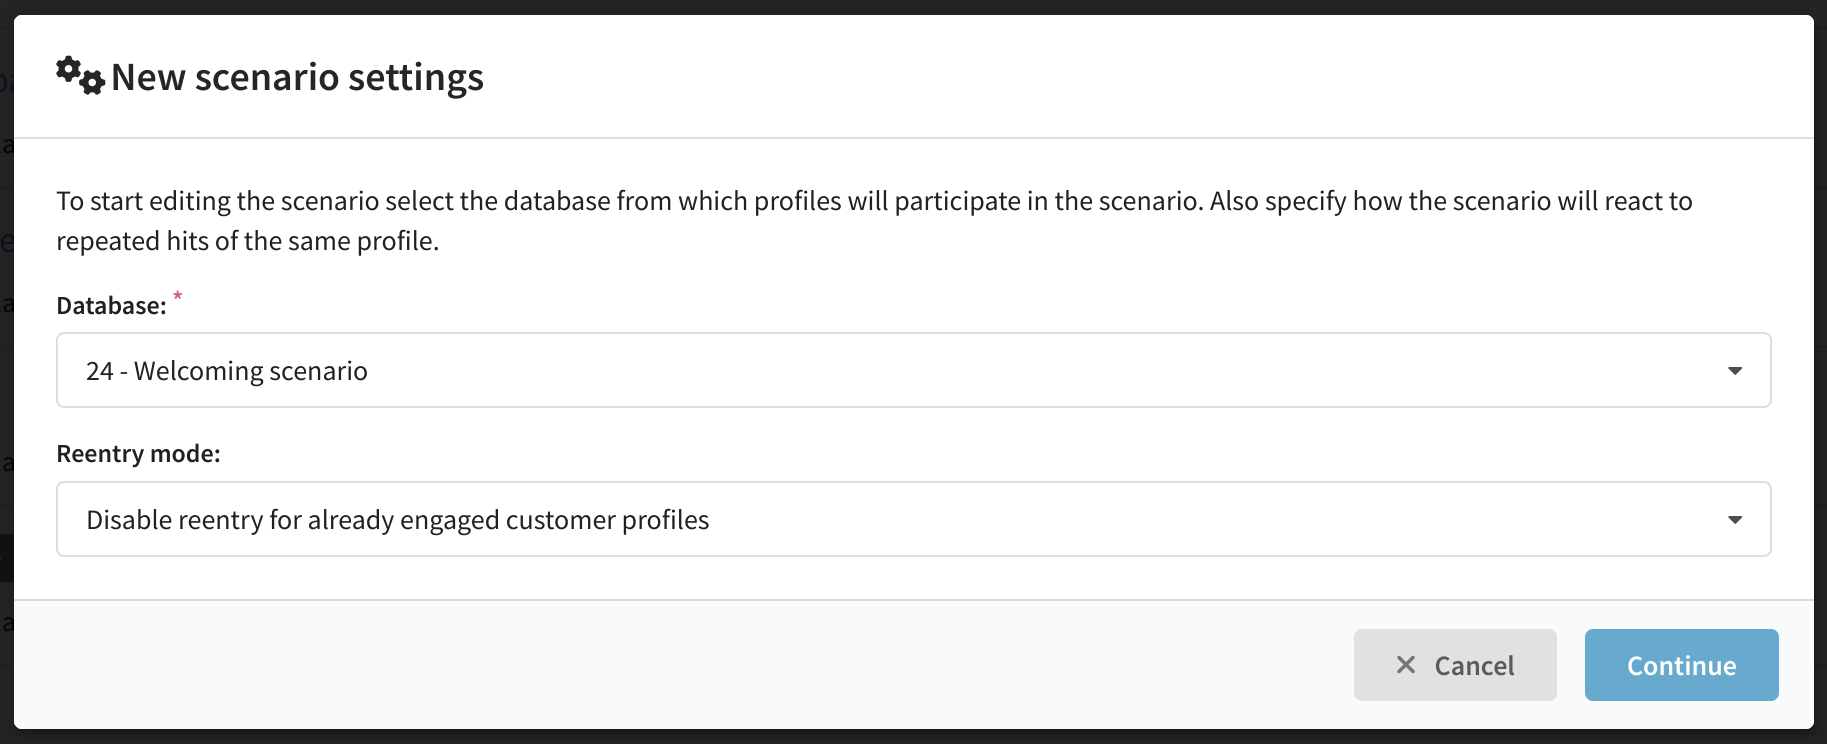
In the Scenarios section, create a new scenario by clicking the appropriate button at the top of the screen. Specify the profile database and disable re-entry for the profiles involved in the scenario, as the greeting is a one-time event:
Step 1: Configure customer capturing mode
Customers will get engaged in the scenario when their subscriber profiles are created within the platform. Thus, capturing event depends on how you import your customers' data into the platform:
- Any profile import - launches any time a new customer profile is created.
- Manual profile import - launches when you create a customer profile manually
- API profile import - launches when you import a profile via platforms' web API from your website or integration middleware (ETL)
- Form import - launches when filling in form fields. To learn how to create a form in the platform, read in this article.
- Popup import - launches when filling out a form in a popup. You can learn more about creating and customizing popups in this article.
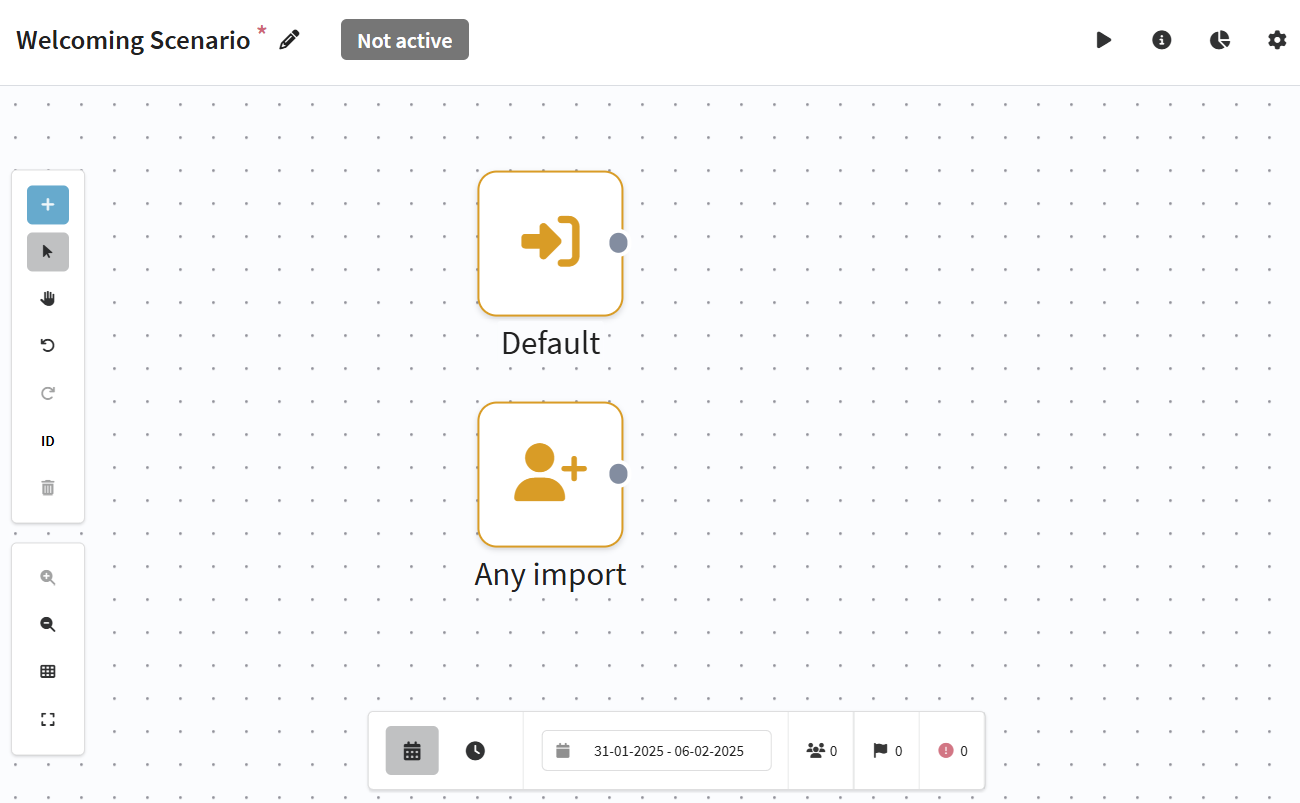
There is also an element capture default profiles in any scenario. It is required to capture profiles added manually, via API and chained from another script.
Various customer data import and update options are described in this article.
This article describes scheduled customer profile import from an SQL storage.
API requests considering customer profiles are described in this section of API docs.
In order for all new profiles from the database to get into the script, we use the trigger Any profile import:
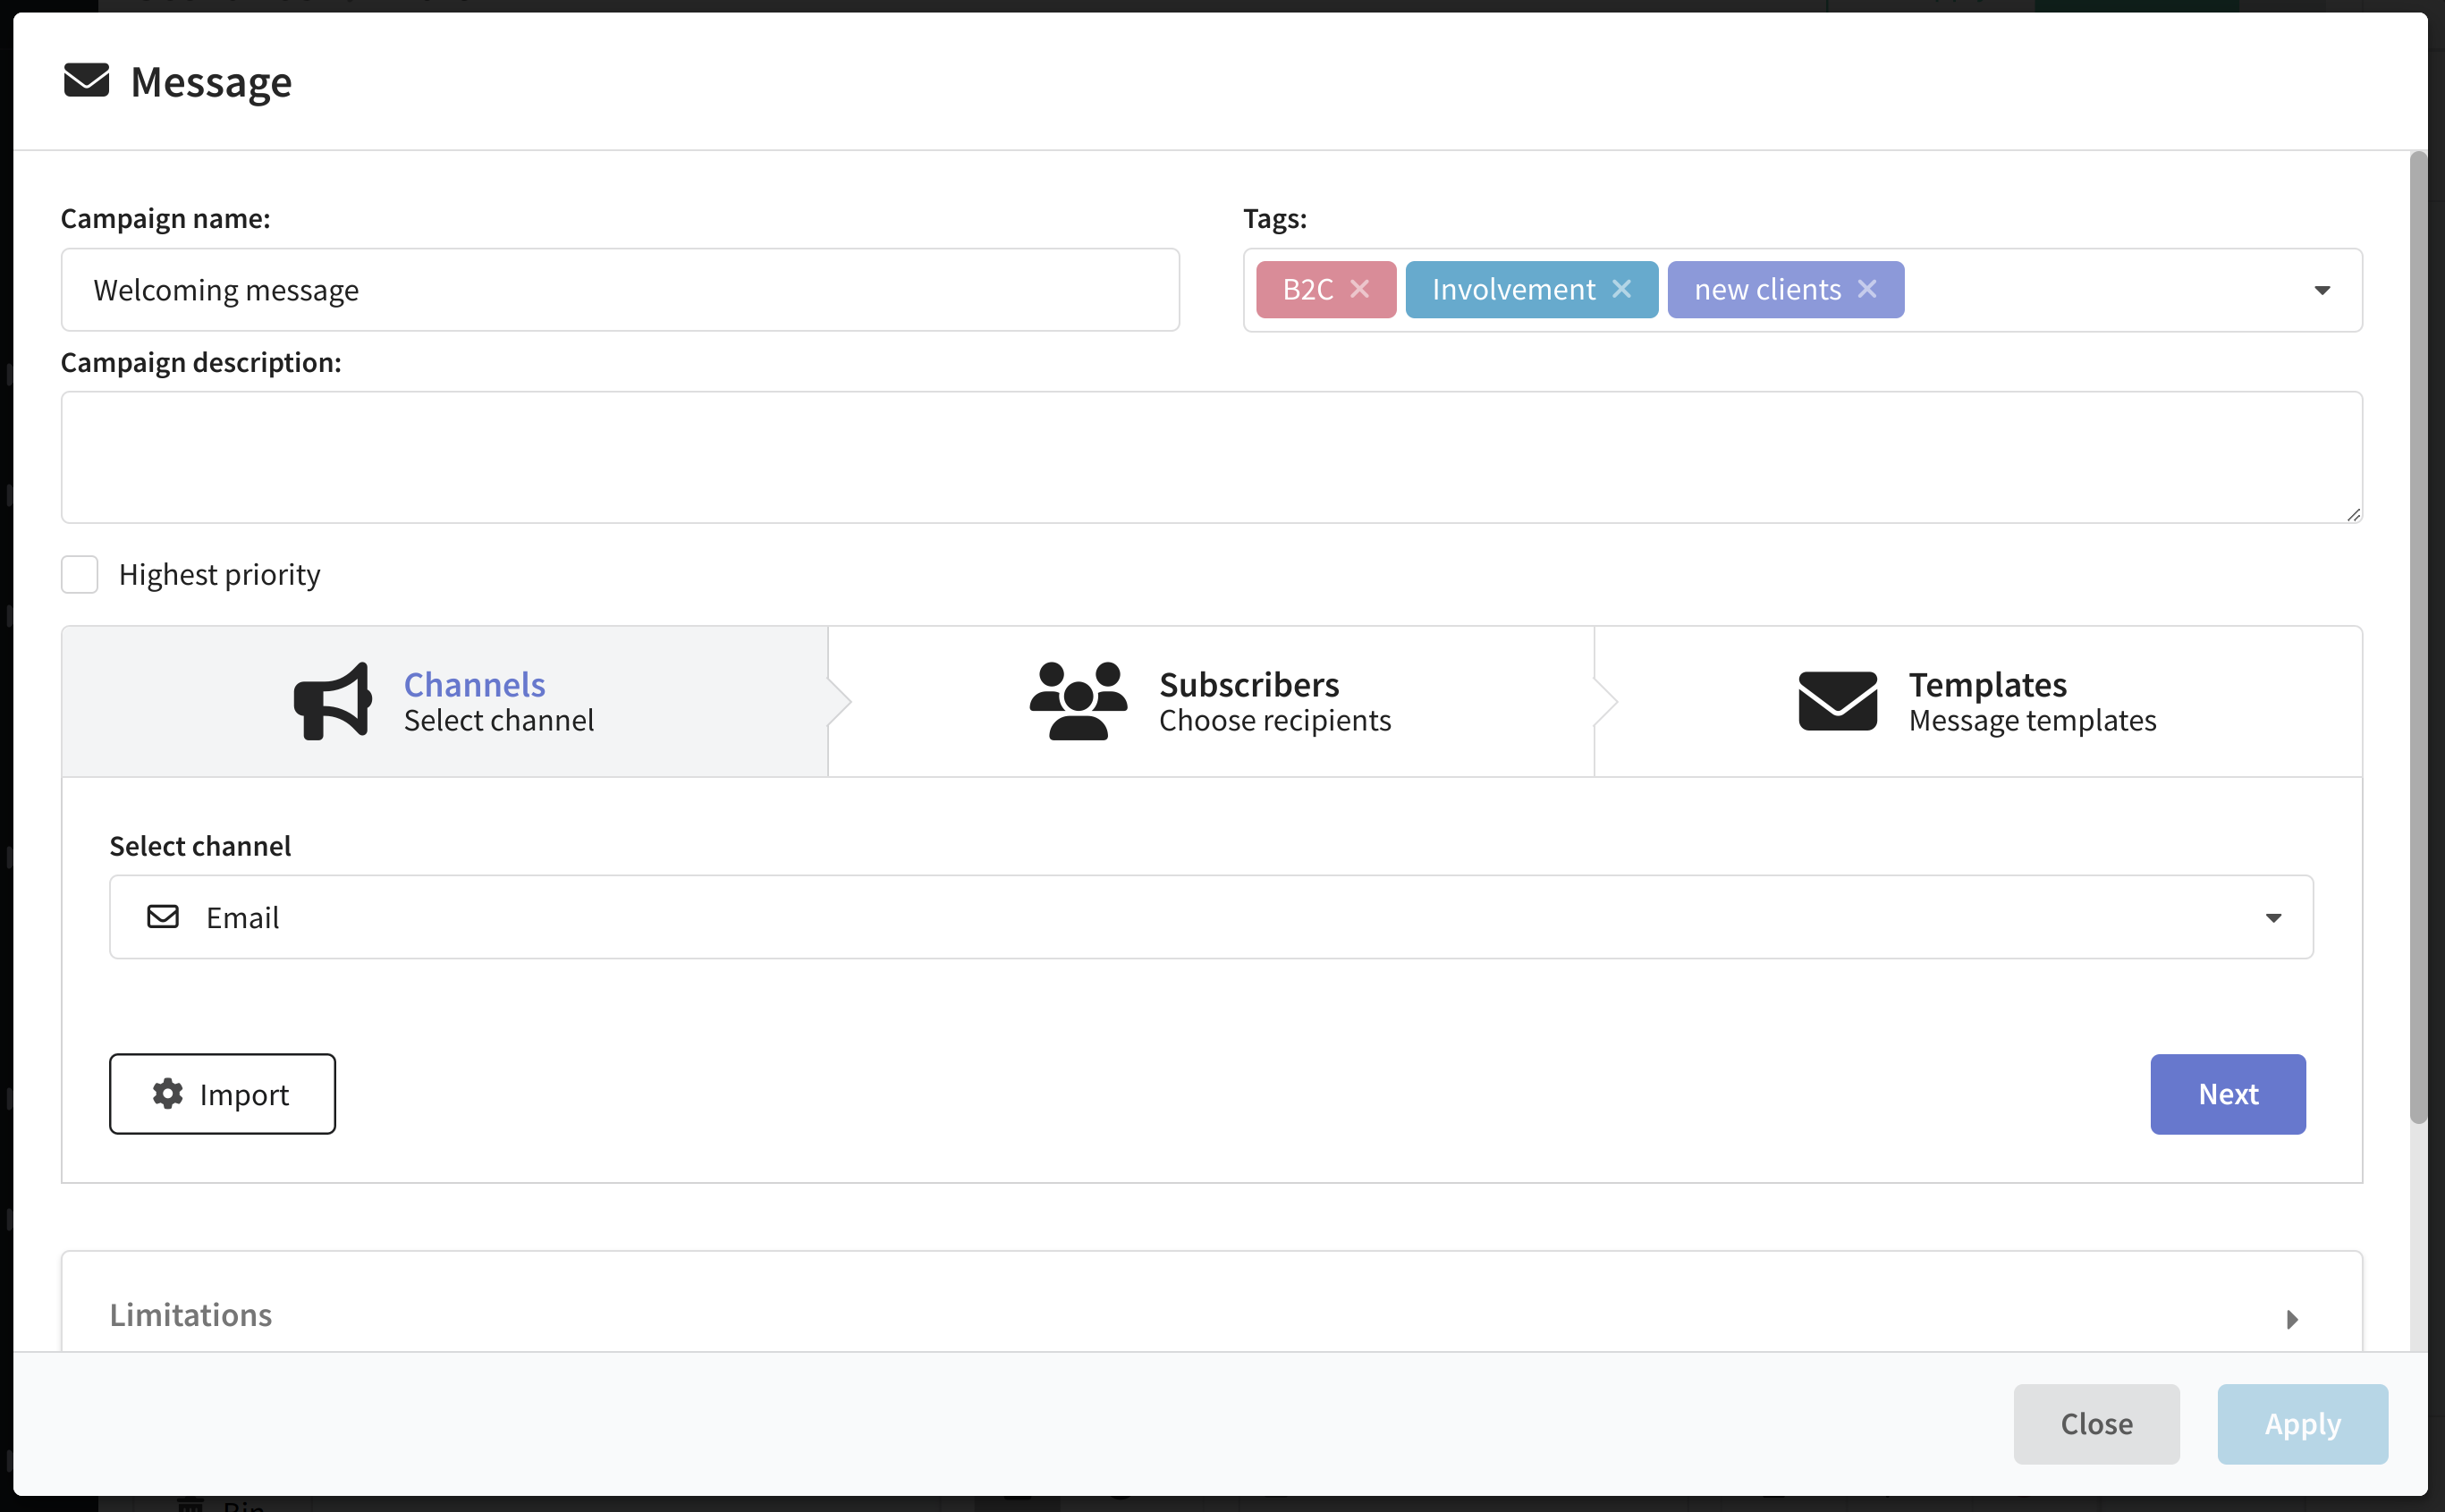
Step 2: Create an Email welcoming message
Add the following element to the script - email distribution. To do this, click on + Element - Channels - Email. This will open the mailing customization window. Here you can specify channel, resource and message template.
Subscription resources for your audience are described in this article.
This section will tell you all you should know about message templates.
You can find a step-by-step Email mailing guide here.
Step 3: Set up a sequence for active recipients
After you send an Email welcome, a part of your customers will open, read it, click a link to the purchase page and make a deal. The percent of those who do is called your marketing conversion. Now, to increase welcome workflow conversion let us compose a Customer journey sequence. Various scenario nodes will help you a lot.
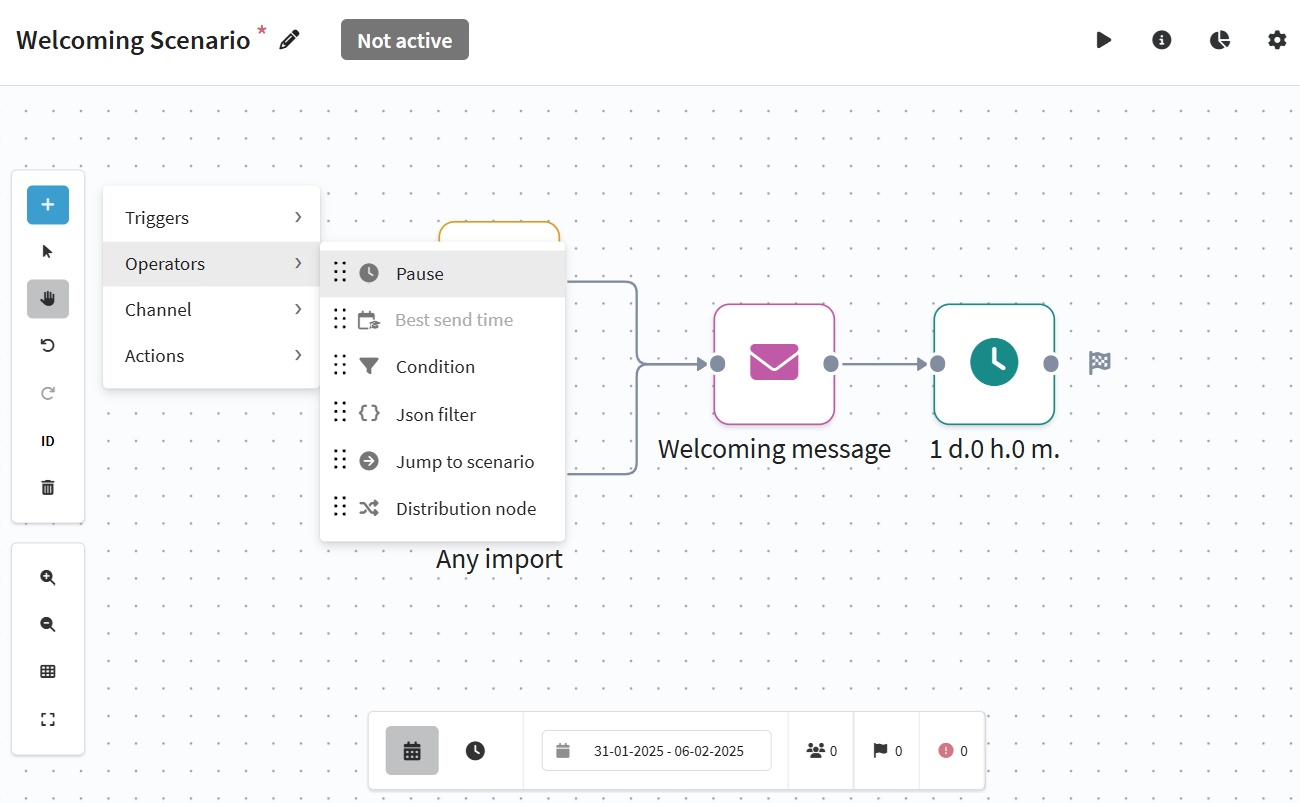
The next element will be the pause. With its help we will give customers time to read the email. The Pause element is located in the Operators category:
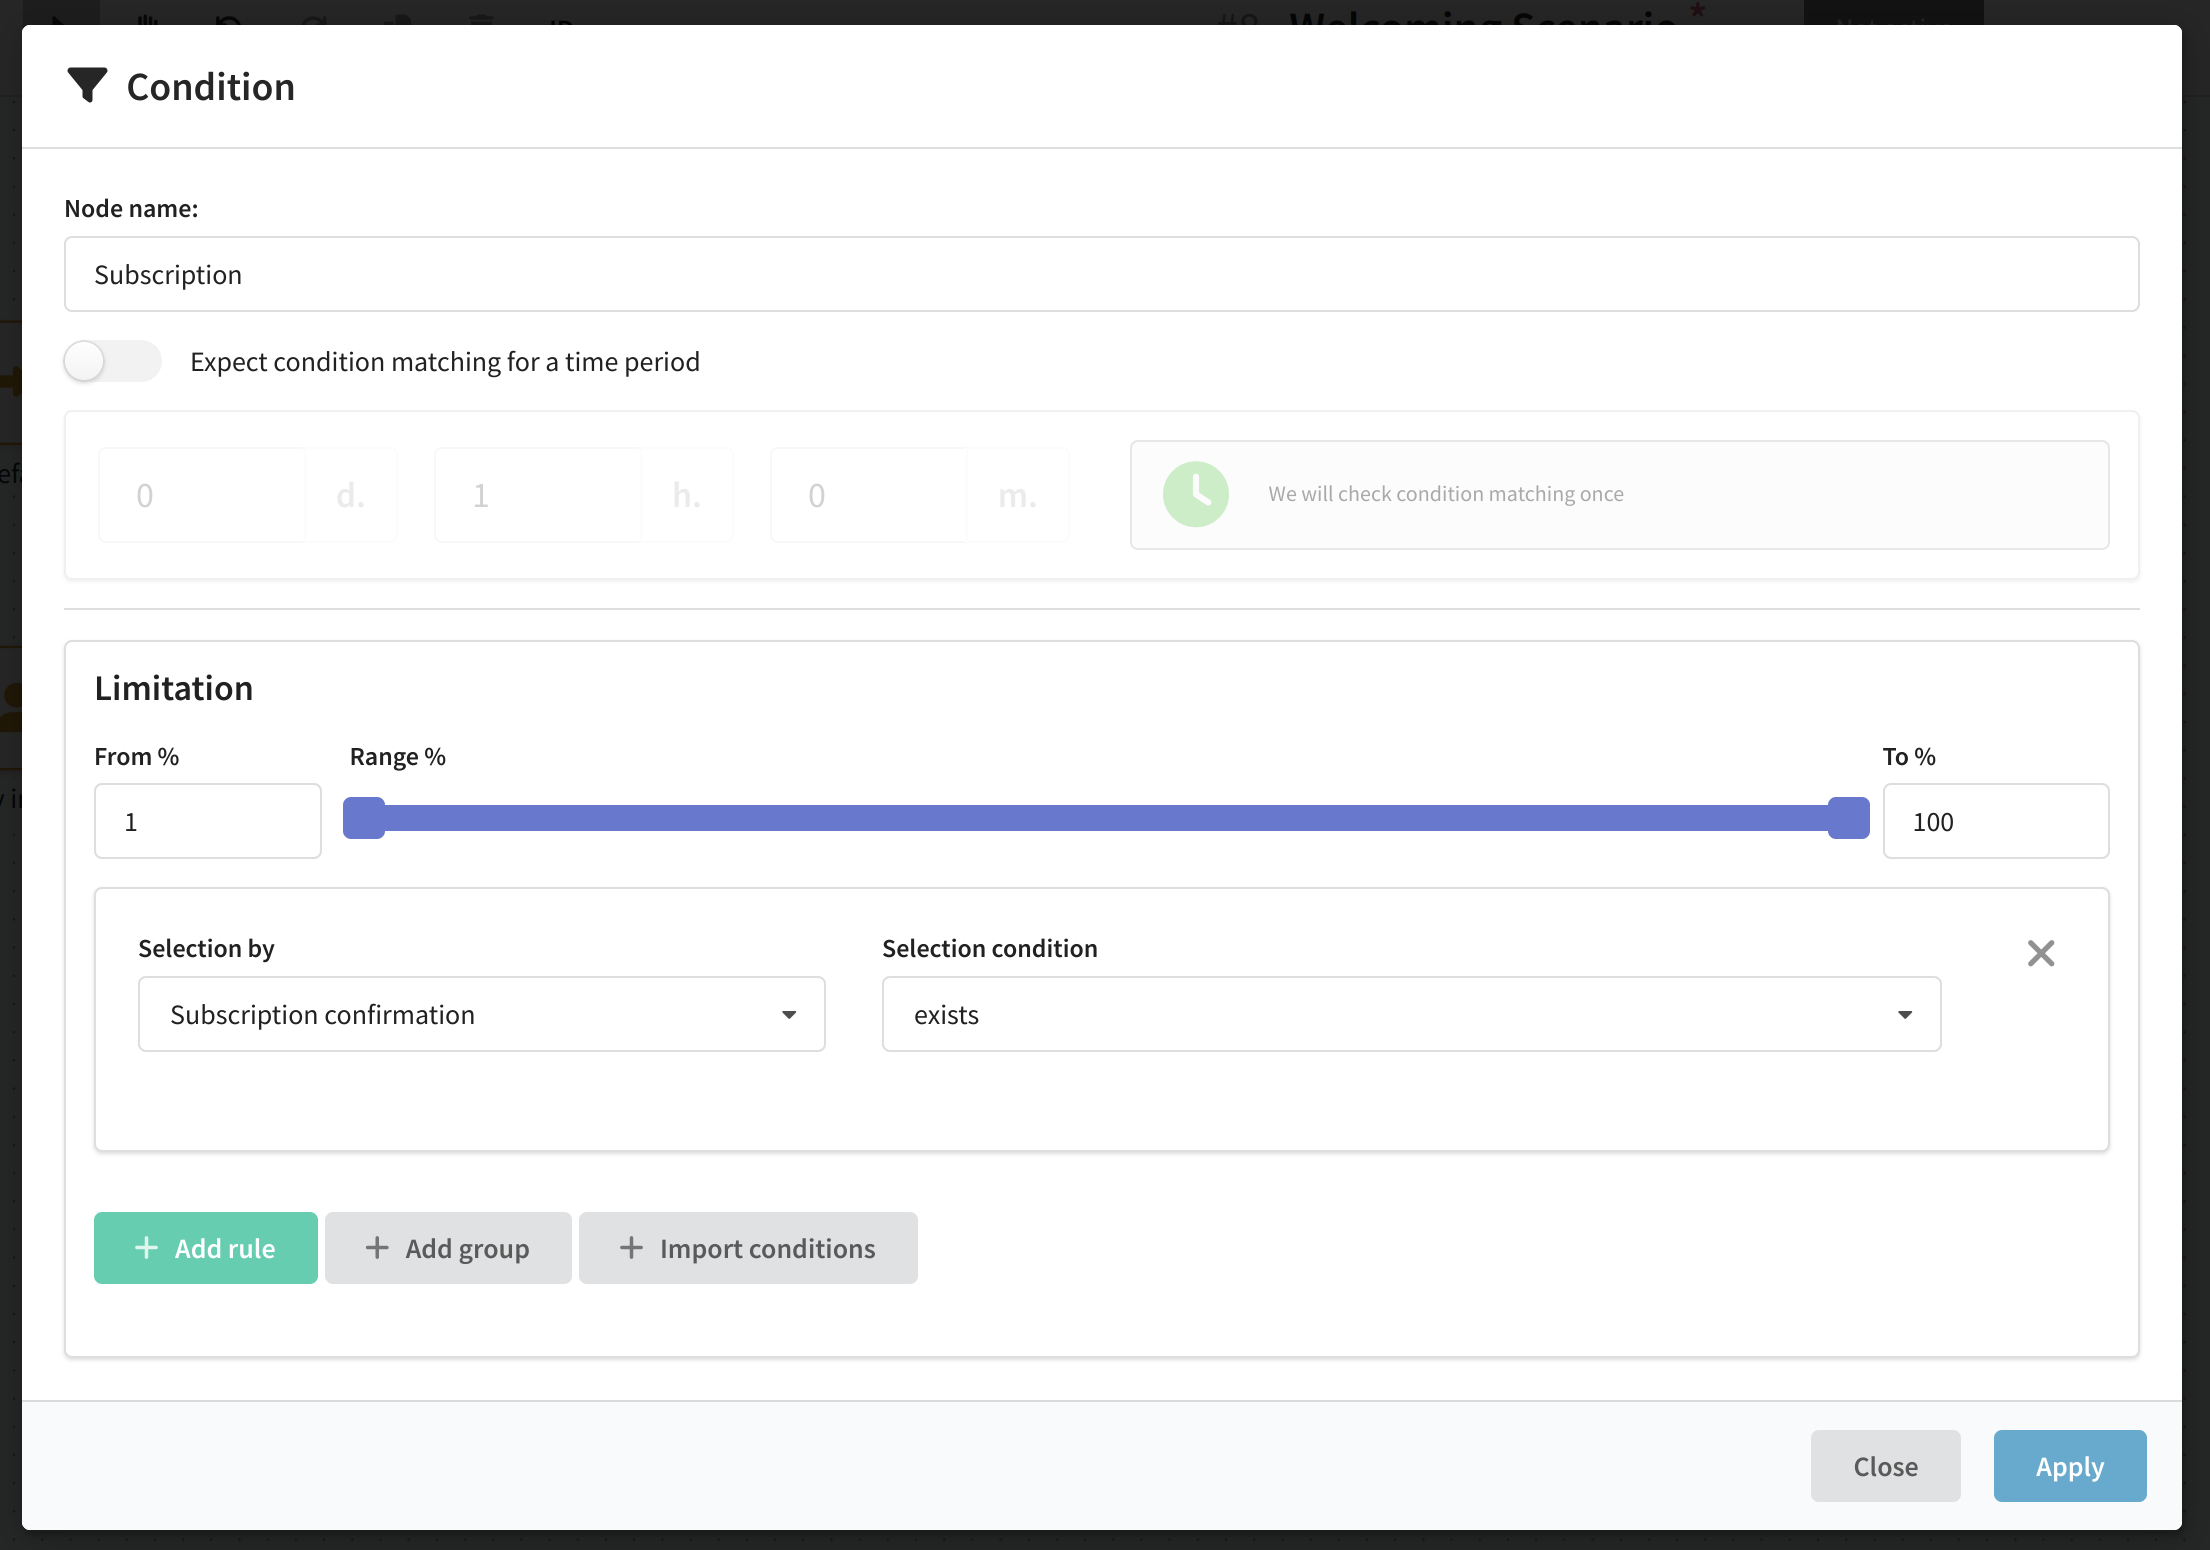
Next, using the Condition element, let's separate out those subscribers who opened the welcome message and confirmed their registration on the first day:
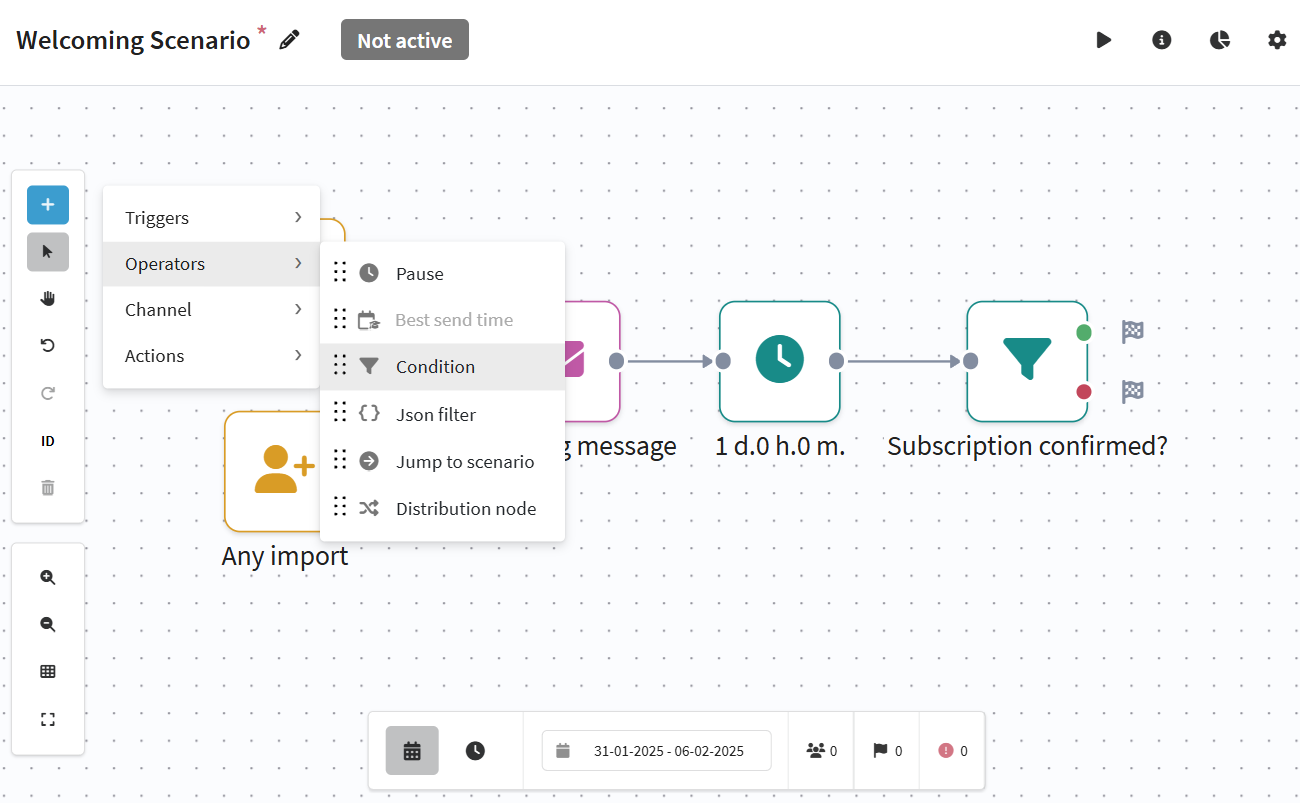
You can use the "Email opened" or "Click on link" rule instead of the registration confirmation. The example uses the DOI (double opt-in) strategy subscription confirmation:
These customers are likely to be highly motivated to buy. It's a good idea to reward these customers, for example, you can give them bonus points right away. These can then be used to assign promo codes, discounts or gifts.
Such actions in marketing are called scoring. Scoring is one of the elements of sales gamification that can significantly increase conversion rates. To implement it in the platform, you must first create a numeric field in the profile database for the value of loyalty points. You can update these points in the script using the Update Profile element:
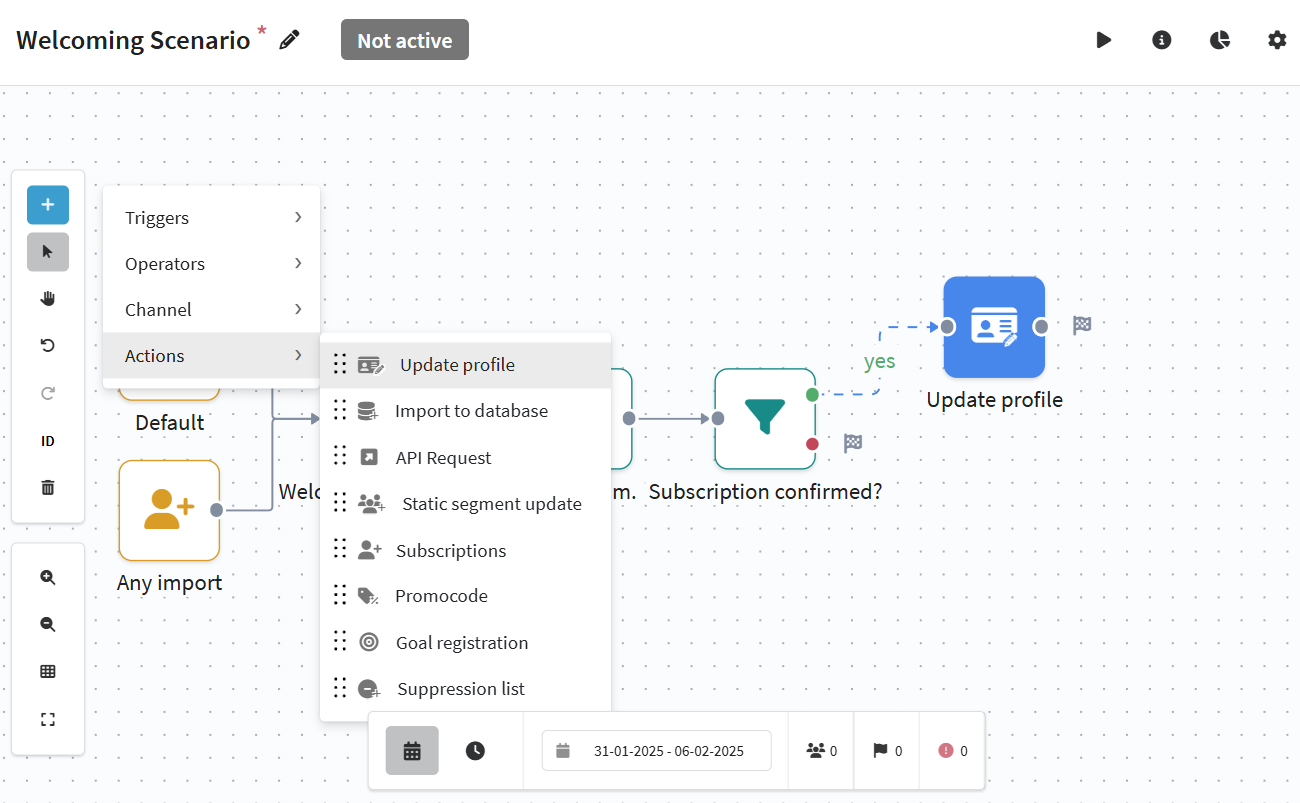
Add the element to the top (green) branch coming from the condition. In the element settings, specify the field that will contain loyalty points and increase its value by the required amount:
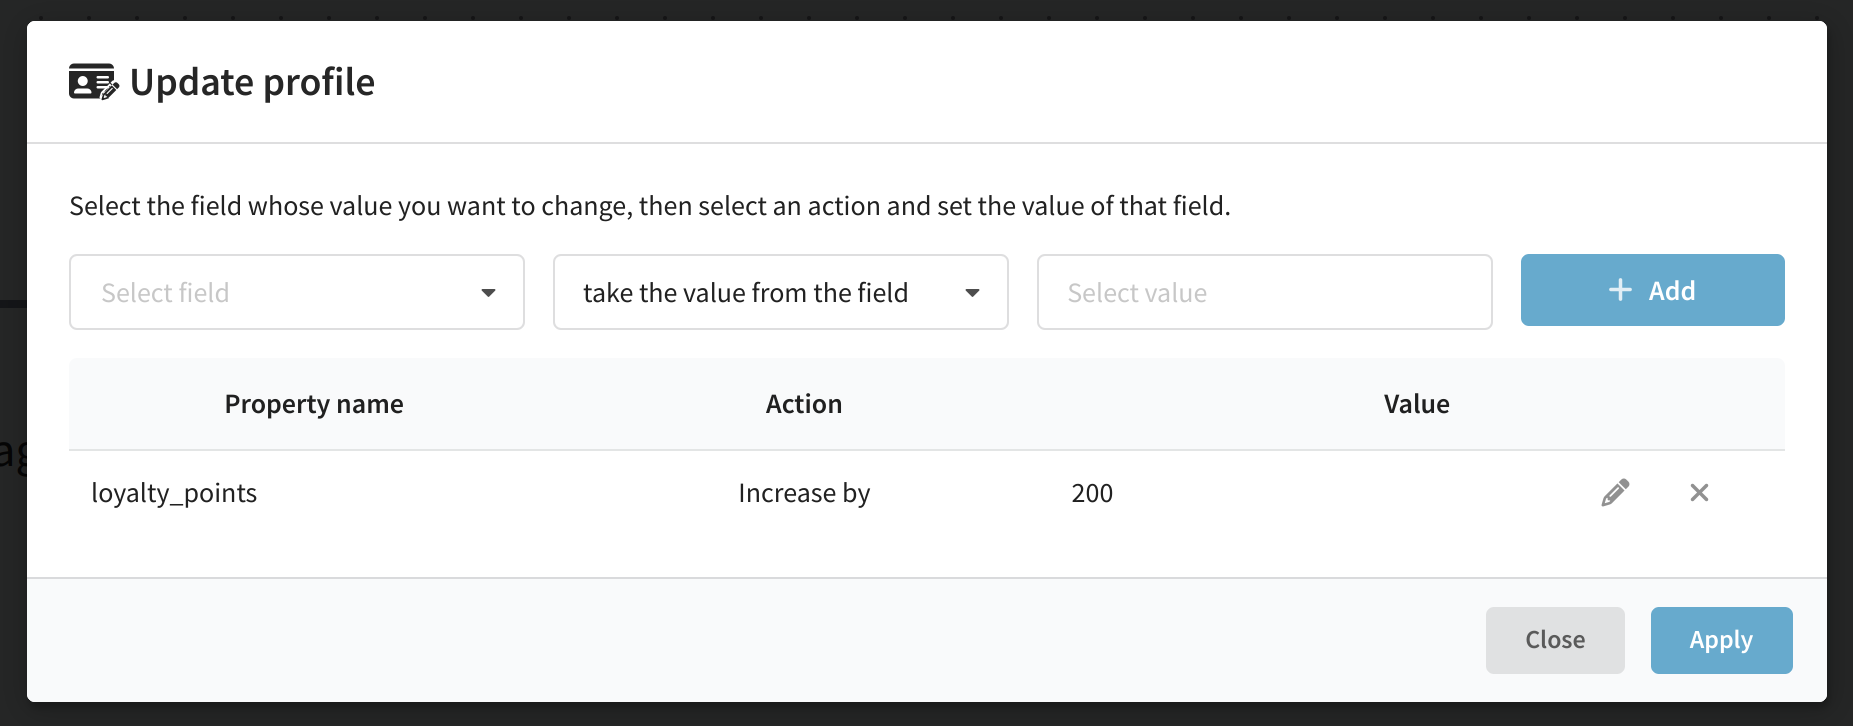
Next, you can assign promo codes to new customers (for example - for a part of a product serving specifically to warm up sales) and send promo offers to customers. To do this, add a Promo Code element and an email channel message.
Promo codes are created by Altcraft Marketing's loyalty programs. You can read more in this article.
Step 4: Set up a sequence for not-so-active recipients
Some of the customers to whom you sent a welcome message may have forgotten about it, not received it, postponed it, or simply not interested in the offer. In this case you can remind them about the incomplete registration. It's best to use the SMS channel: everyone has a phone and it's always at hand.
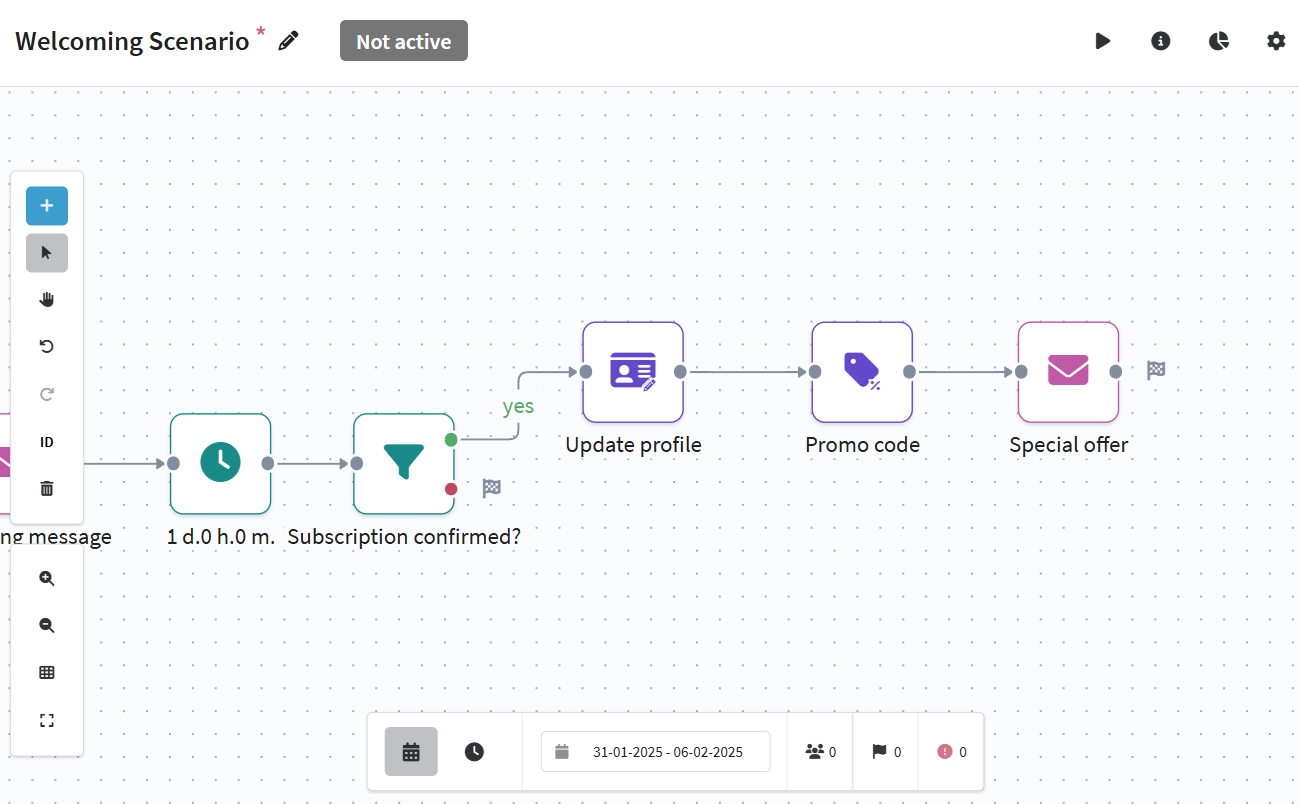
However, it is usually not always advisable to send the same reminder more than once. It is much more effective to use different reactivation tactics. In the example, let's use two: first, a SMS is sent, and if there is no response to it, a notification with contact information from the profile is sent to managers or call center operators so that an employee can personally communicate with the customer. Our "branch" for inactive customers would look like this:
To apply two tactics at the same time, add a Condition element for those who have been sent an SMS reminder at least once. Select the rule There is an existing SMS sending:

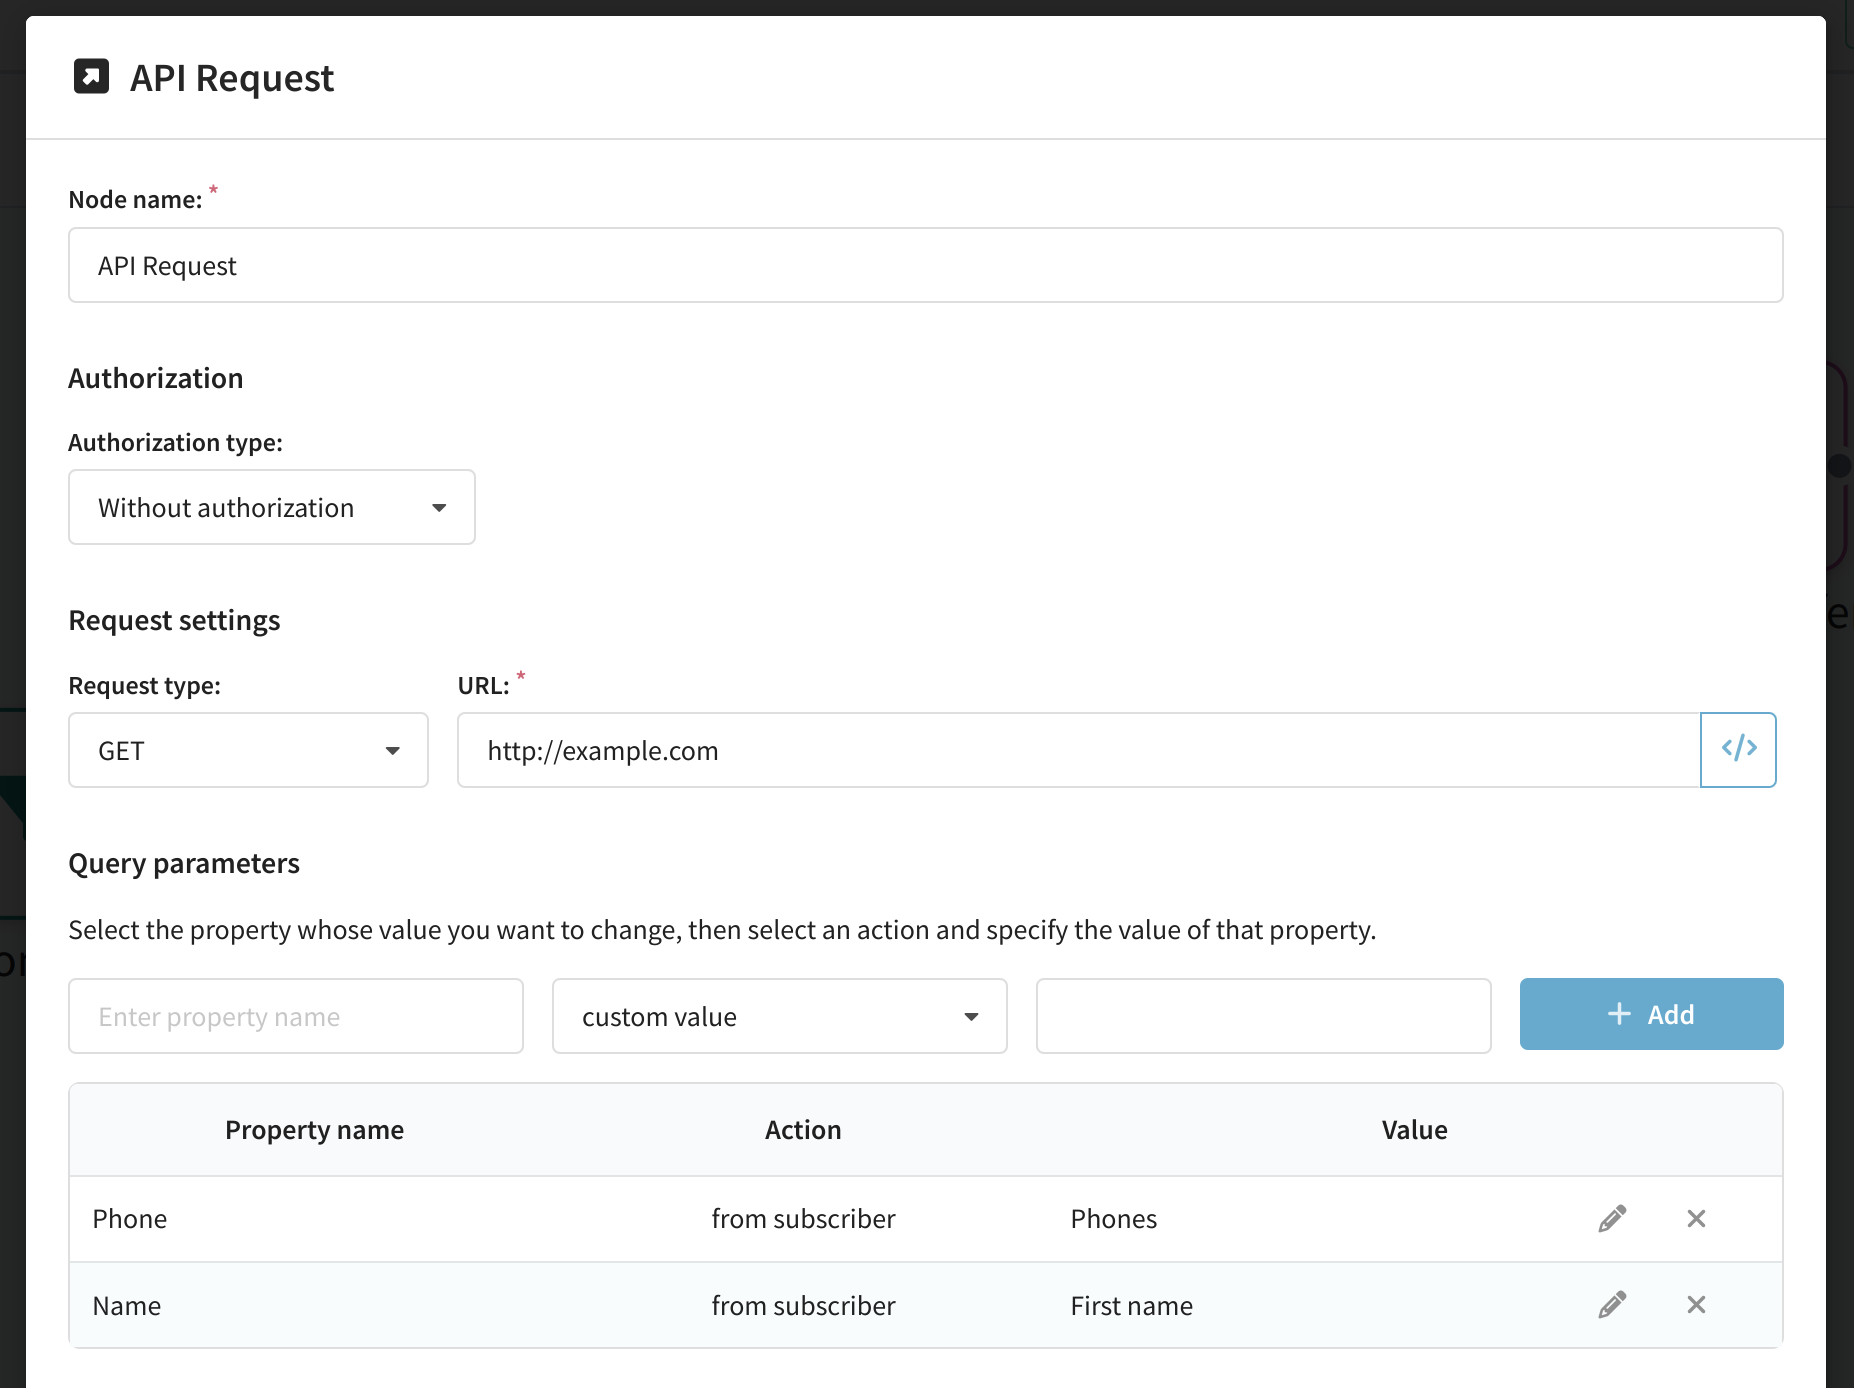
From the top (along the green branch), add the API Request element. In it, specify the network address, the type of request, and the data you want to pass to the call center. Contact your company's system administrators for details:
Down from the condition (along the red branch) add an SMS element where you create a new SMS mailing or import an existing one.
You can find a step-by-step guide on how to create an SMS newsletter right there.
After the message, add a Pause - just like you would after an Email Welcoming. When time runs out after sending the SMS, the customer should be sent back to the beginning of the script, to recheck the subscription confirmation in the Condition element. To do this, drag the cursor from the right point of the Pause element to the SMS sending condition:
Step 5: Save and activate the scenario
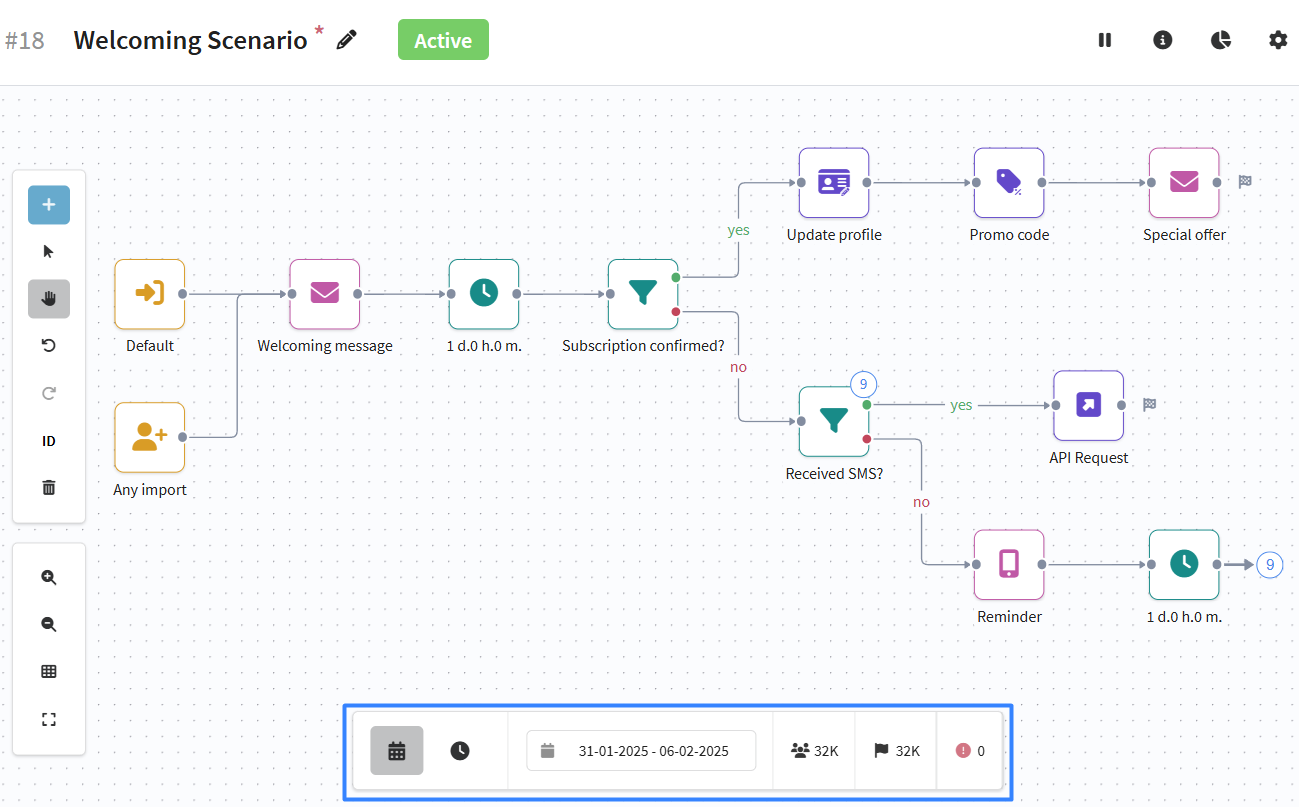
Once you have made the necessary settings and configured the script steps, save and activate it by clicking on the appropriate buttons at the top of the screen:

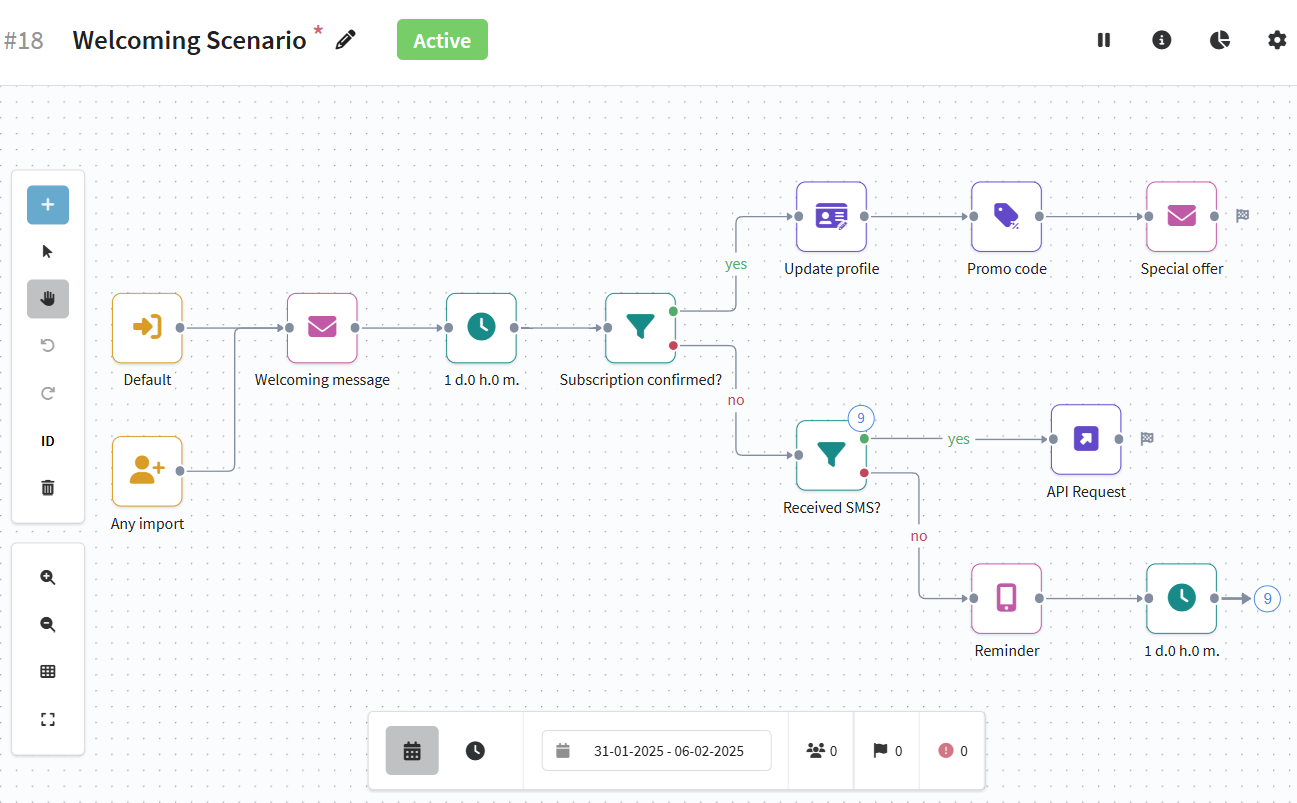
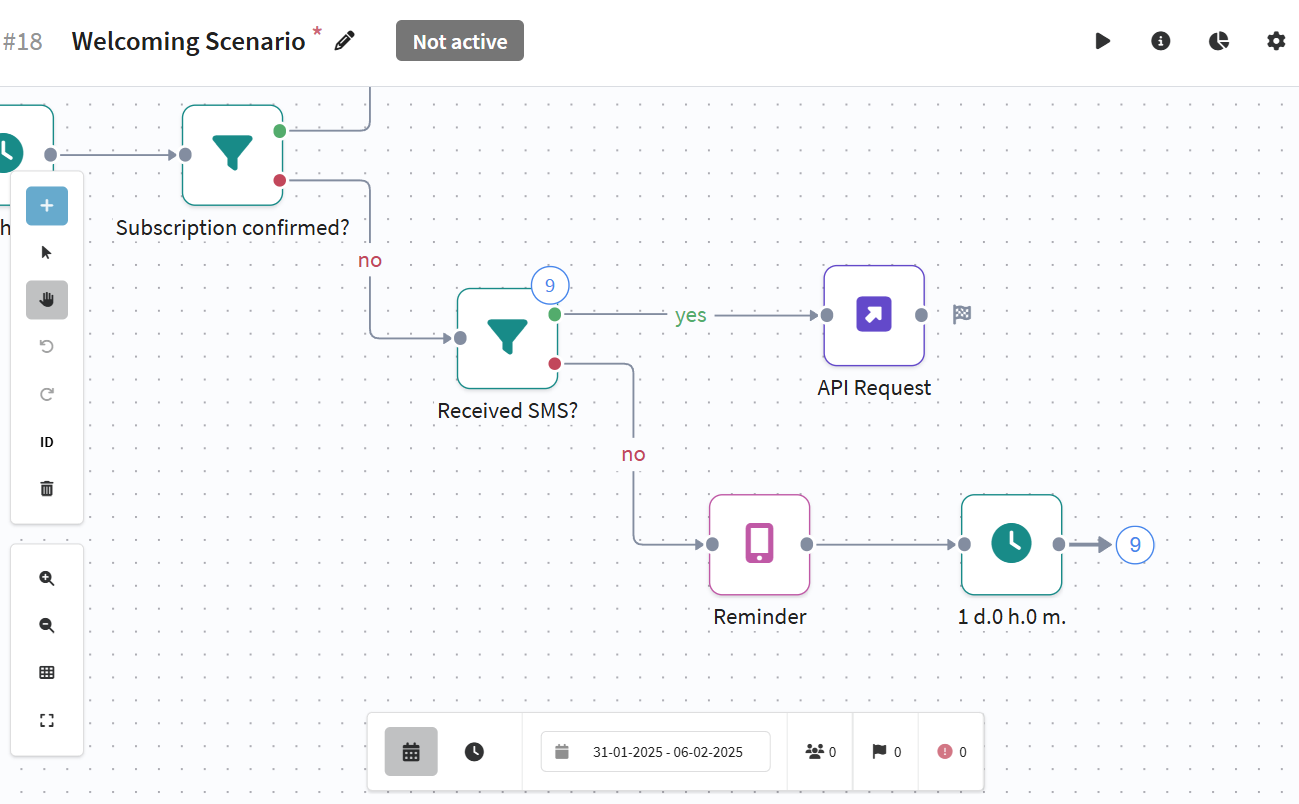
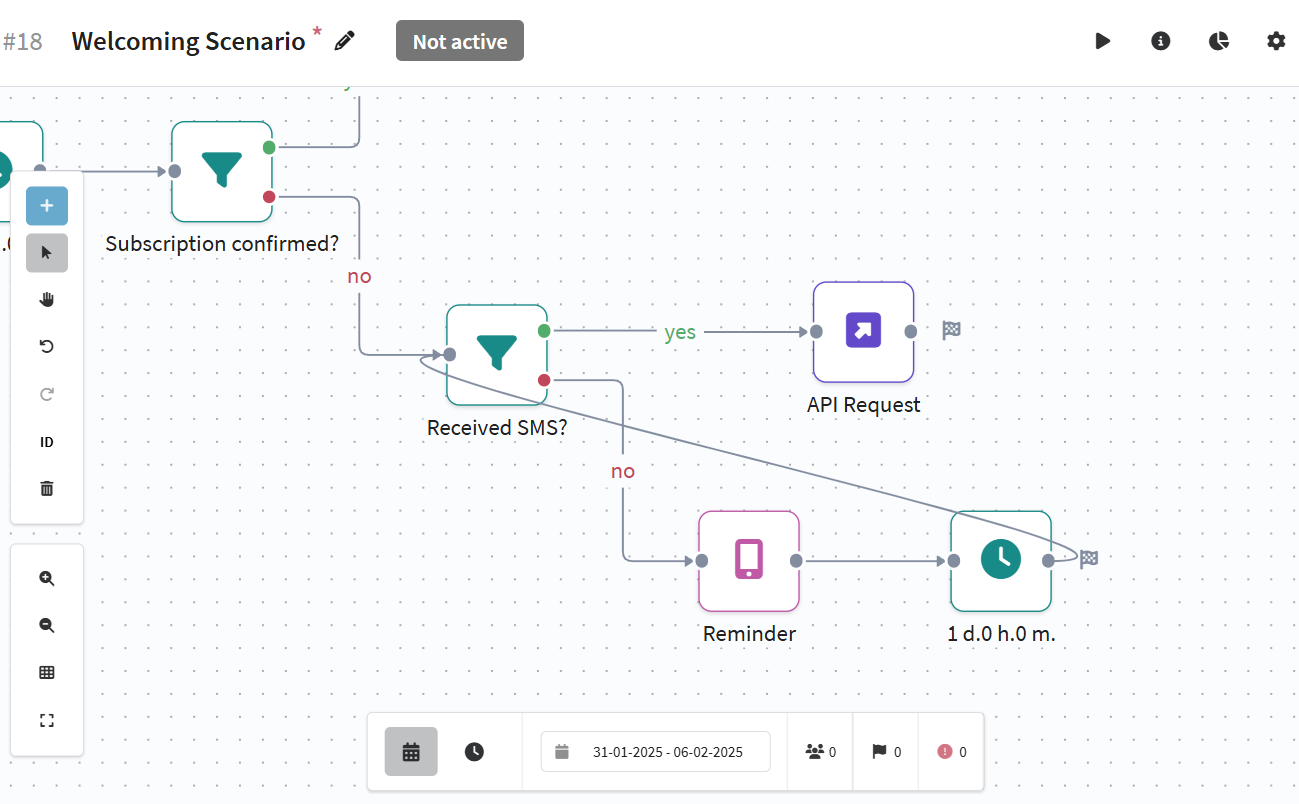
The welcome sequence will be a great start to effective long-term communication with your customers. You can open the script for viewing and editing by clicking on its title:

Step 6: Analyze performance
You can evaluate the effectiveness of a scenario using several analytical tools.
The first is statistics within the scenario. Select the required period and view the pass rates:
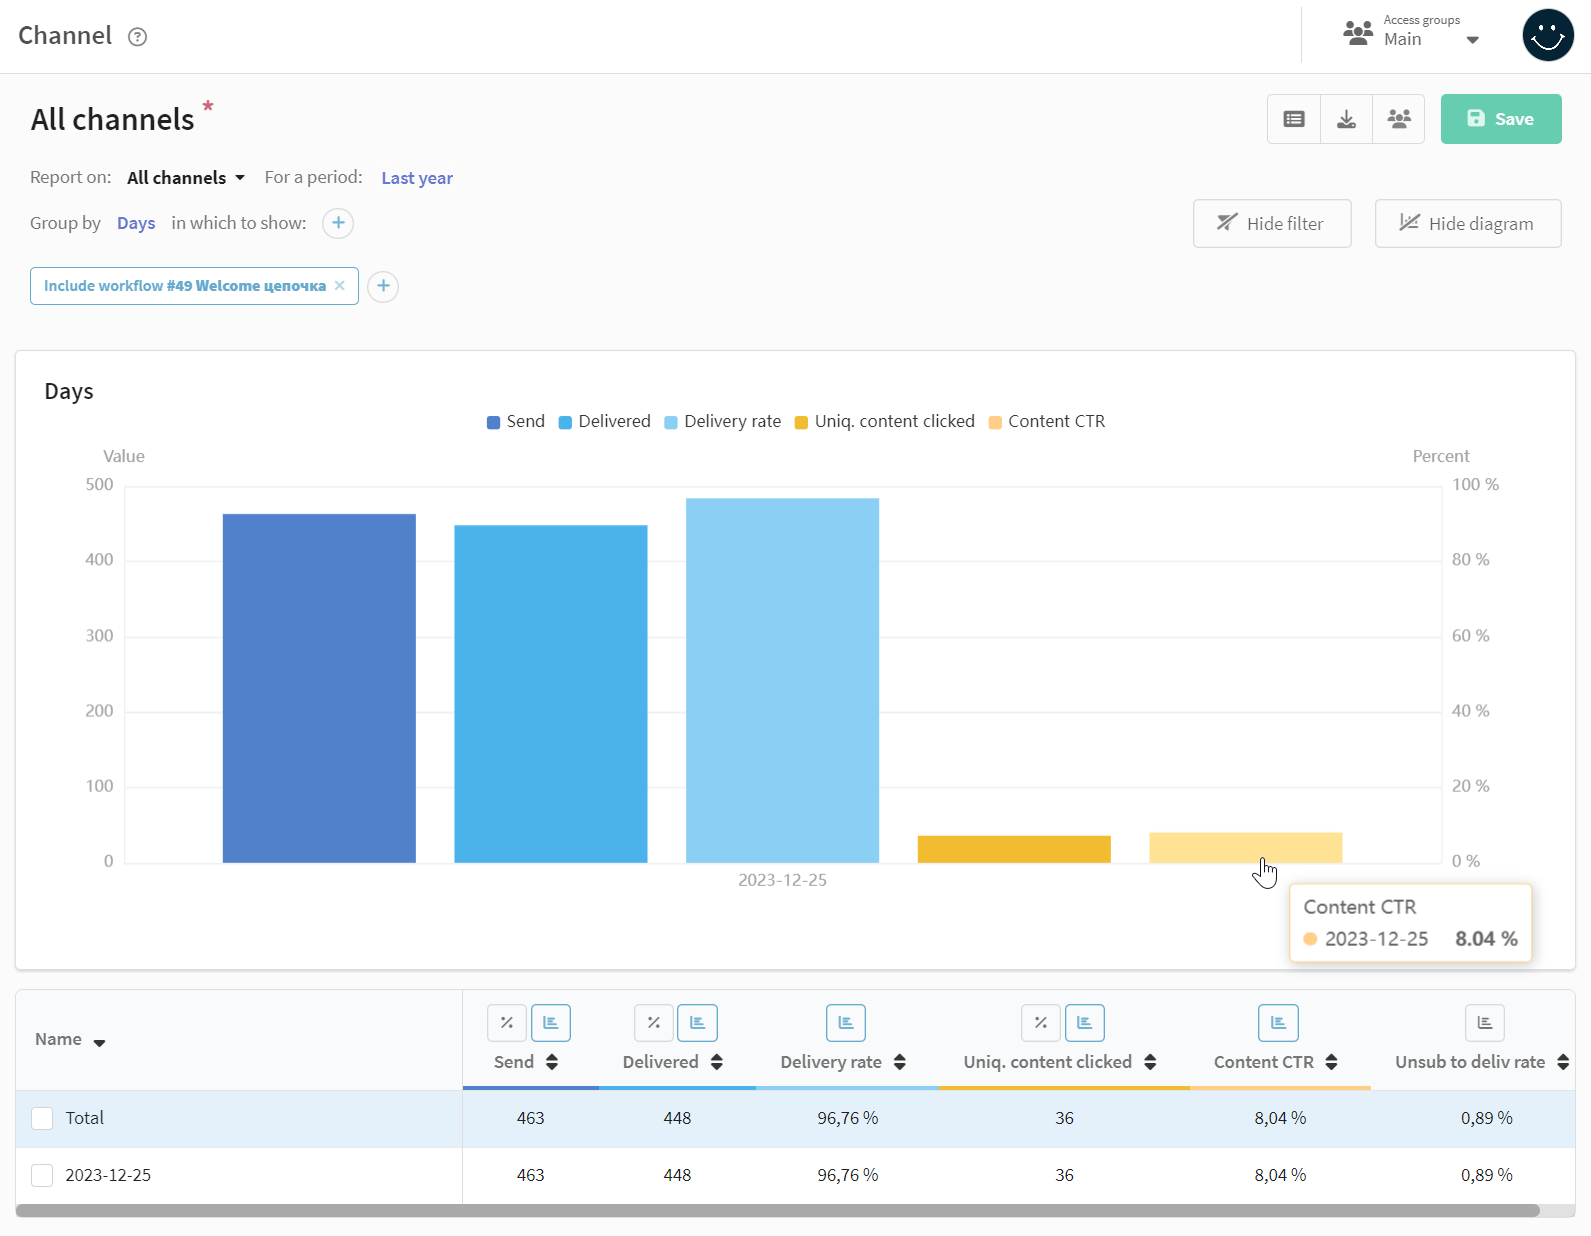
The second is channel report of the scenario. It will provide detailed information on the mailings within the scenario:
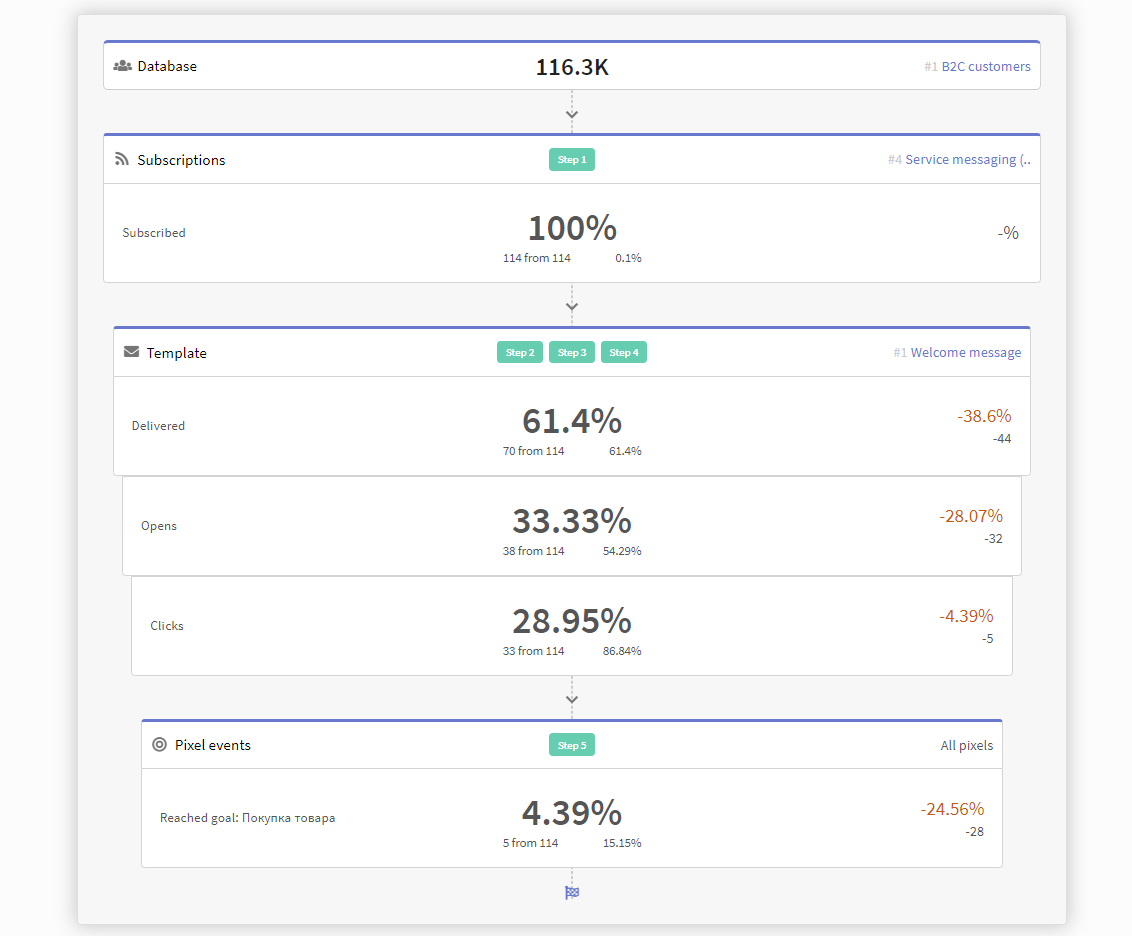
Finally, you can add mailings and other scenario events to funnel-report to monitor conversion rates even more confidently. A step in the funnel can be whether a customer falls within the sample conditions or reaches a certain goal (Purchase, Contribution).