Basic loyalty program use cases
A loyalty program in Altcraft can be used for automatically rewarding users and for personalized communications at different stages of their interaction with the product. Below are basic practical cases that show how to configure point accrual, adding profiles to the loyalty program, and sending notifications based on user actions and their balance status. All examples are designed for typical scenarios and can be adapted to specific business tasks.
Altcraft Platform provides technical tools for storing and processing data, including custom fields that can be used to record consent to participate in the loyalty program. The platform is not responsible for the legal correctness of the method for obtaining, storing, and using such consent. Issues of compliance with legal requirements (including those related to personal data and marketing communications) are the user's responsibility, taking into account applicable regulations and the advice of legal professionals.
Rewarding a profile for filling out a form
This case allows you to automatically add a user to the loyalty program immediately after they fill out a form on a website or in an application. The logic works correctly for both new participants and those already registered in the loyalty program, also rewarding them for filling out the form:
If the initial balance in the point settings is zero, after the "Loyalty participation" node, you must also add a "Loyalty points management" node with a trigger promotion to award the bonus for filling out the form.
- Loyalty
- Database and Form
- Scenario
Before creating a scenario, you need to prepare the basic configuration of the loyalty program. In the Loyalty — Loyalty programs section, create the program itself.
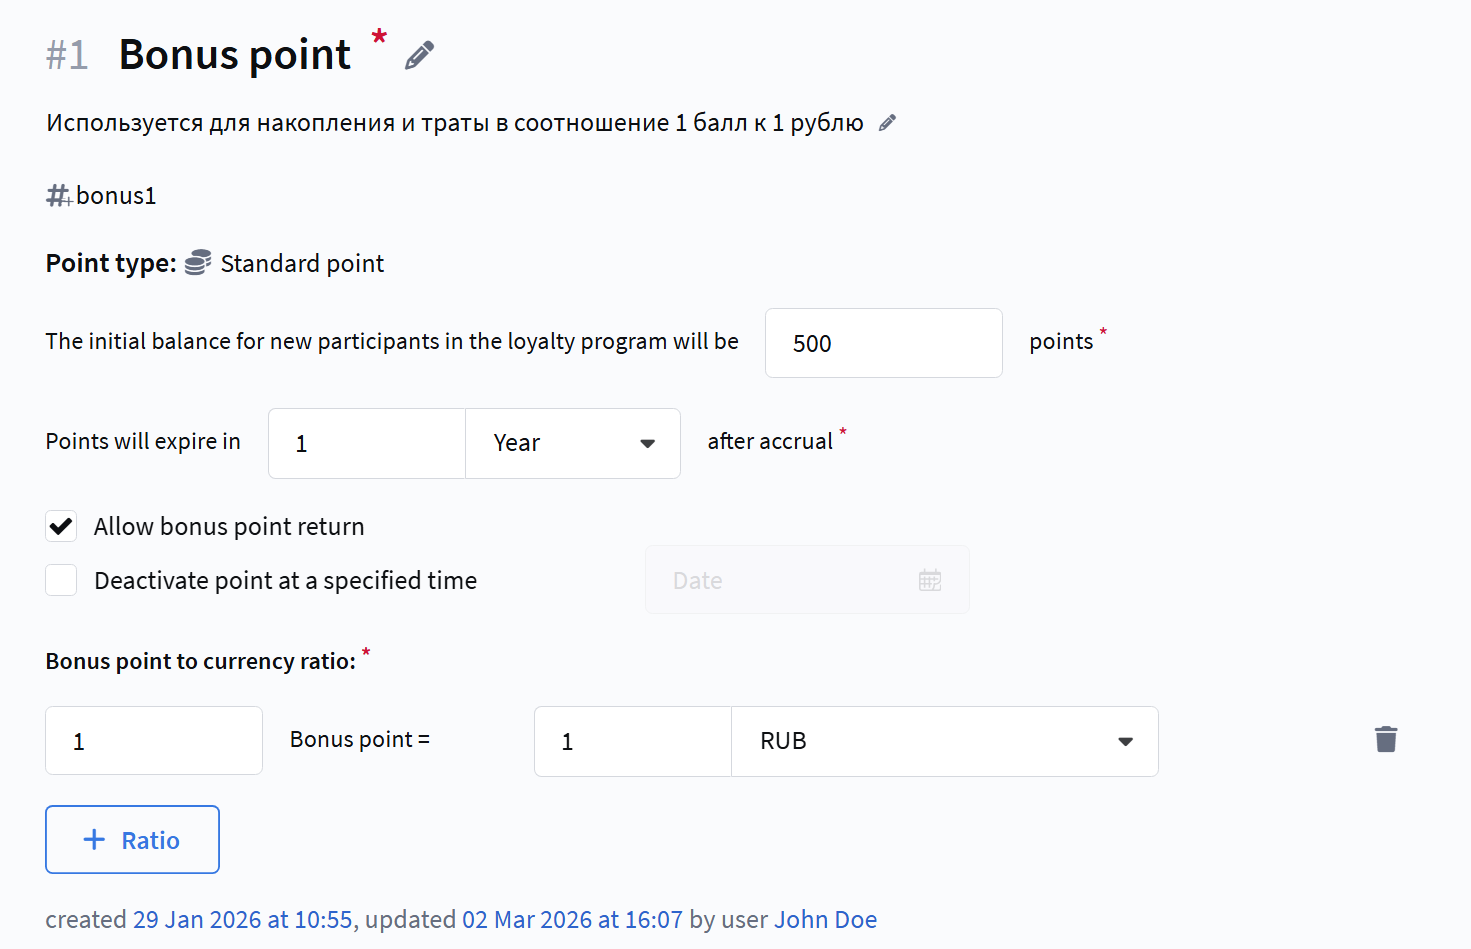
Configure standard points. When creating standard points, you must fill in the required parameters:
- point name and external identifier;
- initial balance for a new loyalty program member;
- points expiration period (after a specified number of days, months, or years after accrual);
- point-to-currency ratio.
These parameters determine the balance with which a profile will be added to the program and how the accrued bonuses will be accounted for in the future:
A trigger promotion is used as a universal mechanism for accruing or redeeming points. Despite the name, such a promotion does not have its own trigger — the moment of its execution is determined by the scenario.
Configure the point accrual rules.
- Select the created point type;
- Set a range or a fixed amount:
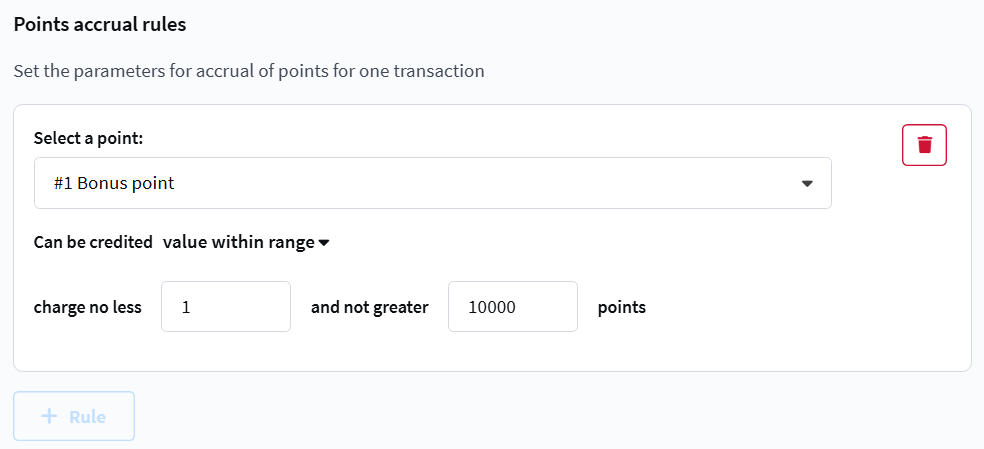
If a range is specified, the exact number of points to be accrued is determined in the scenario node settings. This allows you to use the same trigger promotion for different cases, for example, awarding 500 points for downloading a mobile app and 300 points for filling out a form, without creating separate promotions for each case.
After saving and activating the loyalty program, the trigger promotion becomes available in automation scenarios. In the scenario, it is added as a Loyalty points management node, and it is there that the exact moment of execution and the precise number of points to be accrued or redeemed are determined.
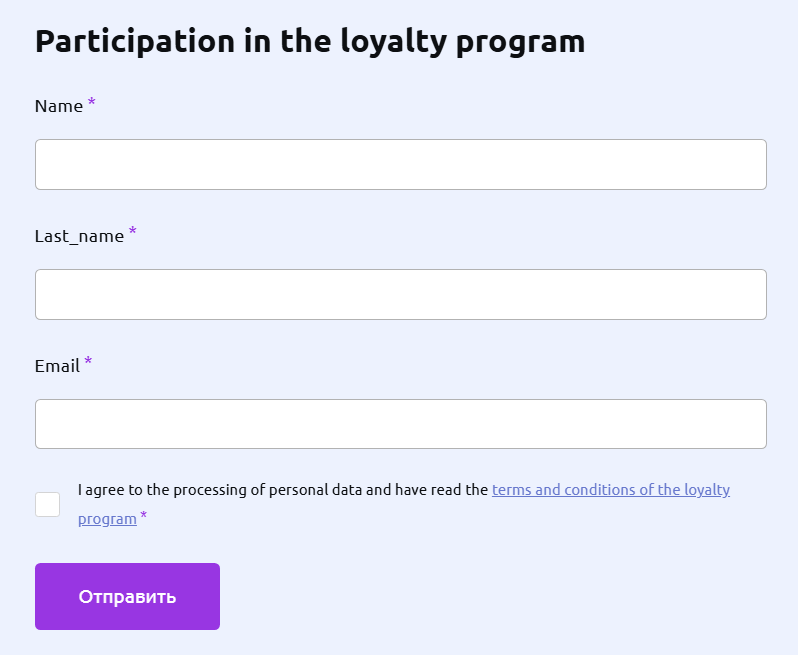
In the Profile database, create an additional Boolean field to record the user's consent to participate in the loyalty program:

Then, create a Form and add this boolean field to it. It is recommended to make the field required so that a profile cannot submit the form without confirming consent. After publishing the form, data from it will be saved to the user's profile, including the value of the consent field:
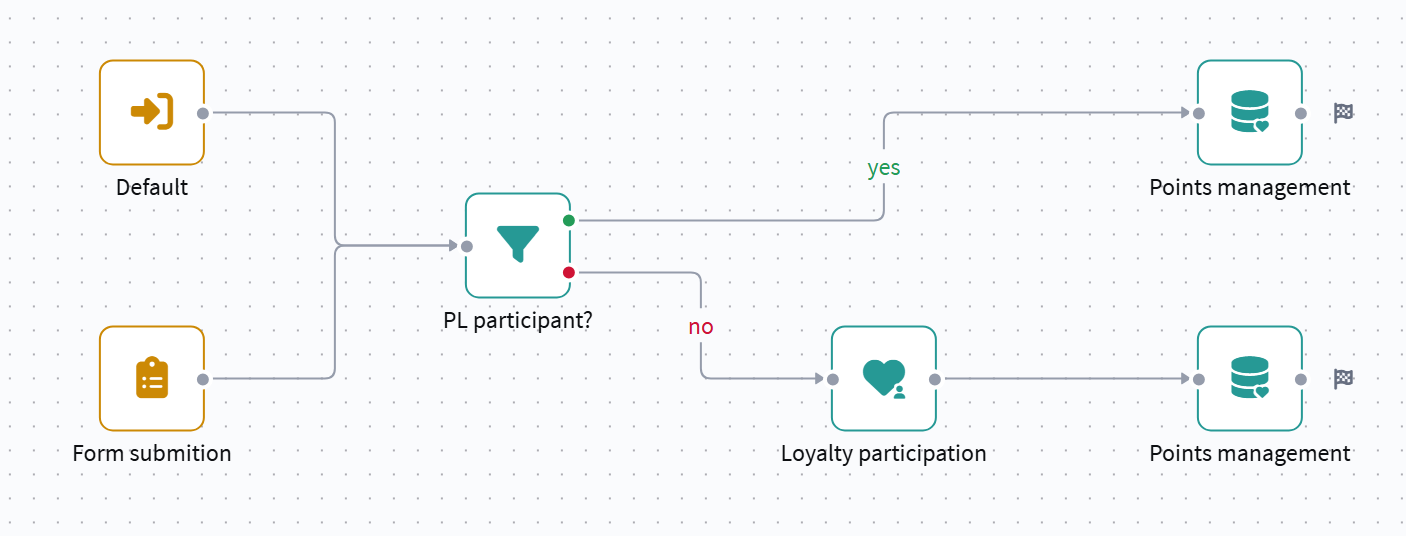
Once the loyalty program and trigger promotion are configured, you can proceed to create a scenario. In the scenario, disable re-entry for profiles to prevent the same profile from entering the scenario again. Select Form submission as the entry trigger:
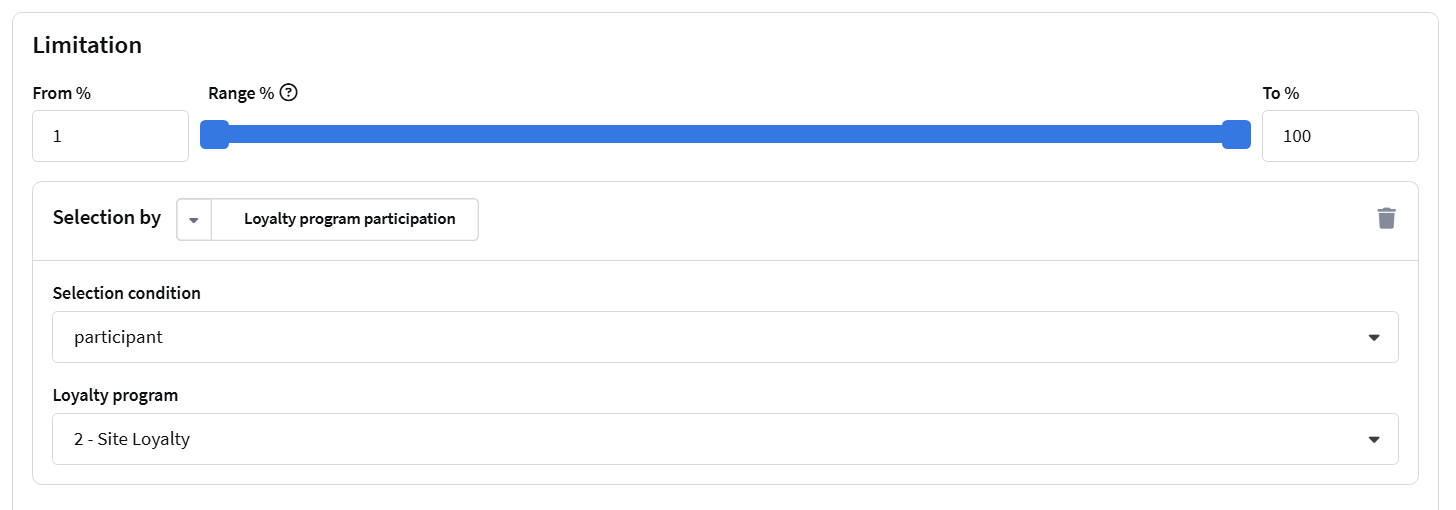
In the scenario, add a condition check element to verify the profile's participation in the loyalty program:
If the profile is already a member of the program, the "Loyalty participation" node is not used, and the trigger promotion is called directly to accrue, for example, 500 bonus points for filling out the form:
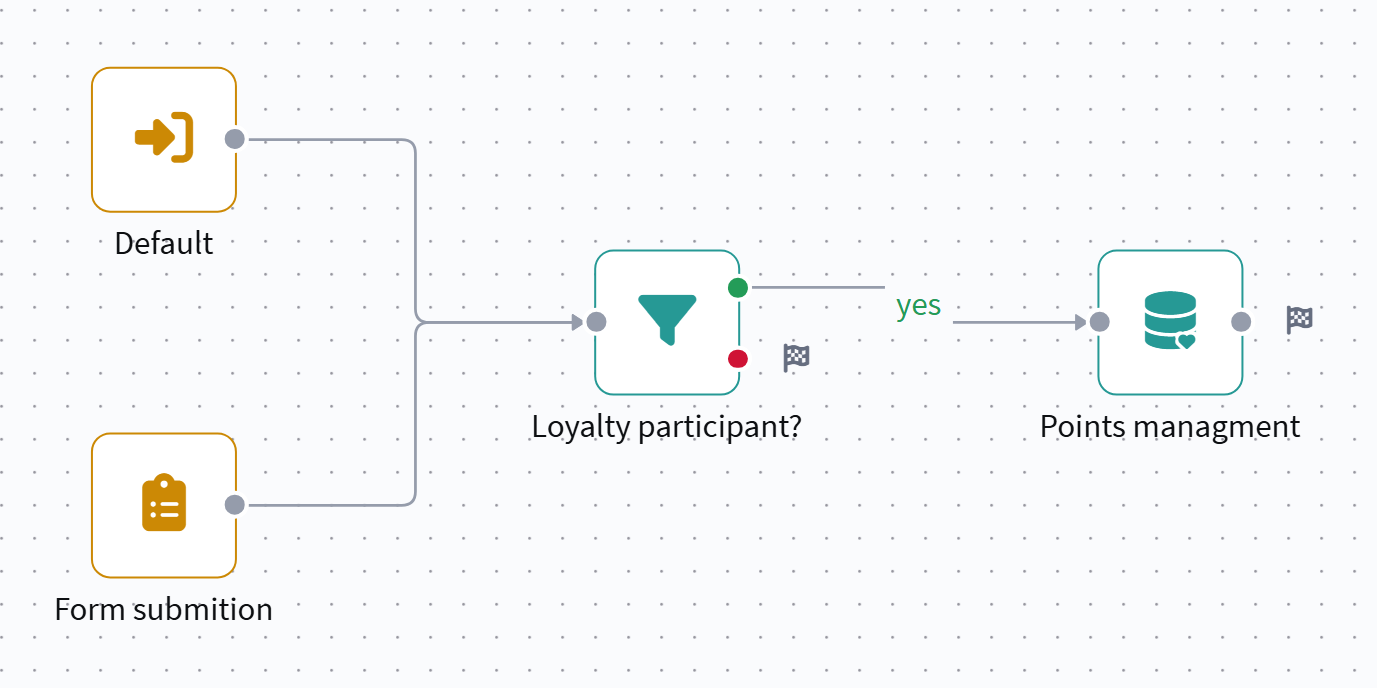
If the profile is not yet a member of the loyalty program, the scenario adds the profile to the program. Since the consent field in the form is required, no additional consent check is needed:

When a profile is added to the program, points are accrued automatically — according to the set initial balance value for the standard points.
If the point settings specify a zero initial balance upon registration, you must add a Loyalty points management node (similar to the previous one) to manually accrue the required number of points.
Automatically rewarding a profile for installing a mobile app
This case allows you to automatically add a user to the loyalty program or accrue points immediately after they install a mobile application. This uses a pixel that triggers upon app installation.
If the initial balance in the point settings is zero, after the "Loyalty participation" node, you must also add a "Loyalty points management" node with a trigger promotion to award the bonus for downloading the app.
- Loyalty
- Pixel
- Scenario
Before creating a scenario, you need to prepare the basic configuration of the loyalty program. In the Loyalty — Loyalty programs section, create the program itself.
Configure standard points. When creating standard points, you must fill in the required parameters:
- point name and external identifier;
- initial balance for a new loyalty program member;
- points expiration period (after a specified number of days, months, or years after accrual);
- point-to-currency ratio.
These parameters determine how many points a profile will receive after installing the app:
A trigger promotion is used as a universal mechanism for accruing or redeeming points. The moment of its execution is determined by the scenario.
Configure the point accrual rules:
- Select the created point type;
- Set a range or a fixed amount.
If a range is specified, the exact number of points to be accrued is determined in the scenario at the moment the promotion is called. This allows you to use the same trigger promotion for different cases: for example, 300 points for installing iOS and 500 points for installing Android.
After saving and activating the loyalty program, the trigger promotion becomes available in automation scenarios. In the scenario, it is added as a Loyalty points management node, where the moment of point accrual is determined.
Create a pixel for the mobile application. The pixel is used for a single purpose — to record the fact of app installation.
- Event type: App install goal.
- It is activated automatically upon installation.
- For correct operation, ensure the pixel is integrated into the mobile application via mSDK.
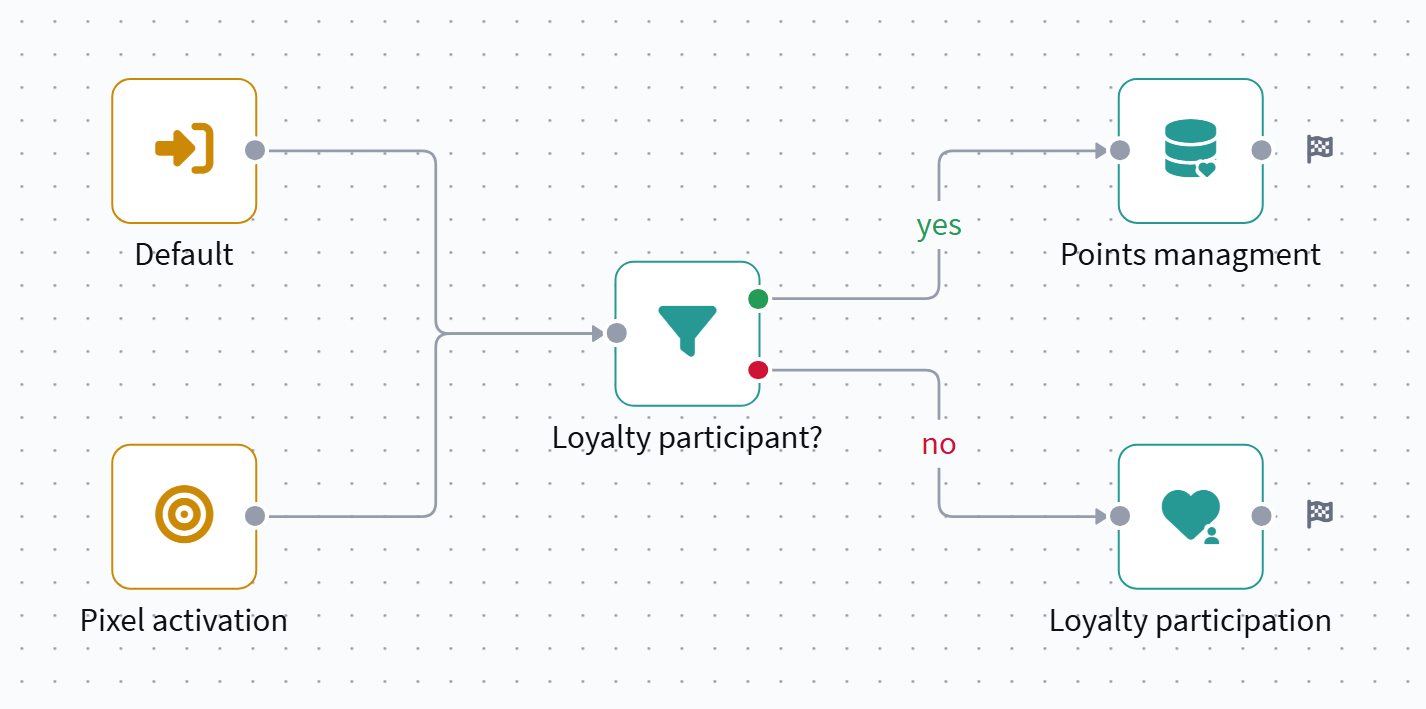
Once the loyalty program and trigger promotion are configured, create a scenario. In the scenario, disable re-entry for profiles to prevent the same profile from entering the scenario again.
Select Pixel event — app install as the entry trigger:
In the scenario, add a condition check element to verify if the profile is already a member of the loyalty program:
If the profile is already a member of the program, the "Loyalty participation" node is not used, and the trigger promotion is called directly to accrue points (for example, 500 points for installing the app):
If the profile is not yet a member of the loyalty program, the scenario adds the profile to the program. After this, starting points are automatically accrued due to the configured initial balance of the standard points.
Notification about imminent loyalty points expiration
In this case, users receive a Notification that their loyalty program points are about to expire. This uses a dynamic segment that selects profiles with the soonest point expiration, and a regular campaign executed on a schedule.
- Segment
- SMS Template
- Mailing
Create a dynamic segment for profiles whose points are about to expire soon.
In the segment conditions, use the filter Interaction with entities — Loyalty — Points expiration
- Condition: in the next [X] days
- Value X:
10 - Loyalty program: select the desired program
- Points: specify the required point type
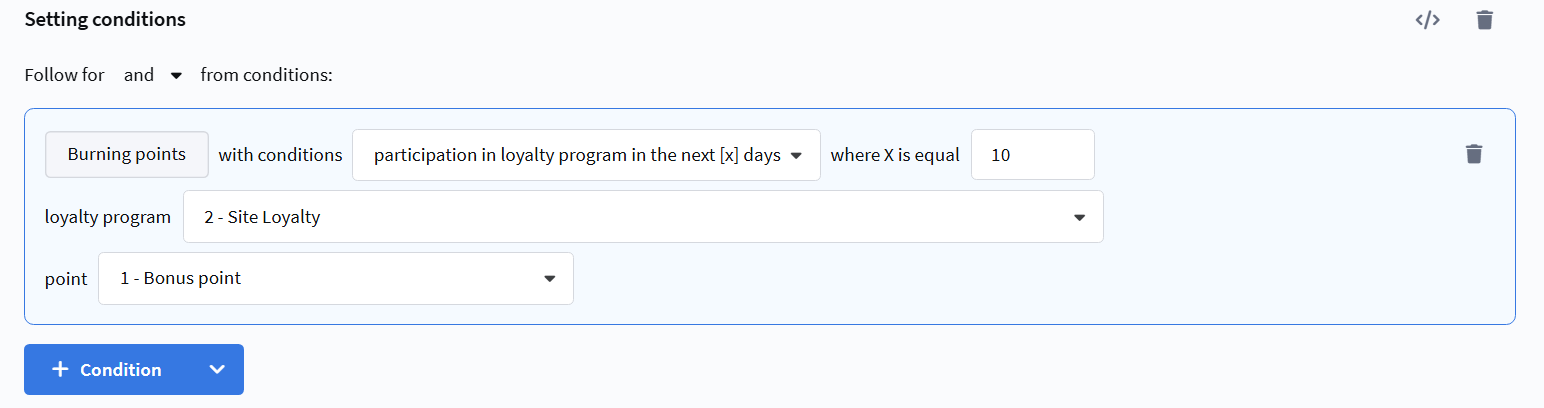
Such a segment automatically includes profiles that have points of the specified type expiring within the next 10 days.
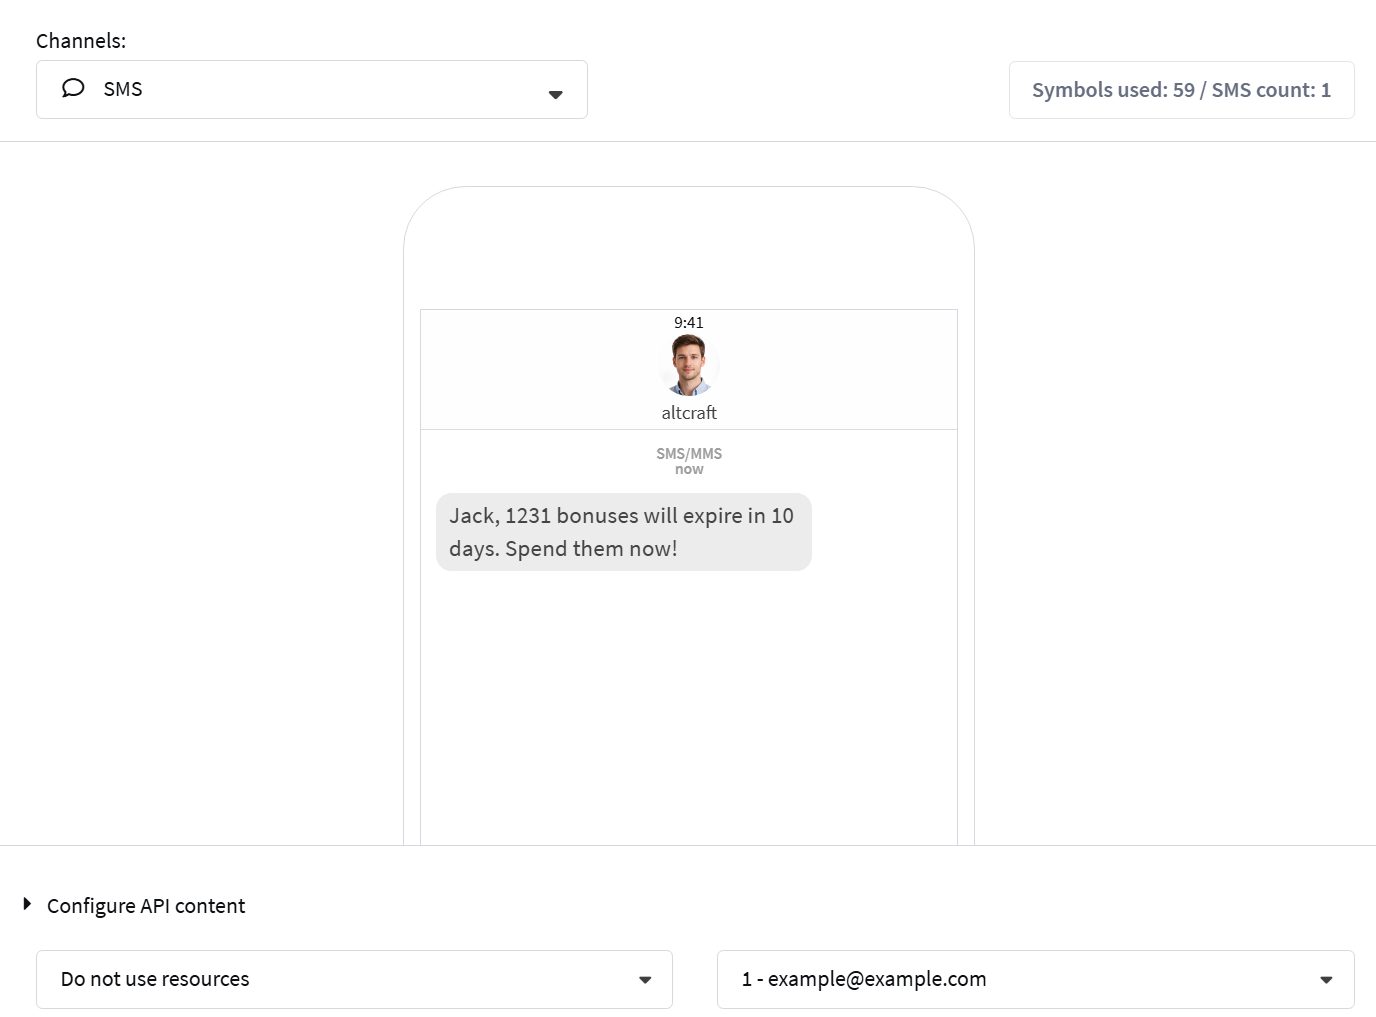
Create an SMS message template that will display information about the imminent points expiration.
Use the variable {loyalty_expiration_points(<Loyalty_Program_ID> "<Point_SID>" x y "desc")} to output the data.
The variable returns information about the nearest expiration of points for the selected currency:
<Loyalty_Program_ID>— loyalty program identifier;<Point_SID>— point SID;x— points validity period;y— transaction count limit;"desc"— sort by transaction date (descending).
Example SMS text:
{for $i $p = loyalty_expiration_points(2 "bonus1" 10 1 "desc")}{lead._fname}, {$p.Amount} bonus points will expire in 10 days. Spend them now!
{end}
Create a regular maling, select the created dynamic segment as the audience. Choose the SMS template with the points expiration information. Configure the schedule (e.g., "Every day at selected time" "Send in the profile's timezone if known").

After activating the campaign, the system will send notifications daily only to those profiles whose points are genuinely nearing expiration.
Using a dynamic segment and a regular campaign allows you to notify users about points expiration without scenarios and manual control. Notifications are sent only to the current audience and automatically stop when the conditions change.