Import or update a profile
This article will show you how to write and submit API requests to perform the following tasks:
- Adding a profile to the database
- Updating profile data
- Subscribing a profile to different channels
Getting an API token
API token is a key to access the platform via API. It is used in any API request.
You can find the token in Altcraft platform settings, in the "Tokens" section. If you don't have a token yet, create one by clicking on the corresponding button:

Only master users can create an API token. If you do not have rights to create a token, contact a user with master rights.
Installing and running Postman
To work with API requests, you need an application that allows you to send and receive them.
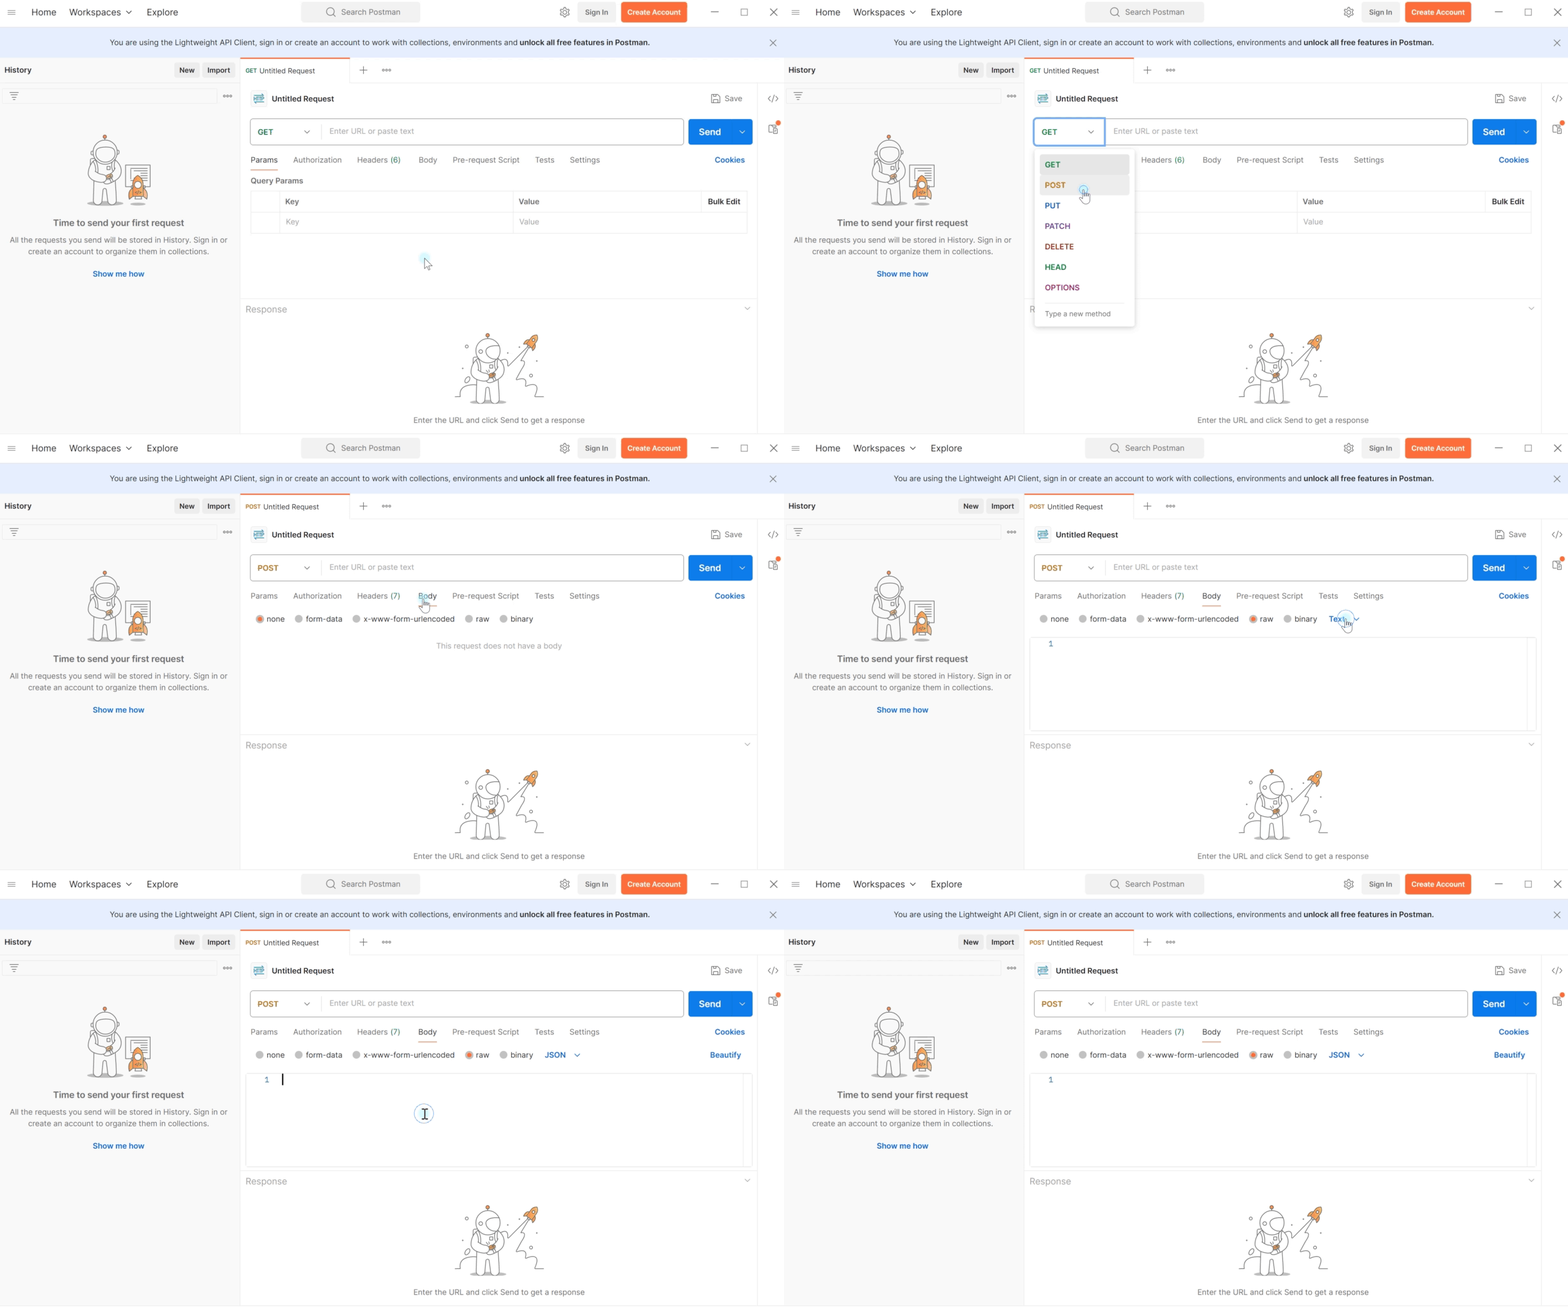
1. Download and install the Postman application or open its web version.
2. Select the POST method for your request.
3. Click the Body tab and select raw mode. Make sure the JSON format is selected.

Request URL

To send a request to the server you need to enter its URL. It is individual for each request. For example, for a profile import request, the URL would be:
https://example.com/api/v1.1/profiles/import.
Instead of example.com you need to specify the address where the platform is located. You can get it directly from the address bar:

Creating a request
Adding a new profile
Let's move on to writing the query. Suppose we want to manually add a customer profile with e-mail i.petrov@example.com to database #5. Let's make a query:
{
     "token": "abcdefghklmnopqrstzxc",
     "db_id": 5,
     "matching": "email",
     "email": "i.petrov@example.com",
     "data": {
        "email": "i.petrov@example.com"
    }
}
- "token " - API token. You can read more about where to find it at the beginning of the article.
- "db_id " - number of the database to which the profile is added. This number is indicated next to the name of the profile database to the right of the # sign.
- "data " - the object that contains the profile data. In the example above, we only pass the client's email address in this object.
- "matching " and "email " - parameters by which the query will determine whether this profile exists in the database. In this case, the email address is used to search for the profile. If the profile with this address already exists in the database, the query will update its data, if not - it will create a new profile. The "matching" parameter can take different values. However, it is not mandatory and if it is not specified, the profile will be searched by email.
More details about the matching parameter
The matching parameter defines by which field the profile will be searched in the database. Several search modes are available in the platform, for example, the platform can search for a profile by email address, phone number, system ID or by any value you store in an additional field in the database.
The main thing is that the field by which you launch a search in the database is unique for the profile, i.e. the value of this field should not be the same for different profiles in the same database.
If you want to find a profile by its email, then matching will look like this:
{
     "matching": "email",
     "email": "example@example.com"
}
Search for a profile by phone::
{
     "matching": "phone",
     "phone": "+79000000000"
}
Search for a profile by ID (only when updating a profile):
{
     "matching": "profile_id",
     "profile_id": "012452gf62fcd71fjh8ec0"
}
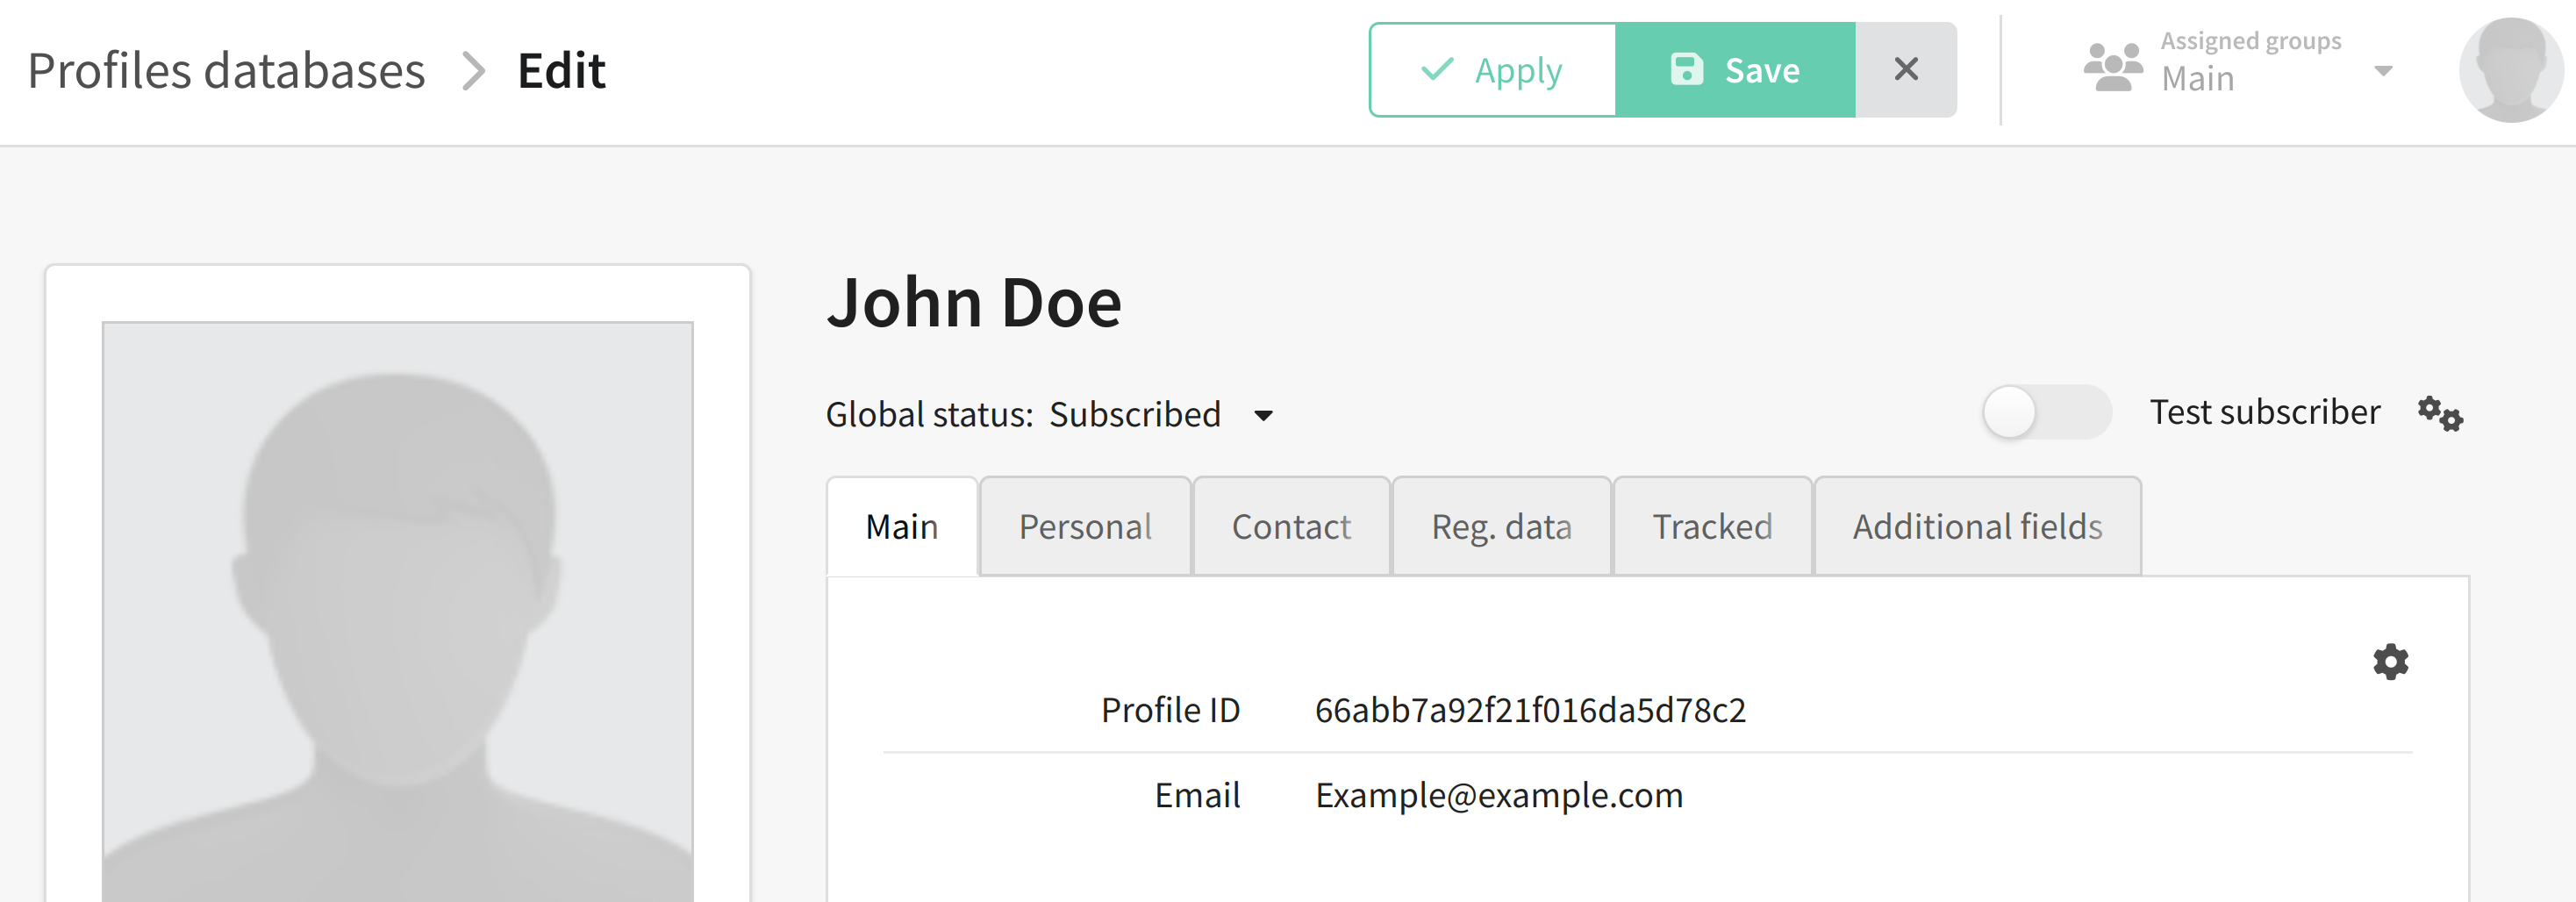
The profile ID can be found here:

If you use a custom field to search for a profile, then your query will look like this:
{
     "matching": "custom",
     "field_name": "CRM_ID",
     "field_value": "12345"
}
where CRM_ID is the name of the field, and 12345 is the value of this field for the profile.
Updating profile data
Let's assume that we have new data about the client: his name is Ivan Petrov, born 15.01.1990, lives in Moscow, phone number - +79000000000. Now we need to update the profile and add this information. The query will look like this:
{
     "token": "abcdefghklmnopqrstzxc",
     "db_id": 5,
     "matching": "email",
     "email": "i.petrov@example.com",
     "data": {
        "email": "i.petrov@example.com",
        "_fname": "Ivan",
        "_lname": "Petrov",
        "_sex": "male",
        "_bdate": "1990-01-15T12:00:00Z",
        "_city": "Moscow",
        "phones": ["+79000000000"]
    }
}
We have extended the "data" parameter with the following data:
- "_fname" - first name
- "_lname" - last name
- "_bdate" — date of birth in the format "1990-01-15T12:00:00Z"
- "_sex" - gender, "male" for men, "female" for women
- "_city" - city
- "phones" — phone number.
Adding subscriptions to a profile
We have updated the profile and now we need to subscribe it to email, sms and push channels in resource #1. To do this we need to add the subsriptions array to data:
{
    "token": "abcdefghklmnopqrstzxc",
    "db_id": 5,
    "matching": "email",
    "email": "i.petrov@example.com",
    "data": {
      "email": "i.petrov@example.com",
      "_fname": "Ivan",
      "_lname": "Petrov",
      "_sex": "male",
      "_bdate": "1990-01-15T12:00:00Z",
      "_city": "Moscow",
      "phones": ["+79000000000"],
      "subscriptions": [
            {
                "channel": "email",
                "email": "i.petrov@example.com",
                "resource_id": 1
            },
            {
                "channel": "sms",
                "phone": "+79000000000",
                "resource_id": 1
            },
            {
                "channel": "push",
                "provider": "Firefox",
                "resource_id": 1,
                "subscription_id":"abcdefghijklmnqrstuvwxyz"
            }
        ]
    }
}
For each communication channel, the following parameters must be specified:
- "channel" — type of channel, for example, "email", "sms", "push"
- "resource_id" is the resource ID that you must configure before.
Also, depending on the channel you are subscribing to, you will need to provide certain contact information. For example, for an email channel it is an email address, for an sms channel it is a phone number, and for a push channel you need to specify the provider (
provider) and the push token (subscription_id).
Pay attention to the syntax of your request. Any extra character, be it a parenthesis, comma or period, can lead to errors when sending a request. Likewise, the query will not work if you do not close any quotes or parentheses.
Sending a request
To send a request, click Send in Postman. If the request is successful, the following message will appear:

If something went wrong, the error code and its description will be indicated in the reply message:

If you are unable to resolve the error yourself, please forward the error code and description to Altcraft Support team.
This article describes only some of the possible parameters for this request. The remaining parameters can be found here.