Setting up a popup in the code editor
To work directly with the pop-up code, go to the Settings section. In the upper right corner you can switch between HTML, CSS and JavaScript code:
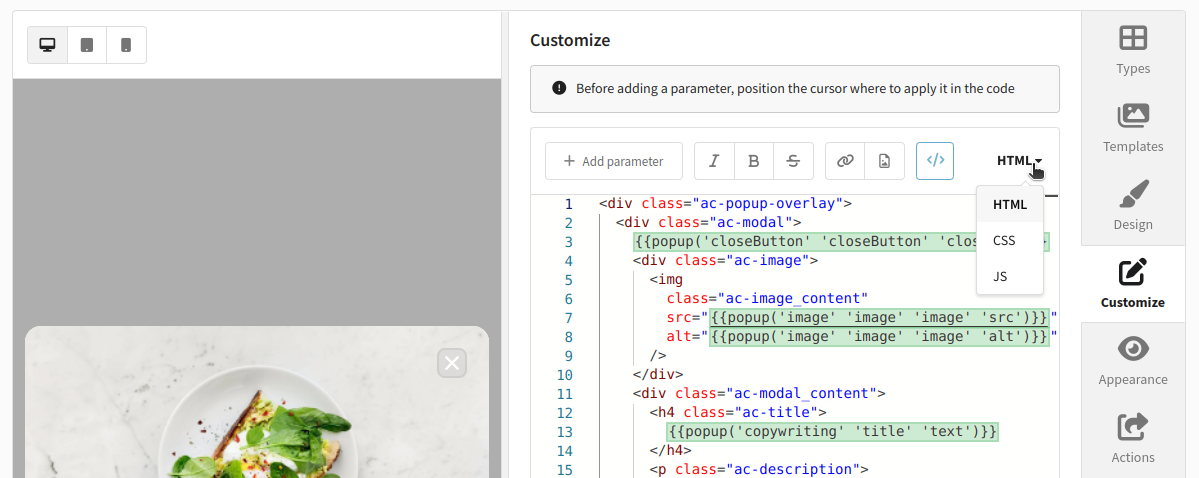
To make it easier to work in the editor, use the following functions in the toolbar:
![]() — bold text;
— bold text;
![]() — italic;
— italic;
![]() —
— strikethrough text ;
![]() — adding or editing links;
— adding or editing links;
![]() — adding images from the platform gallery;
— adding images from the platform gallery;
![]() — the list of variables and functions of the editor. Using this button you can add dynamic content to the popup.
— the list of variables and functions of the editor. Using this button you can add dynamic content to the popup.
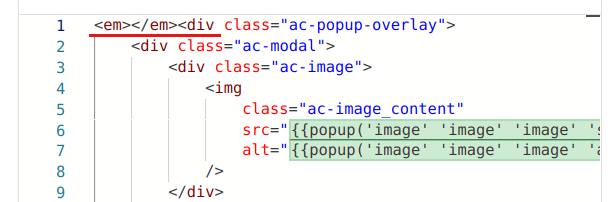
You cannot add other HTML elements before the top-level div element, otherwise the template preview will become unavailable.
Creating a parameter
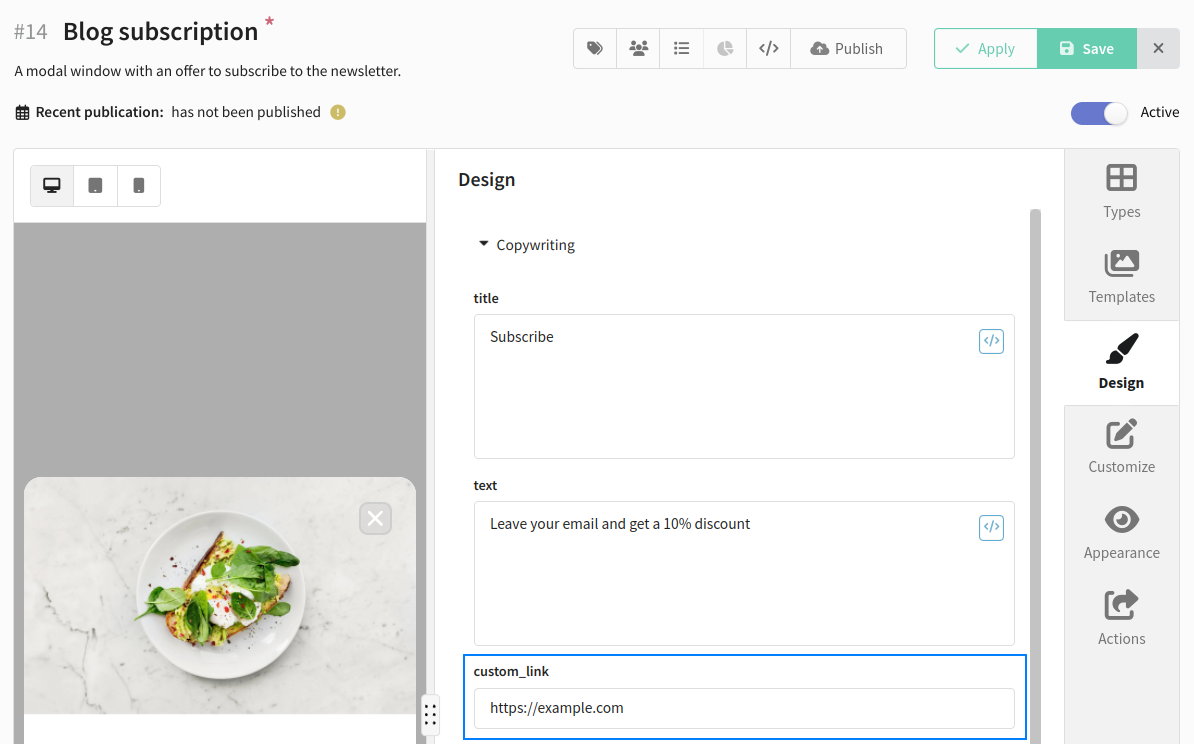
You can also create new settings in this section. When saved, they will appear on the Design tab. Thus, users who are not familiar with the code will be able to change the values of custom parameters in the visual editor.
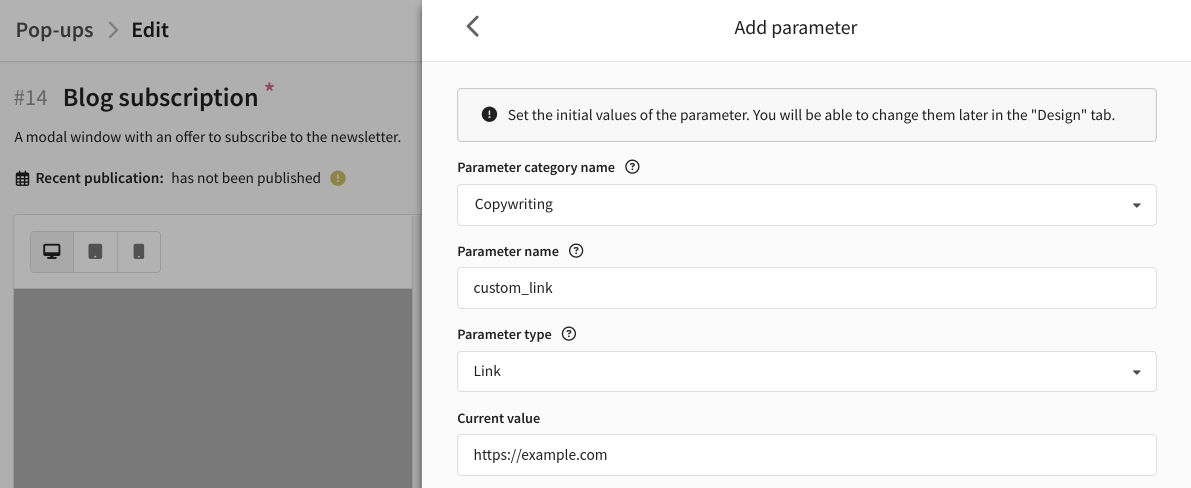
To create a new parameter, place the cursor in the editor line where you want to add the parameter. Click the Add parameter button in the upper left corner of the editor. In the new window select:
-
Parameter category name. Built-in parameters in the visual editor are grouped by category. You need to select one of the categories for the custom parameter. You can also create your own category. To do this, enter the category name and press Enter.
-
Parameter name. Enter the name of the parameter to be used in the editor. The name must be unique within the category.
-
Parameter type. Select the type of value that the parameter will contain (for example, text, numeric value, font family, input field options, etc.).
-
Current value. Specify the default value for the parameter. This field is optional.
Once configured, click the Insert button at the bottom of the page. The parameter will be added in the following form:
{{popup('<category_name>' '<parameter_name>' '<parameter_type>')}}

The created parameter will appear in the visual editor in the selected category. After saving the popup, the value of the new parameter can be edited by other platform users:
Popup elements settings
When creating a pop-up, the platform offers many ready-made templates, but sometimes you need to make changes to an existing template. Below are recommendations on how to do this.
The field name (name attribute) before and after the expression should not contain extra characters:
Correct usage: name="{{popup('form' 'week-field' 'fieldData')}}"
Incorrect usage: name="{{popup('form' 'week-field' 'fieldData')}}-"
Overlay layer
The overlay layer is designed to visually highlight the pop-up. Defined by an element with class ac-popup-overlay. By default, this element has a translucent background and occupies the entire available screen area.
Usage example:
<div class="ac-popup-overlay">
     <!--Popup contents-->
</div>
Text content
By default, two types of text are available: heading and paragraph.
Usage example:
<!-- Title -->
<h4 class="ac-title">
     {{popup('copywriting' 'title' 'text')}}
</h4>

<!-- Paragraph -->
<div class="ac-description">
     {{popup('copywriting' 'text' 'text')}}
</div>
Images
There are two ways to add an image to a popup:
- as an element with the
<img>tag - using the
background-imageCSS property
An example of adding an image using the <img> tag:
<div class="ac-image">
     <img class="ac-image_content img"
         src="{{popup('image' 'image' 'image' 'src')}}"
         alt="{{popup('image' 'image' 'image' 'alt')}}"
     />
</div>
An example of adding an image using the background-image CSS property:
background-image: url("{{popup('background' 'backgroundImage' 'image' 'src')}}");
Form
For the popup to work correctly, all input fields and the form submit button must be placed in an element with the <form> tag.
Usage example:
<form id="ac-form" class="ac-form">
     <!-- Form content -->
</form>
Input fields
For correct display, each input field must be inside an element with the ac-field class. To add a title, it is recommended to use an element with the ac-label class. Be sure to specify the name attribute, if it is not specified, the value of the input field will not be sent to the server and will not be saved in the platform.
If you intend to use validation rules, you must add an element with the class ac-validation-msg.
Example of an email input field:
<div class="ac-field">
     <label class="ac-label" for="email">
         {{popup('copywriting' 'emailLabel' 'text')}}
     </label>
     <input
         id="email"
         type="email"
         class="ac-input"
         name="{{popup('form' 'email' 'fieldData')}}"
         placeholder="{{popup('copywriting' 'emailPlaceholder' 'text')}}"
     />
     <div class="ac-validation-msg" for="email"></div>
</div>
Example of a phone number input field:
<div class="ac-field">
    <label class="ac-label" for="phone">
        {{popup('copywriting' 'phoneLabel' 'text')}}
    </label>
    <input
        id="phone"
        type="tel"
        class="ac-input"
        name="{{popup('form' 'phone' 'fieldData')}}"
        placeholder="{{popup('copywriting' 'phonePlaceholder' 'text')}}"
    />
    <div class="ac-validation-msg" for="phone"></div>
</div>
To correctly collect statistics for input fields, you should set the type attribute, the value of which will correspond to the type of input data.
The following field types are available:
<input type="text">- basic text field as a string.<input type="email">- field for email address. Before sending, it is checked that the input value contains either an empty string or one valid e-mail address.<input type="tel">- input field for a phone number; line breaks are automatically removed from the input value.<input type="number">- input field for a float format number.<input type="search">- one-line text field for entering search strings.<input type="url">- field for URL editing. The entered value must contain either an empty string or a valid absolute URL.<input type="color">- a color control element.<input type="date">- control element for entering date (year, month and day, no time).<input type="datetime">- control element to enter the date and time (hour, minute, second and fraction of a second) according to the UTC time zone.<input type="datetime-local">- control element for entering date and time without time zone.<input type="week">- control element for entering the date containing the number week-year and week number without time zone.<input type="month">- control element for entering month and year without time zone.
Form submit button
To create a form submit button, it is recommended to use an element with class ac-form_submit, which contains a button element with type submit and class ac-button.
Usage example:
<div class="ac-form_submit">
     <button type="submit" class="ac-button">
         {{popup('cta' 'text' 'text')}}
     </button>
</div>
Close button
To create a button to close a popup, it is recommended to use the popup function, passing the appropriate parameters to it.
Usage example:
{{popup('closeButton' 'closeButton' 'closeBtn')}}
The element has several different options, which can be viewed on the Design —> "Close" button tab.
Additional event tracking
To track events, you need to add the data-tracking-event="[event-name]" attribute to the html element with which the event is associated. Replace [event-name] with the name of the event. The following events are supported:
click- click on an elementclose— closing the popup
An example of registering clicks on a popup element:
<div data-tracking-event="click"></div>
If the popup contains an HTML form element, then when the form submit button is clicked, the action of filling out the form will be automatically registered. That is, in this case, to register an event, you do not need to add an additional attribute to the form button.