Dynamic Segments
A dynamic segment is a segment that selects users directly at the moment of each use.
You can work with such a segment without saving it if you need a one-time quick selection. If you decide to save the segment, it can be used in mailings, scenarios, etc. Each time it runs, the segment will recalculate the profile selection based on the specified conditions.
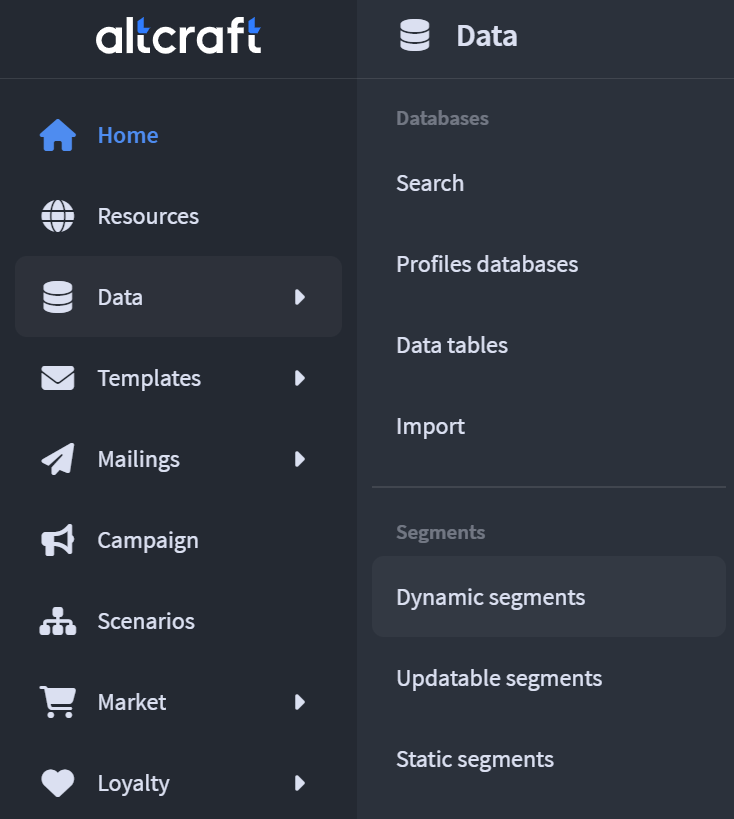 | To get started, go to Data → Segments → Dynamic Segments. |
Creating a Dynamic Segment
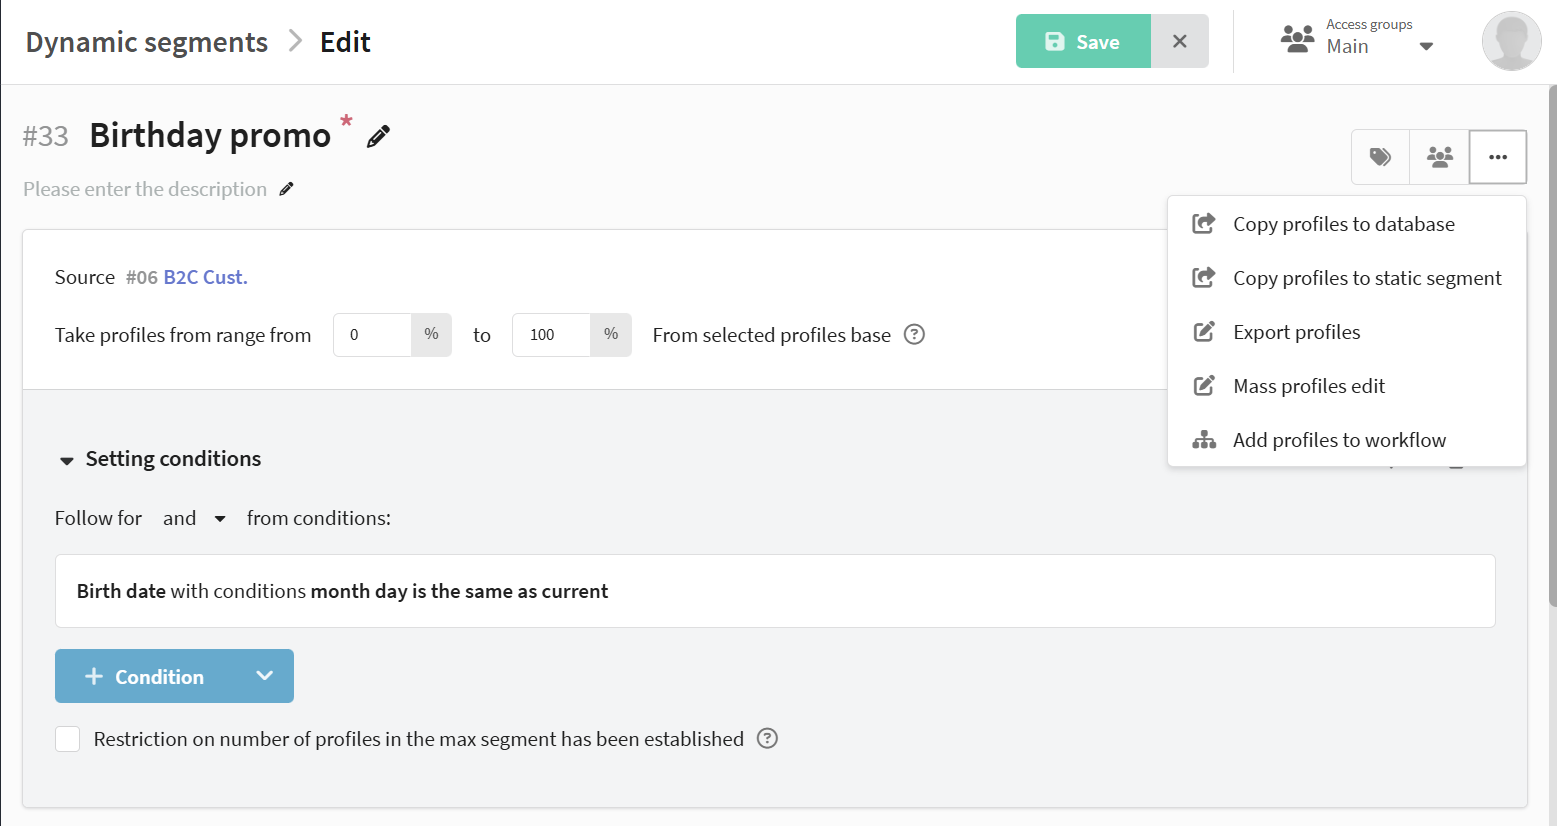
In the dynamic segments list, click + Create. In the form that opens, specify the Name of the segment and click on the Select source block. In the side panel, select one Profile Database — this is a mandatory step; segment creation is impossible without selecting a database:

Please note that after selecting a source, it cannot be changed.
Configuring Range and Conditions
Here you can also set the Range, which defines the portion of the database to which the segmentation conditions will be applied:

By default, the range is set from 0% to 100% of the entire selected profile database. Profiles are selected proportionally — the same range always selects the same users.
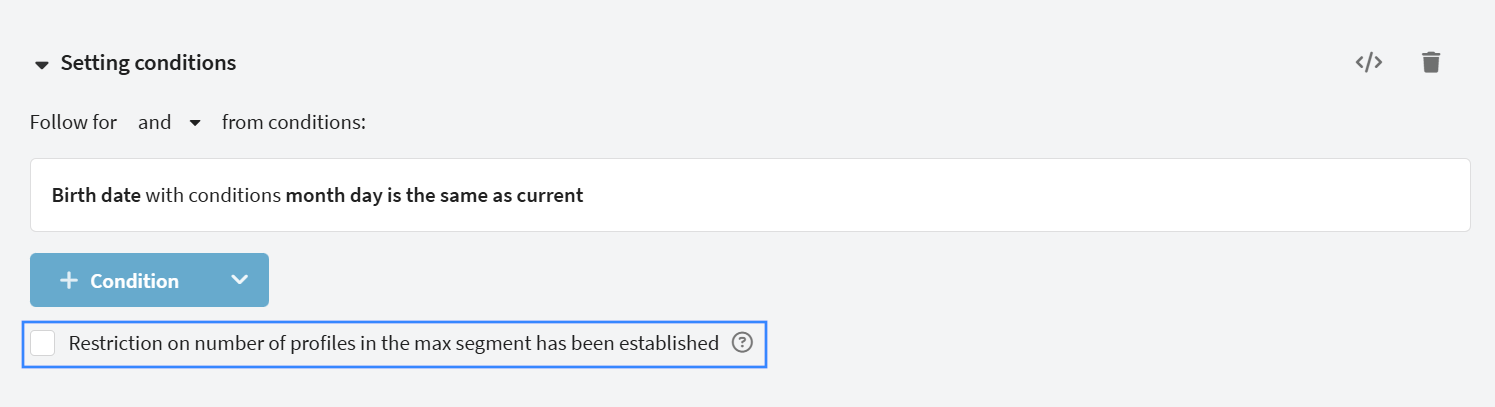
The main block is Condition Settings. To add a rule, click the + Condition button. In the dropdown menu, the options Add Condition Group or Import Conditions from another segment are available. After selection, the condition settings window will open:

The mechanics are completely identical to static segments: all the same filter categories by profile data, interactions, and behavior in channels are available. Conditions within a group can be combined using must comply with each of the conditions (AND) or must comply with one of the conditions (OR) logic.
In the "Condition Settings" block, the Delete button (clears the set rules) and the Script button (opens an editor for manually writing conditions in JSON format) are also available.
After configuring the conditions, in the same window, you can activate the checkbox Set a limit on the maximum in the segment and specify the desired number. This limitation is applied to the selection result after selection by range and conditions:
More about how audience limitations work
Limit on the maximum
Maximum profile count limit — the limit on the number of profiles that can be included in a segment.
This method limits the size of the final segment. You specify the maximum number of profiles that can be included. If more people match the segmentation conditions, the platform takes the first profiles from the resulting sample.
For example, if 1,000 people match the conditions and the maximum count is set to 400, the first 400 profiles will be included in the segment. This restriction applies to the sample result of the segment. If a range is also used, the range restriction is applied first, and then the profile count limit is applied to the selected portion of the database.
Range

The range determines which portion of the entire database will participate in segmentation. By default, it is set to 100%, meaning the conditions apply to all profiles. The key feature is that the range is tied to specific users: each profile in the database is assigned a numeric value, and the same range always selects the same people.

This means the selection is not random. A profile is included in the segment if its assigned value falls within the selected range. This allows you to create non-overlapping groups by setting different ranges — for example, a range from 0 to 20% and a range from 80 to 100% will never intersect.
When new users are added to the database, they are distributed according to the same rules: if a 20% range is selected, a new profile has the same probability of falling into it.
If a maximum profile count limit is also used, the range is applied first to determine the portion of the database, and then the limit takes effect within that portion.
Working with the Segment
Quick Segment
Before clicking the "Save" button, a dynamic segment can be used as a quick segment — for example, to export profiles or copy them to a static segment without the need to save the segment itself.
After adding at least one condition, additional actions for working with the current profile selection become available in the upper right corner, next to the fields for tags and access groups:
- Copy Profiles to Profile Database;
- Copy Profiles to Static Segment;
- Export Profiles;
- Bulk Edit Profiles;
- Add Profiles to a Scenario.
Preview and Save
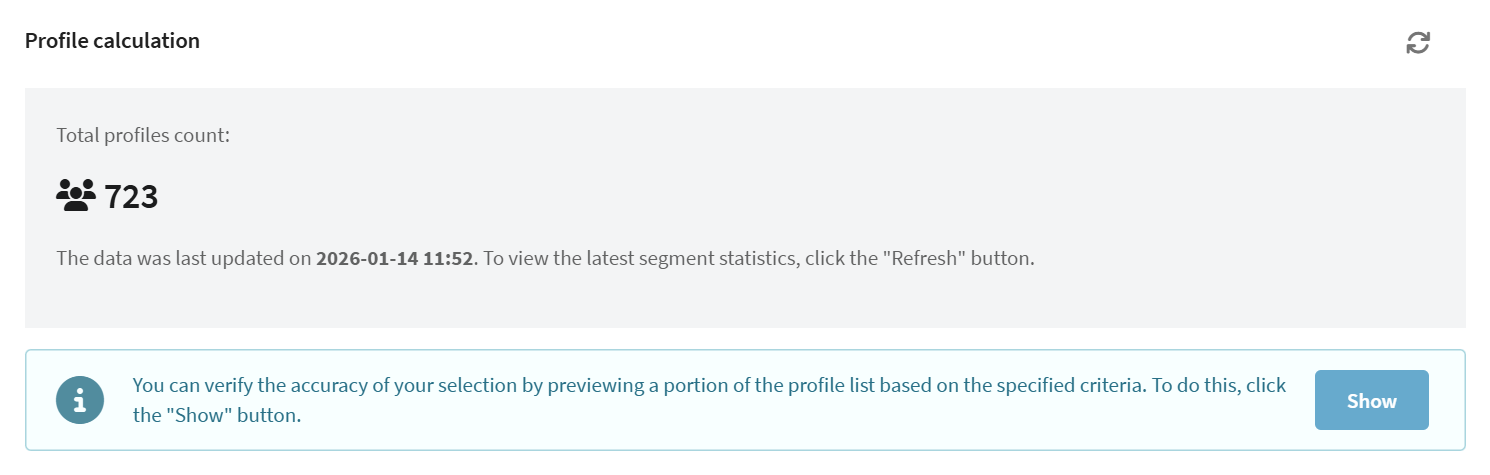
Also, after configuring the conditions, you can immediately estimate the size of the future audience. Click the Calculate button in the profile calculation block — the system will process the database and show how many profiles match the conditions:
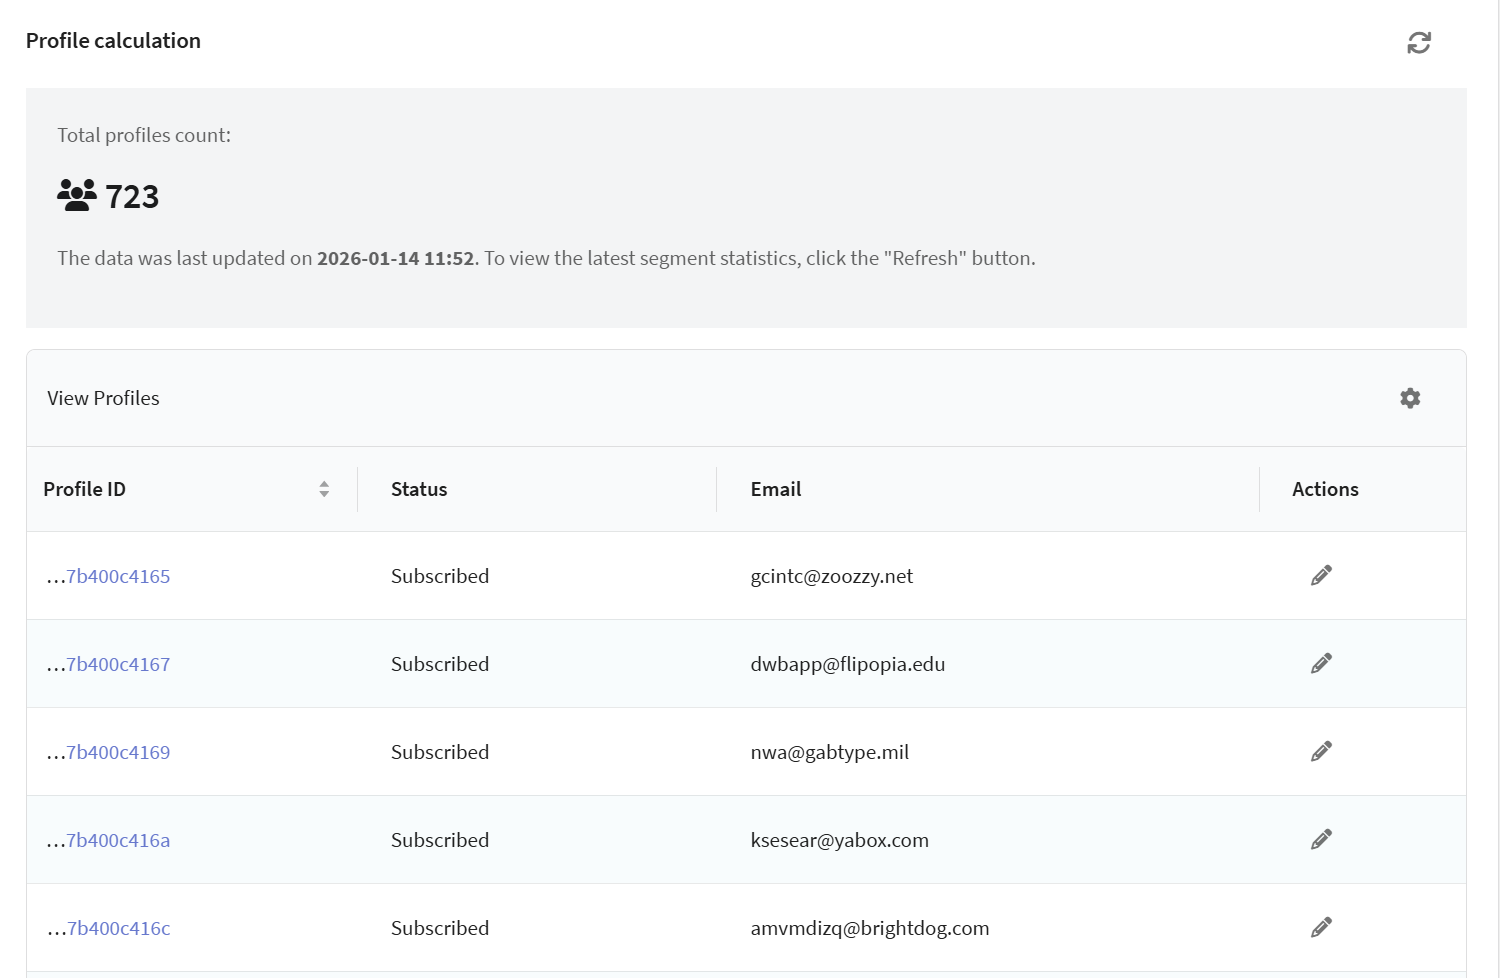
To see the profiles themselves, click Show — a table with the first 100 profiles from the calculated selection will open:
After calculation, the profile count can be manually updated using the corresponding button next to the counter.
Fill in the remaining fields in the form: if necessary, specify Description, Tags, and Access Groups. Then click Save. After saving, the segment will automatically calculate its audience for the first time.
If no conditions are set when saving the segment, all profiles from the selected database within the set range will automatically be included in the segment.
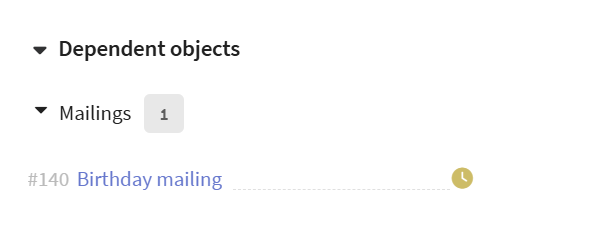
Dependent Objects
If a dynamic segment is used in other platform entities (for example, in mailings or scenarios), the Dependent Objects block will automatically appear below the update log. This block shows exactly where your segment is used:
Managing Segments from the General List
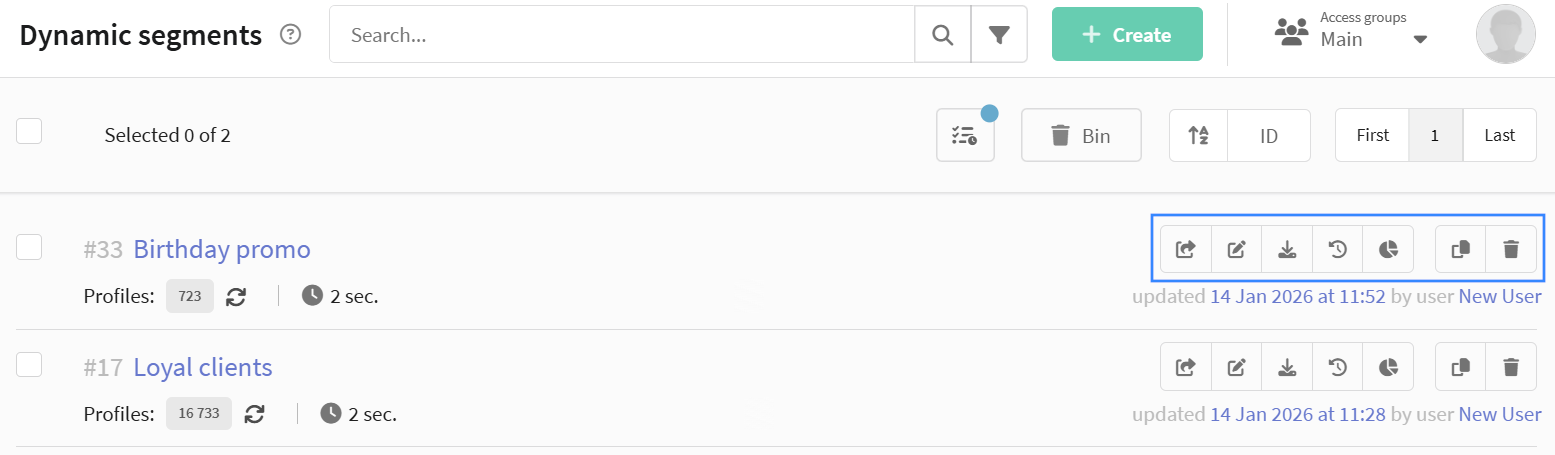
In the row of the desired dynamic segment in the general list, the following actions are available for working with dynamic segments:
- Copy Profiles from Segment: Copy the list of profiles from the current segment to another selected segment.
- Update Profiles: Mass-modify profile data in the segment (e.g., update fields, add a subscription).
- Export Profiles: Export data of profiles included in the segment to an external file.
- Export Profile History: Export interaction and change history for profiles from the segment.
- Analytics: Go to analytical reports for this segment.
- Clone Segment: Clone the segment conditions, tags, access groups, and Profile Database.
- Delete Segment: Move the segment to the bin.