Dynamic API content
When sending messages using the API Call Trigger, starting from version 1.1, it is possible to transmit data for the message along with the API request.
Using apicontent, one message can be automatically personalized for each client. Using apicontent, you can transfer information about completed transactions, purchases, customer history, etc. This information is transmitted as a json-object.
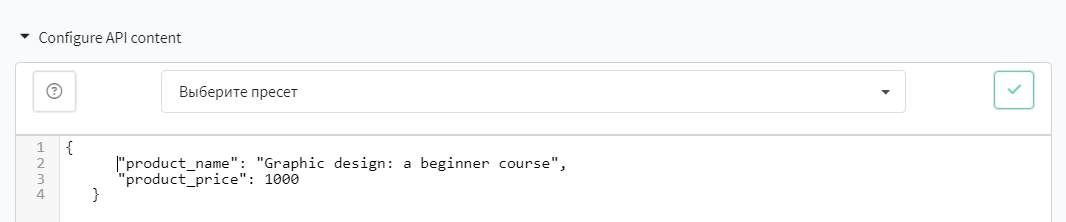
An example of what an object for apicontent might look like:
  {
    "product_id": 11,
    "product_name": "Graphic design: a beginner course",
    "product_price": 1000
   }
How to transfer API content to the platform
API request
Data can be transferred if you run a trigger mailing or scenario using an API request. In the request, the data is passed to the content field. Examples of requests in which the content field is available:
- Trigger launch
- Profile Import + trigger mailing launch
- Bulk trigger launch
- Bulk profiles import + trigger mailing launch
- Engage profile in scenario
- Import and engage profile in scenario
- Batch import and engage profiles in a scenario
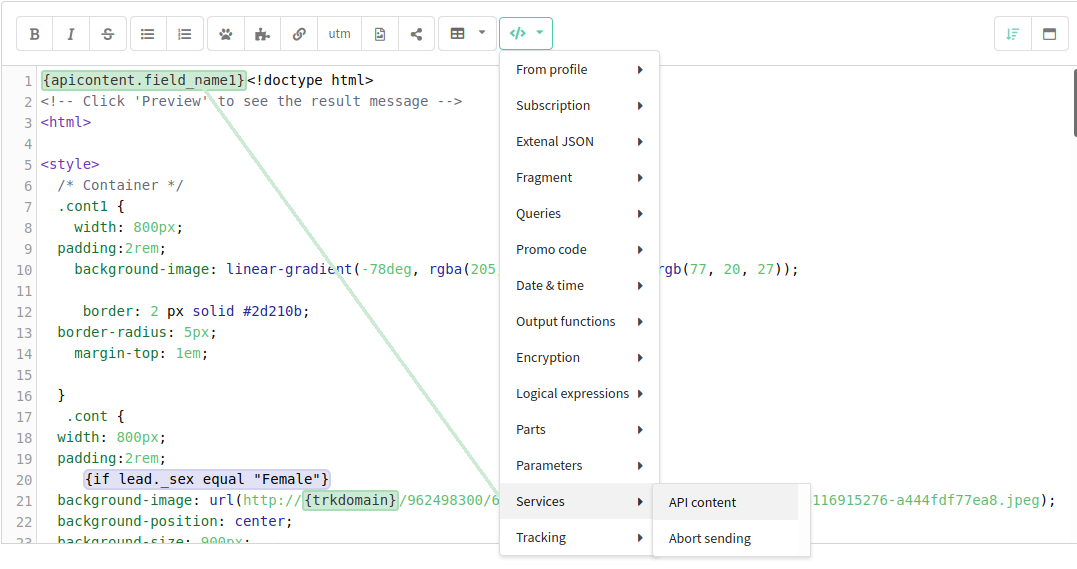
Next, this data can be inserted into the template using the apicontent variable:
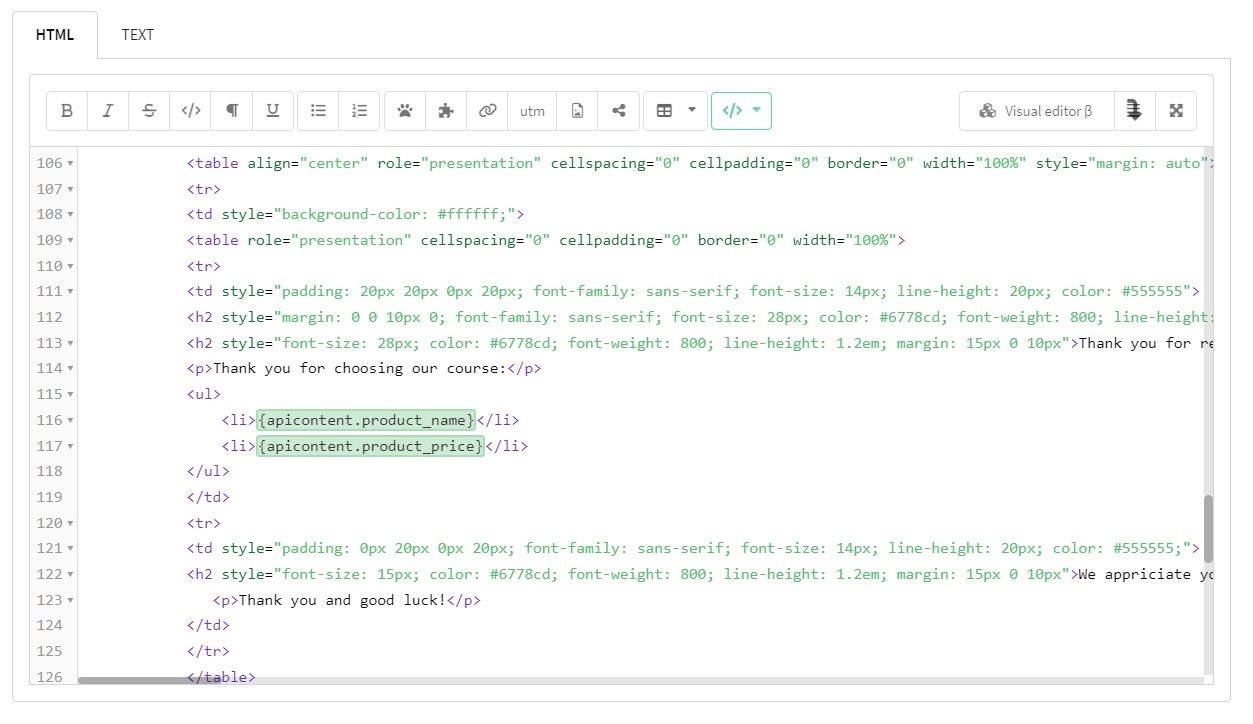
The preview of the message with apicontent is available only after configuring the section Configure API content. To do this, go to the preview section and paste the object containing the apicontent into the editor. Click on the check mark to apply the changes.
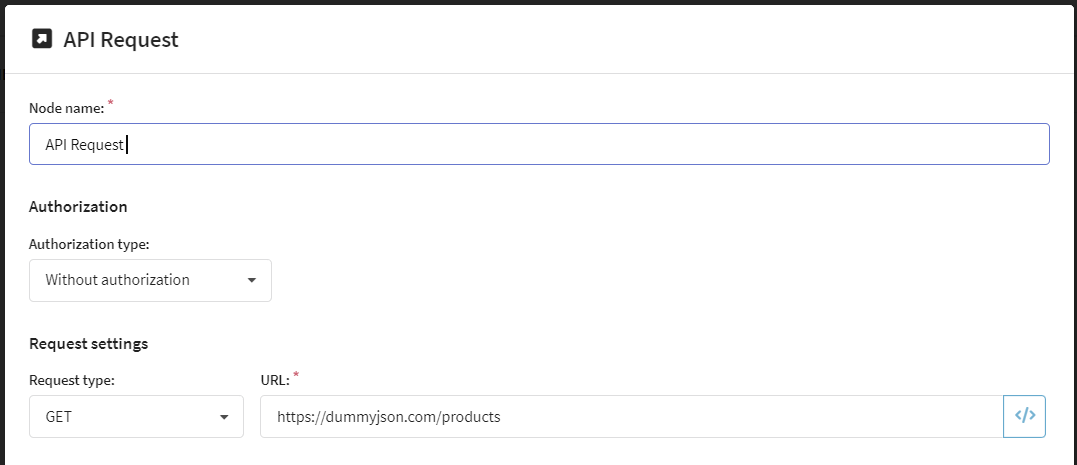
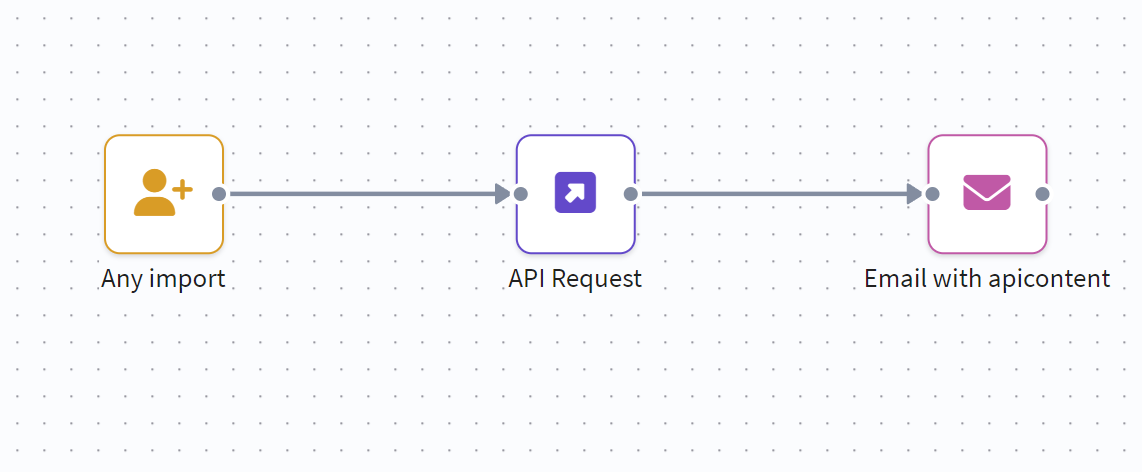
"API Request" element in the scenario
In the API Request scenario element, you can get data from an external source using a request and save the http response to the apicontent variable. The information from the request can later be used in the scenario.
You can read about how to configure the "API Request" element in this article.
Select the type of request and paste the link to the service that will return the json-object:
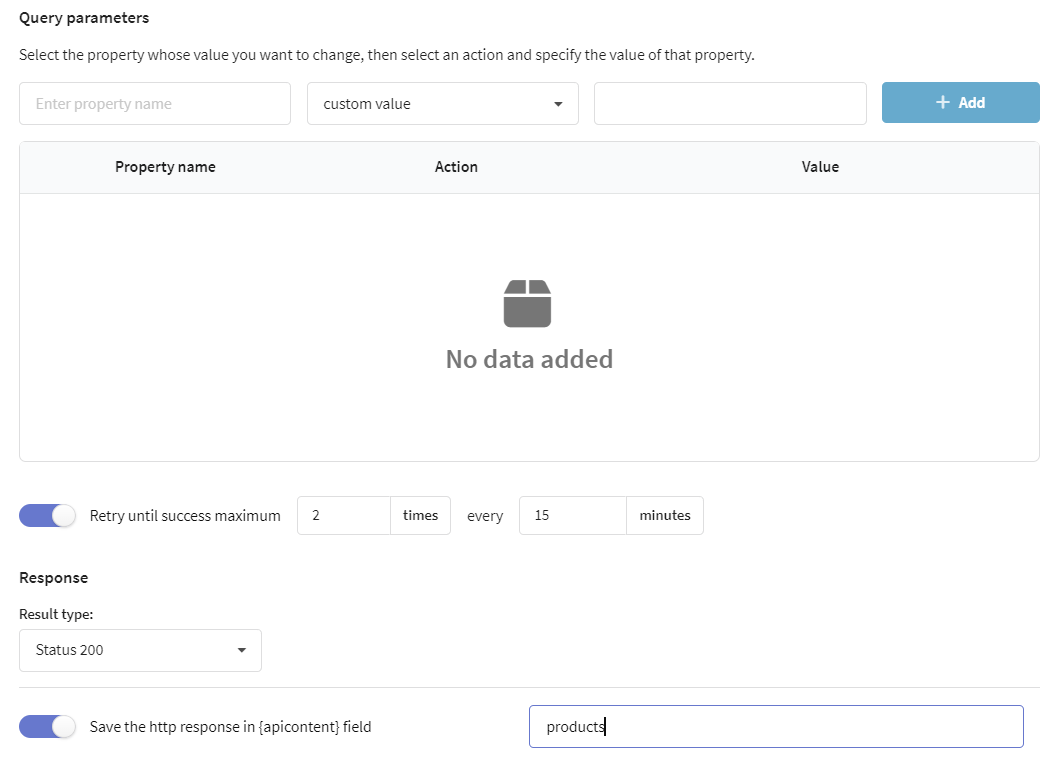
Click on the switch Save the http response in apicontent field and enter the name of the field under which information from external sources will be recorded and which will be used in the message template in the future:
In order to understand how information will be transmitted to apicontent in the future, let's look at the following example. Add the Email element in the required place in order to send the data received from the external service to the client via email.
The path to the data in the template will change slightly:
The preview of the message with apicontent is available only after configuring the section Configure API content. To do this, go to the preview section and paste the object containing the apicontent into the editor. Click on the check mark to apply the changes.

Using a loop in a template with apicontent
You can also transfer apicontent variable into json-object with an array.
An example:
{
    "products": [
      {
        "product_id": 11,
        "product_name": "Graphic design: a beginner course",
        "product_price": 1000
      },
      {
        "product_id": 12,
        "product_name": "Web design: advanced course",
        "product_price": 2000
      }
  ]
}
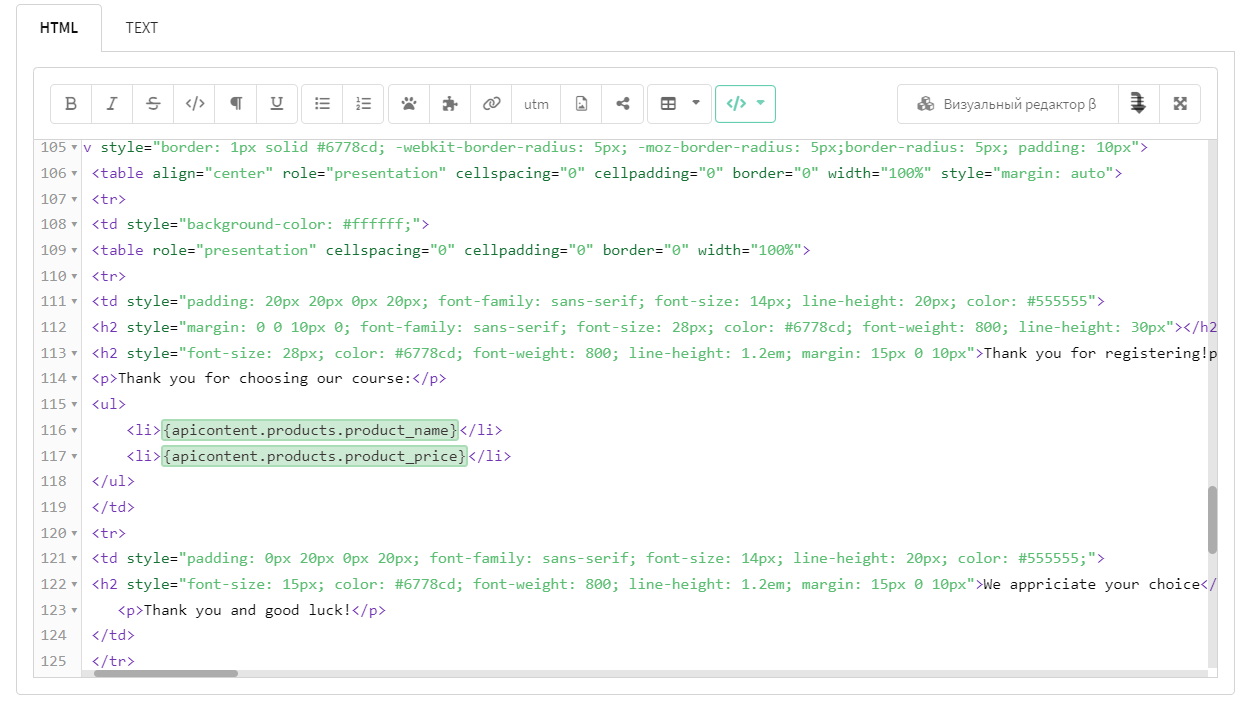
To insert data from an array into a template, you need to iterate through your array. To do this, use the loop with variables.
{for $index $el = apicontent.products}
<div>
  <p>Course: {$el.product_name}</p>
  <p>Price: {$el.product_price}</p>
</div>
{else}
  if empty array
{end}
This code will insert the following data into the email:

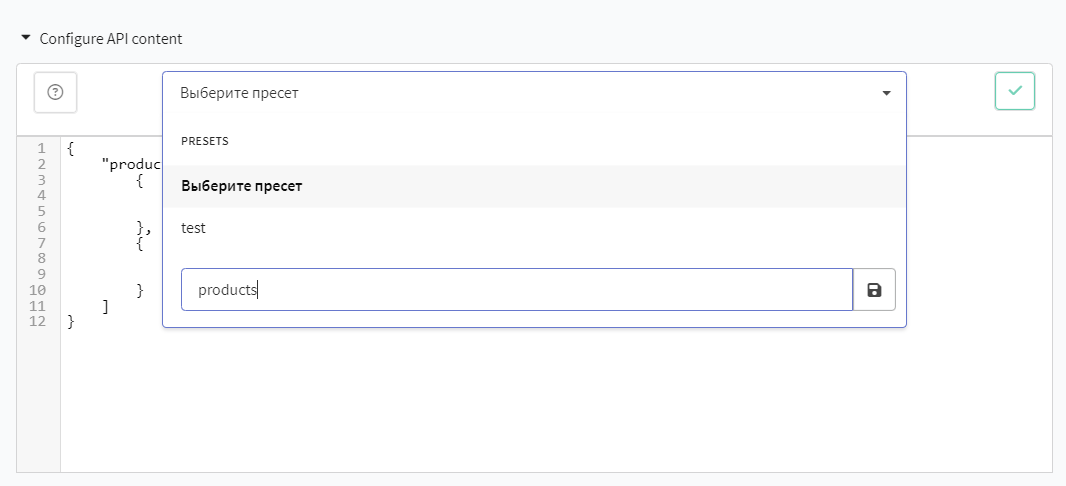
If you regularly use the same json-bject in a variable, then you can save it as a preset and then select it in the preview window:
Cancel sending message if field is missing
You can configure the cancellation of the message sending if a specific field in the apicontent object is missing or contains an empty value. To do this, add a check for the field's existence and use the {cancel} variable.
Example:
{if apicontent.field_2}
field_2 не пустое
{else}
{cancel}
{end}
In this case, the mailing will not send the email if the apicontent object contains one of the following:
{
  "field_1": "example"
}
{
  "field_1": "example",
  "field_2": "" / or 0, null, false
}
This approach helps to avoid sending irrelevant emails and blocks sending if incomplete data was received from an external source.
Use case example
Suppose you have a marketing mailing intended only for users who have started or completed a certain course. The request includes an apicontent object with information about the course progress status:
{
  "user_id": 123,
  "course_id": "abcadefg",
  "course_name": "Graphic Design: Beginner Course",
  "course_status": "completed"
}
However, if the course_status field is missing or empty in the request, it may indicate that the user has not started or completed the course. In this case, the email should not be sent. The email template:
{if apicontent.course_status}
<div>
  <span>You showed interest in the course {apicontent.course_name}.</span>
  <span>You might also like these courses: <course list></span>
</div>
{else}
{cancel}
{end}