Data analytics
Description
You can analyze the results obtained after filling out the form in the "Collected data" section or in the "Insights" section.
![]() Collected data shows the responses of a specific user.
Collected data shows the responses of a specific user.
![]() Insights provides a general summary of the form (views, completions) and statistics on a specific question.
Insights provides a general summary of the form (views, completions) and statistics on a specific question.
To go to one of the sections, find the required form in the general list and click the corresponding icon on the toolbar:
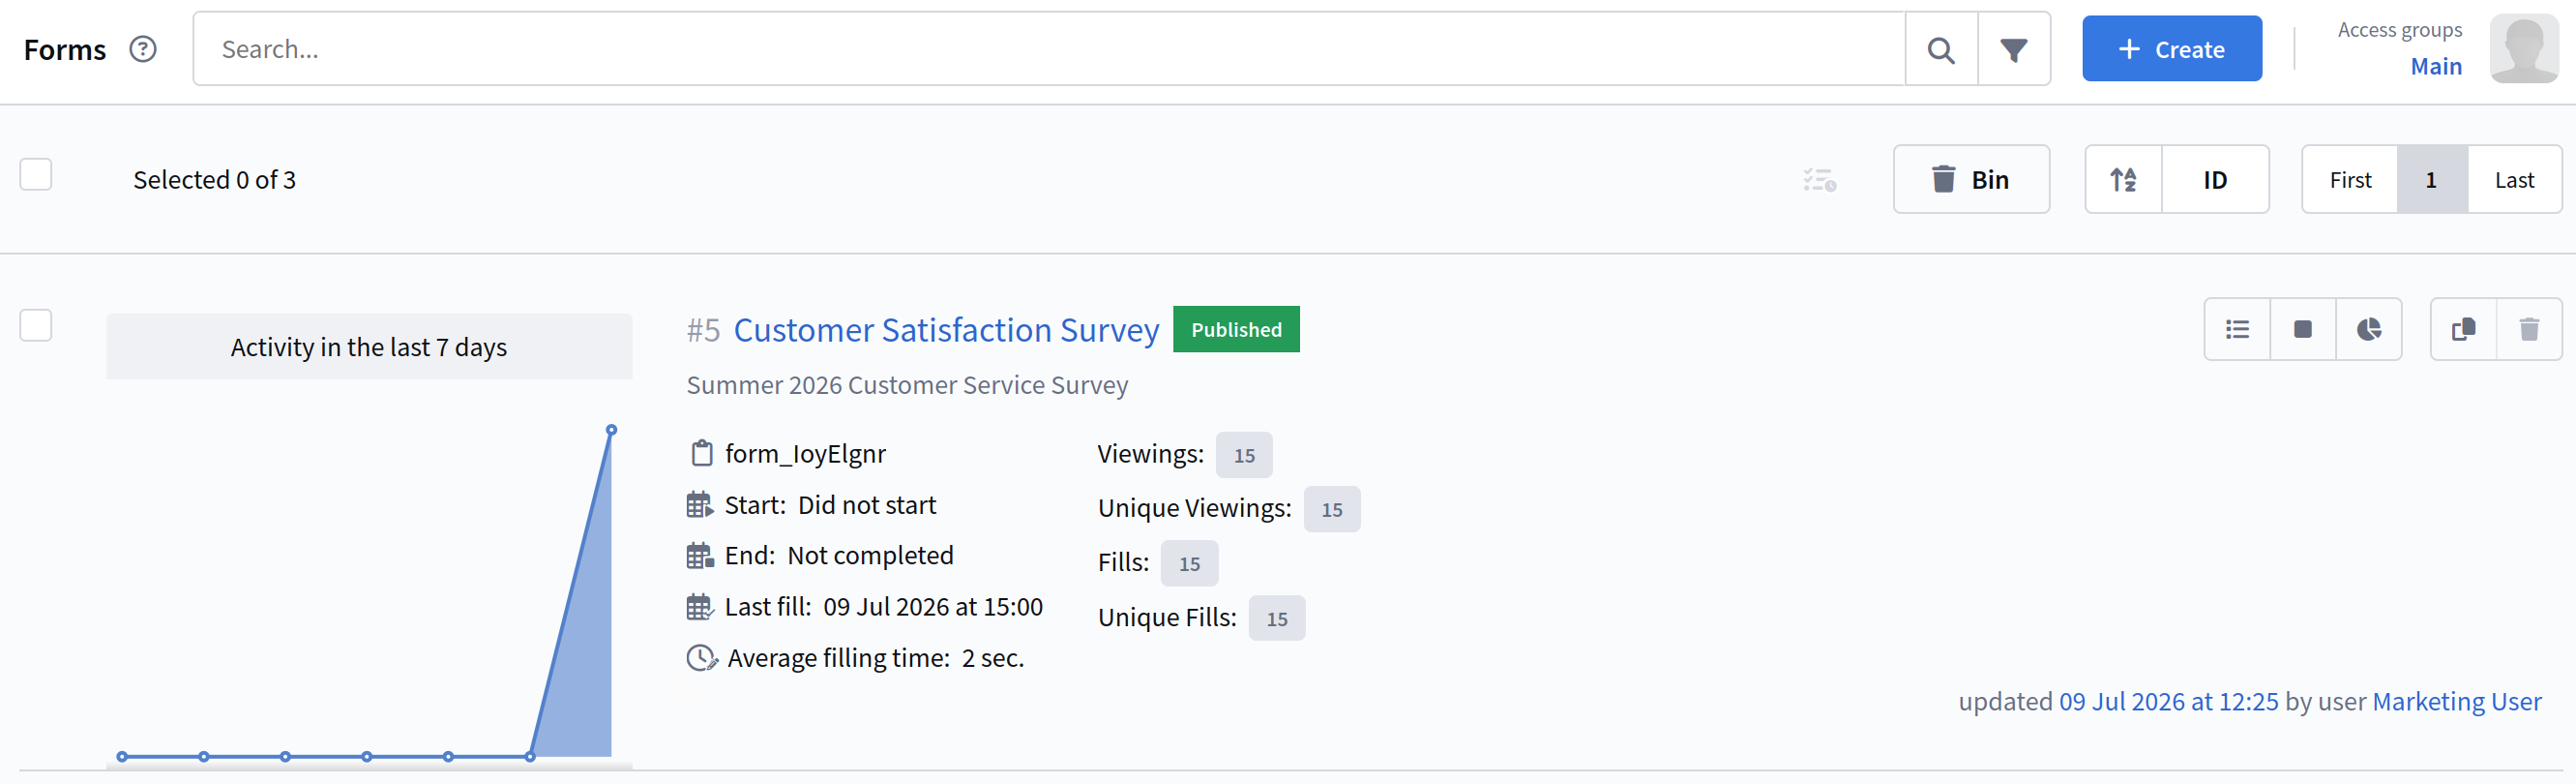
You can view data on views, unique views, fills, unique fills, and average fill time directly in the form list, without navigating to the analytics section.
When a user interacts with a form on the website, the platform sets a cookie. If the cookie is not already present, a unique view or unique submission is recorded. The cookie's lifespan is determined by the TRK_WEB_CTRL_COOKIE_TIME_SEC configuration parameter; the default is 30 days.
Collected data
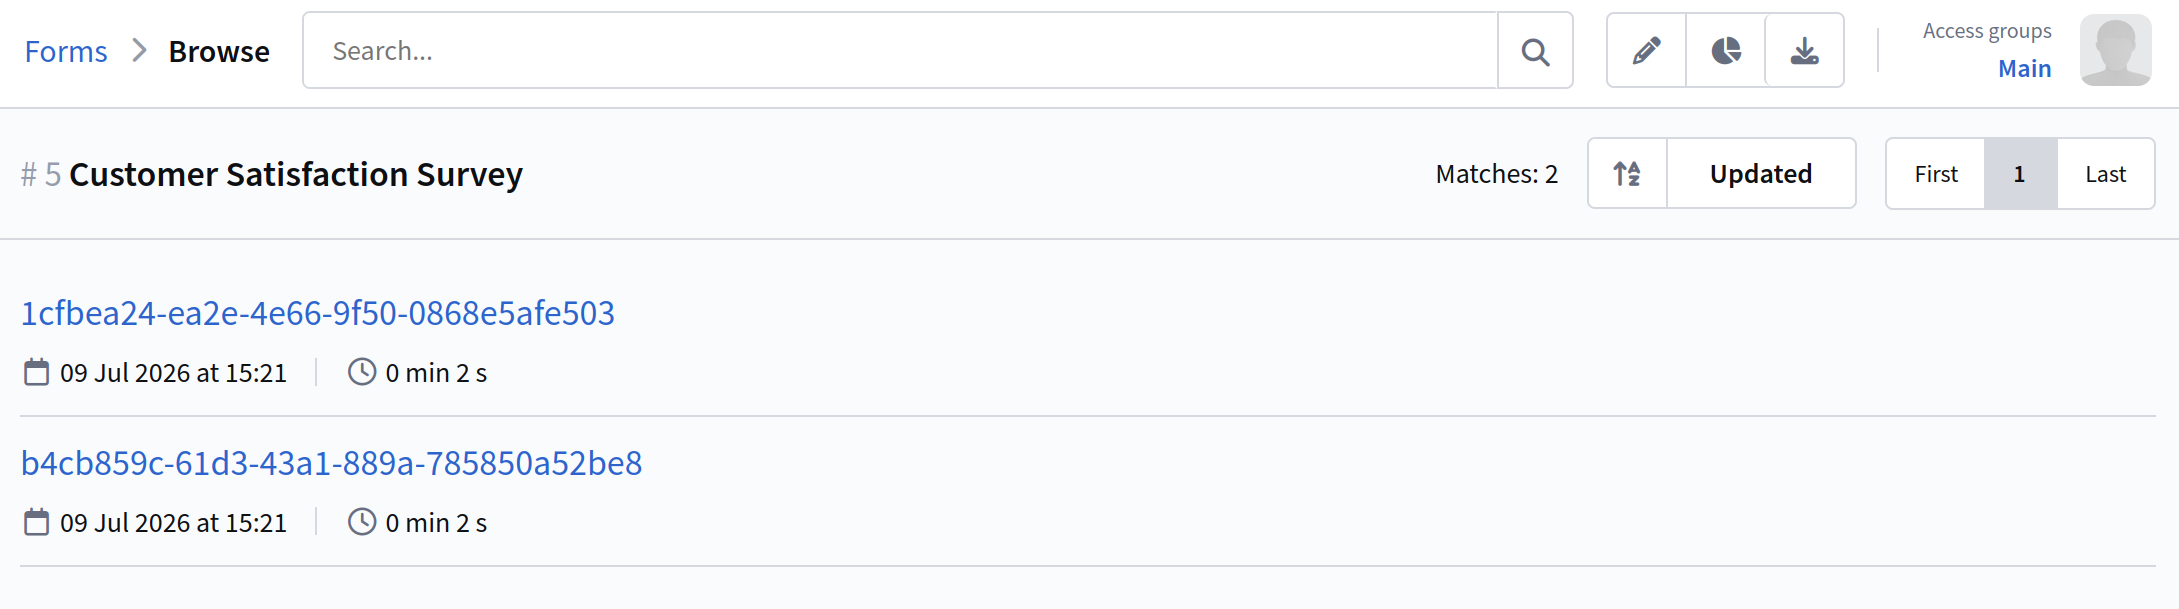
Open the form and go to the Collected data section. Here you will see a list of IDs of all completed forms. Click on an ID to get detailed information.
The following buttons are located in the upper right corner:![]() — go to the form editing window.
— go to the form editing window.![]() — open form insights.
— open form insights.![]() — export data on form completions for a certain period.
— export data on form completions for a certain period.
On the Completed form tab, you can find out exactly how the user filled out each field:
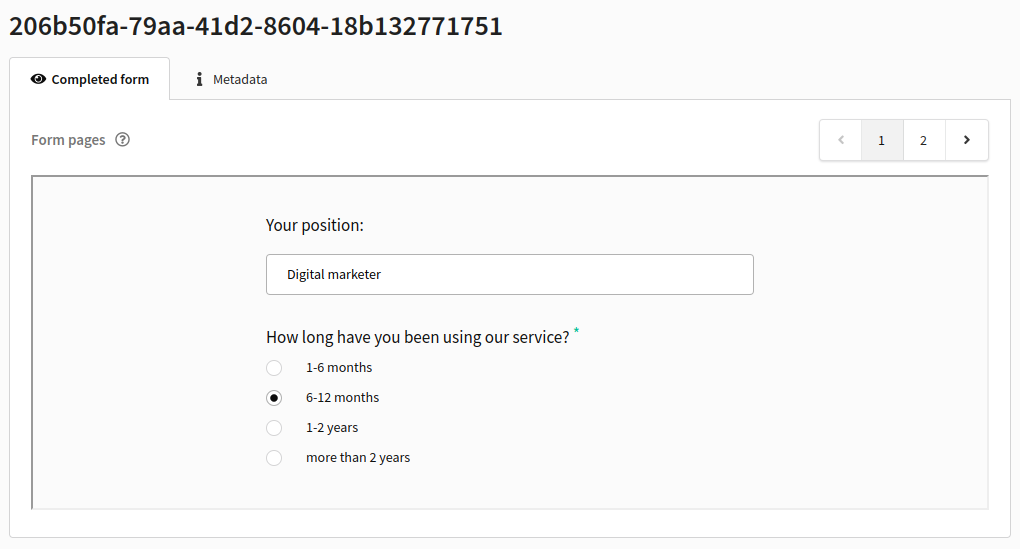
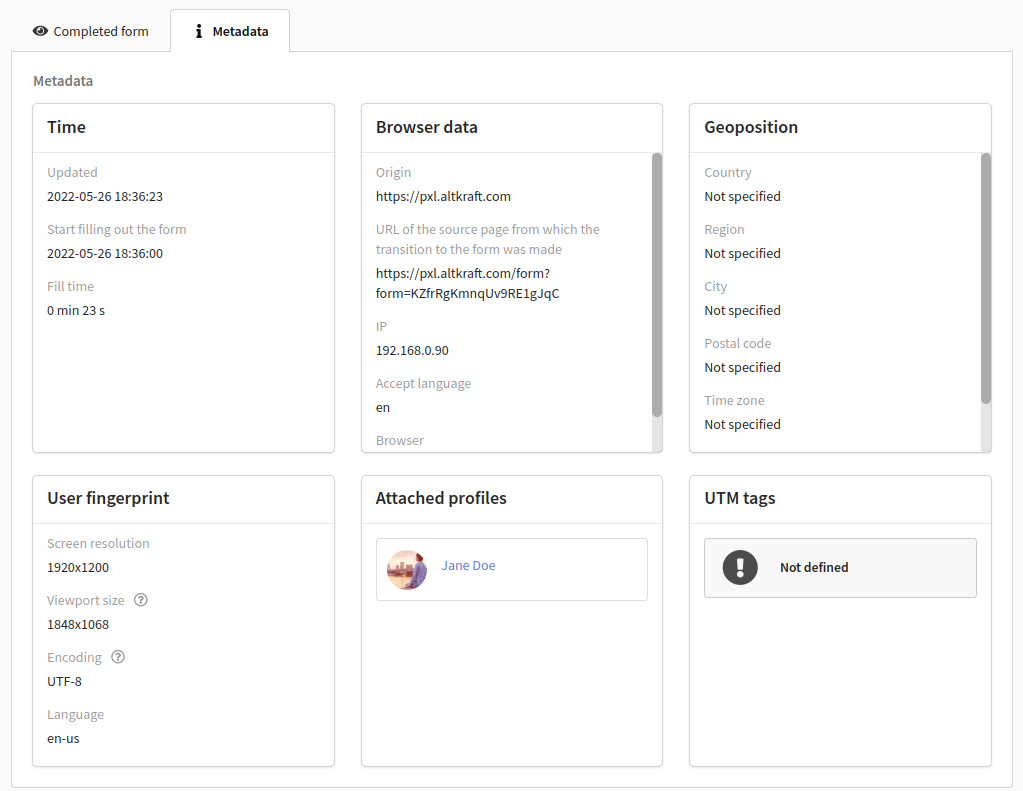
The Metadata tab displays detailed information about filling out the form: time, browser data, geolocation, user fingerprint, and UTM tags.
Form insights
Open the form and go to the "Insight section. On the top panel, open the calendar and select the period for which you want to receive data.
Analytics provides the following information:
- Views (how many times the form page was loaded).
- Fills (how many times the form was filled out and submitted).
- Average filling time .
These metrics are not unique. If the same user has viewed or completed the form multiple times, all views and submissions will be counted.
There are two tabs available in Form insights:
- Results analysis — statistics on a specific field in the form.
- Statistics of survey — a general summary of the form.
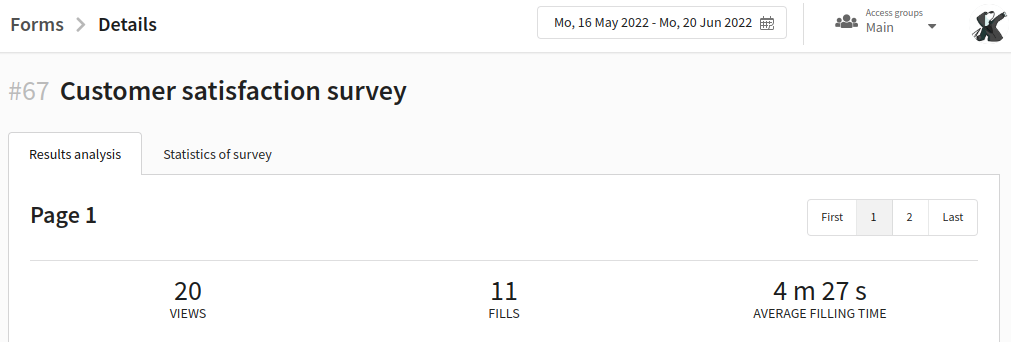
Results analysis
This tab displays statistics on the completion of a particular field in the form. To switch between pages of the form, use the buttons in the upper right corner.
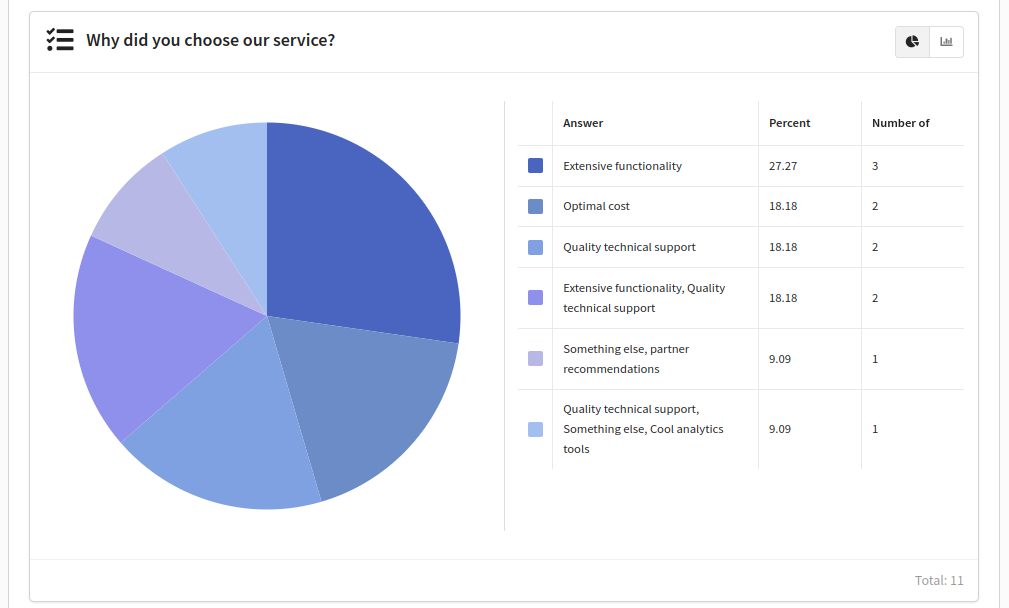
Data for each field is collected in a separate block. Here you can see the question and answers given by users. At the bottom of the block, it shows how many times the field was filled in total.
Most of the data are presented in percentage and quantitative terms. Additionally, it is possible to visualize them in the form of a bar - ![]() or pychart
or pychart ![]() .
.
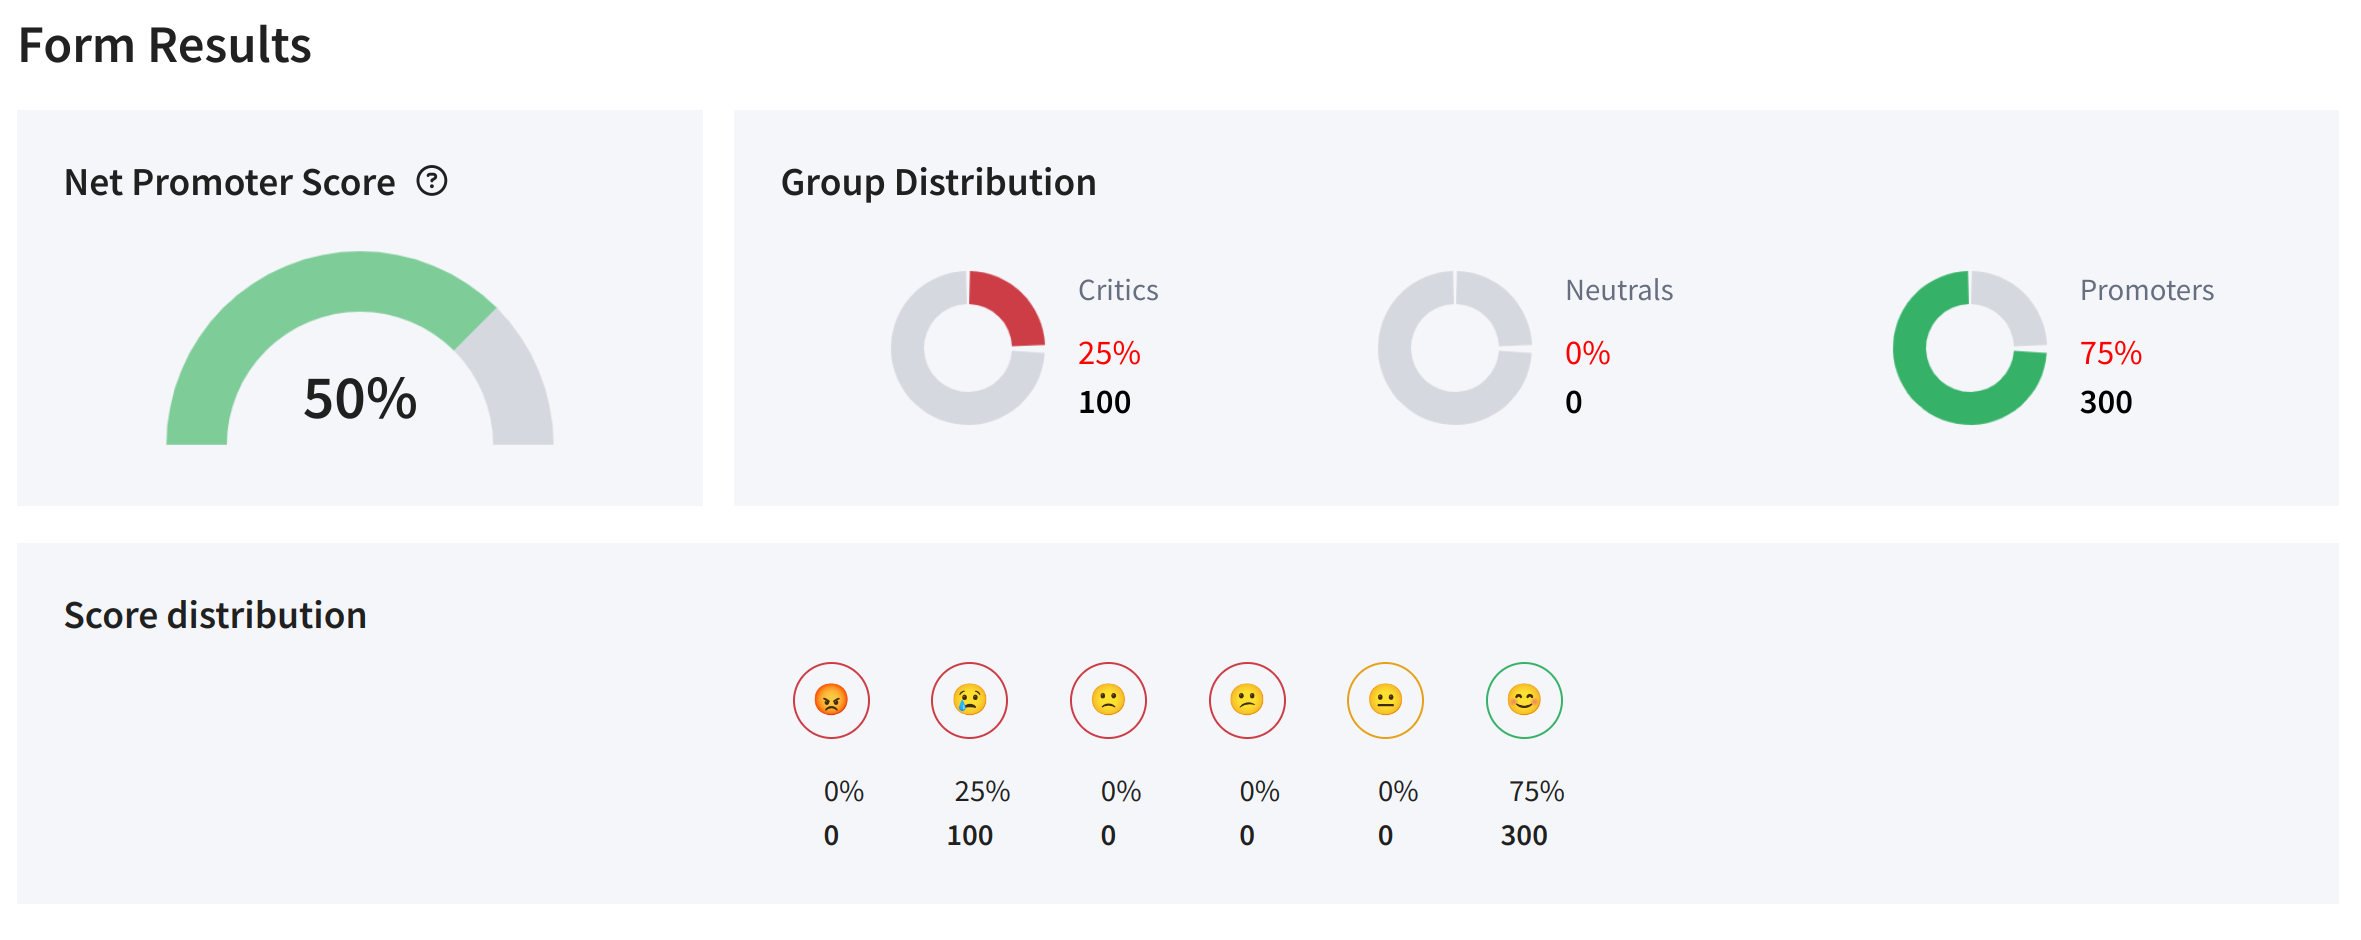
For forms containing NPS survey, the Net Promoter Score and the distribution of responses by group will be provided:
Statistics of survey
On this tab you can find the following information:
Page viewsViews will show how many times each page has been loaded. With this metric, you can find out on which page users most often abandon the form, and further optimize it. | 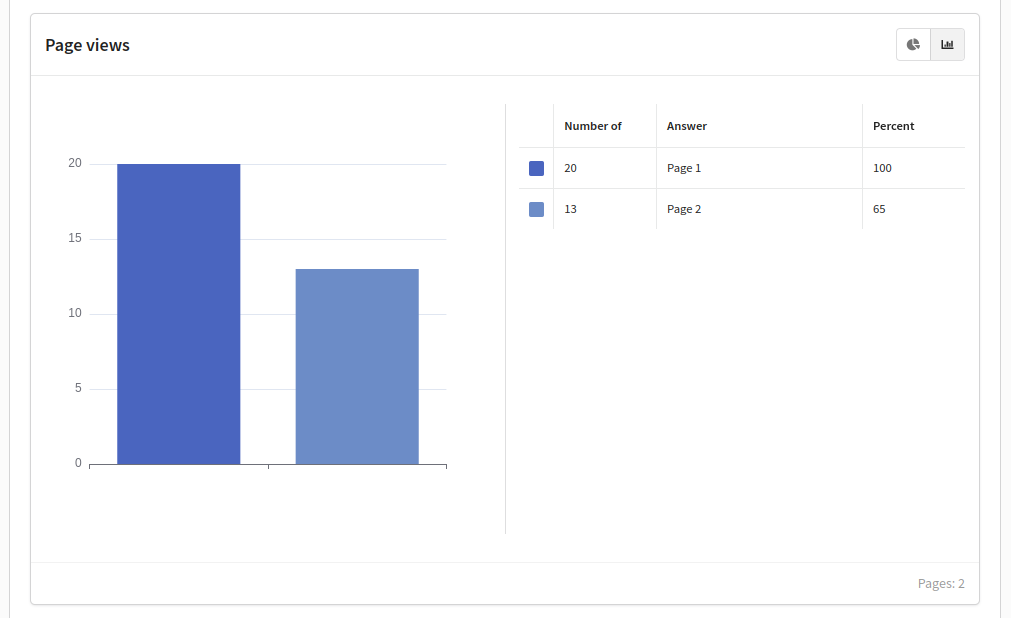 |
Reasons for refusal1. Abandoned fills — the user partially or completely fills out the form, but does not submit it. | 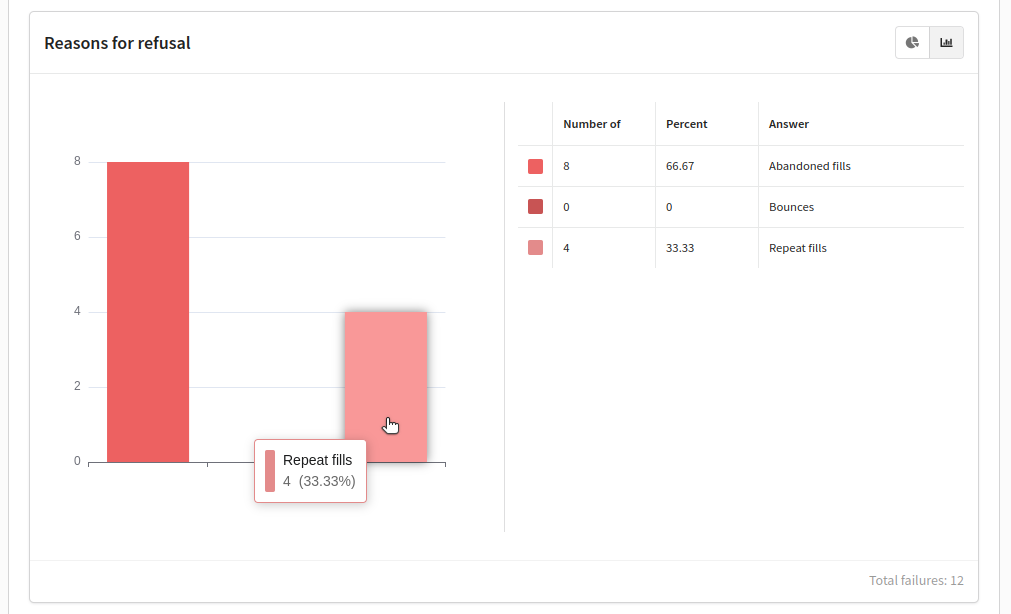 |
Analytical slices of the report
Below you can group respondents by additional parameters:
- referrer
- browser
- operation system
- language
- time zone
- UTMs
Form export
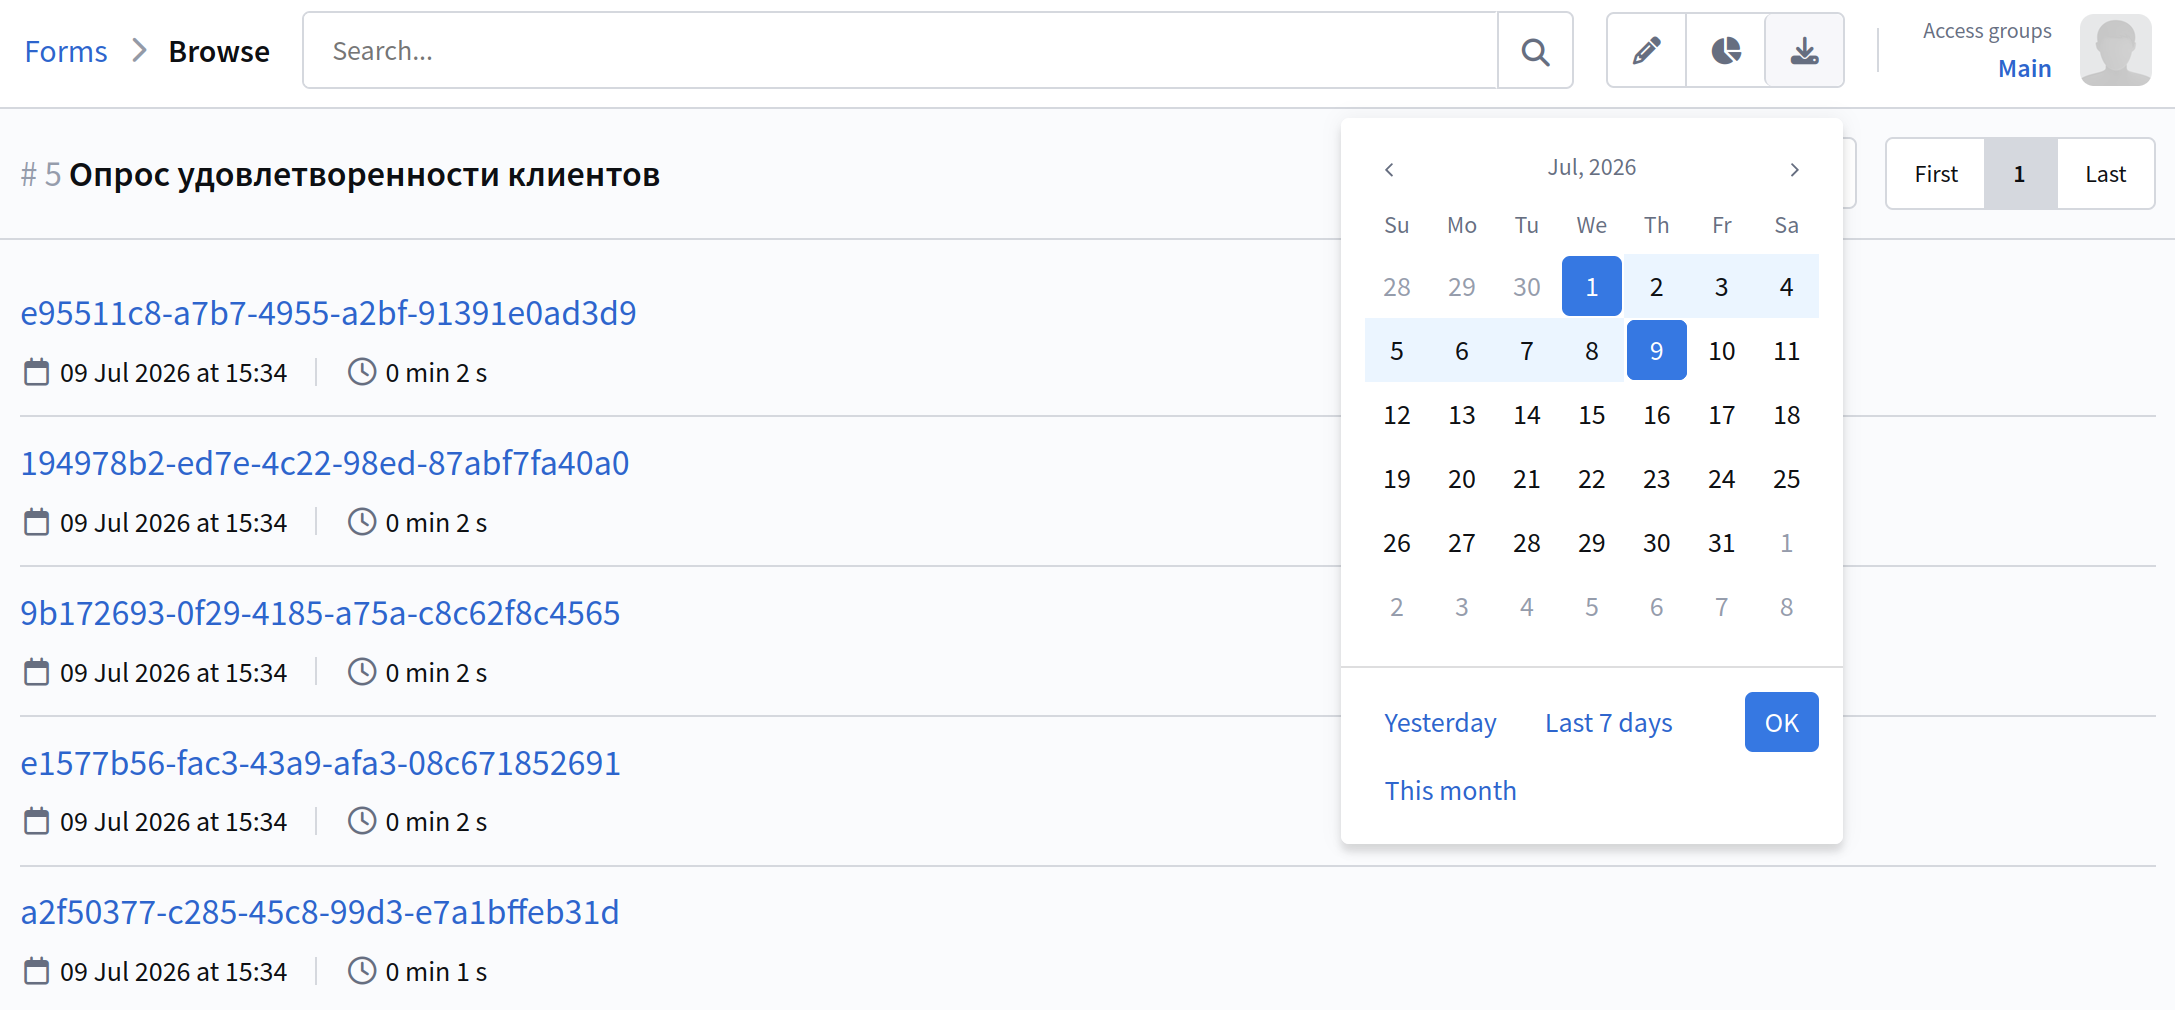
Choose a form. Go to the "Collected data" section. There is an export button ![]() at the top of the page. Click on it.
at the top of the page. Click on it.
In the calendar, specify for which period to export data. Click OK. Go to Tasks and download the file.