Scheduled product import
This article describes how to synchronize products and SKUs in Market with your product feed data. This feature allows you to avoid having to download a new yml file every time your feed is updated.
After setting up the import, new information about products will be automatically uploaded to the Market according to the specified schedule. Information will be loaded from the yml feed with products, to which you will need to provide a link.
The YML (Yandex Market Language) format is a data format for product platforms developed by Yandex. Detailed information about the structure of the yml file, its parameters and properties, as well as examples of ready-made yml feeds with products, can be found here.
Step 1. Create a new import
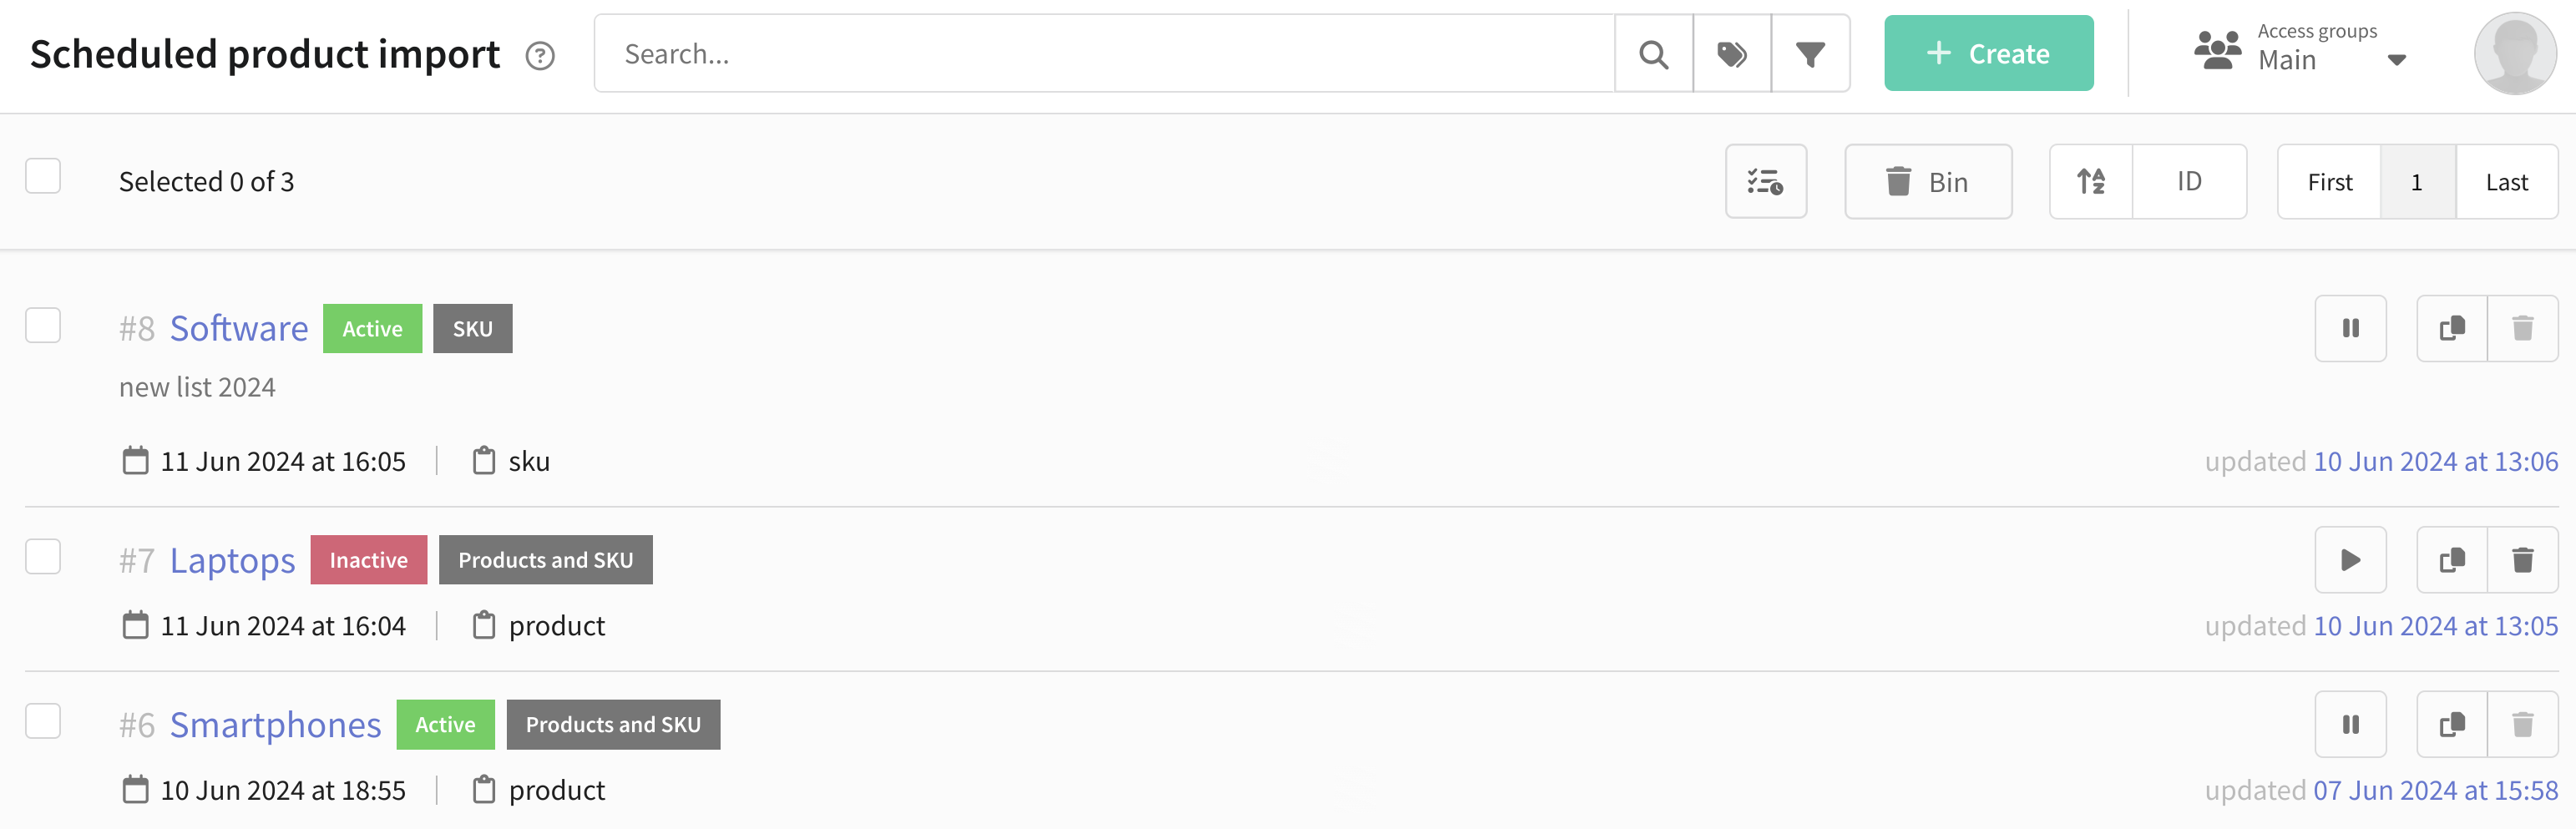
Go to the Market section, select Scheduled product import. A list of existing imports will appear in front of you with brief information about them. Here you can also start, pause, clone or delete an import.
Click the Create button in the upper right corner:
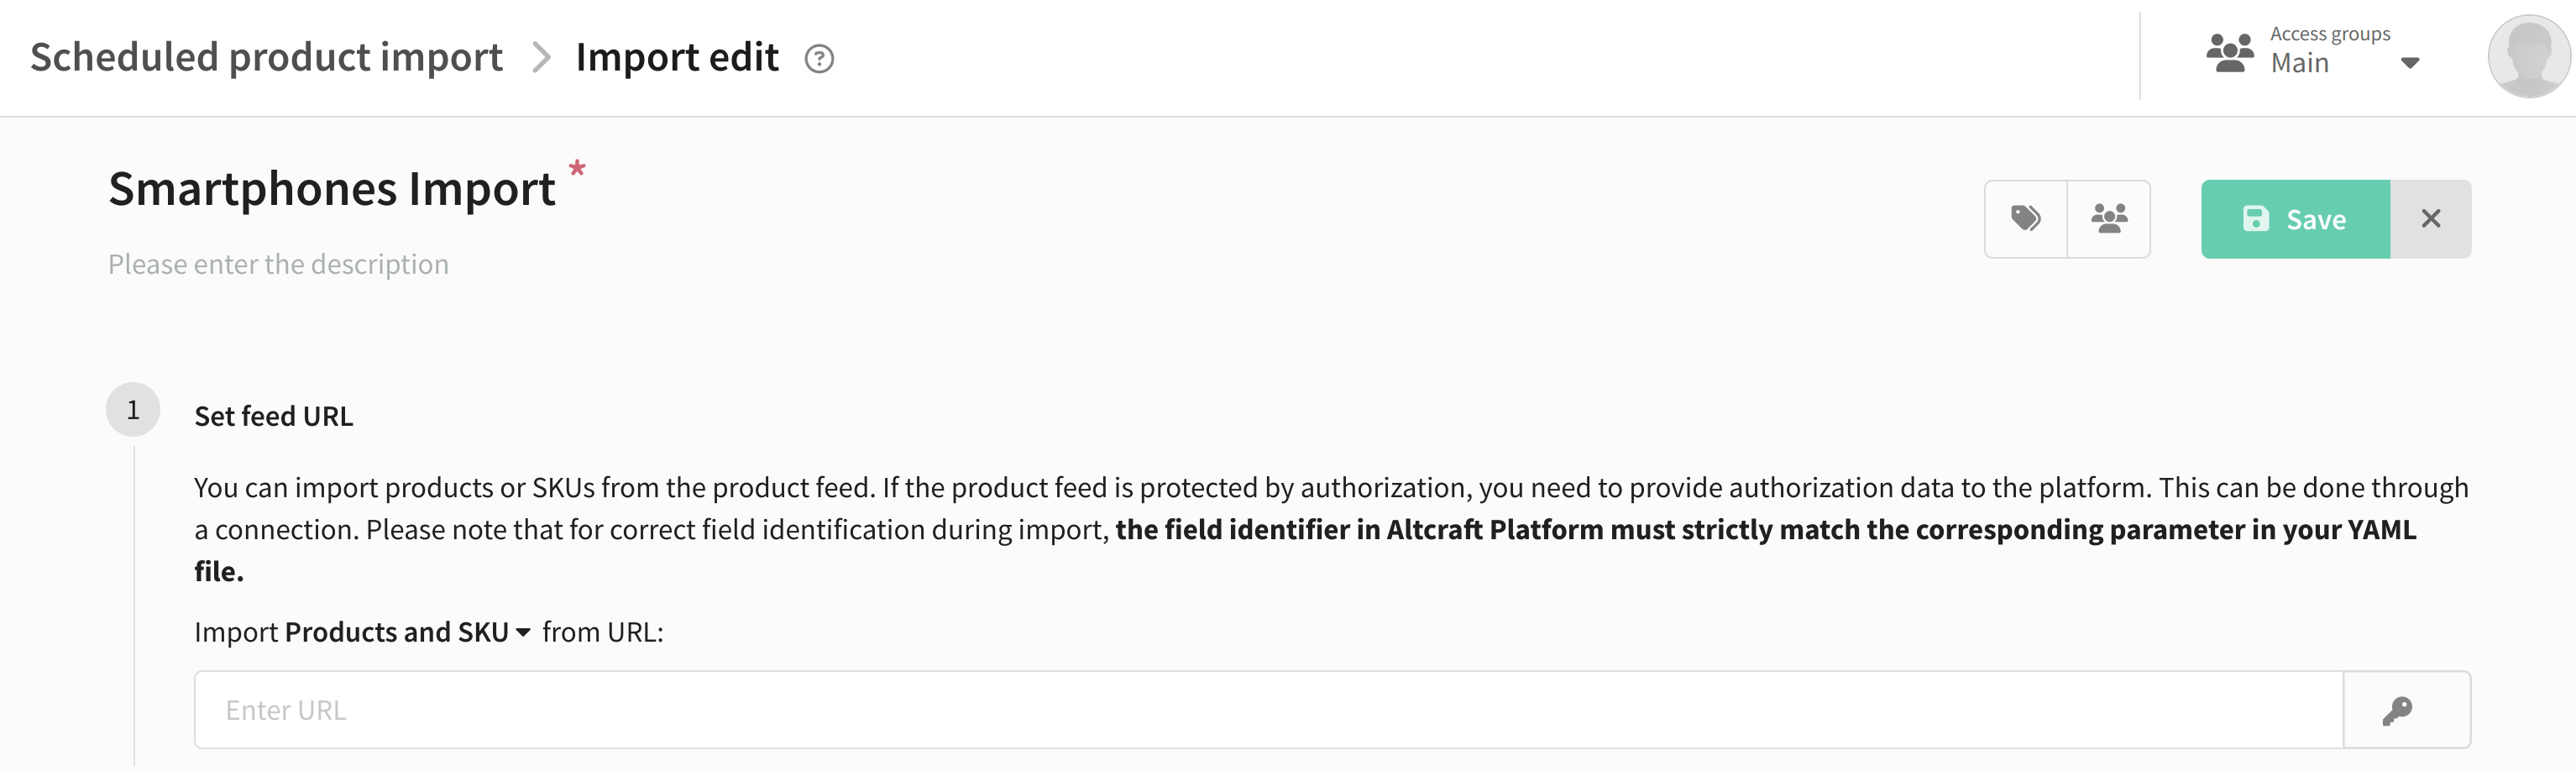
Step 2. Specify the feed URL
Insert the URL of your feed into the corresponding field. In the item Import products and SKU from URL you can choose what type of objects will be loaded from the feed - products and their SKUs or only SKUs. In the first case the platform will first import all products and then add all relevant SKUs, in the second case - new products will be completely ignored and SKUs will be loaded for existing products:
If your product feed has fields that are not provided by default in the Market platform, make sure you have created the appropriate additional fields in Market Settings, otherwise the import will fail.
Connection selection
If your product feed is protected by authorization, you need to add connection to the import. You can do this by clicking on the button with the key icon:

A connection selection window will appear in front of you. There are three types of authorization connections on the Altcraft platform:
- OAuth2 is an authorization protocol that allows you to grant one service (application) the rights to access user resources on another service. The user does not need to trust the application with a login and password.
- Basic Authentication - HTTP authentication protocol that uses login and password to gain access to protected information.
- Token Authentication - a protocol that uses a special token that is provided to the user after successful authentication to access protected resources.
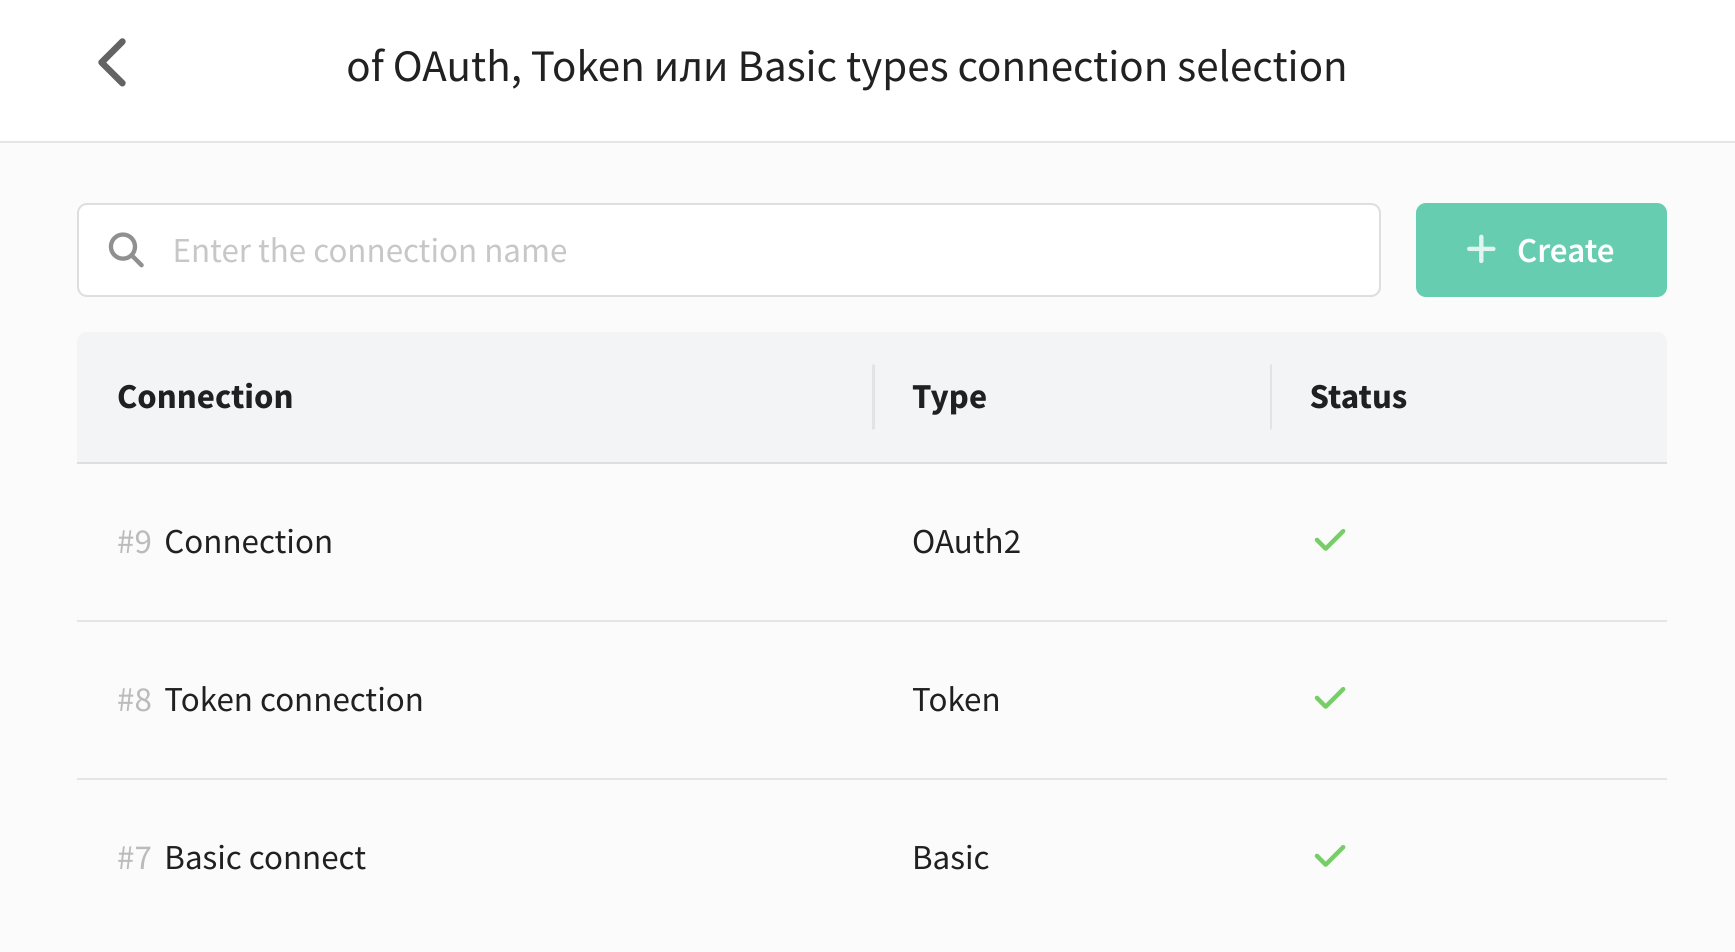
If there are no connections, you can create a new one directly in this window. To do this, click + Create and select the type of connection: OAuth2, Basic Authentication or Token Authentication. Fill in the required fields and click **Save **.
More detailed information about creating and configuring a connection is available in the "Connections" section.
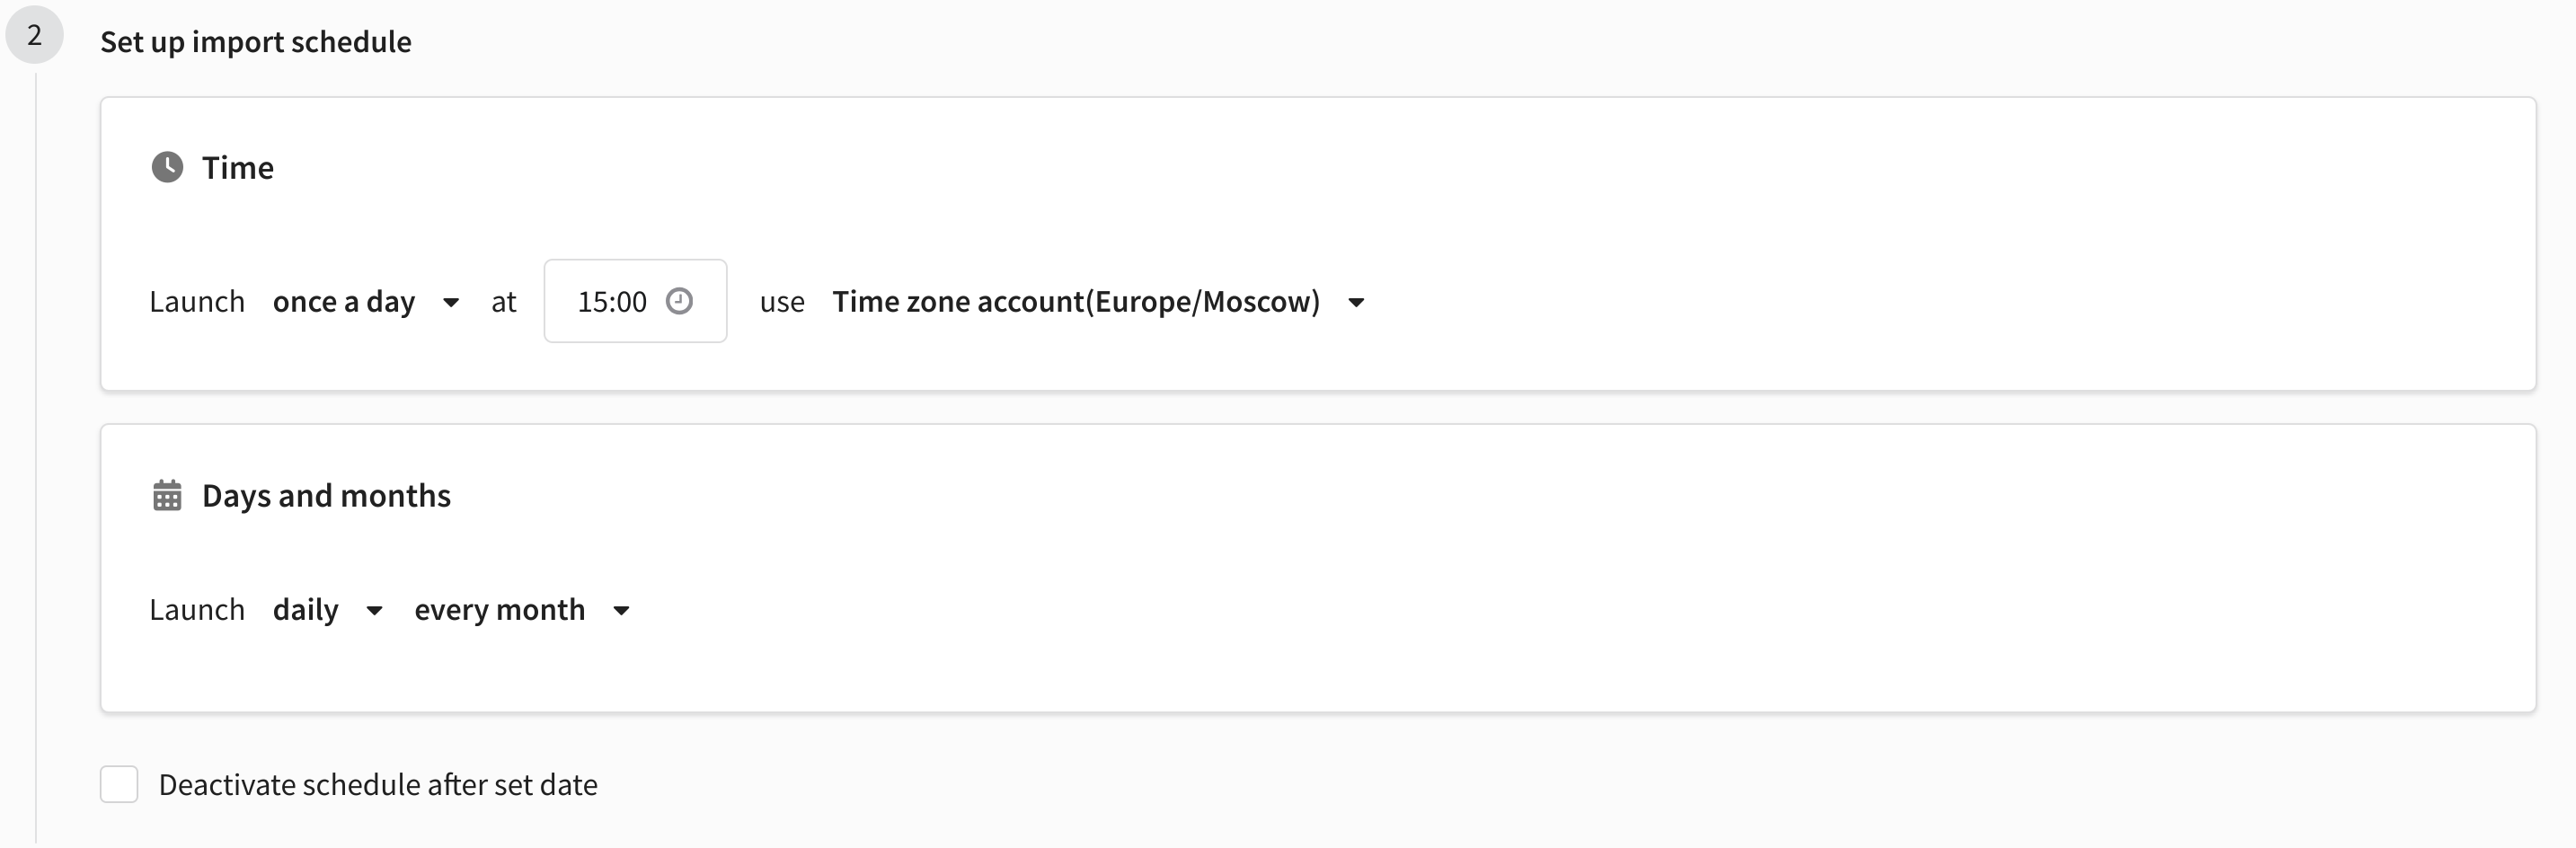
Step 3. Set up the import schedule
From the drop-down menu, select a schedule plan and customize depending on how often you want the product list to be updated. For each schedule plan, you can set specific time zone. You can also specify the import deactivation date:
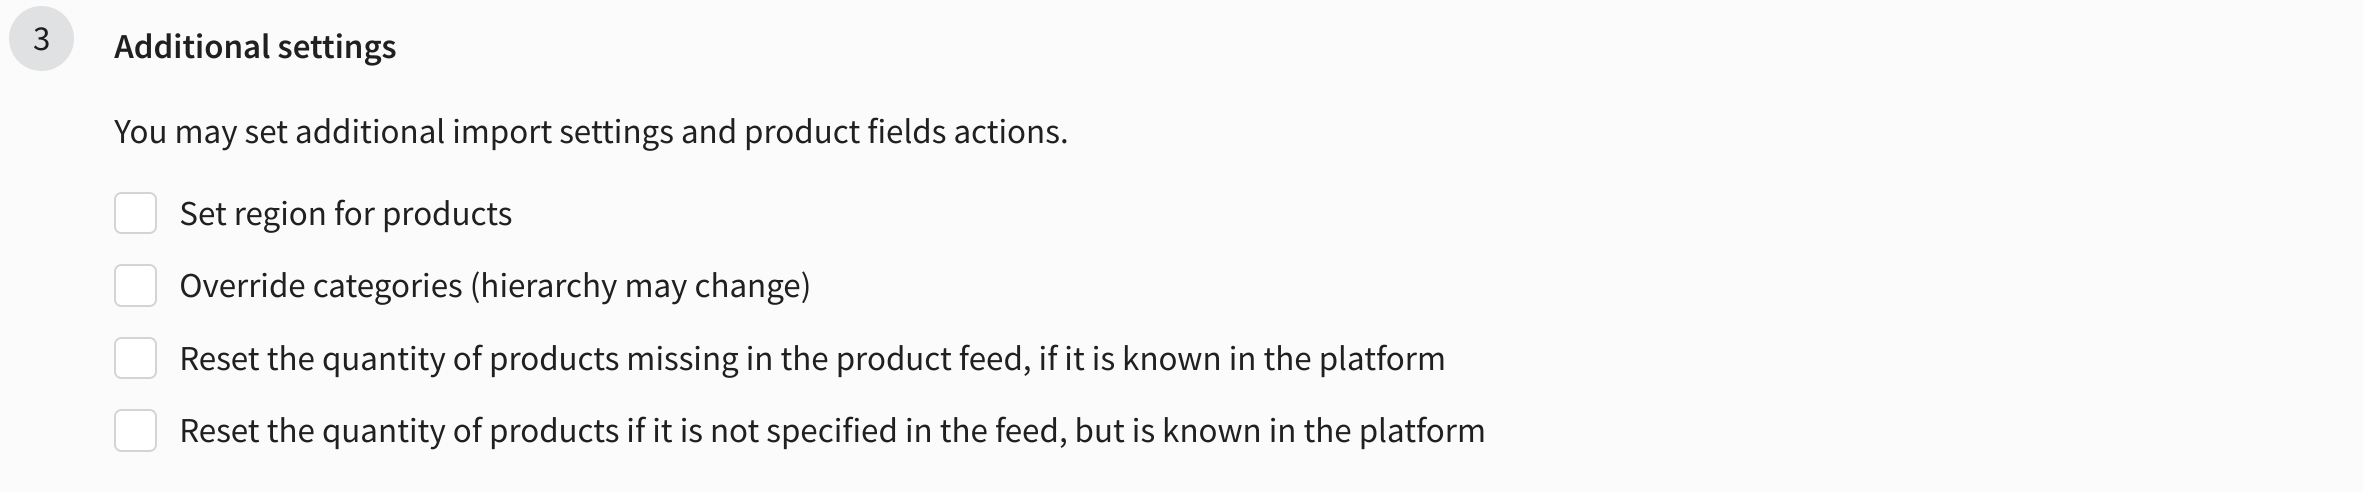
Step 4. Specify additional settings
After setting the basic parameters, you can specify the necessary additional options:
- Specify region for products - sets the region for imported products. The region must be created on the platform in advance.
- Override categories (hierarchy may change) - product categories will be overwritten in accordance with the content of the feed.
- Reset the quantity of products missing in the product feed, if it is known in the platform - if any product is not specified in the feed, then its quantity on the platform will become 0.
- Reset the quantity of products if it is not specified in the feed, but is known in the platform - if the quantity of a product is not indicated in the feed, then its quantity on the platform will become 0.
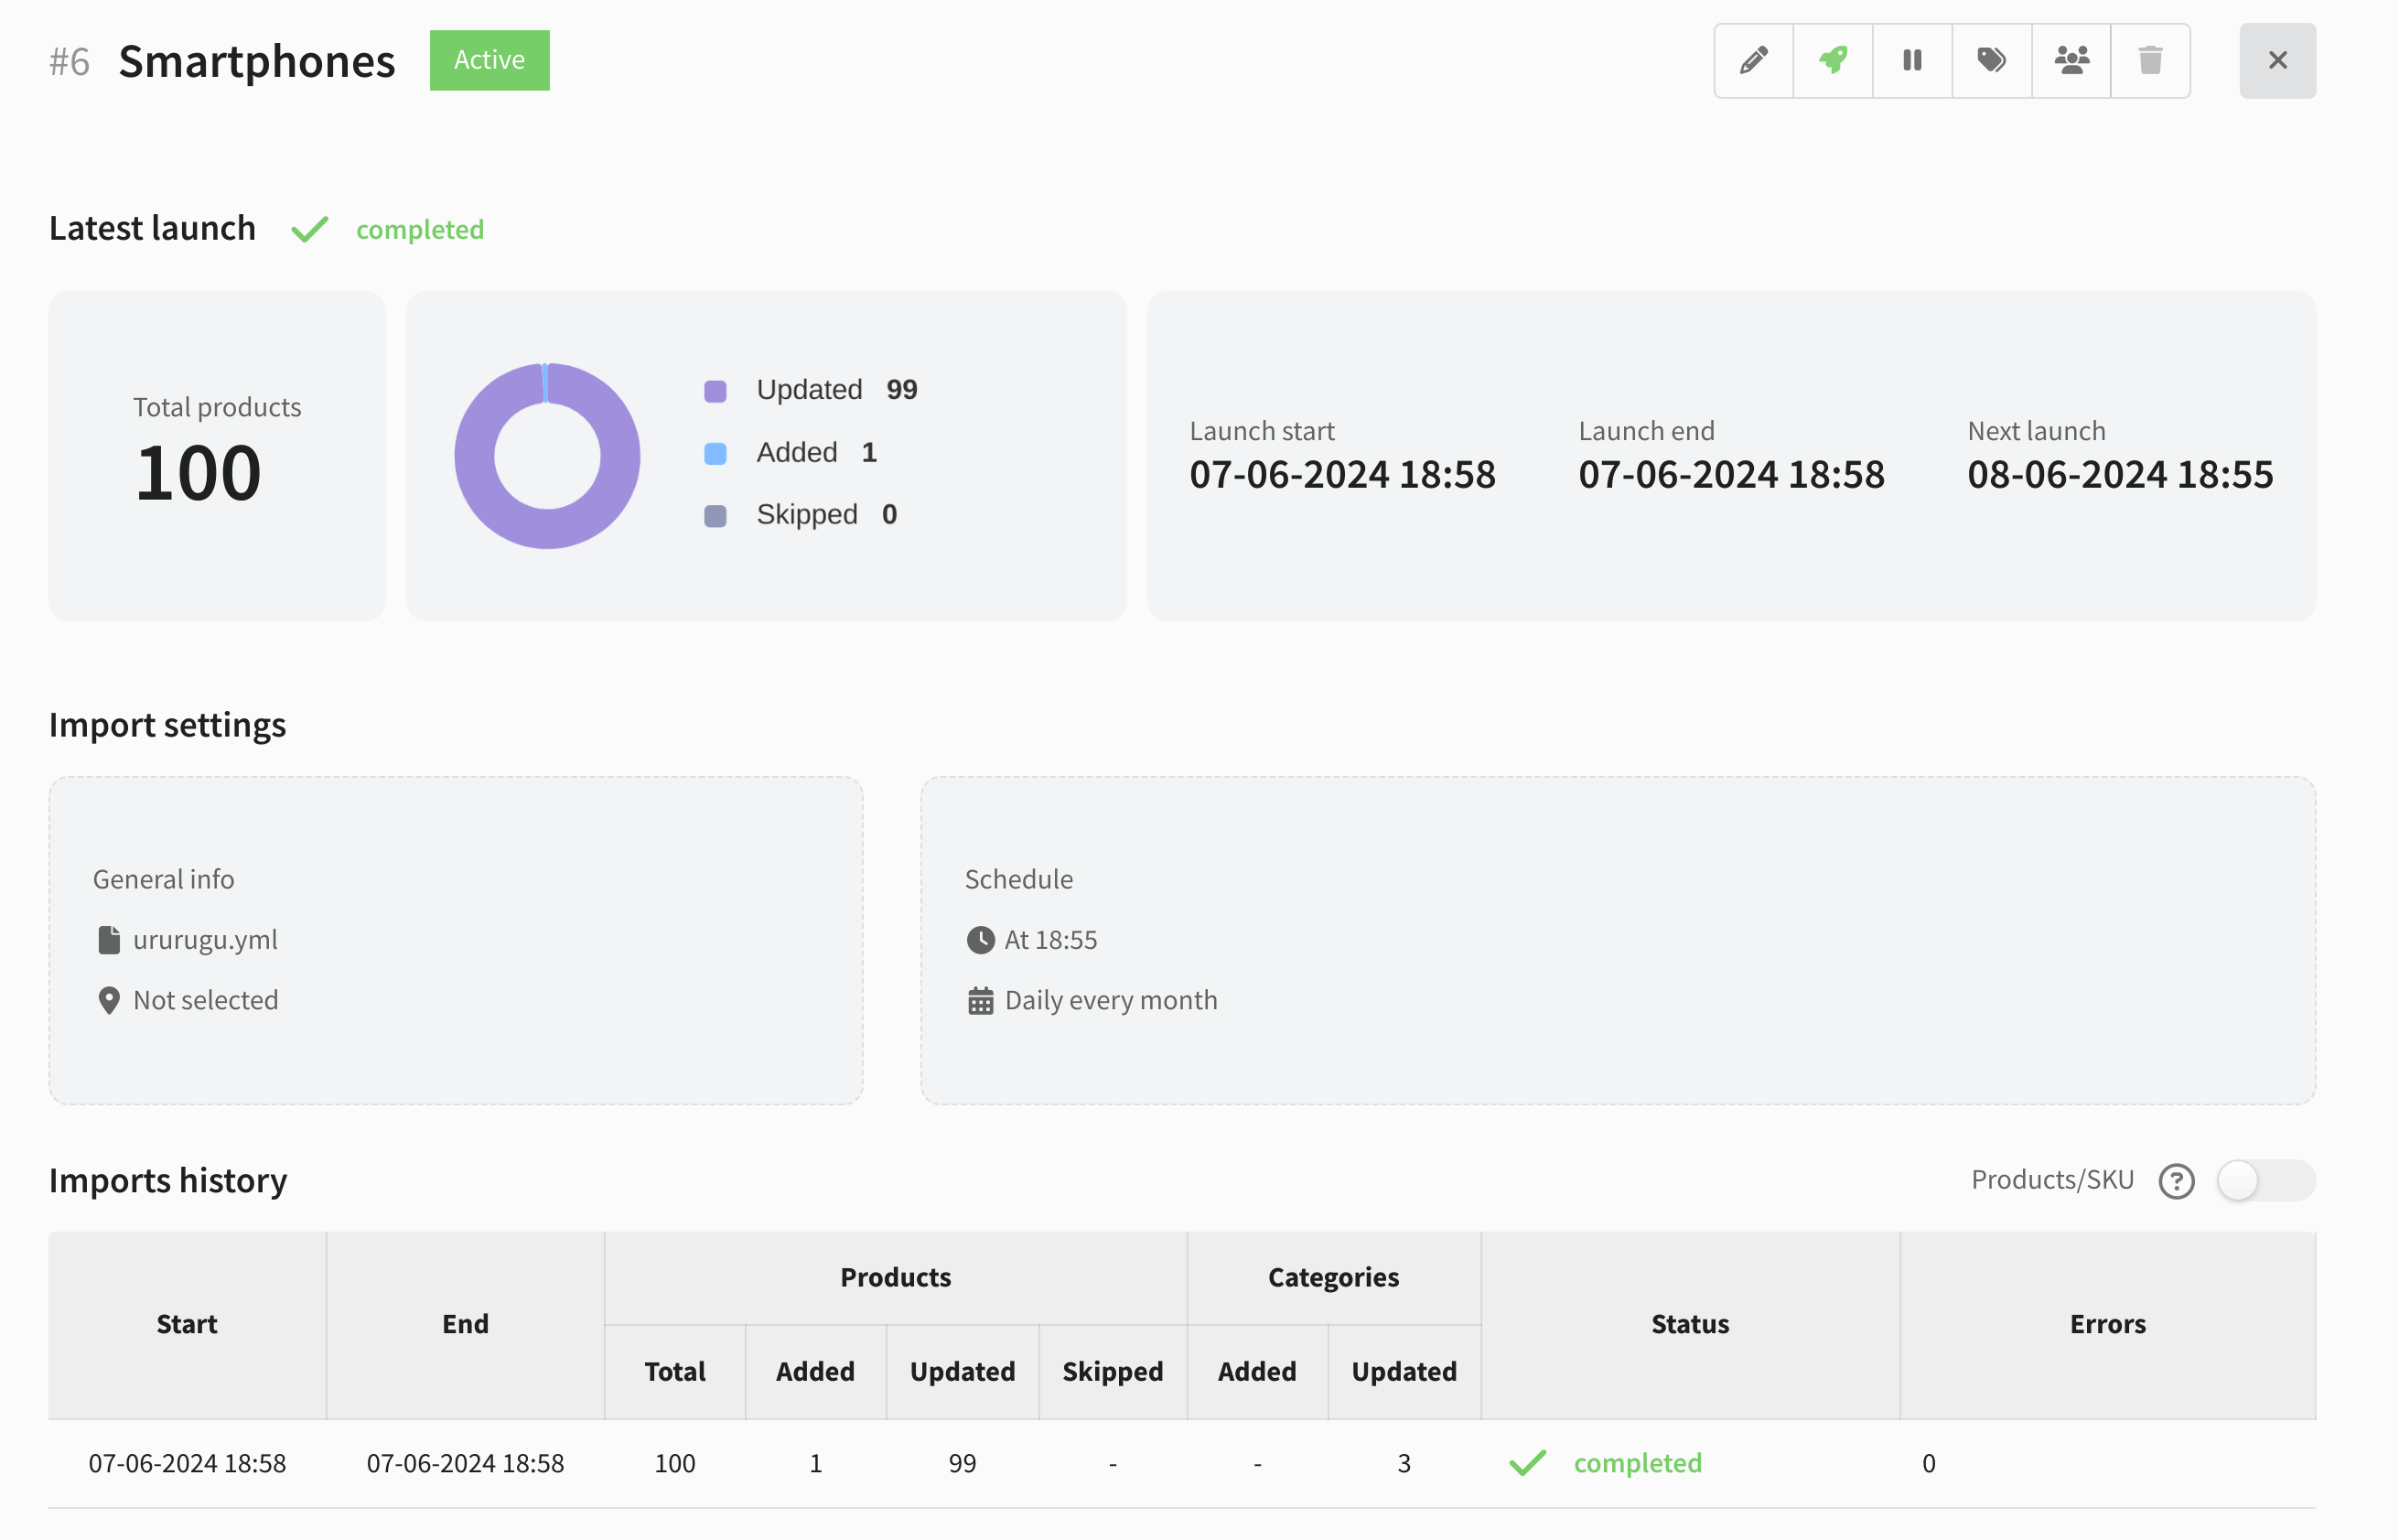
Step. 5. Saving and starting import
To save the created import, click the Save button. You will see an overview of your import.

The following functions are available in the context menu:
![]() — edit import
— edit import
![]() — launch and activate import right now
— launch and activate import right now
![]() — activate/deactivate import
— activate/deactivate import
![]() — assign tag
— assign tag
![]() — assign access groups fot his import
— assign access groups fot his import
![]() — delete import
— delete import
After the first launch, the imports history and information about added products will appear in the table below. There you can also see the status and number of errors that occurred during the import. To switch the type of data displayed (product data or SKU data), activate the Products/SKU switch: