Viber*™ integration
Description
Use Viber*™ integration to automate communication with subscribers in the messaging app. By setting up this channel, you will be able to:
- send personalized messages to subscribers in the app;
- segment the audience based on user behavior;
- use this channel to set up scenarios;
- collect statistics and analyze the received data.
The integration can be implemented through the providers Devino Telecom, SMS Traffic, MTS OmniChannel or Rapporto. Before setting up the integration, you need to:
1. Register an account with any provider. 2. Create a connection in order to link your provider account with Altcraft Platform.
- Instructions for Devino Telecom
- Instructions for SMS Traffic
- Instructions for MTS OmniChannel
- Instructions for Rapporto
The cost of messages is determined by providers. Altcraft does not charge additional fees for sending messages to this messenger*™.
Creating an integration
Go to the Integrations section and select the required type of integration.
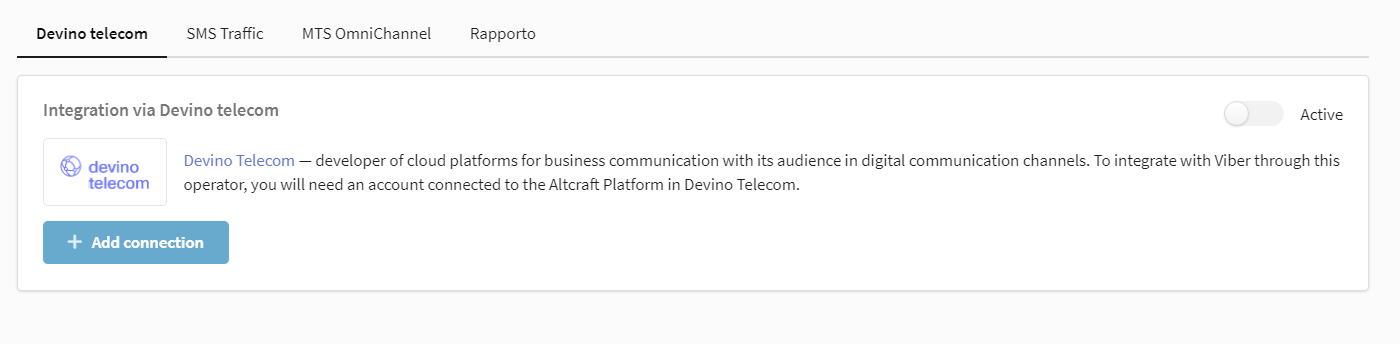
Devino
Activate the integration using the switch in the upper right corner. Click on "Add Connection":
A window will appear on the right where you need to select an available connection:

No connections available
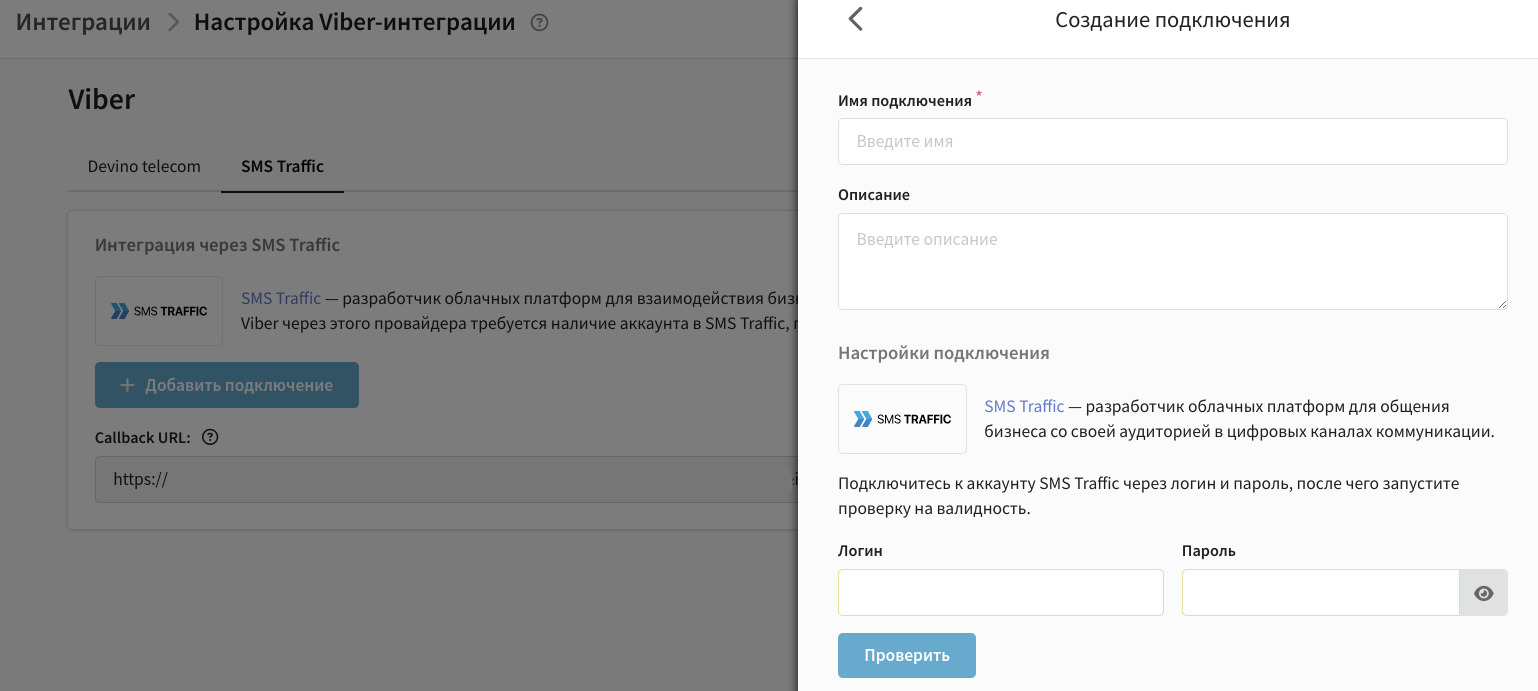
If you have not yet set up a connection to your provider, you can create one directly in this window.
- Press Create.
- Enter the name and a description of the connection.
- Enter the authorization data (two authorization options are available for Devino).
- Press Check to run a validation check on the entered data.
- If the entered data has been verified, click the ** "Create"** button in the lower right corner.
The documentation portal has published detailed instructions for creating a connection via Devino Telecom.

Information about the added connection will be displayed in the integration. Make sure that the connection status is "active". Otherwise, check the status of your account in the provider's personal account. Keep in mind that the account may be blocked if the subscription fee is not paid.
If necessary, you can add multiple accounts. To remove an account from integration, click ![]() .
.
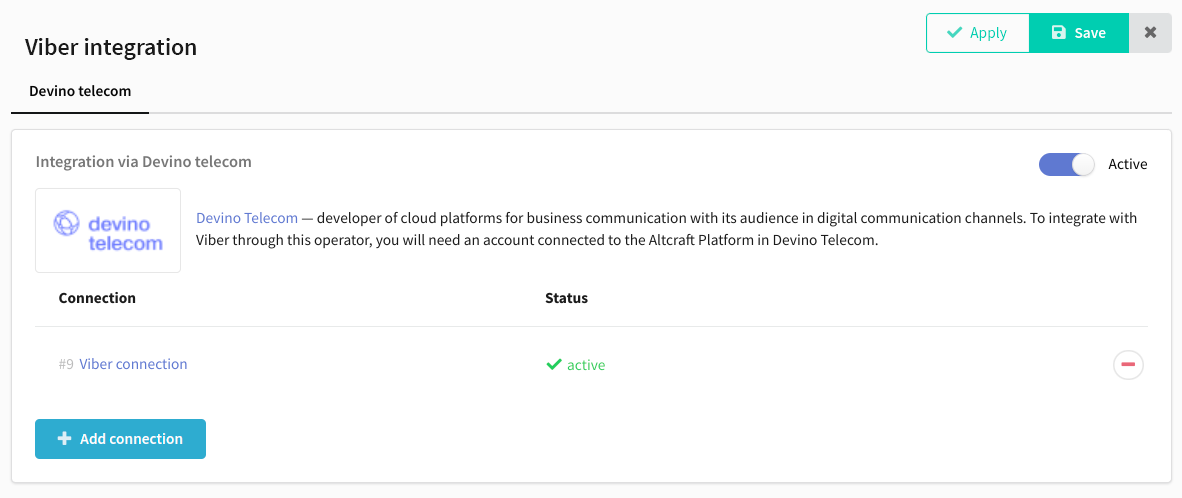
Save the integration using the buttons in the upper right corner.
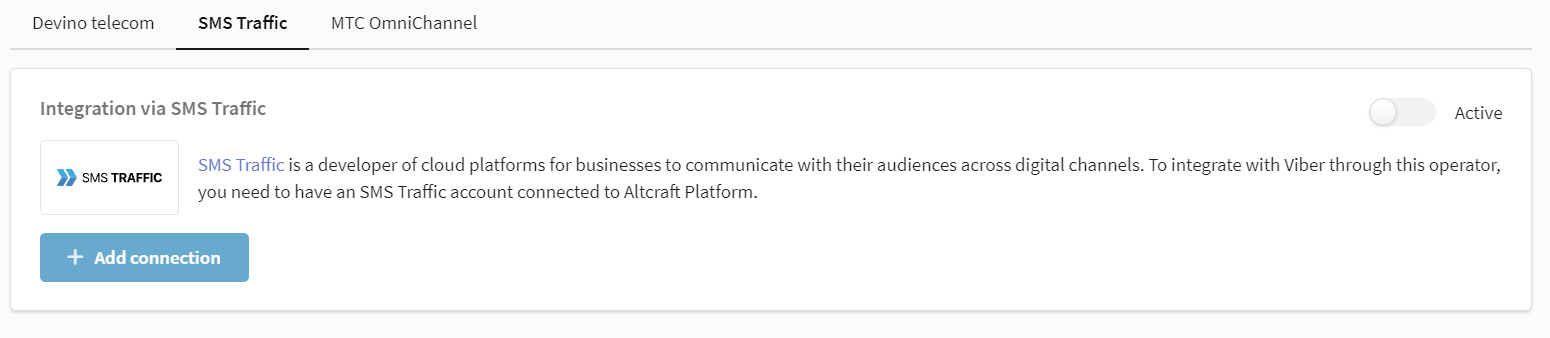
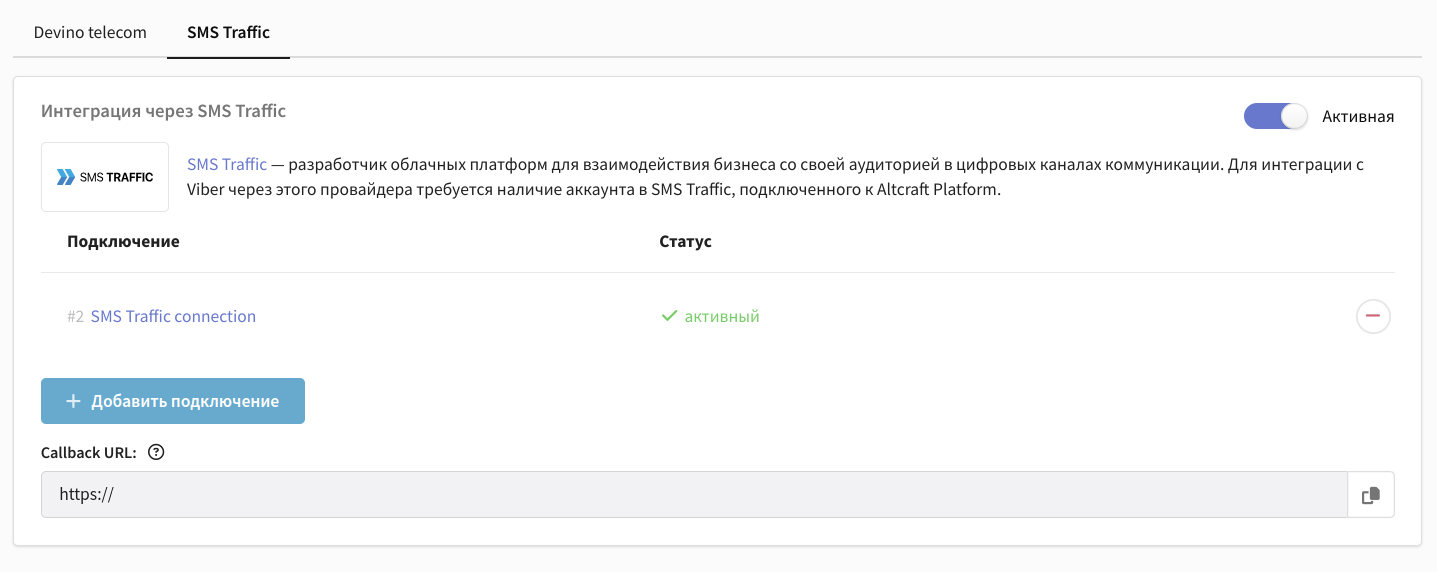
SMSTraffic
Activate the integration using the switch in the upper right corner. Click on "Add Connection":
A window will appear on the right where you need to select an available connection:
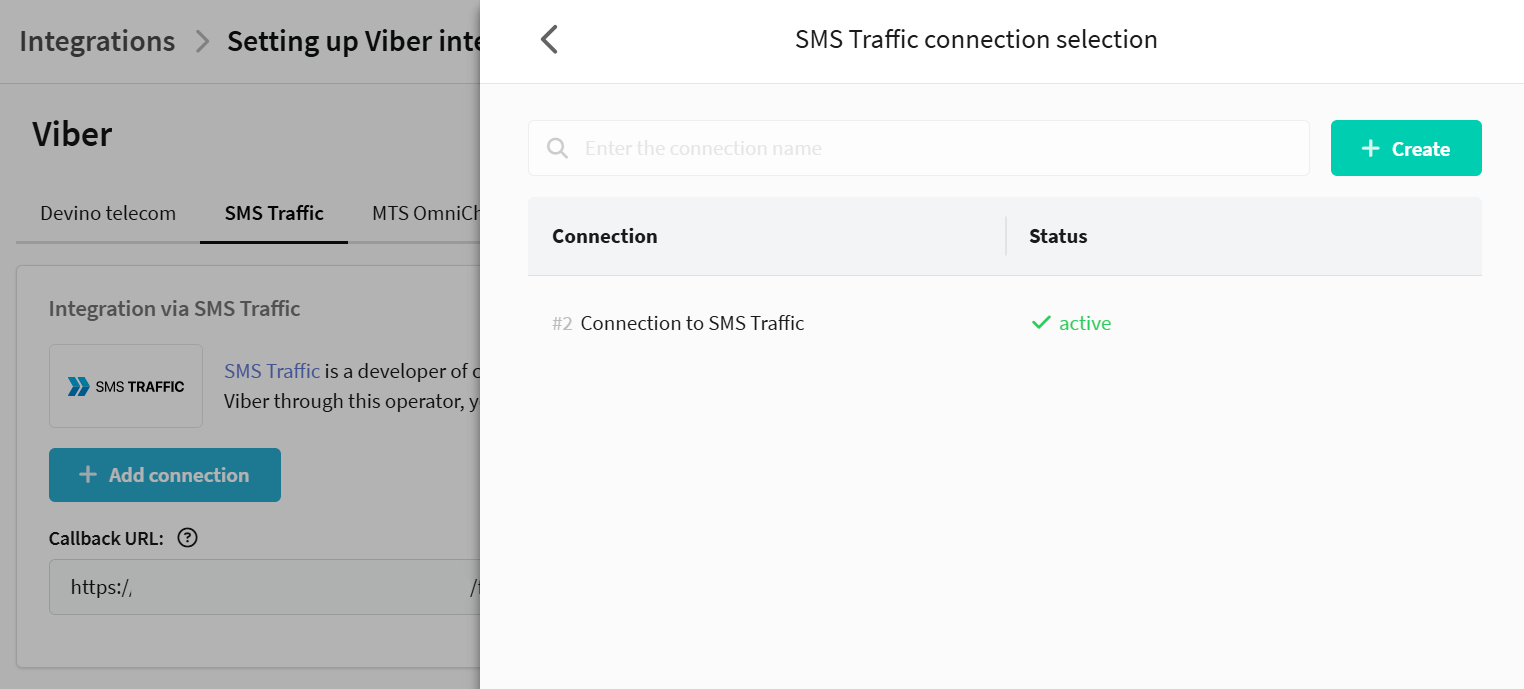
No connections available
If you have not yet set up a connection to your provider, you can create one directly in this window.
- Press Create.
- Enter the name and a description of the connection.
- Enter the authorization data.
- Press Check to run a validation check on the entered data.
- If the entered data has been verified, click the ** "Create"** button in the lower right corner.
The documentation portal has published detailed instructions for creating a connection via SMSTraffic.
For the integration to work correctly, you also need to send to technical support your Callback URL specified in the integration.
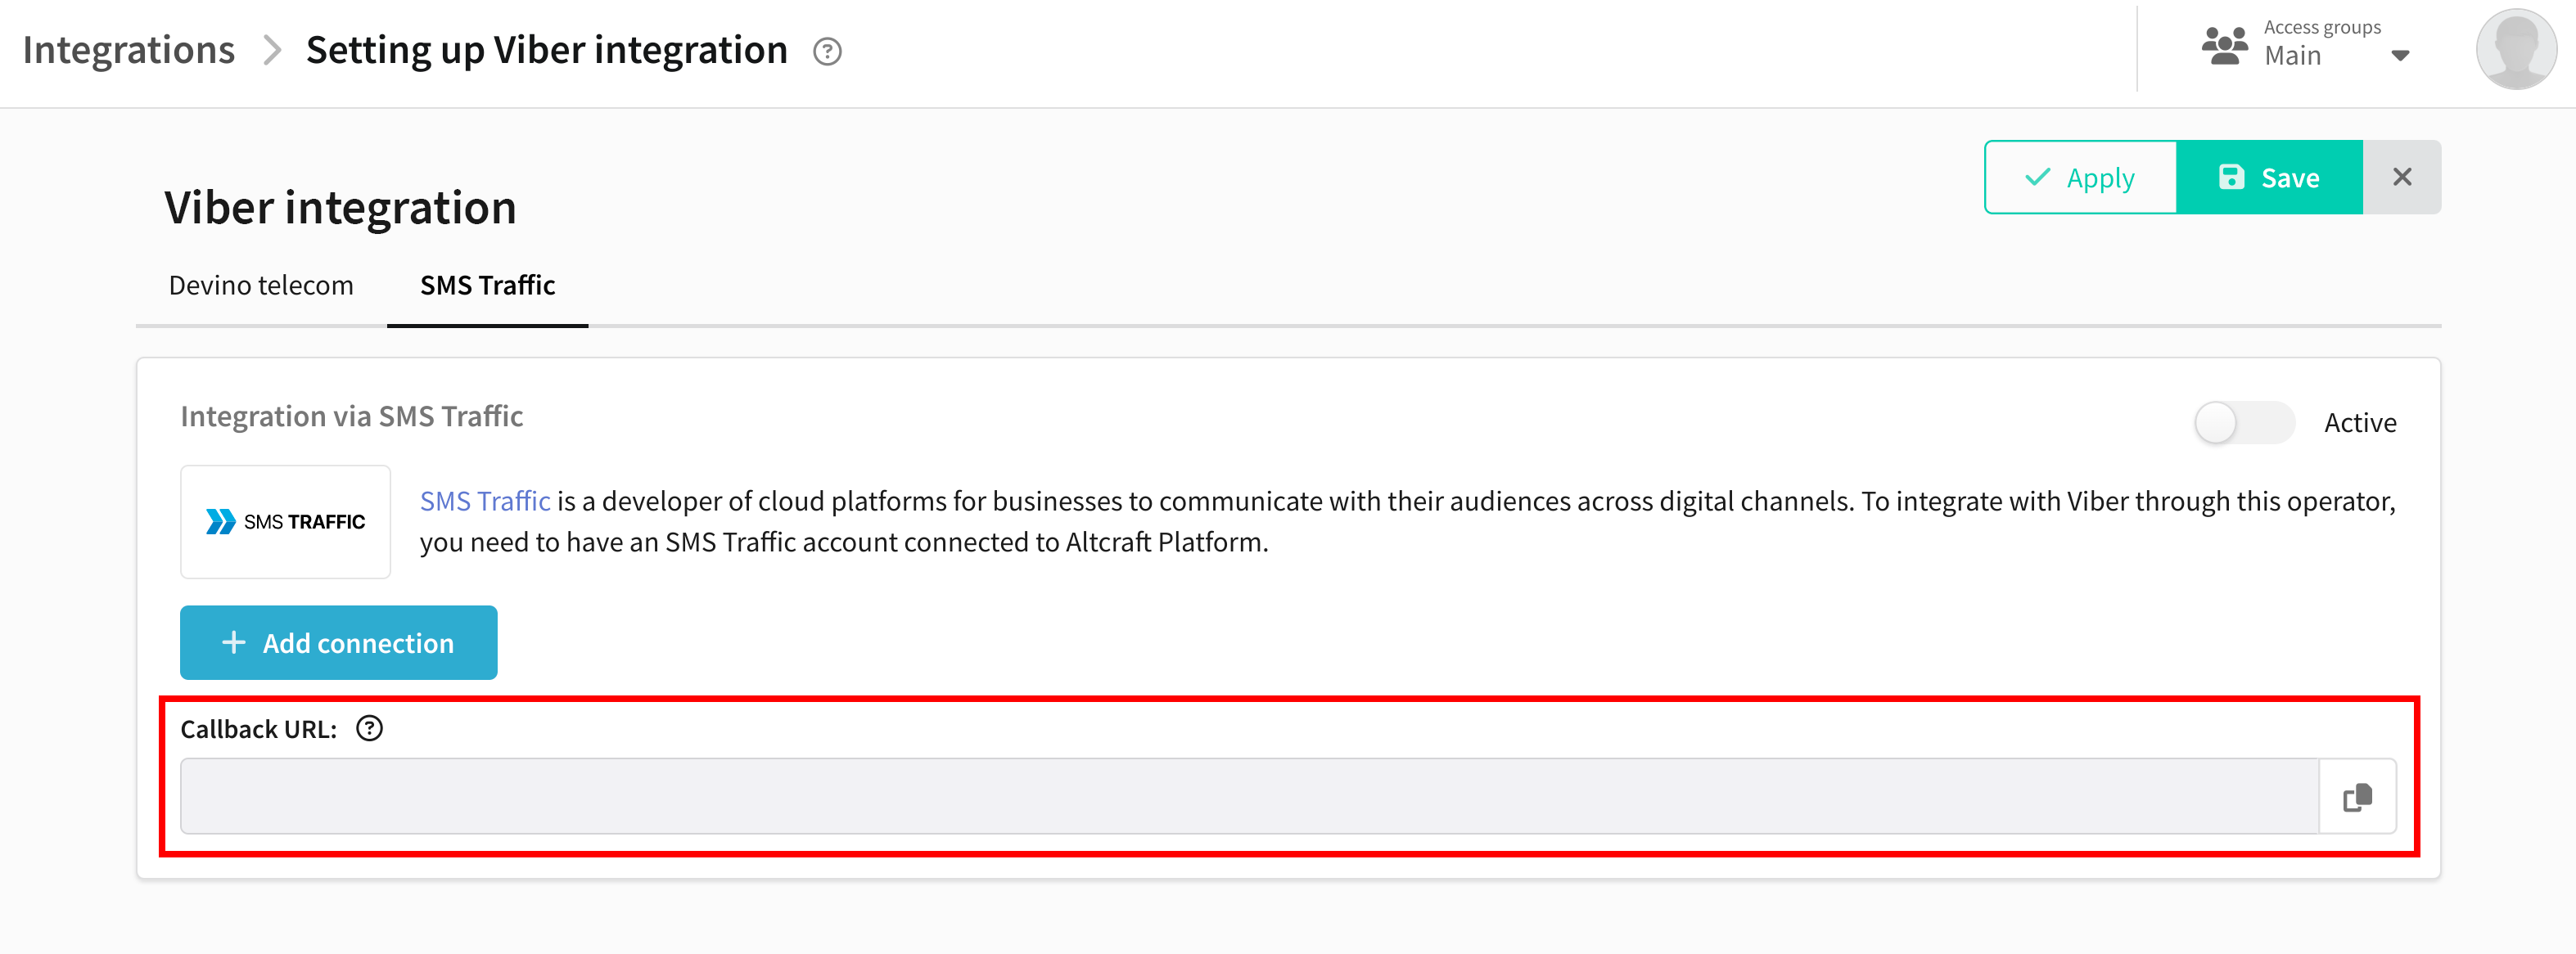
Information about the added connection will be displayed in the integration. Make sure that the connection status is "active". Otherwise, check the status of your account in the provider's personal account. Keep in mind that the account may be blocked if the subscription fee is not paid.
If necessary, you can add multiple accounts. To remove an account from integration, click ![]() .
.
Save the integration using the buttons in the upper right corner.
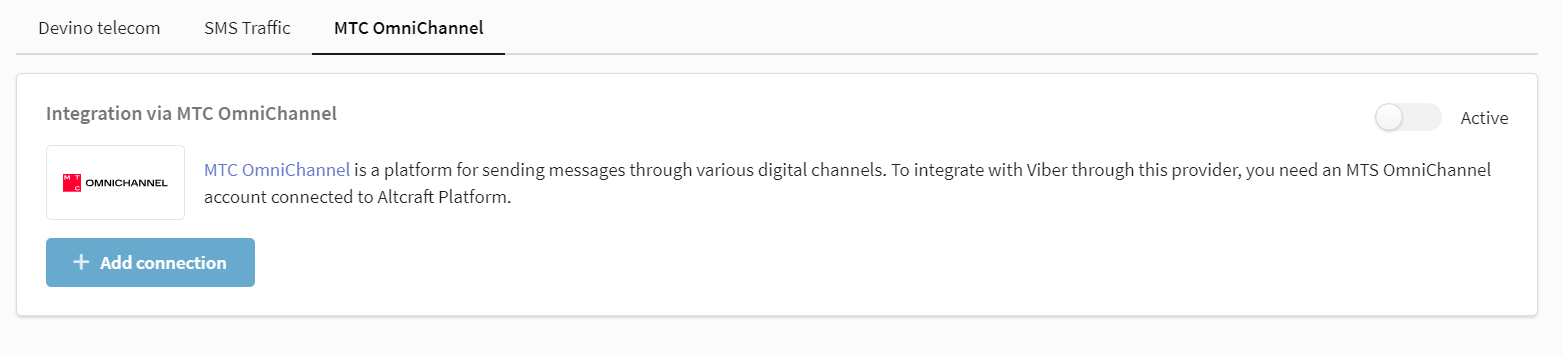
MTC OmniChannel
Activate the integration using the radio button in the upper right corner. Click on Add Connection:
A window will appear on the right where you need to select an available connection:
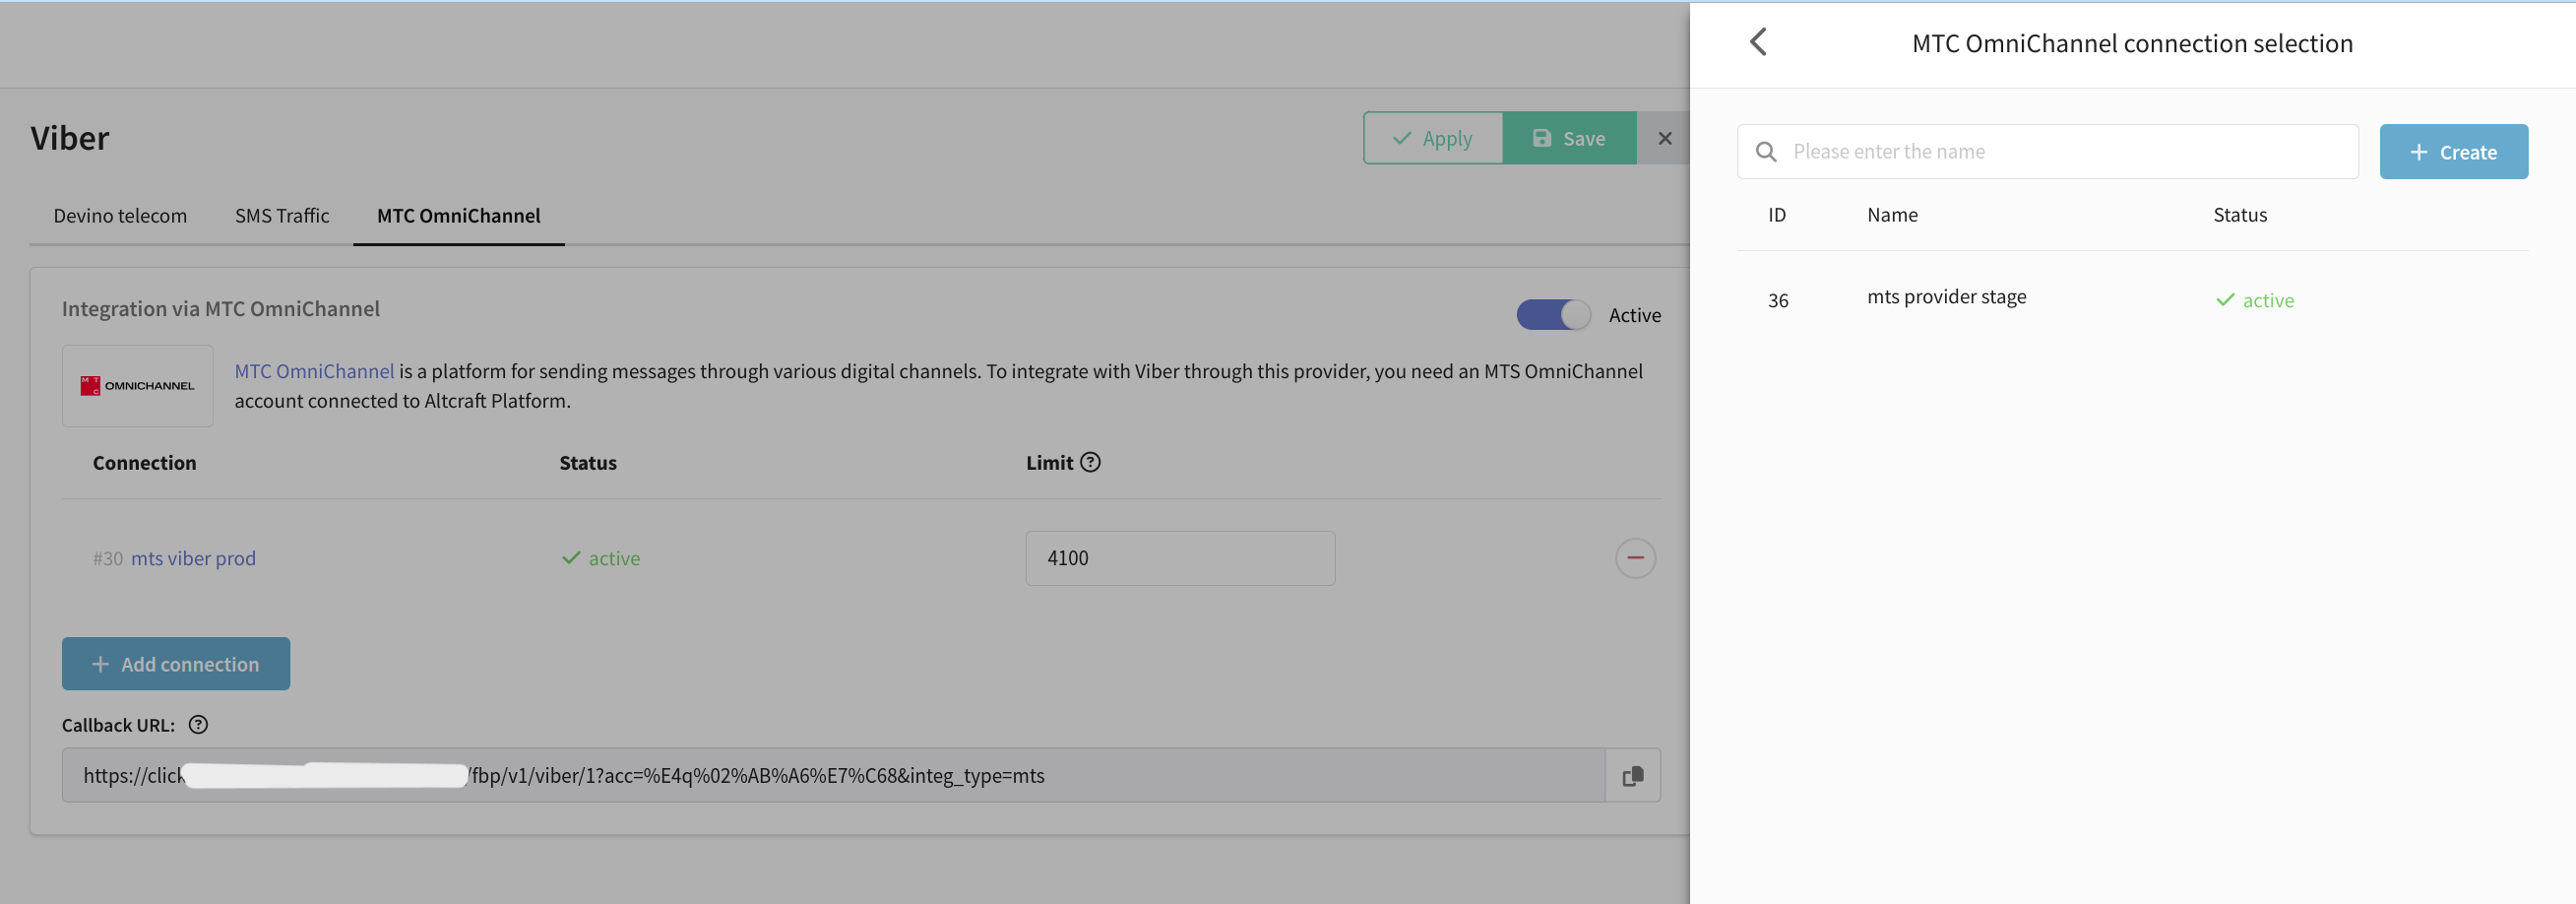
No connections available
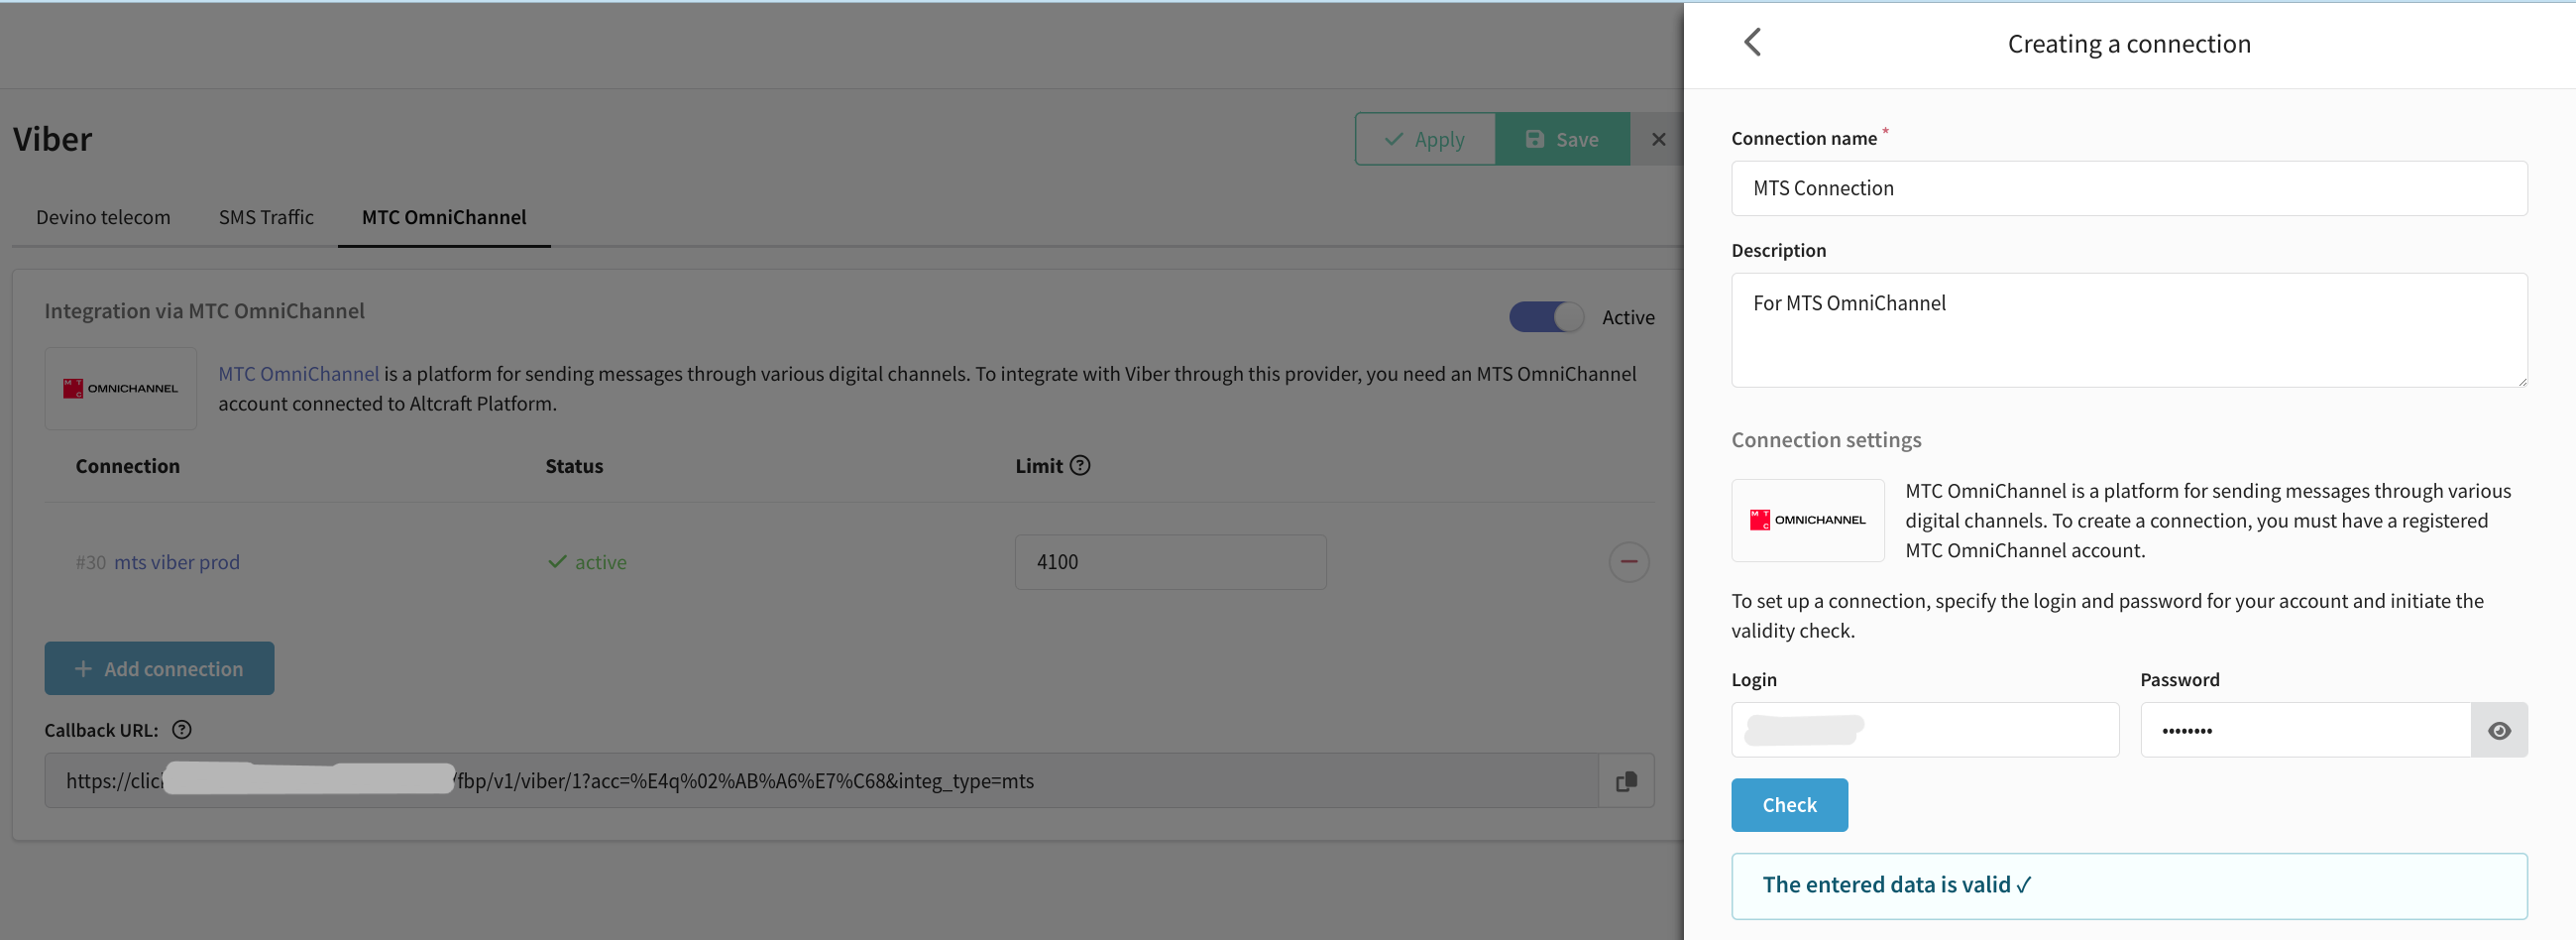
If you have not yet set up a connection to the provider, you can create one directly in this window.
- Press Create.
- Enter the name and a description of the connection.
- Enter the authorization data.
- Press Check to run a validation check on the entered data.
- If the entered data has been verified, click the Create button in the lower right corner.
The documentation portal has published detailed instructions for creating a connection via MTS OmniChannel.
For the integration to work correctly, you will also need to report to tech support your Callback URL specified in the integration.
Information about the added connection will be displayed in the integration. Make sure that the connection status is "active". Otherwise, check the status of your account in the provider's personal account. Keep in mind that the account may be blocked if the subscription fee is not paid.
If necessary, you can add multiple accounts. To remove an account from integration, click ![]() .
.
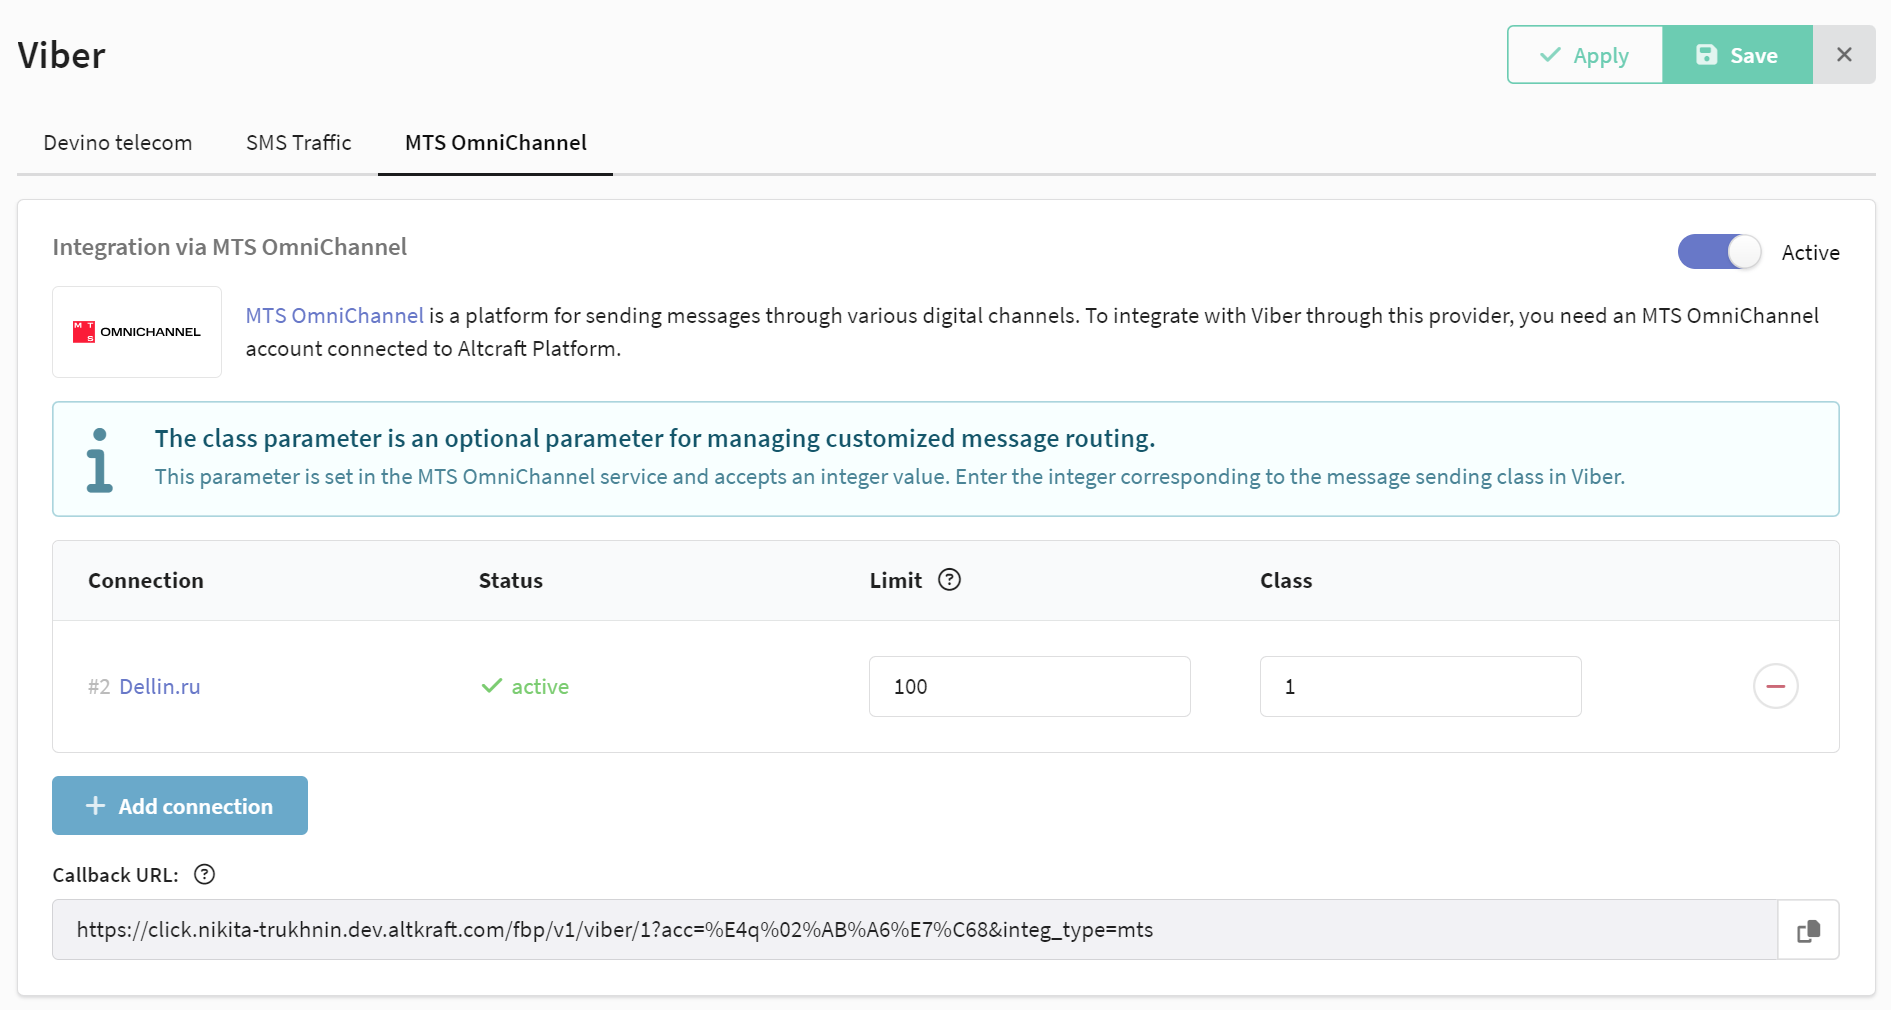
Specify the limit of messages sent per second (0 by default - no limit). Check with your MTC OmniChannel manager to find out your limit.
In the class field, specify the message routing parameter. This parameter is set in the MTS OmniChannel service and accepts an integer value. Enter the integer corresponding to the message sending class in Viber*™.
Save the integration using the buttons in the upper right corner. Save the integration using the buttons in the upper right corner.
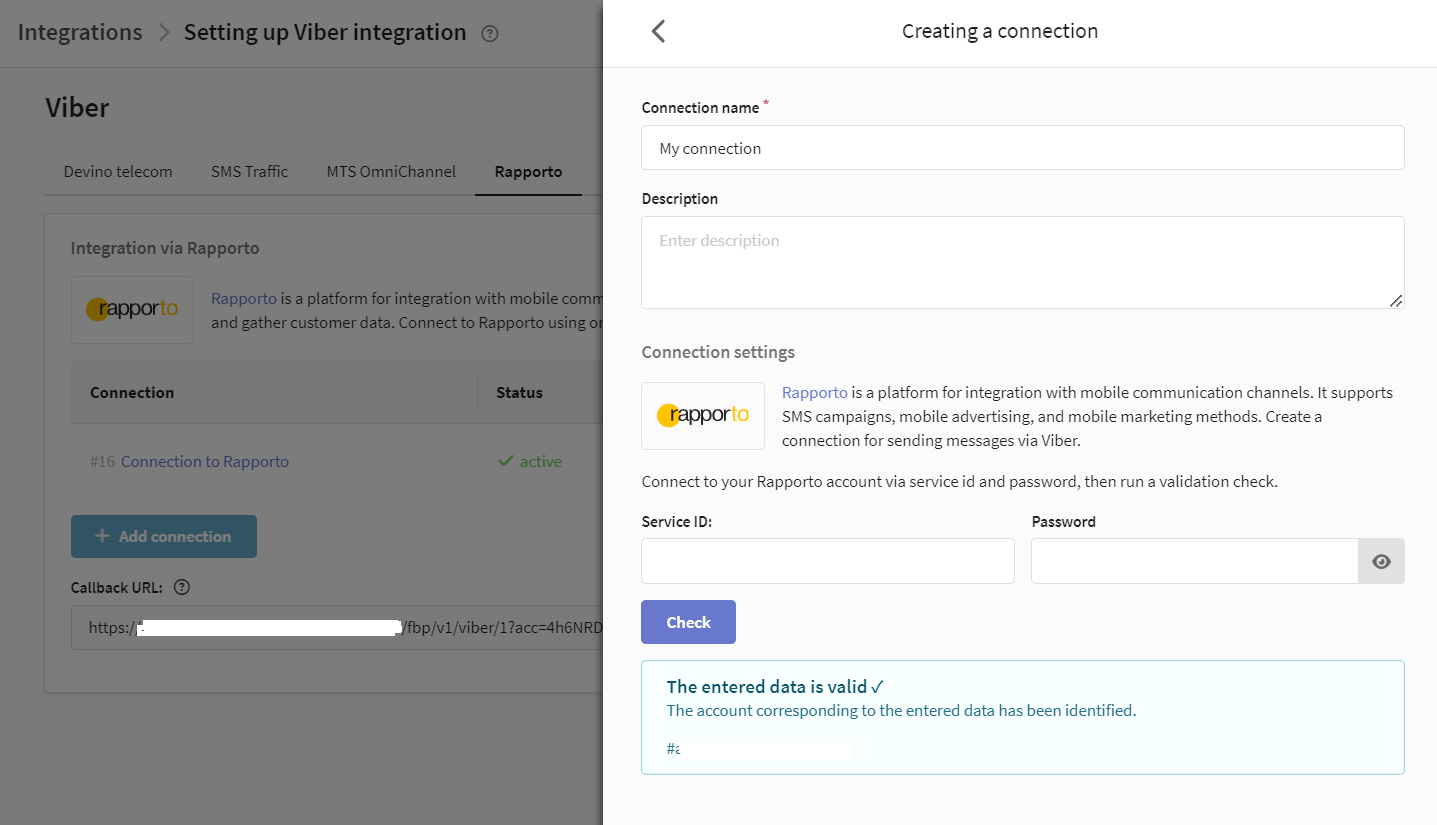
Rapporto
Activate the integration using the button in the upper right corner. Click on Add Connection:
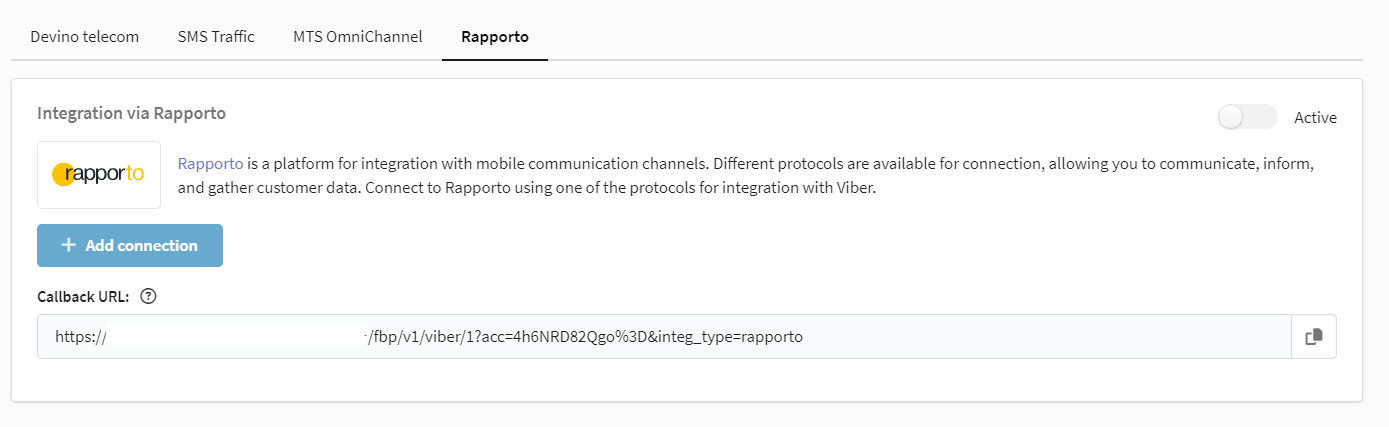
A window will appear on the right where you need to select an available connection:

No connections available
If you have not yet set up a connection to the provider, you can create one directly in this window.
- Press Create.
- Enter the name and a description of the connection.
- Enter the authorization data.
- Press Check to run a validation check on the entered data.
- If the entered data has been verified, click the Create button in the lower right corner.
The documentation portal has published detailed instructions for creating a connection via Rapporto.
For the integration to work correctly, you will also need to report to tech support your Callback URL specified in the integration.
If needed, you can add multiple accounts. To remove an account from the integration, click on the cross.
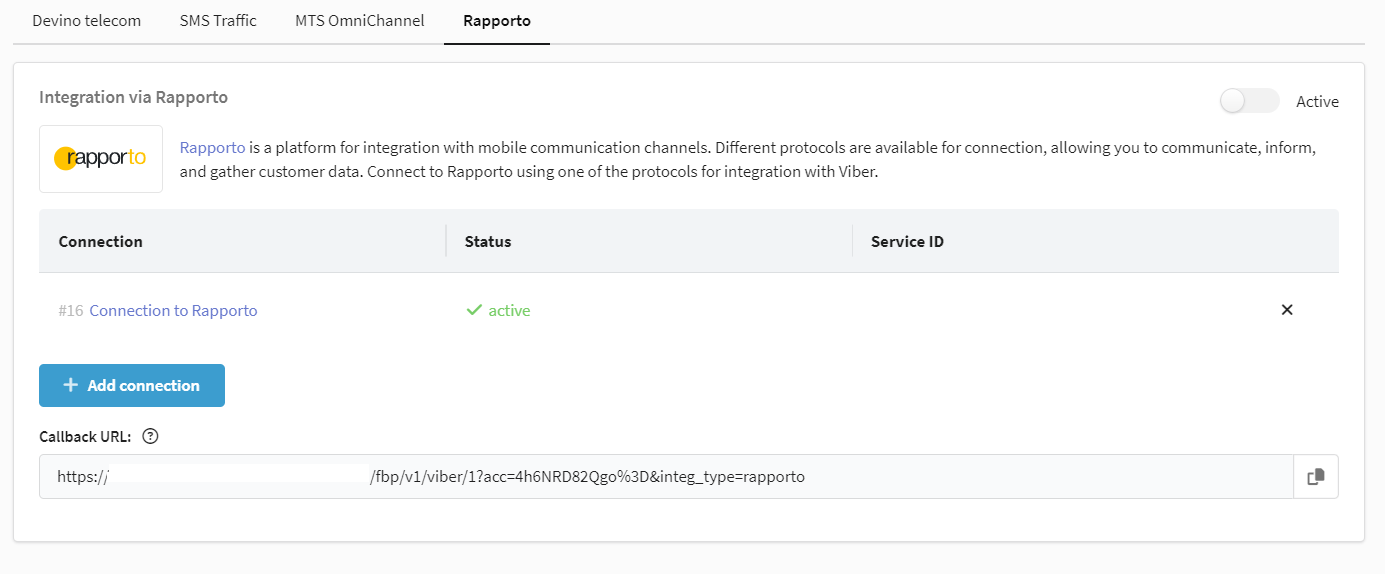
Save the integration using the buttons in the upper right corner.
Finishing creating an intergration
Once you have successfully set up the integration, you can use it to add a new channel to your resource.
* Viber™ is a trademark of Rakuten Group, Inc. Blocked in the Russian Federation.