Altcraft Docs LogoAltcraft Docs Logo
User guide iconUser guide
Developer guide iconDeveloper guide
Admin guide iconAdmin guide
English
  • Русский
  • English
Login
    User documentationGetting StartedFAQAltcraft glossary
      Profiles and databasesarrow
    • Subscription resourcesManaging databasesSubscriber profileProfiles import and data updateScheduled customer data importAutomatic data collectionBulk customers profiles updateDouble opt-in subscriptionSuppression listsProfile relationsProfile history exportProfile exportCreating a static segment based on import resultsHow to open a CSV fileMatchingTypes of fields in the databaseGlobal control groupsSubscription Manager
      Communication channelsarrow
      • Email channelarrow
      • Email: ISP interactions best practicesEmail: sending domain configurationEmail: setting up and using postmastersБыстрый старт
        Push channelarrow
        • Mobile Pusharrow
        • Settings & implementation
            Integrate your app with Altcraftarrow
          • Providers: push message structureProcessing and adding a subscriptionEvent registration
          Web pusharrow
        • Preliminary Settings
            Web browser push configurationarrow
          • Firebase Cloud messagingApple SafariMozilla Services
          Connecting Web Push to a WebsiteTransferring Data to the PlatformWeb Push SDK Methods
            Import of subscriptions from third-party push servicesarrow
          • Migrating push subscriptions from third-party servicesHow to transfer push subscriptions configured for Safari?Migration from OneSignal
      SMS channel
        Creating mailing from scratcharrow
      • EmailSMSWeb PushMobile PushWhatsAppViber*™Руководство: SMS-рассылка через VK NotifyMAX BotMAX GroupNotifyTelegram BotTelegram Group
      Communication Channels WorkflowРуководство: SMS-рассылка через УТШРуководство: push-рассылка через сервис от "Согласие"
      Segmentationarrow
    • Static SegmentsDynamic SegmentsUpdatable Segments
        Segmentation Conditionsarrow
      • Segmentation by Profile dataSegmentation by Interactions with EntitiesSegmentation by Activity of the channelSegmentation by external dataSegmentation by external SQL tablesSegmentation by Profile structure
      Best Send Time (BST)Logical operators "AND" and "OR"Recommendations for working with segments
      Message templatesarrow
      • Working with message templatesarrow
      • Working in the editorEmail-templateSMS templatePush templateMAX templateTelegram templateWhatsApp templateViber™ templateNotify template
        Visual editor for email-templatearrow
      • Visual editor interfaceAdding blocksElements and their settingsCustom blocksStyle managerLayer manager
      Template fragmentsImage galleryContent personalizationCreating tables based on array elementsBlock editor for email template
        Altcraft Variables and Functionsarrow
      • Logical expressions in messagesLoops in messagesMarket variables in templatesUsing the JSONPath functionality
        Dynamic content in messagesarrow
      • Dynamic HTML contentDynamic JSON contentContent from SQL database in templatesDynamic API content
      Importing and exporting a message templateImporting a template from a third-party serviceExporting a template from Pixcraft
      Mailingsarrow
    • Mailings calendarBroadcast mailingsRegular mailingTrigger mailingMultivariate testingMailing testingMailing schedulePlacement mailing
      Campaignsarrow
    • Working with CampaignsLocal control groups (LCG)Stratification Violation ErrorAudience expansionAudience building
      Automation scenariosarrow
    • Managing scenariosNodes of the scenarioClassic marketing scenariosStep-by-step welcome scenario guideScenario for automatic notification of the managerAbandoned cart scenario
      Marketarrow
    • Market settings
        Productsarrow
      • How to create a product manuallyHow to import a product from a fileScheduled product importProduct and SKU SegmentsPreparing the YML file
      OrdersMarket variables in message templateGuide: how to send an order confirmation email
      Loyalty programsarrow
    • Loyalty programsLoyalty integration with external systemsБыстрый стартBasic loyalty program use casesOrder SegmentsPromotion codes
      Reports and analyticsarrow
    • Channel reportTraffic report
        Summary reportarrow
      • Summary report metrics
      Cohorts reportLifetime reportFunnels reportGoals reportAudience growth reportClick map reportLoyalty programs reportBounces reportUndeliveries reportReport on global control groups
      Integrationsarrow
      • Action hooksarrow
      • Altcraft Action HooksAction hooks event typesAction Hook Message StructureJSON batch request (HTTP POST action hook)Message to RabbitMQ brokerMessage to RabbitMQ exchangerMessage to Kafka brokerTest event
        Integration of third-party services using Albatoarrow
      • Connecting Altcraft to Albato Launching the welcome scenario using AlbatoTransmitting event dataSetting app a trigger mailingEvent registrationGoogle Sheets and Altcraft integration AmoCRM and Altcraft integration
      Facebook Ads Manager™Google Ads AudiencesMAXYandex.Audience™VK Ads™Static segment synchronizationYandex AppMetrica™Tilda™Lpgenerator™WhatsAppViber*™ integrationIntegration scopeData Transmitted During SynchronizationNotify
      Weblayersarrow
      • Formsarrow
      • Create a formForm constructorAppearanceActions after form activationData analyticsBinding data channel and formsConditional logic in forms and surveysNPS testing
        Pixelsarrow
      • Goal customer actions and scoring
        Pop-upsarrow
      • Creating and publishing a pop-upSetting up a popup in the code editorManaging pop-ups manually via scriptPopup analyticsGuide: pop-up for push subscriptionsCase: Creating a pop-up with the "Wheel of Fortune" widgetBasic cases of placing a popup via the Tag Manager
        Tag Managerarrow
      • Configuring and installing Tag ManagerTrigger typesVariables typesLinking a pixel and the Tag manager
      Settingsarrow
    • Account settingsCustom linksVirtual sendersSending policiesAudit journalTags FAQ
        Users, groups and accessarrow
      • Two-Factor Authentication (2FA)
        Connectionsarrow
      • Connection to Facebook Ads ManagerConnection to Google AdsConnecting to Yandex.Audience™Connection to 360dialogConnection to EdnaConnection to Devino TelecomConnection to SMSTrafficConnection to VK Ads™Connection to MTS OmniChannelCustom Authentication ConnectionOAuth2 connectionBasic Authentication connectionToken Authentication connectionConnection to RapportoMAX connectionConnection to Notify
      Attribute settings
      API requests: where to startarrow
    • Import or update a profileTrigger mailing launchEngage profile in scenario
      Changelogarrow
    • v2026.1.76v2025.4.75v2025.4.74v2025.3.73v2025.2.72v2025.1.71v2024.4.70v2024.3.69v2024.2.68.2v2024.1.68
    Documentation archivelibrary
  • Message templates
  • Working with message templates
  • Notify template

Notify template

info

According to the service policy, new access to the Notify service personal account is currently not provided.

Support for current users is provided by MAX Business tech support.

Using the Notify channel you can send business-messages via VK, OK and also send SMS notifications. Social media messages and SMS messages are customized in two different sends that follow each other.

Existing operator templates​

When you open the template editor for Notify, you will be shown the operator templates created in your personal Notify account:

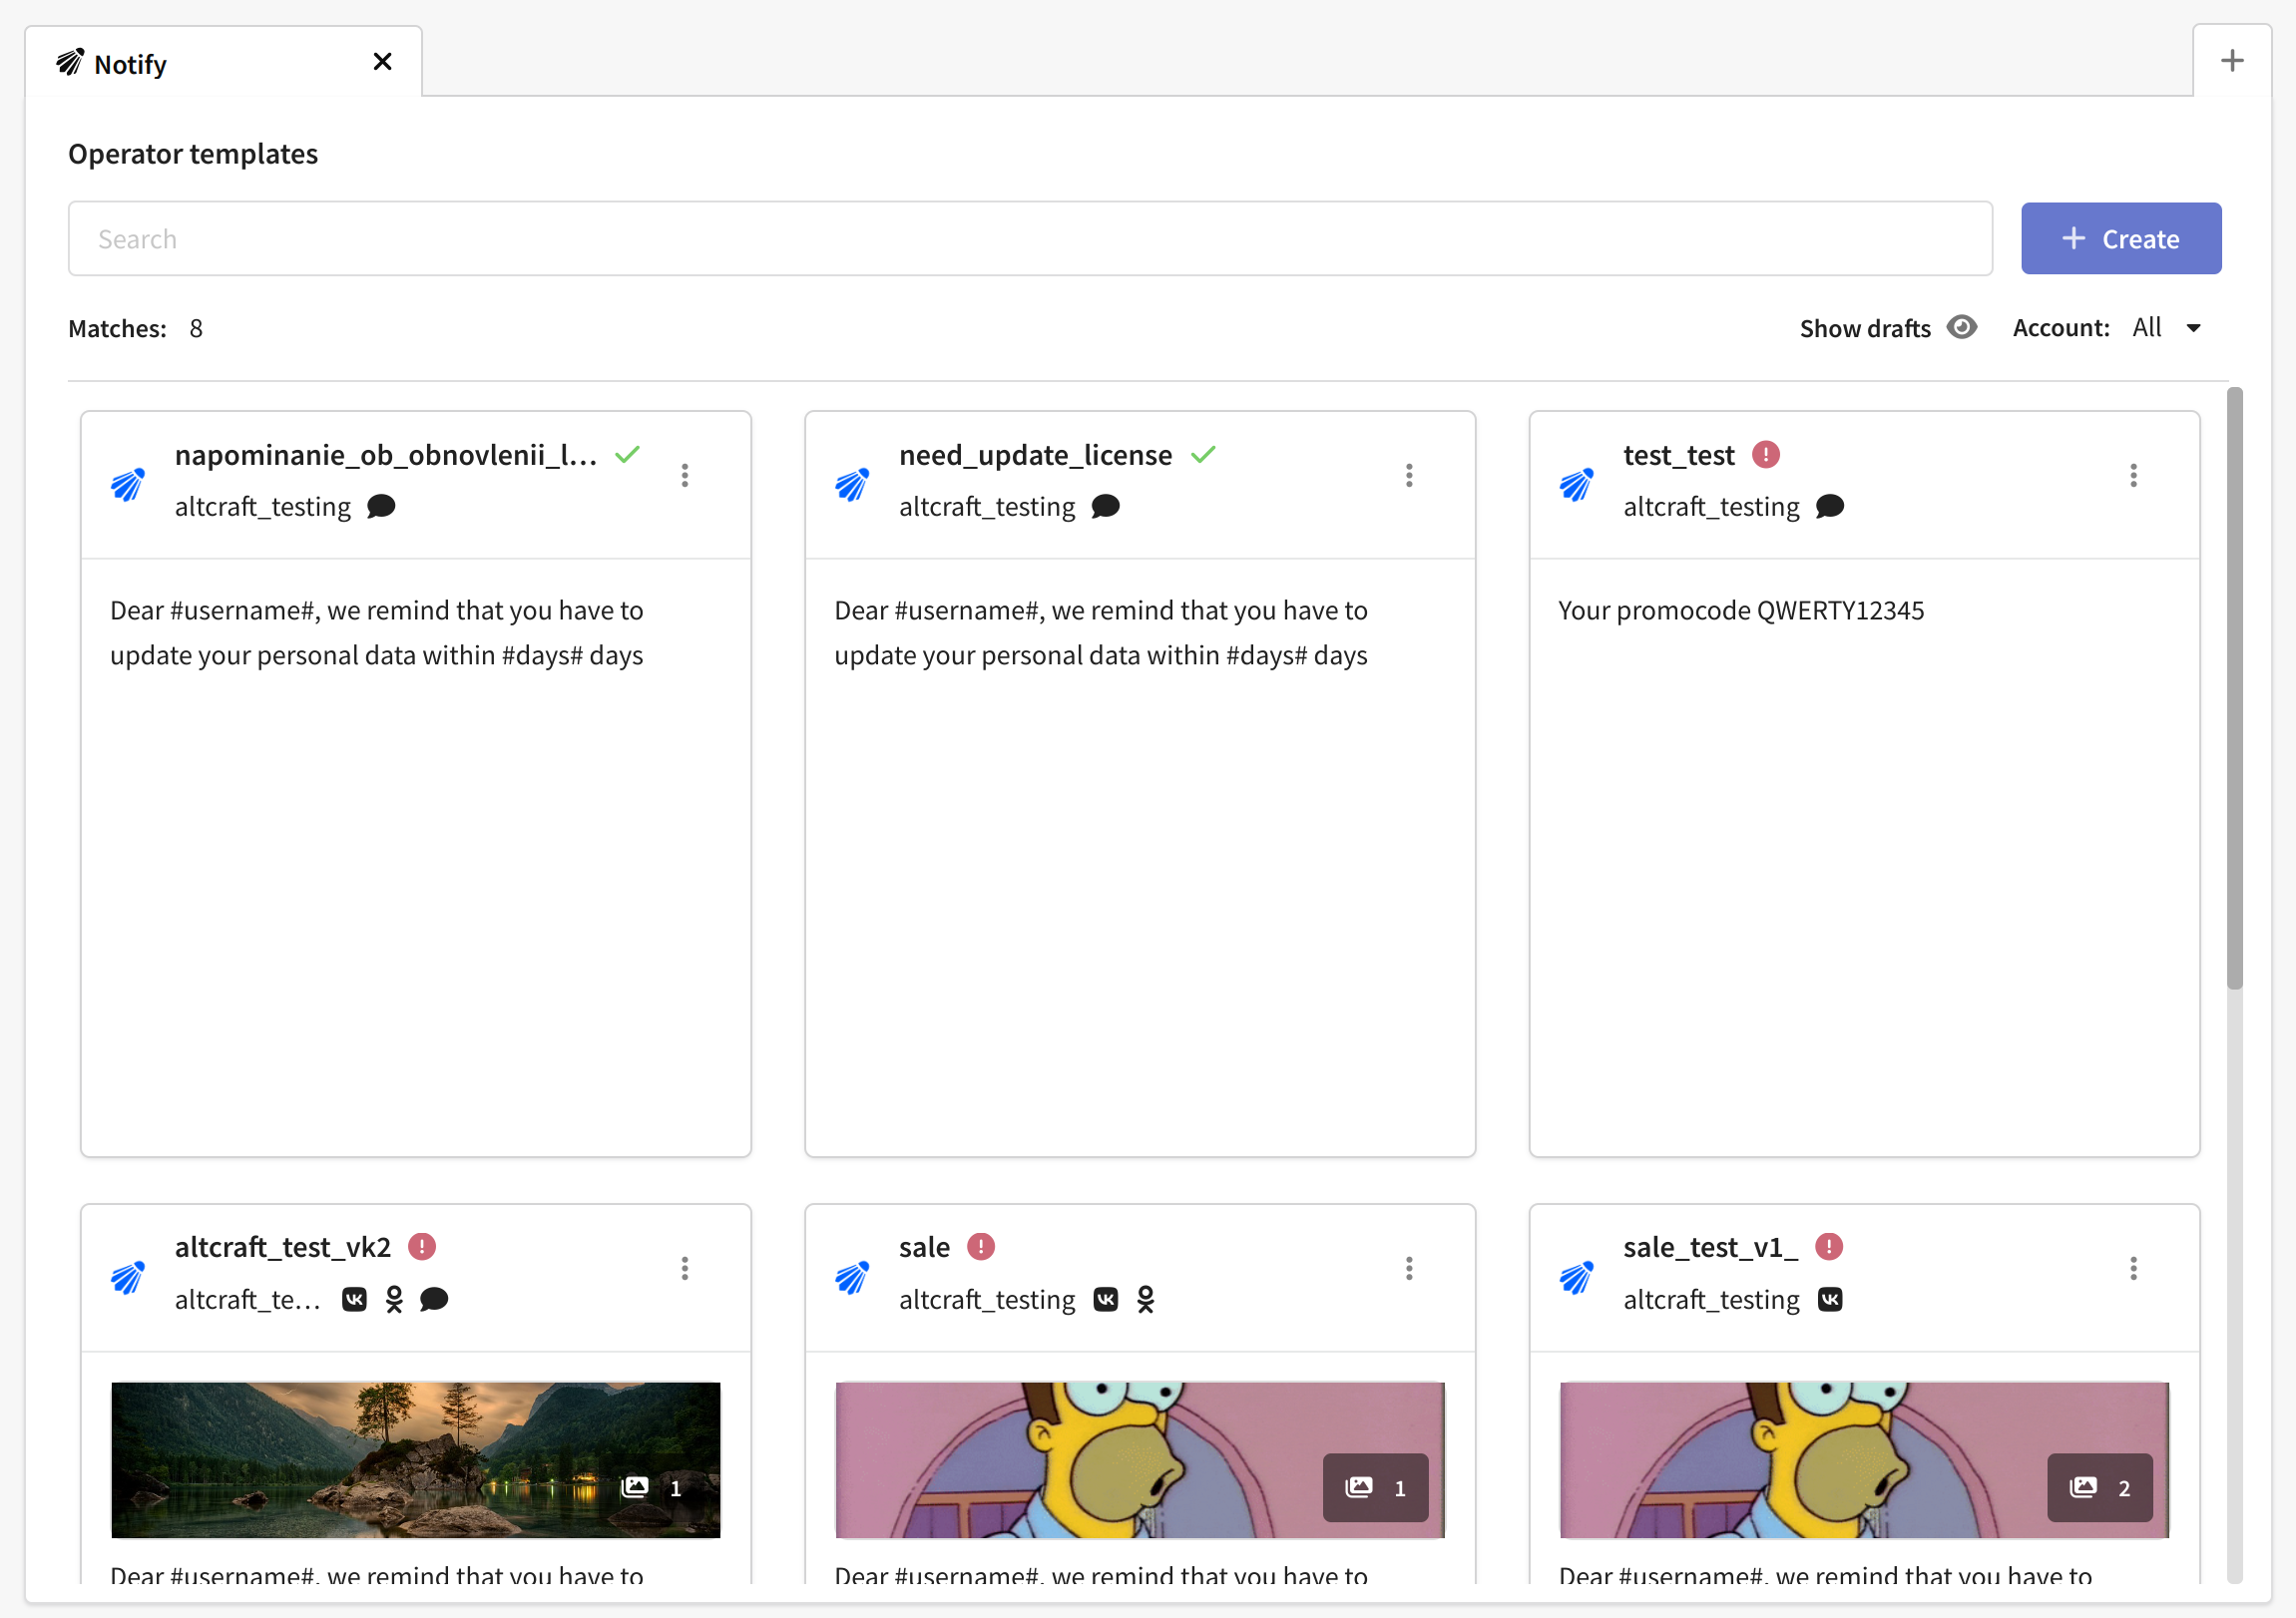
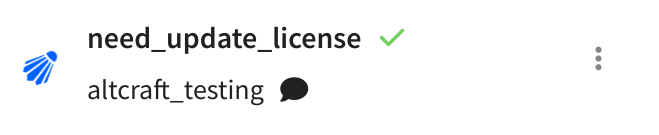
All templates for sending are moderated by the service. Templates approved by the service are marked with a check sign:

Templates that have been archived or have not been moderated will carry a warning. They cannot be used until you edit them and they are approved:

Creating an operator template​

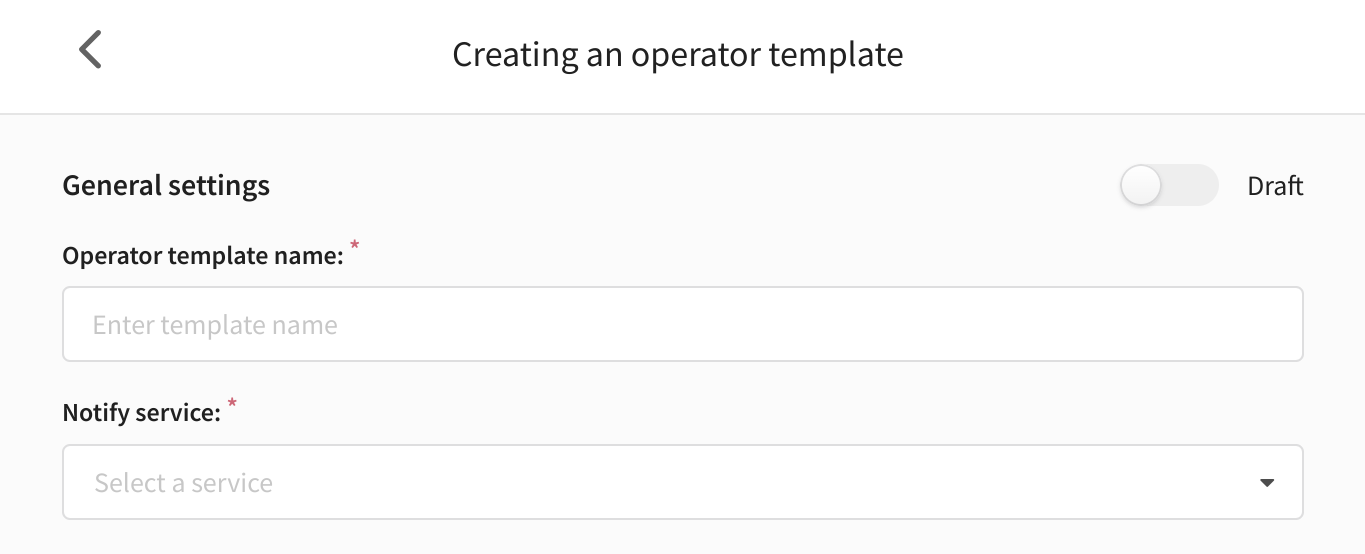
You can also create a new Notify template while in the platform. To create a template, click the corresponding button. The window of template creation will open, in this window you should specify name of the template and service configured in your personal cabinet:

There is an option in the template to set time to wait for the message to be delivered and read. The delivery wait time is the time during which Notify will attempt to resend the message if any error occurs. When this time expires, a second send will be triggered. Read event waiting time is the amount of time Notify will wait for the message to be read on VK or OK. When this time expires, a send with an SMS message will be triggered.

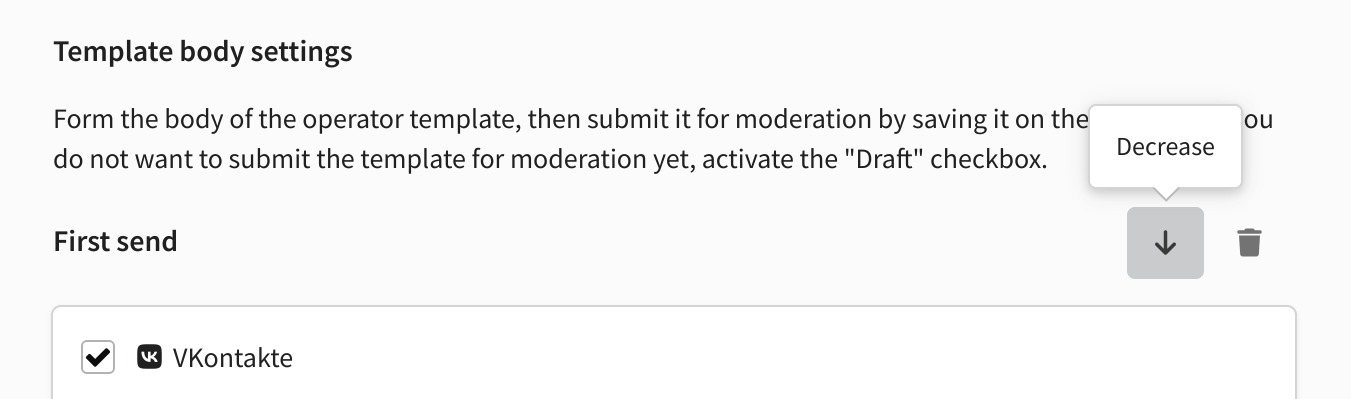
The Notify template consists of sends. One send is a message to VK or OK, the other sending is an SMS to the user's phone number. You can add or delete a sending, as well as change the order of their sending by clicking the corresponding button:

The message body defines the content of your notification. An OK message can be text-only. You can attach an element to a VK message:

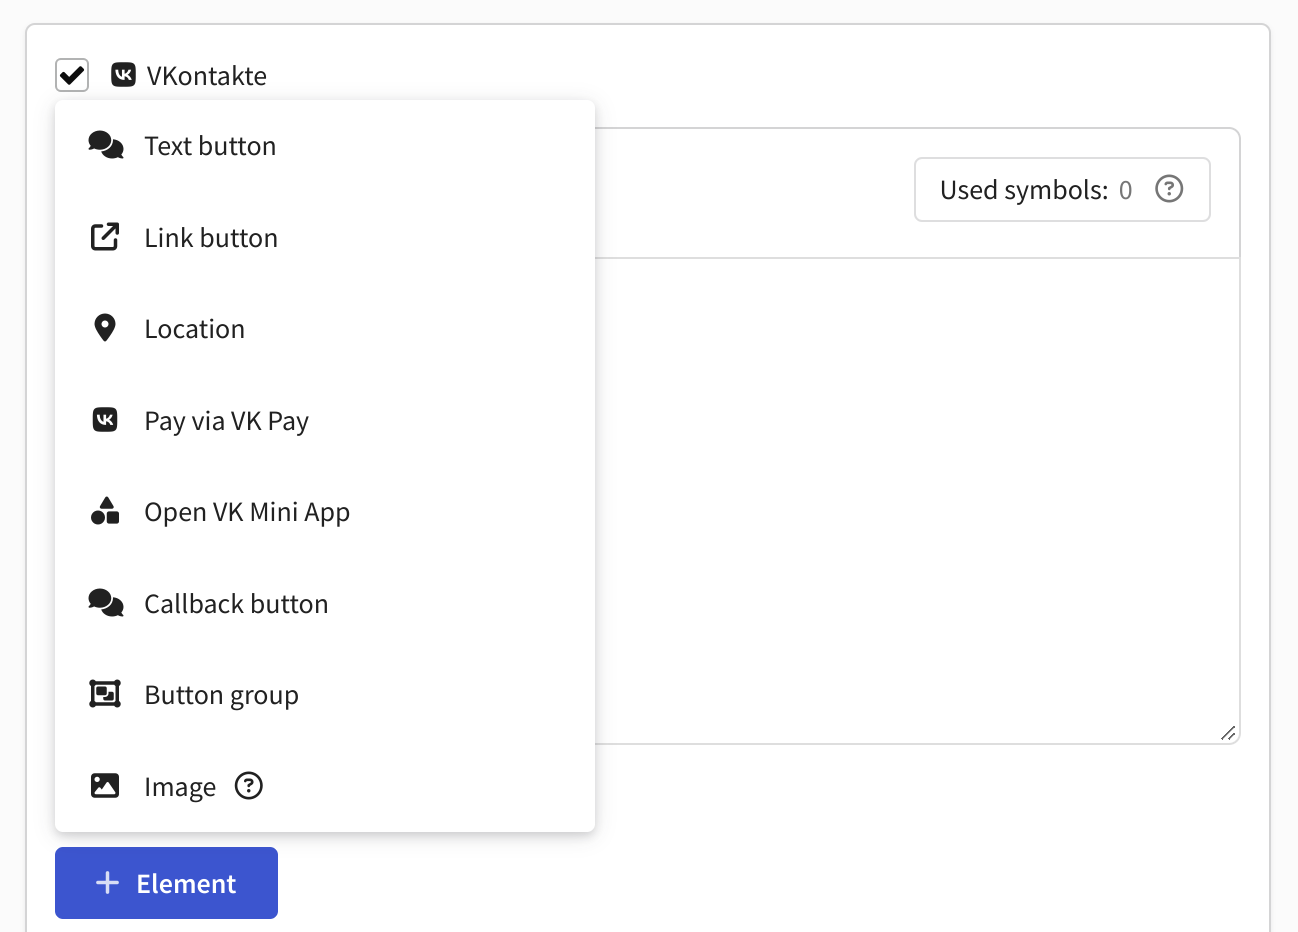
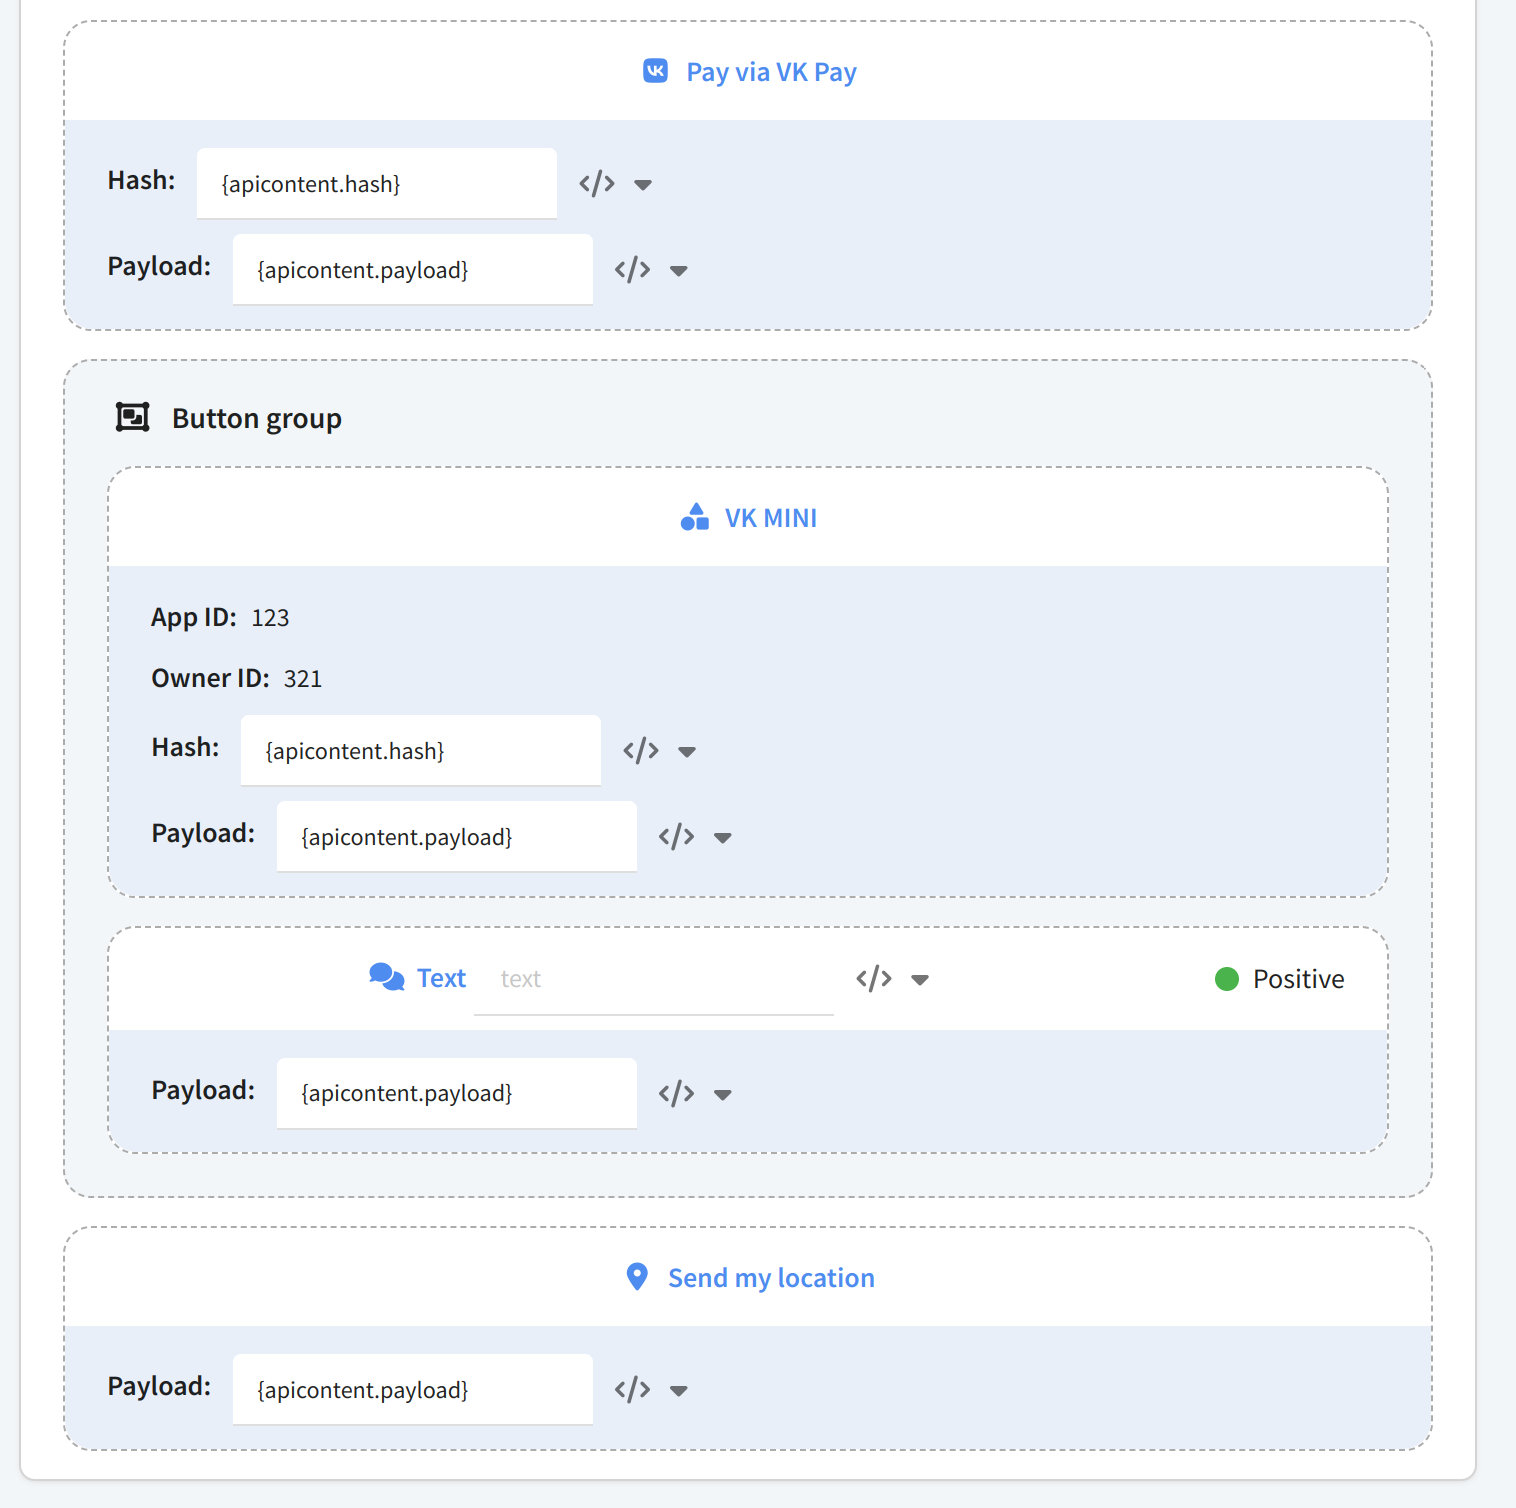
  • Text Button - sends a message with text. For a text button you can choose a color, as well as attach additional information in JSON format.
  • Link Button - opens the specified link. In the button you can specify its text, a link to go to, as well as additional JSON information.
  • Location - when clicked, opens a dialog box with location information. The user can select location in this dialog box and send it to the chat. Community administrators will receive the map image in chat.
  • Pay via VK Pay - opens VK Pay payment window with predefined parameters. For the button it is necessary to specify a hash - a string containing payment parameters and application ID.
  • Open VK Mini App - opens the specified VK Mini Apps application. To customize the button you need to specify the application ID, Owner ID, as well as a hash for navigation in the application.
  • Callback Button - allows you to receive a notification of a button press and perform the required action without sending a message from the user. You can specify a caption and color for the button.
  • Button group - cobmination of the above buttons.
  • Image - up to 5 images with total weight not more than 50 MB. Supported formats - JPG, PNG, GIF.
tip

Read more about elements in Notify documentation.

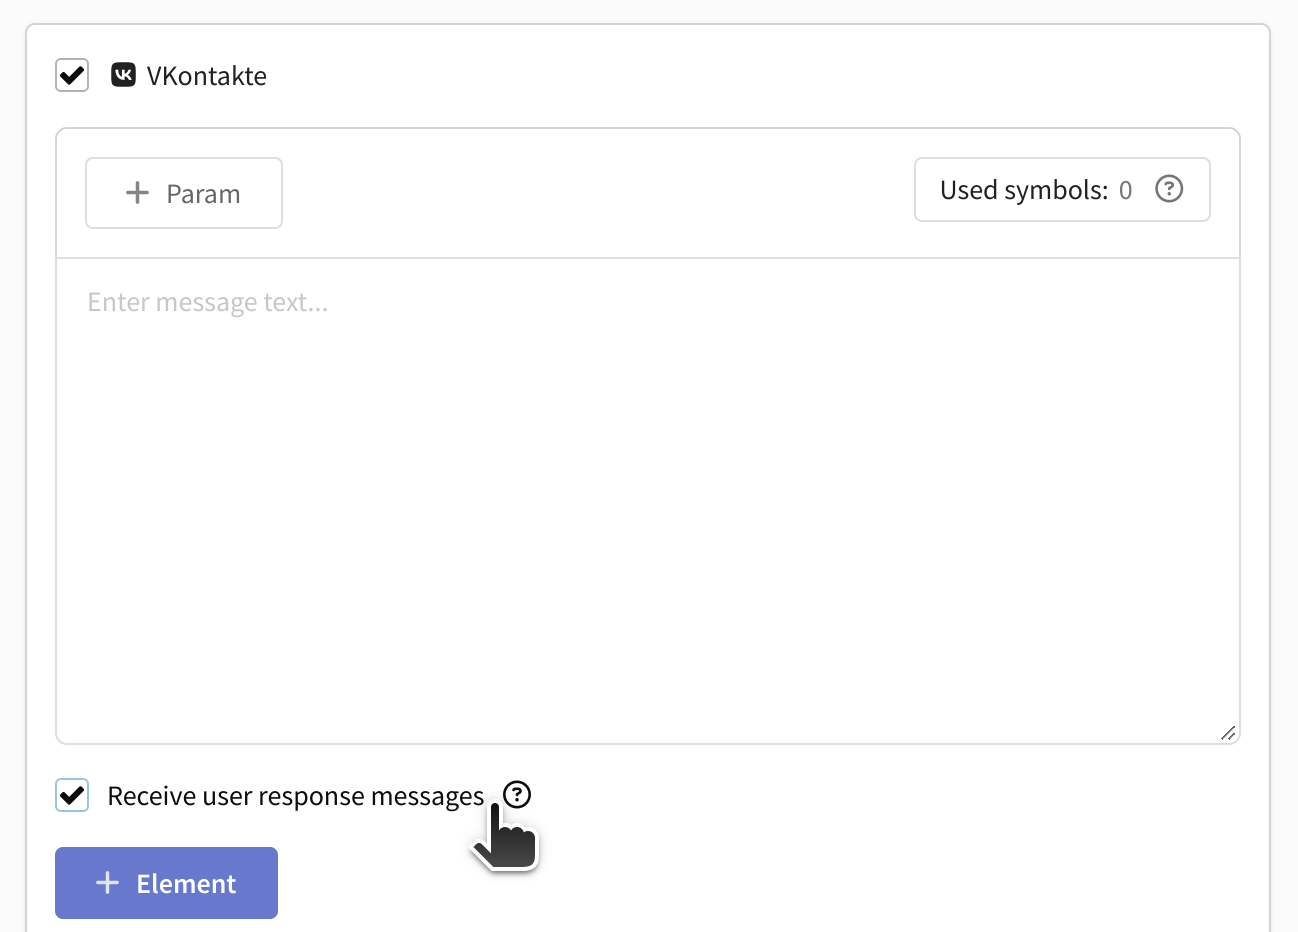
You can insert parameters into the message body. Later you can substitute field values from the platform's databases into them.

You can also allow the client to send reply messages in the chat with the company. To do this, activate the "Receive user response messages" box in the settings:

There are several types of SMS messages - advertising, identification, service and transactional. Message type affects its charging in Notify, you can get detailed information about it from the service support.

Once you save the template, it will be sent to moderation in the service. If you don't want to send it for moderation, activate the "Draft" switch.

Managing parameters​

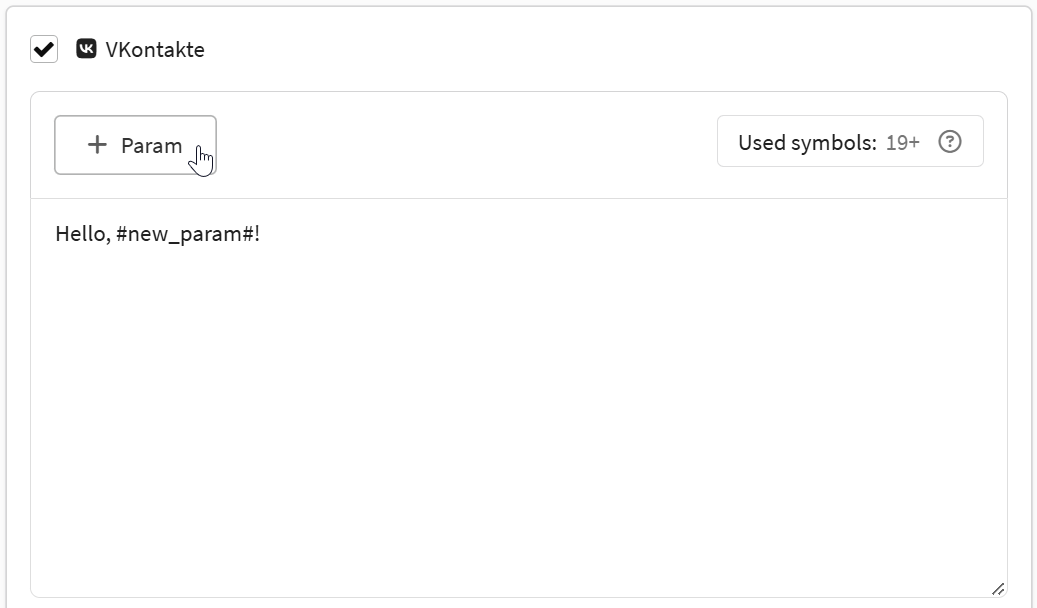
The text block in Notify consists of fixed text and parameters. Parameters are template text that changes for each new message (name, address, event name, date and time, link, etc.).

A parameter can be added to the text block in two ways: manually by typing #parameter_name#, where parameter_name is an arbitrary parameter name, or by using the +Parameter button, which will automatically insert it into the text:

You can manually prescribe parameter values or add Altcraft variables. To open the list of variables, press </>. When you send a message, the entered text will be automatically substituted into the template.

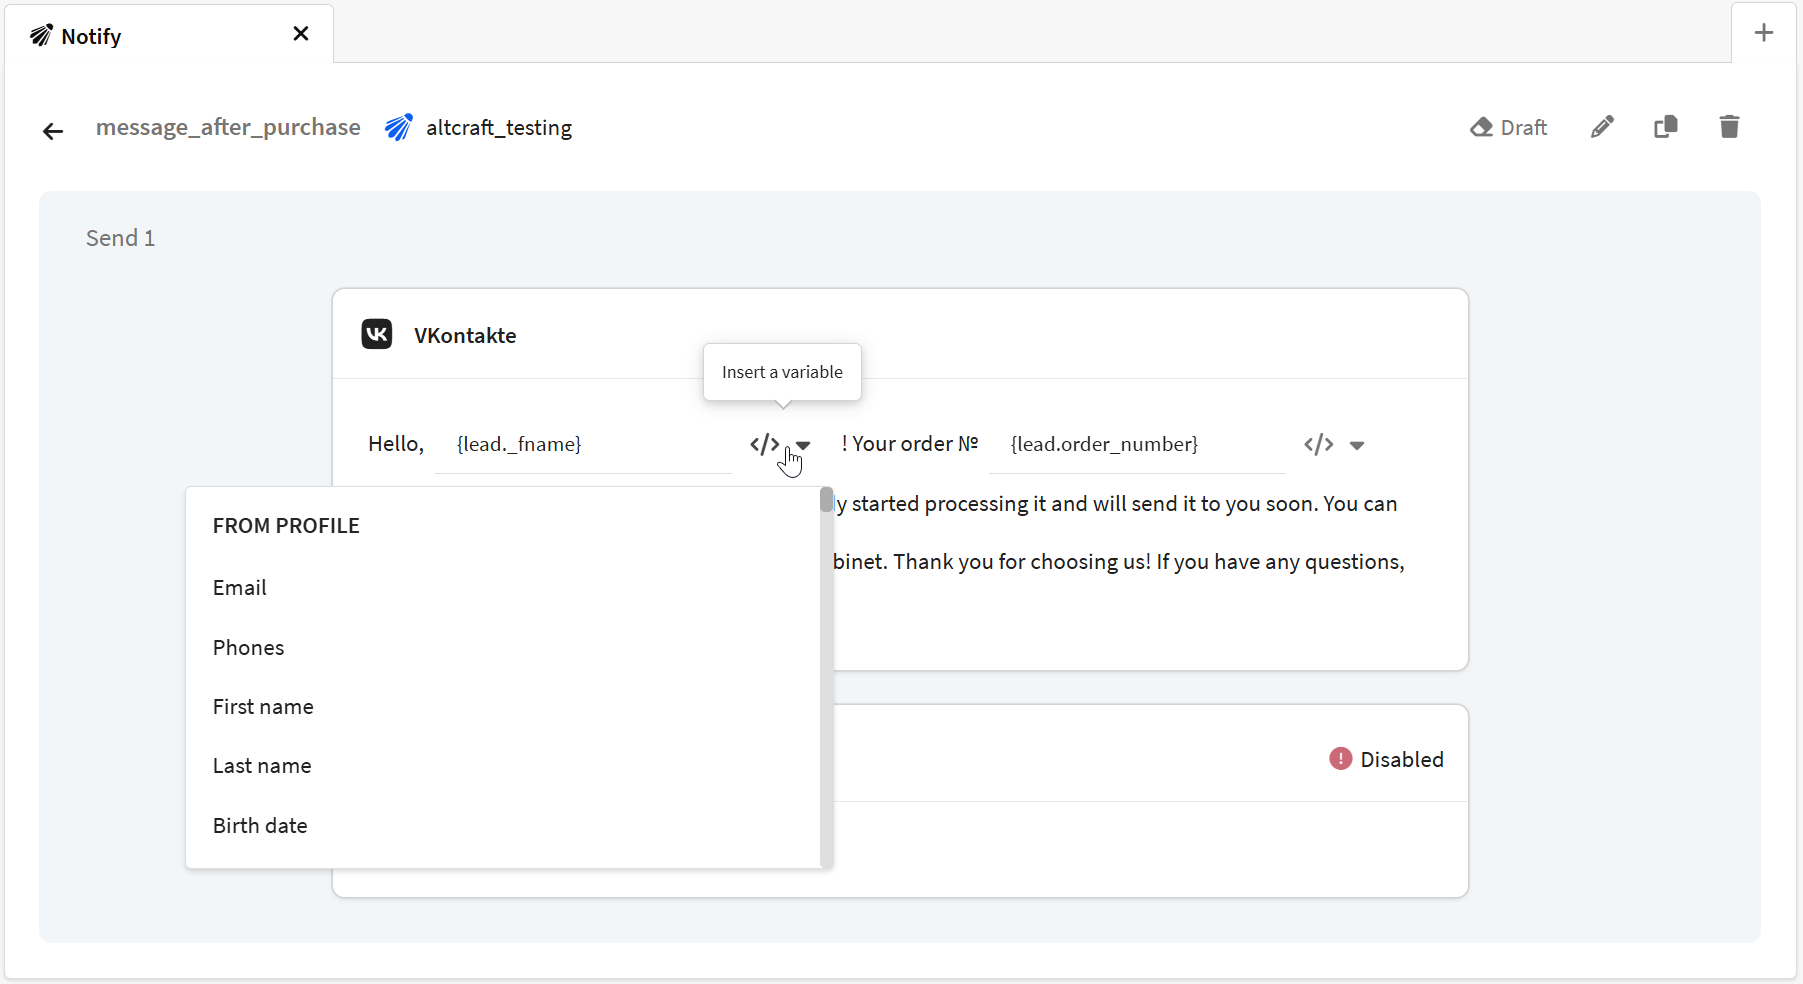
Parameters can be used not only in the Notify text block, but also in elements such as buttons:
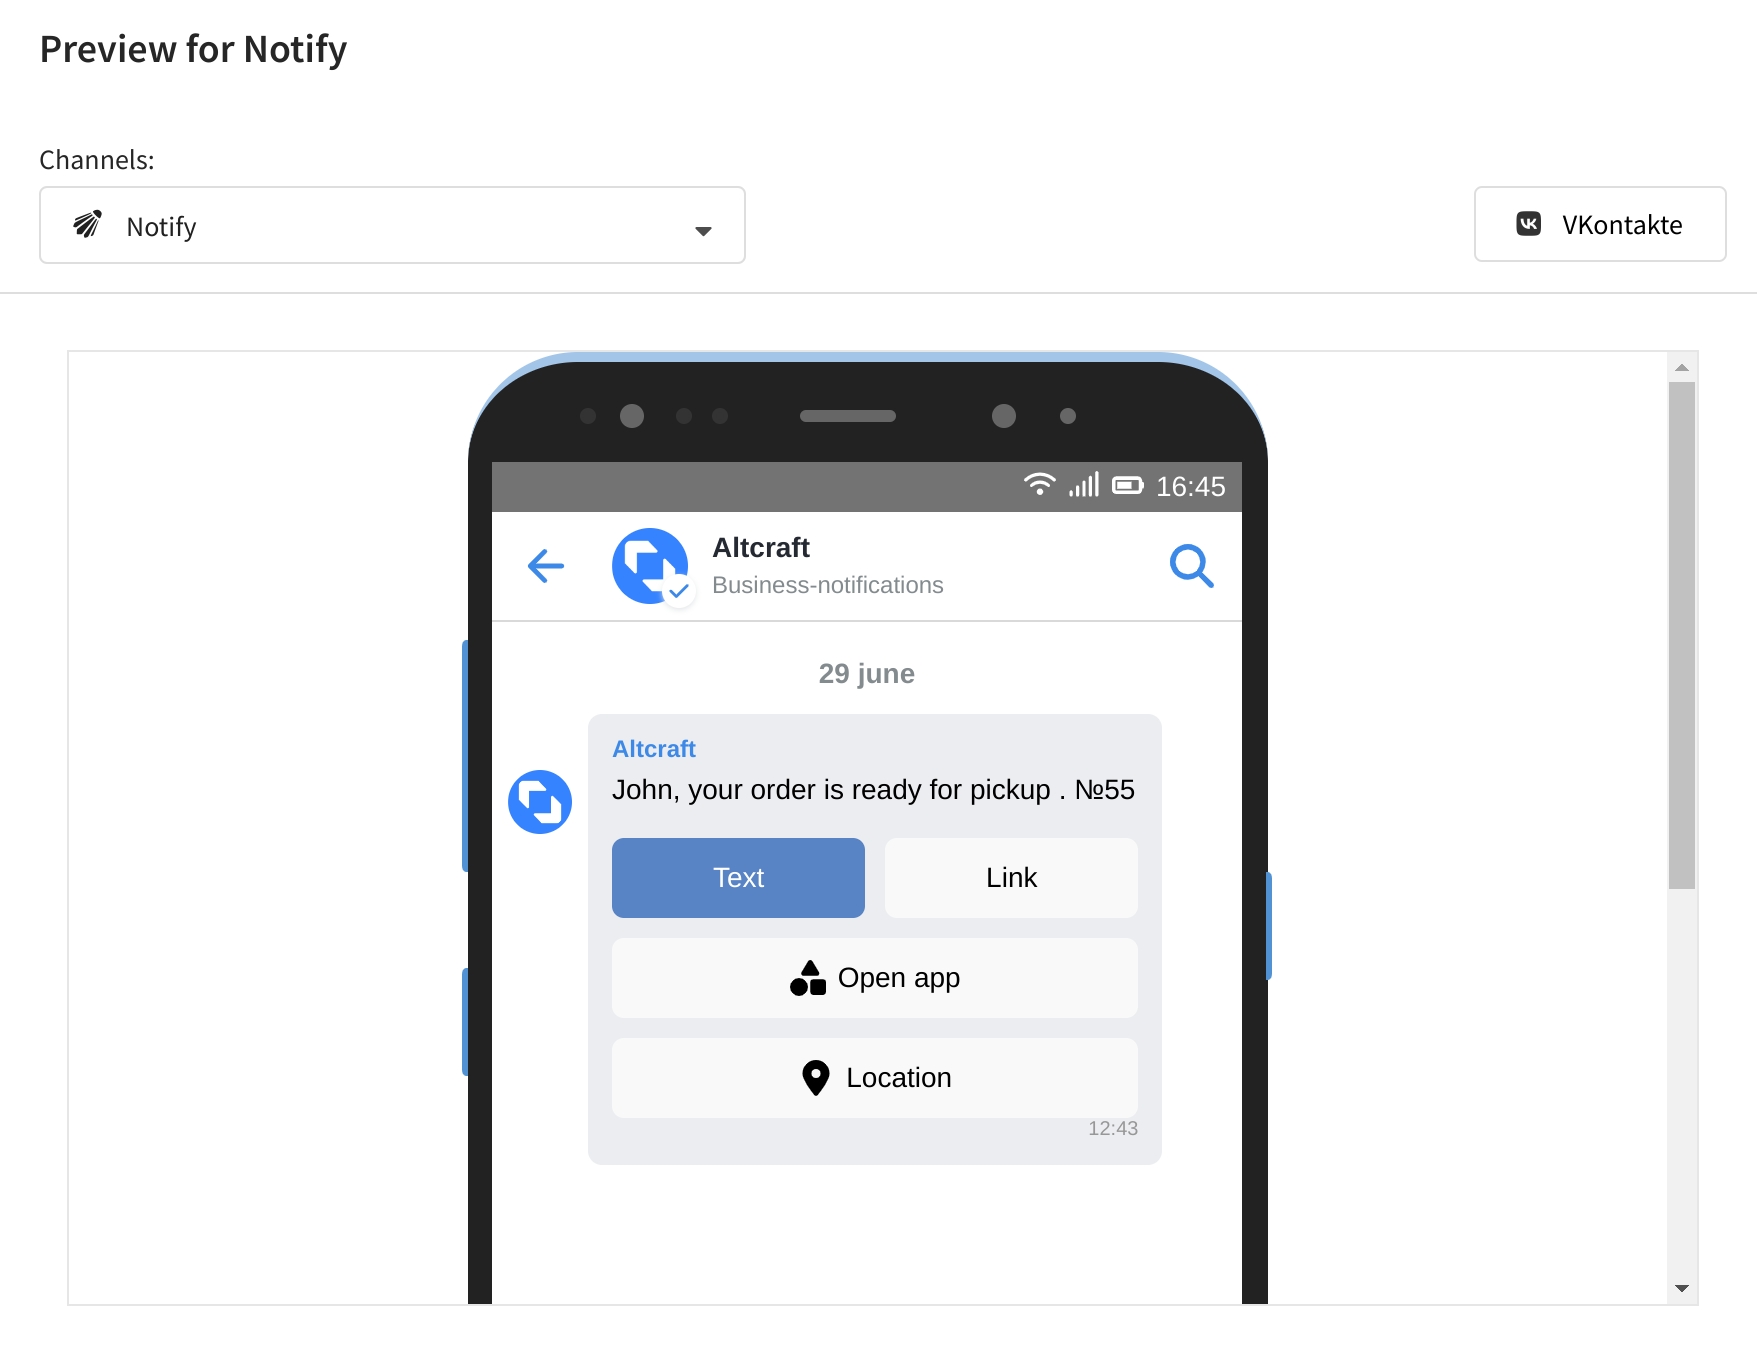
Template Preview​

After selecting an approved template, you can specify the required values or variables from the platform for the parameters:

To see how the user will see the received message, click the preview button at the top of the screen:

Don't forget to save the template in the platform after making all the changes. You can now use this template to send out Notify feeds.

Last updated on Mar 12, 2026
Previous
Viber™ template
Next
Visual editor for email-template
  • Existing operator templates
    • Creating an operator template
    • Managing parameters
    • Template Preview
© 2015 - 2026 Altcraft, LLC. All rights reserved.