Description
Use WhatsApp* integration to automate communication with subscribers in the messaging app. By setting up this channel, you will be able to:
- send personalized messages to subscribers in the app;
- segment the audience based on user behavior;
- use WhatsApp* channel to set up scenarios;
- collect statistics and analyze the received data.
In order to initiate a WhatsApp* message to a person, you must first receive opt-in permission confirming that they wish to receive future messages from you on WhatsApp*. Learn more.
Businesses use the WhatsApp* Business API to communicate with customers in the app. API access is provided through official Meta providers. In Altcraft Platform, you can set up integration through such providers as Edna and 360dialog. In order to link the provider's account to Altcraft Platform, you need to create a connection through Edna or through 360dialog.
In addition to the services of the provider, you also have to pay for messages sent to users. You can find out more about the cost of WhatsApp* messages here.
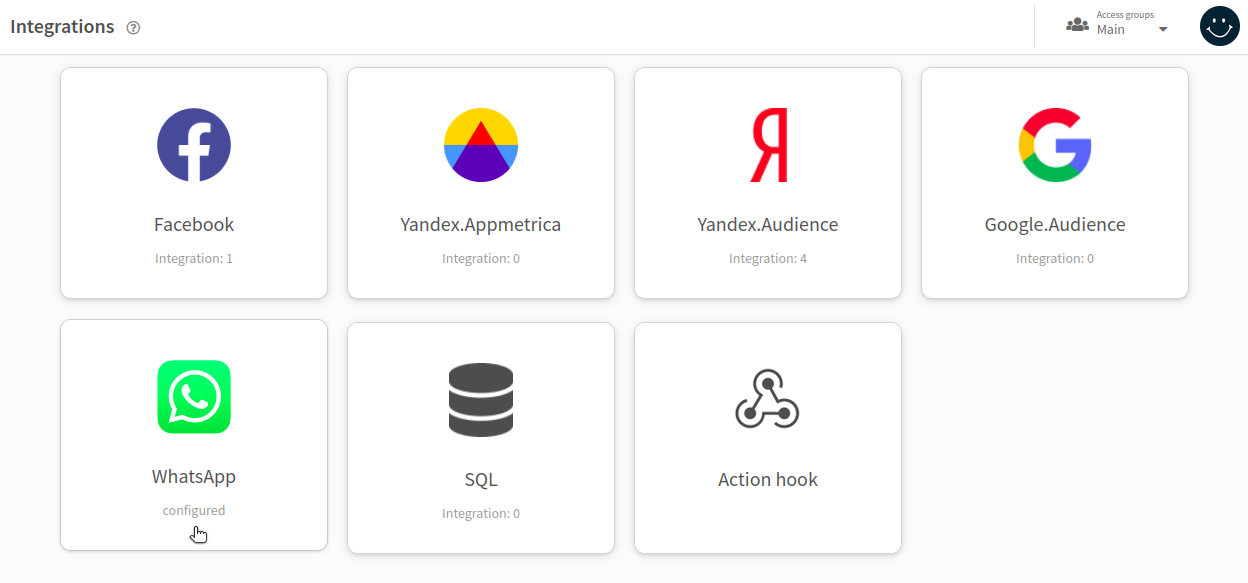
Creating an integration
Go to the Integrations section and select the type of integration — WhatsApp.*
Go to your provider's tab:
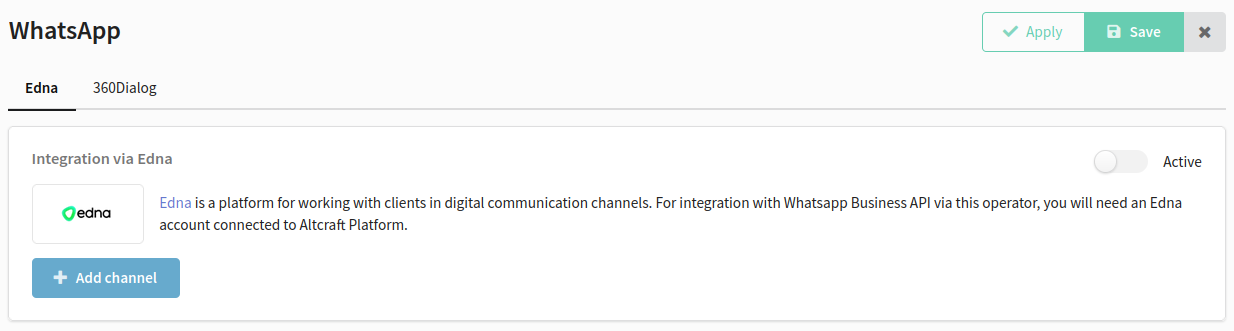
Edna
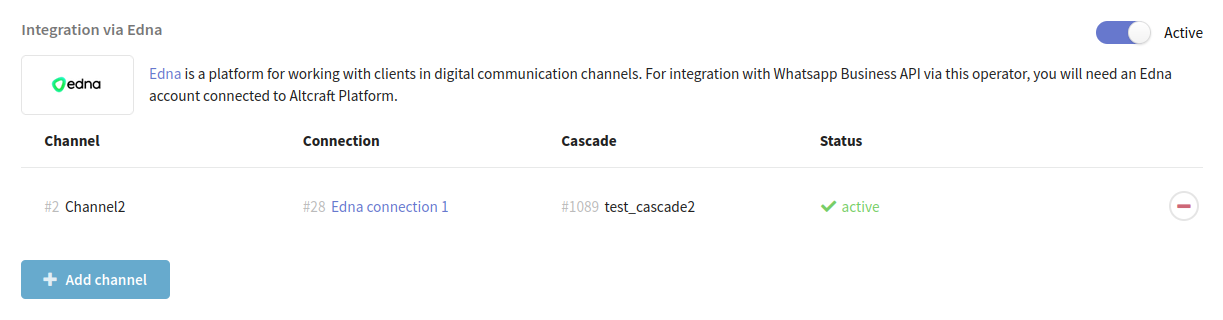
Activate the integration using the toggle in the top right corner. Click "Add channel".
A window will appear on the right where you first need to select an available connection:
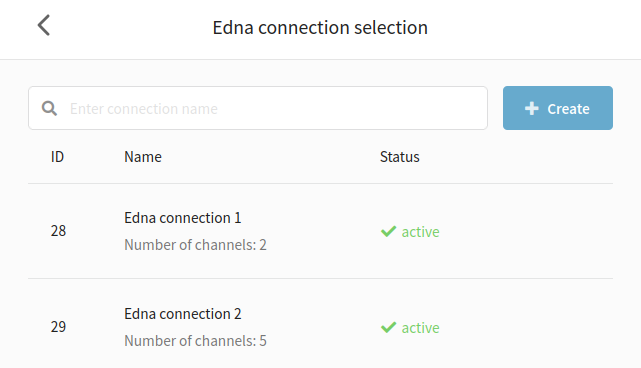
I don't have any connections available
If you haven't set up a connection to Edna yet, you can create one without leaving the current page.
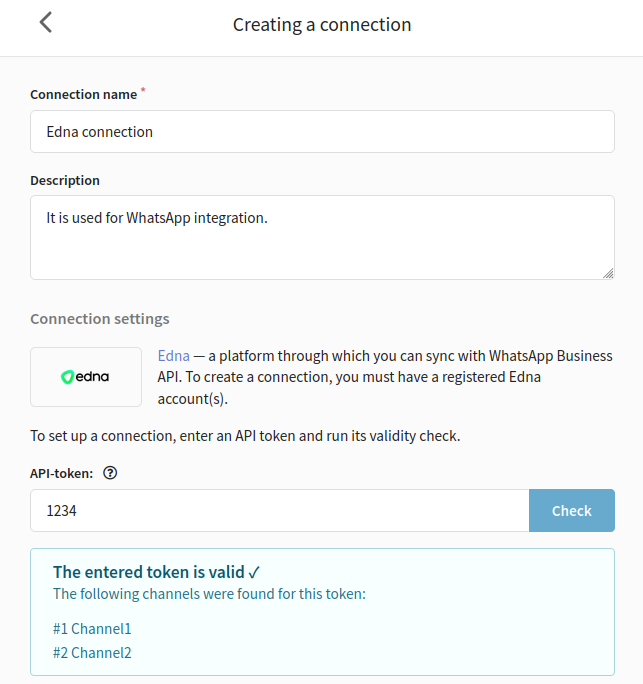
Click "Create". Enter a name and description for the connection. Next, specify the API token generated in your Edna's personal account and check its validity. If the token passed the verification, click the Create button in the lower right corner.
You can read more about creating a connection to Edna in this guide.
Next, select an active channel. The channel should be in the "Correct" status.
After that, specify the cascade. The edna cascade is a scenario that sets an order in which the system sends the messages through several channels if the message was not delivered to the previous channel.
Some cascades may not be available in the list. Such cascades are configured for several channels, and the platform considers them invalid. You can only select cascades that use one channel.
If needed, you can enable event capture in Edna to send message status data to Altcraft Platform. When this option is enabled, a Callback URL will be automatically added to your Edna account after the integration is saved. This URL is used to transmit WhatsApp events to Altcraft. If the option is disabled, delivery and read analytics will not be available in the platform.
Once you've set up the channel and cascade, click "Add" in the bottom right corner.

Details for the added channel will be displayed in the integration. You can add multiple channels if necessary. To remove a channel from integration, click  .
.
360dialog
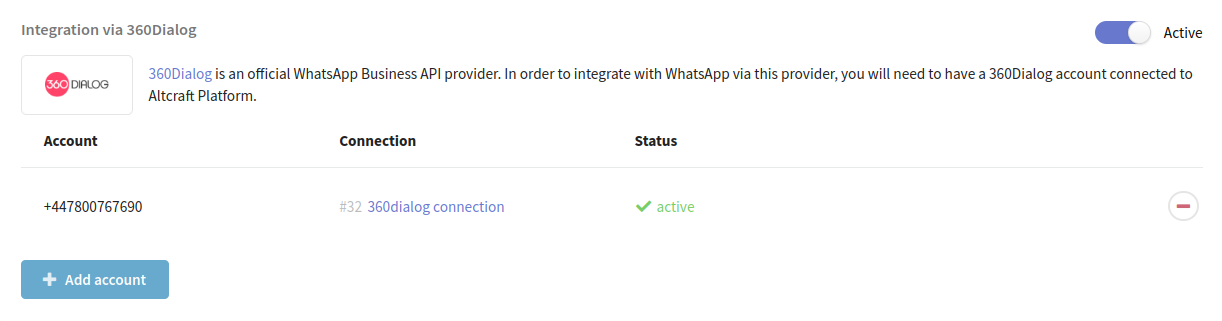
Activate the integration using the toggle in the top right corner. Click Add account.

A window will appear on the right where you first need to select an available connection:
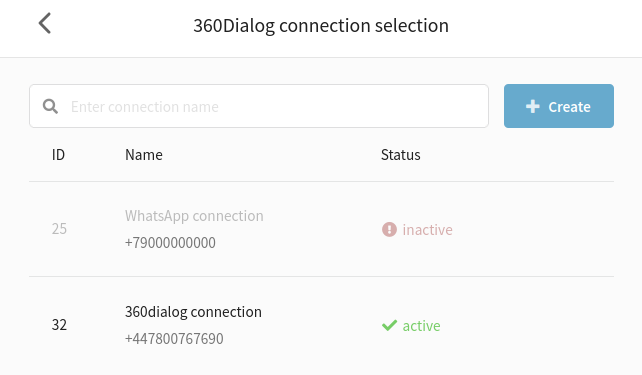
No available connections
If you have not yet configured a connection to 360dialog, you can create one directly in this window.
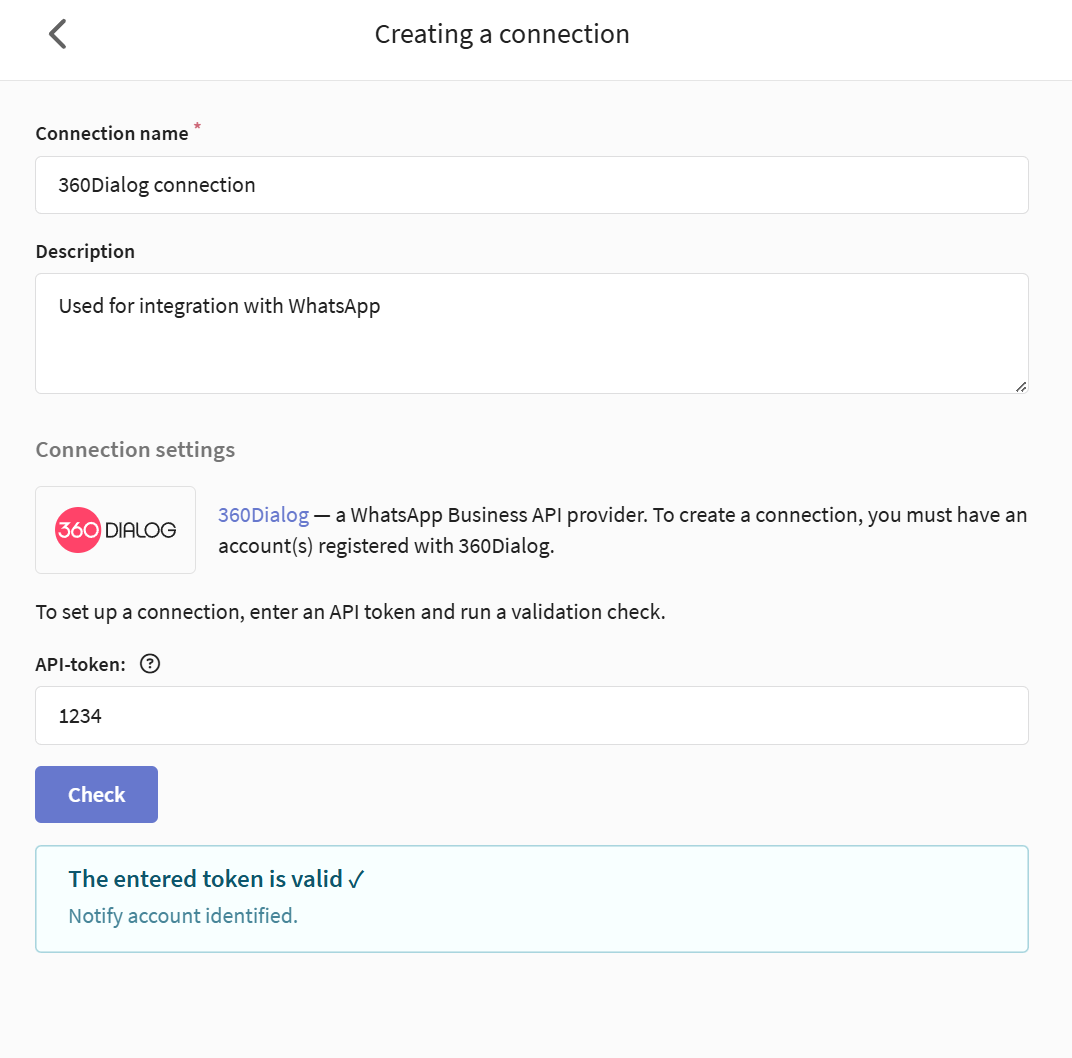
Click Create. Enter a name and description for the connection. Next, enter the API token generated in your 360dialog account and run a validation check. If the token passes the validation, click the Create button in the lower right corner.
You can read more about creating a connection here.
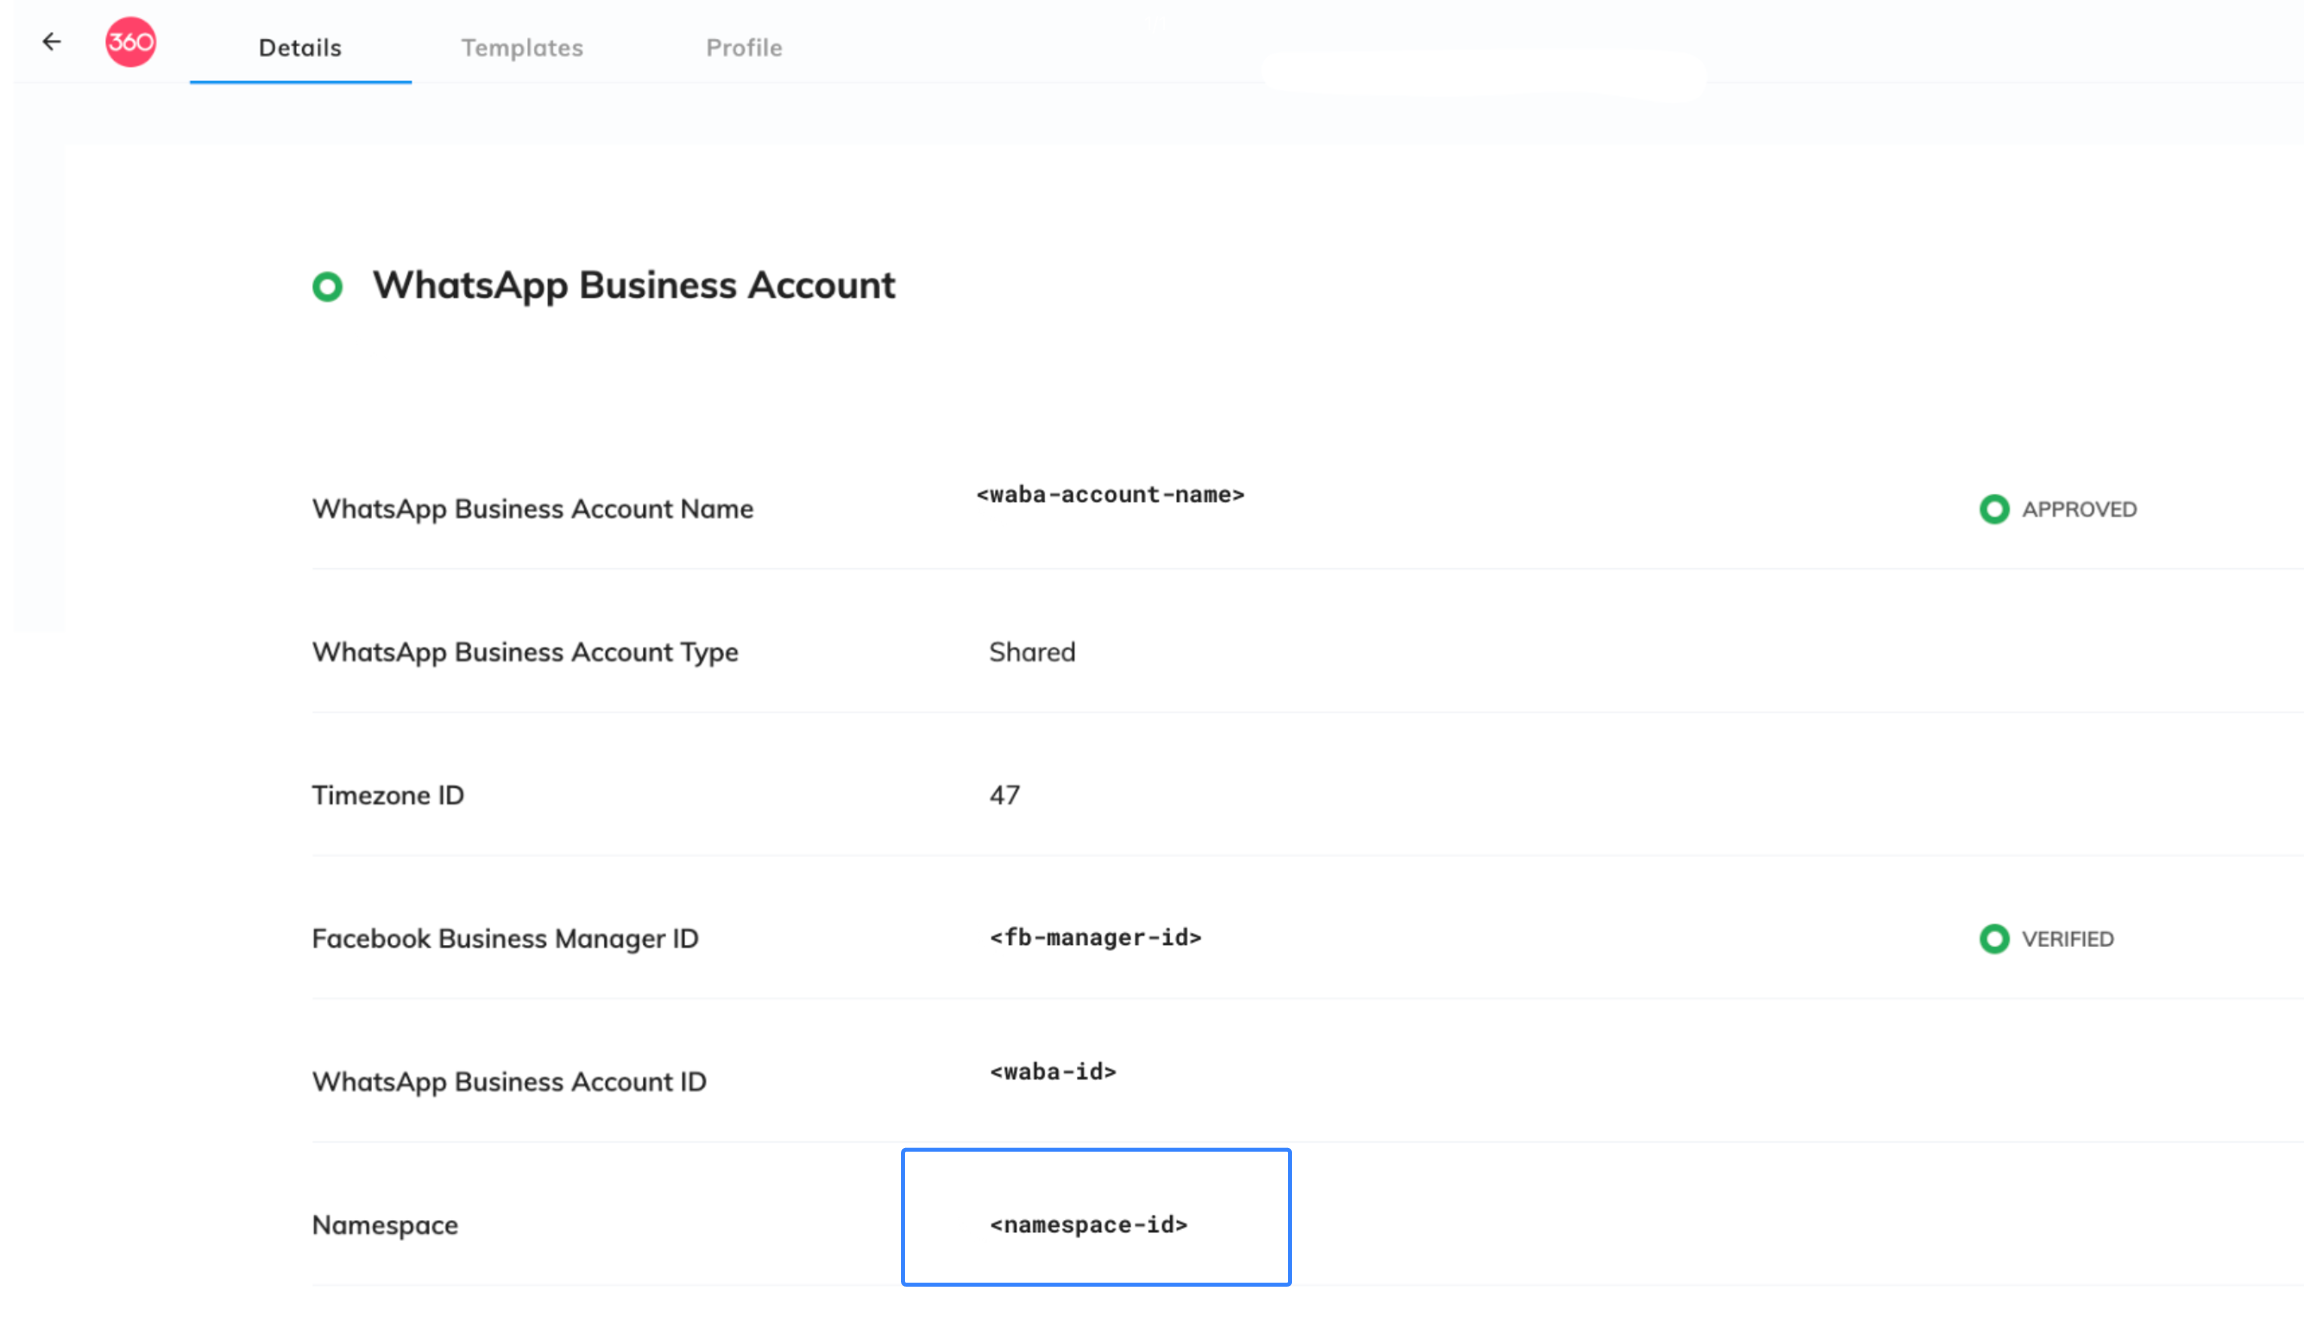
Next, enter the namespace — a unique string used to identify all templates created within a specific WhatsApp Business Account.
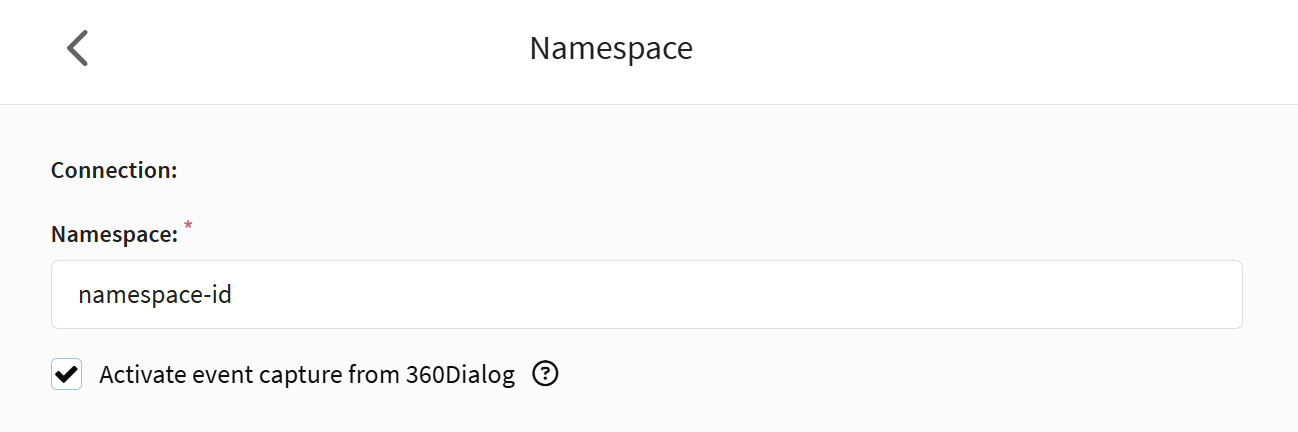
You can find the Namespace in your 360dialog account:
If needed, you can enable event capture in 360dialog to send message status data to Altcraft Platform. When this option is enabled, a Callback URL will be automatically added to your 360dialog account after the integration is saved. This URL is used to transmit WhatsApp events to Altcraft. If the option is disabled, delivery and read analytics will not be available in the platform.
Click Add in the lower right corner.
You can read more about creating a connection to 360Dialog in this guide.
You will see information on the added account in the table. You can add multiple accounts if needed. To remove an account from the integration, click .
Click the Save button in the upper right corner to save your integration.
Once you have successfully set up the integration, you can use it to add a WhatsApp* channel to a resource.
*The Meta organization, which owns Instagram, Facebook and WhatsApp products, has been declared as extremist and banned in Russia.