Altcraft Docs LogoAltcraft Docs Logo
User guide iconUser guide
Developer guide iconDeveloper guide
Admin guide iconAdmin guide
English
  • Русский
  • English
Login
    User documentationGetting StartedFAQAltcraft glossary
      Profiles and databasesarrow
    • Subscription resourcesManaging databasesSubscriber profileProfiles import and data updateScheduled customer data importAutomatic data collectionBulk customers profiles updateDouble opt-in subscriptionSuppression listsProfile relationsProfile history exportProfile exportCreating a static segment based on import resultsHow to open a CSV fileMatchingTypes of fields in the databaseGlobal control groupsSubscription Manager
      Communication channelsarrow
      • Email channelarrow
      • Email: ISP interactions best practicesEmail: sending domain configurationEmail: setting up and using postmastersБыстрый старт
        Push channelarrow
        • Mobile Pusharrow
        • Settings & implementation
            Integrate your app with Altcraftarrow
          • Providers: push message structureProcessing and adding a subscriptionEvent registration
          Web pusharrow
        • Preliminary Settings
            Web browser push configurationarrow
          • Firebase Cloud messagingApple SafariMozilla Services
          Connecting Web Push to a WebsiteTransferring Data to the PlatformWeb Push SDK Methods
            Import of subscriptions from third-party push servicesarrow
          • Migrating push subscriptions from third-party servicesHow to transfer push subscriptions configured for Safari?Migration from OneSignal
      SMS channel
        Creating mailing from scratcharrow
      • EmailSMSWeb PushMobile PushWhatsAppViber*™Руководство: SMS-рассылка через VK NotifyMAX BotMAX GroupNotifyTelegram BotTelegram Group
      Communication Channels WorkflowРуководство: SMS-рассылка через УТШРуководство: push-рассылка через сервис от "Согласие"
      Segmentationarrow
    • Static SegmentsDynamic SegmentsUpdatable Segments
        Segmentation Conditionsarrow
      • Segmentation by Profile dataSegmentation by Interactions with EntitiesSegmentation by Activity of the channelSegmentation by external dataSegmentation by external SQL tablesSegmentation by Profile structure
      Best Send Time (BST)Logical operators "AND" and "OR"Recommendations for working with segments
      Message templatesarrow
      • Working with message templatesarrow
      • Working in the editorEmail-templateSMS templatePush templateMAX templateTelegram templateWhatsApp templateViber™ templateNotify template
        Visual editor for email-templatearrow
      • Visual editor interfaceAdding blocksElements and their settingsCustom blocksStyle managerLayer manager
      Template fragmentsImage galleryContent personalizationCreating tables based on array elementsBlock editor for email template
        Altcraft Variables and Functionsarrow
      • Logical expressions in messagesLoops in messagesMarket variables in templatesUsing the JSONPath functionality
        Dynamic content in messagesarrow
      • Dynamic HTML contentDynamic JSON contentContent from SQL database in templatesDynamic API content
      Importing and exporting a message templateImporting a template from a third-party serviceExporting a template from Pixcraft
      Mailingsarrow
    • Mailings calendarBroadcast mailingsRegular mailingTrigger mailingMultivariate testingMailing testingMailing schedulePlacement mailing
      Campaignsarrow
    • Working with CampaignsLocal control groups (LCG)Audience expansionAudience building
      Automation scenariosarrow
    • Managing scenariosNodes of the scenarioClassic marketing scenariosStep-by-step welcome scenario guideScenario for automatic notification of the managerAbandoned cart scenario
      Marketarrow
    • Market settings
        Productsarrow
      • How to create a product manuallyHow to import a product from a fileScheduled product importProduct and SKU SegmentsPreparing the YML file
      OrdersMarket variables in message templateGuide: how to send an order confirmation email
      Loyalty programsarrow
    • Loyalty programsLoyalty integration with external systemsБыстрый стартBasic loyalty program use casesOrder SegmentsPromotion codes
      Reports and analyticsarrow
    • Channel reportTraffic report
        Summary reportarrow
      • Summary report metrics
      Cohorts reportLifetime reportFunnels reportGoals reportAudience growth reportClick map reportLoyalty programs reportBounces reportUndeliveries reportReport on global control groups
      Integrationsarrow
      • Action hooksarrow
      • Altcraft Action HooksAction hooks event typesAction Hook Message StructureJSON batch request (HTTP POST action hook)Message to RabbitMQ brokerMessage to RabbitMQ exchangerMessage to Kafka brokerTest event
        Integration of third-party services using Albatoarrow
      • Connecting Altcraft to Albato Launching the welcome scenario using AlbatoTransmitting event dataSetting app a trigger mailingEvent registrationGoogle Sheets and Altcraft integration AmoCRM and Altcraft integration
      Facebook Ads Manager™Google Ads AudiencesMAXYandex.Audience™VK Ads™Static segment synchronizationYandex AppMetrica™Tilda™Lpgenerator™WhatsAppViber*™ integrationIntegration scopeData Transmitted During SynchronizationNotify
      Weblayersarrow
      • Formsarrow
      • Create a formForm constructorAppearanceActions after form activationData analyticsBinding data channel and formsConditional logic in forms and surveysNPS testing
        Pixelsarrow
      • Goal customer actions and scoring
        Pop-upsarrow
      • Creating and publishing a pop-upSetting up a popup in the code editorManaging pop-ups manually via scriptPopup analyticsGuide: pop-up for push subscriptionsCase: Creating a pop-up with the "Wheel of Fortune" widgetBasic cases of placing a popup via the Tag Manager
        Tag Managerarrow
      • Configuring and installing Tag ManagerTrigger typesVariables typesLinking a pixel and the Tag manager
      Settingsarrow
    • Account settingsCustom linksVirtual sendersSending policiesAudit journalTags FAQ
        Users, groups and accessarrow
      • Two-Factor Authentication (2FA)
        Connectionsarrow
      • Connection to Facebook Ads ManagerConnection to Google AdsConnecting to Yandex.Audience™Connection to 360dialogConnection to EdnaConnection to Devino TelecomConnection to SMSTrafficConnection to VK Ads™Connection to MTS OmniChannelCustom Authentication ConnectionOAuth2 connectionBasic Authentication connectionToken Authentication connectionConnection to RapportoMAX connectionConnection to Notify
      Attribute settings
      API requests: where to startarrow
    • Import or update a profileTrigger mailing launchEngage profile in scenario
      Changelogarrow
    • v2026.1.76v2025.4.75v2025.4.74v2025.3.73v2025.2.72v2025.1.71v2024.4.70v2024.3.69v2024.2.68.2v2024.1.68
    Documentation archivelibrary
  • Mailings
  • Placement mailing

Placement mailing

Description​

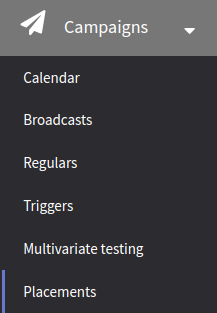
Placement mailing is a tool for placing content for subscribers on a specific resource with the possibility of cancellation at any time.

After launch, the mailing sends content to each subscriber in the data source (in the case of a scheduled start) or to a specific lead that initiated a certain event (in the case of a triggered start condition). If the channel is configured to unsubscribe, the placed content can be removed from the resource manually or upon reaching a certain date and time.

To create a new mailing, go to "Mailings" → "Placements" in the main menu. Click + Create in the top panel.

General settings​

In the main settings, specify the name and description of the new segment, and if needed, set the access group, add tags and attributes for additional grouping:
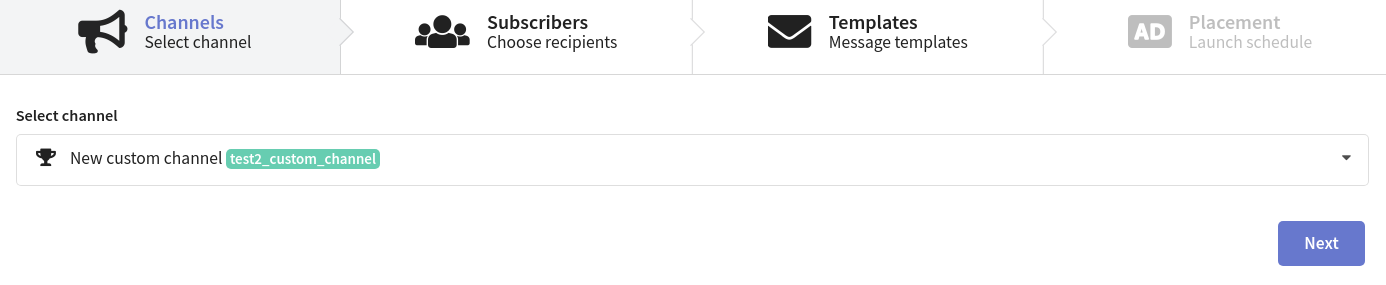
Channel​

In the drop-down list, select a channel that can be used to send messages for this mailing type.
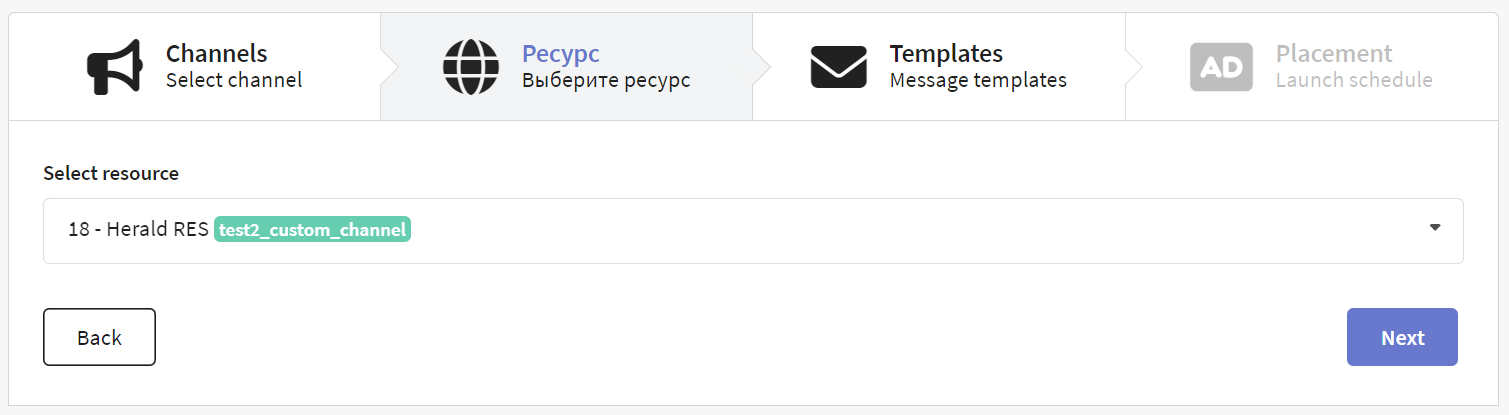
Subscribers​

Mailings are sent to customers who subscribe to a certain resource. Resources can be a separate website, product, promotion, or another direction of your communications with customers. Select a resource. Make sure the recipients in your database are subscribed to it.

Select an audience source. Placement mailing recipients can be a profile database or a segment consisting of profiles from one or more databases.

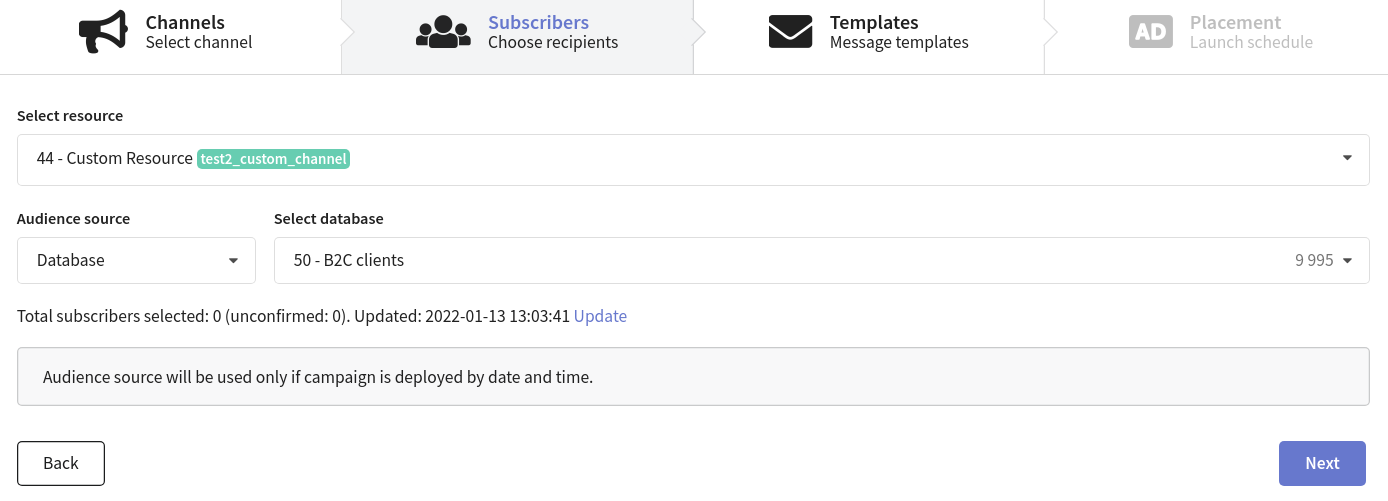
If you are using a placement mailing to send messages through a custom channel, the mailing settings may vary depending on the channel configuration. For example, some channels may require selecting only the resource without specifying the subscriber source.
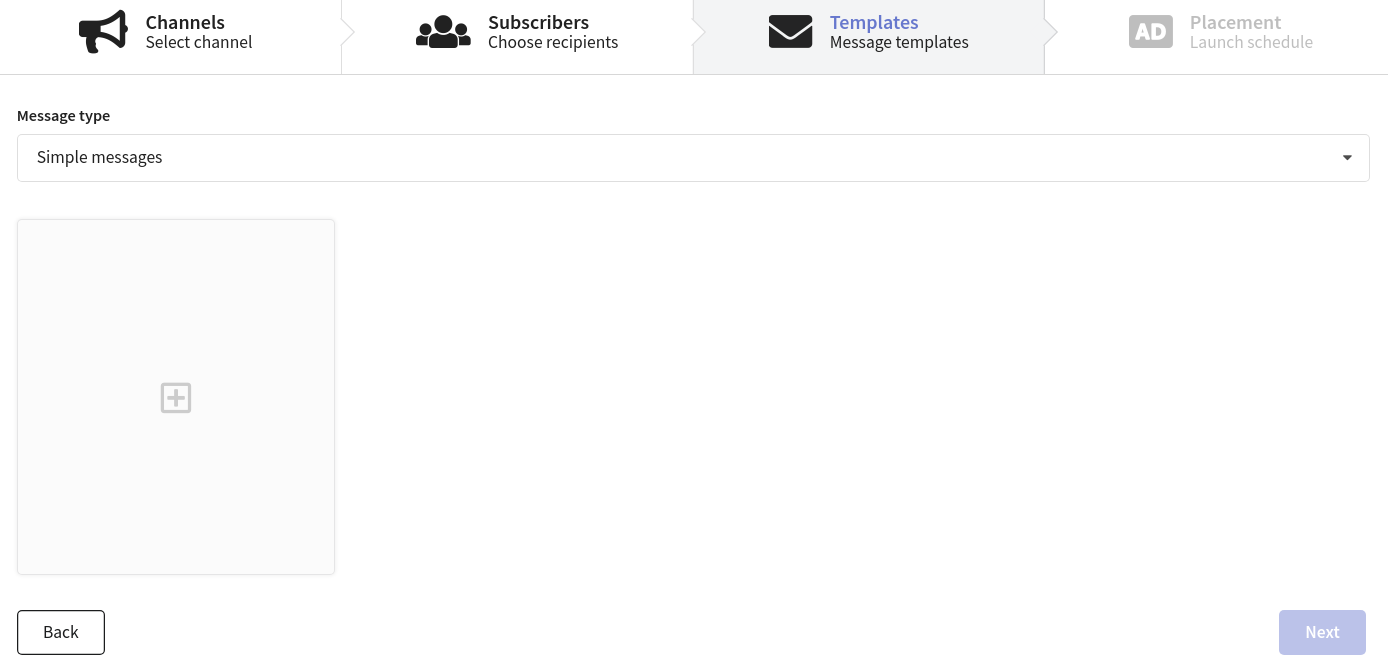
Templates​

Select the content you want to use in your placement mailing. Click     to add a new template. Any mailing type supports up to 8 message templates. The mailing will send each recipient one randomly selected message in equal proportions. If you want to preview the message, click on the template thumbnail.

Schedule​

Start and stop settings​

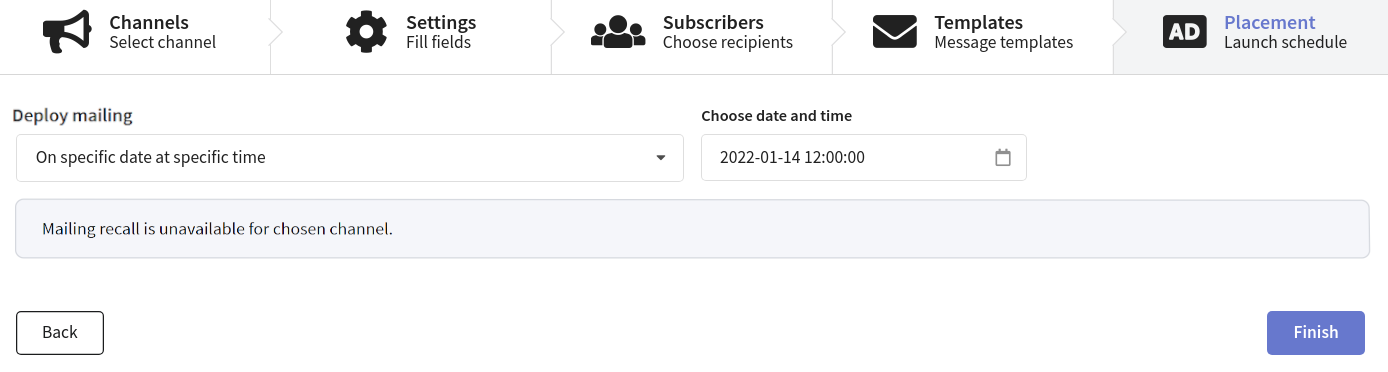
A placement mailing can be launched in two ways:

  • on specific date at specific time
  • on trigger for one subscriber

Start at a specific date and time​

The mailing will run once at the specified time. After that, the mailing will not be available for restart.

Strat by trigger​

The setup is similar to a trigger mailing. Content will be sent to every subscriber that will be captured by the trigger.
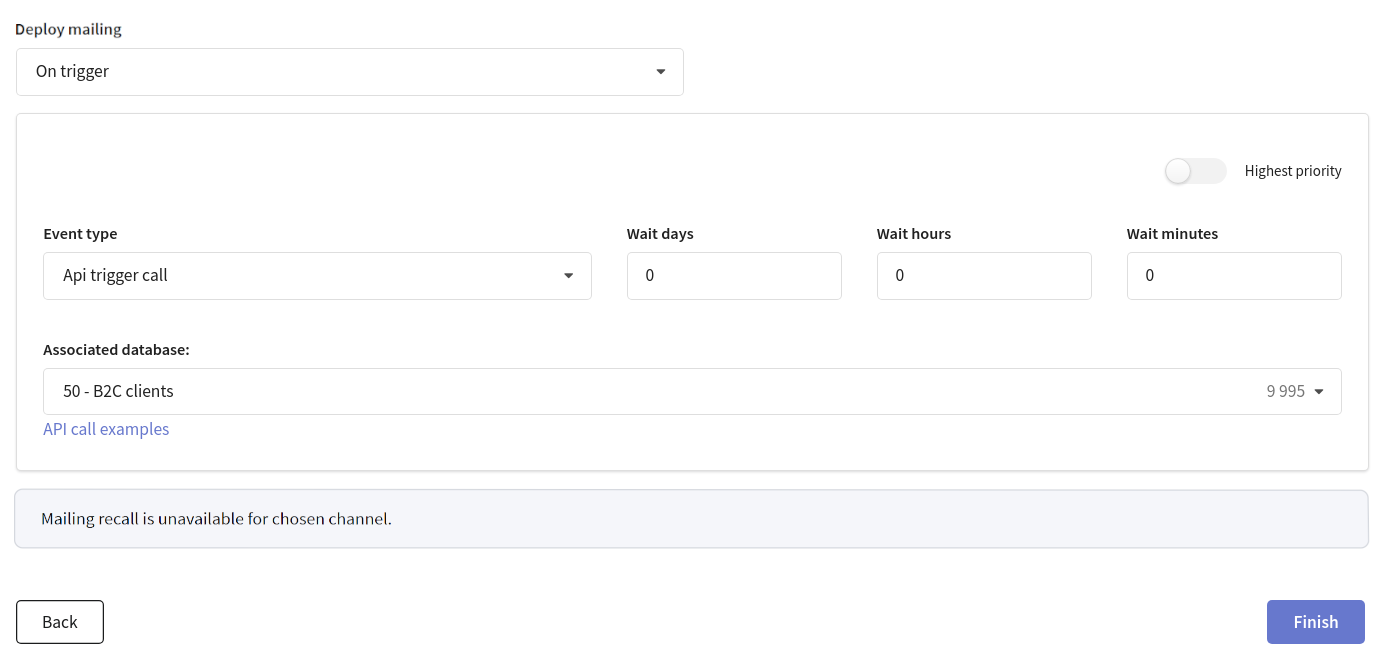
Cancellation of placement​

Cancellation of placement is only available for channels where it's configured. If the cancellation was not provided by the administrator when configuring the channel, this option will not be available for editing in the mailing.

There are two types of cancellation:

  • on specific date at specific time
  • manually

Both options will cancel placements for all subscribers to whom the content was sent. It does not depend on the start type. If the start was set to a trigger, the trigger will be deactivated before cancelling.

Placement mailing can be canceled manually if its status is "Deployed".

Additional settings​

In the "Limitations" block, you can configure limits and sending policy.

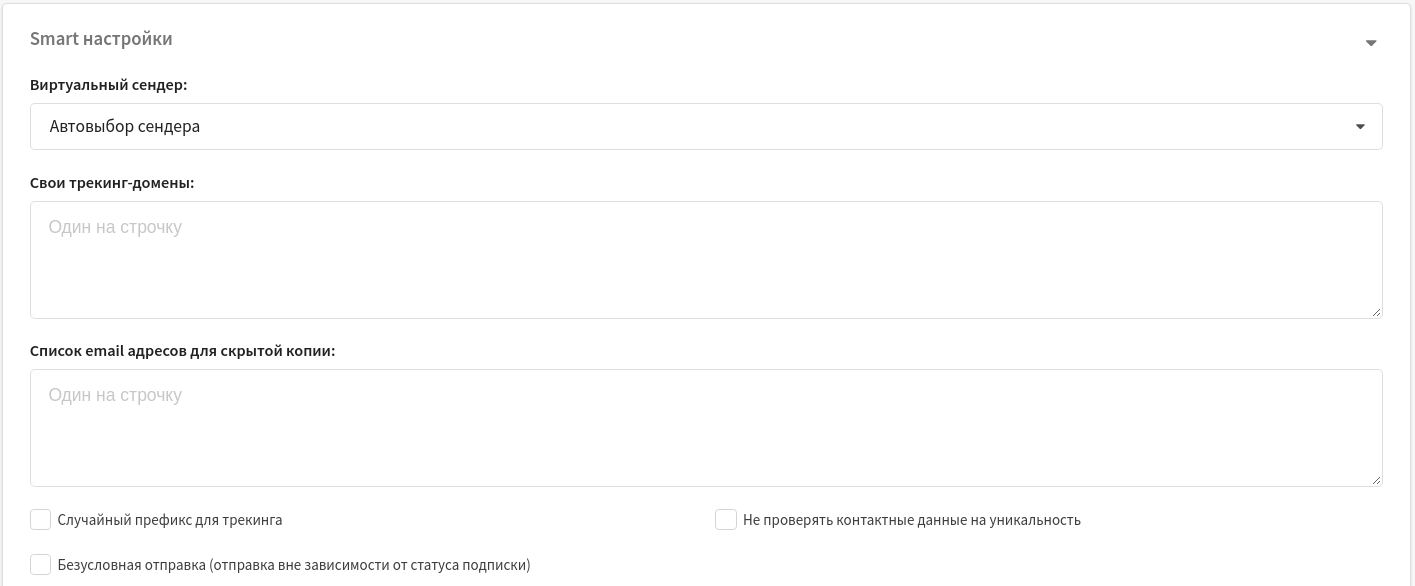
The Smart Settings block includes the following additional mailing options:

  • Virtual sender — lets you select a virtual sender for the mailing (a set of rules for sending messages from the platform’s real senders).
  • Custom tracking domains — tracks message interactions using additional tracking servers. Specify each domain on a separate line.
  • BCC email list — BCC recipients for outgoing messages. Specify each address on a separate line.
  • Do not check contact data for uniqueness — disables uniqueness validation of mailing recipients based on subscription data.

You can also configure mailing watchers in Smart Settings. Watchers receive the same messages as mailing recipients. To do this, you need a watchers database. It is created the same way as a regular database, but you must enable the corresponding option in General settings.

In Smart Settings, select the watchers database and set the message sending limit for each mailing launch:

If you want to launch a mailing right after its creation, toggle the option "Start the mailing right now" at the bottom part of the page.

Last updated on Mar 12, 2026
Previous
Mailing schedule
Next
Campaigns
  • Description
  • General settings
  • Channel
  • Subscribers
  • Templates
  • Schedule
    • Start and stop settings
      • Start at a specific date and time
      • Strat by trigger
      • Cancellation of placement
  • Additional settings
© 2015 - 2026 Altcraft, LLC. All rights reserved.