Bulk customers profiles update
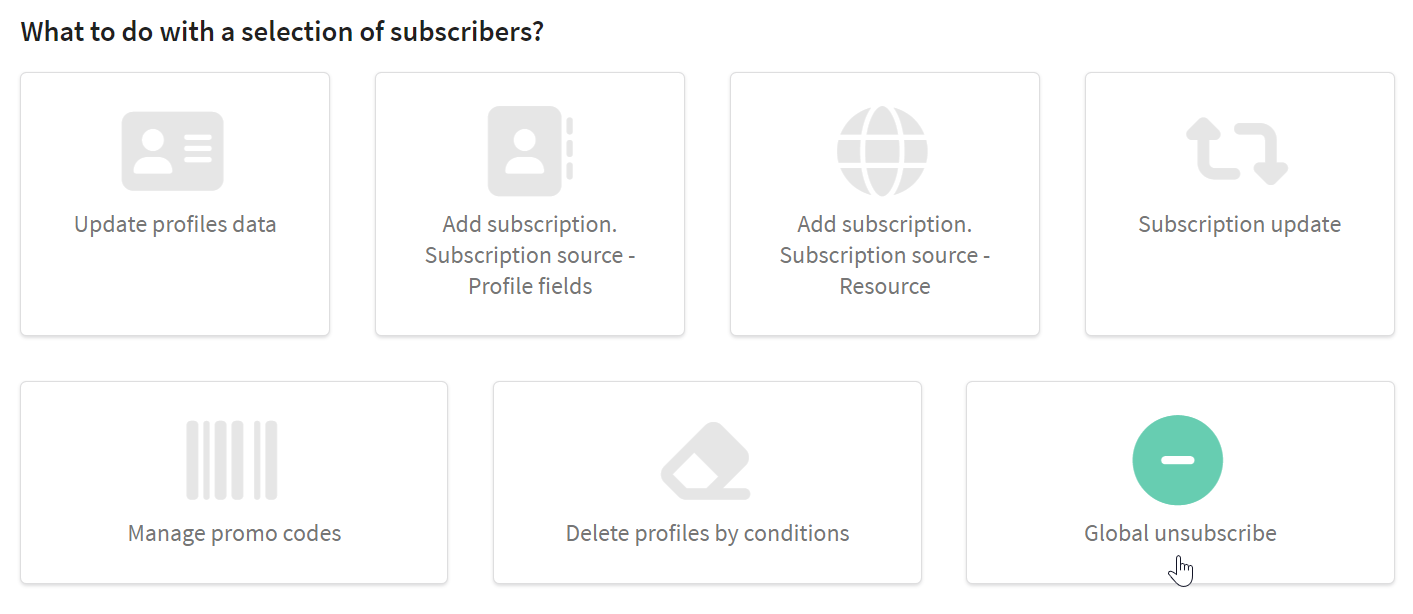
Bulk profiles update allows you to update manually Database or the Segment of customers. In this case, conditions can be configured, to make update query more accurate. The following functions are available:
- Adding and changing customer profile fields value
- Adding and updating profiles subscriptions
- Managing promo codes
- Deleting profiles from a database
- Global profile unsubscribe
To open the bulk update tool, select Data —> Profile databases or Data —> Segments in the main menu. In the context menu of the profile group, select Update profiles:

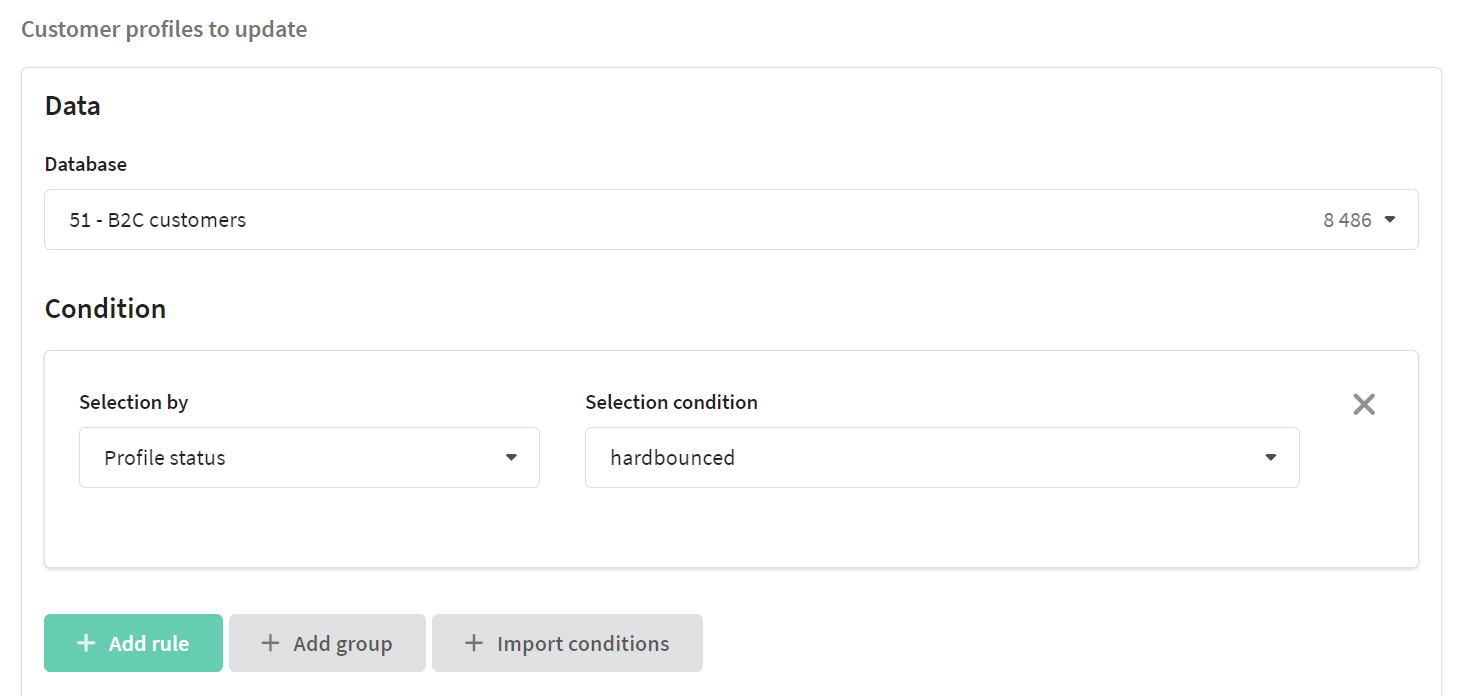
Selecting customer profiles
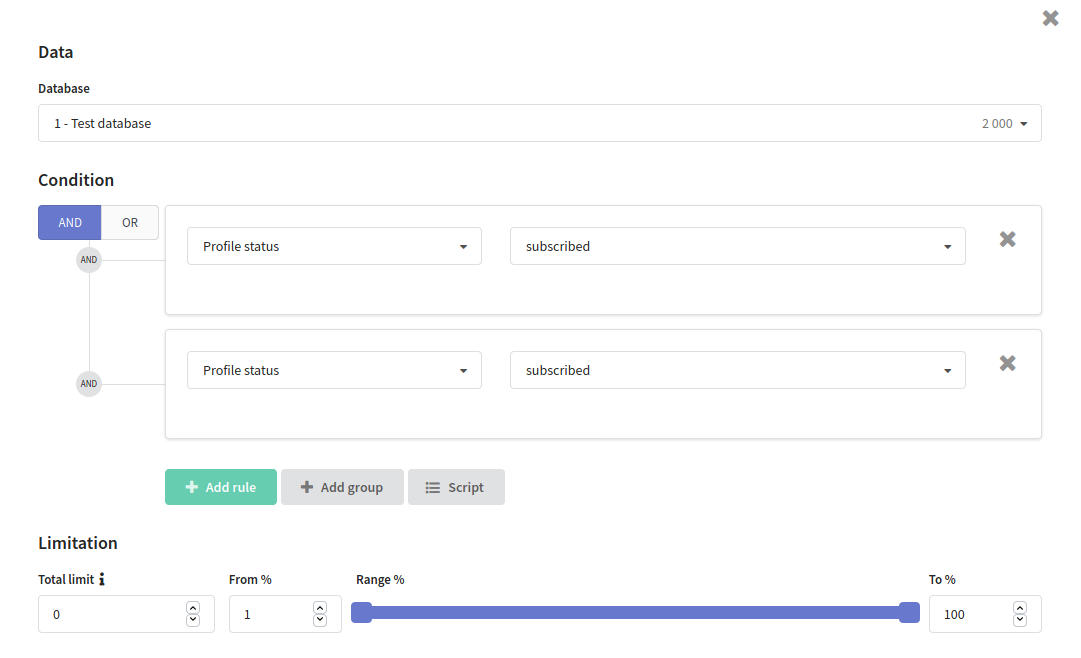
Select the database where profiles that need to be updated are stored. If you want to update only a part of the profiles in the database, add specifying segmentation rules.
You can also add multiple rules and combine them using logical AND (all conditions must be met) and OR (at least one condition must be met).
In this section of the documentation, you can find information on segmenting customer profiles based on personal data, subscription data, and action history.
You can also set a limit on the resulting sample using two options that can be applied simultaneously — the maximum profile count limit and the range.
Maximum profile count limit — the limit on the number of profiles that can be included in a segment.
This method limits the size of the final segment. You specify the maximum number of profiles that can be included. If more people match the segmentation conditions, the platform takes the first profiles from the resulting sample.
For example, if 1,000 people match the conditions and the maximum count is set to 400, the first 400 profiles will be included in the segment. This restriction applies to the sample result of the segment. If a range is also used, the range restriction is applied first, and then the profile count limit is applied to the selected portion of the database.

The range determines which portion of the entire database will participate in segmentation. By default, it is set to 100%, meaning the conditions apply to all profiles. The key feature is that the range is tied to specific users: each profile in the database is assigned a numeric value, and the same range always selects the same people.

This means the selection is not random. A profile is included in the segment if its assigned value falls within the selected range. This allows you to create non-overlapping groups by setting different ranges — for example, a range from 0 to 20% and a range from 80 to 100% will never intersect.
When new users are added to the database, they are distributed according to the same rules: if a 20% range is selected, a new profile has the same probability of falling into it.
If a maximum profile count limit is also used, the range is applied first to determine the portion of the database, and then the limit takes effect within that portion.
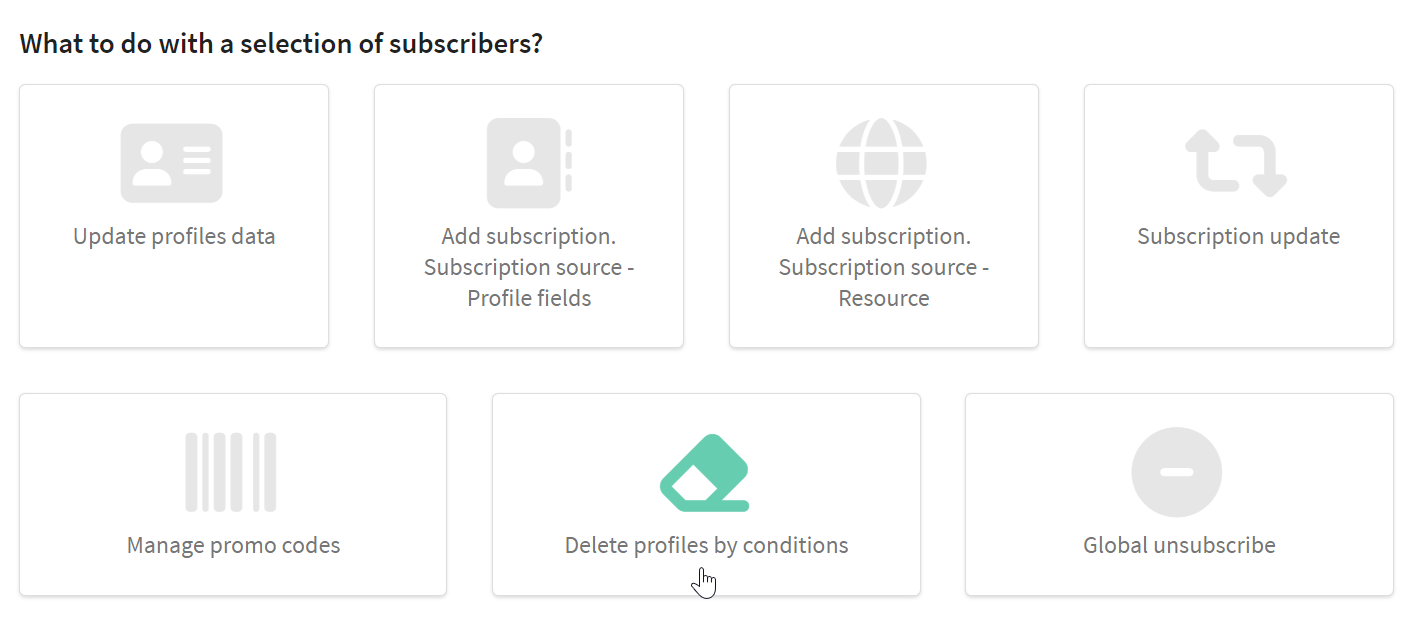
Customer profiles update
Updating profiles data
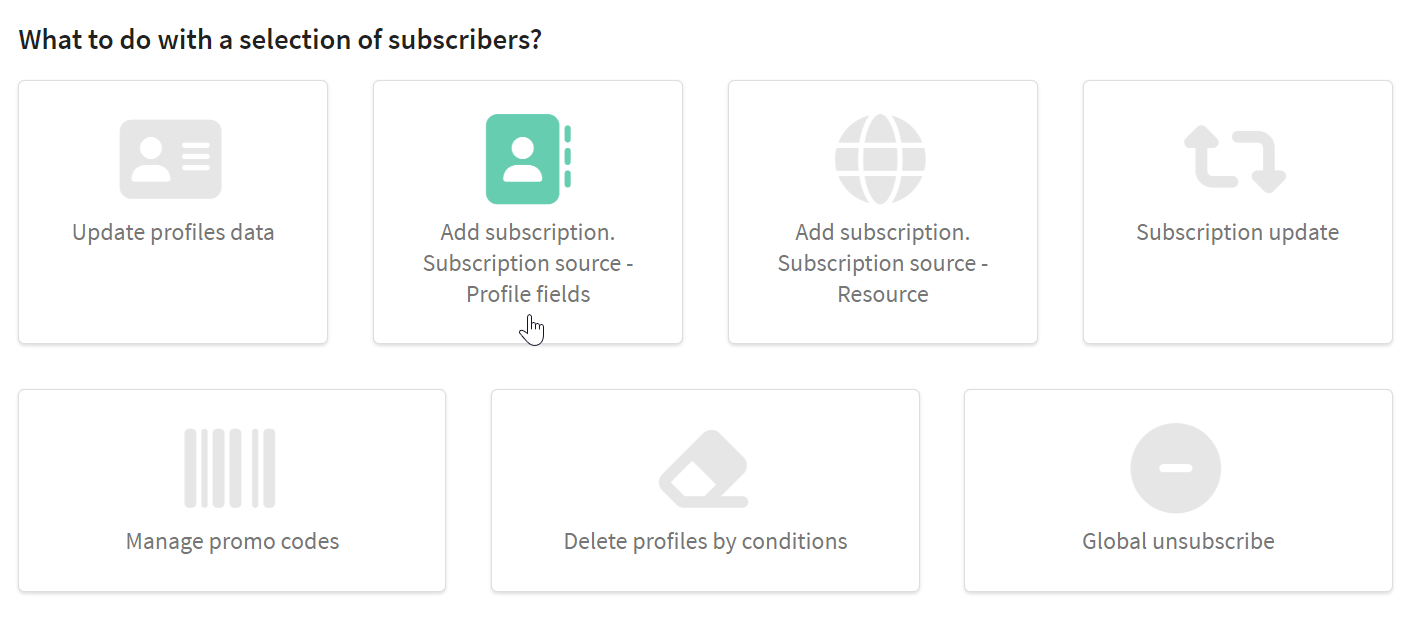
Select the option Update profiles data:

All database fields are available in the dropdown list. Choose the field you want to update and click + Add this field. Then select the update option: change or delete the value. If you want to update, choose a new value depending on the field type:

Adding a subscription to a new resource
Depending on the source of your contact information, there are two ways to add a subscription:
- subscription source — profile fields
- subscription source — resource
Subscription source — profile fields
Subscription is created based on contact details (phone number, email address, etc.) provided in the profile fields.
Select the resource and channel to which you want to add the subscription. The resource must be attached to the database. Then specify the subscription status.
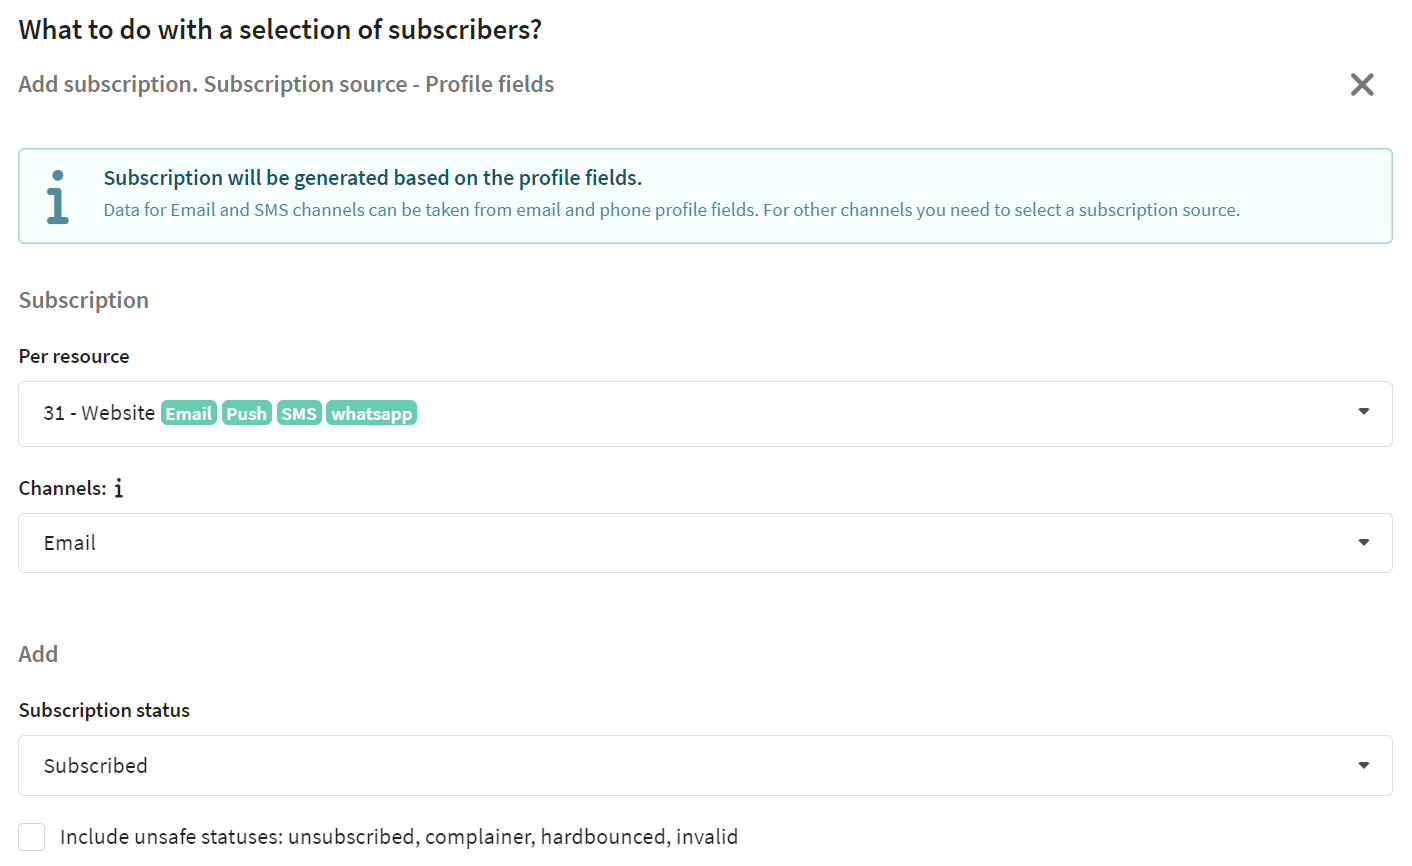
Choose the subscription source from the profile field. For subscribing to the Email channel, use the Email field; for SMS, WhatsApp*, Viber channels, use the Phones field. You can store data for other communication channels in the additional database fields.

If you change the subscription status to "Subscribed", by default, subscriptions of profiles with unsafe statuses are not updated. Unsafe statuses include: Unsubscribed, Complainer, Hardbounced, Invalid. To change this behavior, activate the option Include unsafe statuses.
Subscription source — resource
Subscription is created based on the contact data used in the subscription to another resource.

You need to onfigure the following fields:
- Get channels from a resource. The platform updates contact data using the subscription from the selected resource. If a profile lacks a subscription to this resource, the platform won't add a new subscription.
- Per resource. The platform adds subscriptions to the selected resource for profiles.
- Channels. The platform adds subscriptions to the selected channel in the resource. Note that this channel must be configured in both resources.
- Subscription status. The platform adds a subscription with the selected status.
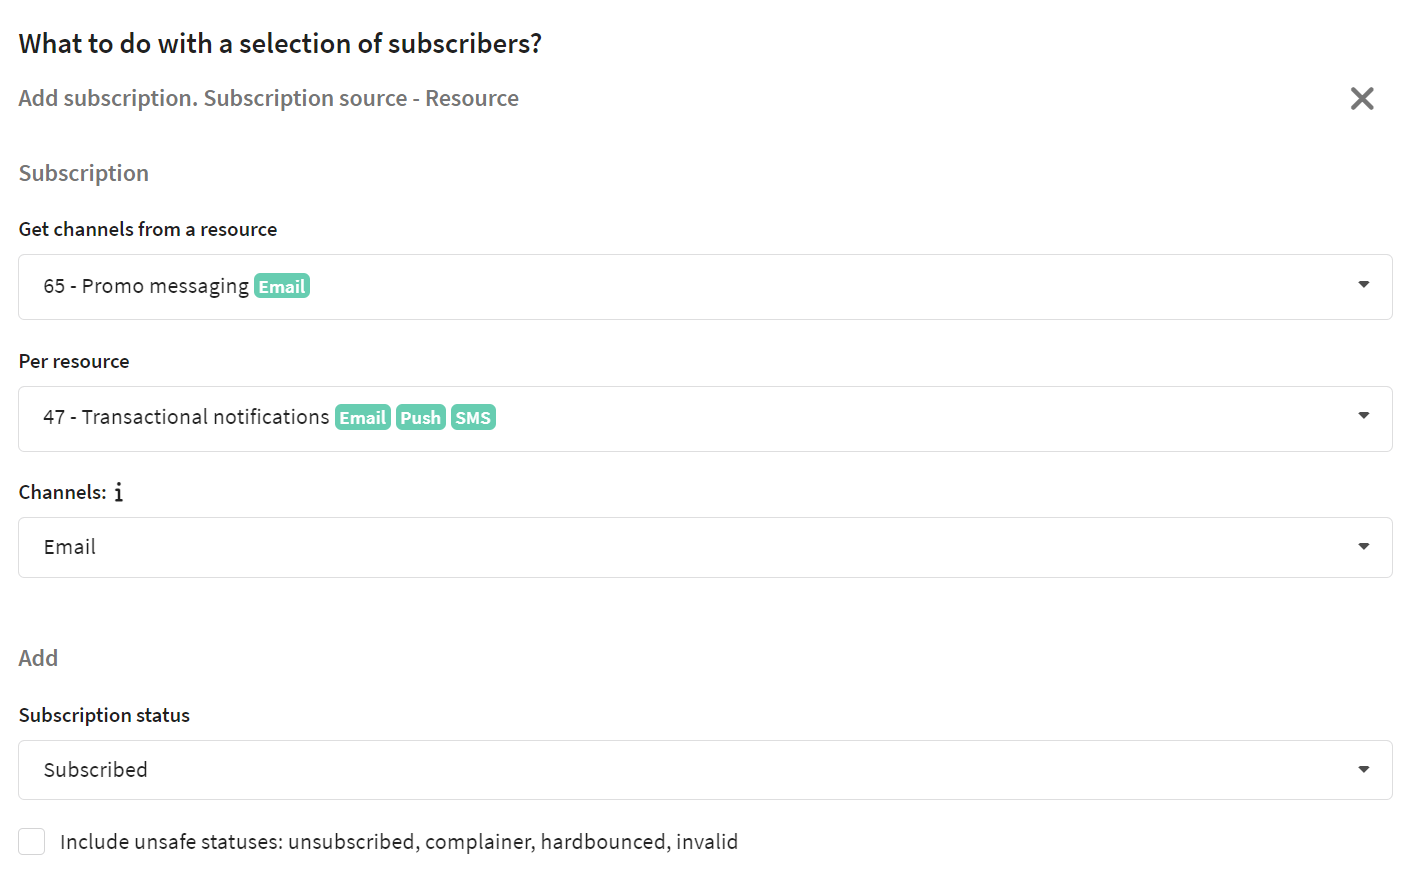
Changing the subscription status to "Subscribed" won't update subscriptions of profiles with unsafe statuses by default. Unsafe statuses include: Unsubscribed, Complainer, Hardbounced, Invalid.
Additionally, the subscription will not be updated if you're using data from a subscription with an unsafe status. To change this behavior, activate the option Include unsafe statuses.
Updating subscription
Updates the status of existing subscriptions to the resource. This feature is handy if you want to unsubscribe all inactive clients at once.

Choose the resource and channel, then specify the status:
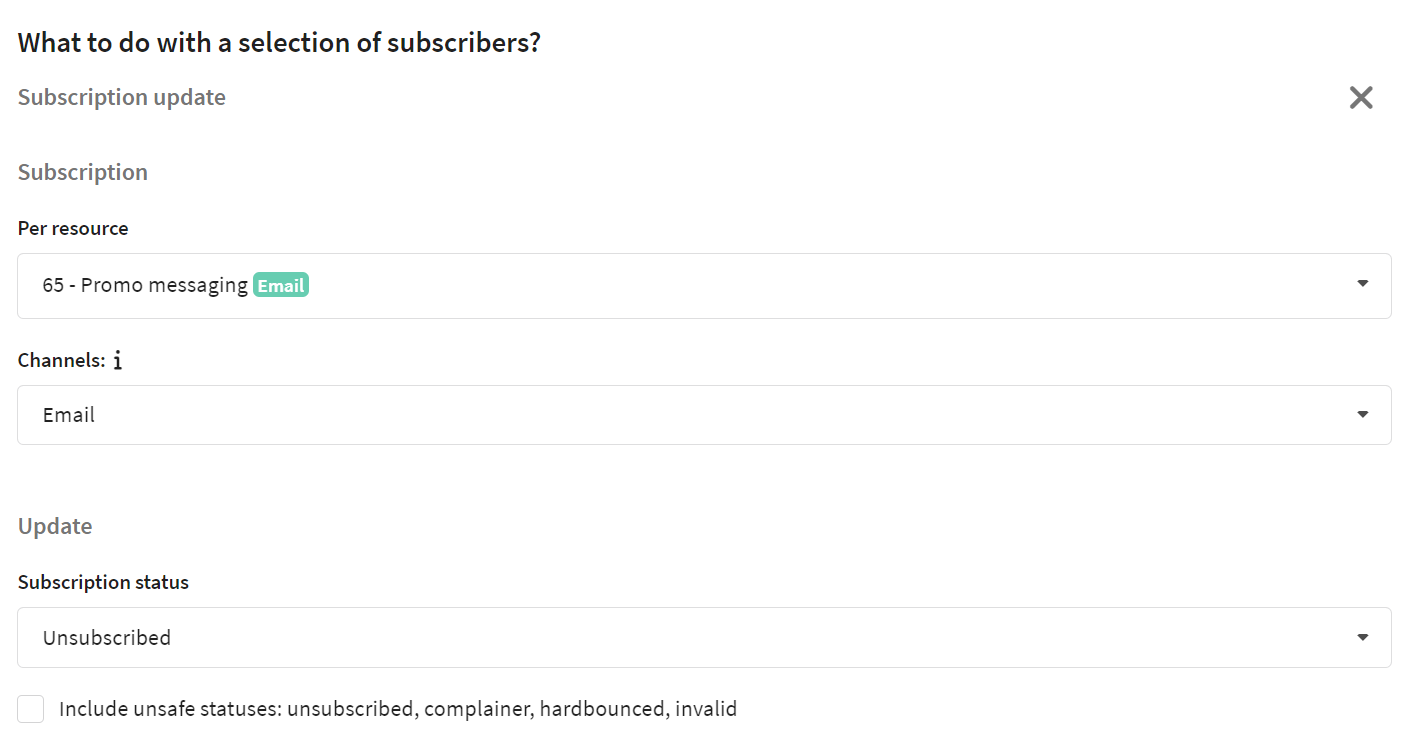
If you change the subscription status to "Subscribed", by default, subscriptions of profiles with unsafe statuses are not updated. Unsafe statuses include: Unsubscribed, Complainer, Hardbounced, Invalid. To change this behavior, activate the option Include unsafe statuses.
Managing promotion codes
This option allows you to attach or detach specific loyalty program promo codes to/from profiles.

Select the action and the loyalty program:

Deleting profiles by conditions
This option allows you to remove profiles from the database that match the specified conditions. The statistics of actions of deleted profiles is saved in reports.
Using segmentation rules, select the profiles you want to delete, then click the "Update" button in the top right corner:
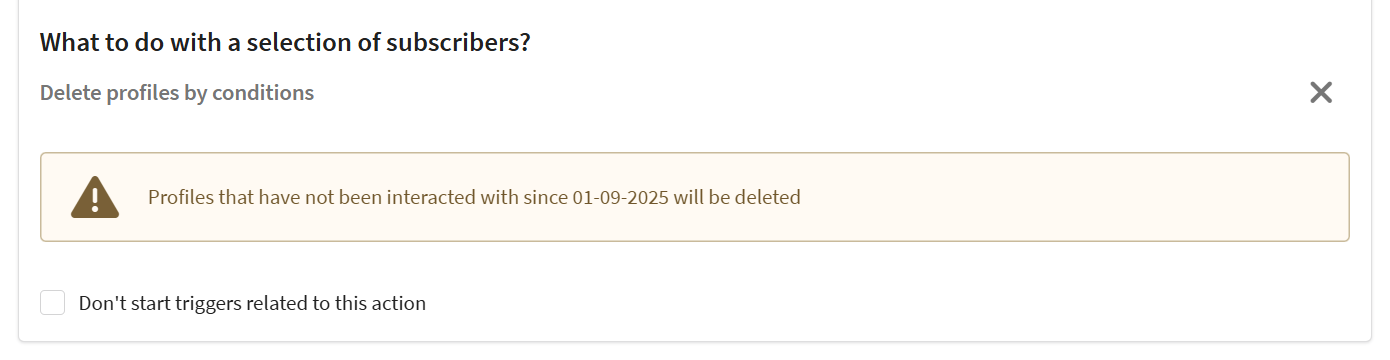
The platform does not delete all selected profiles, but only those that had no interactions during a specific period.
In the Cloud version, this period is fixed and equals one month before the start of the current month. For example:
- If today is October 1, 2025, the system will delete profiles that had no interactions since September 1, 2025.
- If today is October 31, 2025, the same profiles will be deleted — the period does not change within the month.
In the On-premises version, this period is configured in the system settings file using the parameter PROFILES_REMOVAL_MIN_MONTHS. Learn more.
An interaction means any action recorded in the profile’s activity history. Information about the current period is displayed in the interface:
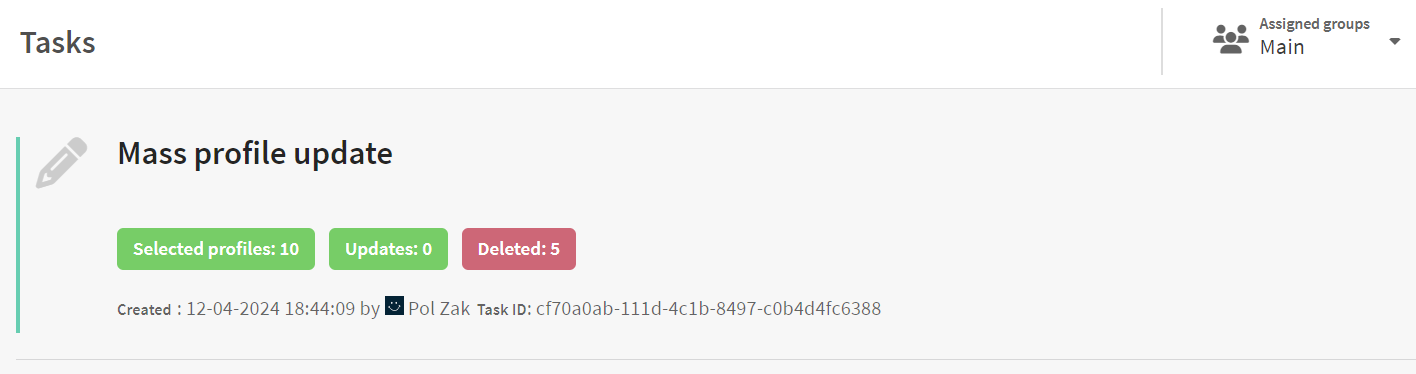
After launching the update, you can check the Tasks section to see how many profiles have been deleted. If a profile matches the selection conditions but was not deleted, it means that some interactions with it were recorded during the specified period.
Global unsubscribe
This option sets the "Unsubscribed" global status for all profiles, completely stoping communication via any channel. Even if a profile has active subscriptions to resources, mailings won't send messages to them.
Using segmentation rules, select the profiles you want to unsubscribe, then click the "Update" button in the top right corner:

In the platform, trigger mailings or scenarios can be configured to activate upon subscription addition or update, profile field update, or promo code attachment. If you don't want these triggers to activate after the current update, enable the option Don't start triggers related to this action.
*The Meta organization, which owns Instagram, Facebook and WhatsApp products, has been declared as extremist and banned in Russia.