Searching tags FAQ
Tag is a label that can be assigned to some platform objects to quickly find these objects later. Tags usually associate objects with a common theme. For example, mailings that are launched as part of one promotion, or templates targeting the same audience.
Which objects can be tagged:
- databases
- resources
- segments
- templates
- scheduled imports
- suppression lists
- mailings
- campaigns
- scenarios
- forms
- products and orders
How to create a tag
The tag is created directly in the object to which you want to assign this tag. Go to the object editing window, place the cursor in the Tags field and enter the text, then press Add or ↵ Enter.
To unpin a tag from an object, click the cross symbol.
You can assign any number of tags to an object. Tag names are not limited in any way:
- any number of characters
- Cyrillic and Latin
- spaces
- special symbols
Tag examples: new2023, брошенная корзина, abandoned_cart.
Where I can see my tags
When you save an object with an assigned tag, the tag is also saved. There is no separate window where you can view all tags. However, when editing another object, all previously created tags will be available in the drop-down list:

While a saved tag can be detached from an object, it cannot be completely removed from the platform. All account users see all existing tags.
If a tag is not attached to any platform object, it will be automatically deleted.
Where to use tags
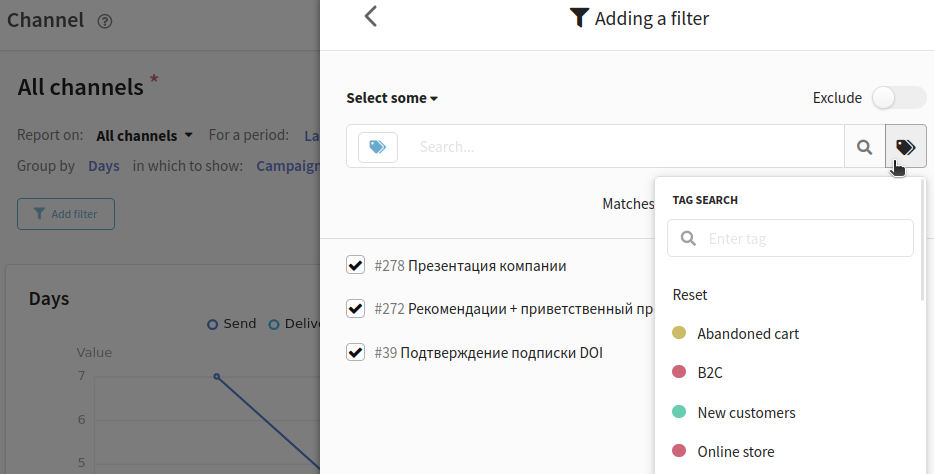
1. Search for objects in the general list
Go to the desired section (for example, Templates) and click the icon  to the right of the search bar. Select one or more tags.

To see what tags have been added to the search, hover over  :
:

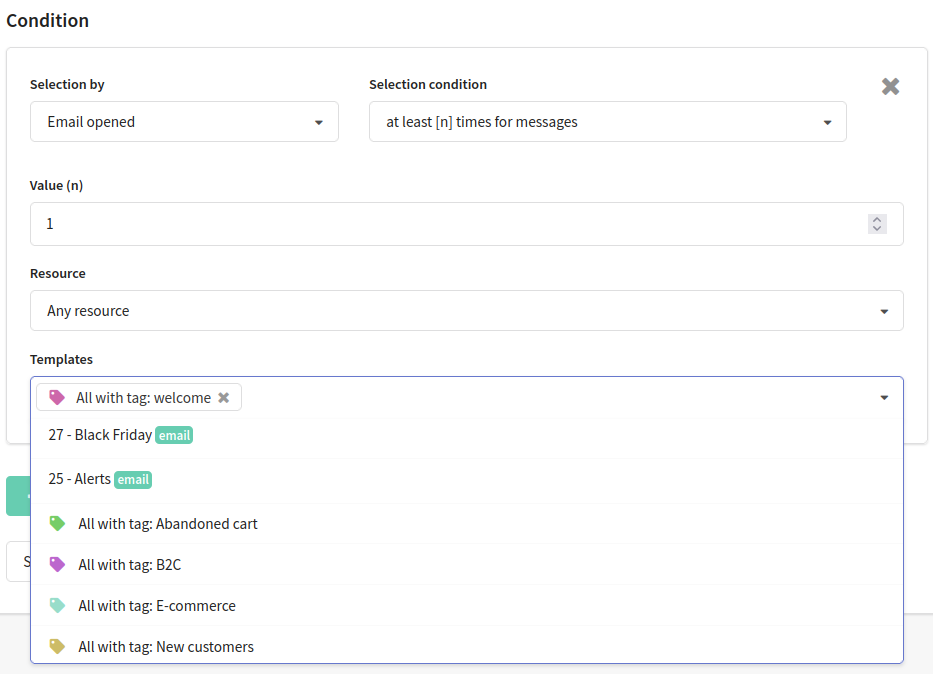
2. Segmentation of profiles by events in mailings or templates (sends, deliveries, opens, clicks)
When you use one of these selection conditions, you can select all mailings or all templates with a specific tag or tags:
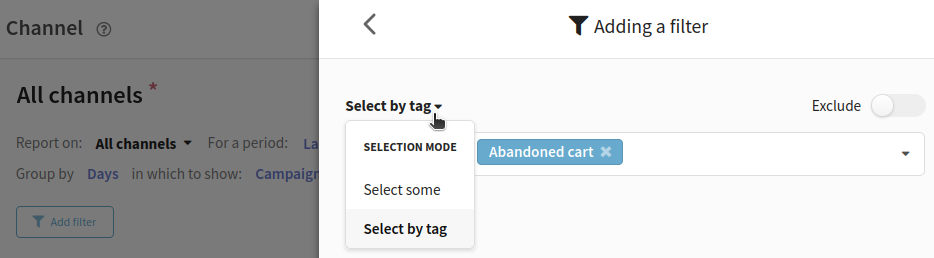
3. Analytical reports
In the channel report and in the traffic report, you can use tags in filters. For example, to quickly find the desired object:
You can also select all objects of the same type that have one or more tags assigned at once. To do this, switch the selection mode: Single selection of campaigns —> Selection of campaigns by tag. Then select tags in the drop-down list and apply the filter: