Mobile Push: Setup and Connection
Setup for Web Push notifications is described in the corresponding article.
Mobile push notifications appear in the device's notification center as they are received — in the notification shade of Android and iOS smartphones, tablets, and other devices. Notifications are enabled by default for installed apps, so you can start engaging customers right from installation.
There are 5 setup options for mobile apps:
Google Firebase Cloud Messaging — for Android and iOS apps
Apple Push Notification Service — for iOS apps only
Yandex.AppMetrica — for Android and iOS apps
Huawei Mobile Services — for Android and iOS apps
RuStore — for Android apps only
Yandex.AppMetrica uses Google Firebase SDK for delivery. To send notifications, you need to install the Firebase SDK in your app.
Altcraft offers an integration with Yandex.AppMetrica for importing user profiles, registering their actions, and associated value (cost).
Provider settings in the resource
Firebase Cloud Messaging
 | To send mobile app push notifications to Android and iOS devices using the Google Firebase platform, you need to set up a project in Firebase Console in advance. |
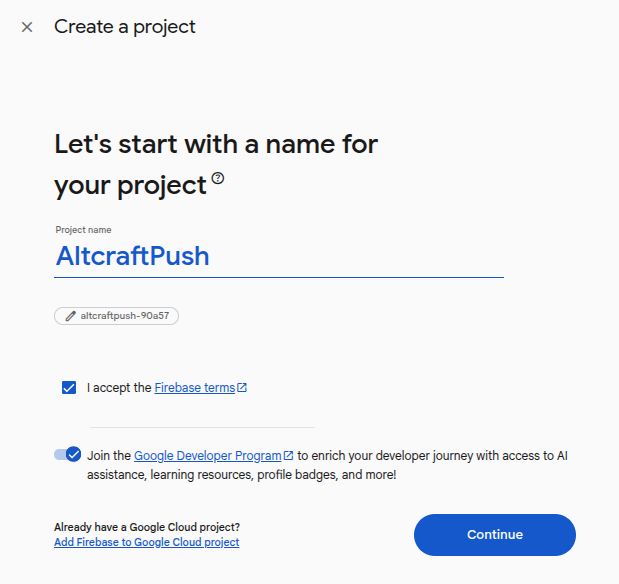
Create a Google Firebase account and register your website or app:
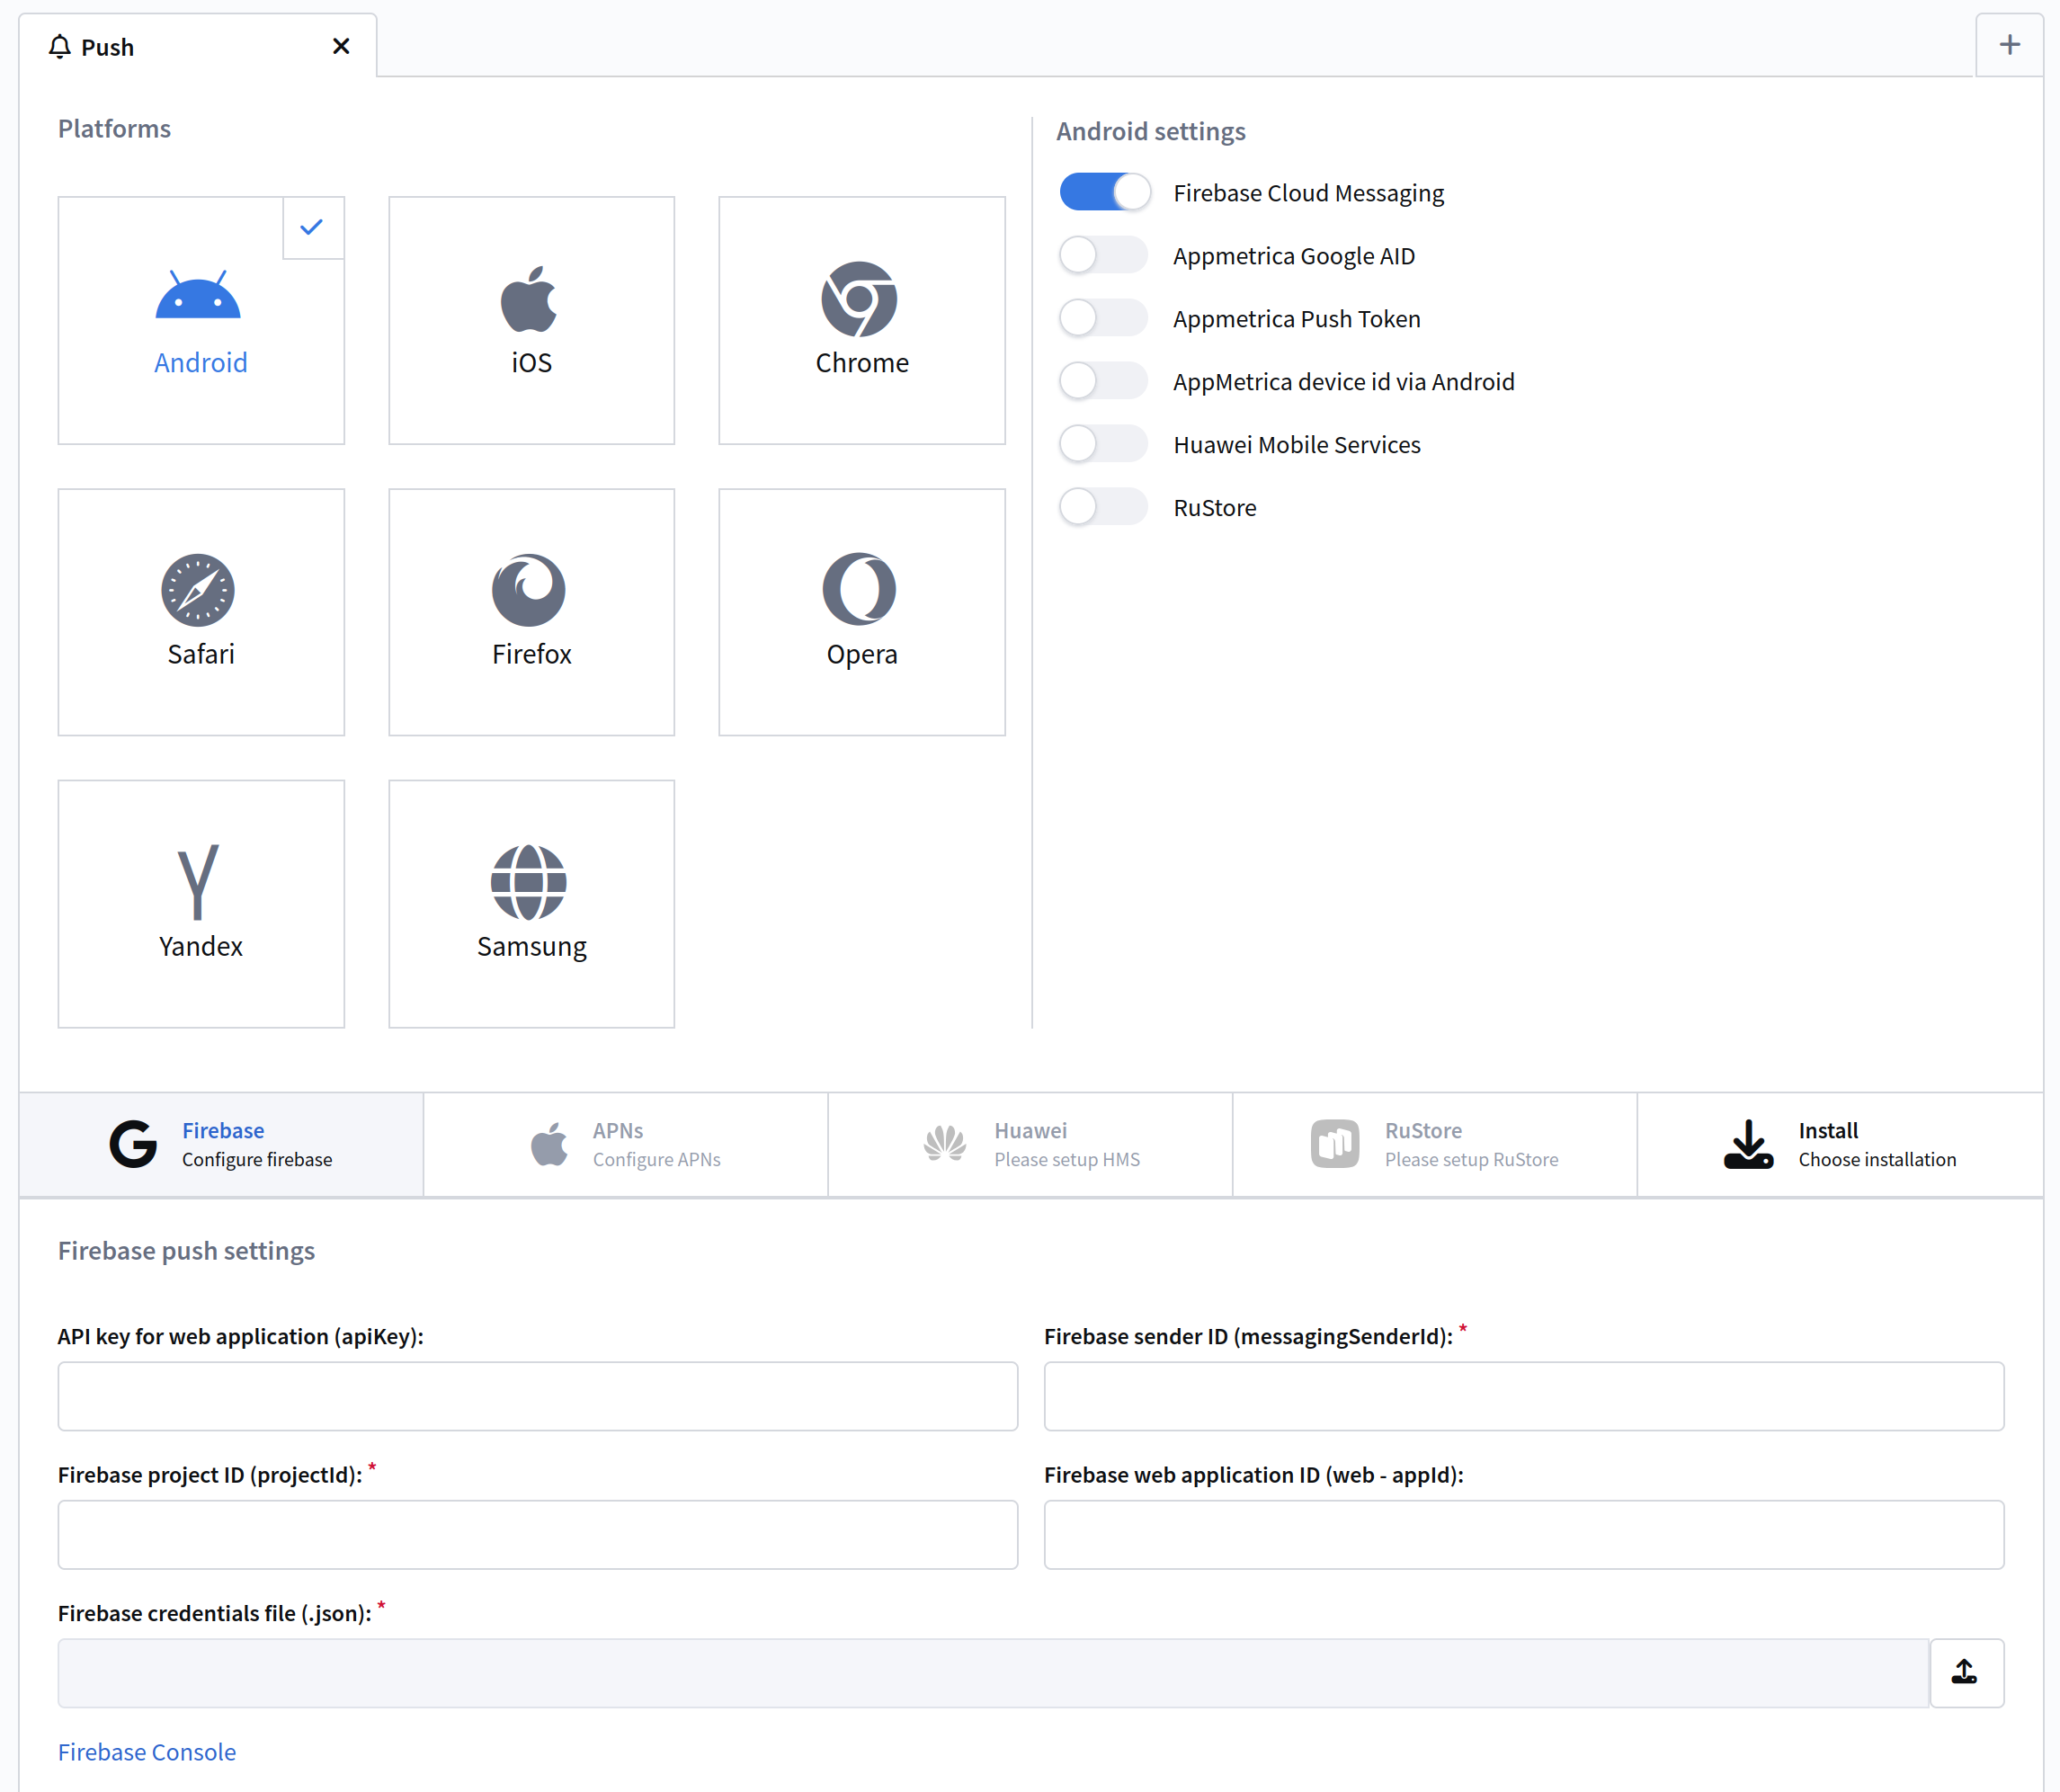
Open the resource settings in the platform and activate Firebase Cloud Messaging for your Android and iOS apps. In the tab that opens below, enter your Firebase project settings:
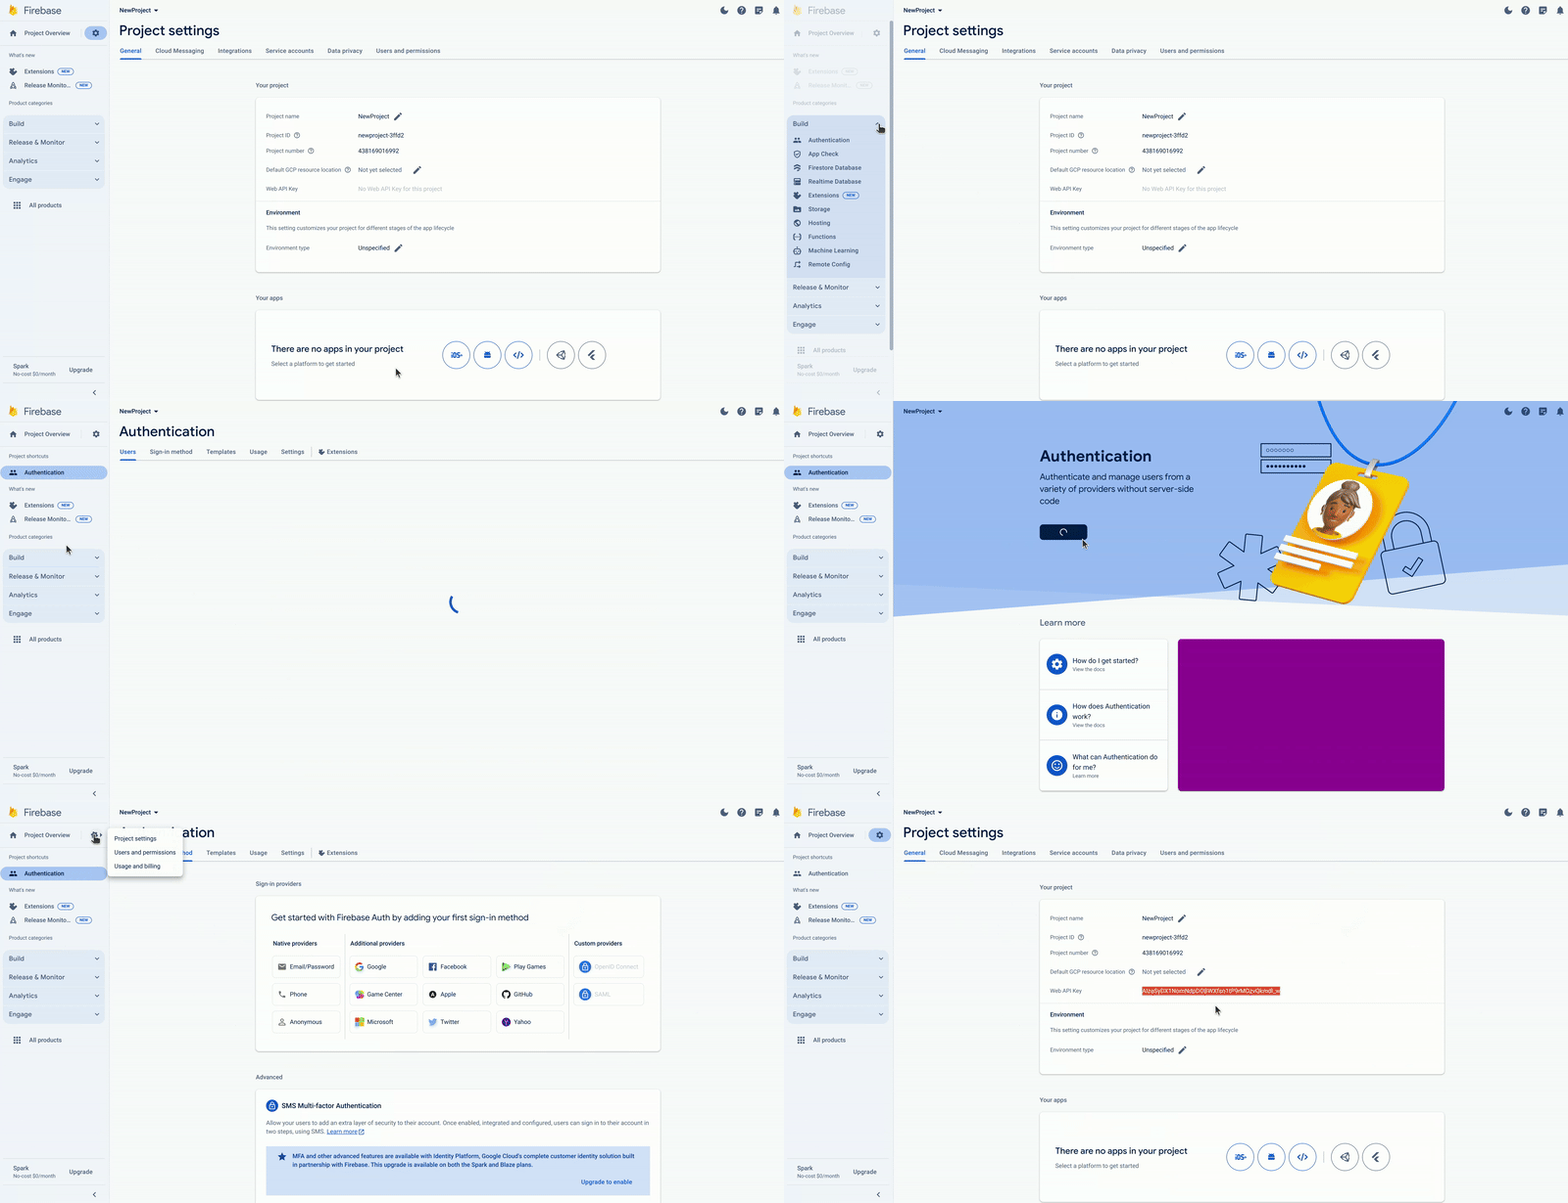
You can find the Web API Key and Firebase Project ID in the Firebase console settings under the General section:
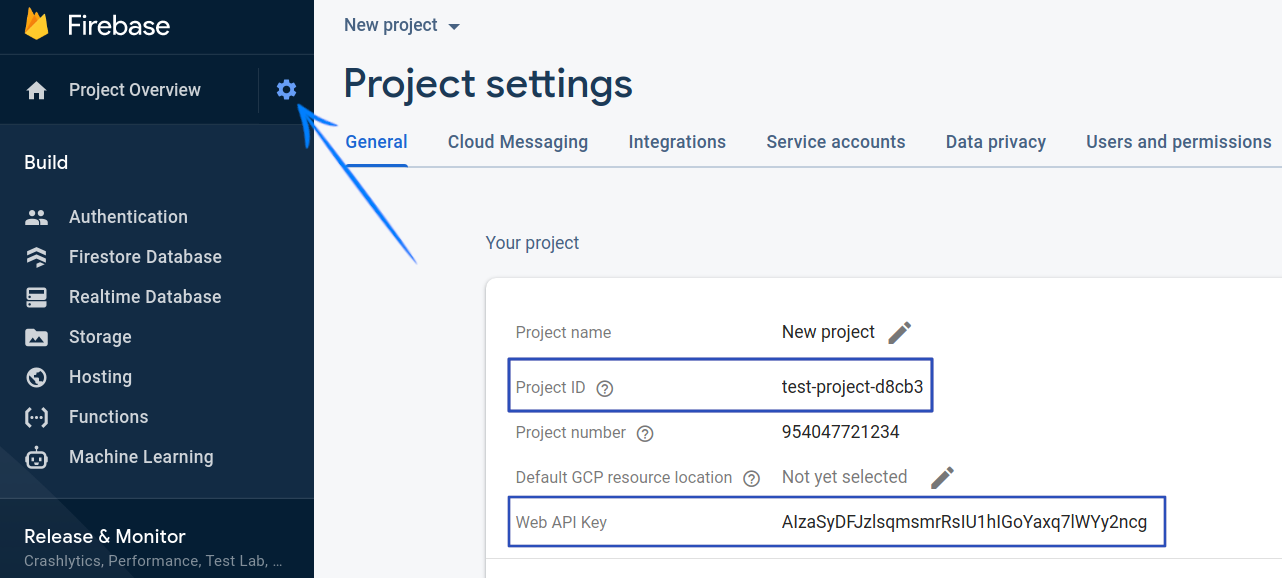
If the Web API Key is not displayed, go to the Build section and select Authentication from the dropdown menu. Click the Get started button that appears on the screen. You can then return to settings by clicking the corresponding icon in the left menu.
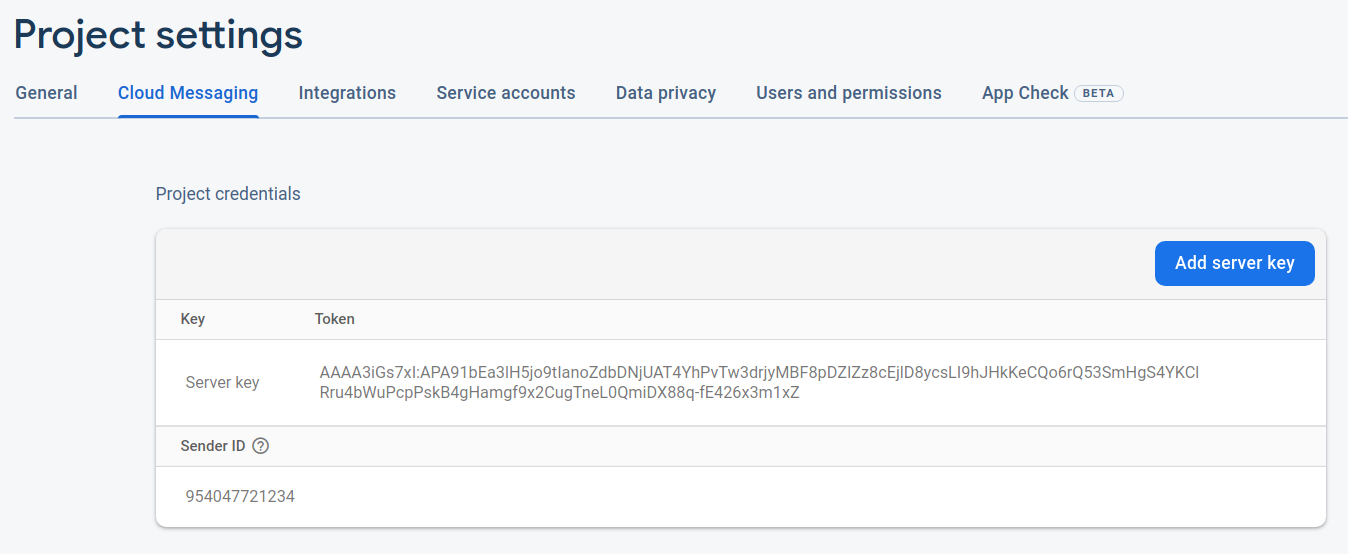
The Server Key and Sender ID are found in the Firebase console settings under the Cloud Messaging section:
Apple Push Notification Service
 | Apple Push Notification Service allows you to send mobile app push notifications to iOS devices. Setting up the service requires an Apple Developer account and a macOS device. |
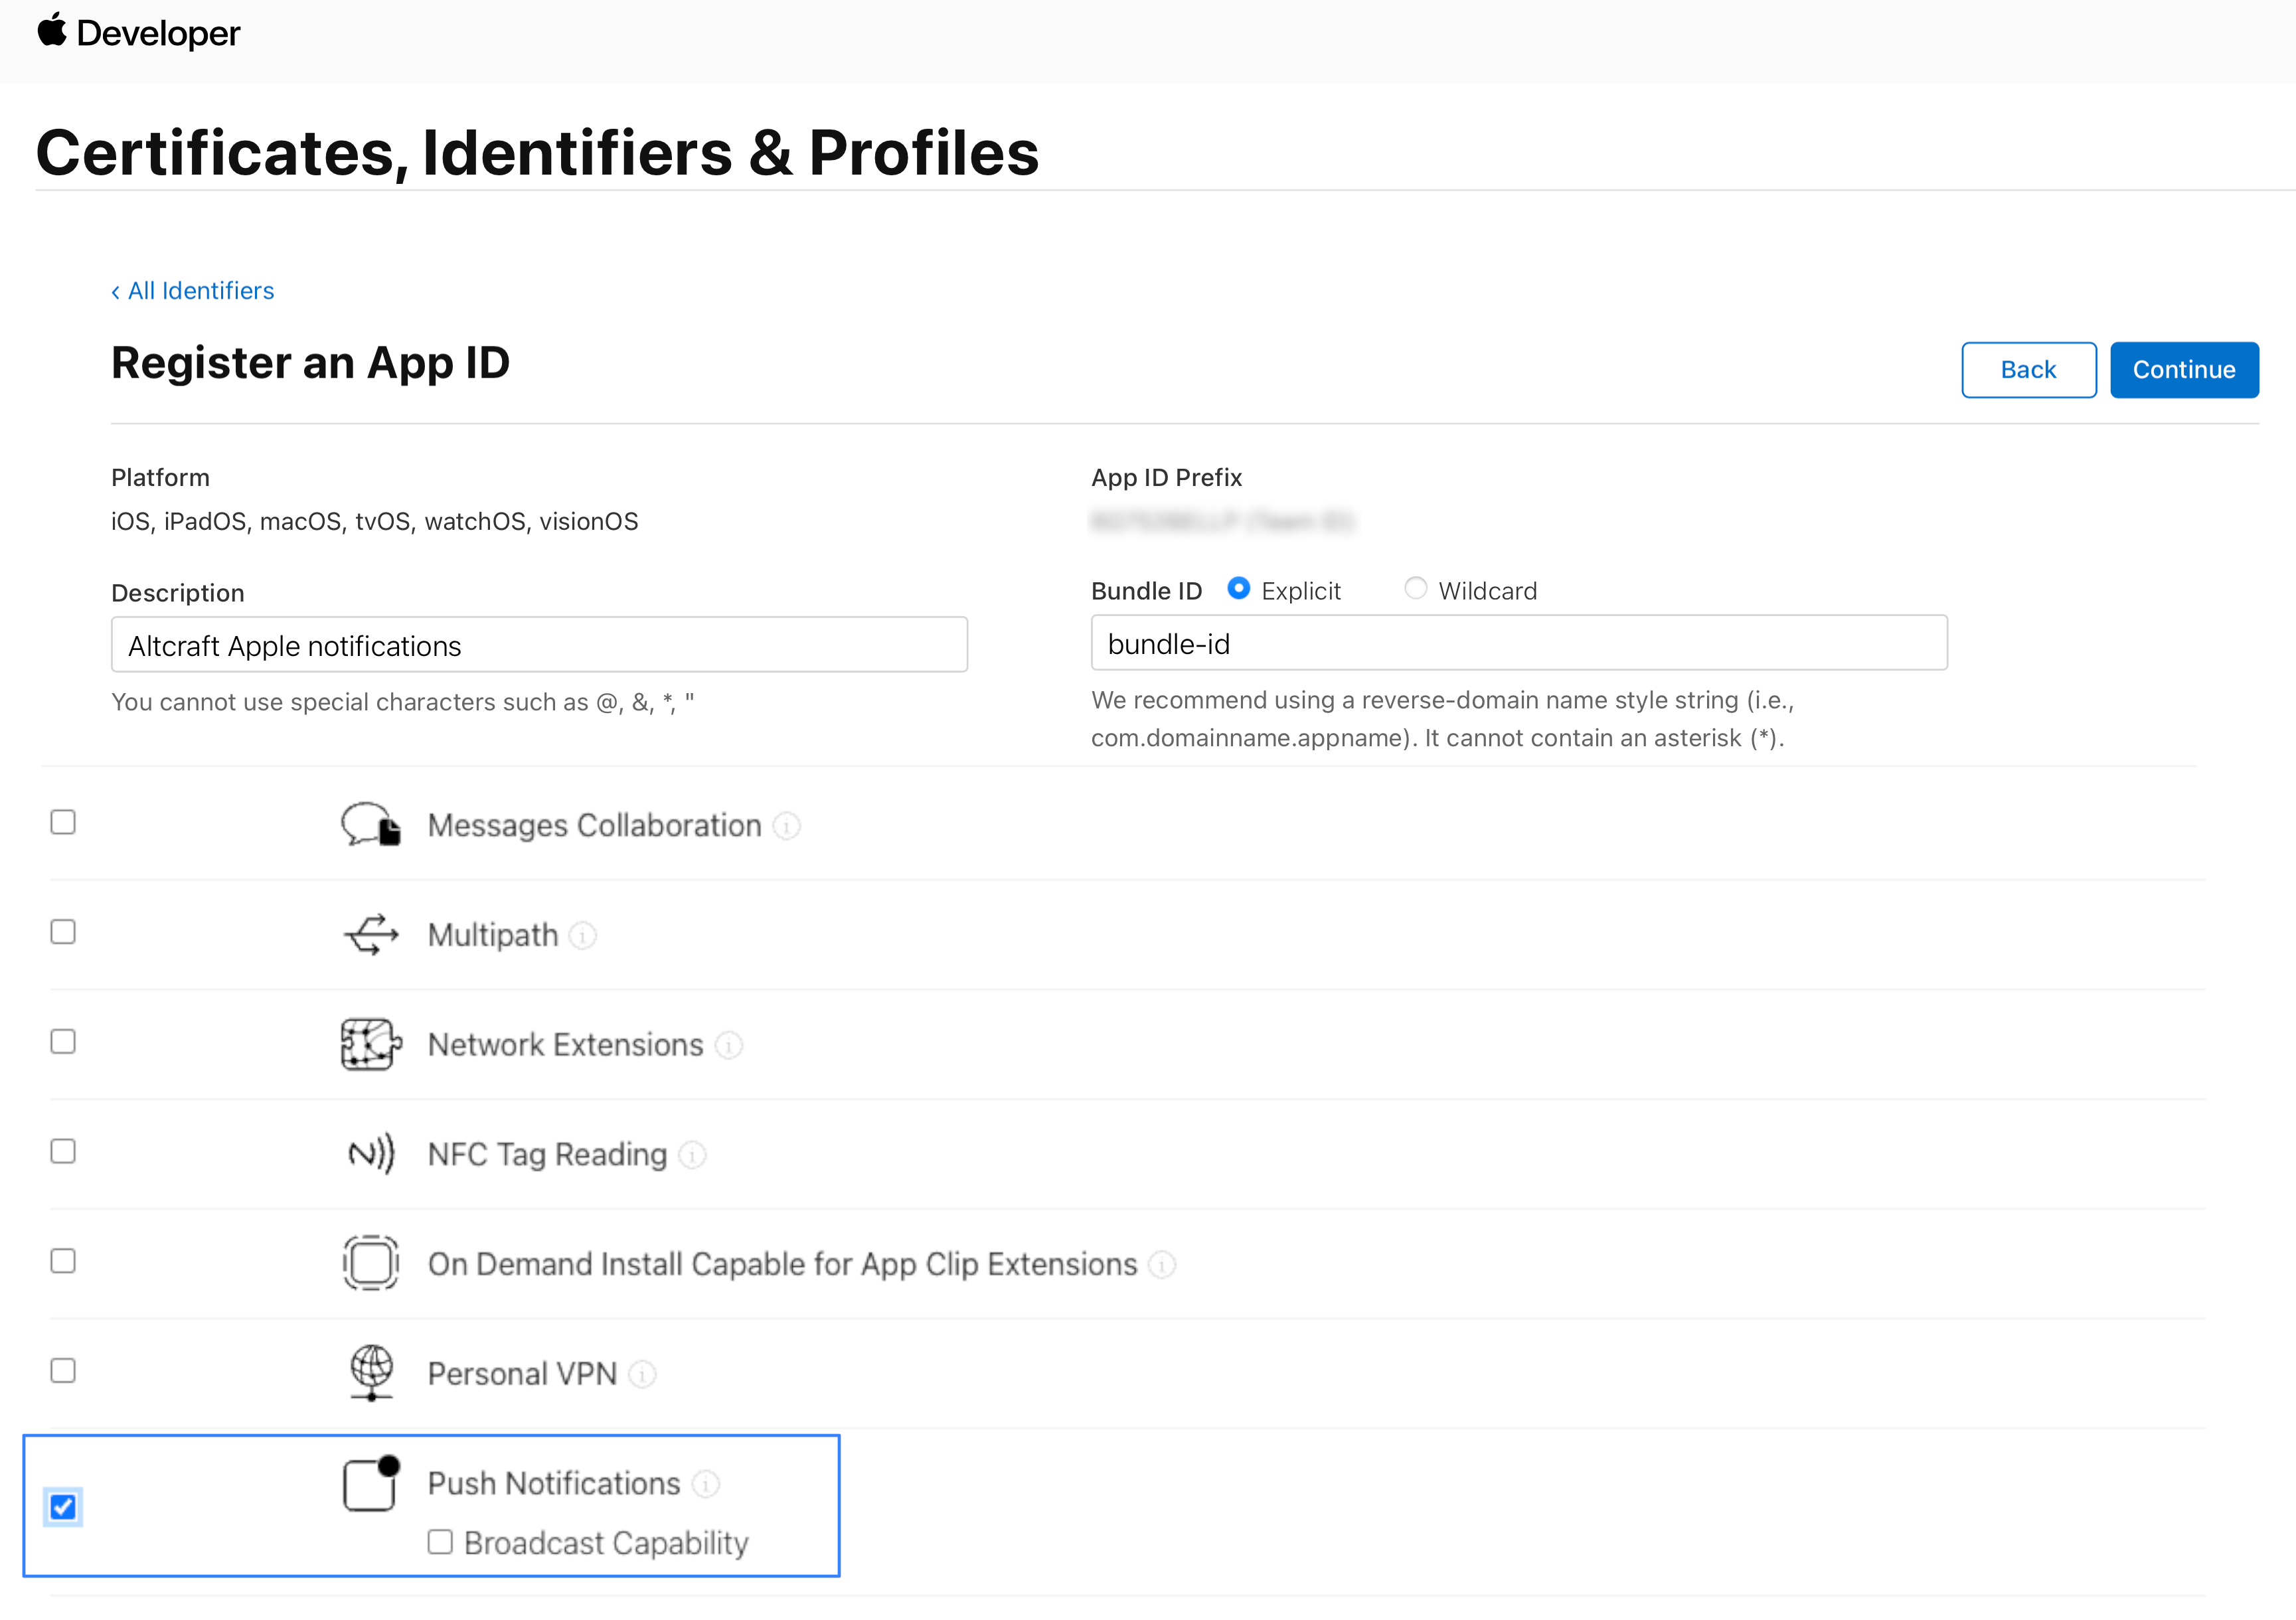
Go to the Apple Developer website and navigate to Account — Certificates, Identifiers & Profiles — Identifiers. Create a new identifier. Select App IDs, then App. Enter a name in the Description field, specify your app's Bundle ID in the corresponding field, select Explicit, then select Push Notifications from the list below and register the ID:
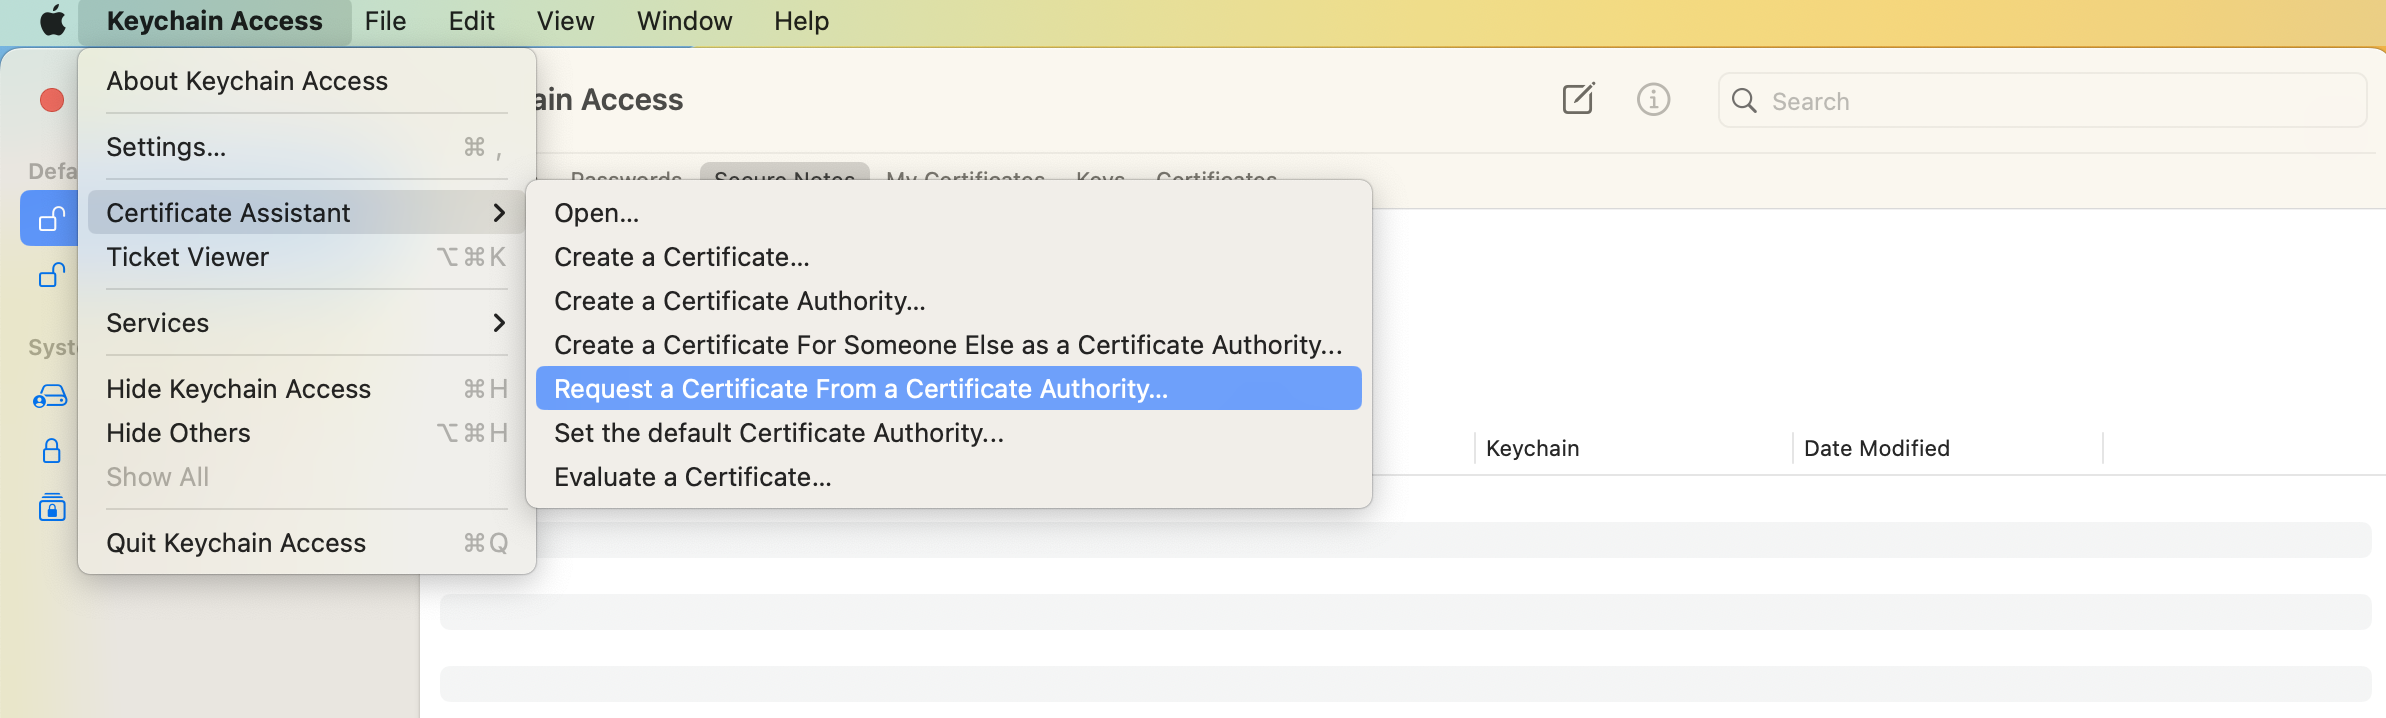
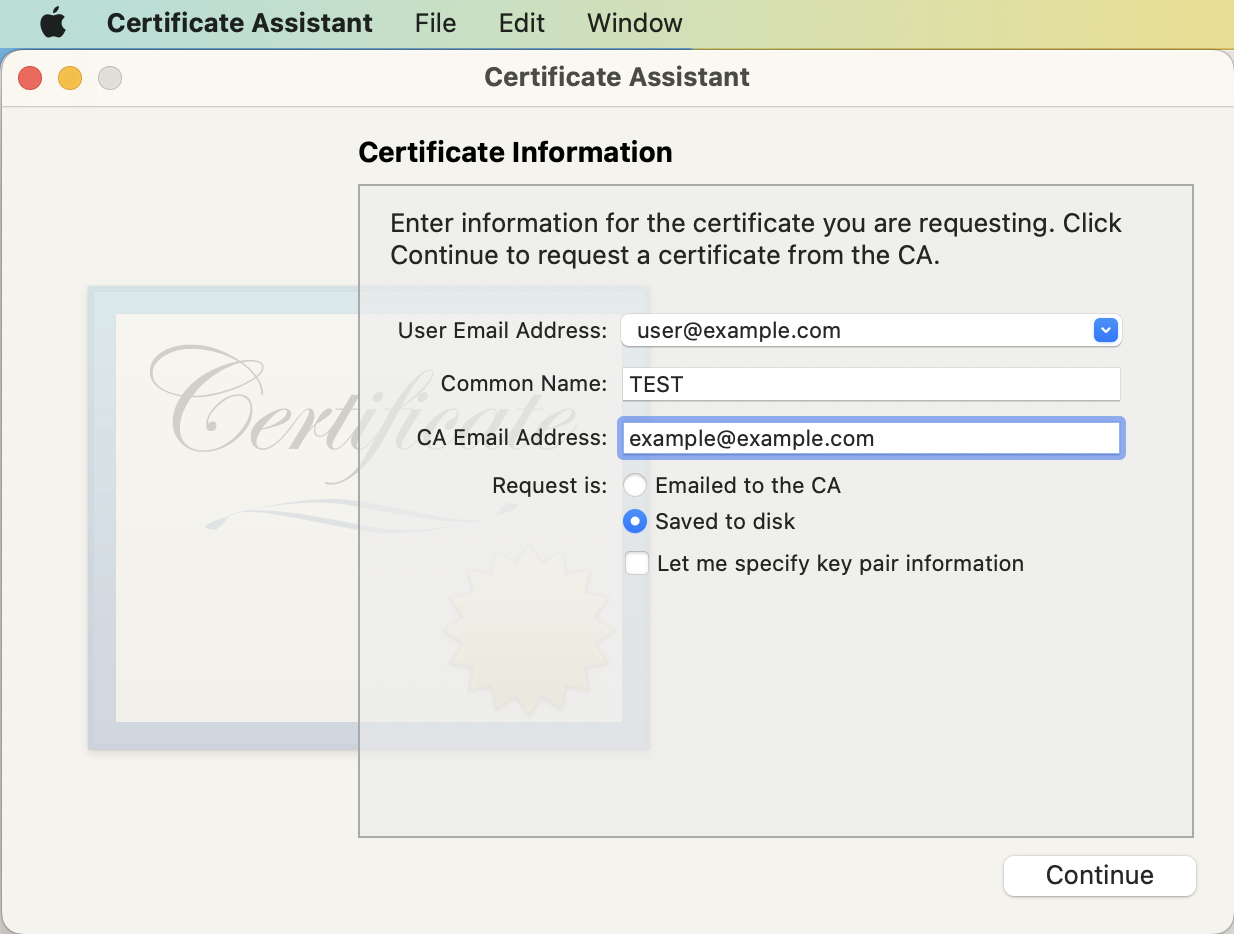
Open the Keychain Access app on your device. Navigate to Default Keychains — Login, then select Keychain Access Assistant — Request a Certificate from a Certificate Authority:
Fill in the required fields in the dialog window and select Saved to disk. Save the certificate to your device:
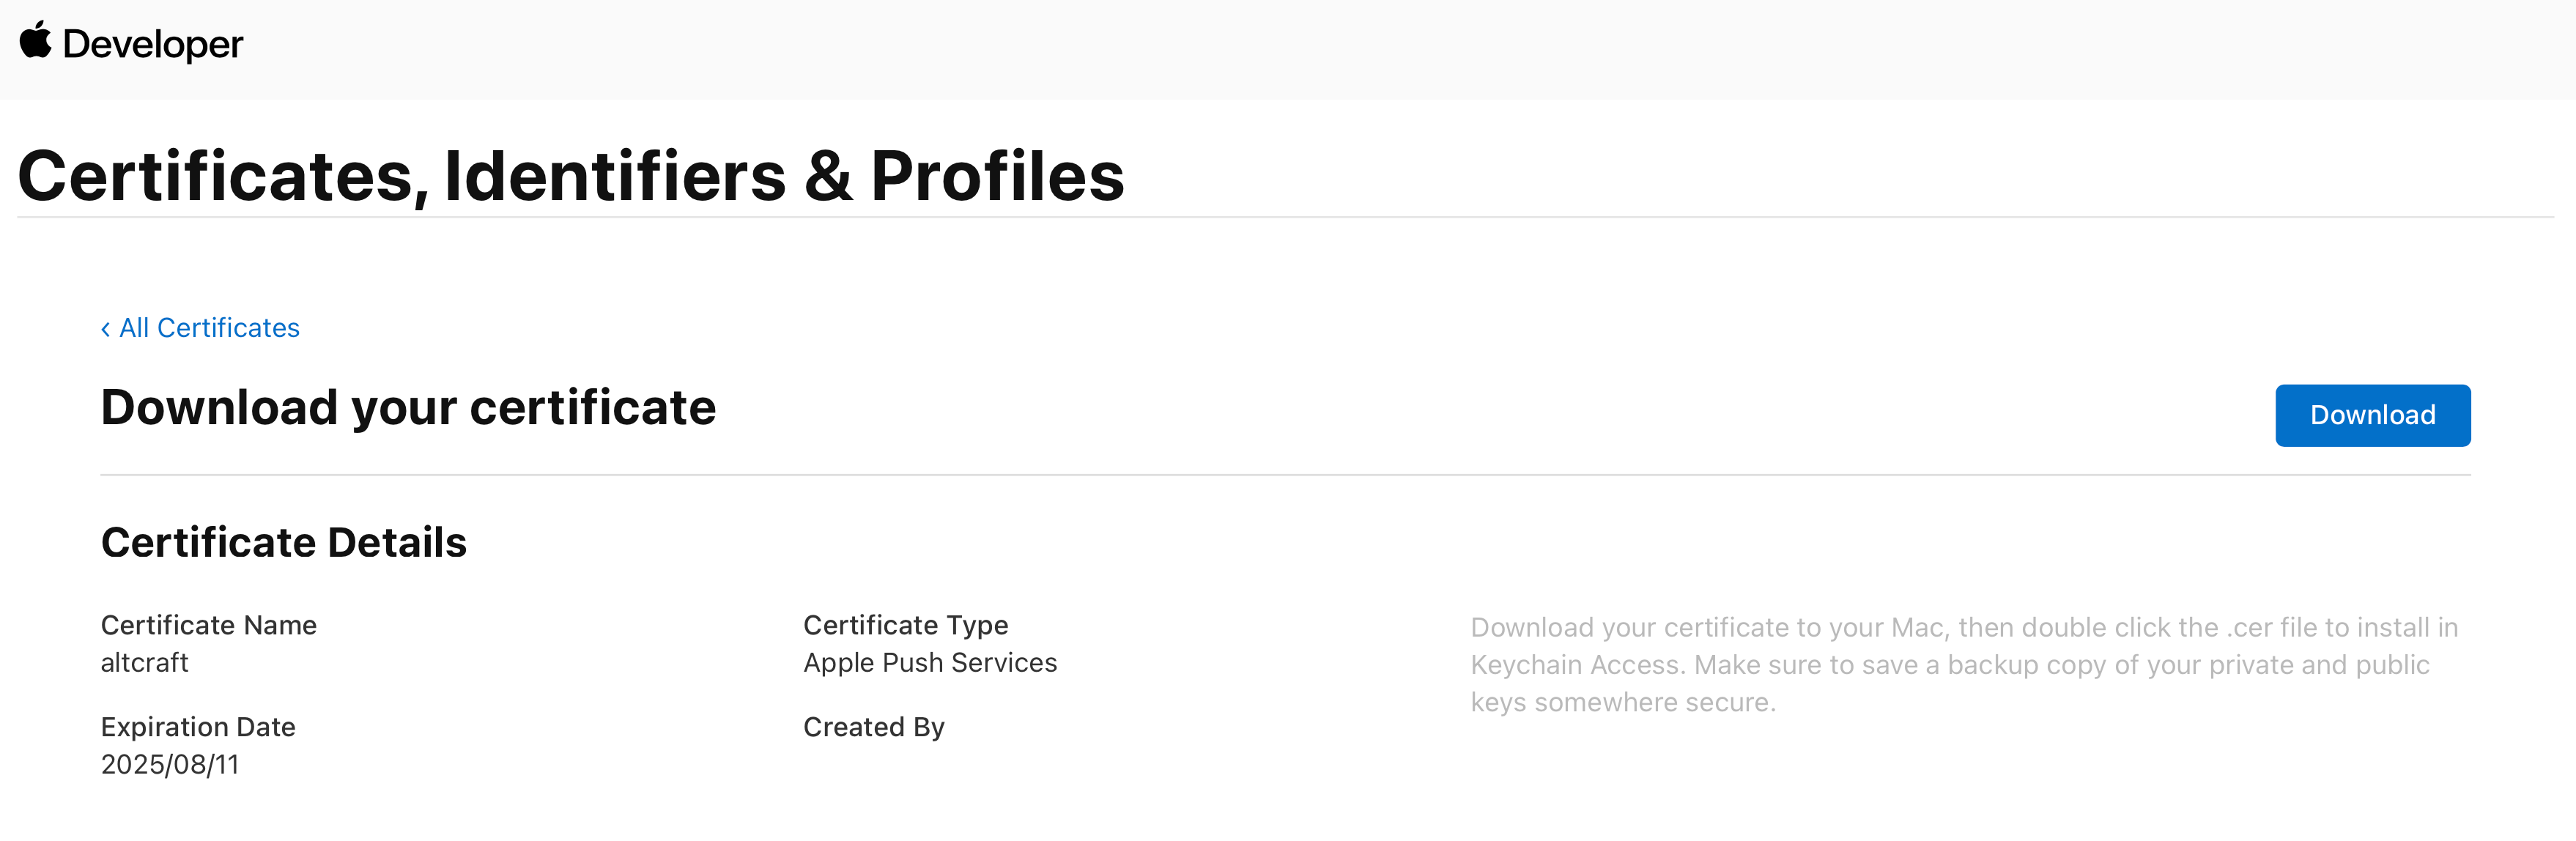
Return to Certificates, Identifiers & Profiles — Certificates on the website. Create a new certificate. In the Services list, select Apple Push Notification service SSL (Sandbox & Production). In the next step, find your app in the AppID dropdown list. Upload the certificate you created earlier into the corresponding field. Save the resulting Apple certificate to your device:
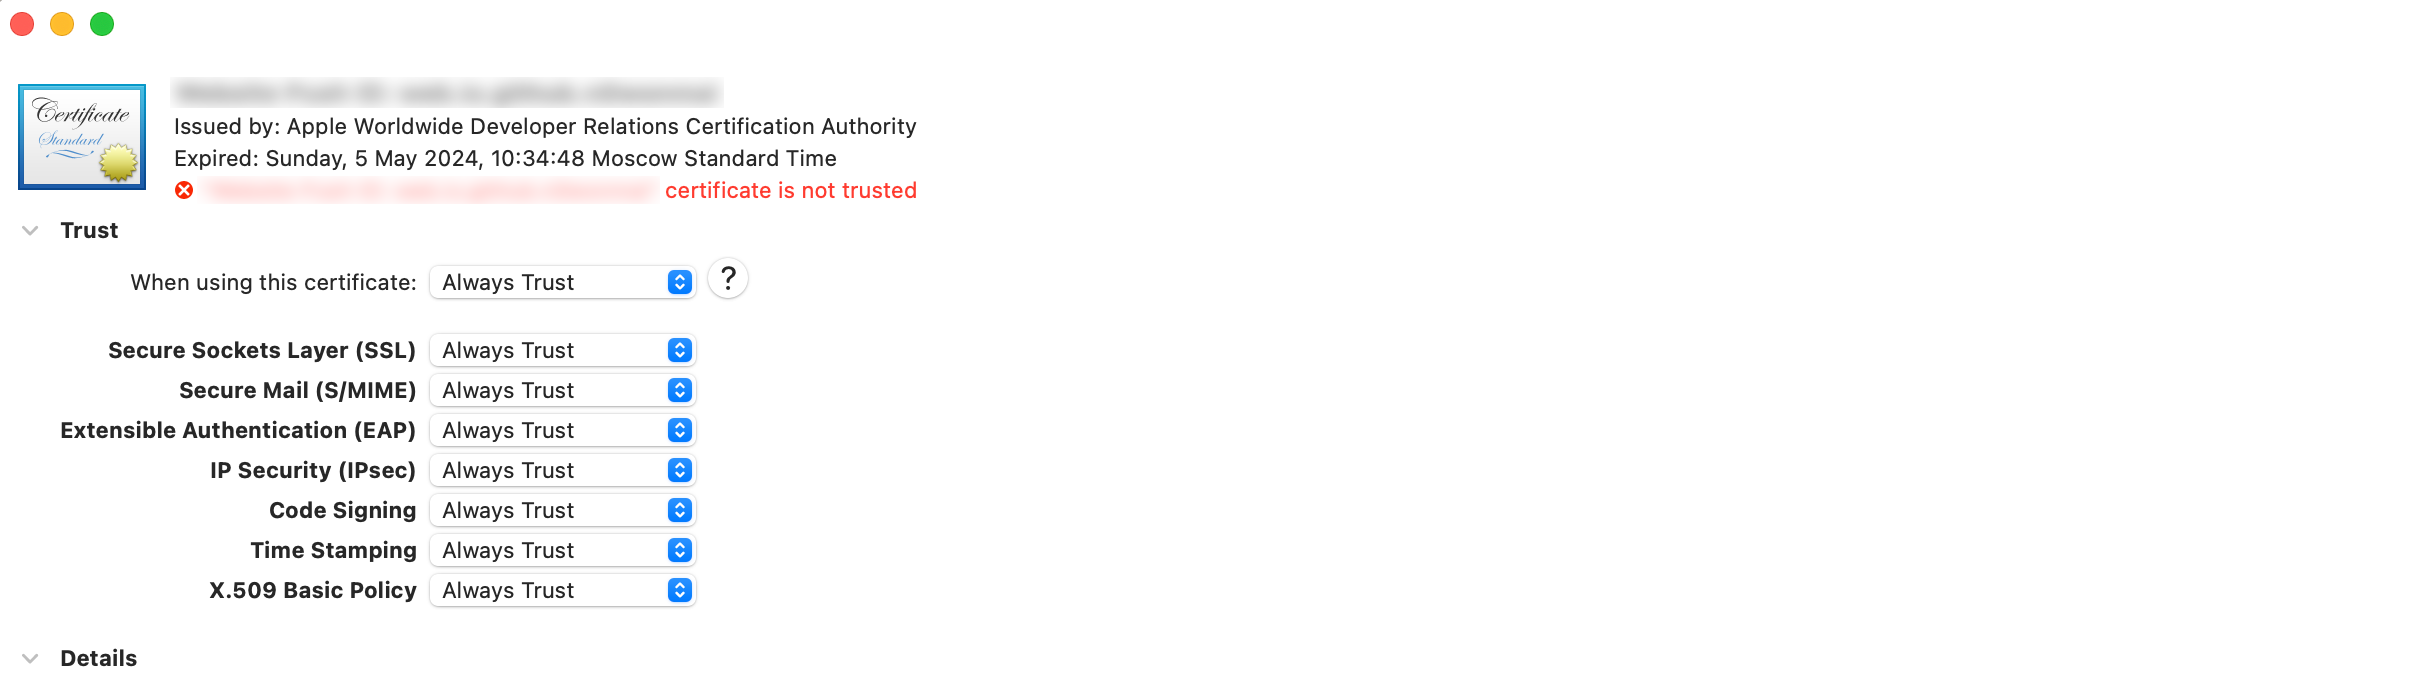
Double-click it so it appears in the Keychain Access app. Open it and select Always Trust in the certificate usage settings:
The next steps depend on which authentication type you will use: token authentication or certificate authentication.
Token Authentication
On the Apple Developer website, go to Certificates, Identifiers & Profiles — Keys. Create a new key. Specify the key name and type — APNs, click Continue, then Register. Note the Key ID — it will be needed for resource configuration on the platform:
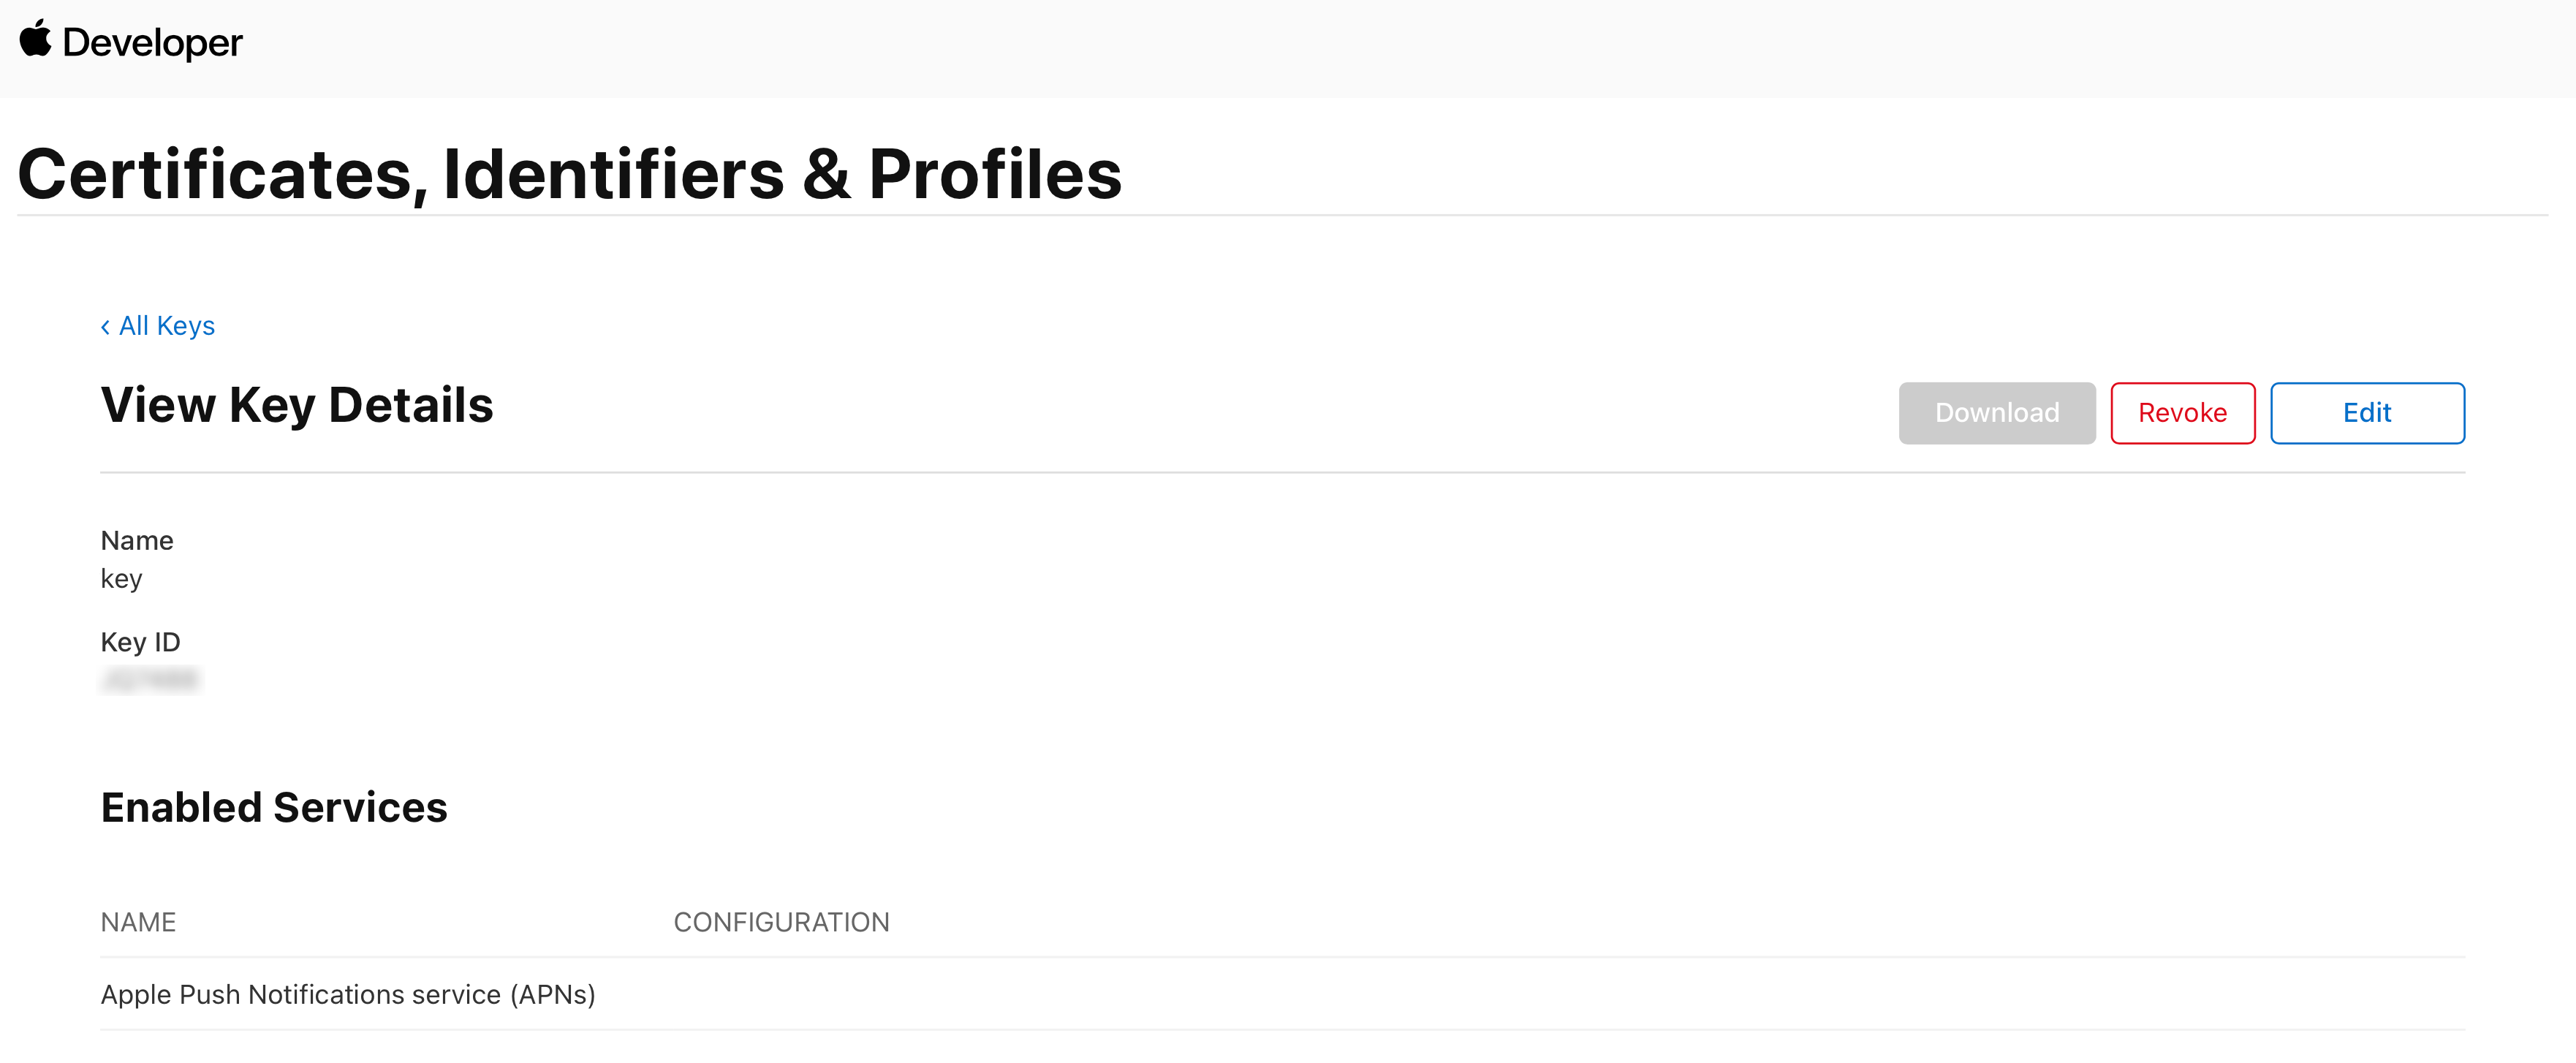
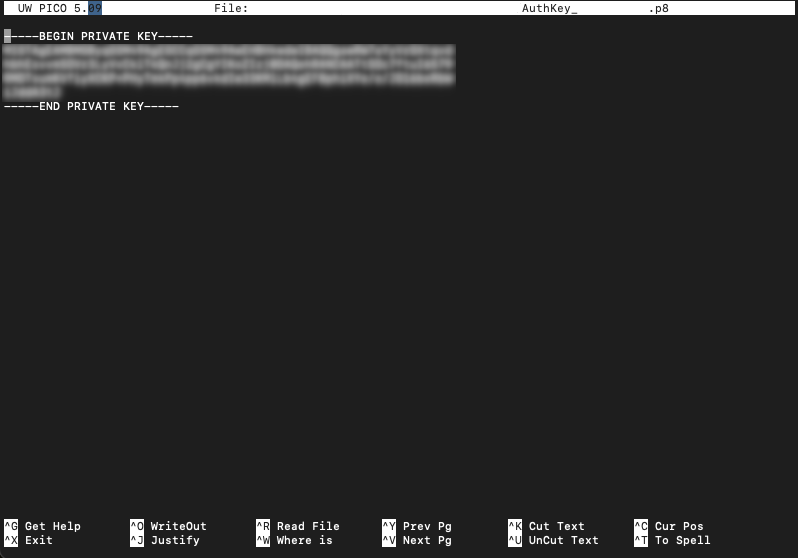
Download the key to your device. Open it with any text editor. It contains the signing key, which you will need to enter in the corresponding field when configuring the resource.
The key can be downloaded only once. If you cannot download it now, click Done and come back when you can.
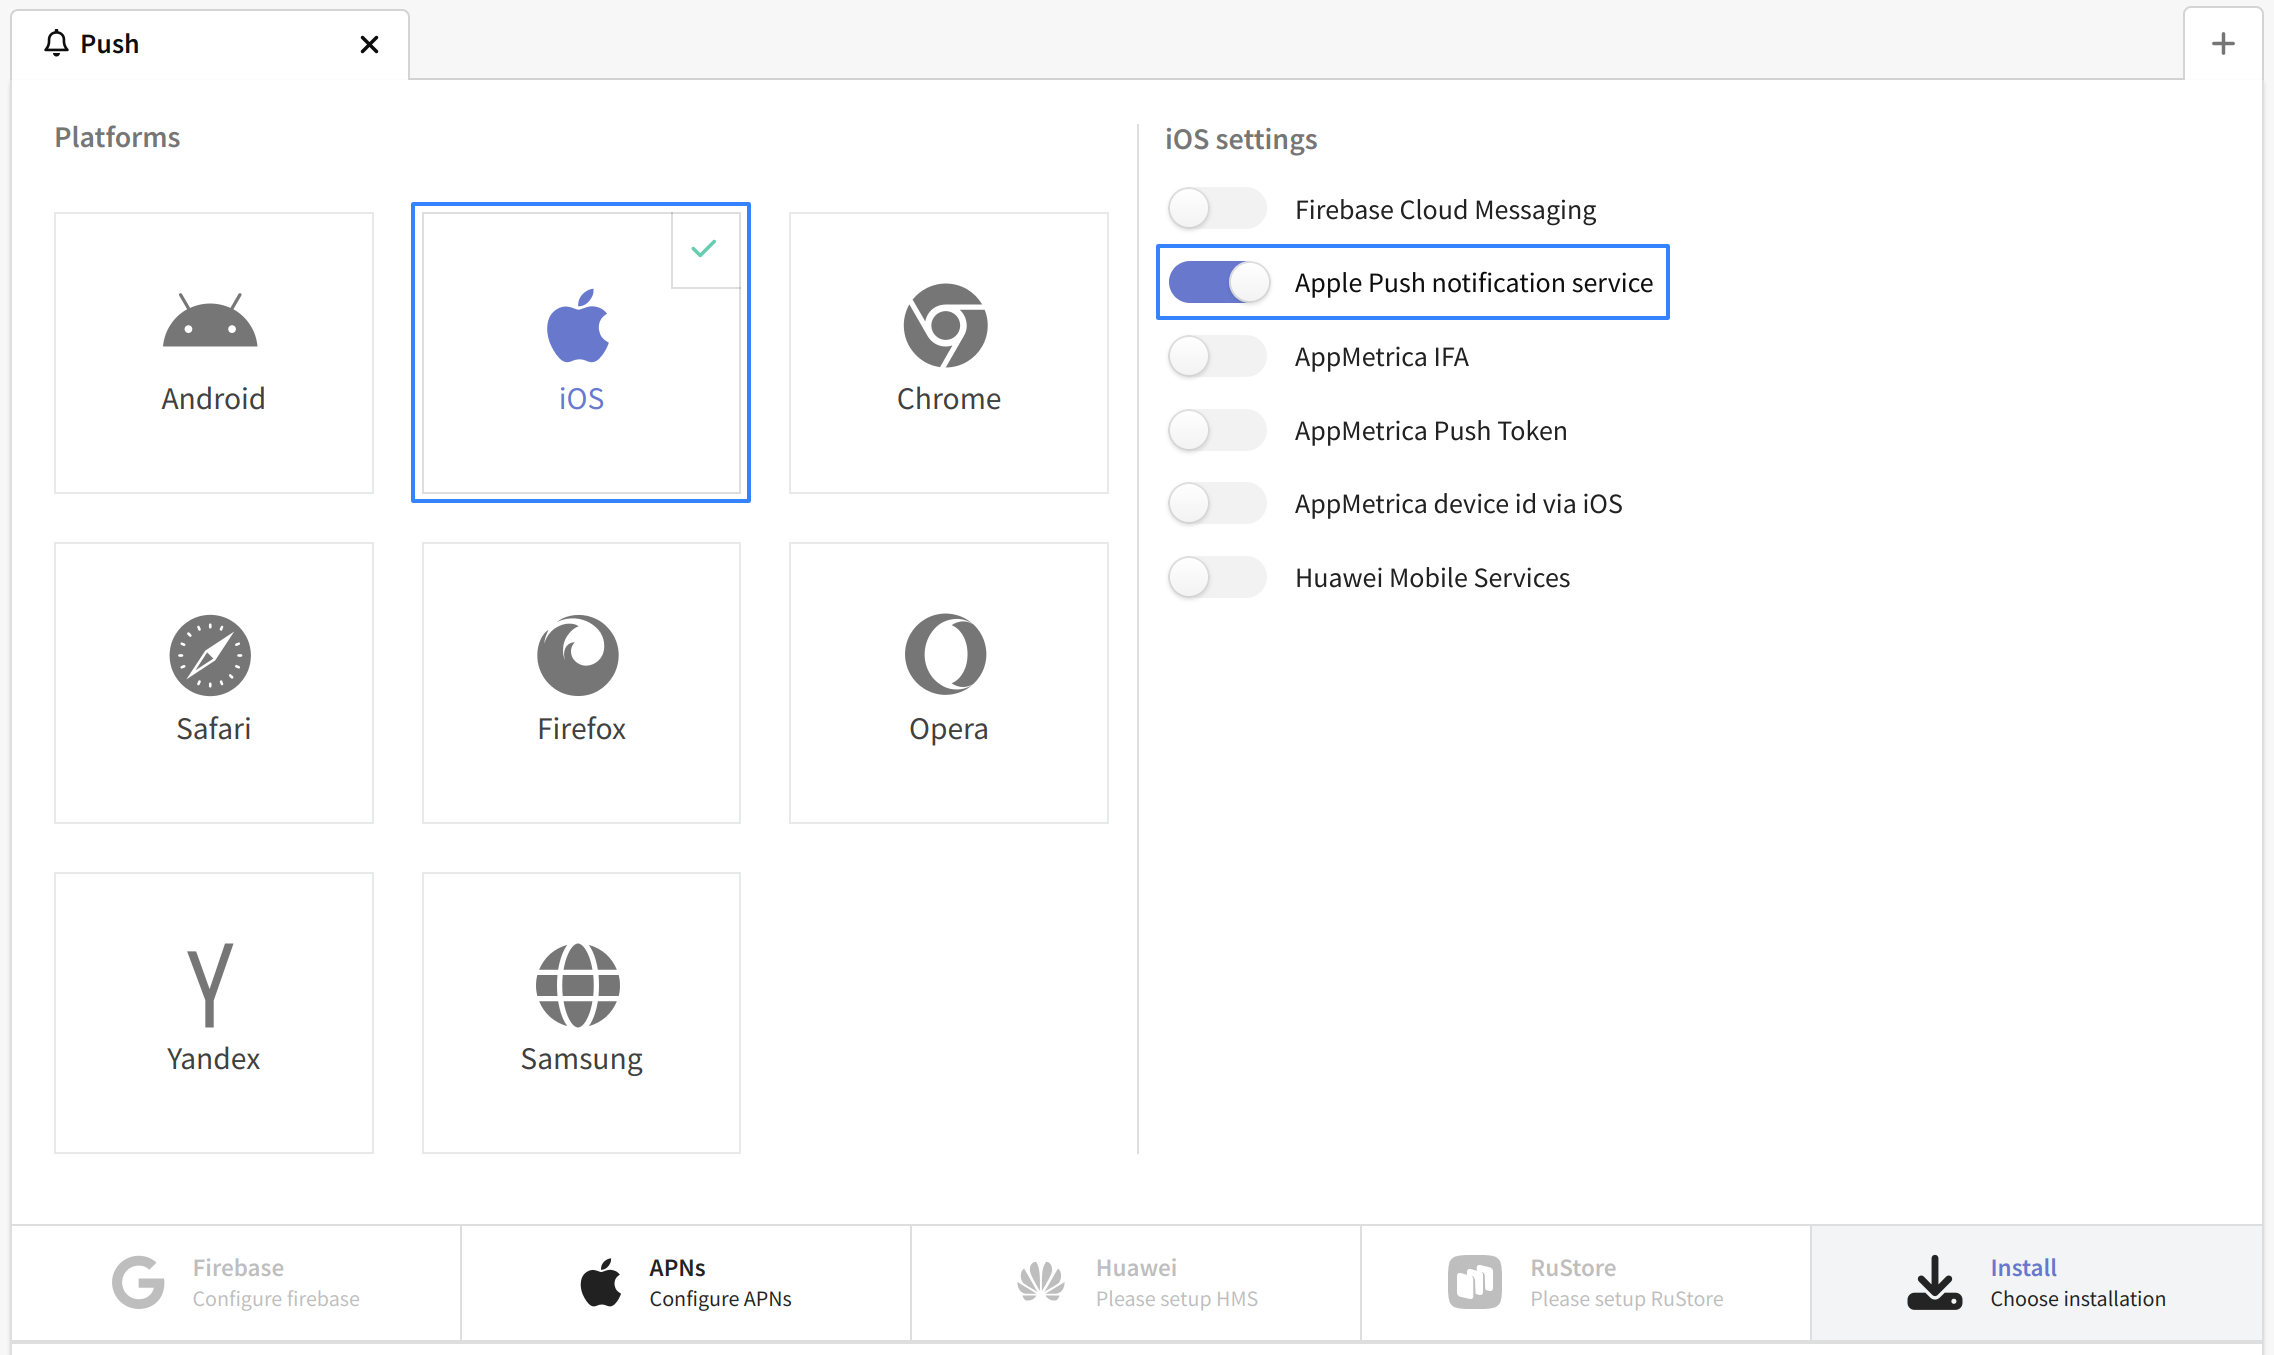
On the Altcraft platform, create a resource for the push channel, select the iOS platform, and enable the Apple Push Notification Service toggle:
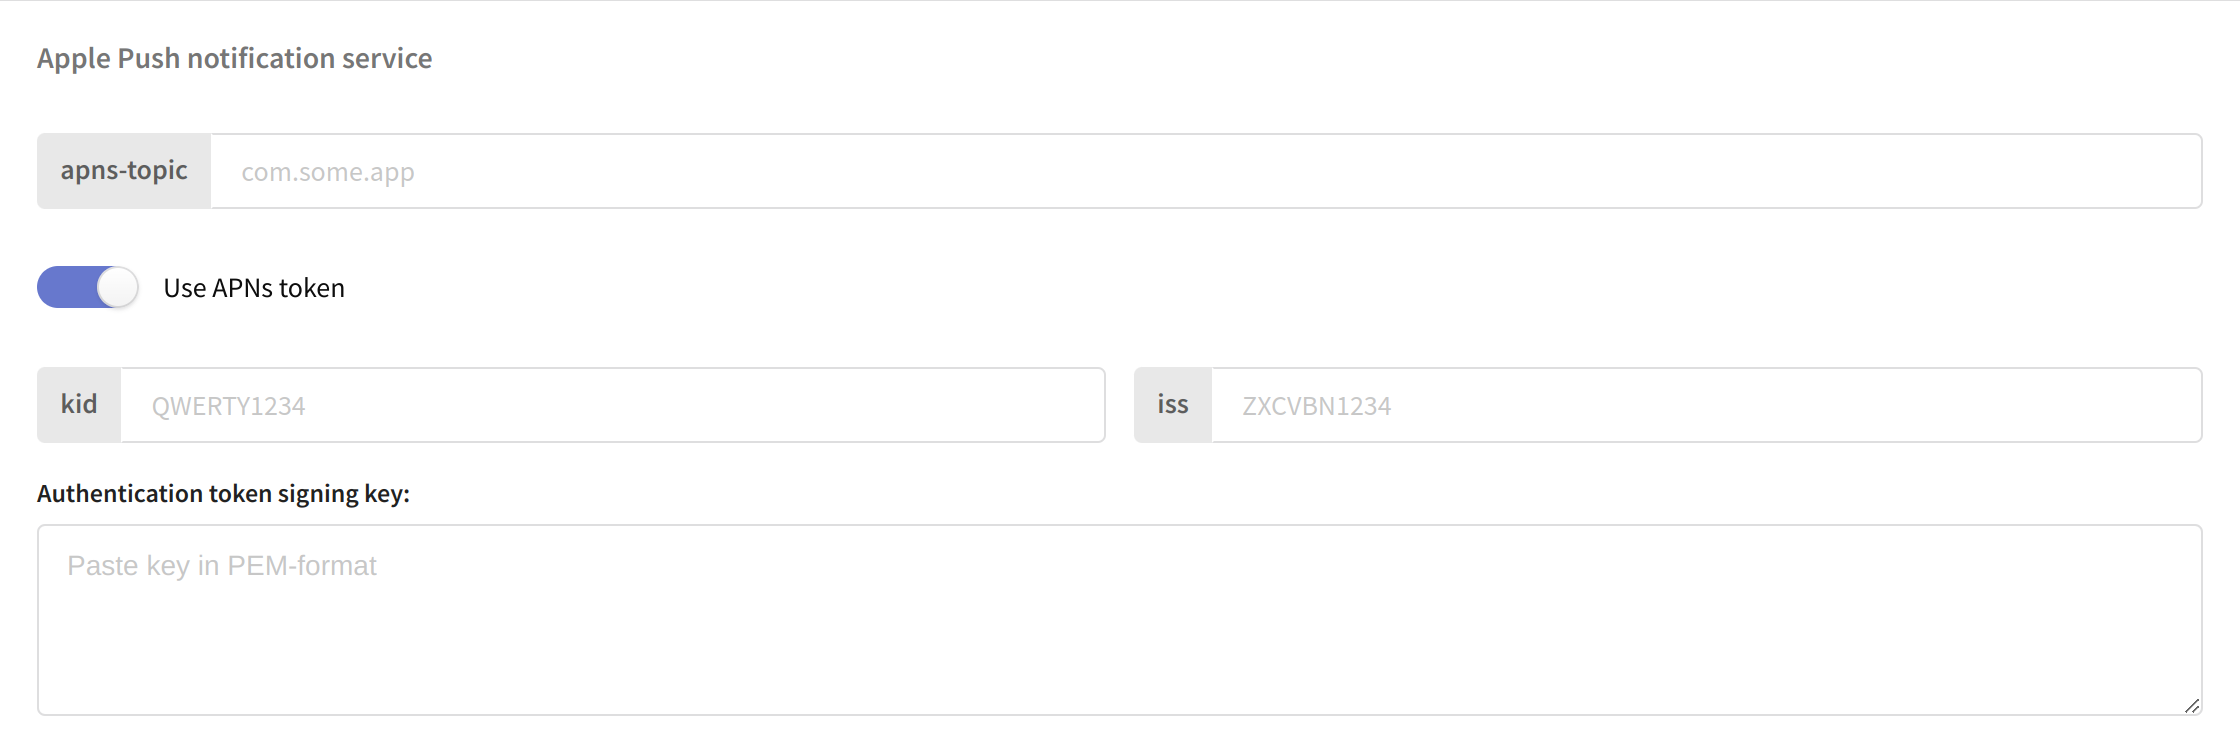
Activate the Use APNs Token toggle in the settings below. Fill in the following fields:
- apns-topic — your app's Bundle ID.
- kid — the key's keyID value.
- iss — Team ID, usually shown in your developer account on the Apple Developer website.
- Signing Key — the contents of the key file downloaded earlier.
Save the configured resource using the buttons at the top of the page. The platform is ready to send notifications via APNs.
Certificate Authentication
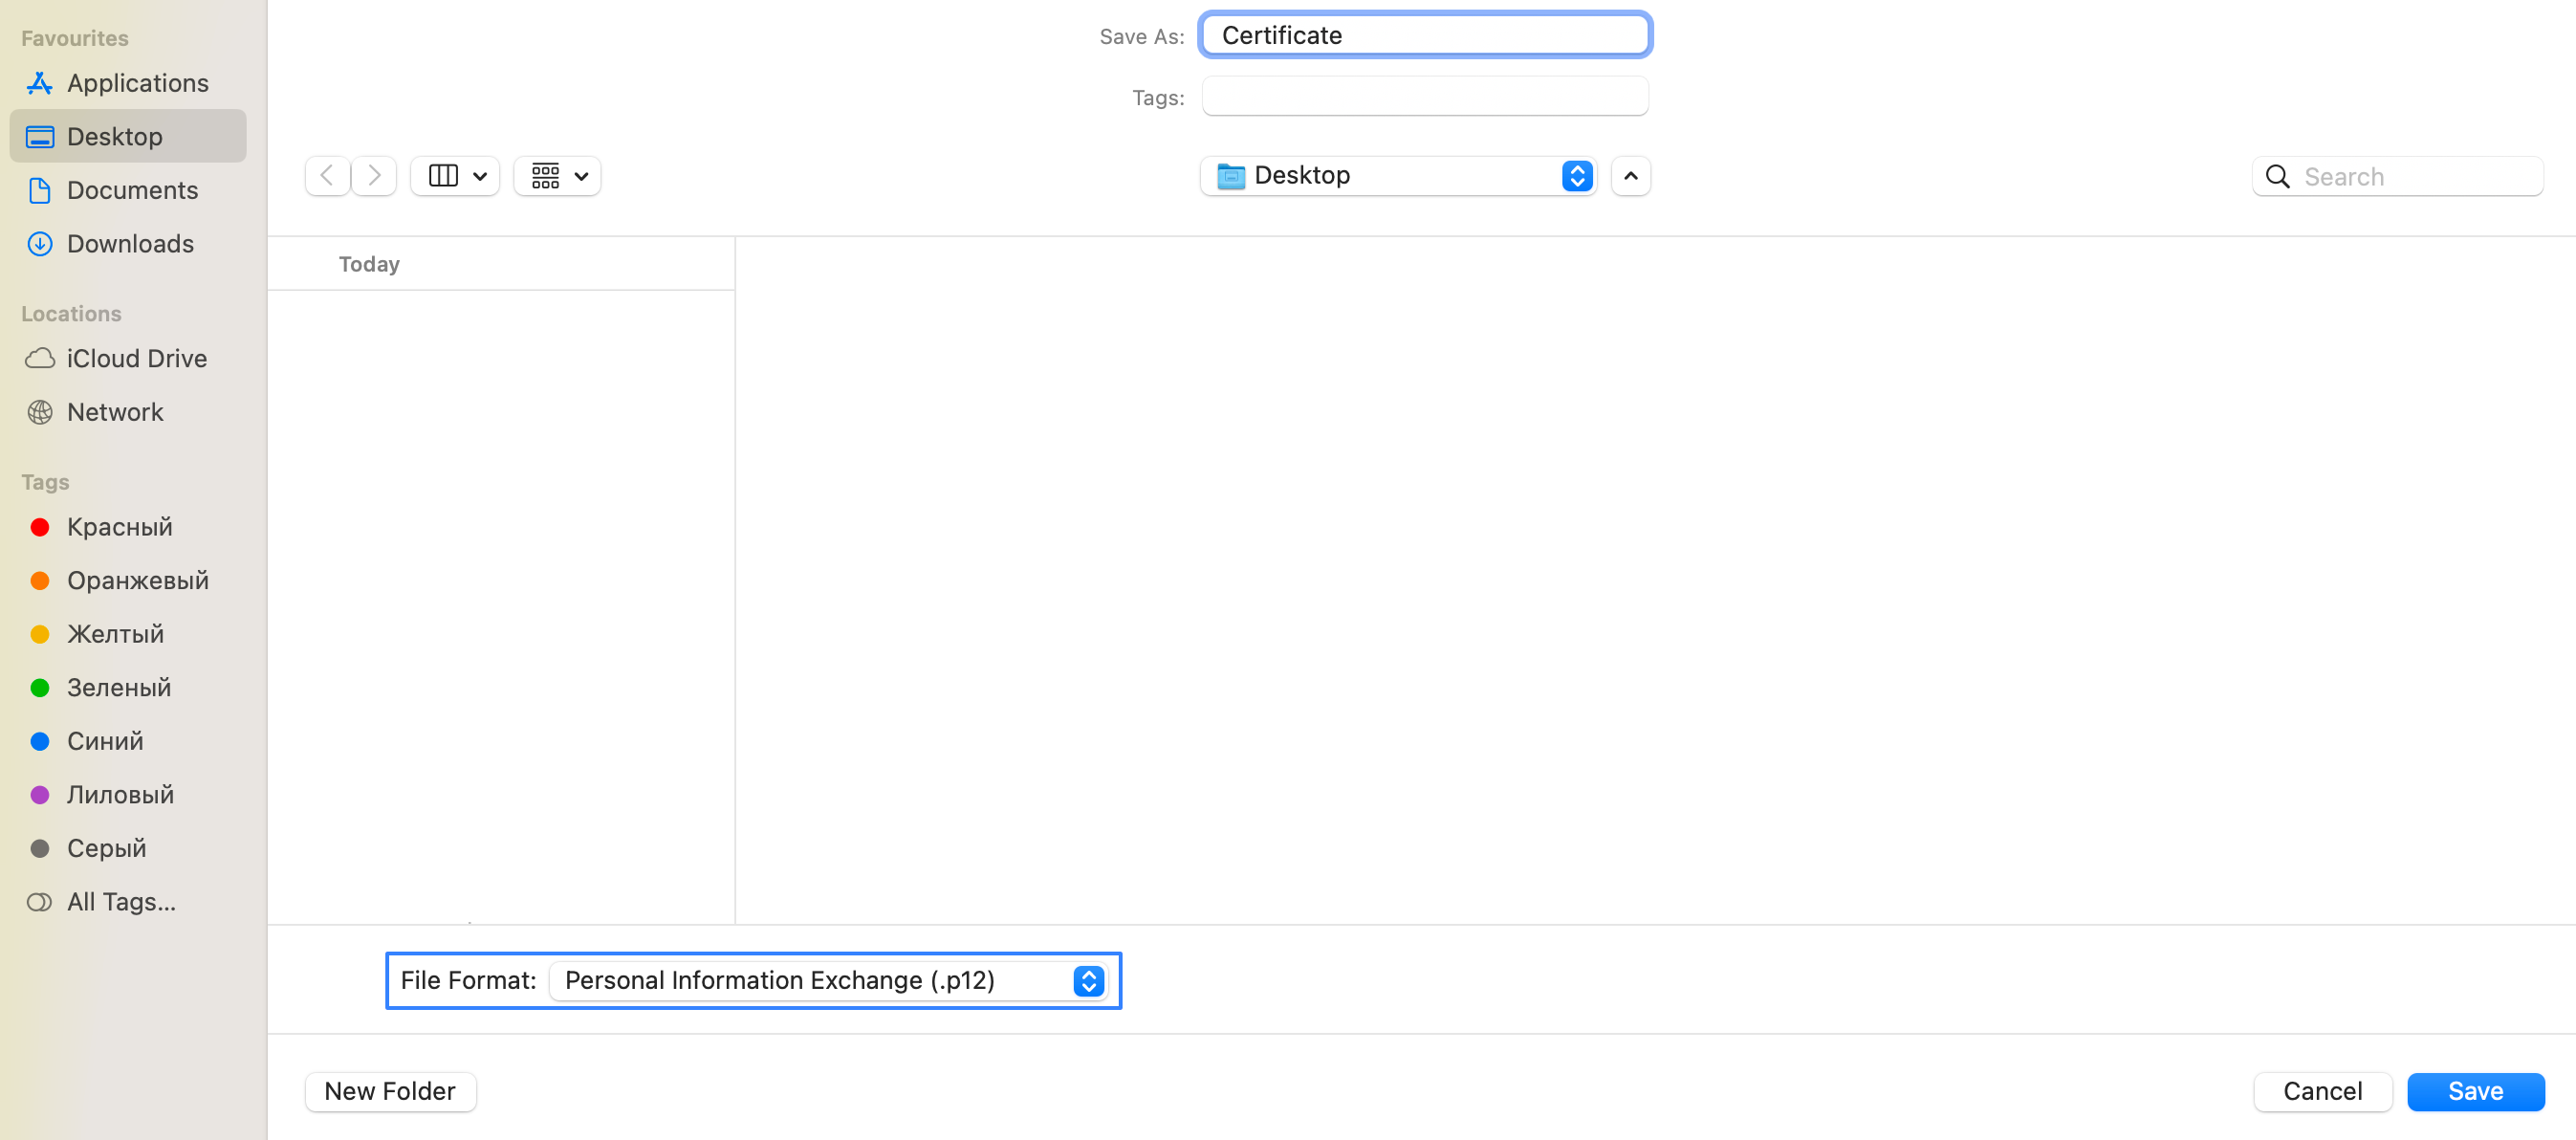
In the Keychain Access app, right-click the created certificate and export it. Select the .p12 format. Optionally set a password for the certificate:
Using the terminal, navigate to the folder where you exported the certificate. Create a pem key with the command openssl pkcs12 -in filename.p12 -out filename.key.pem -nocerts -nodes, where filename.p12 is the exported file name and filename.key.pem is the name of the pem key file to create.
Without closing the terminal or navigating to other folders, create a pem certificate with the command openssl pkcs12 -in filename.p12 -out filename.crt.pem -clcerts -nokeys (same pattern: filename.p12 is the source file, filename.crt.pem is the output file).
Open these files with the nano editor and copy the key and certificate values:
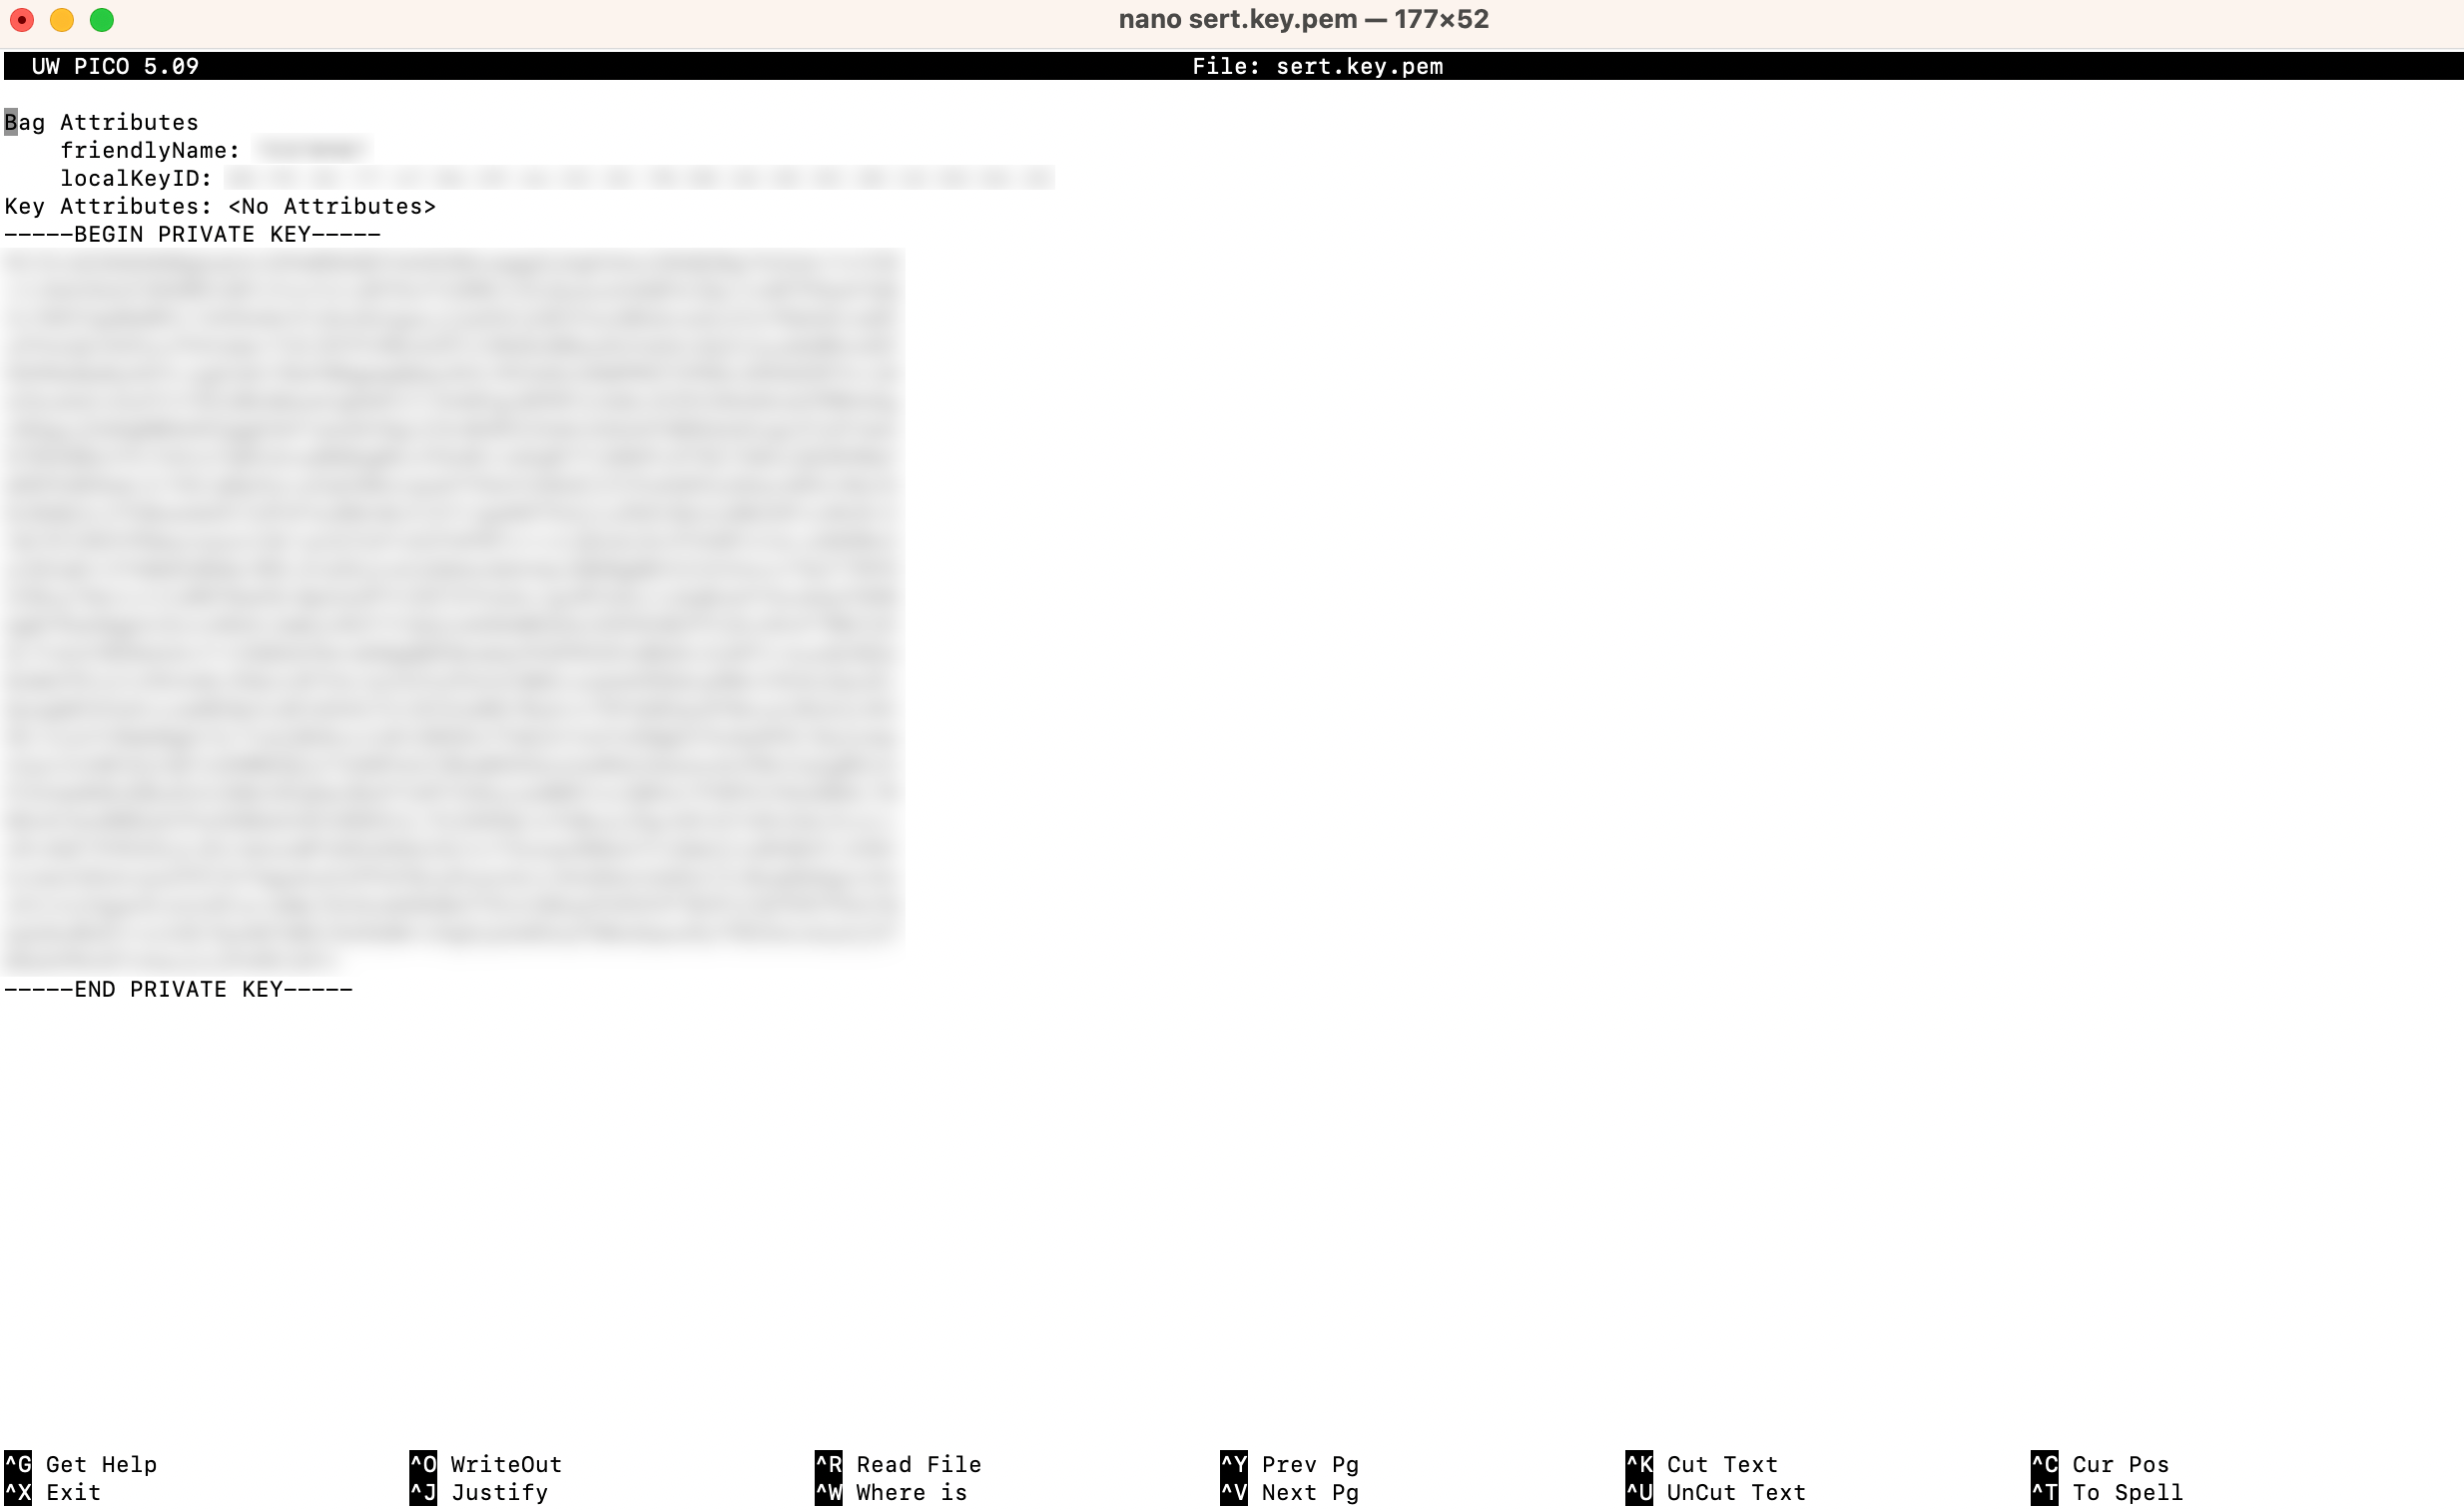
On the Altcraft platform, create a resource for the push channel, select the iOS platform, and enable the Apple Push Notification Service toggle:
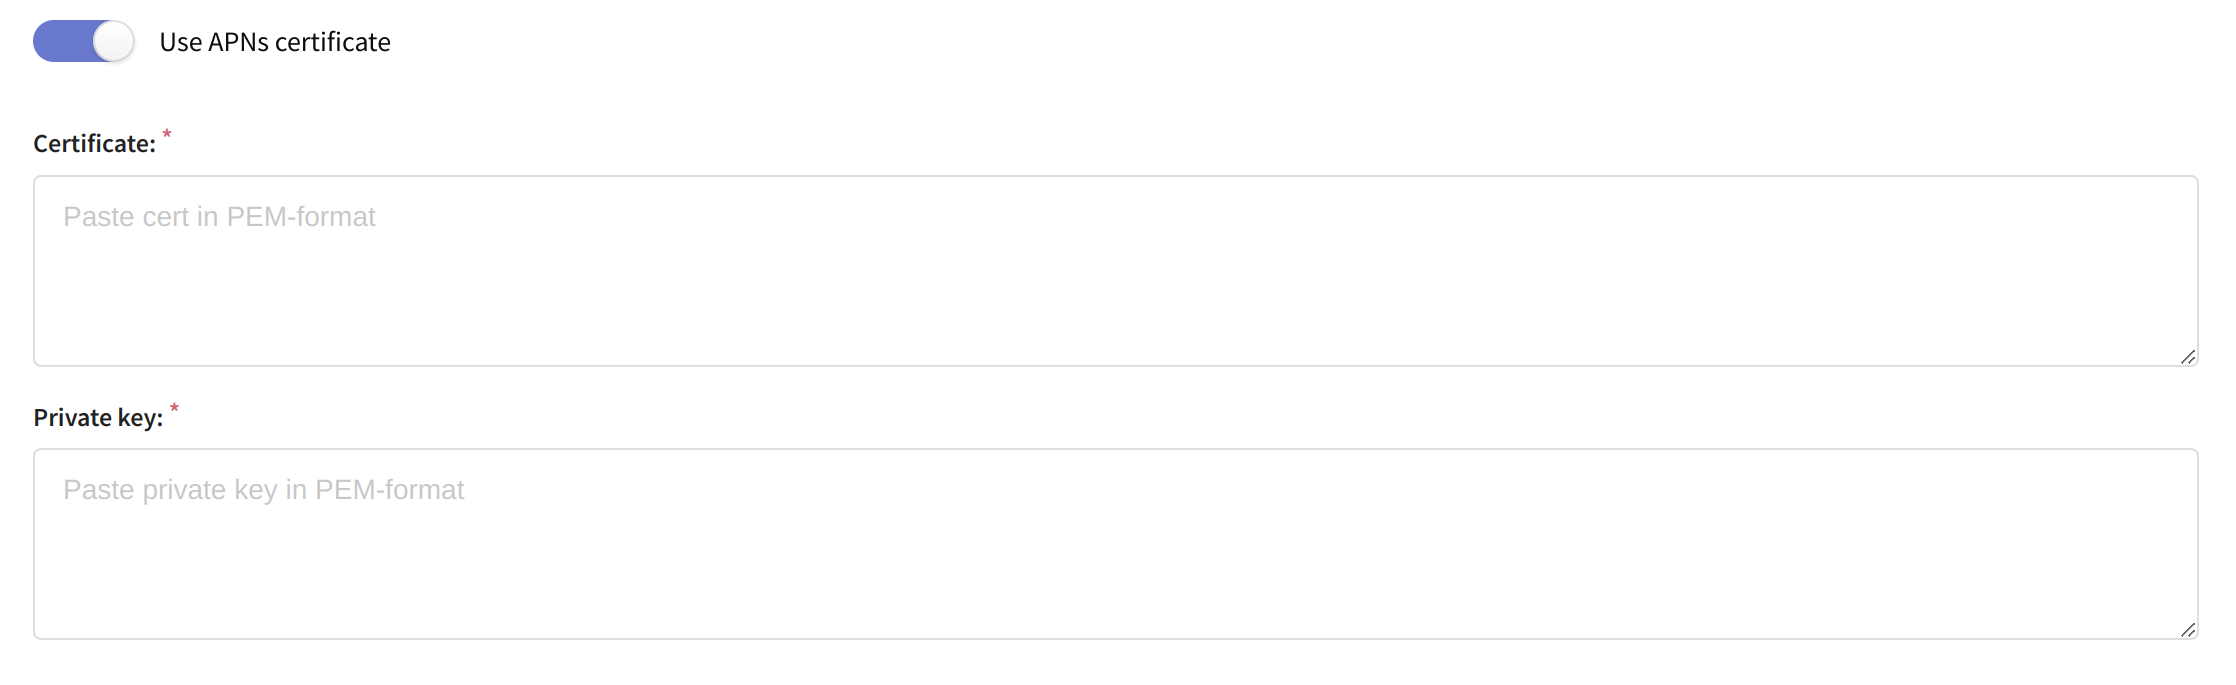
Activate the Use APNs Certificate toggle in the settings below. Fill in the following fields:
- Certificate — the value of the pem certificate you created.
- Private Key — the value of the pem key you created.
Save the configured resource using the buttons at the top of the page. The platform is ready to send notifications via APNs.
Yandex.AppMetrica Push SDK
 | The Yandex.AppMetrica analytics platform can be used to send push notifications to both Android and iOS devices. The AppMetrica Push SDK must be installed in the app for this. For SDK integration documentation, see Yandex AppMetrica Documentation. |
One of the following unique device identifiers can be used as the subscription source:
AppMetrica device ID — the device identifier in AppMetrica (for both operating systems).
iOS IFA — advertising identifier (Apple devices only).
Google AID — advertising identifier (Android only).
Android Push Token and iOS Push Token — tokens assigned by the AppMetrica SDK.
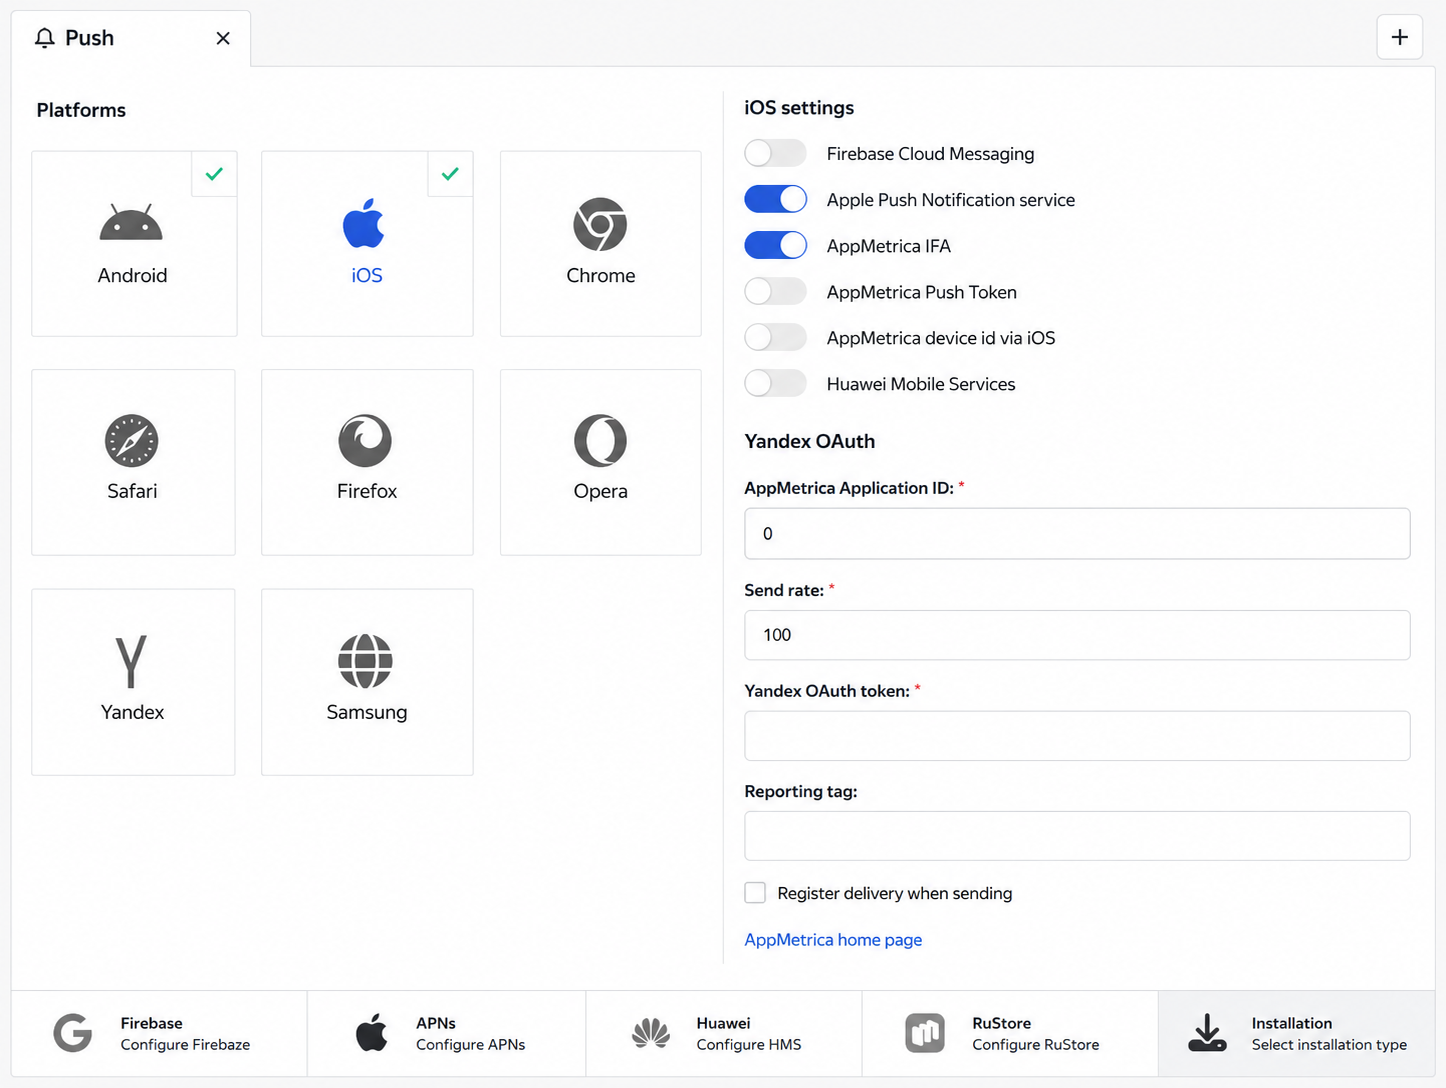
You can configure delivery to both operating systems within a single resource. On the Push tab in the resource, select the mobile platform and enter settings in the right panel:
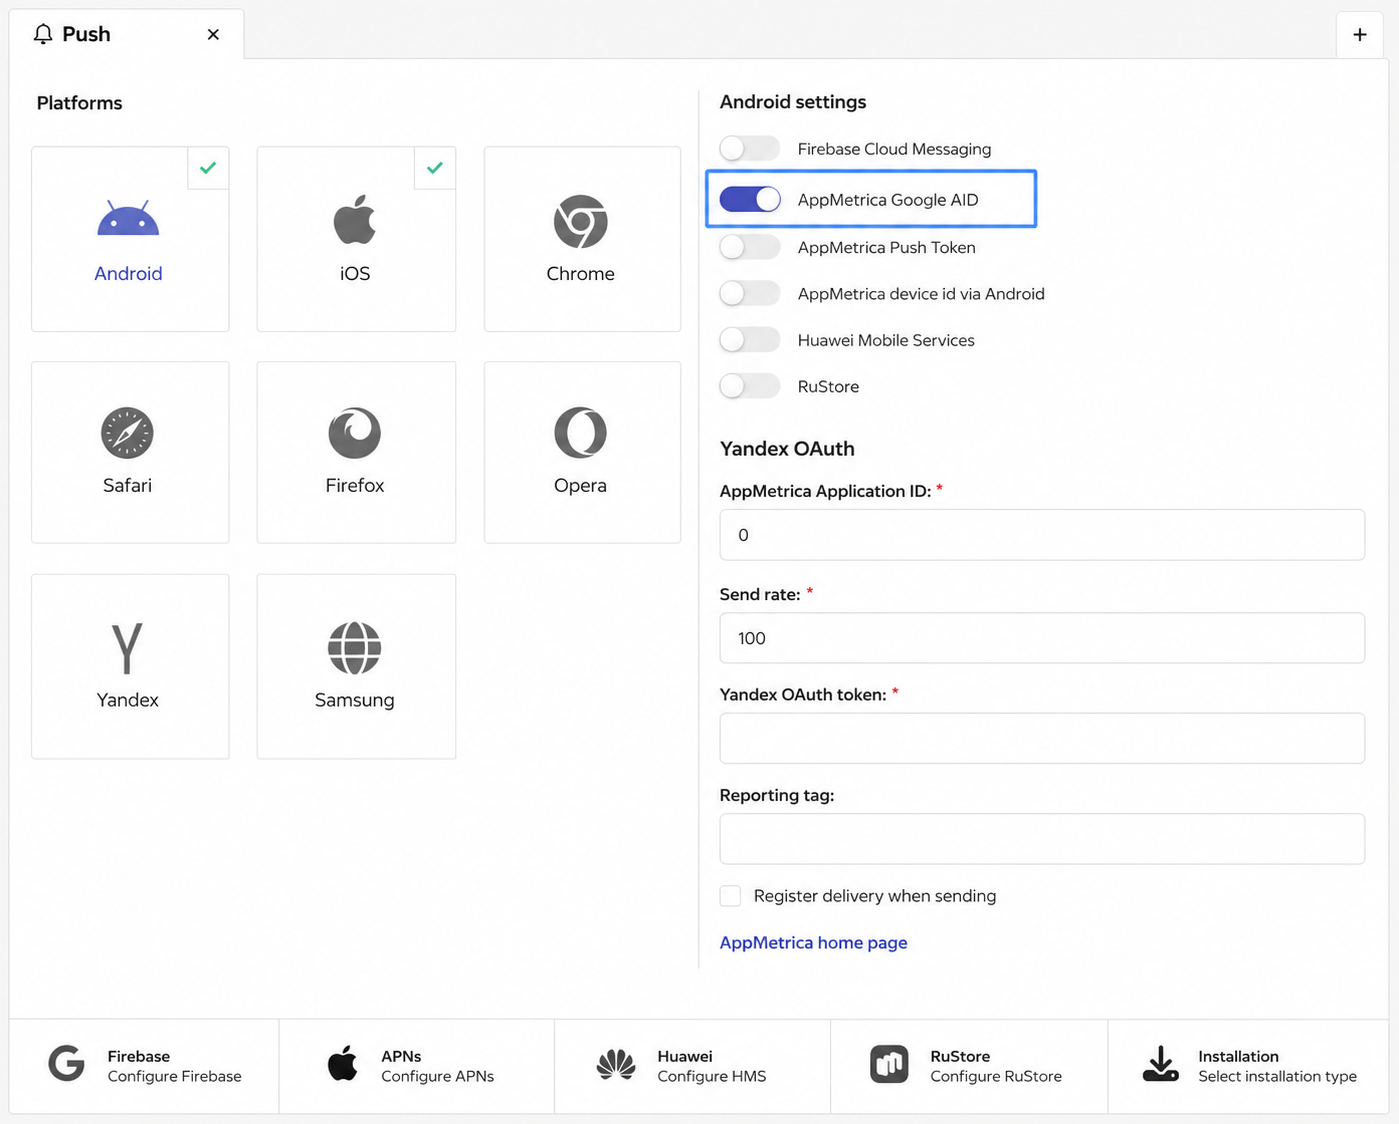
Access to AppMetrica uses an AppMetrica API token. Each app has a unique AppMetrica Application ID. You can obtain these in the Settings section of your app in AppMetrica.
The Send rate parameter limits the maximum notification delivery rate per second.
Yandex OAuth Token — authorization token for Yandex services.
In the Reporting Tag field, enter an arbitrary tag that will be used in AppMetrica reports.
Huawei Mobile Services
 | Huawei Mobile Services allows you to send push notifications from Huawei-supported apps to Android and iOS devices. |
Open the resource settings and activate Huawei Mobile Services for your Android and iOS apps:
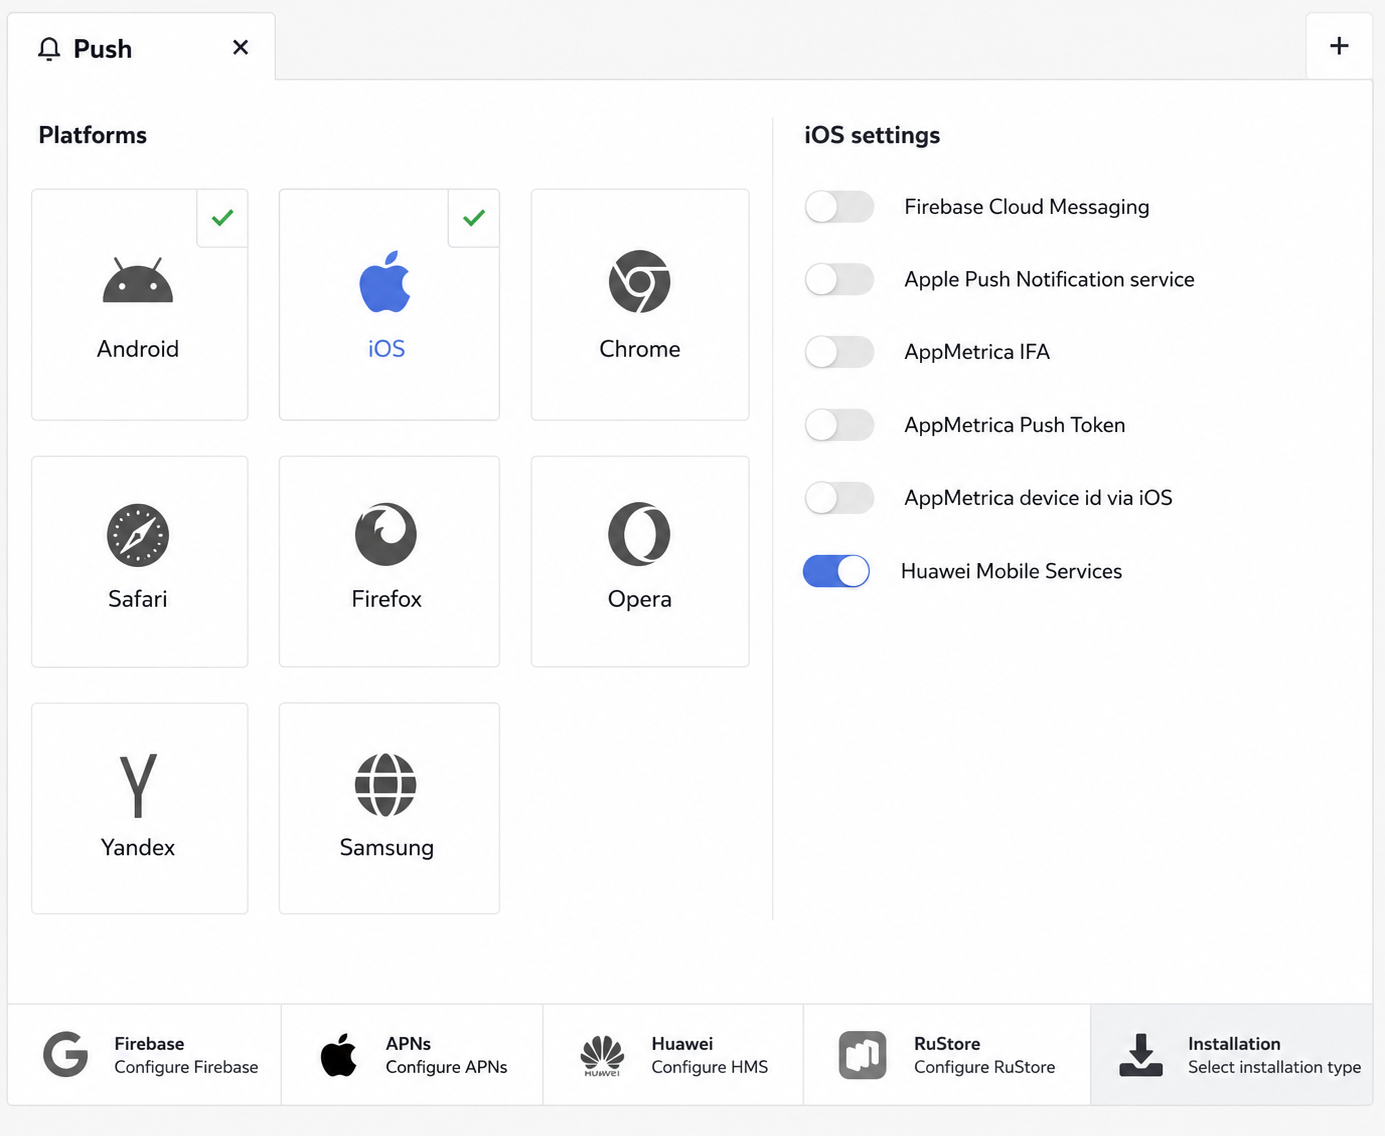
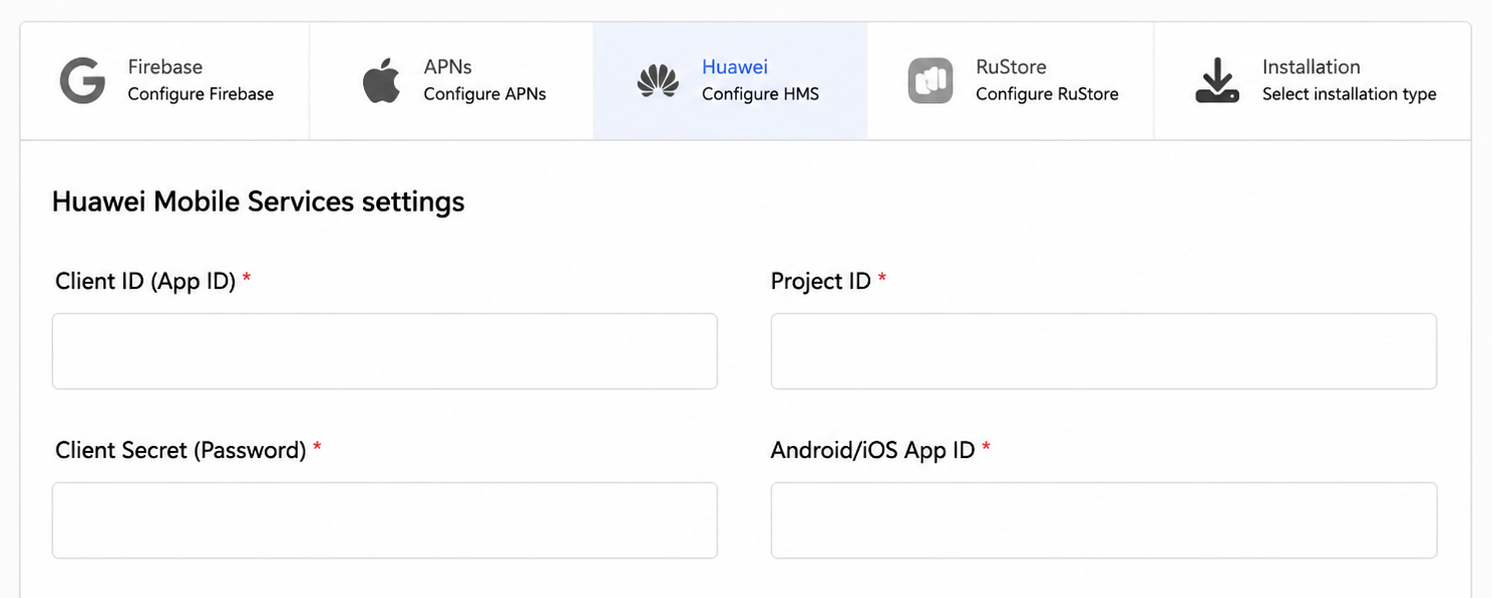
Select Huawei in the bottom panel:

Enter the configuration data:
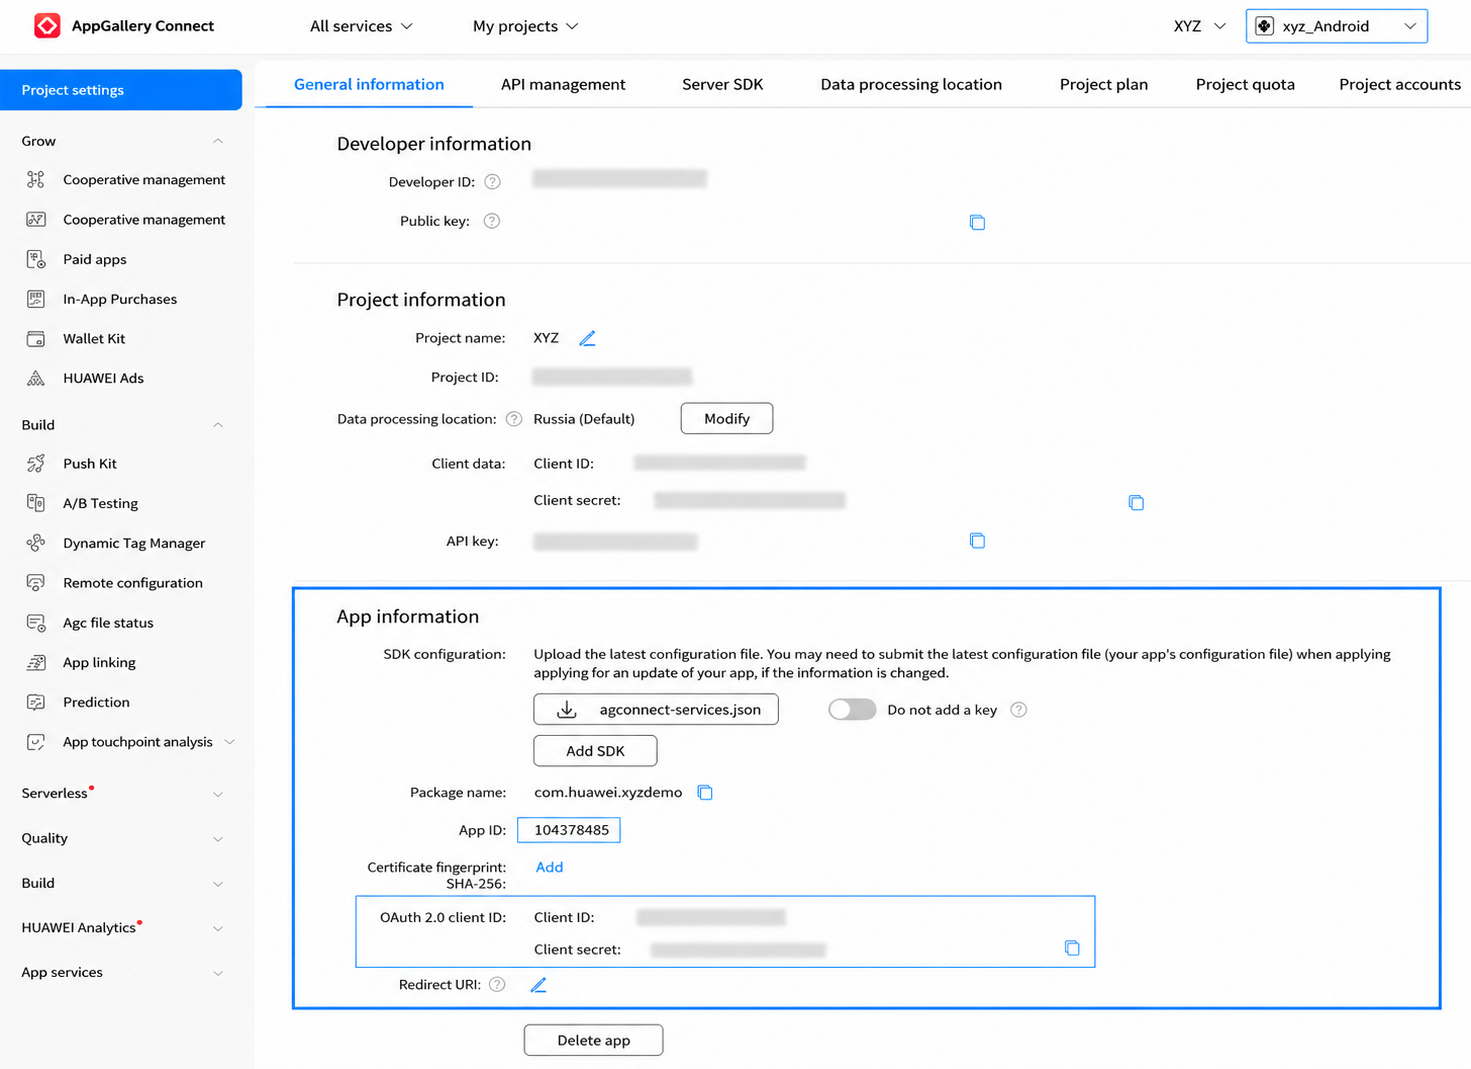
You can find the project ID, password, and Android or iOS app IDs in your project settings. In your Huawei developer account, open the console and go to AppGallery Connect — My Projects. From the dropdown list in the top panel, select the app for which you want to configure push notification delivery.
Use the app data:
- App ID = Client ID = Project ID
- Client Secret = Password
- App ID = Android/iOS App ID
RuStore
 | The RuStore service allows you to send push notifications from apps published in the RuStore marketplace. You need to create a push notifications project for your app in advance. |
To publish an app in the RuStore marketplace, follow the official documentation.
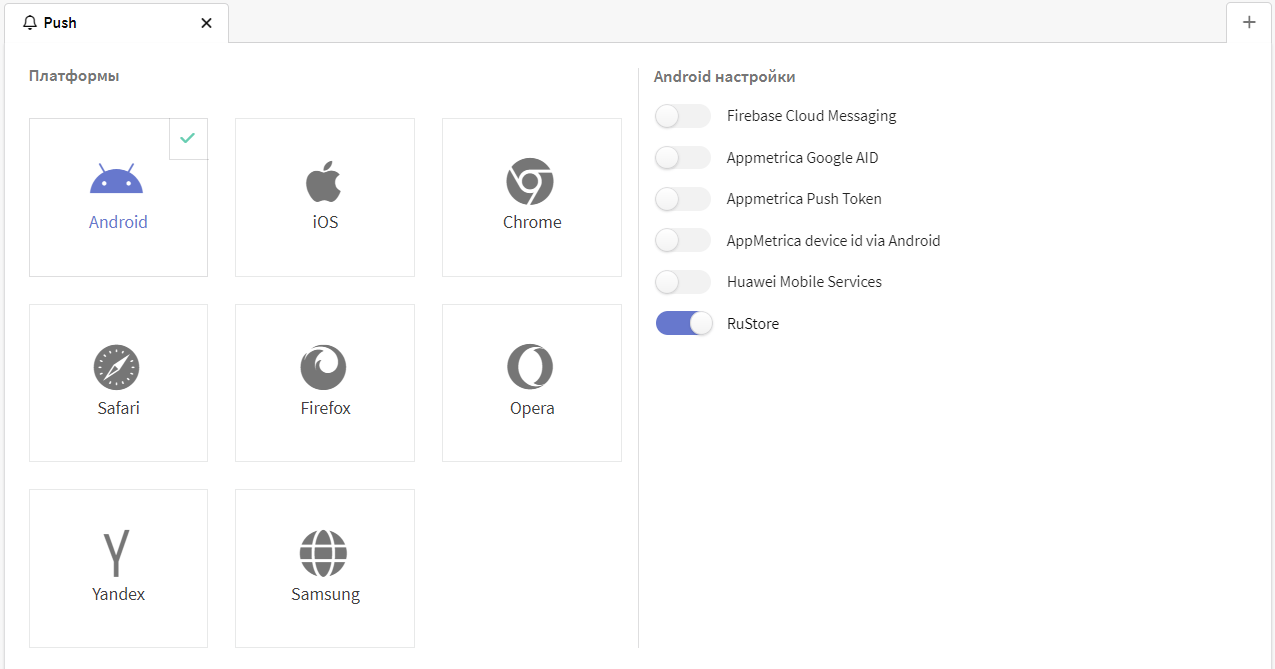
Open the resource settings and activate RuStore for Android apps:
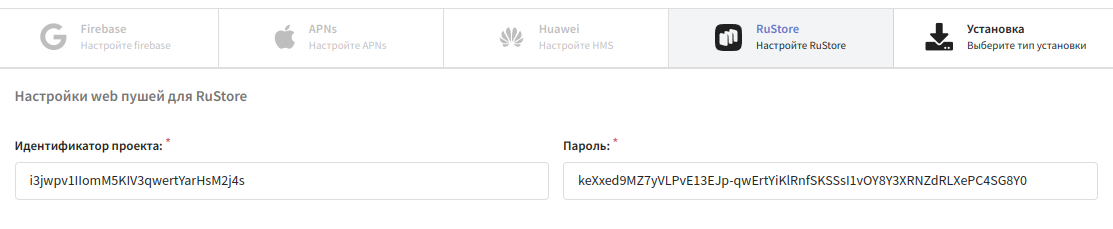
Select RuStore in the bottom panel and enter the configuration data:
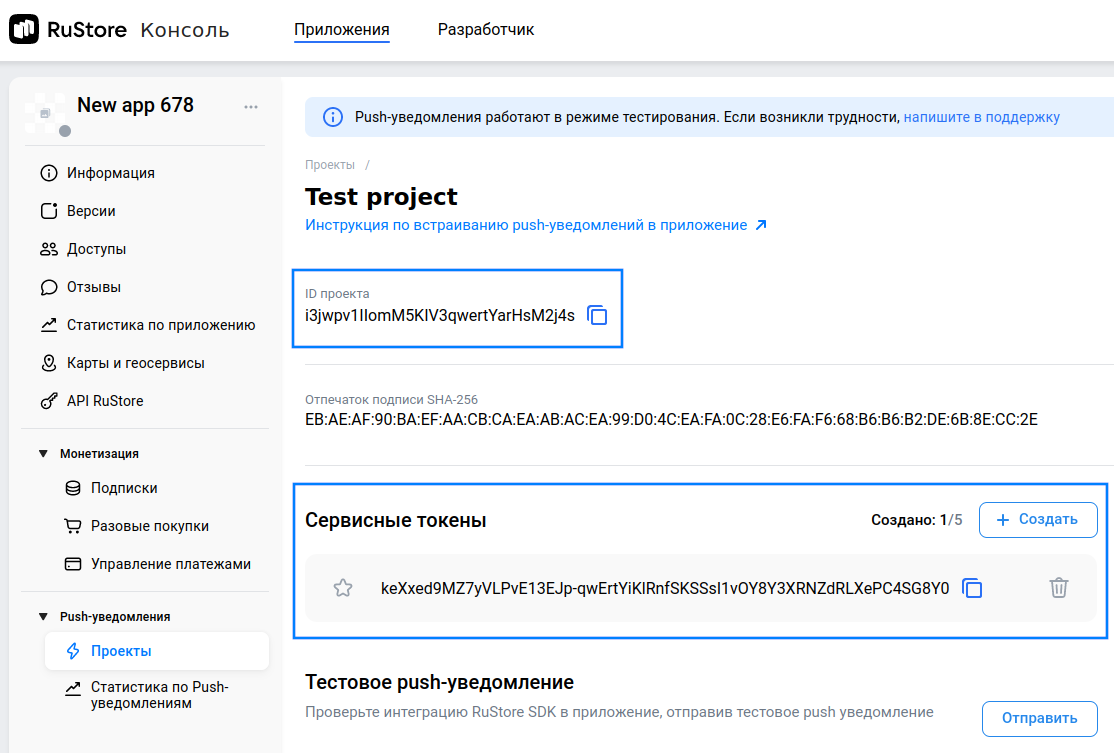
You can obtain the resource configuration data from the RuStore Console. On your app's page, go to Push Notifications — Projects and open the corresponding project:
- Project ID is the project's ID;
- Password is the service token.
Adding push app subscriptions
Push notification subscriptions are assigned to users via an API request from the app: Add a push subscription to the database.
Subscriptions to Yandex.AppMetrica can be added automatically for users of apps with the metrics service connected. For more details, see Integration with Yandex.AppMetrica.
Event tracking in app push
Push notifications for apps include ack and open links. GET requests to these links create push delivered and push opened events. They will appear in the user history and channel reports.
{
    "hub_link": {
        "ack": "http://your.domian.com/api/v1.1/pushes/crypto_post_events?/2ab9162159...",
        "open": "http://your.domian.com/api/v1.1/pushes/crypto_post_events?/555fbe0b9..."
    }
}
Event registration in app push
You can add custom events via an API call: Add events from app push.