Tilda™
Tilda profile import integration
In Altcraft Platform, you can transfer the data of a user who filled out a form on your website designed on Tilda. To do this, you need to use the Webhooks tool. You can read more about Tilda Webhooks in this article.
Please note that integration with Tilda allows you to integrate only user subscriptions to email and SMS resources.
For this integration you will need the following data.
- Altcraft service instance URL. For example,
https://ru.altcraft.com. - API token: tokens are created by platform master users.
- Database ID and Resource ID. If there is no need to subscribe to a resource, you need only the database ID.
Step 1: Create a Tilda webhook
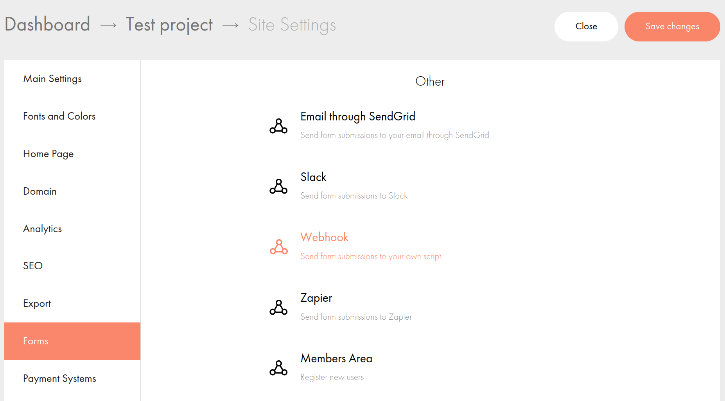
Go to the section: Dashboard —> Your project —> Site settings —> Forms. At the very bottom you will find Other —> Webhook.
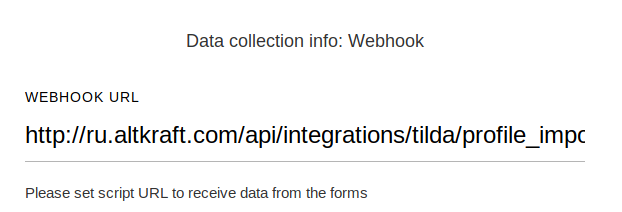
Fill in the WEBHOOK URL field as follows:
<your.domain>/api/integrations/tilda/profile_import/?token=<api_token>
Here you need to replace <your.domain> with the URL of the Altcraft platform service instance and <api_token> with the token provided to you:
Click "Add". After that, you will be prompted to assign this data collection service to all forms on the website. Skip this step by clicking the Close button. So, Webhook is created.
Step 2. Set up a Tilda form
Open the site page editing window and find the form from which you want to transfer data to Altcraft. Then open the "Content" tab:

Find the FORM DATA RECEIVER section and enable your Webhook:

There are two types of form in Tilda:
- a simple form with a button,
- form with multiple fields.
The settings for each of them are slightly different.
Forms with one input

For a single input field form you will need block "Options" to set variable names.
| Field | Description |
|---|---|
| Variable name | If you want this field to get into Altcraft, then its name must correspond to the same field in the database. The variable name must be email or phone. The name is not case sensitive, for example, if the Altcraft database has an "email" field, and Tilda's field is called "EMAIL", the data from the form will be submitted successfully. |
| Variable name for a hidden field | Name it to_ids |
| Variable value for a hidden field | Enter a colon-separated database ID and resource ID. If you do not need to subscribe to the resource, then you need only the database ID. In the screenshot below, in the example, 4 is the database ID, 19 is the resource ID. |

Form with several inputs
If you are working with a form that contains multiple fields, you need to open the "Content tab. There, expand the INPUT FIELDS" tab.
Pay attention to the names of all the variables that the form contains. If you want a field to get into Altcraft, its name must correspond to the same field in the database.
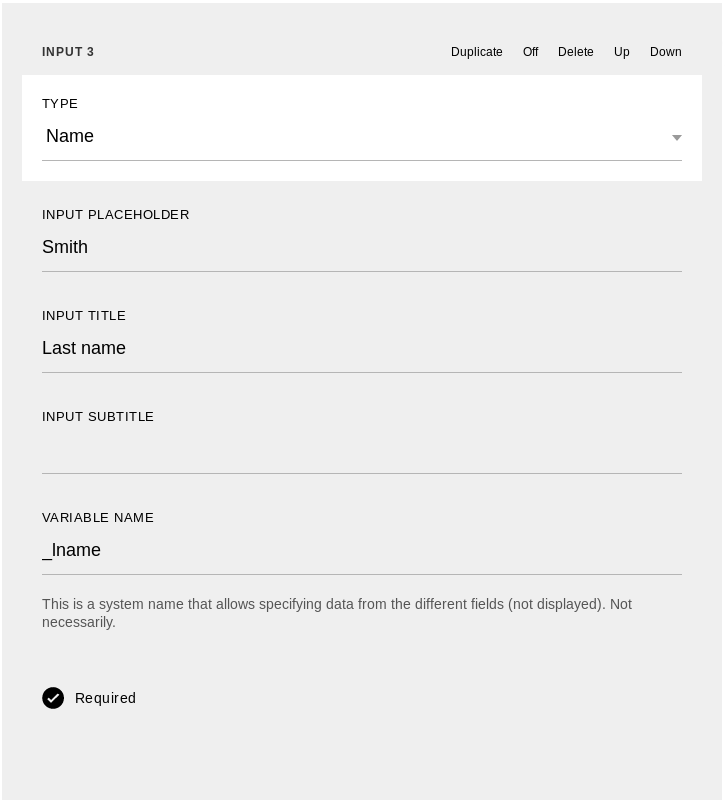
The contact data fields should be named email or phones.The variable name is case insensitive, e.g. EMAIL will also work.
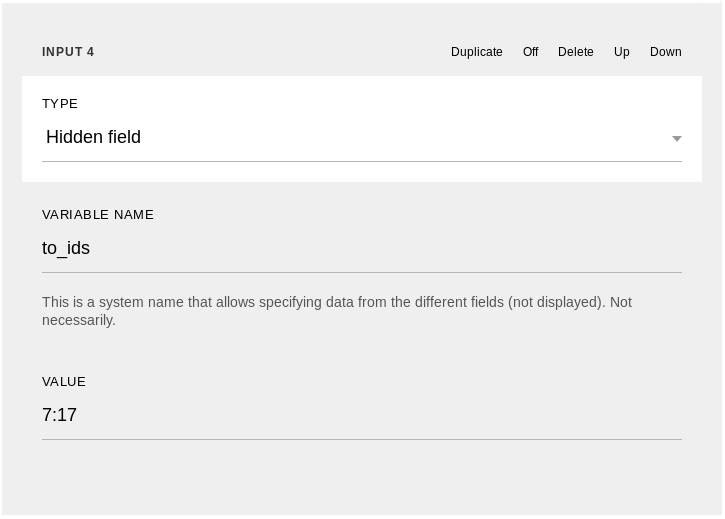
After setting up the visible form fields, add another field. Type is hidden. Name it to_ids . Enter a colon-separated database ID and resource ID. If you do not want to subscribe to the resource, enter only the database ID.
In the example in the screenshot below, 7 is the database identifier, 17 is the resource identifier.
Integration with Tilda allows not only importing new profiles into Altcraft databases, but also immediately start a trigger event. For example, you can run a trigger mailing right after importing a new profile to send them a welcome email, or add the profile to a welcome scenario.
To do this, you need to add additional hidden fields in the form:
| Action after import | Variable name | Value |
|---|---|---|
| Launch a trigger mailing | trigger_id | Trigger mailing ID |
| Add a profile to a scenario | workflow_id | Scenario ID |

Passing a subscription status
When you import a profile from a multi-field form, you can pass a specific subscription status to the resource. It is this status that will be displayed in the digital profile of the subscriber in Altcraft Platform.
To pass profile status, you need to add one more hidden field in your form settings. You must specify status_sub as the variable name, and choose one of the statuses reserved by Altcraft Platform as the value.
Available statuses:
| Status | Status_sub value |
|---|---|
| Subscribed | 0 |
| Unsubscribed | 1 |
| Complaint | 2 |
| Hardbounced | 3 |
| Unconfirmed | 4 |
| Suspended | 5 |
| Invalid | 6 |
Step 3. Test a form
After you set up the fields for the form, publish the page. Then test the page by submitting test data to the form.
Tilda won't update the form right away, so it's best to test it a couple of minutes after posting.
Next, open Your project —> Leads.

The screenshot shows an example of a successfully sent application. If you see an error, you need to check the following points:
- The URL in the Webhook is correct and contains the correct API Key
The database exists and it is selected in the resource you are using to subscribe.
- The form has an email or phone field
Extra options
You can set different variable parameters as hidden form fields:
- Profile matching mode by any of available. Default matching is Email.
- You can use
db_idandresource_idinstead ofto_idsvariable - You can set a custom value for
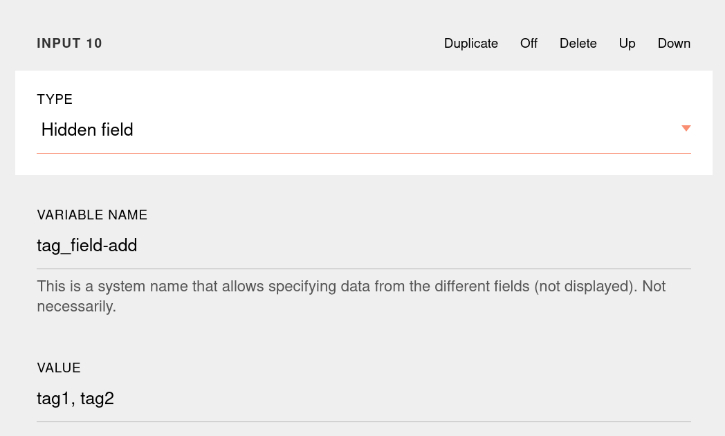
_vendorvariable. By default it will send form ID. - When updating a profile field with the "tags" type in the database, the field is completely overwritten. To add new values to existing ones, add the
-addto the variable name when setting up a field in Tilda. For example, to update a tag_field, use the variable nametag_field-add.