Быстрый старт
Как отправить первую email-рассылку
В этой статье показан базовый рабочий процесс в Altcraft Platform. Цель — отправить первое email-письмо и понять логику работы платформы.
Последовательность действий: База профилей — Ресурс — Профиль — Шаблон — Рассылка — Отчеты
Шаг 1. Создайте базу профилей
База профилей — это место хранения данных клиентов. В документации могут использоваться термины "клиент", "подписчик", "пользователь", но во всех случаях имеется в виду профиль.
1. Перейдите в раздел | 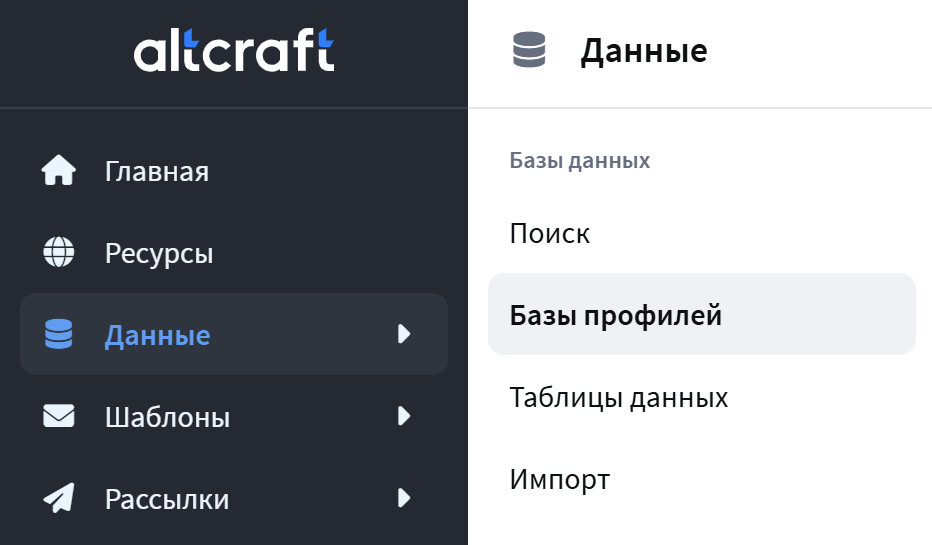 |

2. Укажите Имя базы профилей |  |
3. Задайте Заголовок менеджера подписок
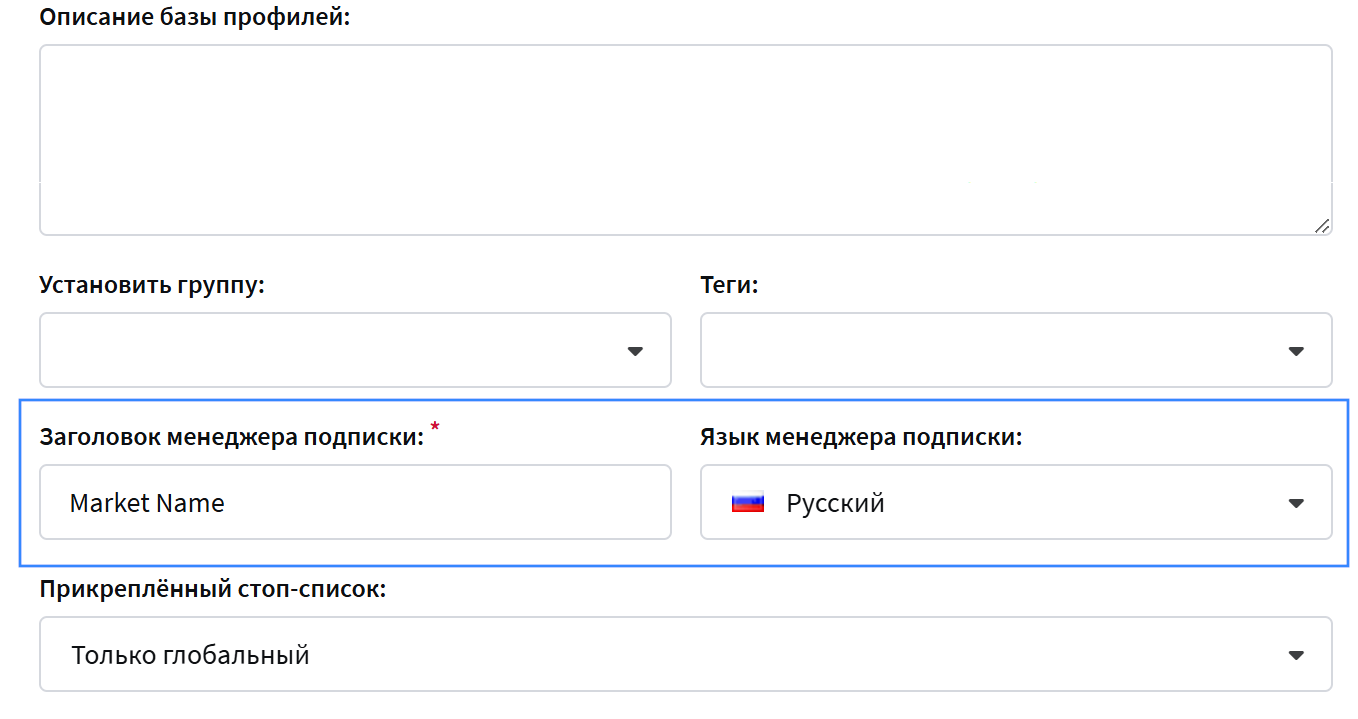
Заголовок менеджера подписок — текст на странице управления подписками
(например, название компании).
4. Укажите Имя и Email отправителя
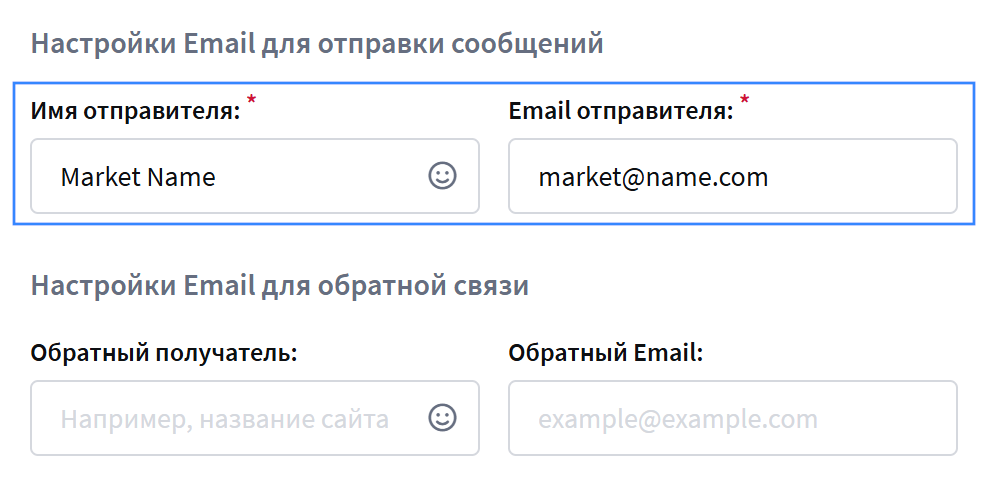
Имя отправителя — имя, которое получатель видит в письмах
Email отправителя — адрес, с которого отправляются письма
5. Сохраните базу

Более подробную информацию по работе с базами профилей вы можете узнать в этой статье.
Шаг 2. Создайте ресурс
Ресурс — это источник коммуникаций: сайт, сервис, бренд или проект. Именно через ресурс оформляются подписки и отправляются сообщения. Без ресурса не получится создать рассылку.
Ресурс нельзя создать без привязки к базе профилей.
Для отправки email требуется настроенный "DKIM" для домена отправителя. Он не выдается автоматически. Для подключения обратитесь в чат технической поддержки.
1. Перейдите в раздел Ресурсы |  |
2. Выберите канал для подписки. Для первой рассылки рекомендуем использовать Email |  |
3. Укажите Имя ресурса 4. Выберите созданную ранее базу профилей 5. Укажите URL сайта и Tracking-домен | 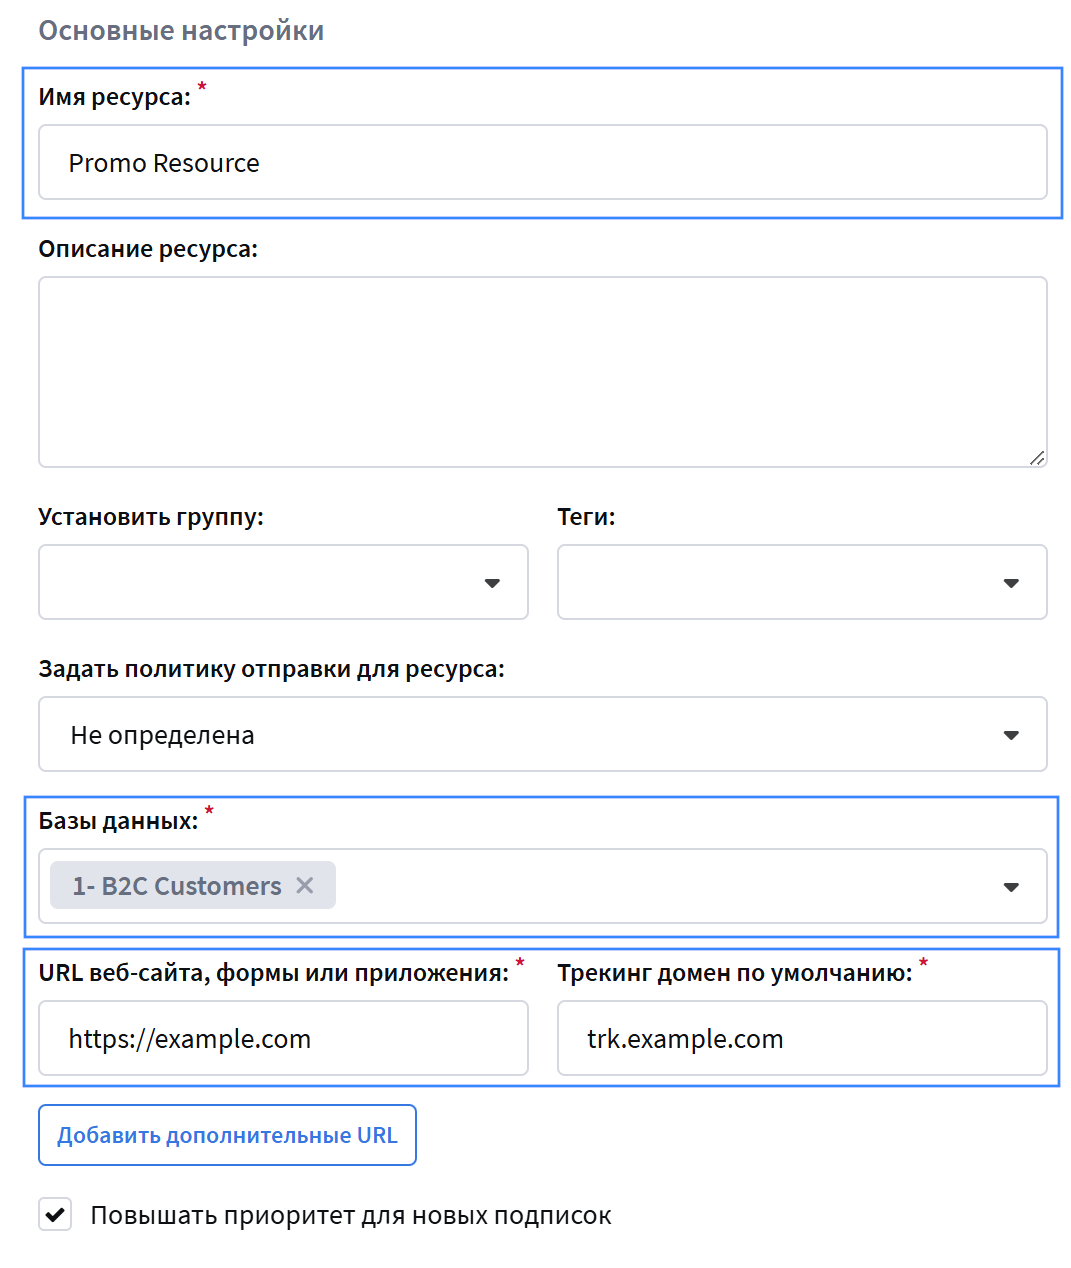 |
URL сайта / формы / приложения — адрес, где пользователи оставляют контакты. Можно указать основной сайт компании
Tracking-домен — технический домен для отслеживания переходов из писем. Если поле уже заполнено, оставьте значение без изменений
6. Укажите Имя и Email отправителя 7. Укажите List ID | 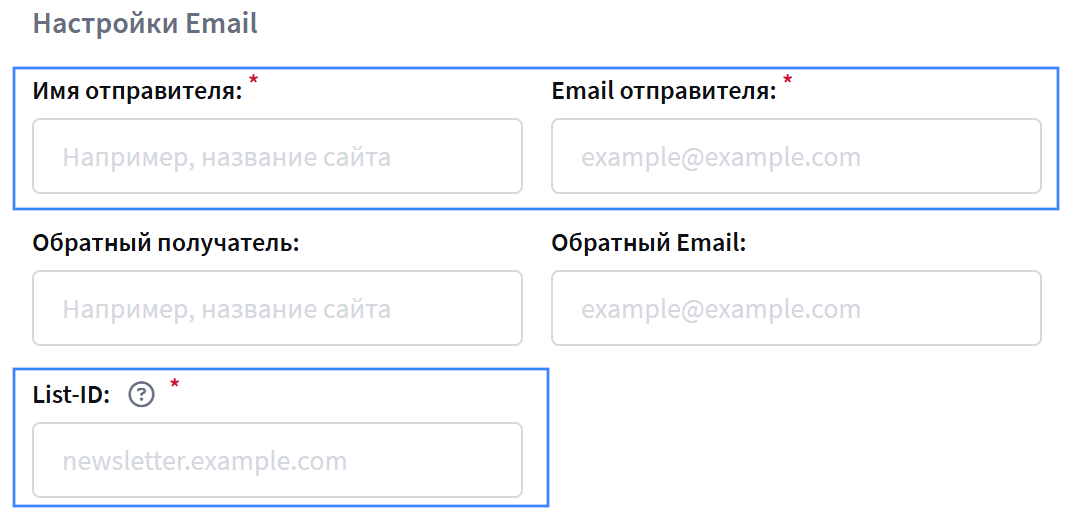 |
- Имя отправителя — имя, отображаемое в письмах
- Email отправителя — адрес отправителя
- List ID — идентификатор списка подписок внутри ресурса. Укажите произвольное понятное значение, можно использовать Email отправителя в формате
example.domain.com
Имя и Email отправителя уже указывались в базе профилей. В настройках ресурса эти значения имеют приоритет.
8. Сохраните ресурс

Более подробную информацию по работе с ресурсами вы можете узнать в этой статье.
Шаг 3. Добавьте профиль
Создайте профиль, которому будет отправлено письмо. Для этого вернитесь в раздел Данные — Базы профилей.
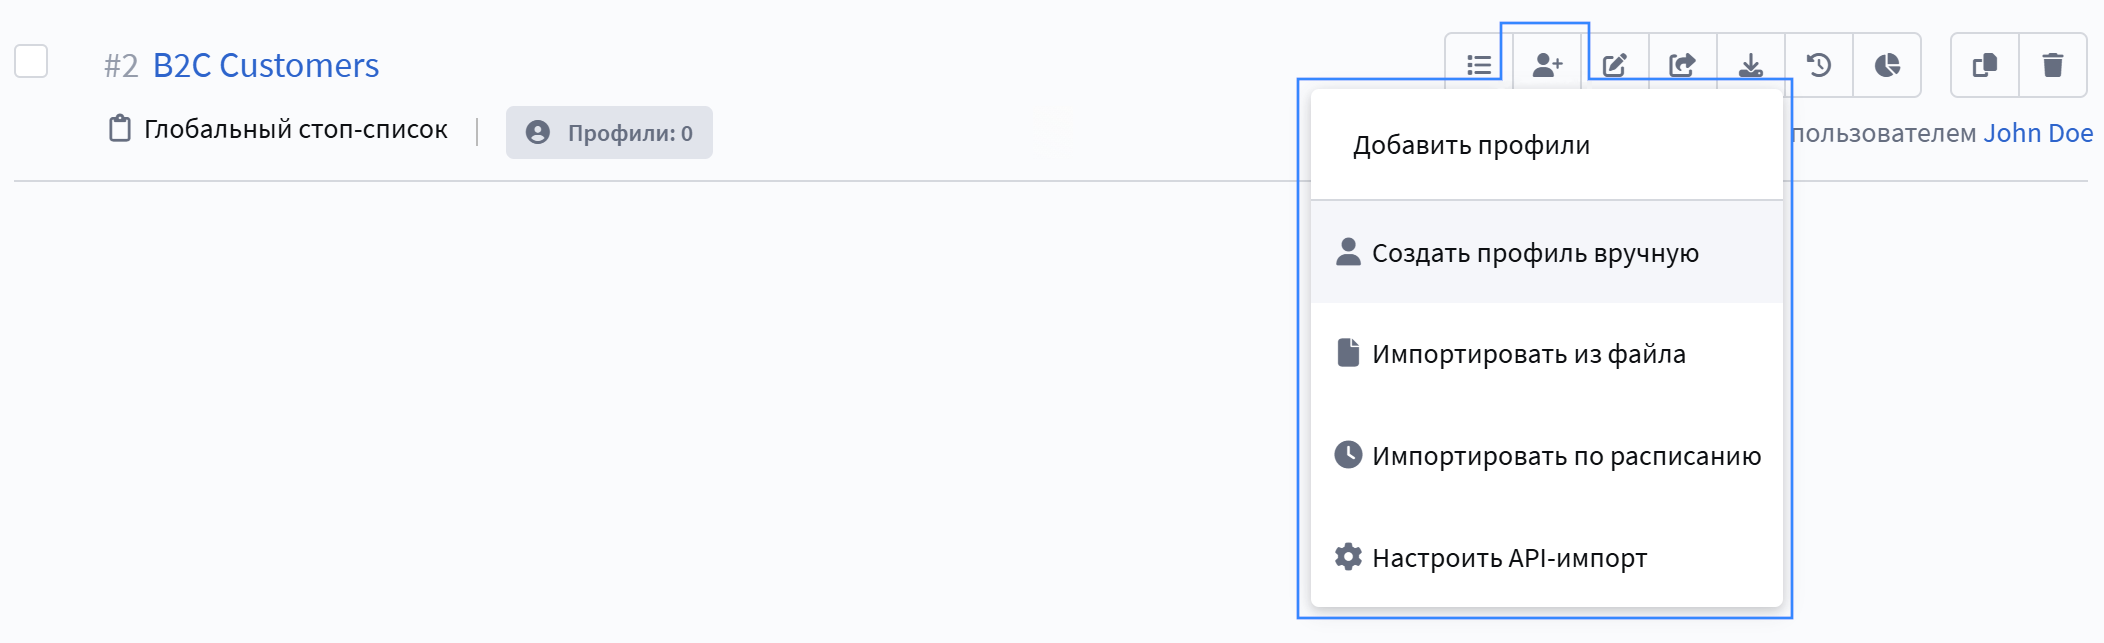
1. Нажмите Импорт профилей клиентов — Создать профиль вручную
2. Укажите имя профиля и нажмите Добавить подписку | 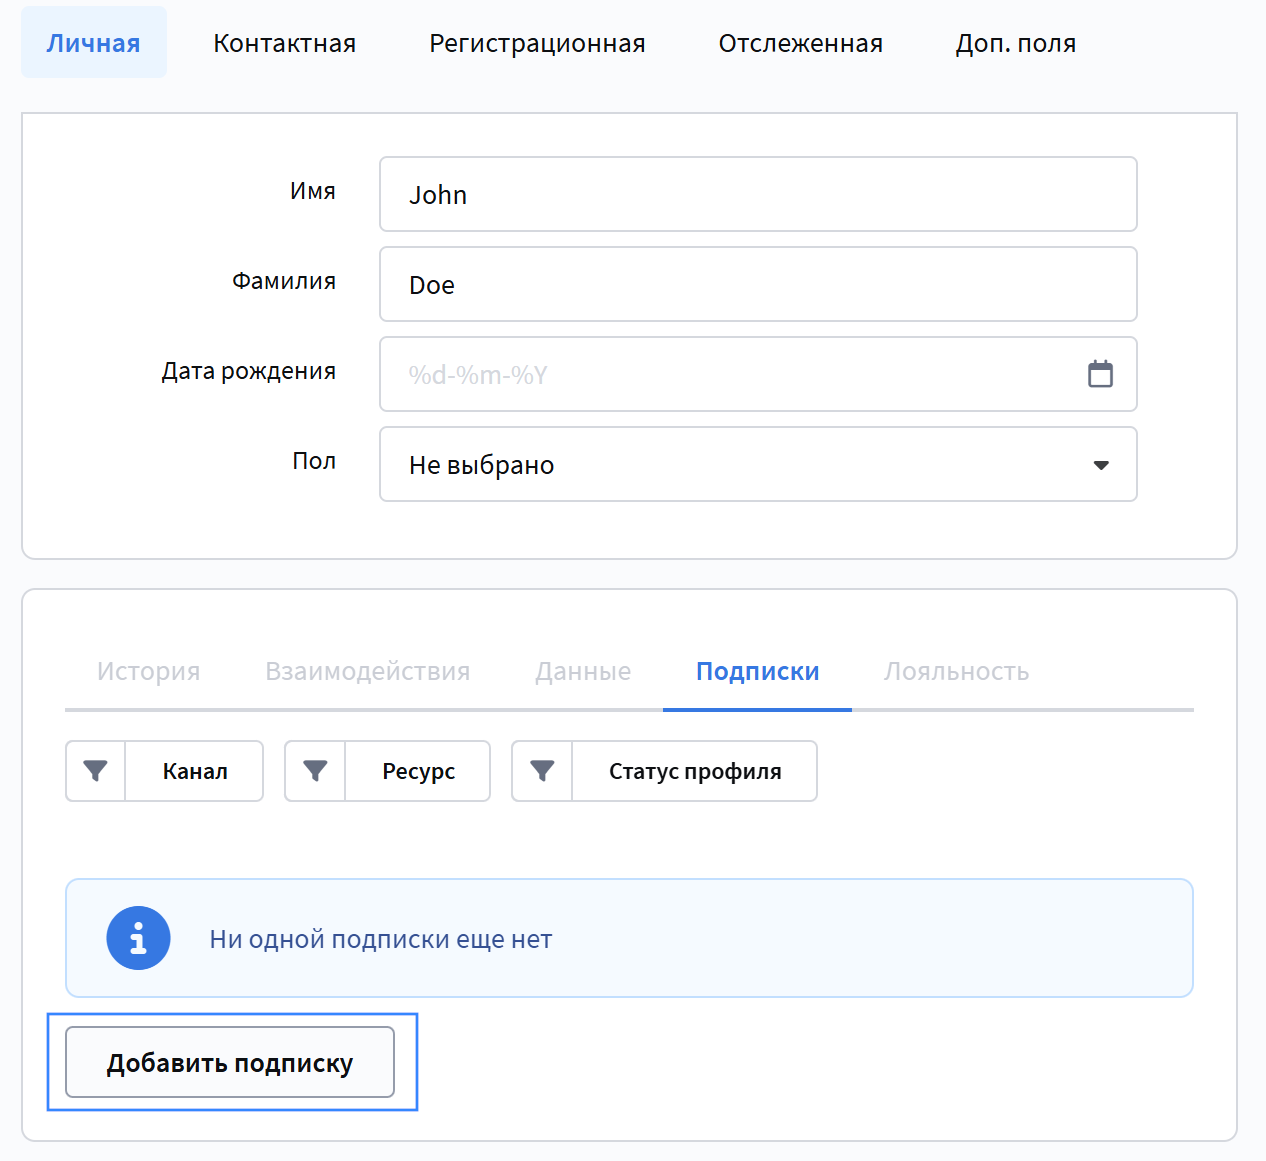 |
3. Выберите созданный ресурс и канал Email | 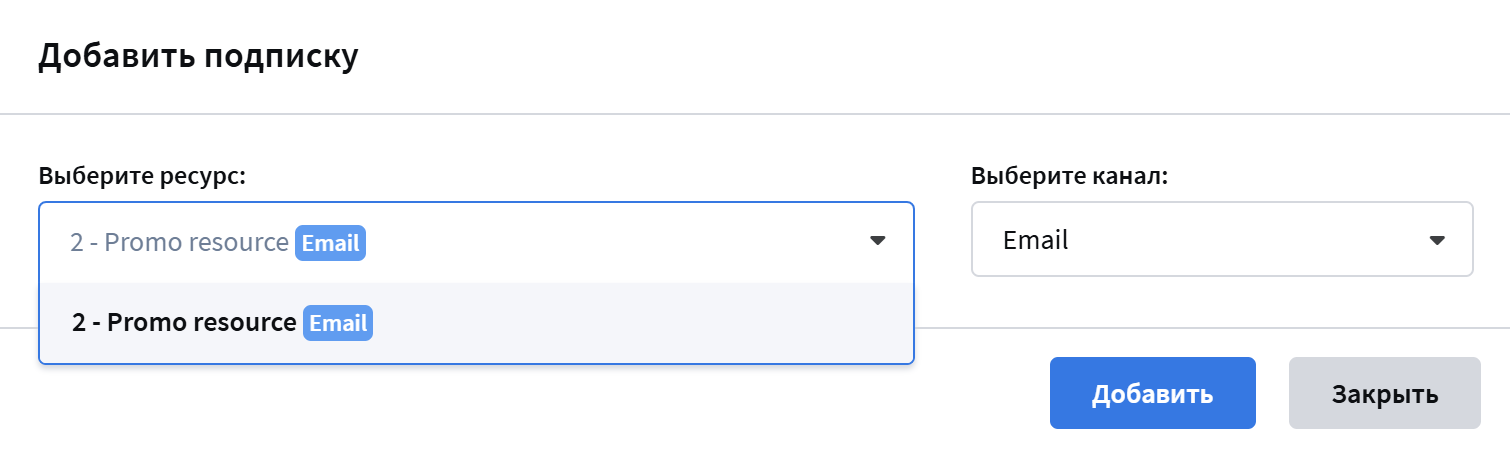 |
4. Укажите email, на который будет отправлено сообщение | 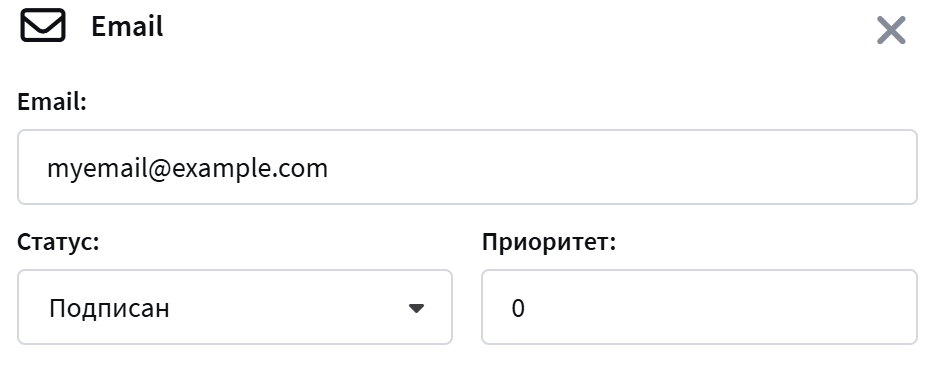 |
5. Сохраните профиль
Более подробную информацию о профилях вы можете узнать в этой статье.

Шаг 4. Создайте шаблон сообщения
Шаблон — это содержимое письма.
1. Перейдите в раздел Шаблоны и нажмите: | 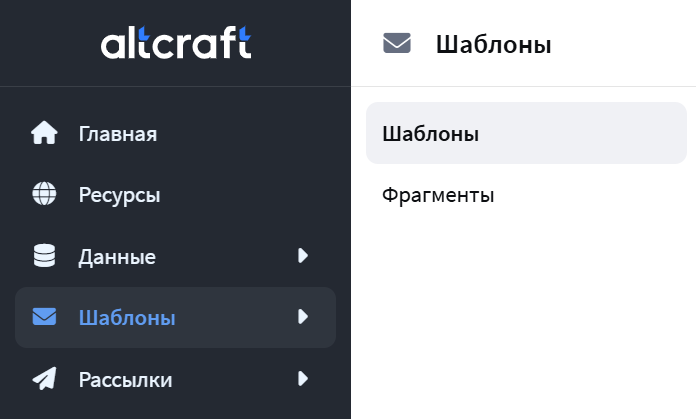 |
2. Выберите способ создания Редактор и канал Email
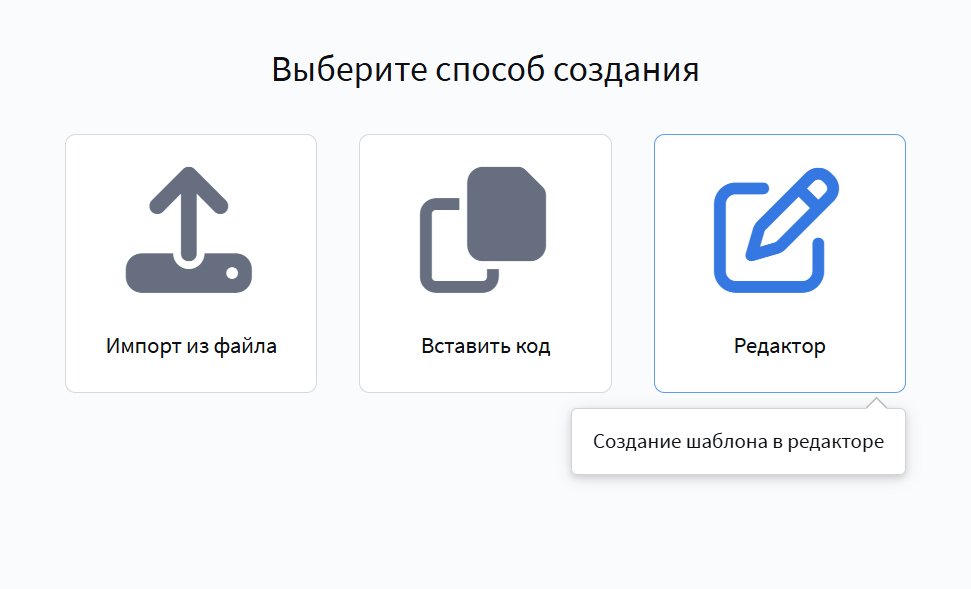 |  |
3. Откройте Редактор кода:
и сохраните шаблон:

В данном случае будет использован стандартный шаблон (заглушка) сообщения Альткрафт. Для настройки или импорта собственных шаблонов рекомендуем ознакомиться с разделом Шаблоны сообщений.
Шаг 5. Создайте рассылку
1. Перейдите в раздел Рассылки — Броадкасты и нажмите: | 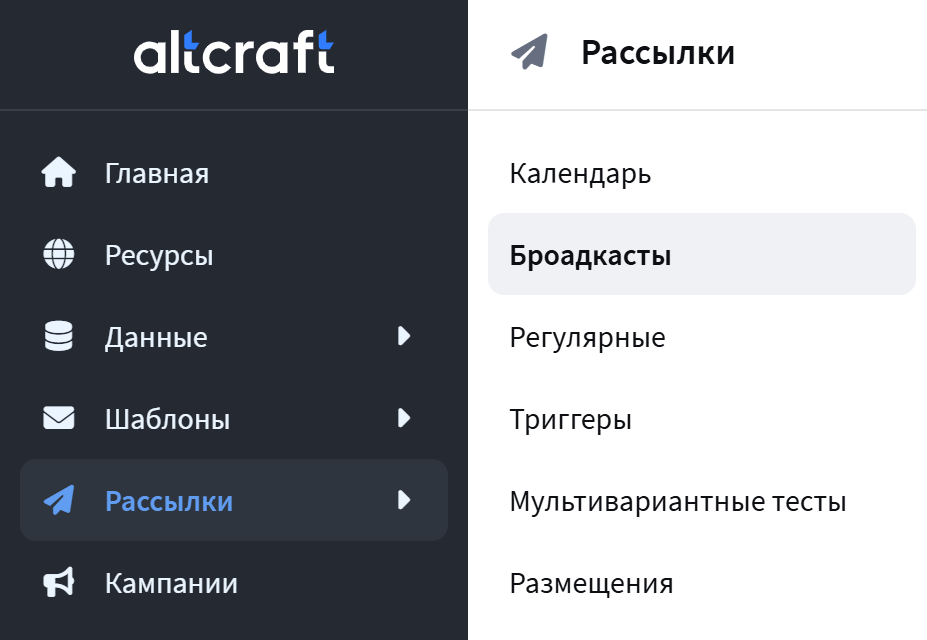 |
2. Введите Имя рассылки и выберите канал Email | 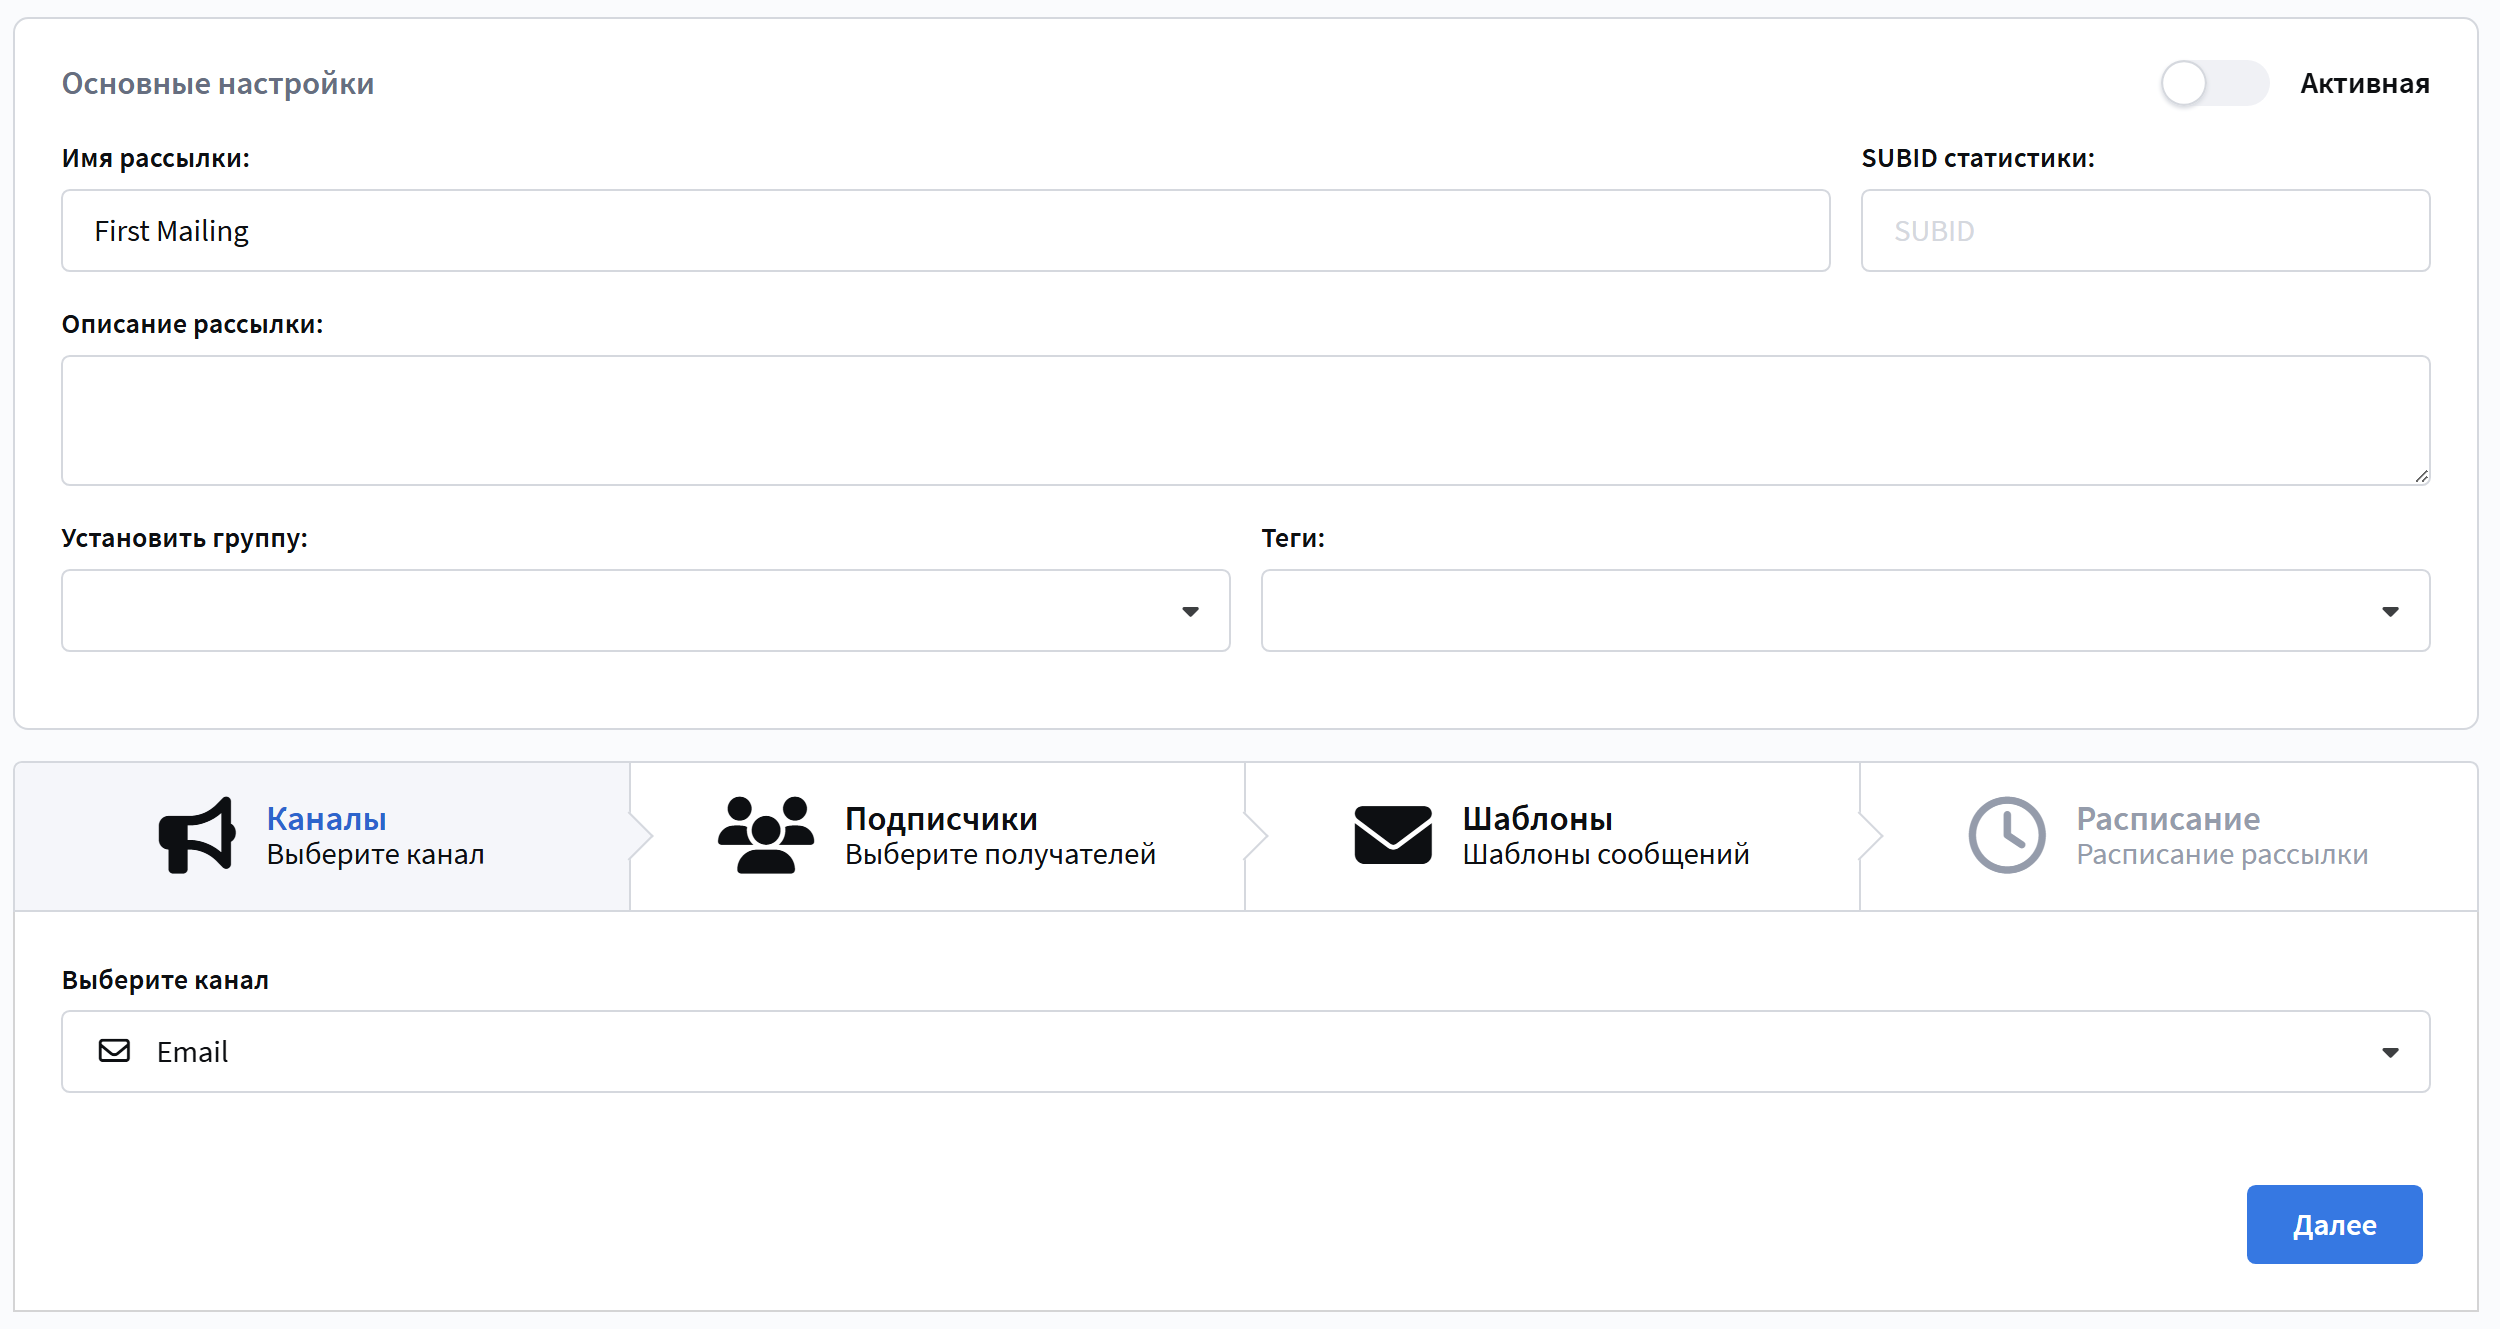 |
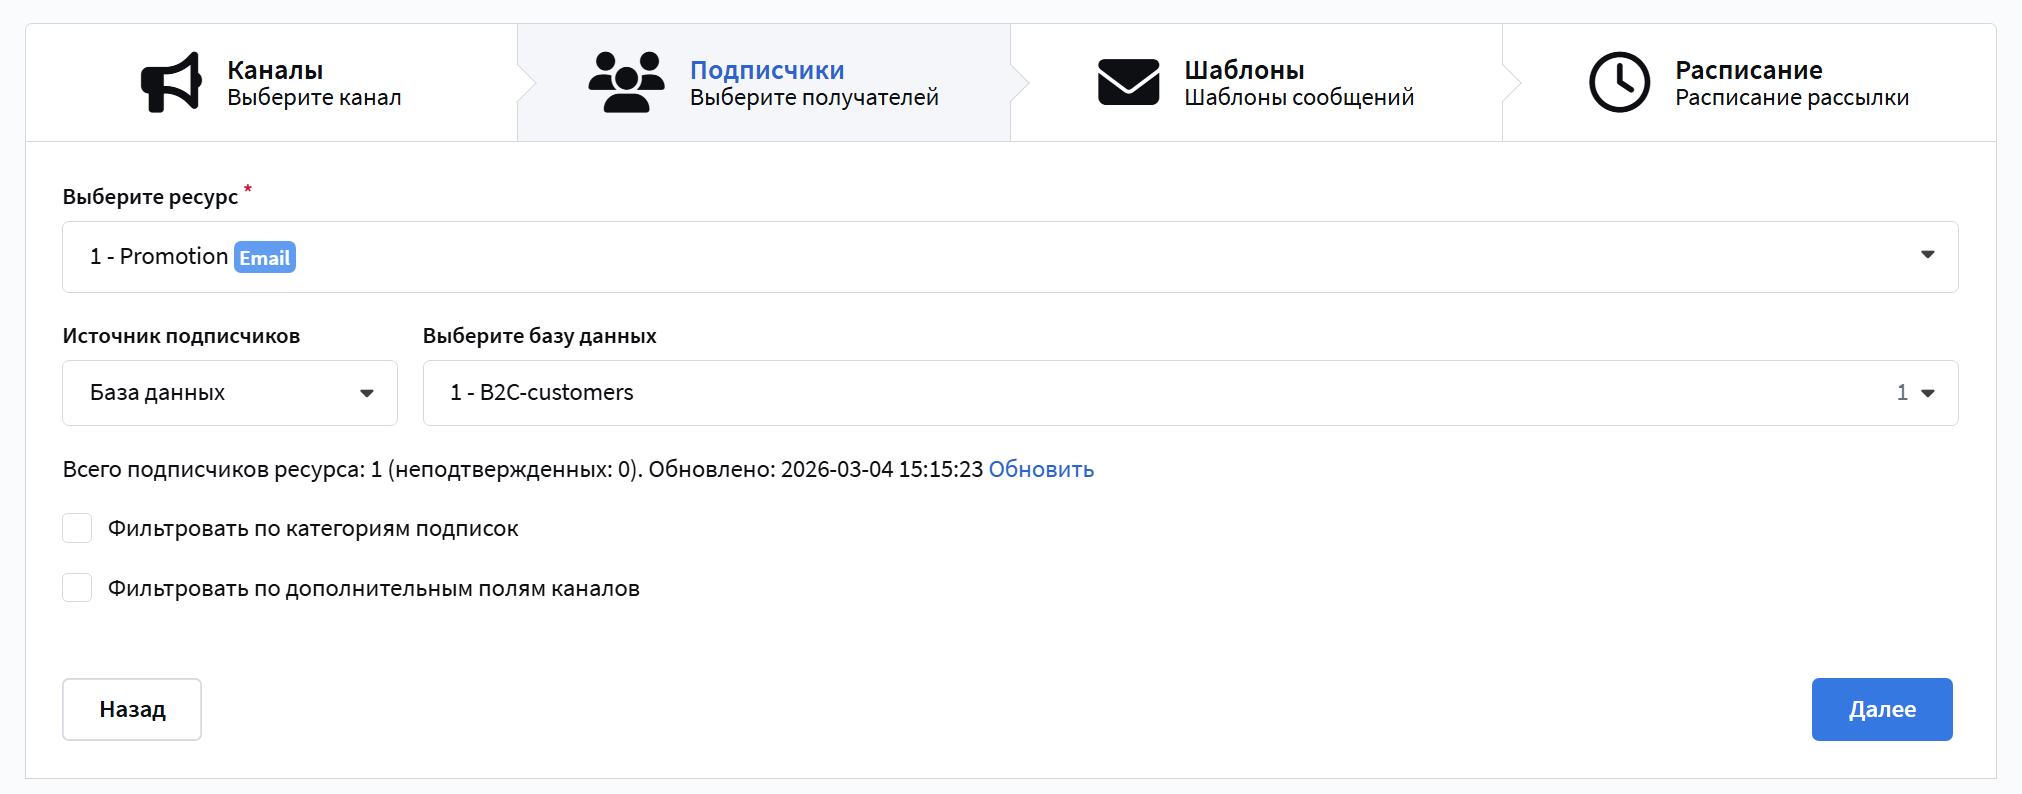
3. Настройте получателей
Перейдите на вкладку Подписчики и укажите:
- Ресурс — выберите созданный ранее ресурс
- Источник подписчиков — оставьте значение База данных
- База профилей — выберите базу, созданную в шаге 1
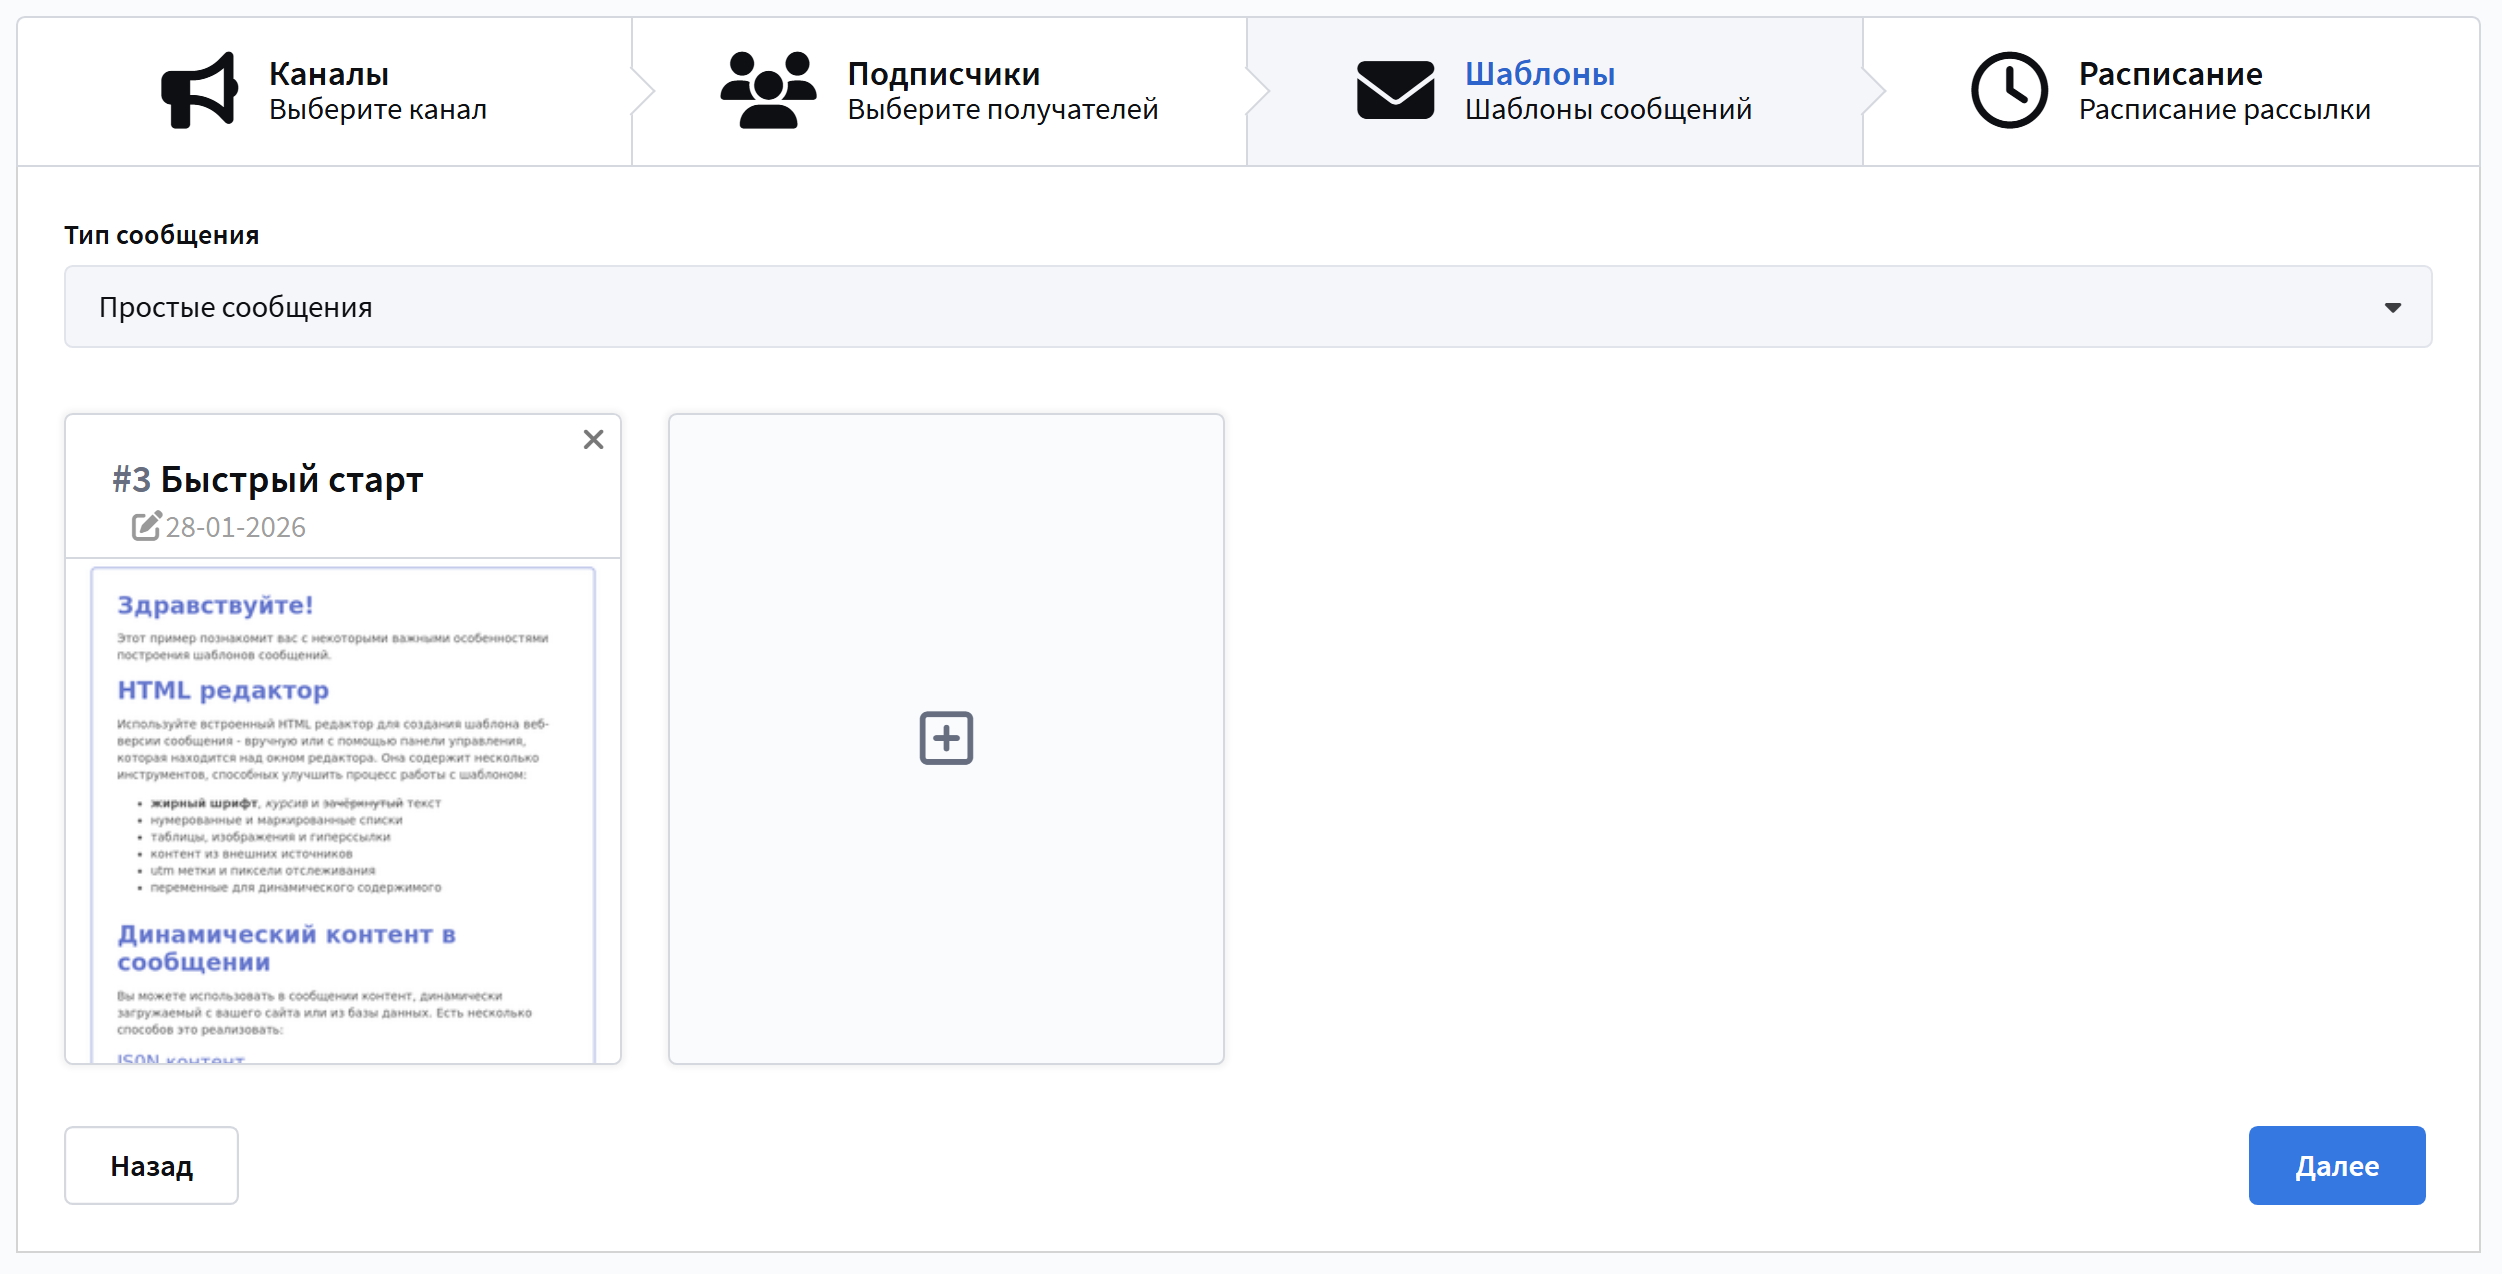
4. Выберите контент
На вкладке Шаблоны укажите созданный ранее Шаблон сообщения.
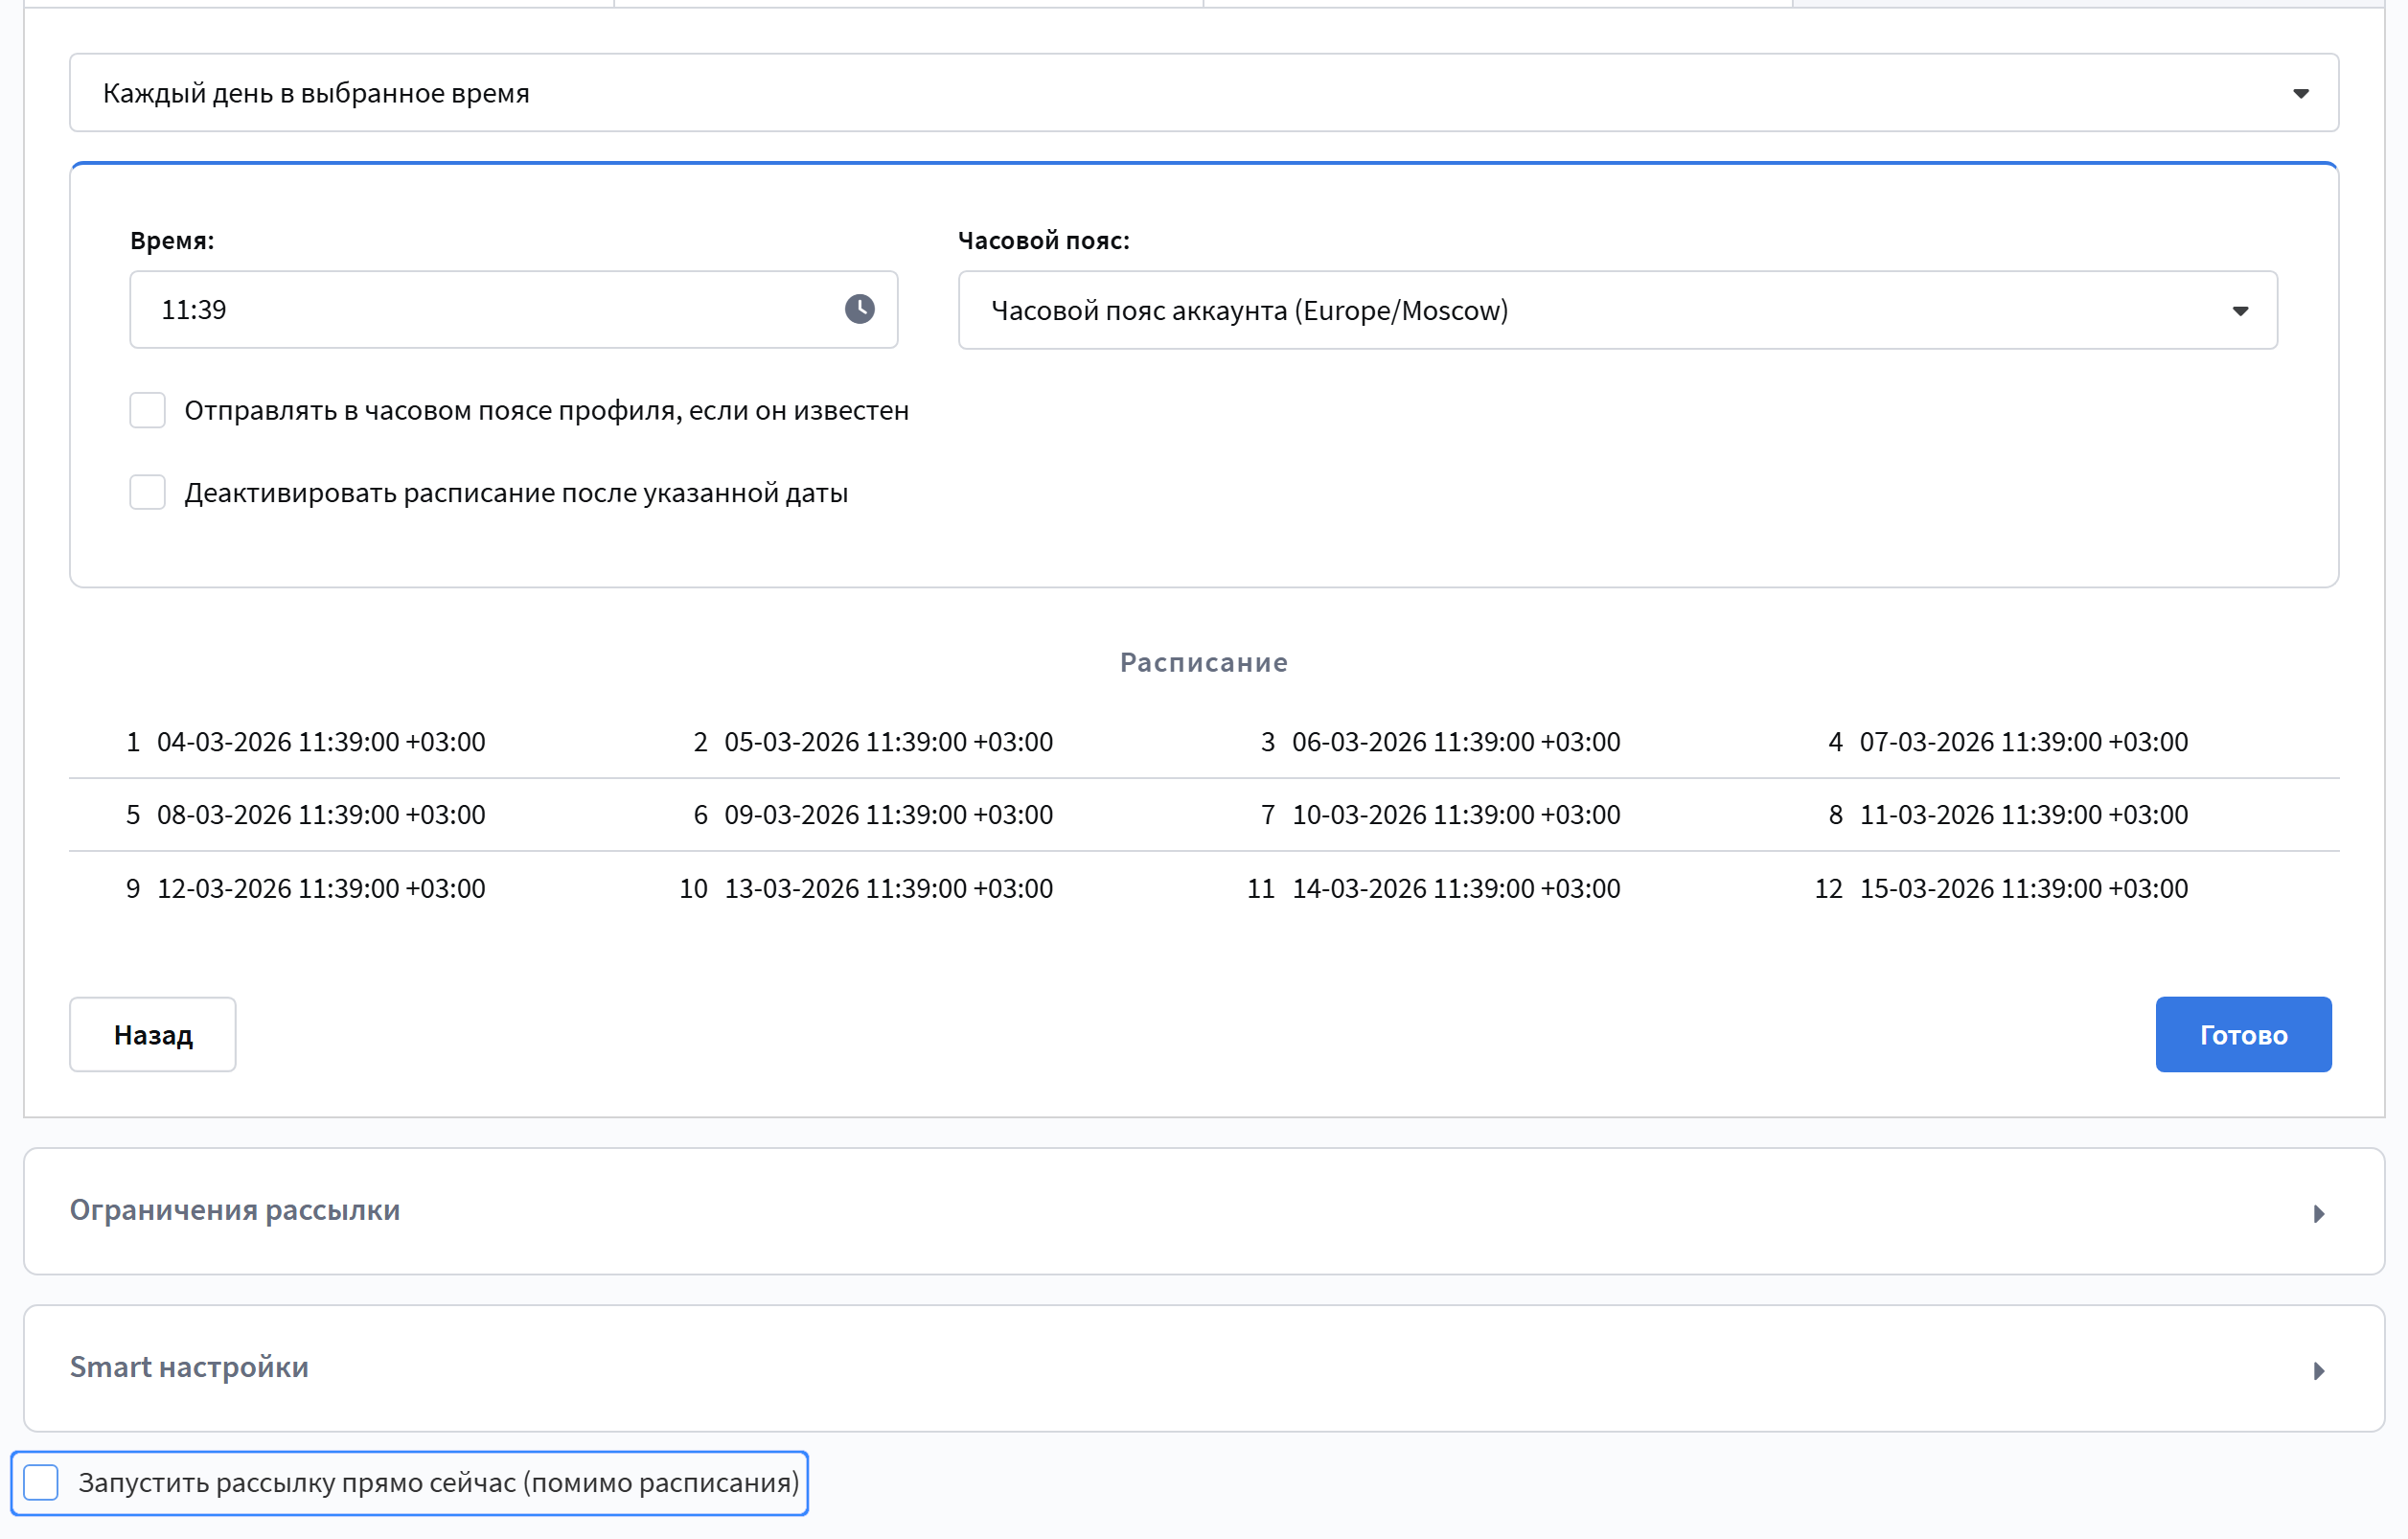
5. Настройте время отправки
Перейдите на вкладку Расписание:
- Вы можете настроить конкретное время старта рассылки
- Чтобы отправить письмо сразу после сохранения, включите чекбокс Запустить рассылку прямо сейчас (помимо расписания)
6. Сохраните и запустите
Активируйте рассылку и нажмите кнопку Сохранить. После сохранения рассылка начнет отправку в соответствии с вашими настройками.

Письмо будет отправлено созданному тестовому профилю.
Более подробную информацию по отправке email-рассылок вы можете узнать в этой статье.
Шаг 6. Посмотрите результат
Проверить результат отправки можно несколькими способами: в блоке аналитики или в карточке профиля.
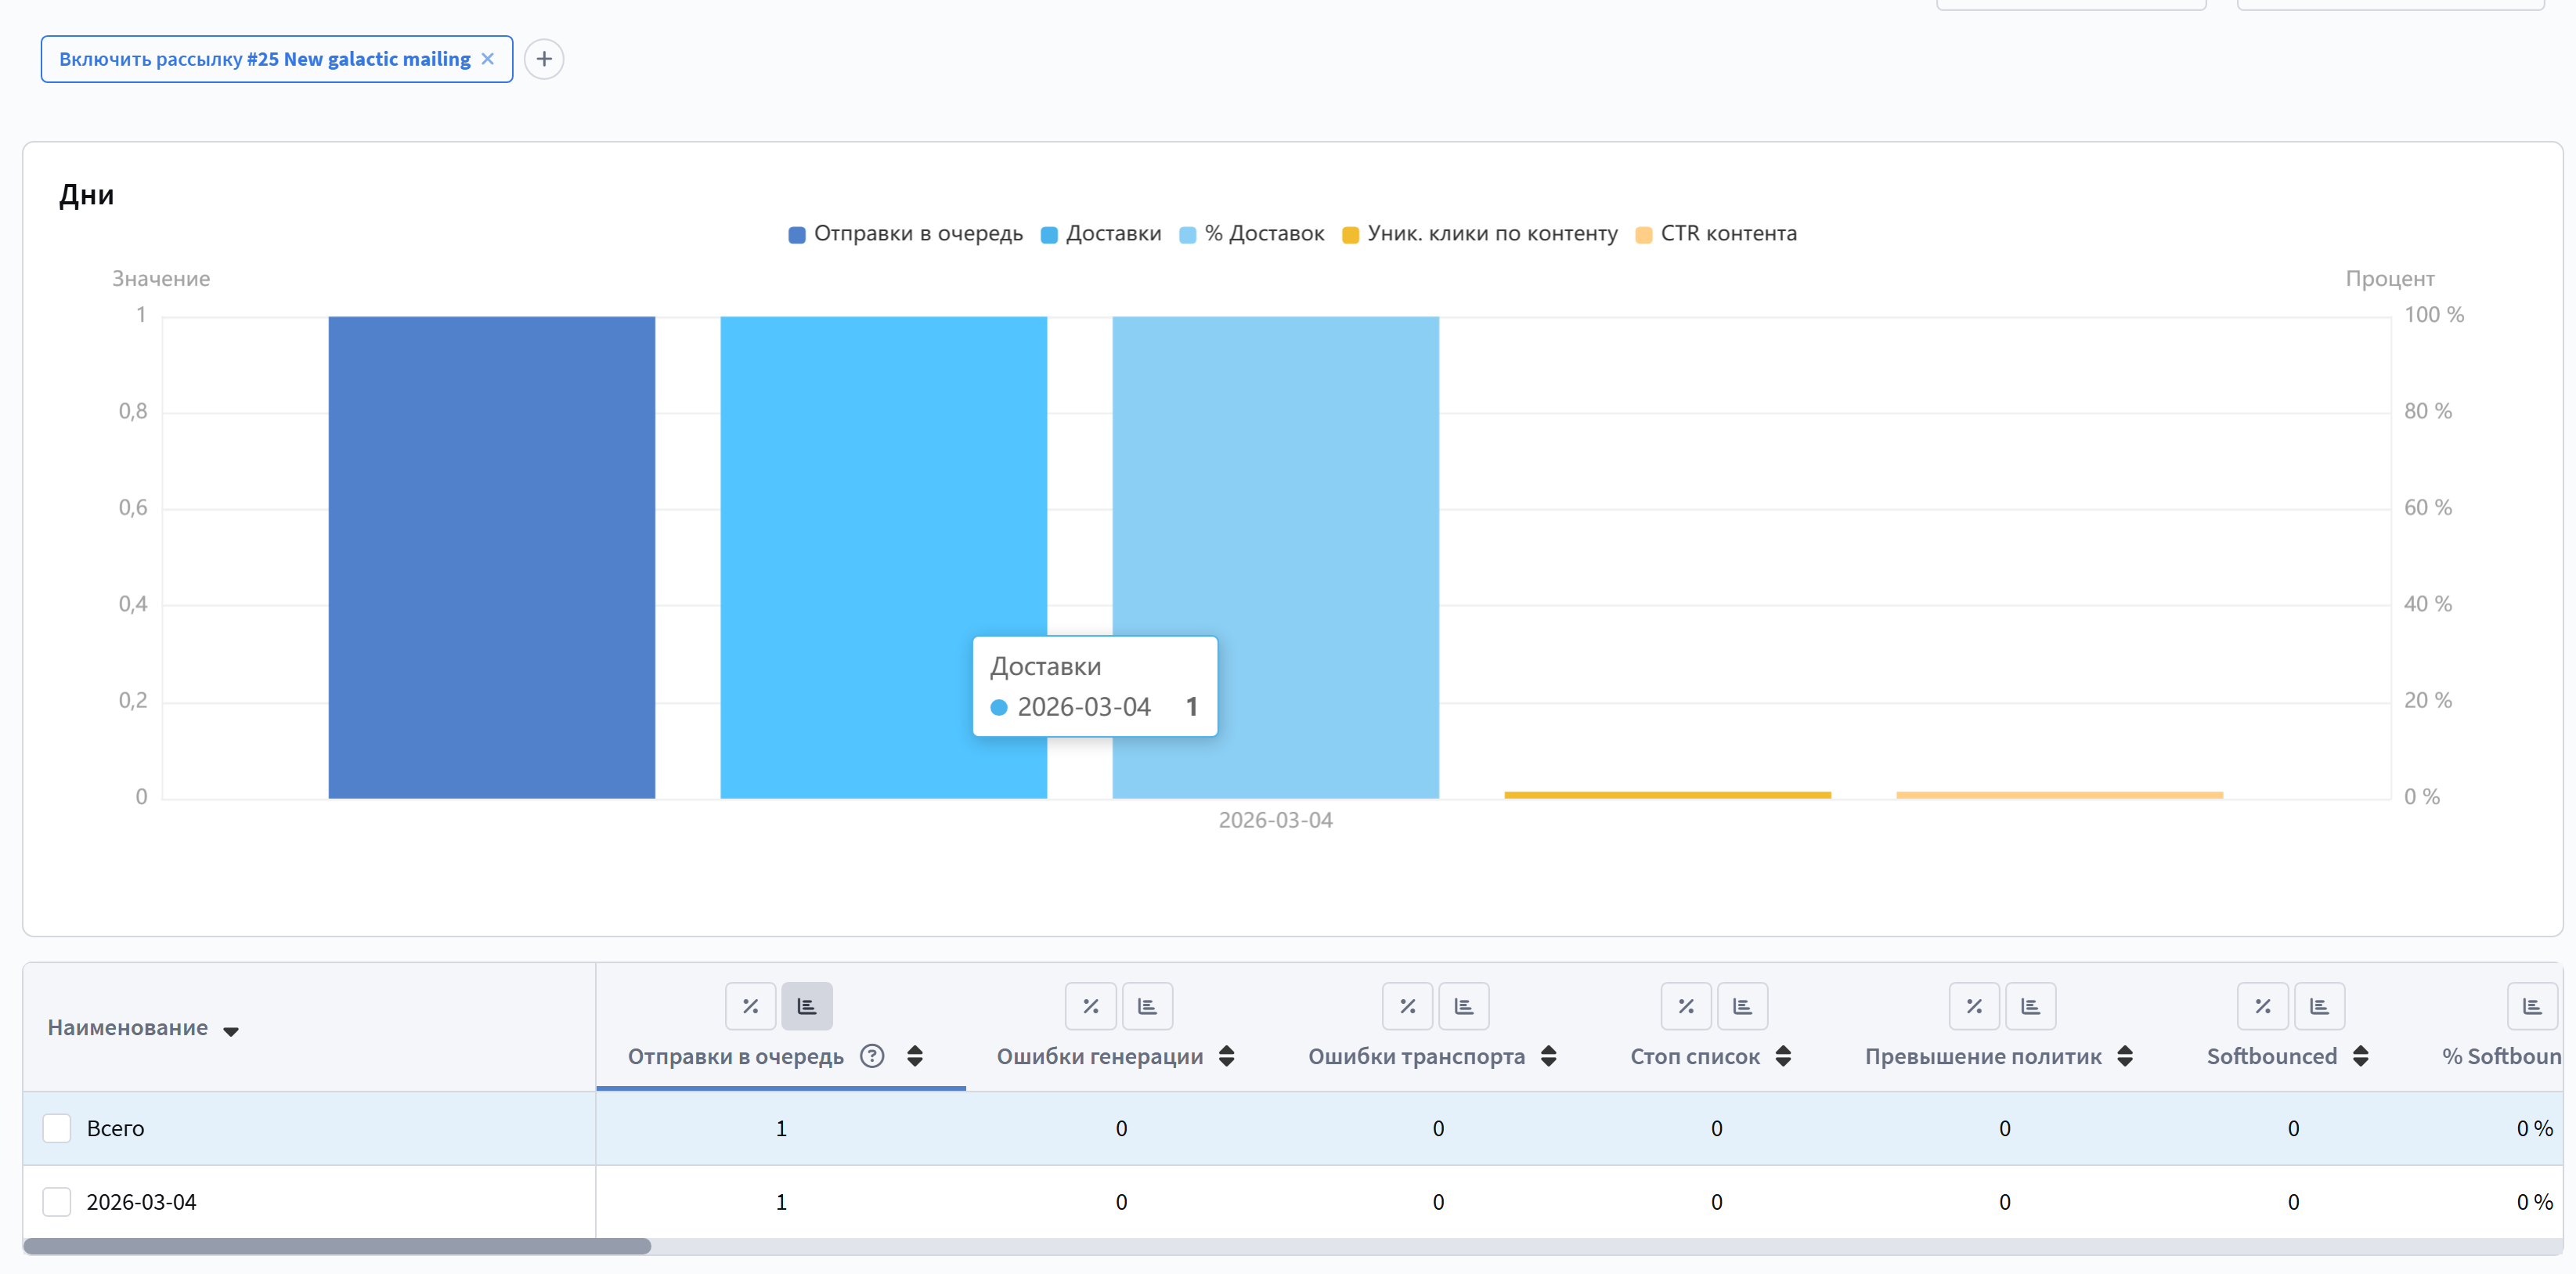
Способ 1. В блоке "Аналитика"
1. Выберите завершенную рассылку и кликните на кнопку 
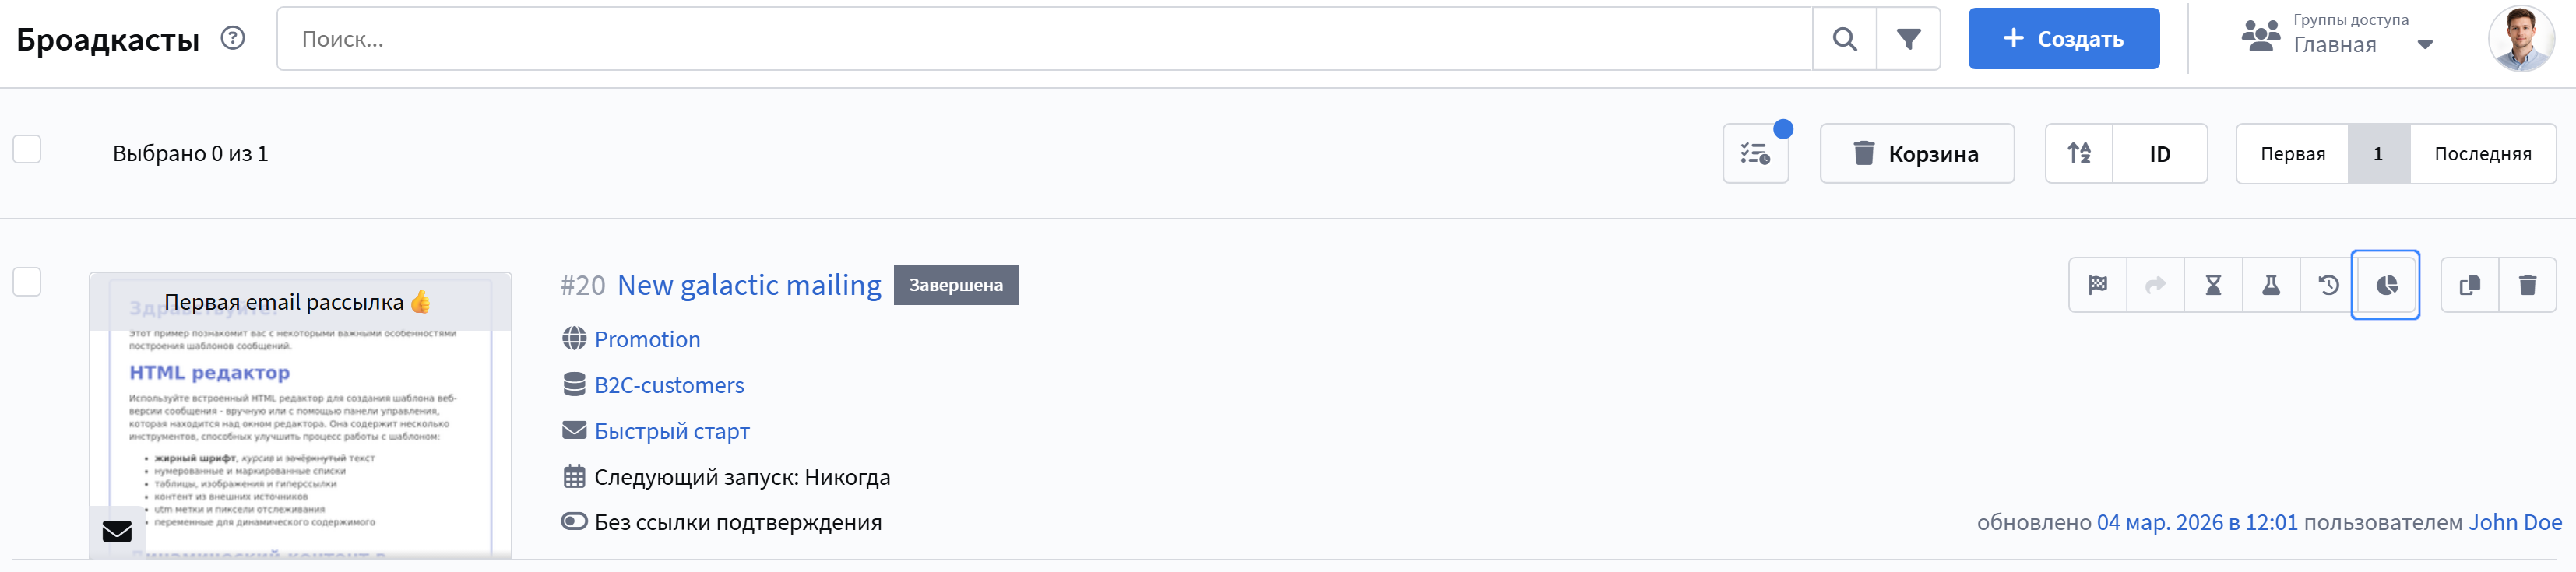
2. Изучите статистику
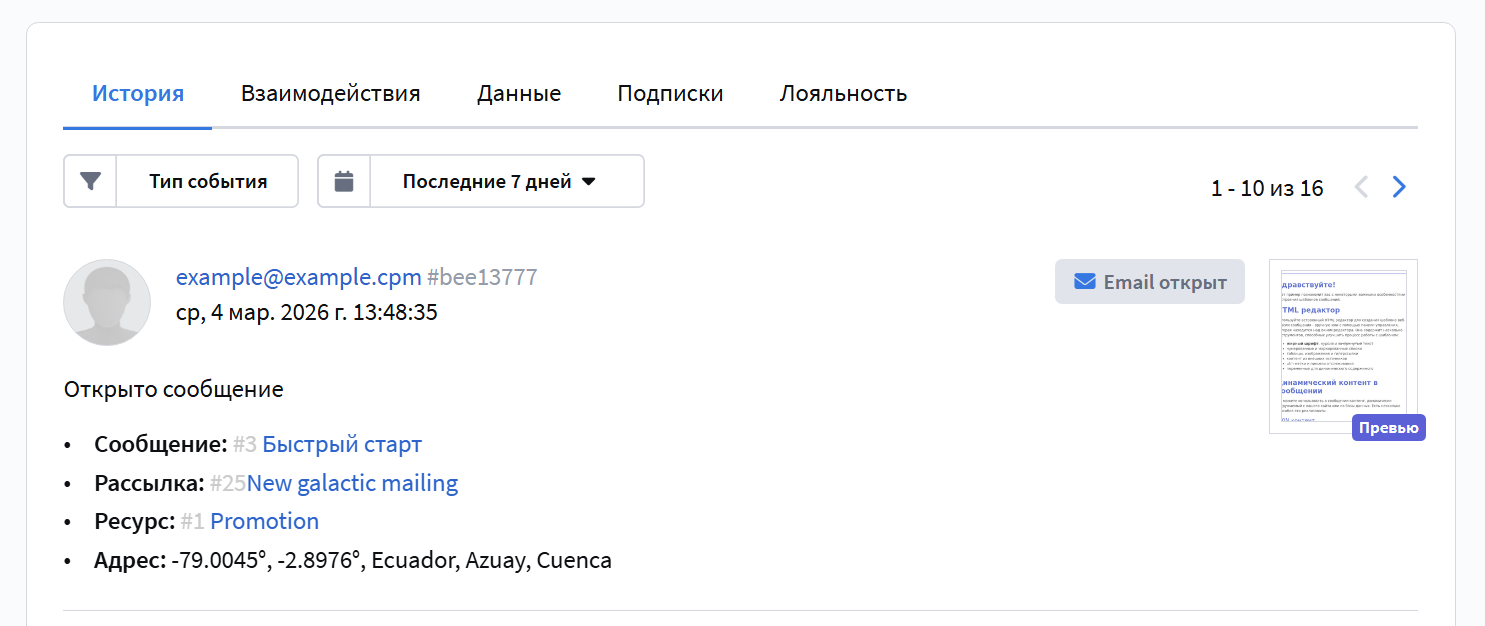
Способ 2. В профиле
1. Перейдите в раздел Данные — Базы профилей
1. Перейдите в раздел | |
2. Откройте карточку созданного профиля и перейдите во вкладку История — там отображается вся информация о конкретном профиле:
Более подробную информацию об отчетах вы можете узнать в этой статье.
Поздравляем! Вы отправили свою первую email-рассылку в Altcraft Platform. Дальше предлагаем ознакомиться с тем как:
- Создать HTML-шаблон — заменить тестовый шаблон на свое письмо
- Импортировать базу клиентов — загрузить реальные контакты
- Настроить сегменты — отправлять письма только целевой аудитории
- Создать триггерную рассылку — автоматизировать коммуникацию