First WhatsApp Mailing
 | WhatsApp* is an effective communication channel that allows you to build a dialogue with the client in real time. Through this channel, you can inform your subscribers about upcoming events and changes in order status. Open rate in the messaging app reaches 90%. This guide will help you start your first WhatsApp* mailing. |
Step 1. Connect WhatsApp Business API through a provider
To send bulk messages in WhatsApp*, you need to connect the WhatsApp* Business API. In Altcraft Platform, such a connection is possible through such official providers as Edna or 360dialog.
Register an account with one of the providers.To do this, you need a phone number and a verified Facebook* Business Manager account.
If you want to register a WABA account through Edna, leave a request at this link.
360dialog collects applications through this form.
A phone number must be clean. This is a number that has not been registered for WhatsApp* Business API in the past, and is currently not registered on the WhatsApp* mobile app.
Integration with WhatsApp* Business API, as well as sending messages, are not charged additionally on the Altcraft side. However, you will need to pay for the services of your provider (360dialog or Edna). In addition, the cost of sending messages on WhatsApp* is also charged separately. You can find out more about the cost of WhatsApp* messages here.
Step 2. Obtain an API Key
The API key can be obtained in the provider’s personal account:
- Edna
- 360dialog
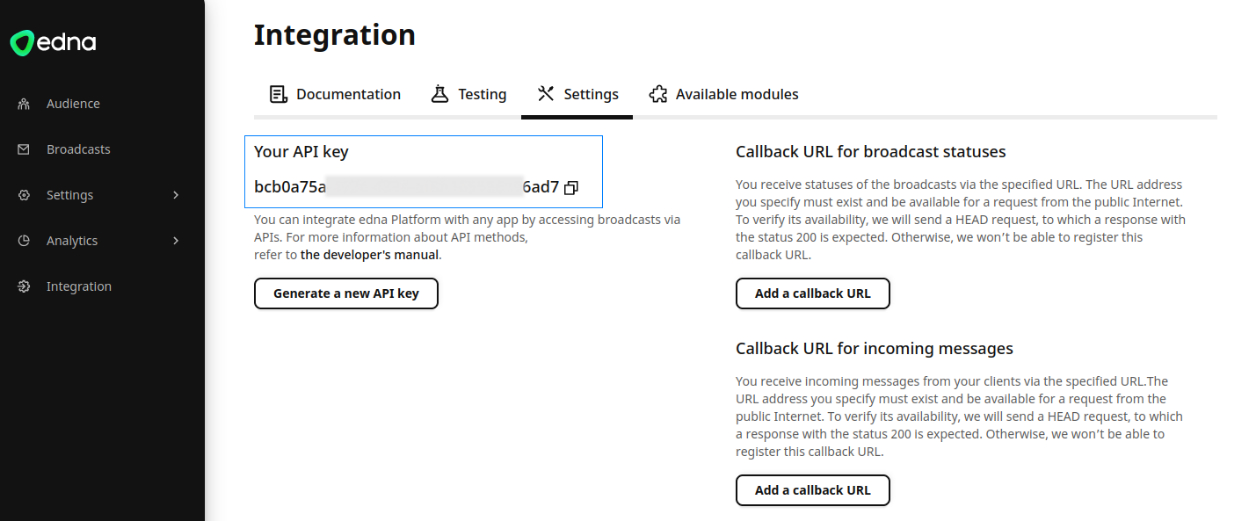
In your Edna account, go to Integration —> Settings:
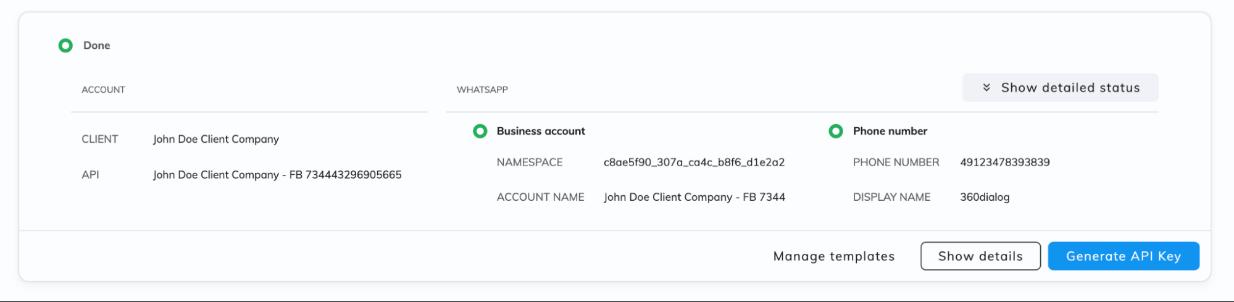
In 360 Client Hub go to WhatsApp Accounts* and click Generate API key:
Step 3. Set up integration
Go back to the platform and open Integrations. Select the type of integration — WhatsApp*. Switch to the tab of your provider.
- Edna
- 360dialog
Activate the integration using the toggle in the top right corner. Click Add channel:

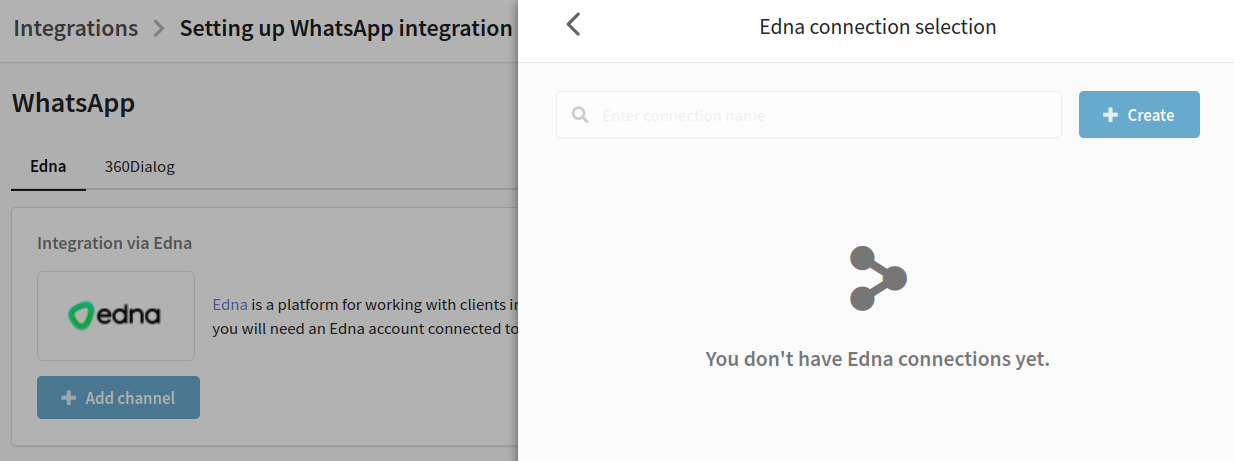
For integration, you need to link your WhatsApp* Business API account to Altcraft Platform. Linking accounts is done through connections. Click Create to set up a new connection:
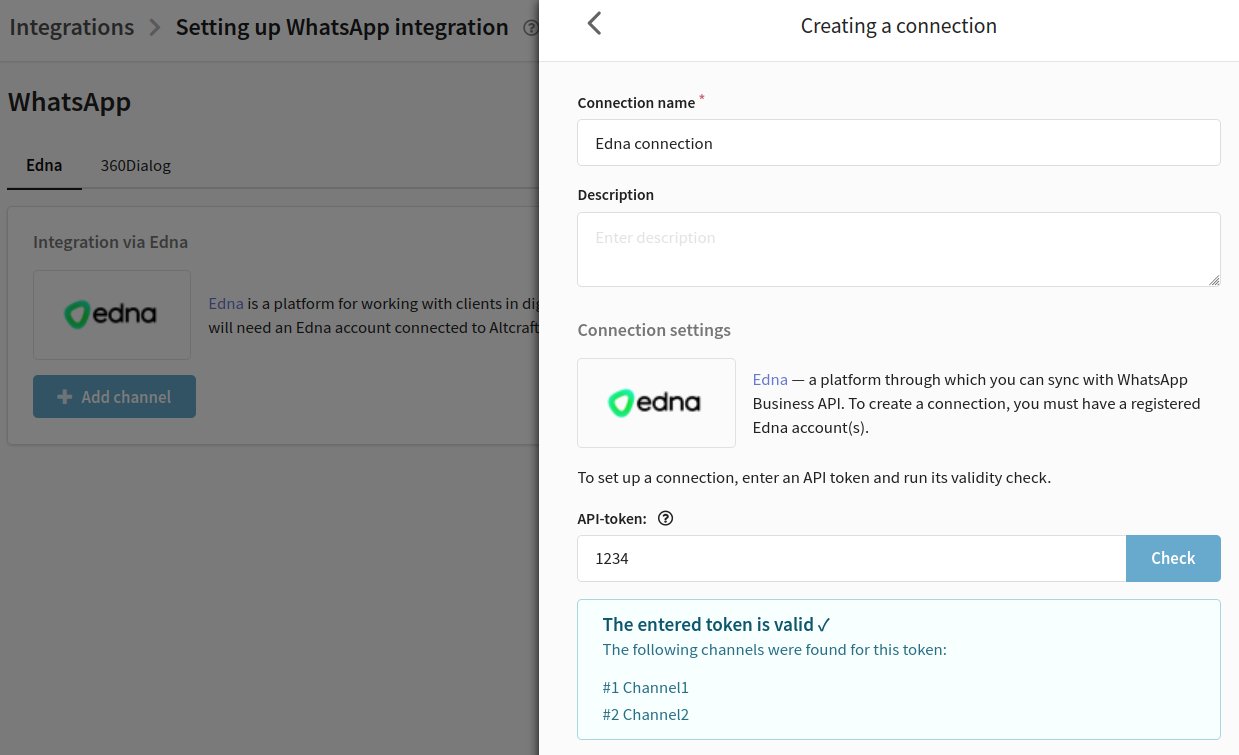
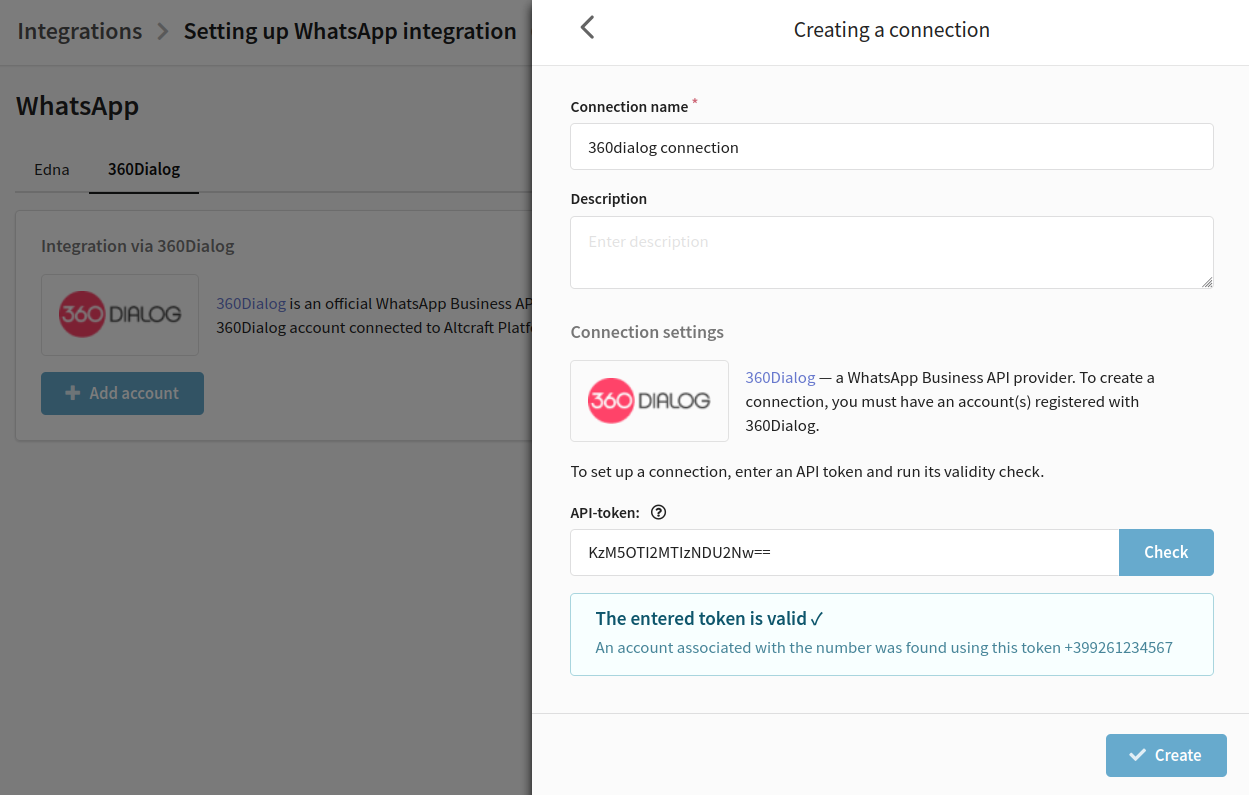
In the new window, enter a name and description for the connection.Enter the API token generated in the provider's personal account and run a check to confirm its validity.
If the token is valid,the window will display data on the available channels in the account:
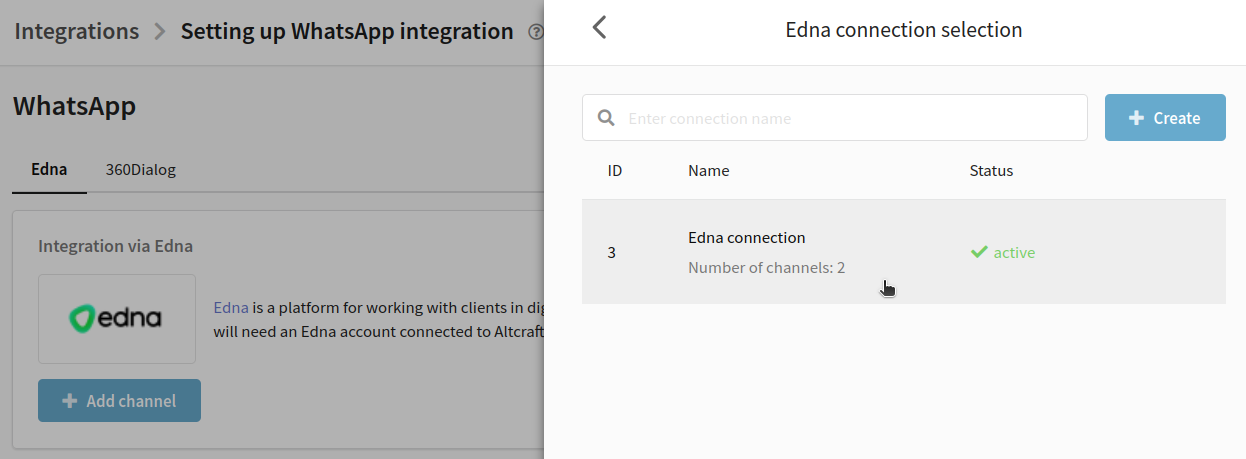
Next, click ✓Create in the lower right corner to save the connection. You will be taken back to the list of connections. Select the one you've just created:
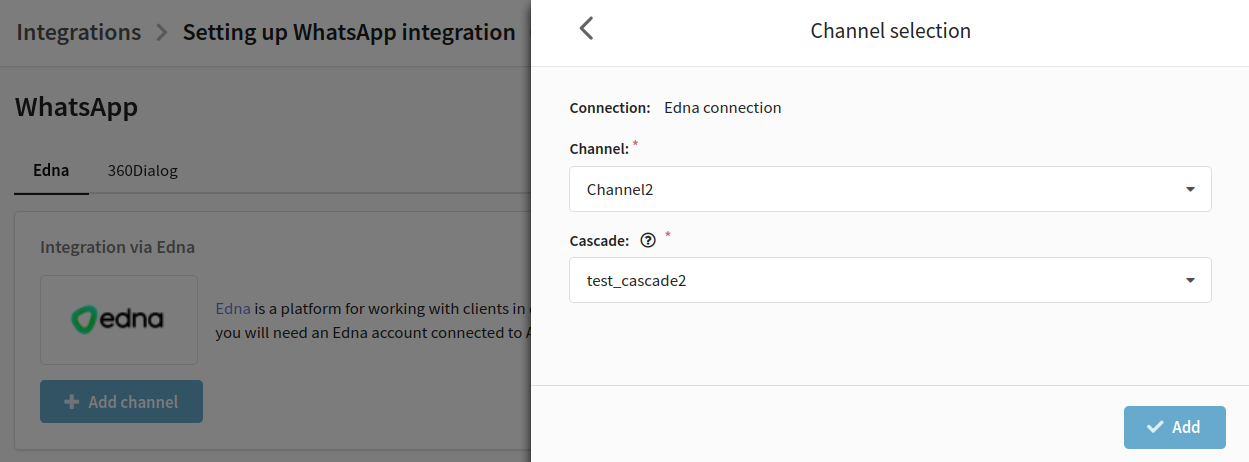
Next step is to select a channel and cascade. The channel must be in the "Correct" status, and the cascade must use only one channel. Then click Add in the bottom right corner.
Data on the added Edna channel will be displayed in the integration:
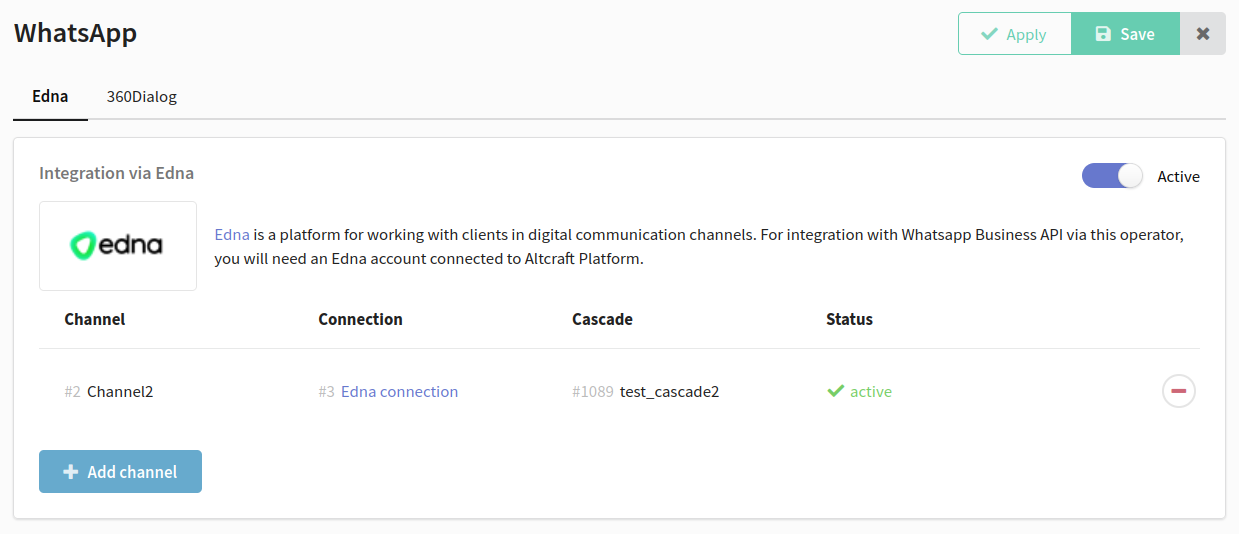
Save the integration using the buttons in the top right corner.
If necessary, you can add multiple channels for Edna integration.
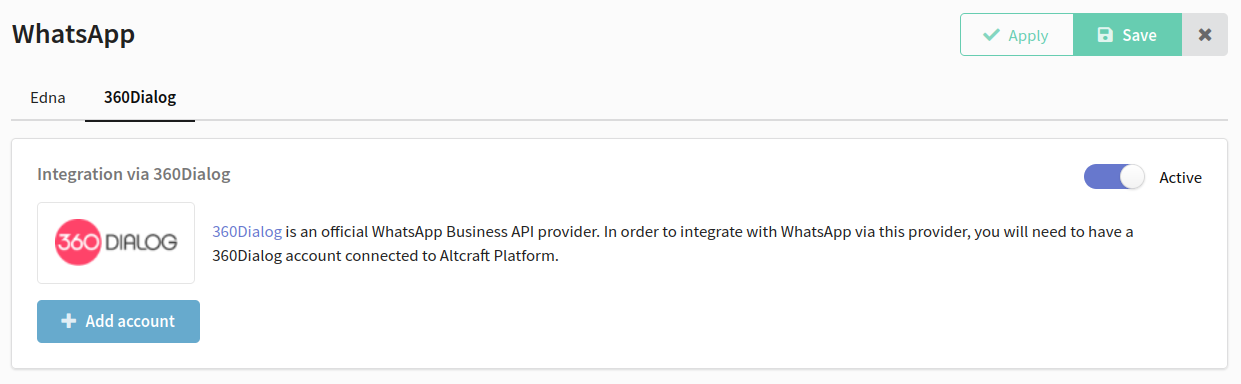
Activate the integration using the toggle in the top right corner. Click Add account:
To set up the integration, you first need to link your WhatsApp* Business API account to Altcraft Platform. Linking accounts is done through connections. Click Create to set up a new connection:

In the new window, enter a name and description for the connection.Enter the API token generated in the provider's personal account and run a check to confirm its validity.
If the token is valid, you will see the phone number attached to the account you are connecting to:
Next, click ✓Create in the lower right corner to save the connection. You will be taken back to the list of connections. Select the one you've just created:

Fill in the "Namespace" field:
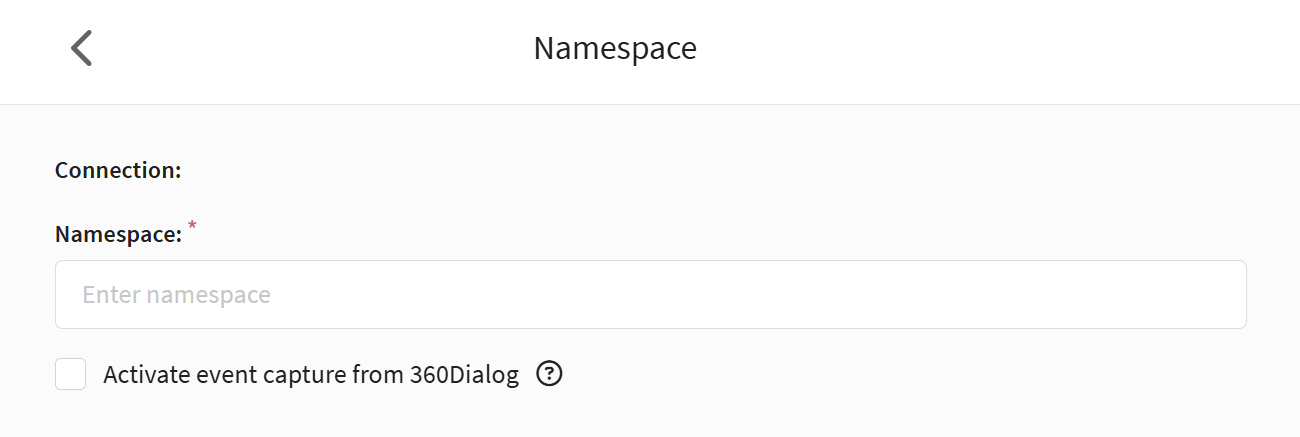
"Namespace" is a free string. Each 360dialog provider account stores the templates created for it and bound through this operator. Namespace can be viewed in the provider's personal cabinet in the account settings.
Go to the settings of your personal cabinet 360Dialog:
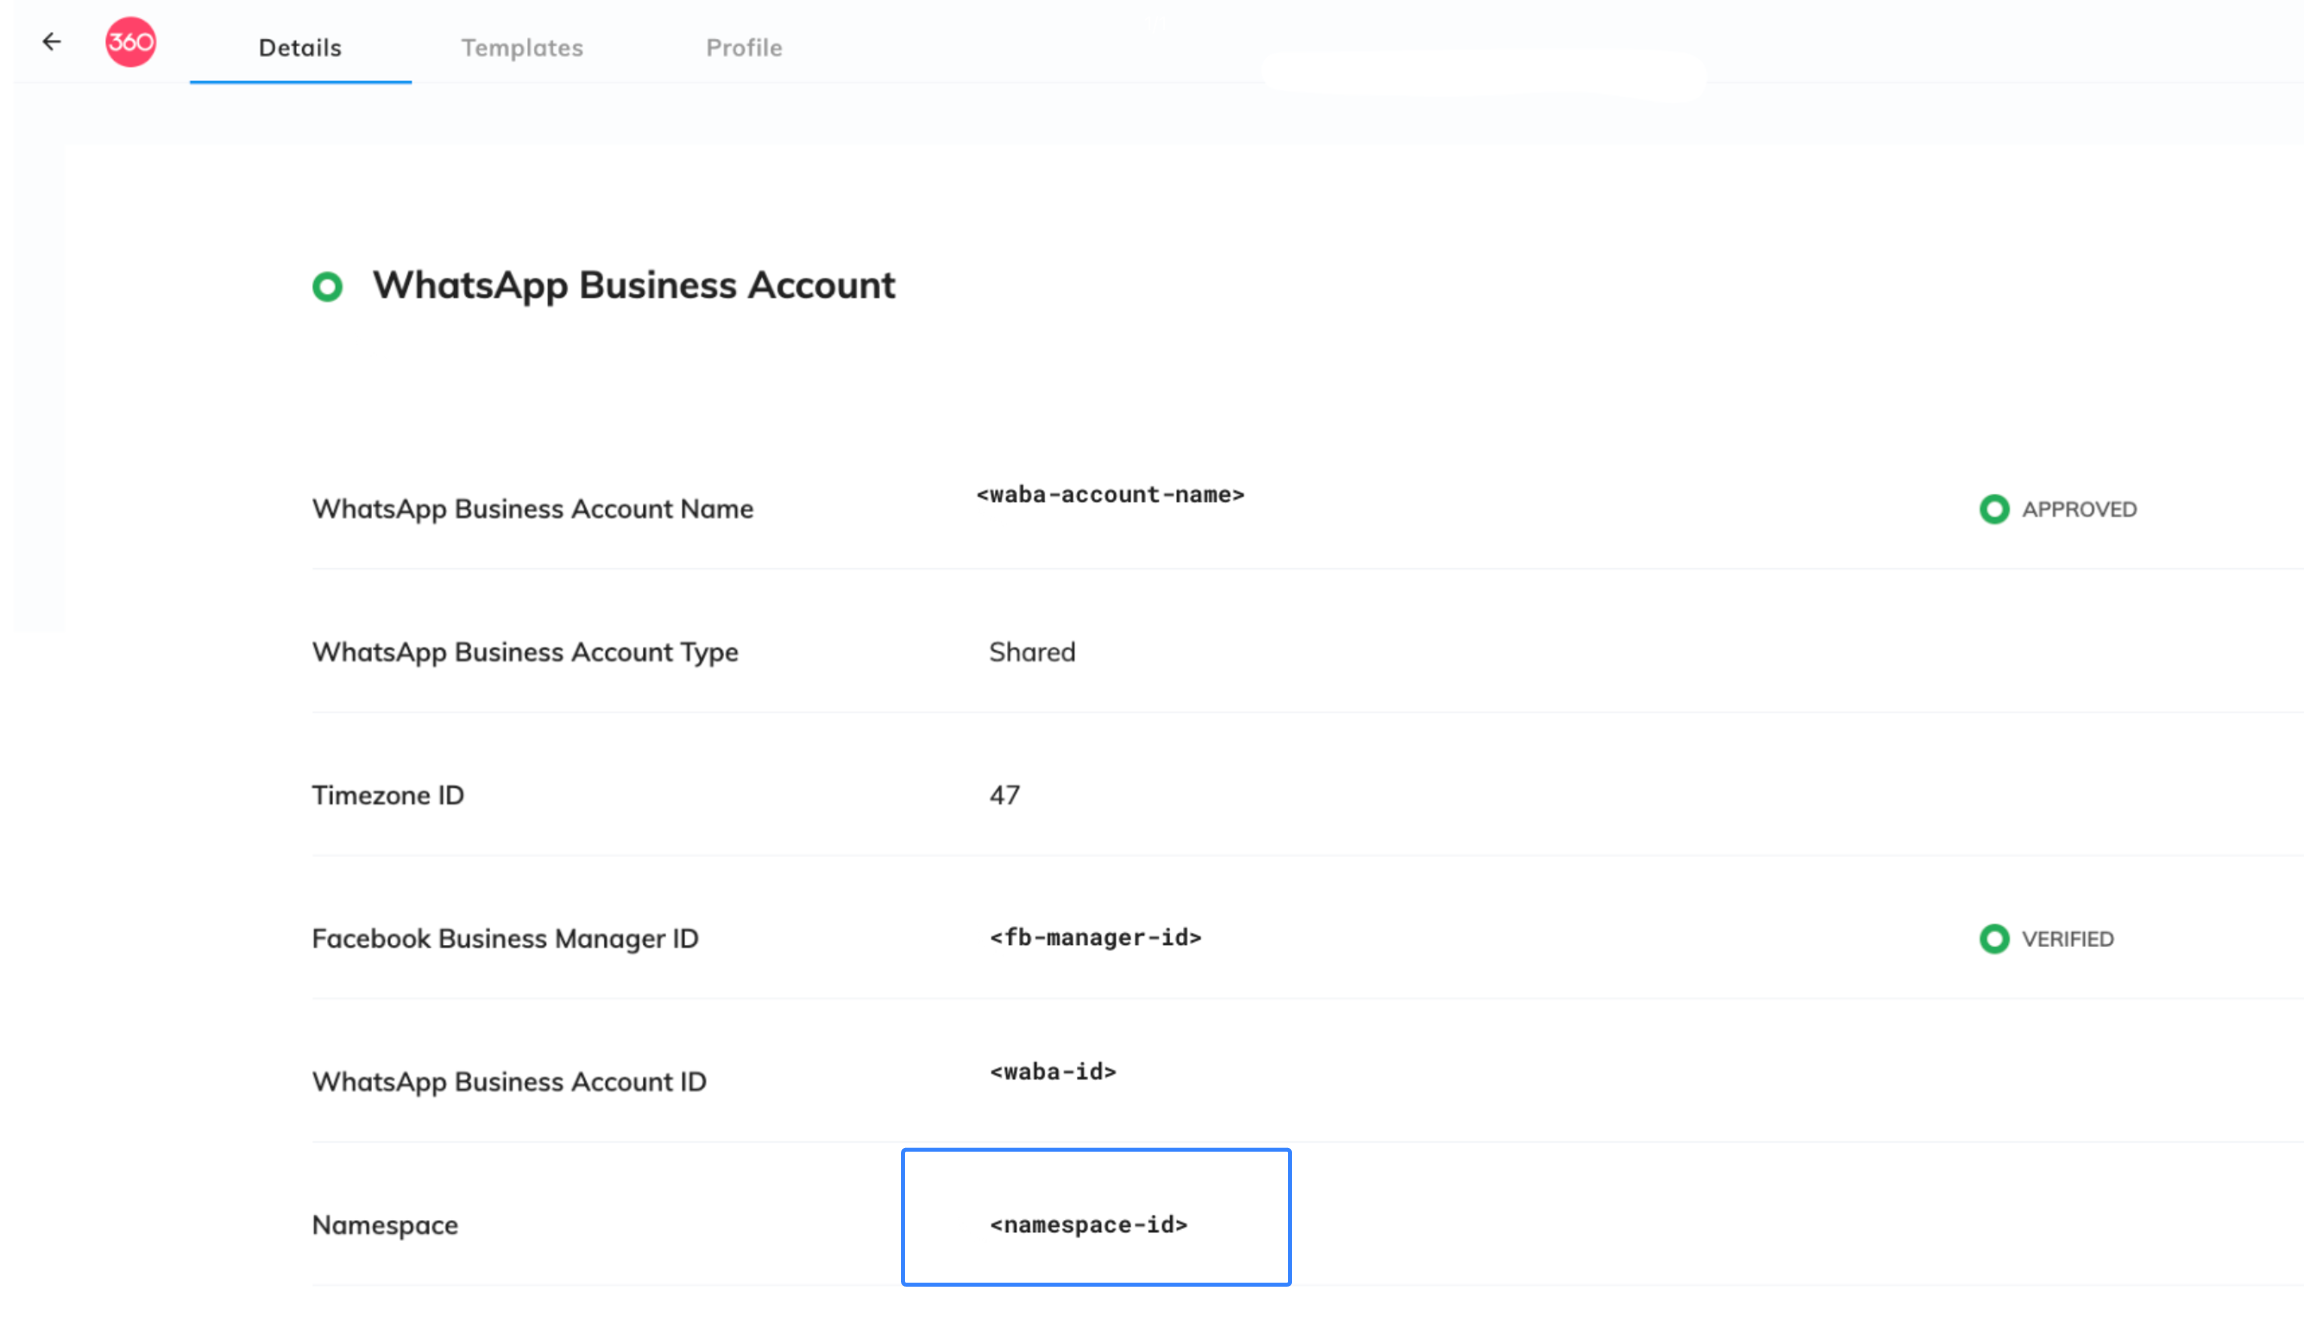
Copy the Namespace value from there, go back to the platform and paste it into the required field:
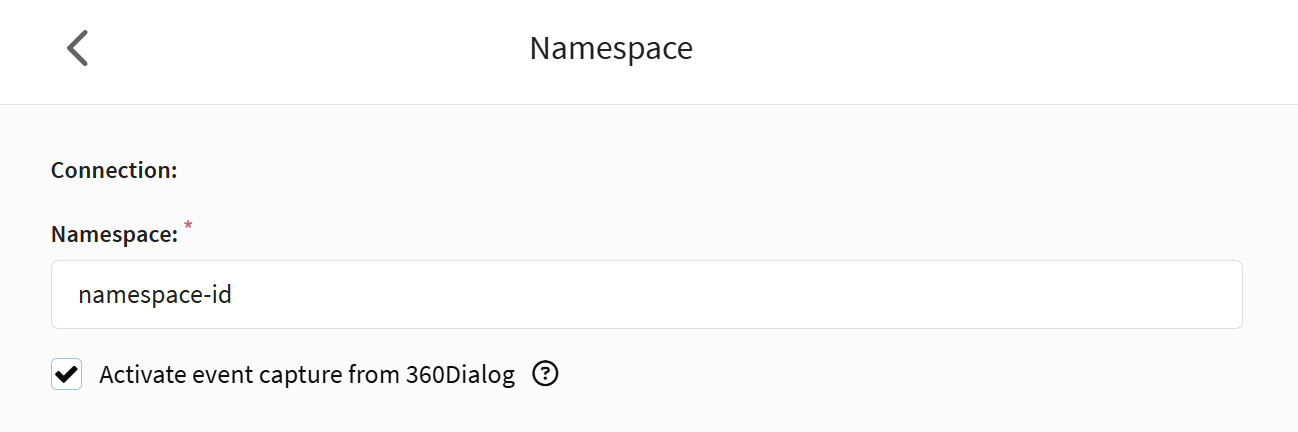
If you want, you can activate the "Capture events from 360Dialog" option.
The "Activate event capture from 360Dialog" option enables sending WhatsApp event data to the Altcraft platform from 360Dialog.
If it is enabled, after saving the integration, a special link (Callback URL) will be automatically added to 360Dialog, through which Altcraft will receive information about message statuses, user actions and other events.
If the transmission of this data is not required, disable the setting.
Click "Add" in the lower right corner.
The integration is set up. You will see the data for the connected account:

Save the integration using the buttons in the top right corner.
If necessary, you can add multiple channels for Edna integration.
Step 4. Subscribe customers to WhatsApp channel
Sending a message to a user in WhatsApp* requires:
- the user's phone number to be in the database;
- the user's profile to subscribe to the resource's WhatsApp* channel;
- the user's consent to receive messages from your company.
The profile phone number to which you send messages must be stored in international format. The following format must be used: +79001234567.
First, select or create a profile database that will store subscriber data, including phone numbers. Then create a new resource or edit an existing one by adding a WhatsApp* channel. To set up a channel, select the previously connected WhatsApp* account:

Next, import subscriber data into the platform, for example, via a file. When importing, add them a subscription to a resource with a WhatsApp* channel. Select the column in your file that contains phone numbers as the subscription source.

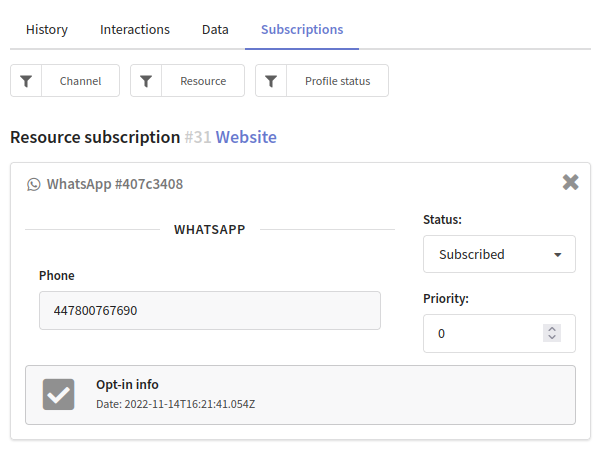
A digital profile will be created for each client. It combines personal data, activity history and subscriptions to resources. If a subscription to the WhatsApp* channel has been successfully added to the client during import, this data will be displayed in the client's history:
Step 5. Create a template in 360 Client Hub
There are two types of conversations in WhatsApp* Business:
- User-initiated conversation. It is aconversation that starts in response to a user message. Whenever you reply to a user within the 24-hour service window, that message is associated with a user-initiated conversation. You can send free-form messages within this 24-hour customer service window.
- Business-initiated conversation. It is a conversation that starts from a business sending a user a message outside the 24-hour service window. Messages that initiate a business-initiated conversation require an approved message template.
Once the customer replies to the business's template message, the business can begin sending any type of message to the customer.
You can only use Altcraft Platform for business-initiated conversations. This means that you can only send approved templates messages (HSM).
A template message consists of fixed text and variables. Variables are text that can be changed before each mailing without the consent of Facebook*.
You need to create a template in your provider's account; in Altcraft Platform you can only add text into variables, set up buttons and add media files.
You can find more information about creating templates in your provider's documentation:
A template created in the provider's personal account must be verified by Facebook*. Mailings launched through Altcraft can only use templates approved by Facebook*.
Step 6. Create a message based on the template
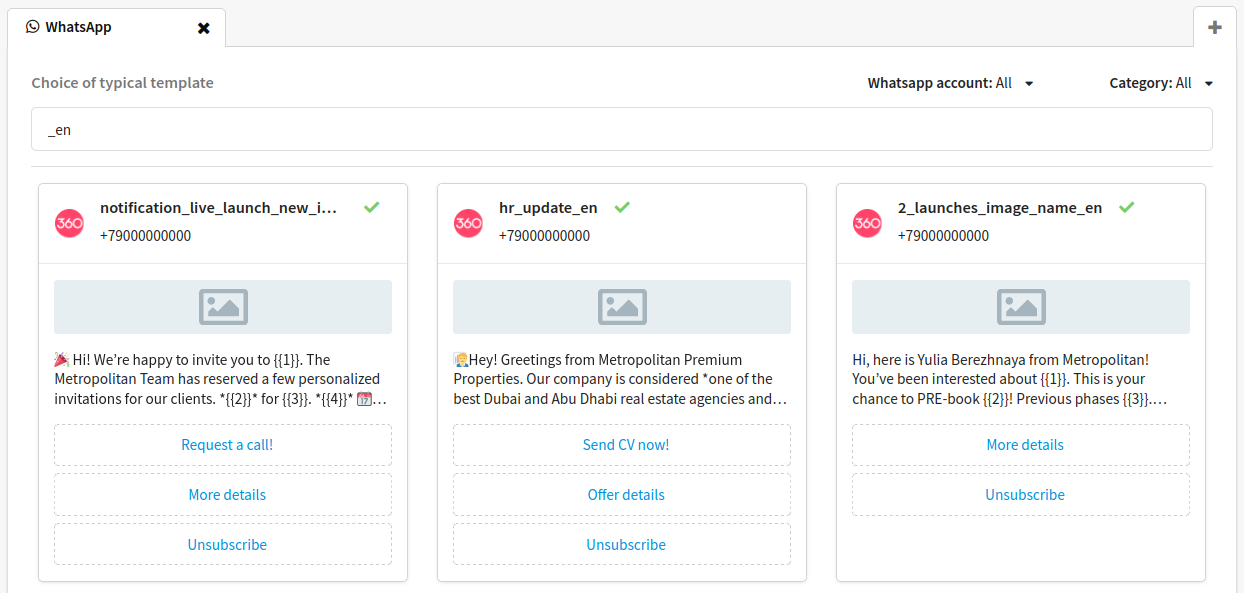
Go back to Altcraft Platform, open the Templates section and create a new template for the WhatsApp* channel. All templates available in connected WhatsApp* accounts through edna or 360dialog are automatically available in the platform and displayed in the editor:
Choose a template and create a message based on it. To do this, fill in the variables, configure the buttons and add media files.
Here is a guide where you will find more details on how to create a template for the WhatsApp* channel.
Step 7. Launch the mailing and evaluate its performance
Go to Mailings and select the mailing type:
- Broadcast is a one-time ending of messages.
- Regular mailing isa periodic sending of messages according to a schedule.
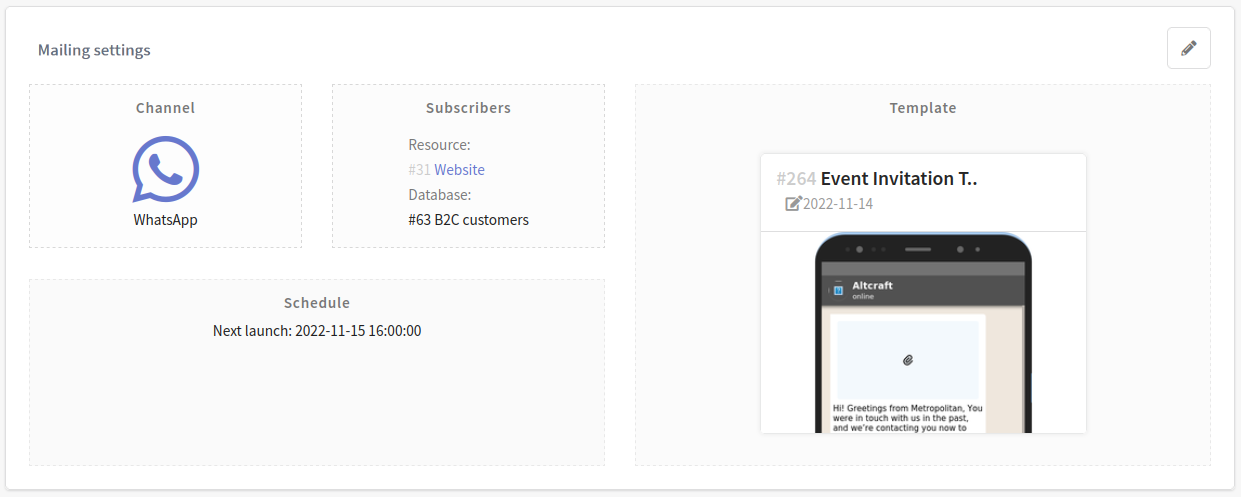
Set up a mailing:
- select WhatsApp* as a communication channel
- select a previously configured resource and a recipient audience (database or segment);
- add a message template;
- set the schedule:
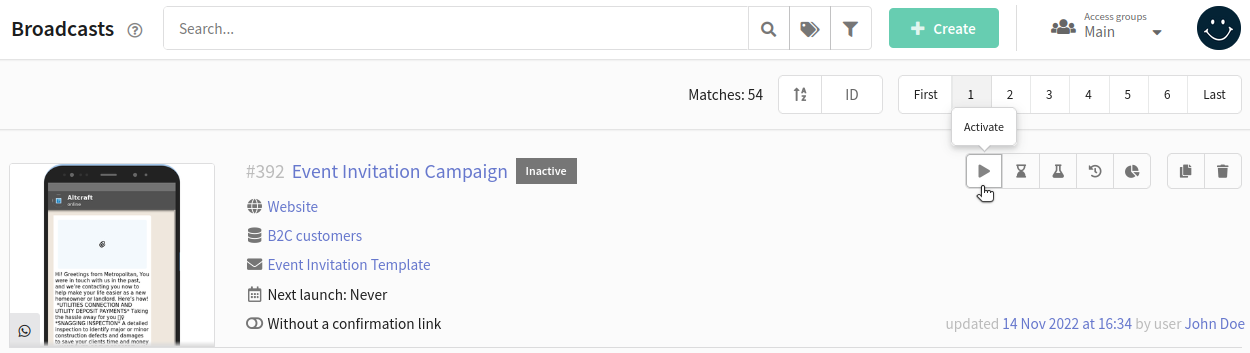
Save the mailing. Find it in the list of mailings of the selected type and activate it by clicking  in the quick action bar.The active mailing will start sending messages when the scheduled launch time comes.
Mailing Log
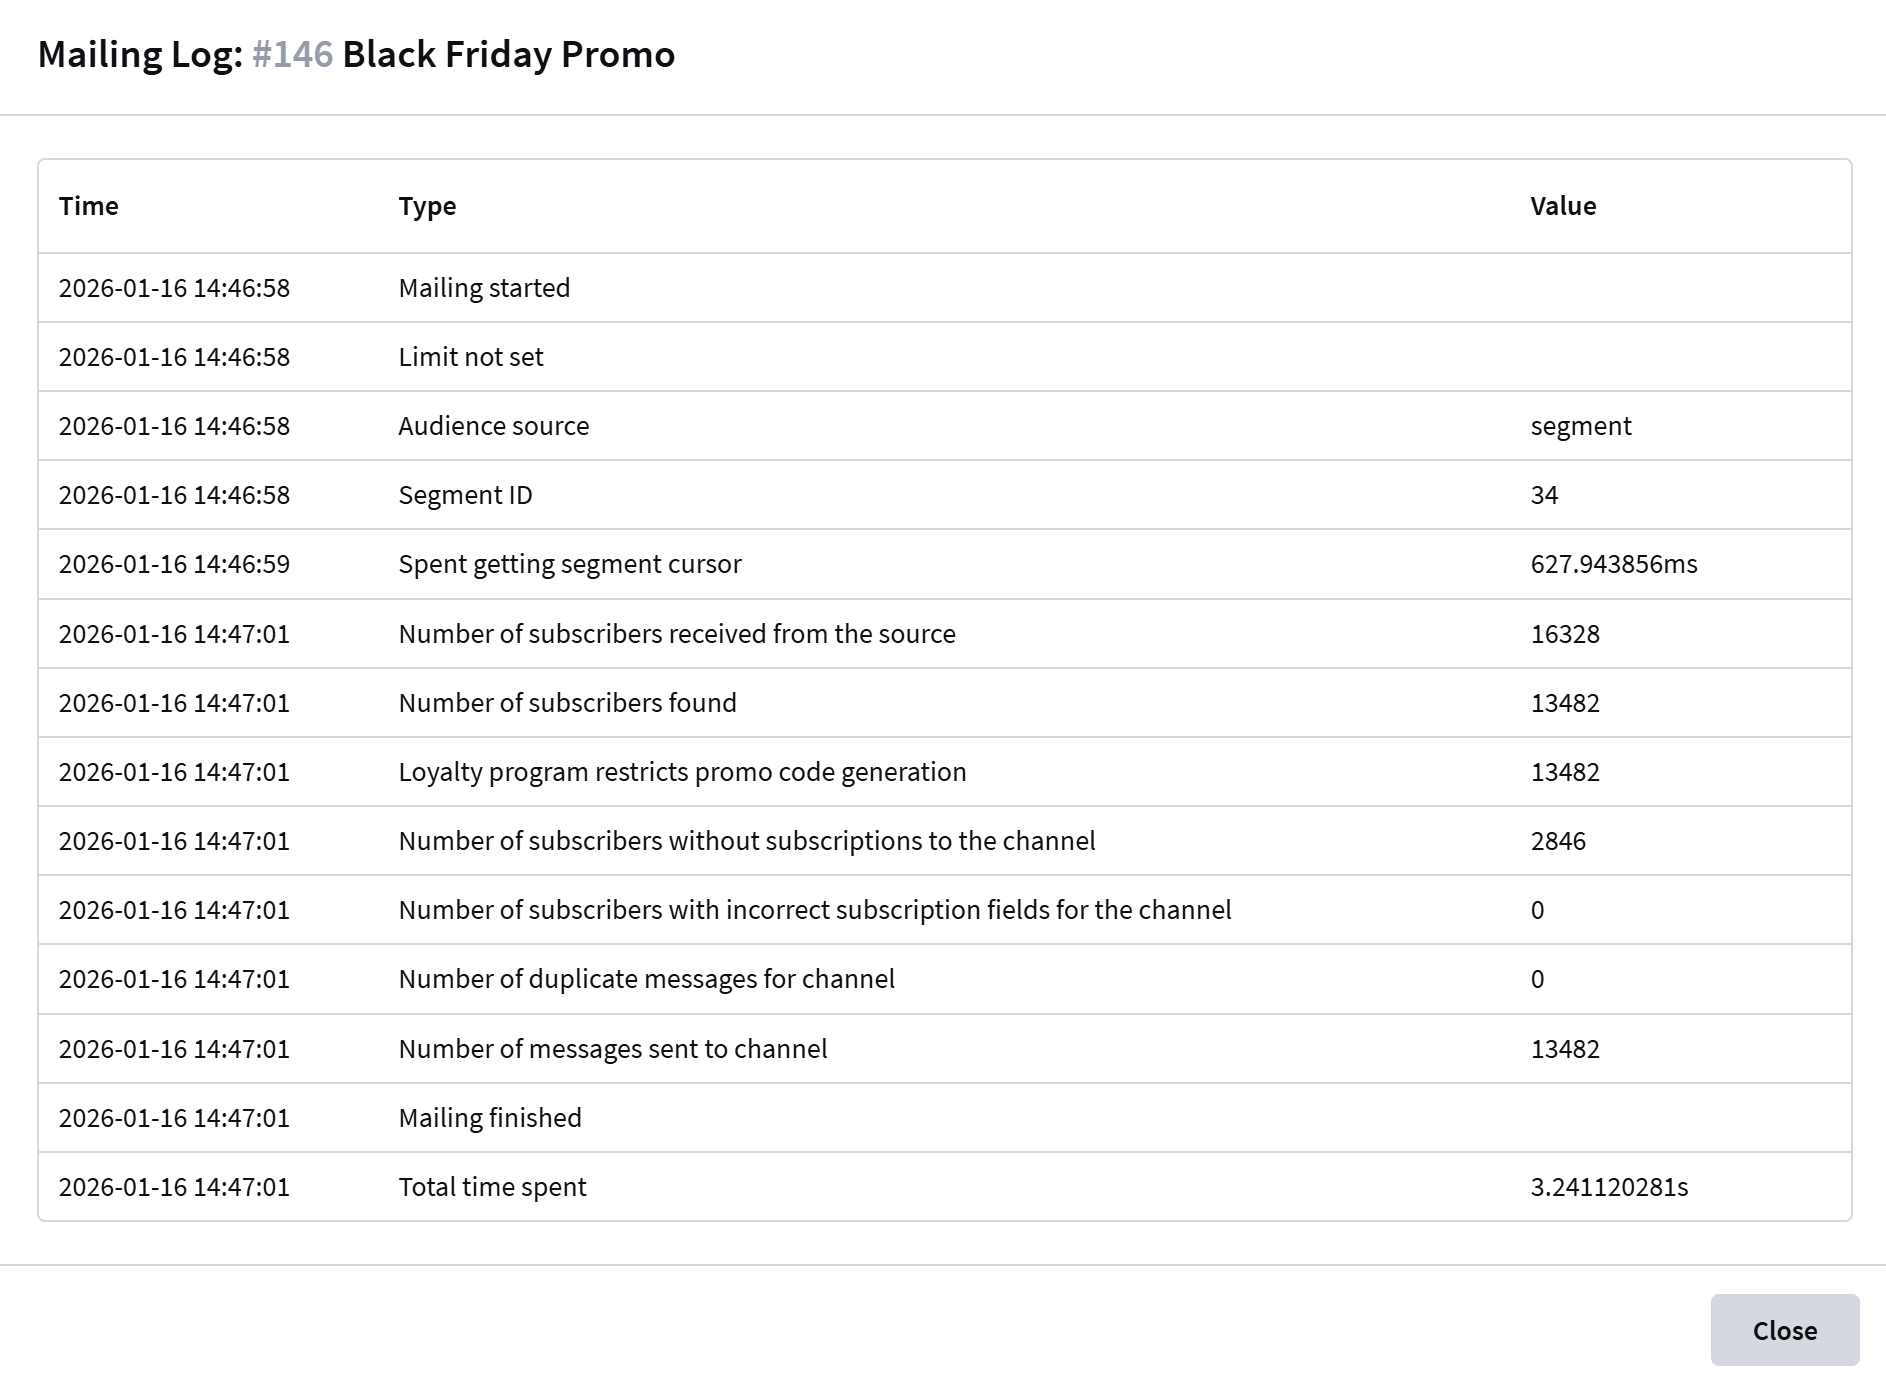
The Mailing Log is a tool that provides a summary of the progress of your email mailing. It logs key events, mailing parameters, and statistics, helping you identify potential issues.
To open the mailing journal, click the "Journal" button in the quick actions menu:

The mailing Log contains the following information:
| Type | Description |
|---|---|
| Mailing started | Start time of mailing execution |
| Limit | Indicates whether a sending limit is set |
| Audience source | Source of contacts: List — Database Segment — Segment |
| Database ID/Segment ID | Identifier of the database/segment |
| Spent getting segment cursor | Time spent loading data from source (ms) |
| Number of subscribers received from source | Total number of profiles in the specified source |
| Number of subscribers found | Number of users in source with active subscription to selected resource |
| Number of subscribers without subscriptions to channel | Users without valid channel subscriptions |
| Number of subscribers with incorrect subscription fields | Users with invalid subscription data fields |
| Number of duplicate messages for channel | Count of duplicate contacts detected |
| Number of messages sent to channel | Final count of successfully delivered messages |
| Mailing finished | Mailing completion timestamp |
| Total time spent | Total execution duration from start to finish (sec) |
Reports and Analytics
To evaluate the effectiveness of your mailings go to Analytics. The channel report will provide data for each mailing. You will receive information about the number of sent, delivered and undelivered messages, as well as the number of new subscriptions to the WhatsApp* channel. For the convenience of grouping, you can choose a preset of indicators for WhatsApp*.
*The Meta organization, which owns Instagram, Facebook and WhatsApp products, has been declared as extremist and banned in Russia.