First Notify mailing
According to the service policy, new access to the Notify service personal account is currently not provided.
Support for current users is provided by MAX Business tech support.
Notify is a service that allows companies to send service and transactional notifications to VKontakte and Odnoklassniki users. Notifications are delivered from the company's official group, even if the user is not subscribed to it, and can be sent in the form of service messages that can be replied to, or business notifications with no reply option.
The service allows you to significantly reduce the cost of mailings, ensuring high delivery speed and a high percentage of messages read. In addition to business notifications for VKontakte and Odnoklassniki users, the Notify channel also supports sending SMS reminders.
Step 1: Configure the integration
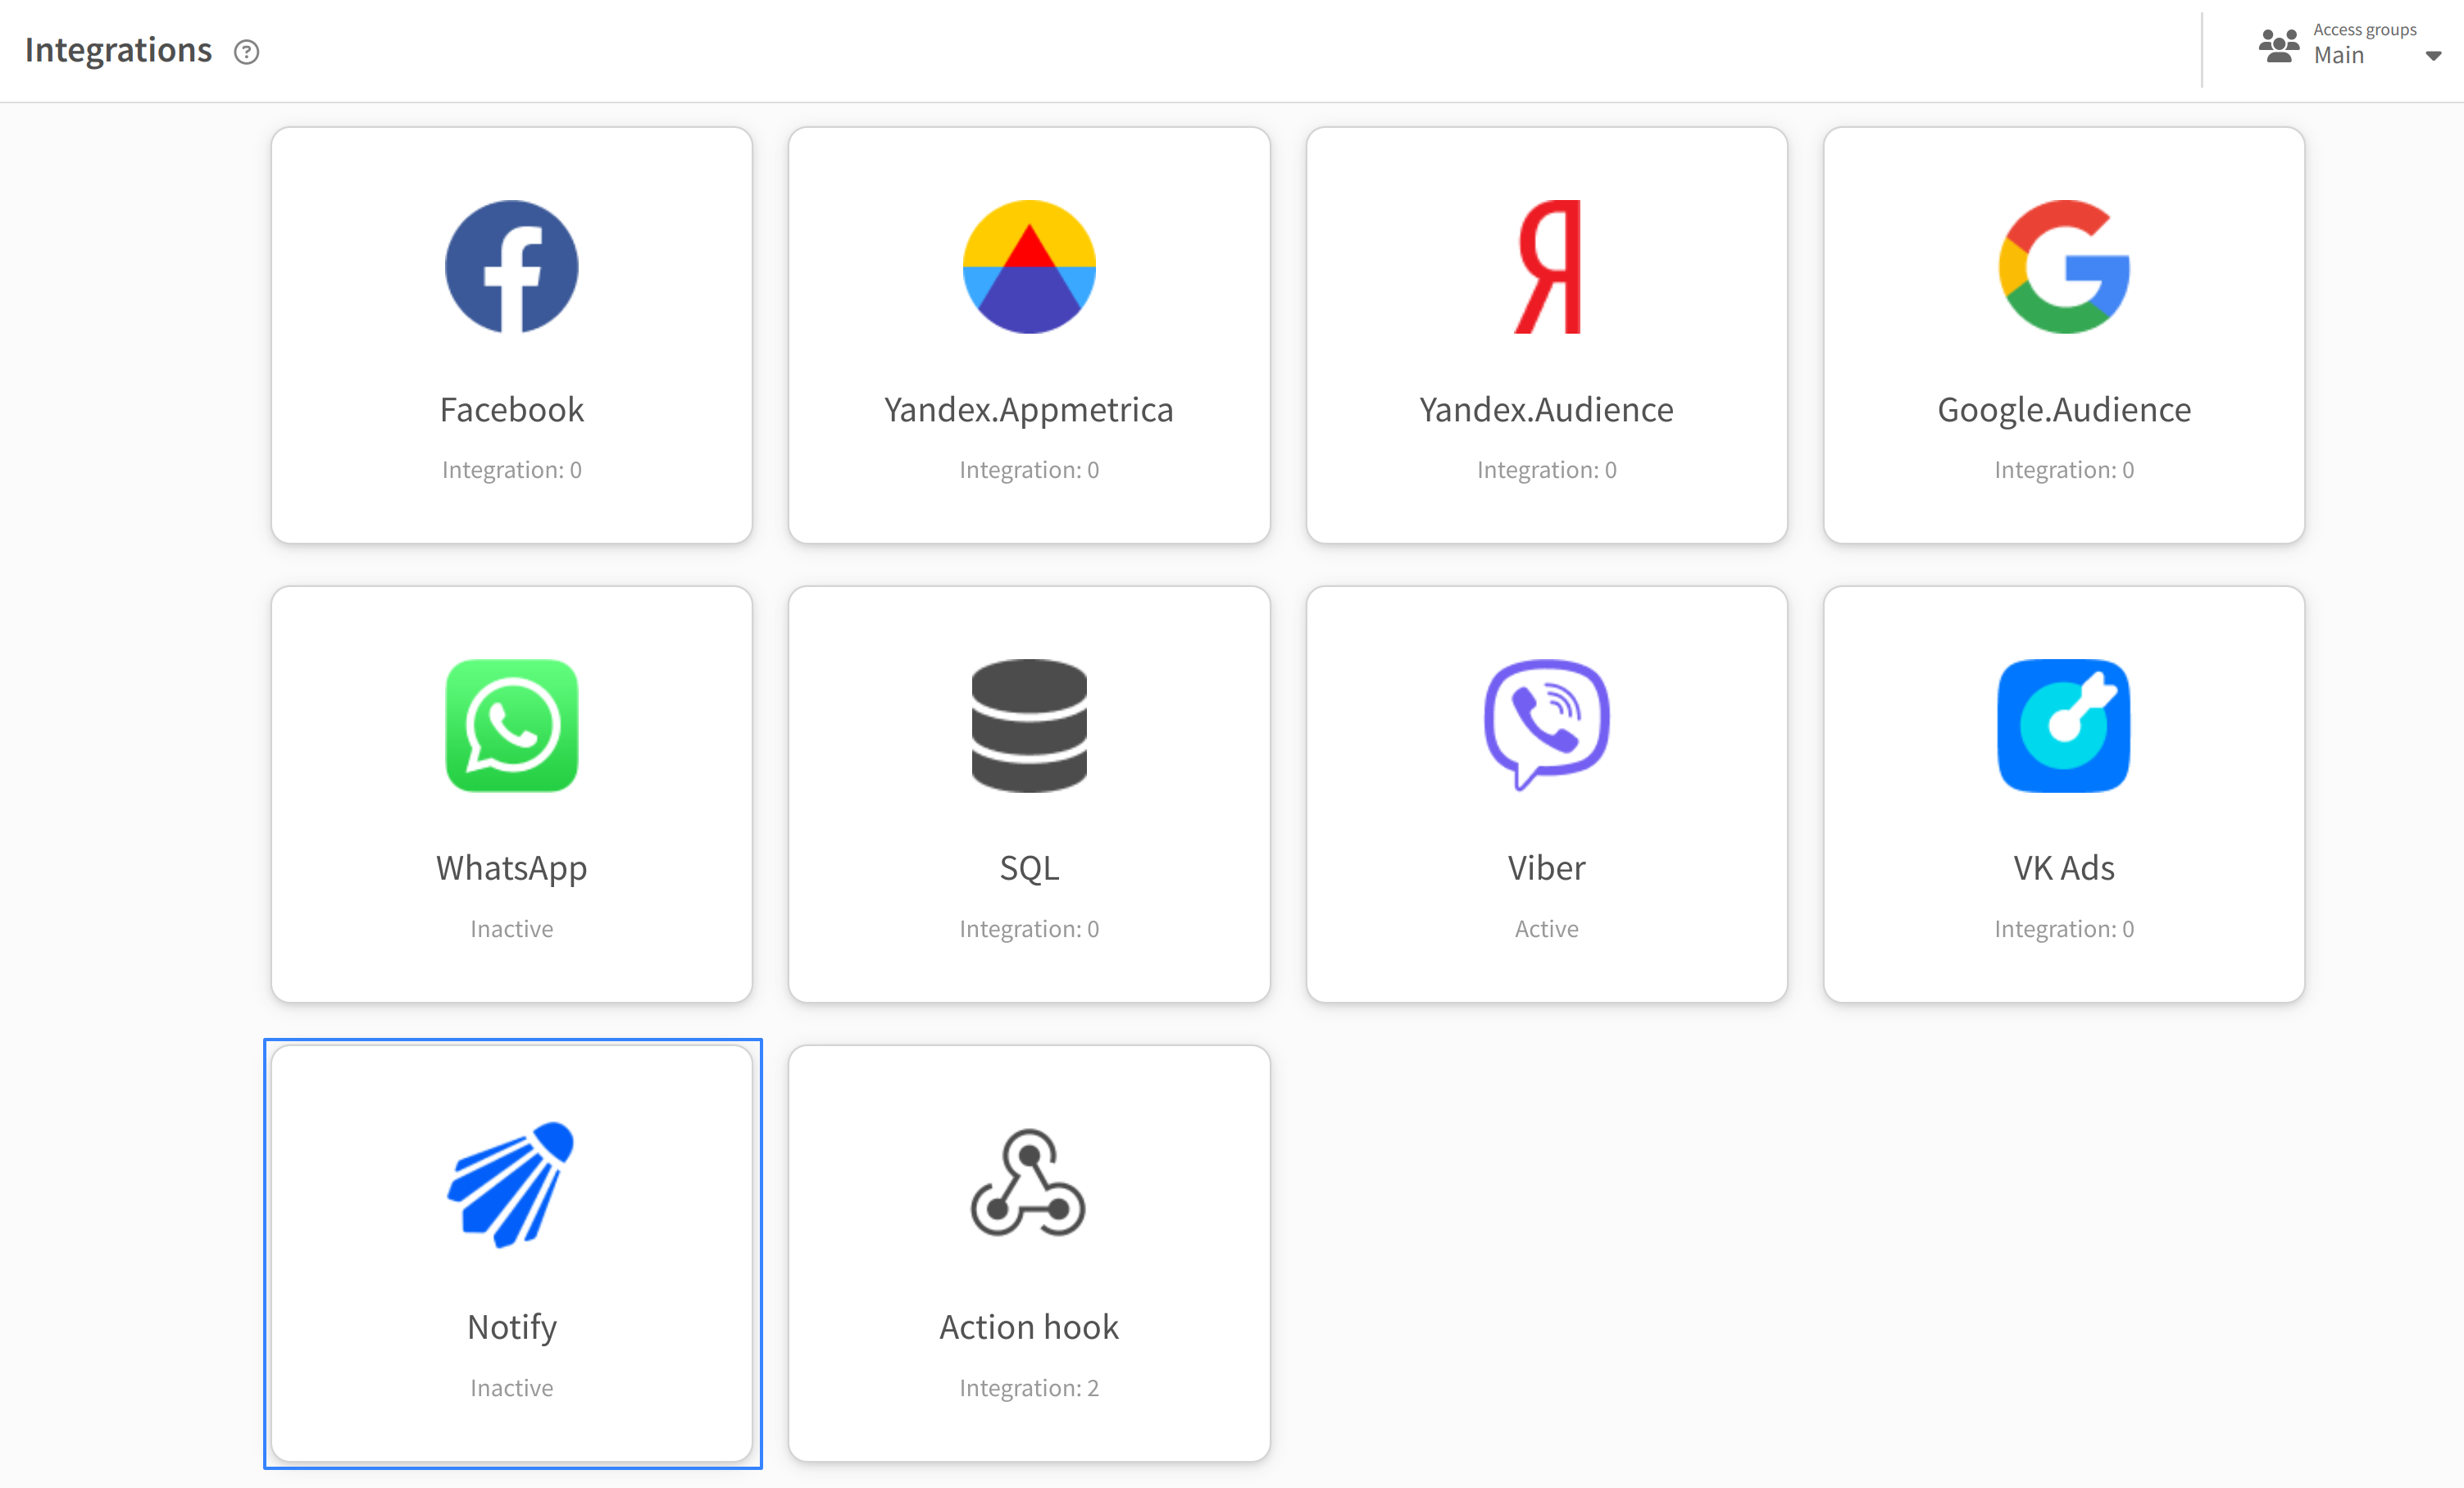
- Open the "Integrations" section and select the integration type - Notify:
- Click "Add Connection":

- Select an available connection to Notify:
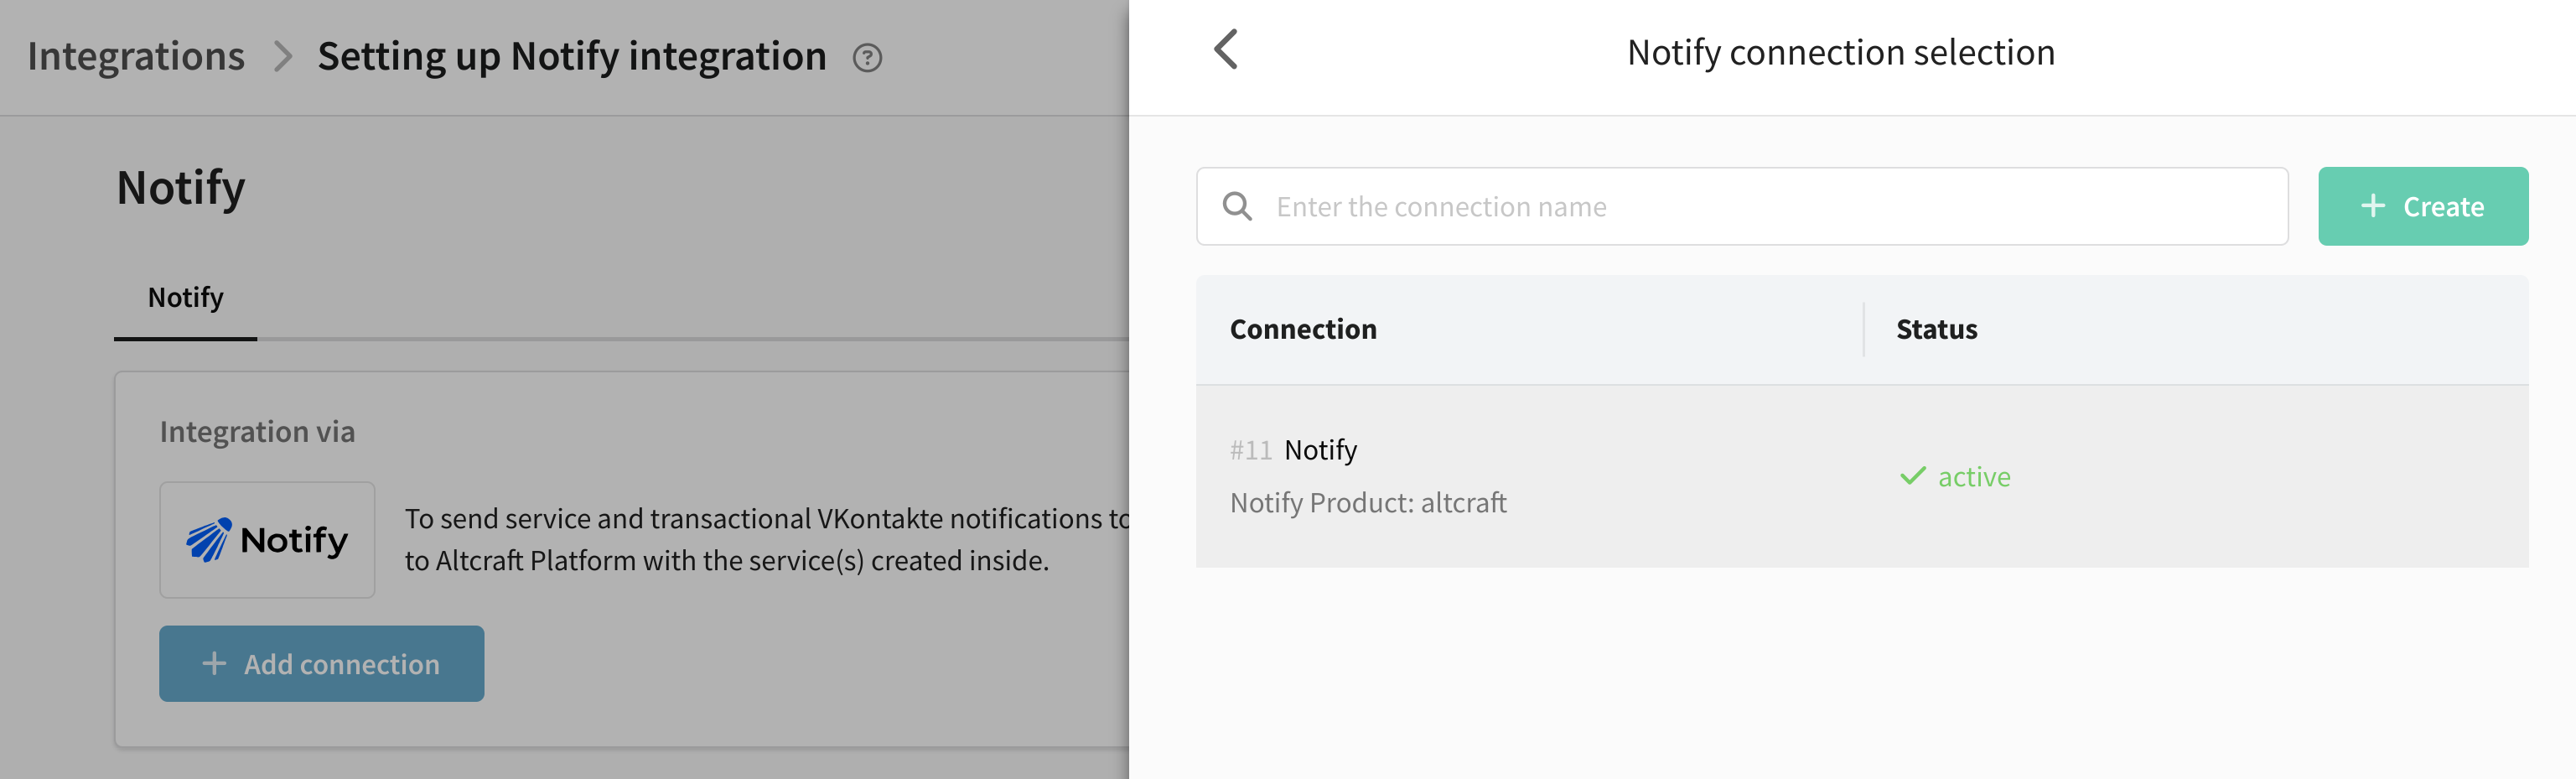
No available connections
If you haven't set up a connection to Notify yet, you can create one right in this window.
Click "Create". Enter a name and description for the connection. Next, enter the Application and Signature key parameters and click "Check" to verify that your data is correct. If the data has been verified, click the "Create" button in the lower right corner:

You can read more about creating a connection ih this article.
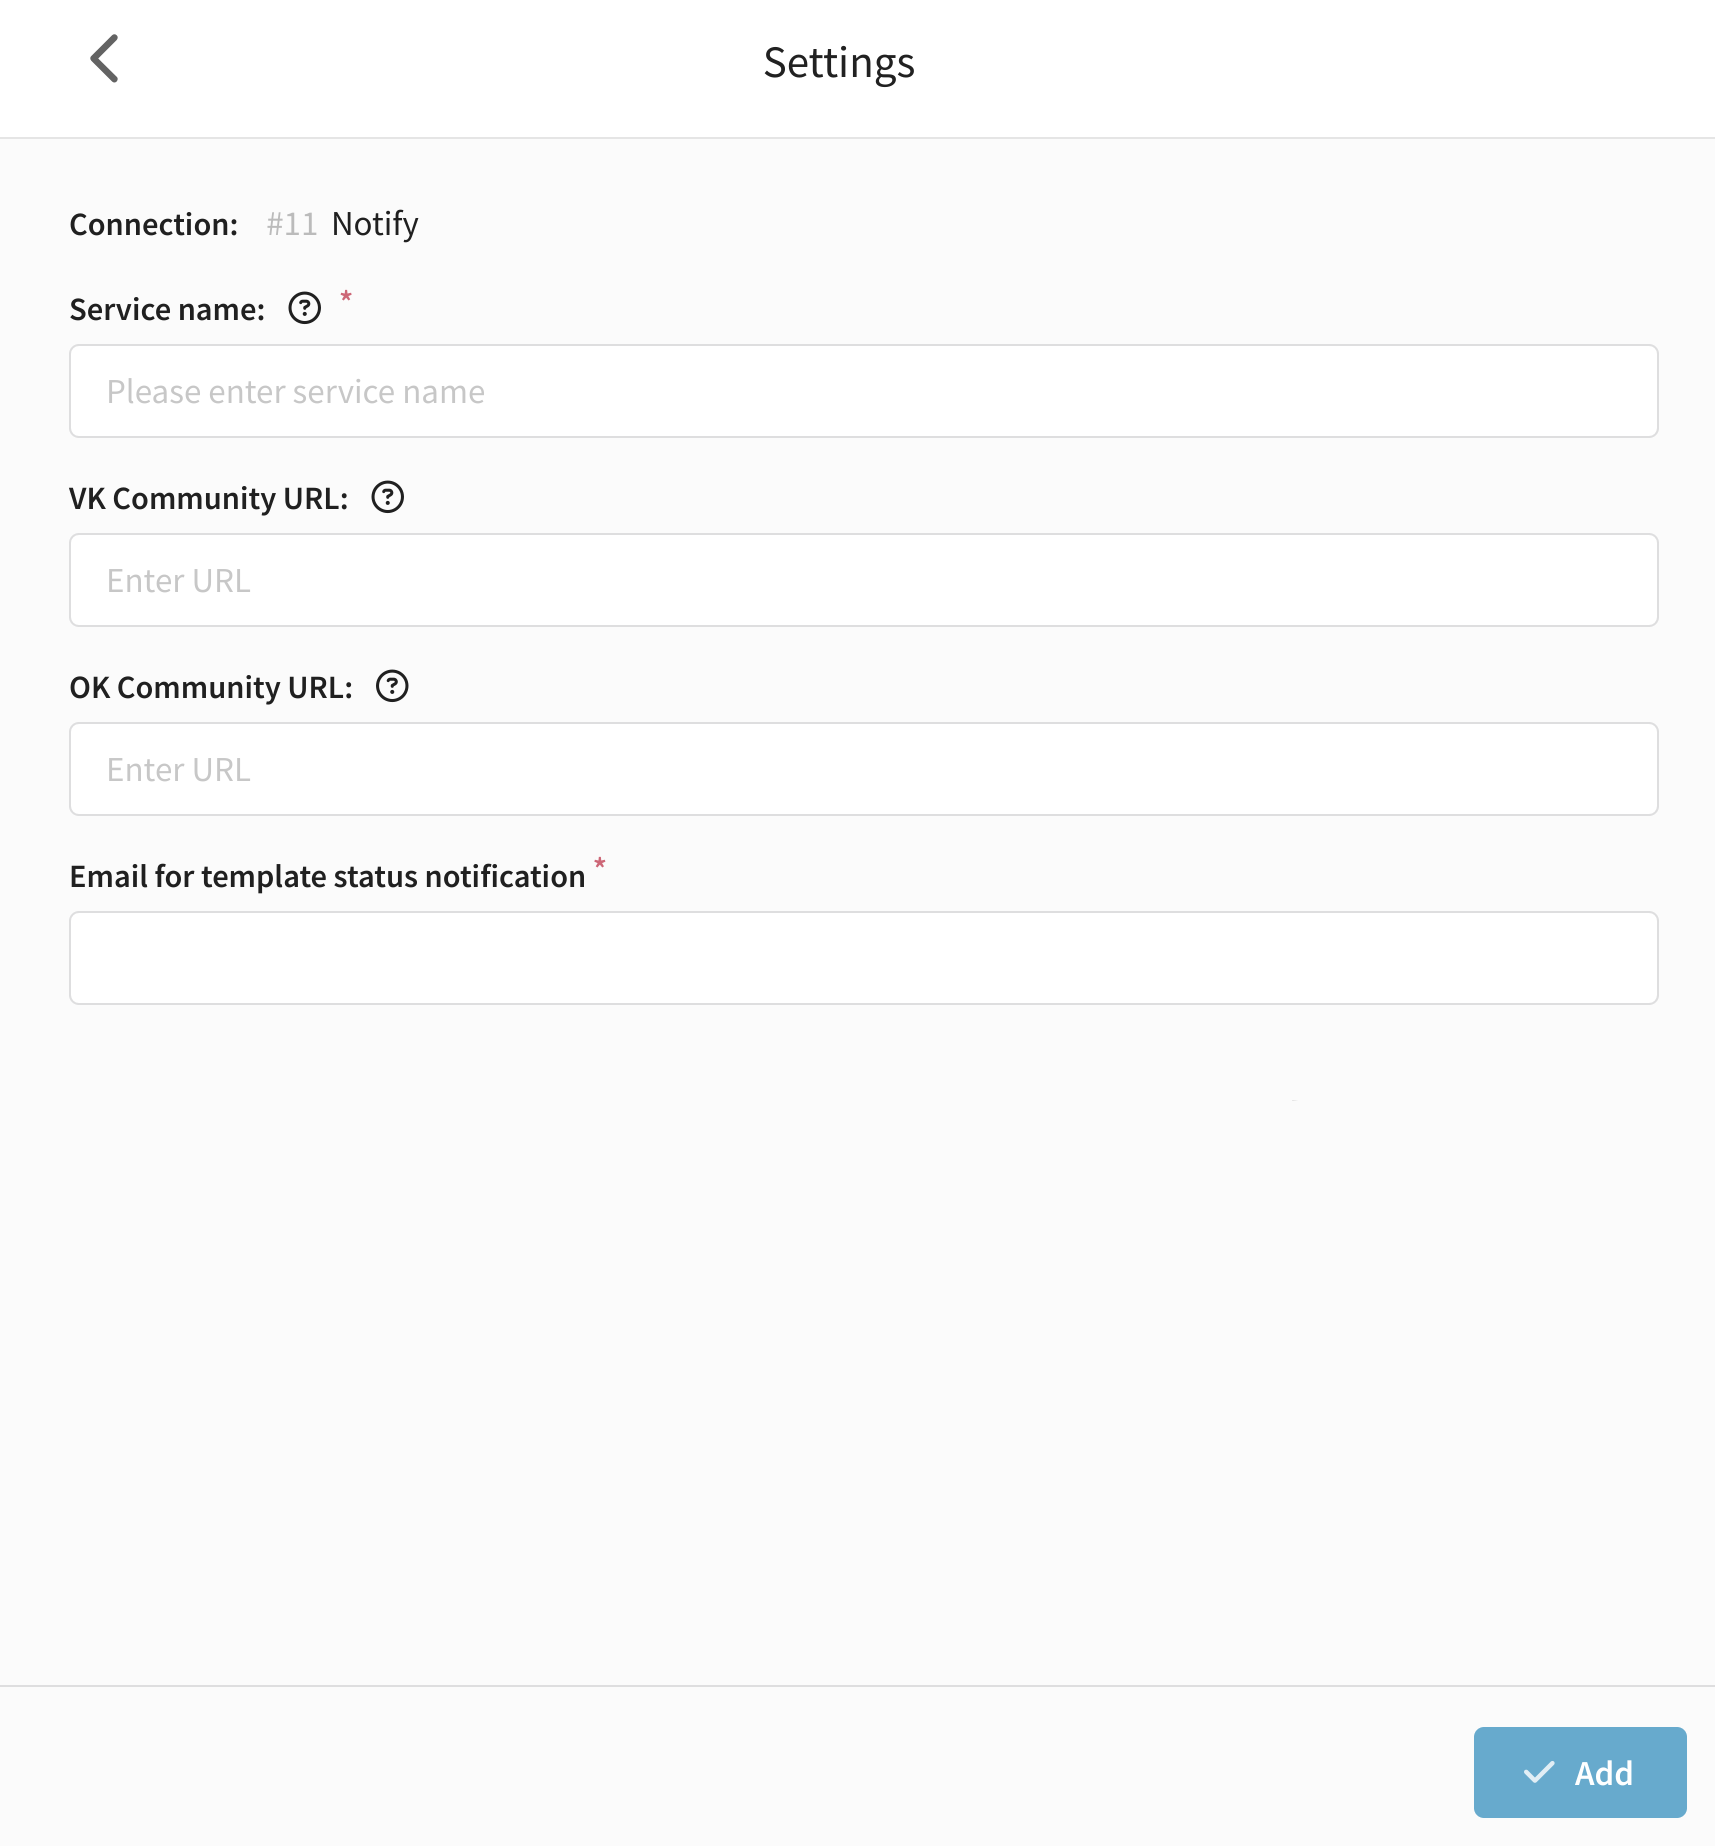
- Next, specify integration parameters, for correct work they must exactly match the corresponding parameters from Notify account:
- Service name - the name of the service for mailing, mandatory field.
- VK Community URL - link to the VK community on behalf of which the mailing will be made.
- OK Community URL - link to the community in OK on behalf of which the mailing will be sent.
- Email for template status notification - e-mail address where reports on template statuses will be sent. Required field.
-
After filling in the fields, click the "Add" button. If the entered data is incorrect, the platform will ask you to verify its correctness. If the data is correct, the parameters will be saved.
-
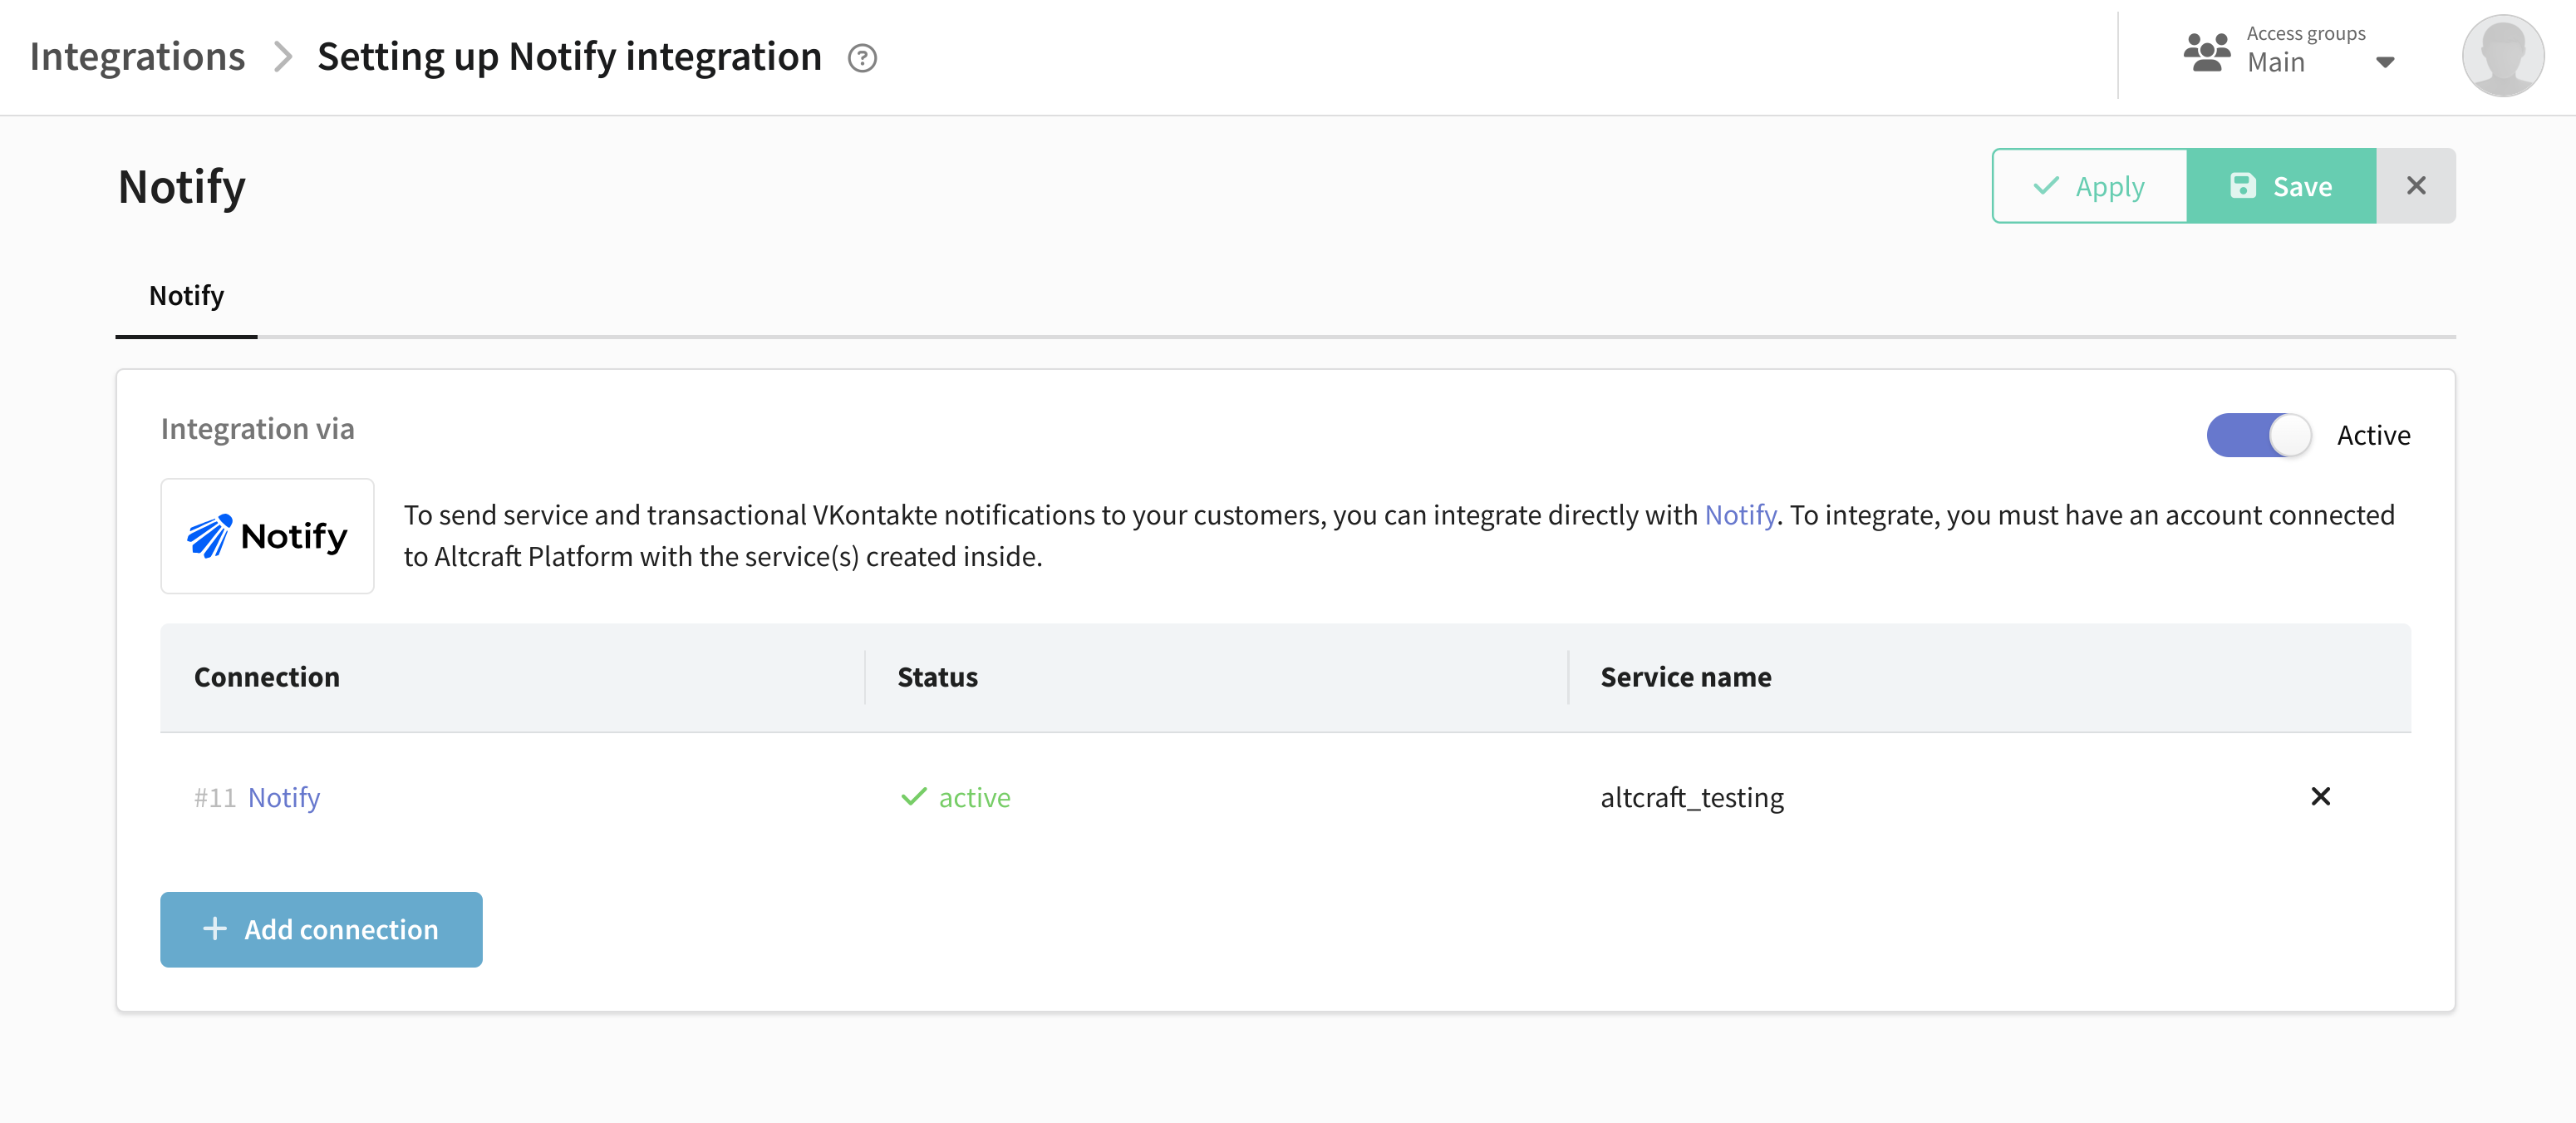
Activate the integration using the toggle and save it.
 .
.
After customizing the integration, you can use it to add a Notify feed to resource.
Step 2: Sign customers up for Notify channel
To subscribe clients to the Notify channel, follow the steps below:
1. Select or create a profile database where subscribers' data will be stored.
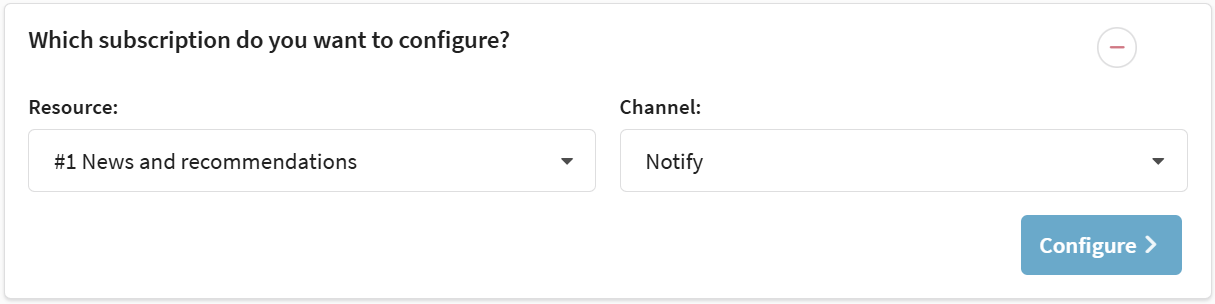
2. Create a new resource or edit an existing one by adding a Notify channel. To customize the channel, select one of the accounts you previously selected for integration.

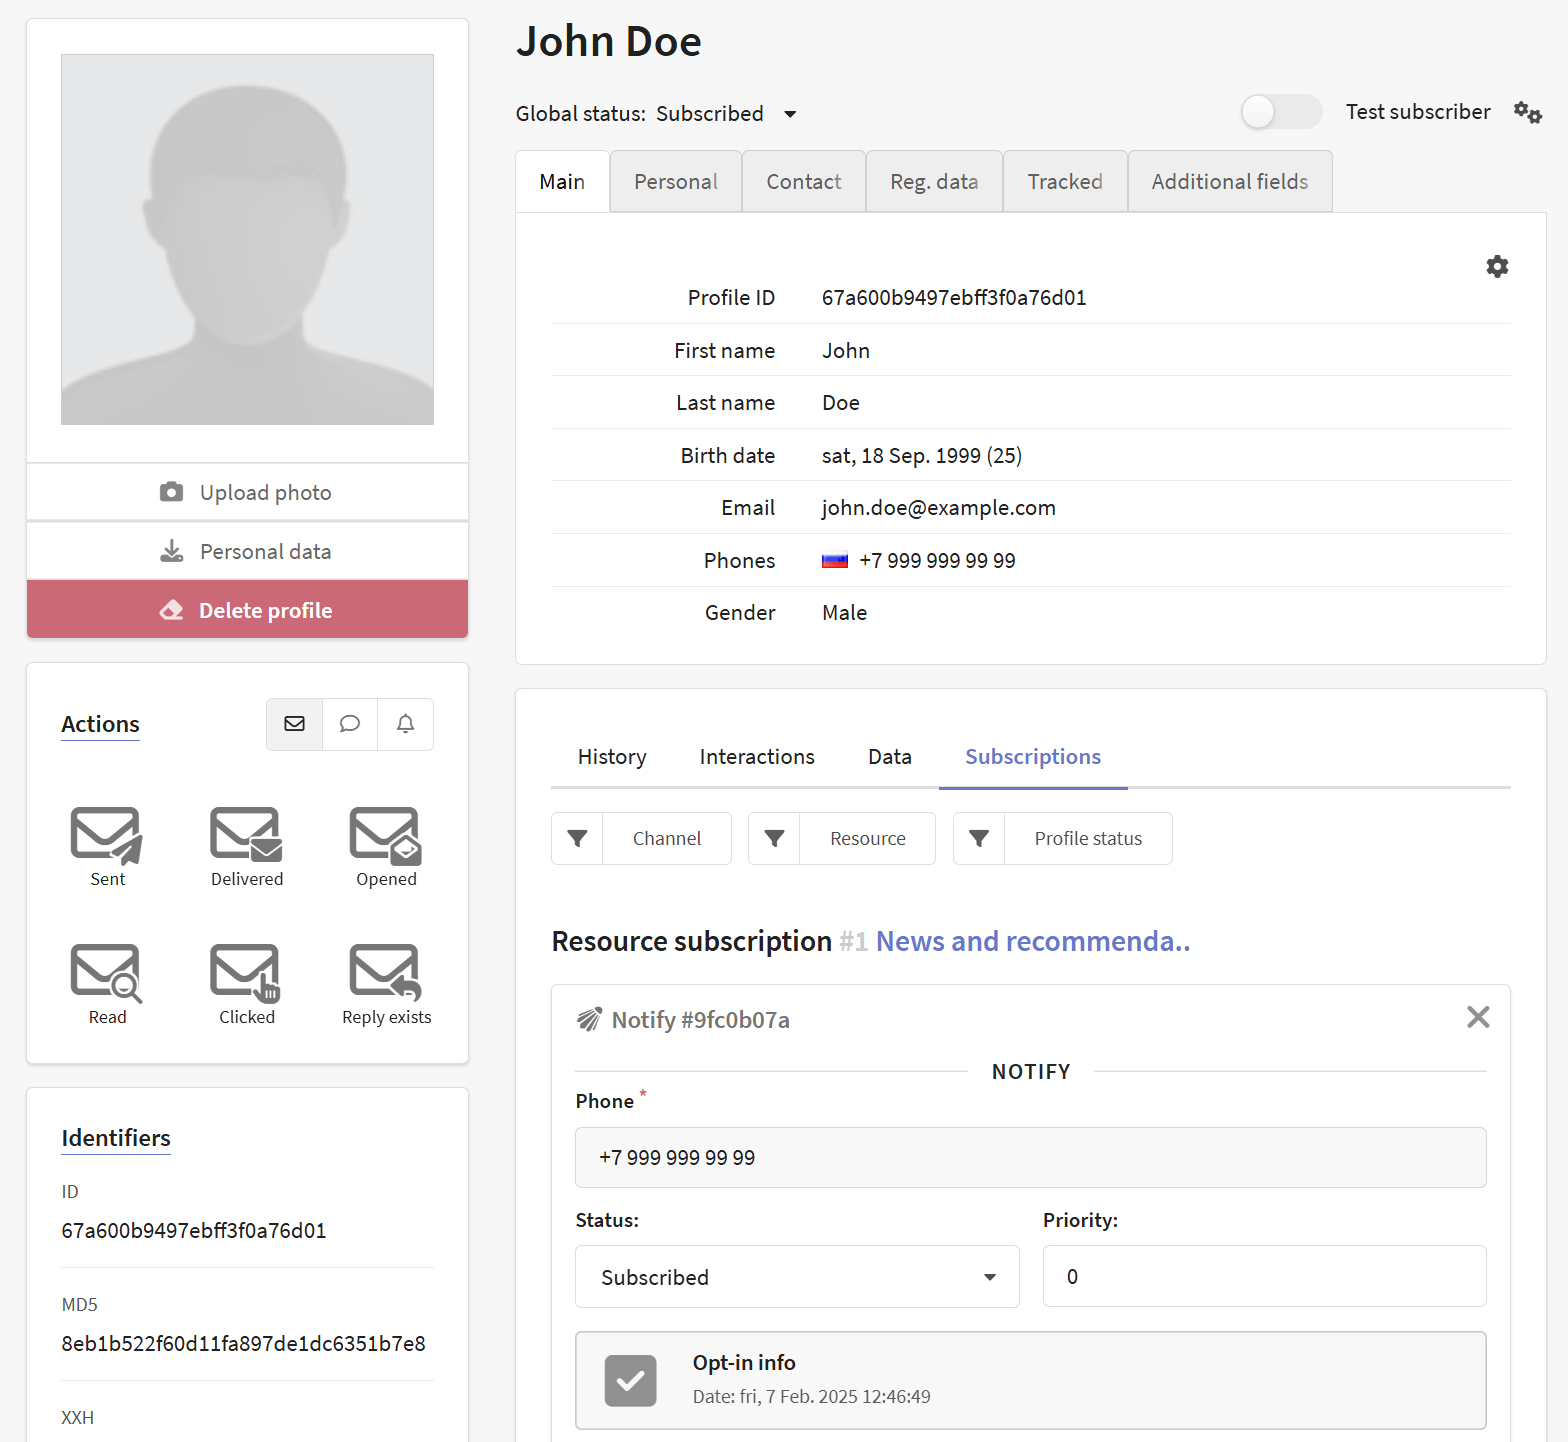
3. Import subscriber data into the platform - e.g. via a file. When importing, add them a subscription to the Notify channel in the resource. In this case the phone number is the source of the subscription.
A digital profile will be created for each customer, combining personal data, activity history, and resource subscriptions. If a Notify channel subscription was successfully added to a customer during import, this data will be displayed in their history:
Step 3: Create a message template
Only templates that have been moderated by Notify can be used to send messages.
1. In the main menu, open the "Templates" section and create a new template using the "Create" button on the top panel.
2. Select Editor as the creation method and Notify as the sending channel.
3. Fill in the basic settings of the template.
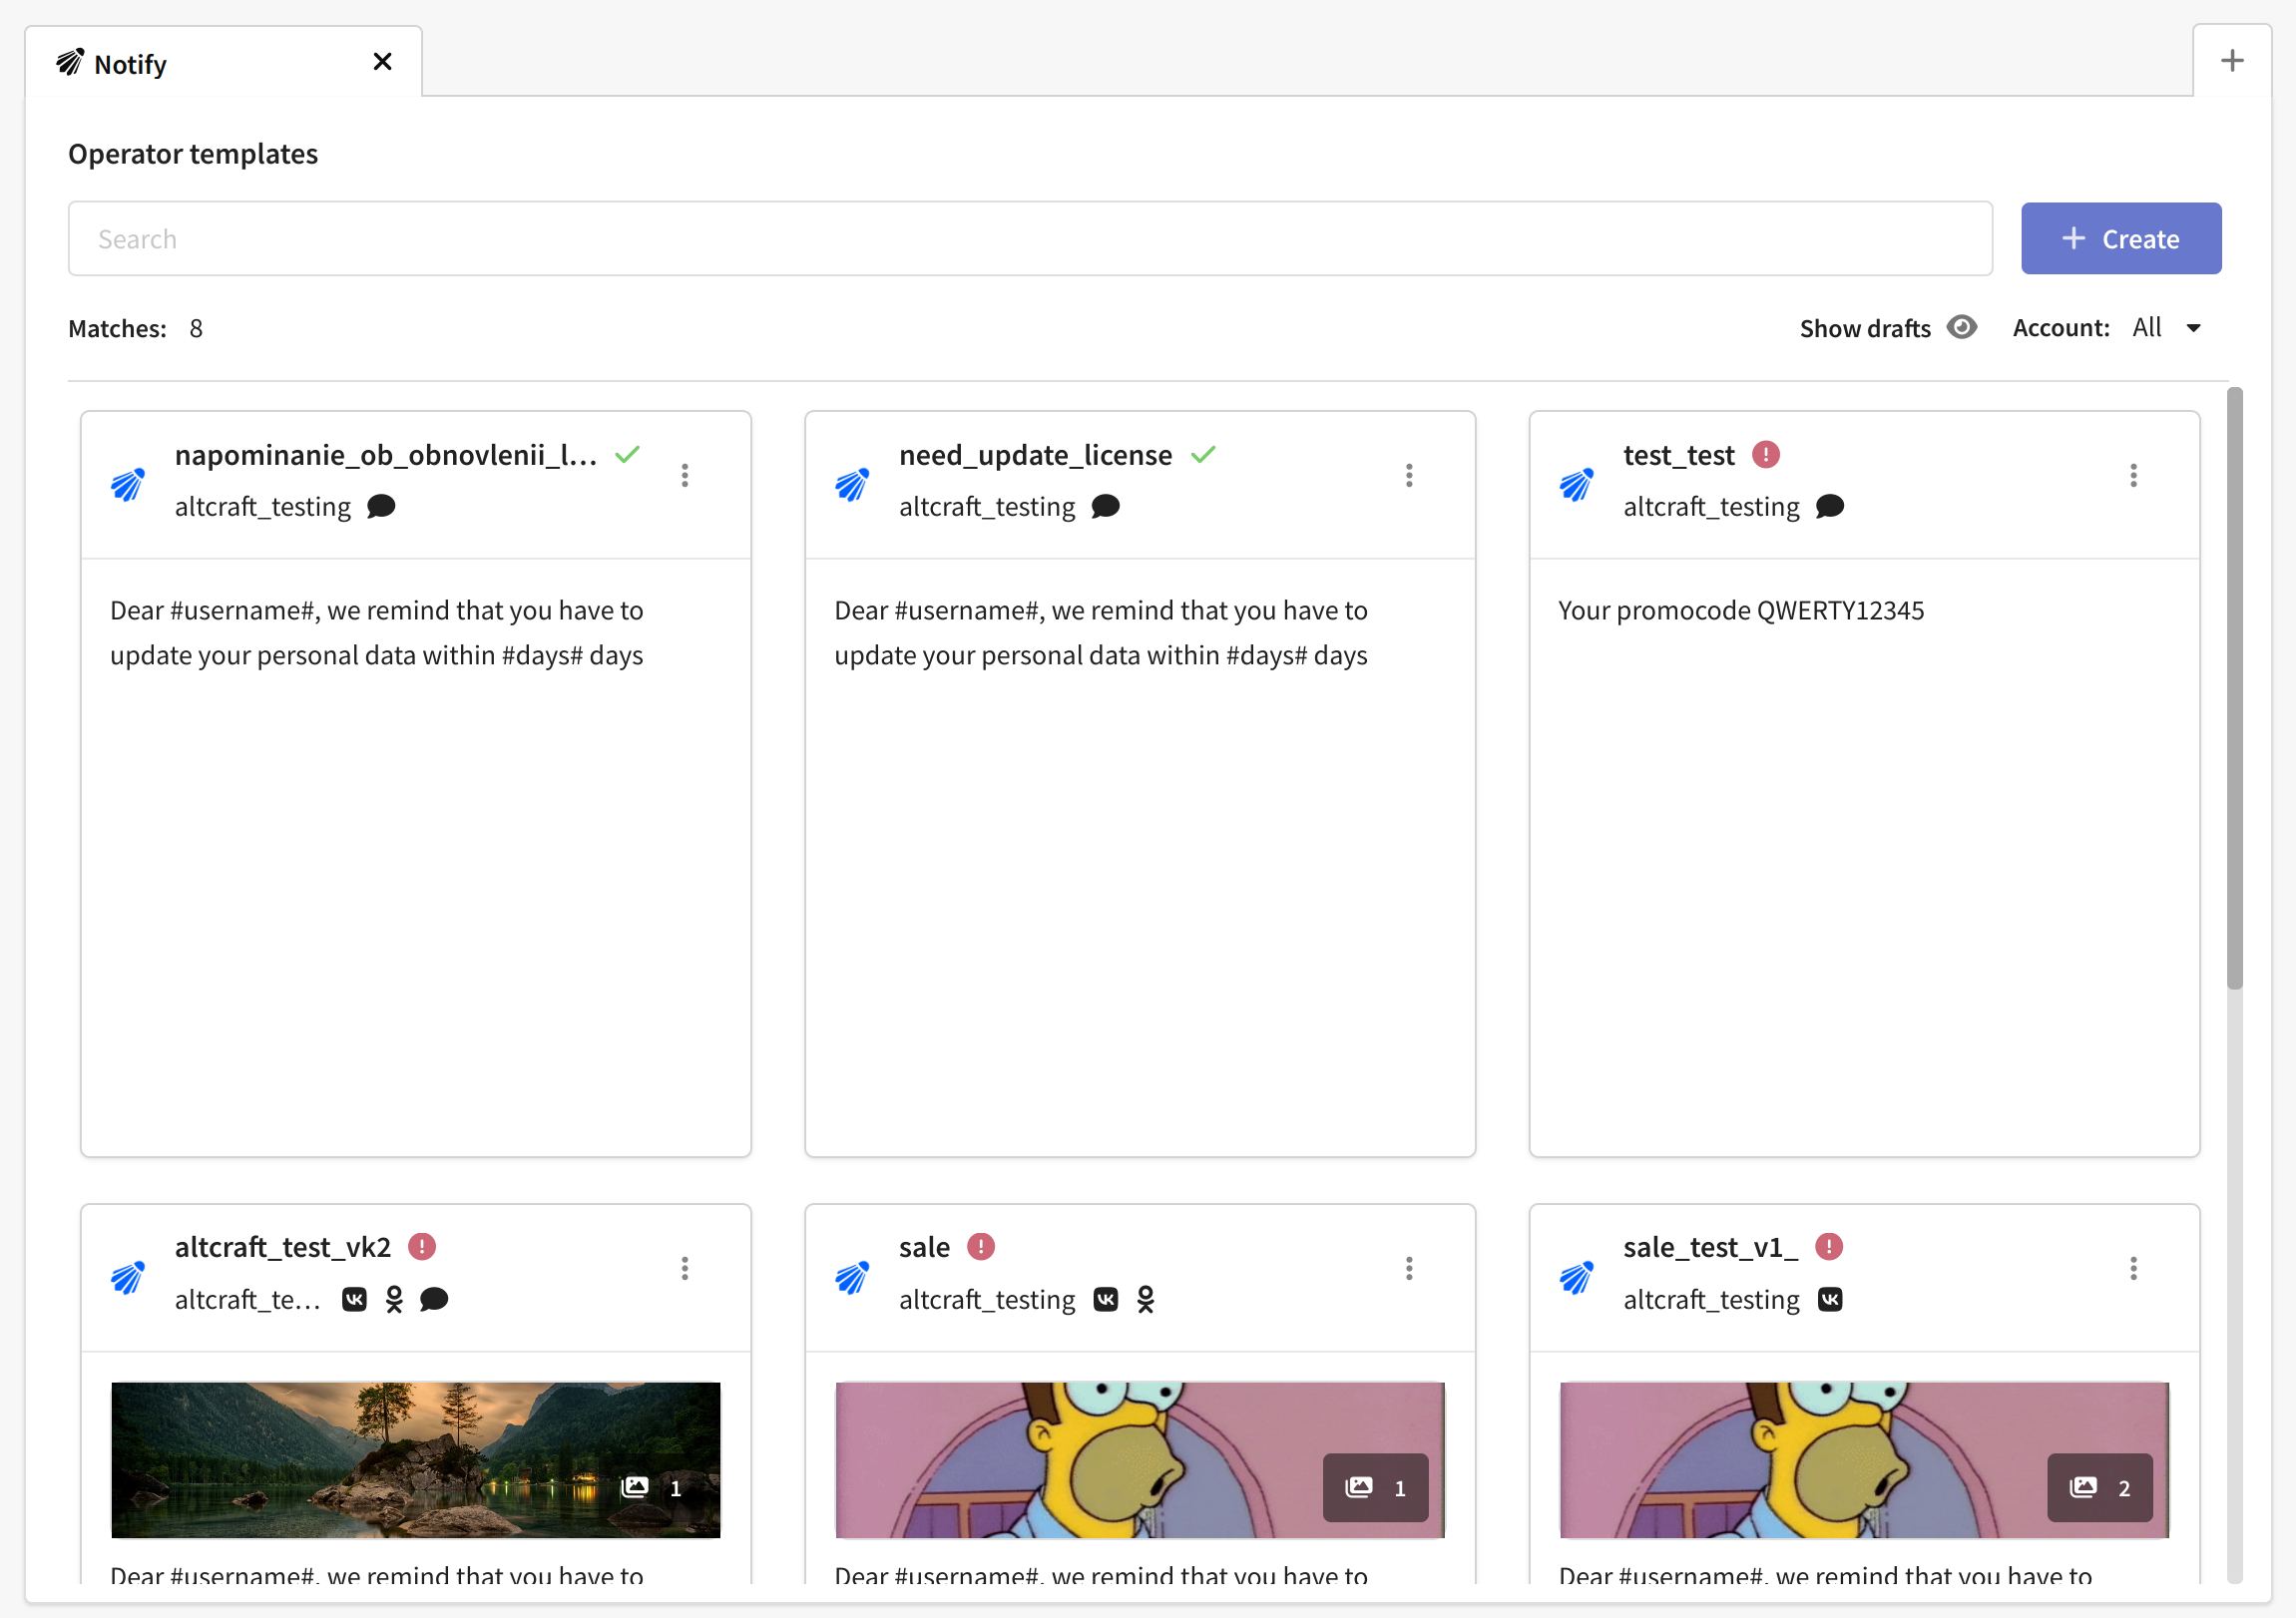
4. When you open the message editor for Notify, you will be shown the generic templates created in your Notify account. You can also create a new template by clicking the button.
5. Fill in the parameters inside the template. Parameters are text blocks that change for each new message (name, address, event name, date and time, link, etc.). You can manually prescribe parameter values or add Altcraft variables.

6. Check to see how your recipients will see the message. To do this, click the preview button on the top bar.
7. Save the message template.
You can also create a Notify template while in the platform. To create a template, click the corresponding button. The template creation window will open, in this window you should specify the name of the template and the service configured in your personal cabinet. More information about creating a template for Notify channel can be found in this article.
Step 4: Launch the mailing and evaluate the effectiveness of the mailings
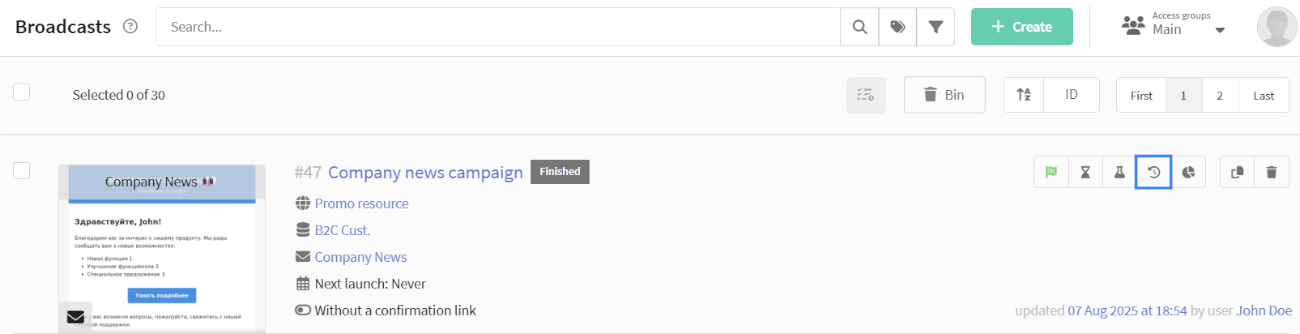
1. Go to "Mailings" and select the type of mailing:
- Broadcast - one-time mailing of messages.
- Regular Mailing is a periodic mailing.
2. Customize the mailing:
- select Notify as the communication channel,
- select the previously configured resource and recipient audience (base or segment),
- add a message template to the mailing,
- set the schedule.

3. Save the mailing.
4. Find it in the list of mailings of the selected type and activate it by clicking  in the Quick Actions panel. The active mailing will start sending messages when it's time to run on the schedule.

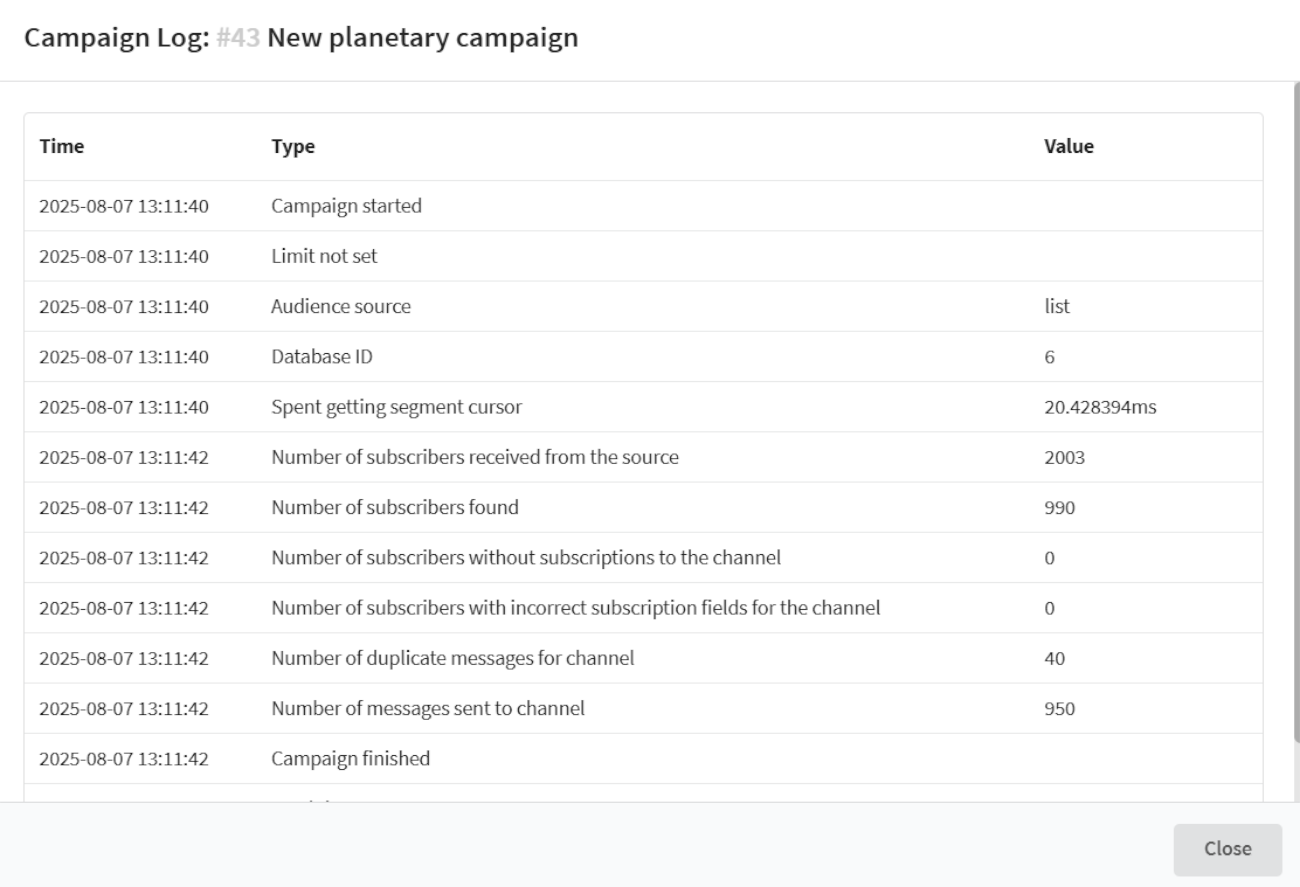
Mailing Log
The Mailing Log is a tool that provides a summary of the progress of your email mailing. It logs key events, mailing parameters, and statistics, helping you identify potential issues.
To open the mailing journal, click the "Journal" button in the quick actions menu:
The mailing Log contains the following information:
| Type | Description |
|---|---|
| Mailing started | Start time of mailing execution |
| Limit | Indicates whether a sending limit is set |
| Audience source | Source of contacts: List — Database Segment — Segment |
| Database ID/Segment ID | Identifier of the database/segment |
| Spent getting segment cursor | Time spent loading data from source (ms) |
| Number of subscribers received from source | Total number of profiles in the specified source |
| Number of subscribers found | Number of users in source with active subscription to selected resource |
| Number of subscribers without subscriptions to channel | Users without valid channel subscriptions |
| Number of subscribers with incorrect subscription fields | Users with invalid subscription data fields |
| Number of duplicate messages for channel | Count of duplicate contacts detected |
| Number of messages sent to channel | Final count of successfully delivered messages |
| Mailing finished | Mailing completion timestamp |
| Total time spent | Total execution duration from start to finish (sec) |
Reports and Analytics
To evaluate the effectiveness of your push mailings use the channel report to evaluate the results of your mailing. To access the report, click on the analytics button ![]() in the quick action bar. The report will provide the following information about the mailing:
in the quick action bar. The report will provide the following information about the mailing:
- number of messages sent, delivered and undelivered;
- number of reads and clicks on links in messages;
- the number of unsubscribes and subscriptions to the Notify channel.