Subscription resources
Resource in Altcraft is a tool for organizing customer subscriptions to certain content via certain communication channels. Subscriptions to different resources are not connected to one another. Unsubscribing to one resource does not affect other subscriptions and global profile status, thus a subscriber can choose which content to receive - and you get more opportunities to retain your customer.
One or several communication channels can be configured in a resource for forming subscriptions. A resource can be:
- Website or landing page
- Mobile or desktop application
- Registration form on the partner's website
- Certain type of mailing
- Special offer or product
For example, if a subscriber is not satisfied with advertisement mailings, but he is interested in information mailings, using two resources, the chance of saving potential customers and making a deal is much higher.
Different resources can use different tracking and sender domains - and different From names as well. In channel reports, general statistics intersections are available for resources, which makes effective end-to-end analysis of different marketing strategies possible.
Managing resources
Choose Resources in the Main menu to start managing resources.

Click on the resource name to edit it. Use the action menu on the right side to view the resource's subscribers ![]() , clone the resource
, clone the resource ![]() , or delete it
, or delete it ![]() . To add a new resource, click + Create at the top of the page.
. To add a new resource, click + Create at the top of the page.
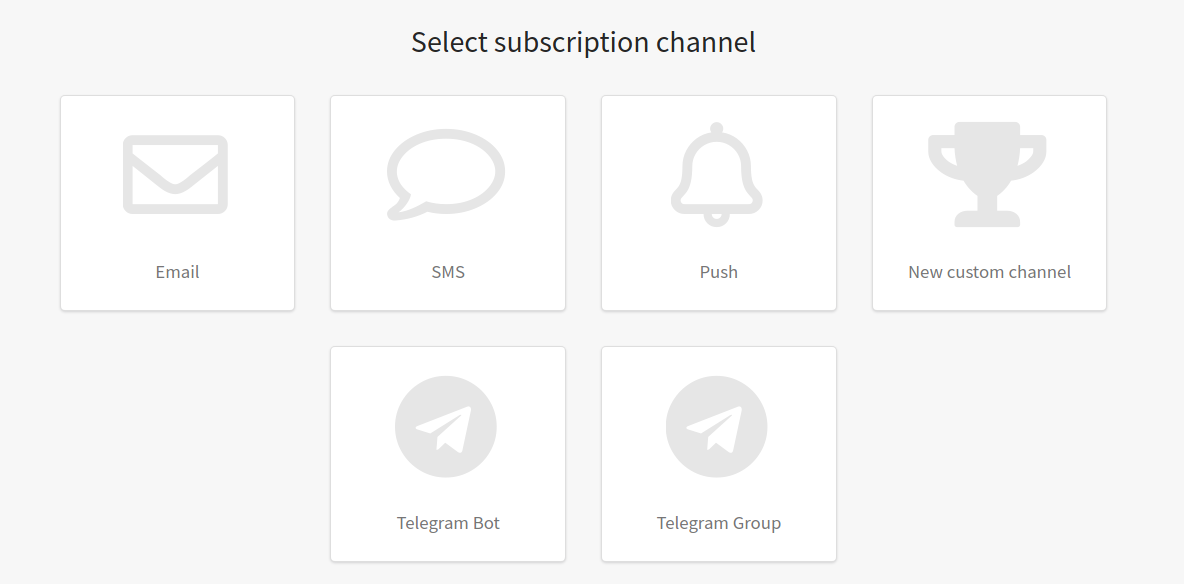
Next, select a primary subscription channel. Note that you can add another one at any time:
General settings
For a new resource, enter a Name and Description (optionally). For every resource you can configure:
- Access group — place resource in account objects group.
- Resource sending policy — limitcommunication with one subscriber within the resource.
- Databases — selectdatabases whose profiles can subscribe to the resource.
- Website, form or application URL — URL of your resource or its opt-in page. Additional URLs can be added.
- Default tracking domain — domain for tracking subscriber actions within the sent messages. In campaign Smart settings you can override or add tracking domains.

A user can subscribe to one resource several times by entering different contact details (email or phone number). If you activate the "Increase priority for new subscriptions" option, the contact information that the user provided during the last subscription will become a priority. It is to this email or number that messages will be sent in subsequent mailings.
Please note that the "Increase priority for new subscriptions" option applies only if the priority is not explicitly specified when adding a new subscription. If the priority of the new subscription is explicitly specified (for example, in an API request), then the priorities of existing subscriptions remain unchanged.
Resource categories
Categories enable you to specify the type of content a profile is subscribed to. For instance, a resource like "Mobile App" can include categories such as "News", "Promotional Offers", and "Transactional messages". If a client unsubscribes from one category within a resource, they will still receive messages from other categories. Unlike subscribing to a resource, subscribing to a category has just two statuses: "Subscribed" and "Unsubscribed". You can manually modify this status in customer profiles or via API requests.
To add a new category to a resource, click the + Create button:

Specify a custom category name and name that will be used in API requests:
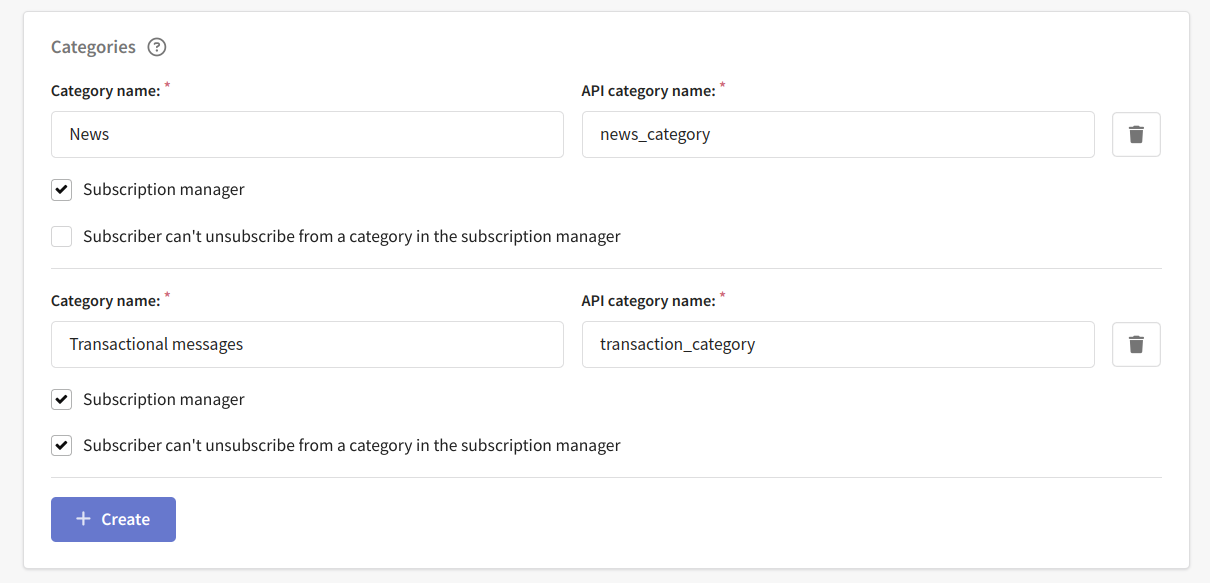
Additionally, you have the option to add a category to the subscription manager, This way, you allow subscribers to manage their category subscriptions by their own. If receiving messages within this category is required, activate the option "Subscriber can't unsubscribe from a category in the subscription manager".
The number of categories is not limited. To delete a category, click the button  .
.
Please note that after saving the resource, you will be able to edit the category name, but not the API name.
Communication channels settings
You can add no more than 8 communication channels for a single resource!
Each resource can form subscriptions via one or several communication channels. 7 channels are available out of the box: Email, SMS, Push, Telegram, WhatsApp*, Viber and Notify. Custom channels are preconfigured by platform administrators. To add a channel configuration tab, press plus on the right side:

Email
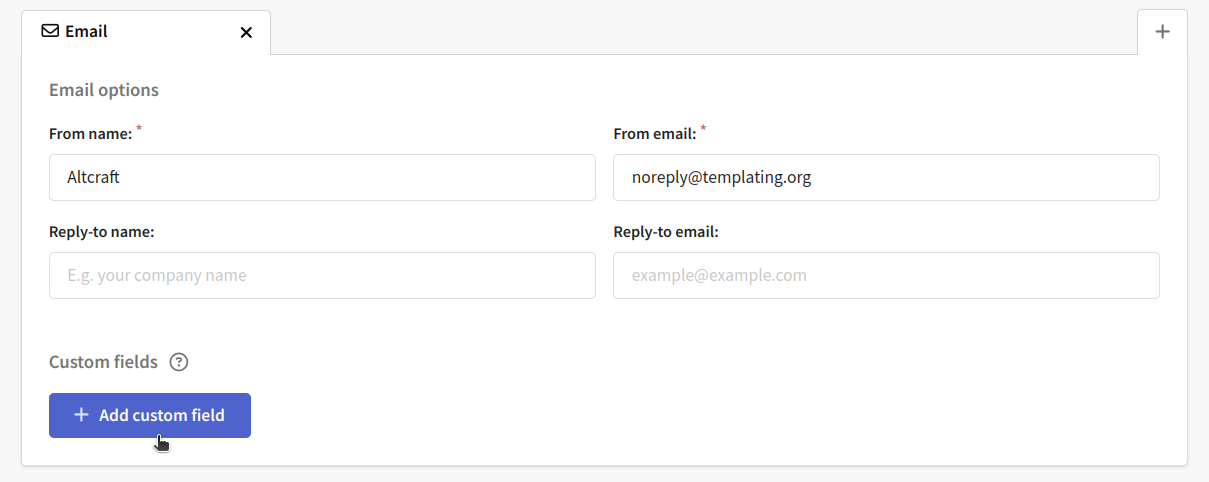
To communicate with customers by email, enter From name, From email, Reply-to name and Reply-to email - in case you will gather replies to your mailings:

You also need to fill in the "List-ID" field. List-ID is an additional header included in a message that transmits a unique mailing list identifier. Email clients use information from the header for filtering and sorting incoming messages. Details of the List-ID standard can be found here.
Enter the List-Id in the format [list-label].[domain]. Examples:
list-header.nisto.comcommonspace-users.list-id.within.com0Jks9449.list-id.cmu.edu
List-ID is specified without < and > symbols. The length of the identifier should not exceed 255 characters. The domain should match the sender's domain.
It is recommended to use different List-IDs for each resource.
Unsubscribe settings in the Email channel
The platform provides two mechanisms for unsubscribing from the Email channel in the resource:
- Unsubscribe link in the List-Unsubscribe is transmitted in the header of the letter for use by mail services.
- Unsubscribe link in the body of the letter is added to the template using the variable
{unsubscribe}.
The following settings are available to manage unsubscribe via List-unsubscribe:
- Don't use list-unsubscribe in email — unsubscribe list-unsubscribe link is not added to the header parameter.
- Call URL if there was an unsubscribe via list-unsubscribe — the required field will be displayed "Called URL". It should specify the URL that the user will go to after unsubscribing via the unsubscribe link of the mail service. If the URL is omitted, the user will be redirected to the system unsubscribe page.
Unsubscribe option "Don't use list-unsubscribe in email" is available only for users of the On-Premise solution. To activate this option, add the unconditional_subscriber parameter to the EXTRAS property in the configuration file main.json.
To communicate with subscribers via the email channel, you need to use email addresses formatted as john@example.com. Email addresses must comply with RFC standards. You can find the main requirements at this link.
SMS
To communicate with short telecom messages, activate the SMS channel in the resource and enter operator name (Caller ID). Generally,it needs to be agreed on with your SMS provider, unless you use your own telecom gateway.

Communication with subscribers through the SMS channel is done using their phone numbers. The number must be provided in international format, without spaces, hyphens, or other separators, and it should start with a plus sign. For example: +79123456789. Learn more.
Push
If a custom unsubscribe link is specified in the email template, then it will be a priority. Read more about user links in the article.
Push channel combines settings for all supported platforms:
Web browsers: Google Chrome, Mozilla Firefox, Apple Safari and Opera browser
Mobile applications: Android and iOS.
The following providers are available out of the box:
- Google Firebase Cloud Messaging — all platforms, except Safari
- Apple Push Notification Service — Safari & iOS
- Mozilla Services — Mozilla Firefox
- Yandex AppMetrica (AppMetrica integration) — Android & iOS with Google FCM SDK.
- Huawei Mobile Services — Android & iOS
- RuStore — only Android
To work with push notifications, activate the Push channel in resource and configure the necessary platforms and providers.
Configuration options for the supported platforms are described in detail in this article.

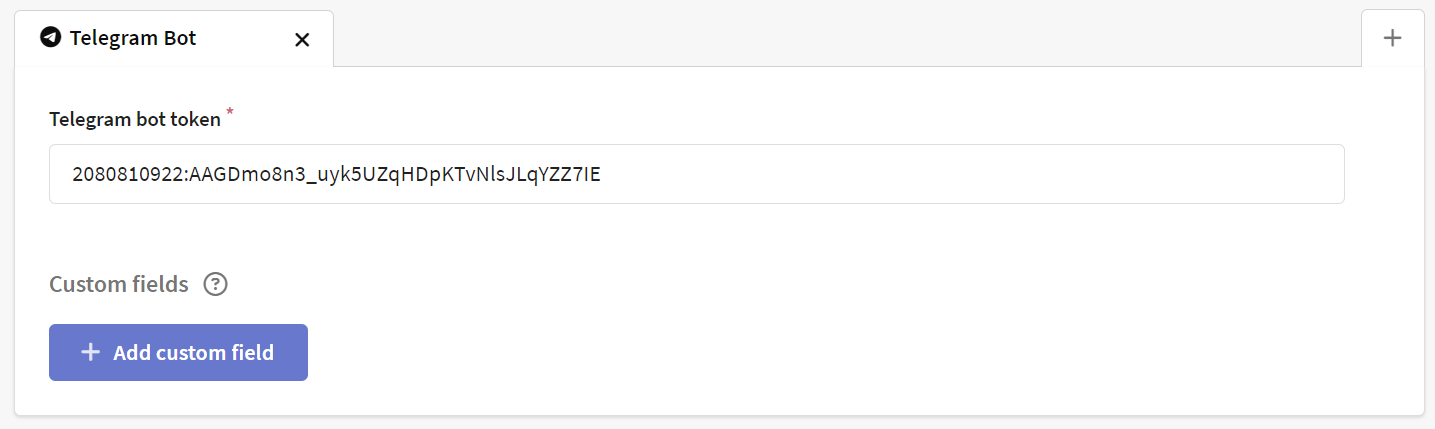
Telegram Bot
Use this channel to send messages to subscribers via the Telegram bot. You need to enter the bot token. Learn how to get a token in this guide.
Telegram Group
You can send messages to this channel using placement campaigns. Specify the bot token and group or channel ID. More information about channel setup can be found right there.

WhatsApp
To send messages to subscribers in the messaging app, you need to set up integration with the WhatsApp* Business API. Integration can be done through such providers as edna or 360dialog.
After setting up the integration, select the connected account (360dialog) or channel (Edna) in the drop-down list:

Communication with subscribers through the WhatsApp* channel is done using their phone numbers. The number must be provided in international format, without spaces, hyphens, or other separators, and it should start with a plus sign. For example: +79123456789.
Viber
To send messages on Viber, you need to set up an integration through the provider, such as Devino Telecom, SMS Traffic, MTS OmniChannel or Rapporto.
In the channel settings, select the Viber connection with Devino Telecom, SMSTraffic, MTS OmniChannel or Rapporto you created earlier and specify the sender's name. This name will be visible to subscribers when they receive a message. You can find the sender's name in your provider dashboard, and it should be verified by your provider.

To set up callbacks with message statuses, please contact your provider's account manager or technical support (Devino Telecom tech support, SMStraffic tech support, MTS OmniChannel, Rapporto).
Communication with subscribers through the Viber channel is done using their phone numbers. The number must be provided in international format, without spaces, hyphens, or other separators, and it should start with a plus sign. For example: +79123456789.
Notify
Notify service allows sending business notifications via VK and OK for effective communication with customers. To use Notify in the platform, you need to pre-configure connection and integration of the service.
In the channel settings, select the previously integrated Notify account:
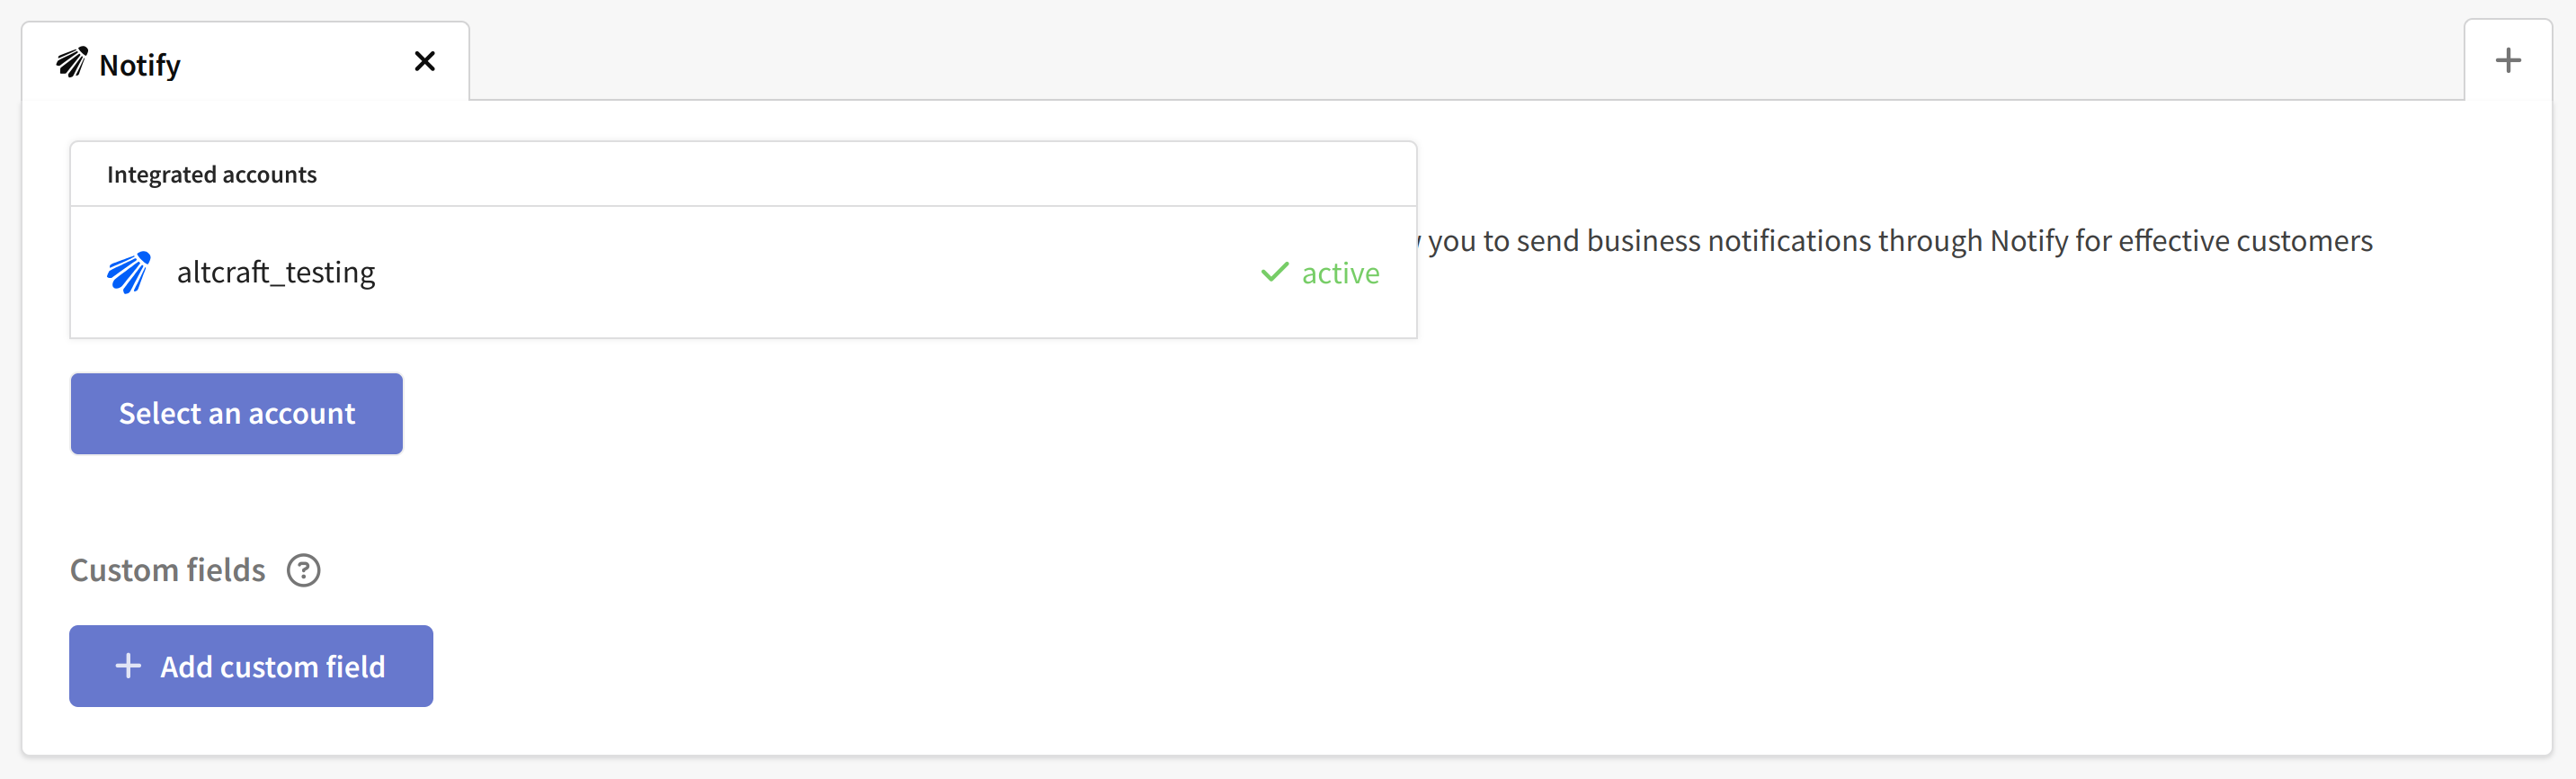
Check if the account is active and save the resource:

Custom fields in subscription channels
You can add custom fields to any channel resource. They are similar to additional fields in the profile database. Use them to store extra information related to the subscription to the channel.
To create a field, click the "Add custom field" button and select its type:
- Integer — positive and negative whole numbers.
- Float — positive and negative floating-point numbers.
- Line — text in any language, including numbers, special characters, and spaces. It uses the Unicode standard.
- Boolean — a field that provides a choice between two options: True or False (Yes or No).
Next, specify the field name and the name to be used in API requests. The field name can include any characters, while the API name should only contain Latin characters, numbers, and underscores. It also must begin with a letter.

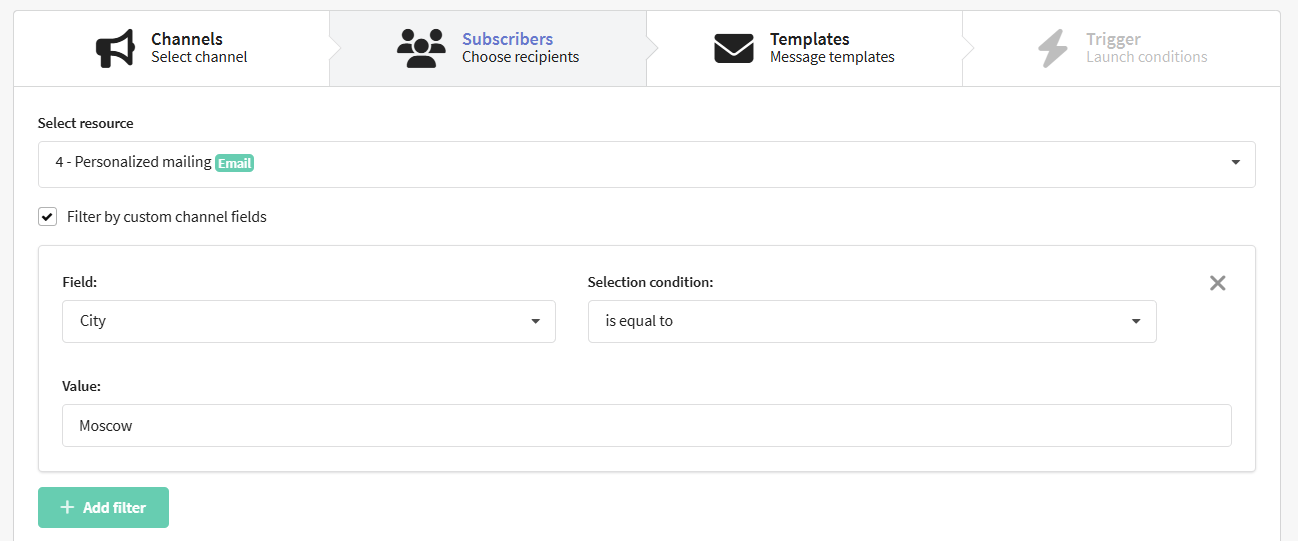
After creating custom fields you can apply them to your trigger campaign. This will make it more personalized.
Additional settings:
- Default value — used when no data for this field is provided during profile import.
- Make required — data for this field will be required during import.
- Subscription manager — the field will be added on the Subscription Manager page.
To delete a field, click the cross. The number of additional fields is not limited. After saving the resource, you can edit the field name and its additional settings, but changing the API name is not possible.
Unsubscribe settings
You can set up a separate unsubscribe mechanism for each resource. The unsubscribe page URL specified in the resource will override the system unsubscribe page. However, if a custom unsubscribe link is specified in the email template, then it will take priority. Learn more about user links.
Instant unsubscribe without confirmation
When clicking on the unsubscribe link, the profile goes to the unsubscribe system page and its status immediately changes to "Unsubscribed". This type of unsubscription is used by default.

You can redirect the profile to your own unsubscribe page by specifying a different URL in the "Unsubscribe page URL" field.
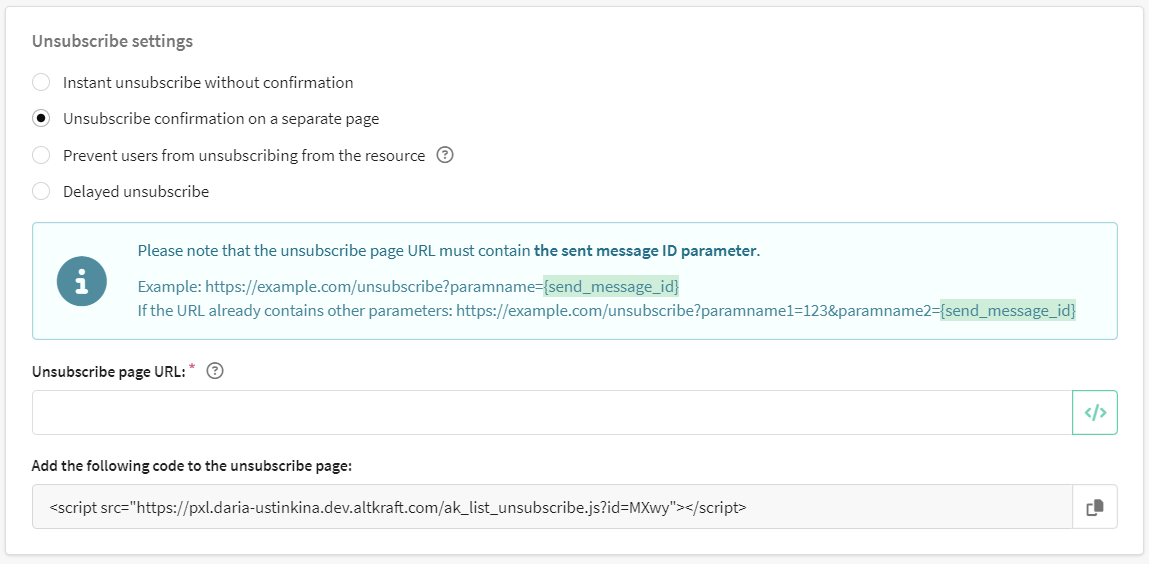
Unsubscribe confirmation on a separate page
This unsubscribe setting is only available for users of the On-Premise solution. To activate these settings, add the unconditional_subscriber parameter to the EXTRAS property in the 'main' configuration file.json`.
When you click on the unsubscribe link in the message, the profile will go to the user's unsubscribe page. Its status will change to "Unsubscribed" only after he confirms the unsubscription. Such a page can be used to clarify the reason for unsubscribing.
Setting up fields:
Specify "Unsubscribe page URL" — this URL will override the URL of the system unsubscribe page.
In the URL of the unsubscribe page, add the parameter ID of the sent message {send_message_id}. This is a required parameter that will allow you to identify the resource and profile for which you want to unsubscribe.
Select the unsubscribe mechanism:
Unsubscribe mechanism using the Altcraft SDK
Paste the code provided in the resource to your unsubscribe page to connect the Altcraft SDK. Next, initialize the AkUnsub class.
Example:
<!-- Connecting the Altcraft SDK -->
 <script src="https://pxl.altkraft.com/ak_list_unsubscribe.js?id=MXw3Mw=="></script>

<!-- Initializing the AkUnsub class -->
<script>
   const akUnsub = new AkUnsub();
</script>
If necessary, you can redefine the resource token and pixel domain in the script:
new AkUnsub({
    rtoken: 'example_token',
    pxl_domain: 'your_pxl_domain',
 })
The AkUnsub class has 2 public methods:
confirmUnsub— method for confirming unsubscriptioncancelUnsub— method for canceling unsubscription. Used only for delayed unsubscribe, more on this in the next paragraph of the article.
Each of the methods accepts the following arguments:
- SMID is the identifier of the sent message (required parameter).
- An array of categories of the resource from which unsubscribing occurs (optional parameter).
Example:
AkUnsub.confirmUnsub('SMID', ['cat_to_unsub'])
AkUnsub.cancelUnsub ('SMID', ['cat_to_unsub'])
To call methods, you can add buttons to the unsubscribe page. Example:
<!-- Unsubscribe confirmation button -->
<button onclick="akUnsub.confirmUnsub('SMID',['category_1', 'category_2'])">Confirm unsubscribe</button>

<!-- Unsubscribe button -->
<button onclick="akUnsub.cancelUnsub('SMID',['category_1', 'category_2'])">Cancel unsubscribe</button>
Replace SMID and ['category1', 'category2'] with the corresponding values.
Unsubscribe mechanism without using the Altcraft SDK
You can implement the unsubscribe mechanism on your side. To do this, add 2 parameters to the Unsubscribe page URL:
-
Send message ID
{send_message_id}. This is a mandatory parameter that allows you to identify the resource from which you want to unsubscribe. -
Resource token
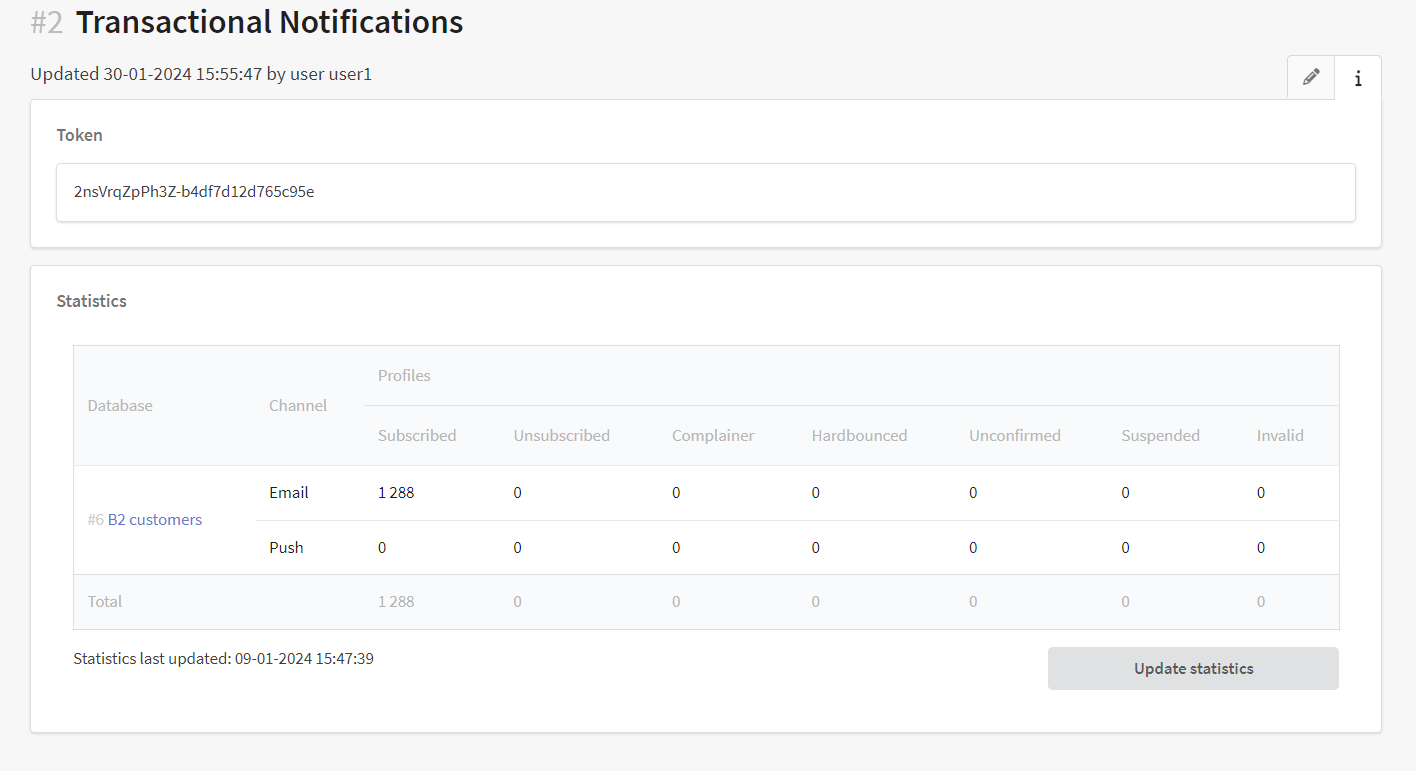
{resource_token}. This parameter is required for additional protection and to implement your own unsubscribe mechanism without using the Altcraft SDK. The resource token can be passed not in the URL of the unsubscribe page, but in the body of the API request. The token can be obtained in the resource editing window on the "i" tab — details:
If the profile has confirmed the unsubscription on your page by its actions, then it is necessary to transfer this data to the platform using the API request /api/v1.1/profiles/message_unsub. The status of the profile's subscription to the resource will change to "Unsubscribed". If you pass the categories parameter, the profile will be unsubscribed only from the specified resource categories.
Request Example:
{
"token": "abcdefghijklmnqrstuvwxyz", // API token
  "smid": "fGmXiWU9Y4NSIpCwl4QG6QXAAAQE", // ID of the sent message
  "rtoken":"2fHLS9YR9daS-a90b371eecc2952f", // Resource token
  "categories": ["cat_to_unsub"] // Resource categories to unsubscribe from
}
API request /api/v1.1/profiles/message_unsub is described in documentation.
Prevent users from unsubscribing from the resource
This unsubscribe setting is only available for users of the On-Premise solution. To activate these settings, add the unconditional_subscriber parameter to the EXTRAS property in the 'main' configuration file.json`.
For certain types of mailings, you can set a limit on unsubscribing. When this option is selected, all unsubscribe links specified in the template will lead to a page where the reason for not unsubscribing is displayed.

Unsubscribing via the list-unsubscribe link in an Email will also be prohibited.
Delayed unsubscribe
When you click on the unsubscribe link in the message, the profile will go to the user's unsubscribe page. Its status will change to "Unsubscribed" if:
- the profile will confirm the unsubscription by its actions;
- The profile will not cancel the unsubscribe during the time specified in the Timer field (the maximum timer value is 30 minutes).

Setting up fields:
Specify "Unsubscribe page URL" — this URL will override the URL of the system unsubscribe page.
In the URL of the unsubscribe page, add the parameter ID of the sent message {send_message_id}. This is a required parameter that will allow you to identify the resource and profile for which you want to unsubscribe.
Select the unsubscribe mechanism:
Unsubscribe mechanism using the Altcraft SDK
Paste the code provided in the resource to your unsubscribe page to connect the Altcraft SDK. Next, initialize the AkUnsub class.
Example:
<!-- Connecting the Altcraft SDK -->
 <script src="https://pxl.altkraft.com/ak_list_unsubscribe.js?id=MXw3Mw=="></script>

<!-- Initializing the AkUnsub class -->
<script>
   const akUnsub = new AkUnsub();
</script>
If necessary, you can redefine the resource token and pixel domain in the script:
new AkUnsub({
    rtoken: 'example_token',
    pxl_domain: 'your_pxl_domain',
 })
The AkUnsub class has 2 public methods:
confirmUnsub— method for confirming unsubscriptioncancelUnsub— method for canceling unsubscription
Each of the methods accepts the following arguments:
- SMID is the identifier of the sent message (required parameter).
- An array of categories of the resource from which unsubscribing occurs (optional parameter).
Example:
AkUnsub.confirmUnsub('SMID', ['cat_to_unsub'])
AkUnsub.cancelUnsub ('SMID', ['cat_to_unsub'])
To call methods, you can add buttons to the unsubscribe page. Example:
<!-- Unsubscribe confirmation button -->
<button onclick="akUnsub.confirmUnsub('SMID',['category_1', 'category_2'])">Confirm unsubscribe</button>

<!-- Unsubscribe button -->
<button onclick="akUnsub.cancelUnsub('SMID',['category_1', 'category_2'])">Cancel unsubscribe</button>
Replace SMID and ['category1', 'category2'] with the corresponding values.
Unsubscribe mechanism without using the Altcraft SDK
You can implement the unsubscribe mechanism on your side. To do this, add 2 parameters to the Unsubscribe page URL:
-
Send message ID
{send_message_id}. This is a mandatory parameter that allows you to identify the resource from which you want to unsubscribe. -
Resource token
{resource_token}. This parameter is required for additional protection and to implement your own unsubscribe mechanism without using the Altcraft SDK. The resource token can be passed not in the URL of the unsubscribe page, but in the body of the API request. The token can be obtained in the resource editing window on the "i" tab — details:
If the profile has confirmed the unsubscription on your page by its actions, then it is necessary to transfer this data to the platform using the API request /api/v1.1/profiles/message_unsub. The status of the profile's subscription to the resource will change to "Unsubscribed". If you pass the categories parameter, the profile will be unsubscribed only from the specified resource categories.
Request Example:
{
"token": "abcdefghijklmnqrstuvwxyz", // API token
  "smid": "fGmXiWU9Y4NSIpCwl4QG6QXAAAQE", // ID of the sent message
  "rtoken":"2fHLS9YR9daS-a90b371eecc2952f", // Resource token
  "categories": ["cat_to_unsub"] // Resource categories to unsubscribe from
}
API request /api/v1.1/profiles/message_unsub is described in documentation.
*The Meta organization, which owns Instagram, Facebook and WhatsApp products, has been declared as extremist and banned in Russia.