Creating a Channel
This is a step-by-step guide to creating a custom channel from scratch. We will go through all interface tabs in the order they open.
Before you begin, make sure you have:
- Documentation for the external service API (sending requests, status checks, callbacks)
- An understanding of which fields are needed for sending a message and identifying a subscription
- An understanding of which fields are configured by the user and which by the administrator
- A list of events that will occur on the channel
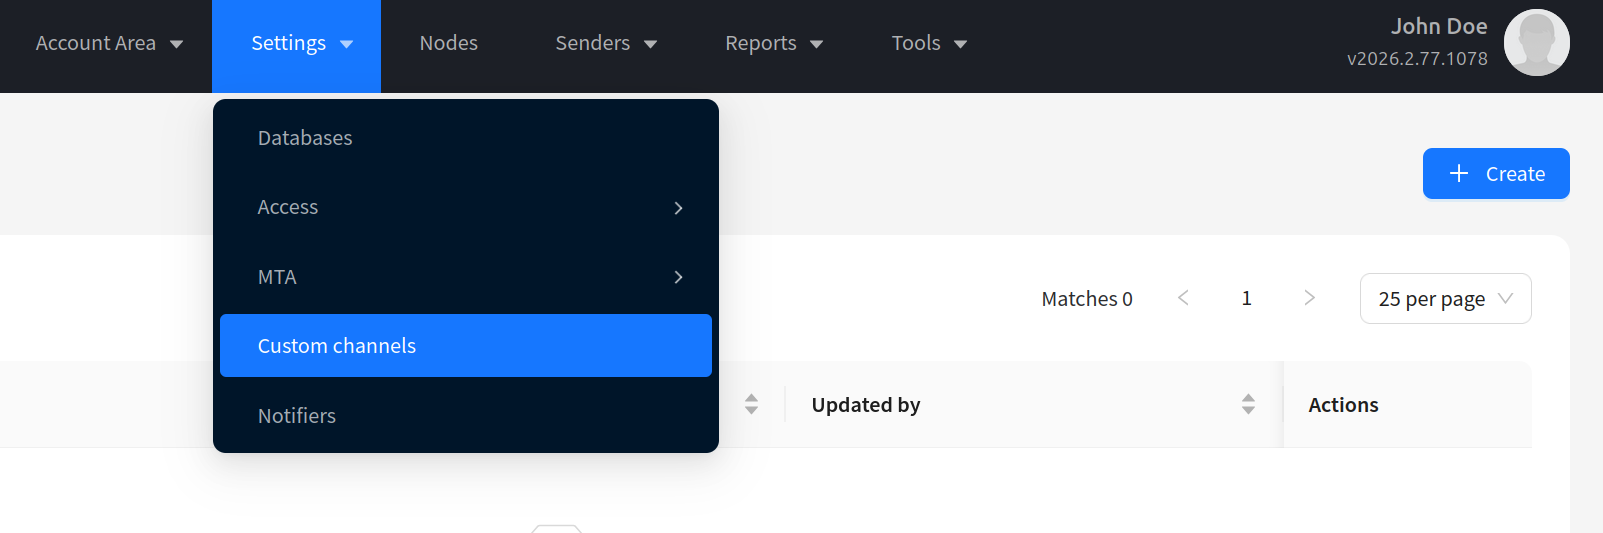
Go to Settings — Custom Channels and click the button to create a new channel:
General
On this tab, the main channel parameters are configured:
| Field | Description |
|---|---|
| Name | Channel name displayed in the interface |
| String ID | String identifier. Used in reports, analytics, exports, and API requests. Cannot be changed after creation |
| Custom channel icon | Channel icon in the platform interface |
| Types of campaigns | Mailing types where the channel will be available: broadcast, regular, splittest, trigger, placement |
| Communication type | Communication type: Direct (personalized sending for each profile) or Indirect (one content for the entire mailing) |
| Enable moderation | Moderation toggle. Available for indirect channels. Enables the Moderate pipeline |
| Dedicated queue | "Dedicated queue" checkbox. When enabled, the channel gets its own piper_messages_<ID> queue and does not use the shared piper_messages. Requires setting up a consumer by the administrator |
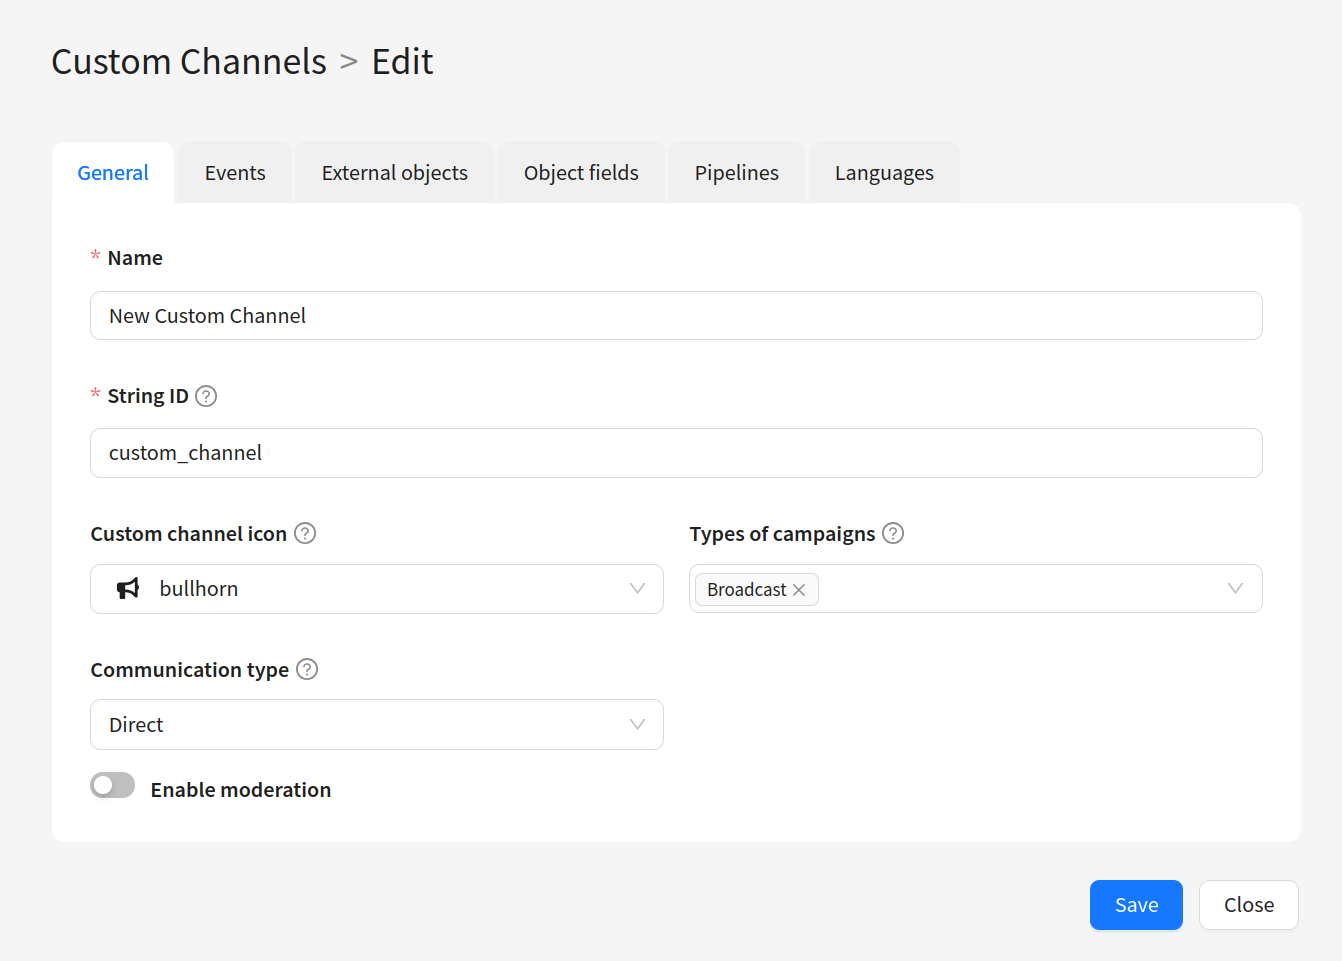
After filling in the fields, click Save. The channel can only be saved after configuring at least one field in Template and Subscription (for direct channels) or Resource (for indirect channels). The remaining tabs will become available for editing.
Events
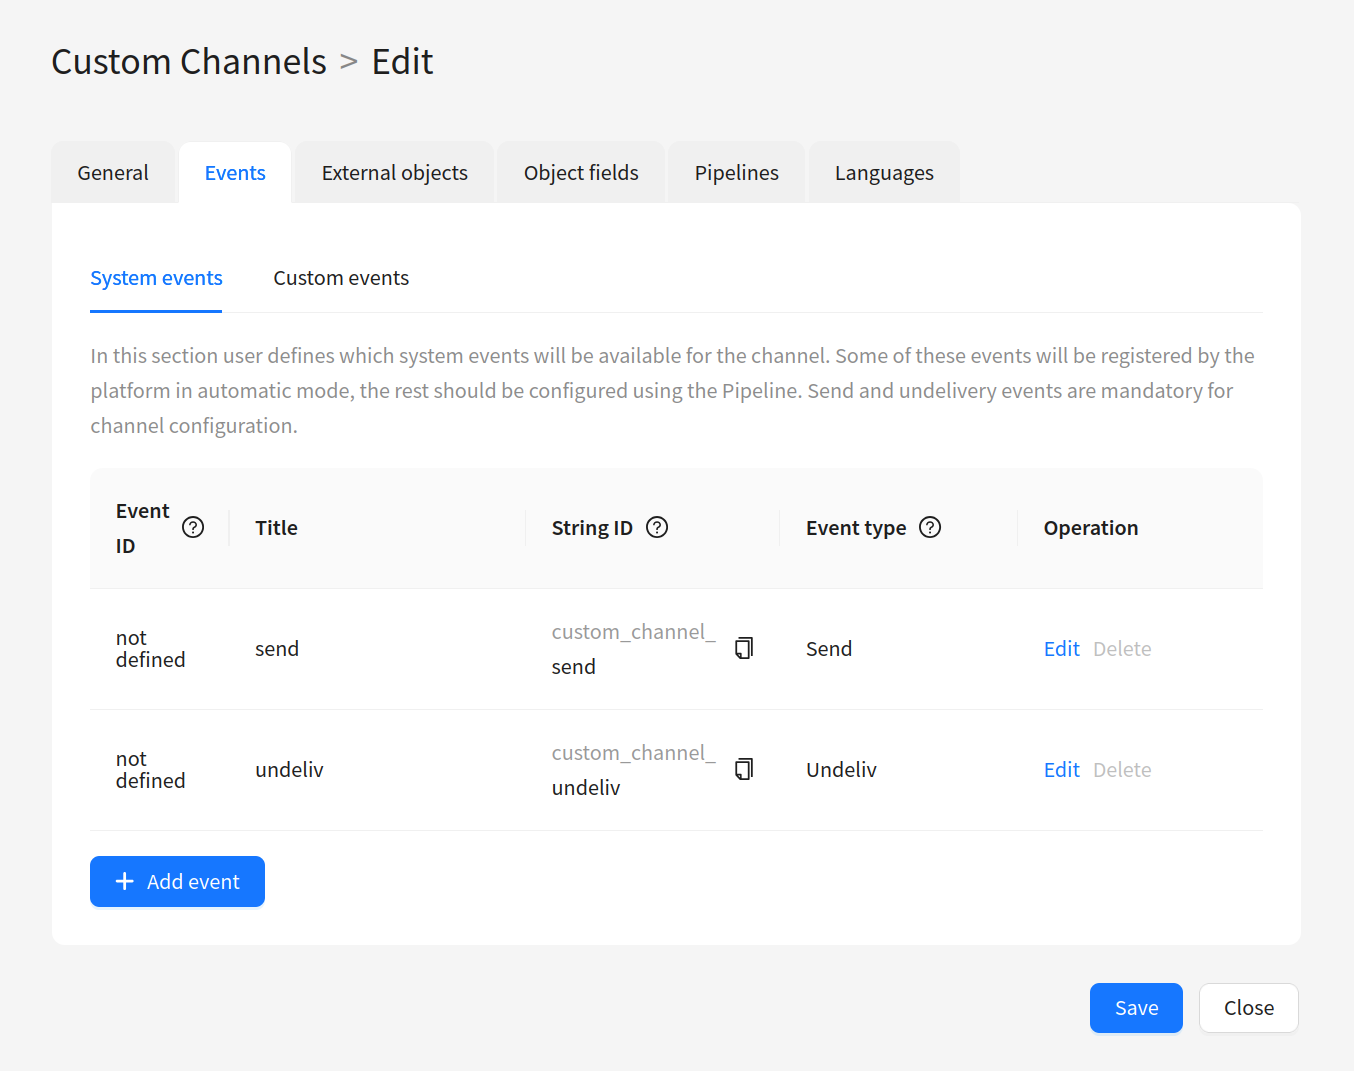
On this tab, channel events are configured, which are displayed in reports, profile history, and segments.
System Events
System events of the channel. Some are registered automatically by the platform (for example, click when following a tracking link), the rest — through a pipeline using the Eventer pipe. Events send and undeliv are mandatory for channel configuration.
When adding an event (Add event), the following are configured:
| Field | Description |
|---|---|
| Event ID | Numeric identifier of the event |
| Title | Event name |
| String ID | String identifier. Used in reports, analytics, exports, and API |
| Event type | Platform event type (see the table below) |
Platform event types
| Event type | Purpose |
|---|---|
send | Message sending |
deliv | Message delivery |
undeliv | Message non-delivery |
click | Link click (automatically when following a tracking link) |
uclick | Unique click |
subscribe | Subscription |
unsubscribe | Unsubscription via API or manually |
unsub | Unsubscription by link (automatically when following the unsubscribe link) |
hbounce | Hard bounce |
sbounce | Soft bounce |
open | Message open |
read | Message read (automatically via {read} tracking pixel, view time >= 8s) |
glanced | Brief view (automatically tracked, view time 0-4s) |
skimmed | Skimmed (automatically tracked, view time 4-8s) |
complain | Spam complaint |
reply | Reply to message |
confirm | Subscription confirmation |
The events glanced, skimmed, and read are registered automatically by the tracking service based on the time spent viewing the message page:
glanced— 0 to 4 secondsskimmed— 4 to 8 secondsread— 8 seconds or more
For these to work, the message template must include the {pixel} or {read} tracking pixel.
The types unsubscribe and unsub are different:
unsubscribe— unsubscription via API or manually in the interfaceunsub— unsubscription by link. If you do not add an event with typeunsub, unsubscription by link will not work: the user will see the unsubscribe page, but the subscription status will not change
Each event has Edit and Delete buttons.
Custom Events
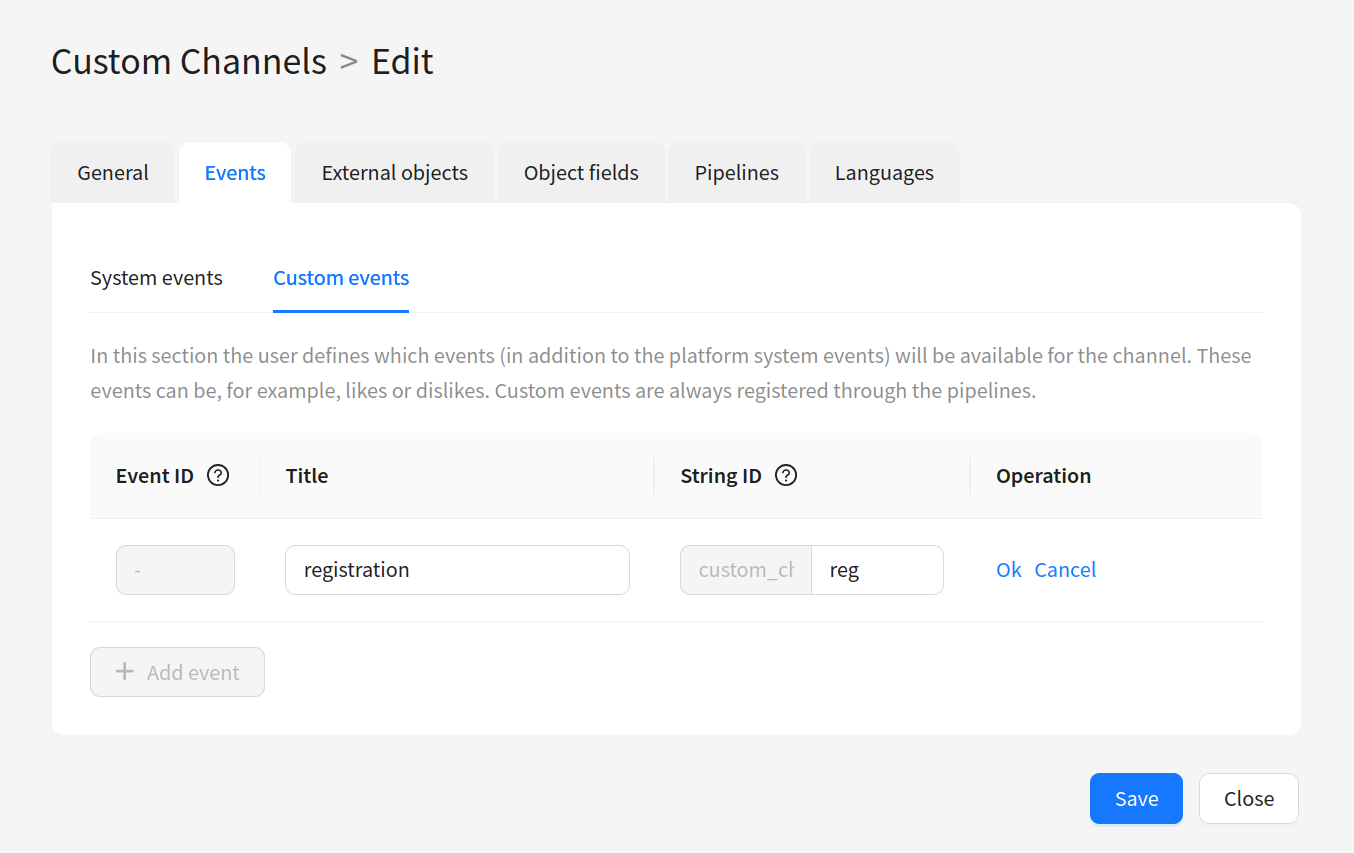
Custom events are events that do not correspond to any system event type, for example, a like or adding to favorites. They are created in the Custom Events section and registered only through a pipeline with type custom. Like system events, they are displayed in analytics and segmentation.
When adding, the same fields are configured: Event ID, Title, String ID.
External Objects
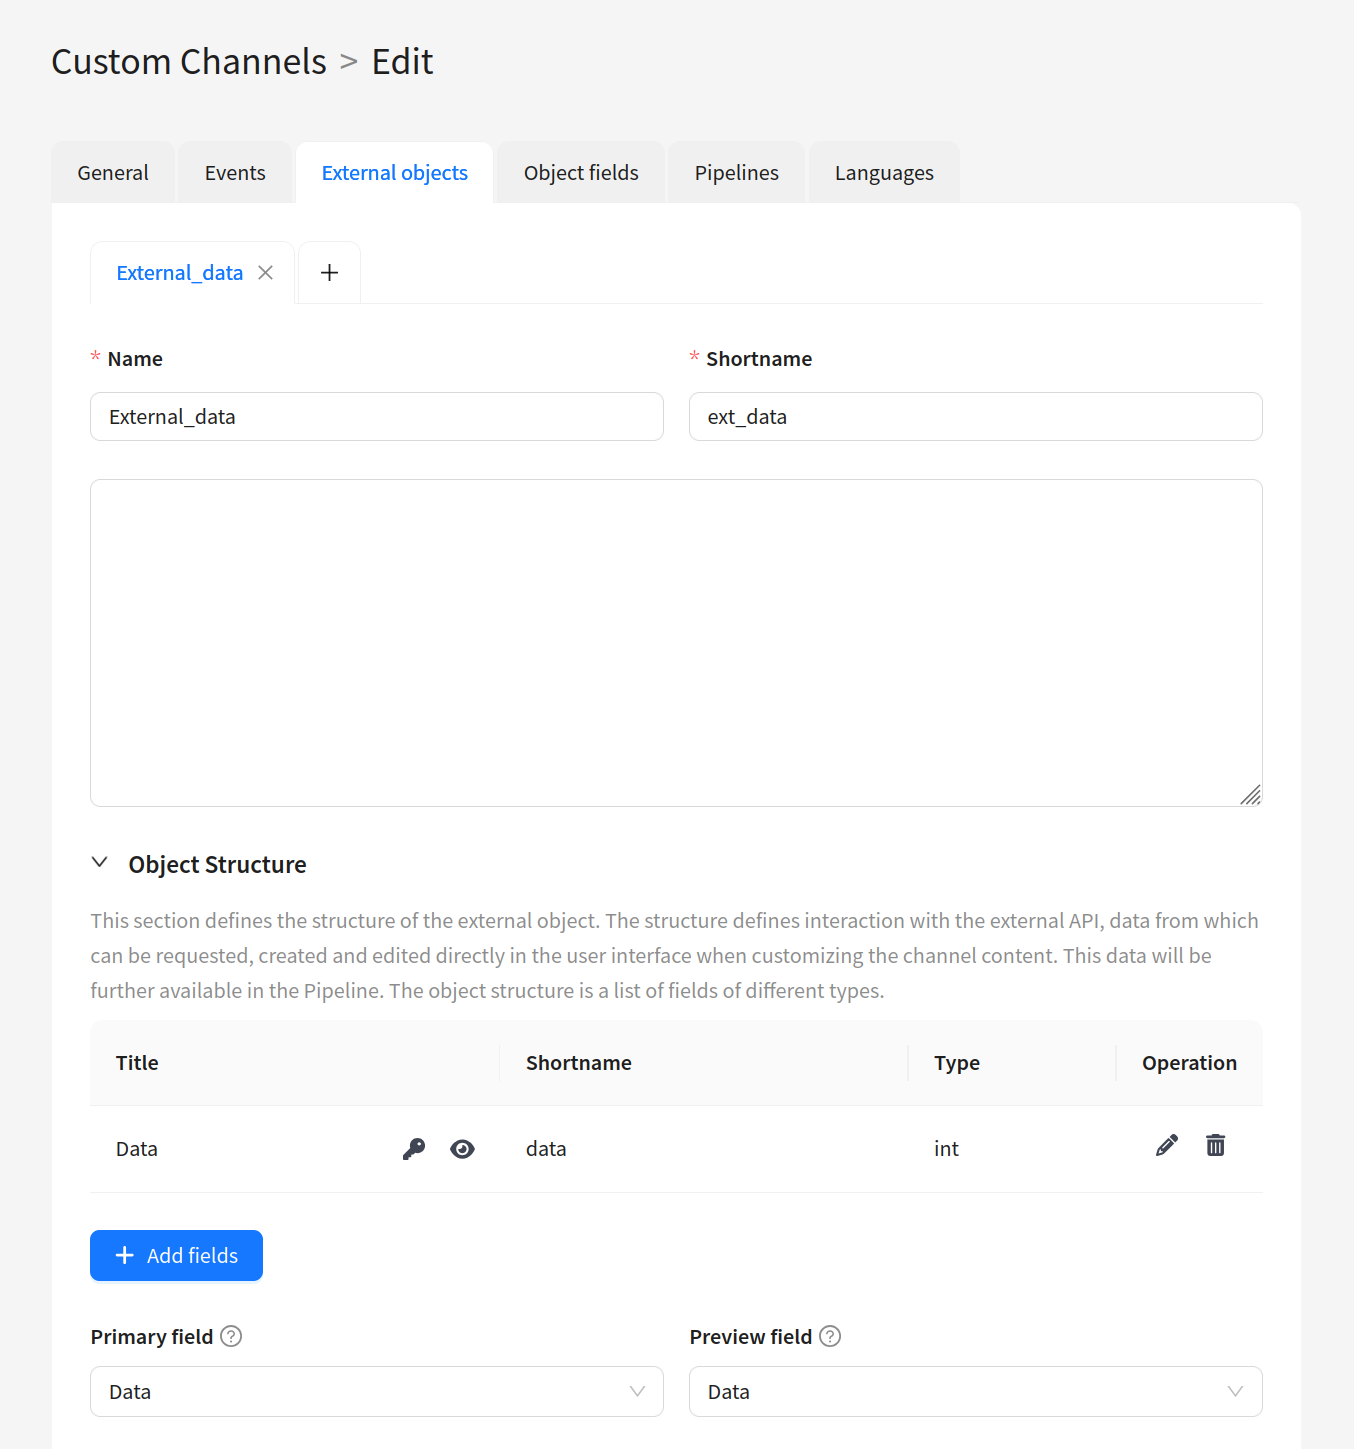
On this tab, external entities (Entities) are created — objects with which the channel interacts through an API. An Entity allows you to load, create, and edit external data directly from the interface when configuring channel content.
To create, click Add and fill in:
| Field | Description |
|---|---|
| Name | Entity name |
| Shortname | Unique string identifier |
| Description | Brief description |
Then configure Object Structure (fields returned by the API), Operations (List, Read, Create, Update, Delete with Input Fields and Pipeline for each), and Output Operations Form (result display forms).
For a detailed description, see External Objects (Entities).
Object Fields
On this tab, system forms for channel entities are configured. Each subsection corresponds to its own entity.
| Subsection | Entity | Required |
|---|---|---|
| Template | Message content | Yes |
| Resource | Resource | Yes for indirect |
| Campaign | Mailing | No |
| Sender | Sender (API keys, URL) | No |
| Subscription | Subscription (profile identifiers) | Yes for direct |
| Account | Account (global settings) | No |
The following buttons are available in the subsections:
- Add field row — adds a row with fields to the form. Fields are added inside rows
- Add object — adds a field with a bound External Entity (available on Template and Campaign)
Field configuration
One-, two-, three-, and four-column layouts are available for field rows. Each row can have its own set of columns. When adding a field, the following are configured:
| Field | Description |
|---|---|
| Title | Display name of the field |
| Shortname | Name for access in the pipeline through templating |
| Type | Data type |
Available field types: int, string, bool, json, text, html, file, enum, color, image_upload.
The set of available field types may vary depending on the entity.
On the Layout element tab, decorative elements are added: header (heading), message (text), divider (separator).
Binding an External Entity
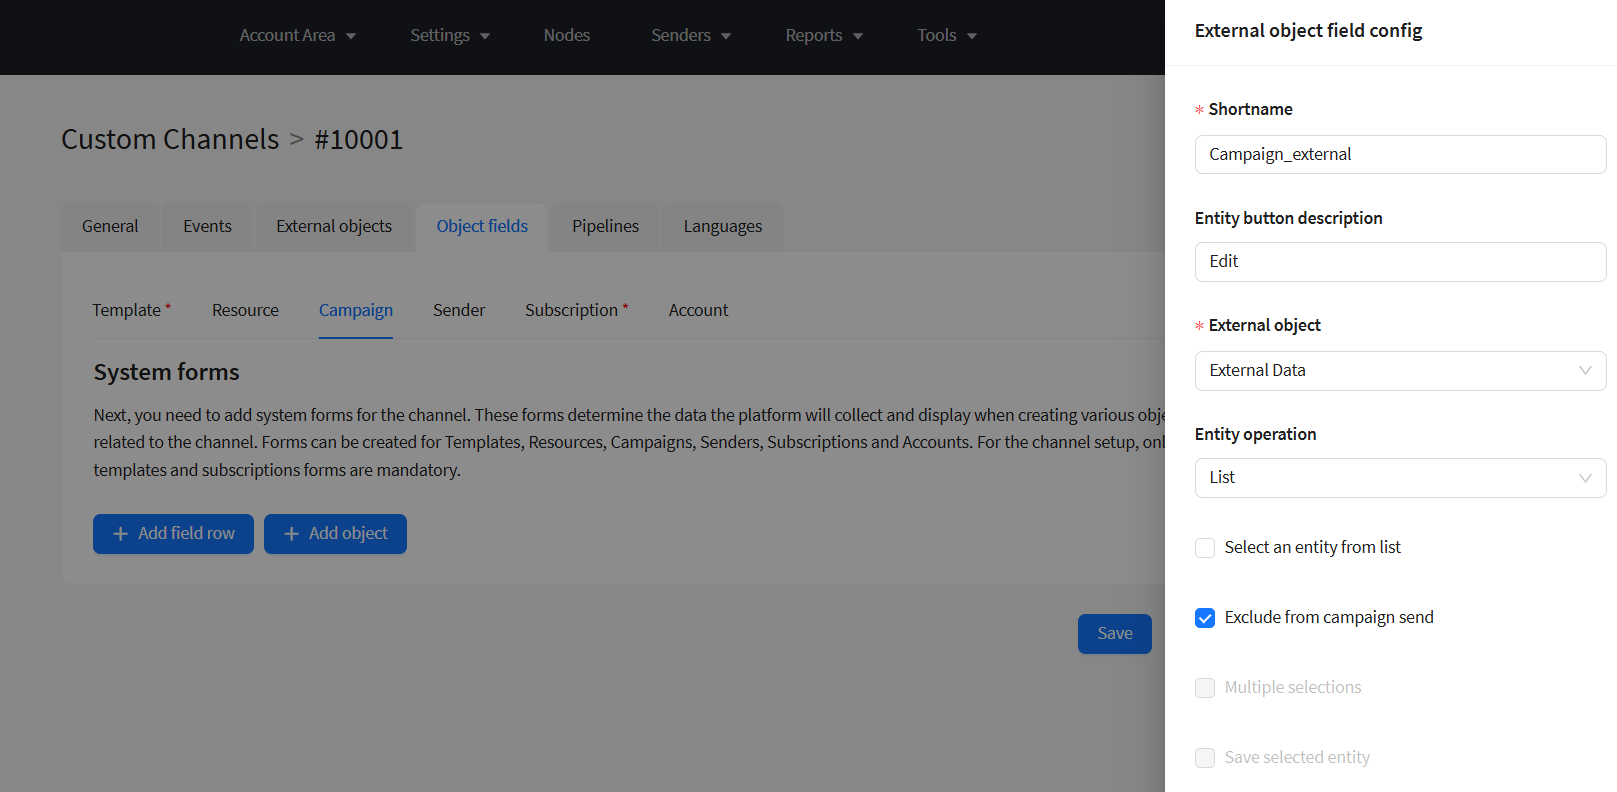
The Add object button allows you to bind a previously created External Entity to a form field. The field occupies the entire row in the Layout.
When binding, the following are configured:
| Field | Description |
|---|---|
| Shortname | Name for access in the pipeline (for example, $template.profile) |
| Entity button description | Button text in the interface (for example, "Select profile") |
| Entity | Entity selection from the list |
| Entity operation | Specifies which operation result (List or Read) will be sent to the sender |
For the List operation, Select entity from list, Multiple selection, and Save selected entity are additionally available. Depending on the settings, the List operation works in one of four modes:
- Automatic loading — all data from List is automatically pulled when sending
- Single entity selection — the user selects one record, data is pulled through Read
- Multiple selection — the user selects one or more records from the list, data is pulled through Read
- Saving at template creation — if the option is activated, the mailing will send the entity data that was saved when the template was saved. If the option is not activated, the mailing will fetch fresh data using the Read pipeline before sending.
For Campaign, the Exclude from campaign send option is also available: when enabled, the Entity field data is not pulled from the external entity and does not go into the sender payload. For details, see External Objects (Entities).
Presets (Template only)
The Presets block is available in the Template subsection — field sets for different content types. Each preset determines which fields the user sees when creating a template. The Links shorter enabled toggle enables link shortening in content.
For details, see the Presets (Field Sets) article.
Pipelines
On this tab, channel pipelines are configured — JSON configurations that describe interaction with external services.
| Subsection | Pipeline | Description |
|---|---|---|
| Message | Message | Main processing of mailing messages |
| Scheduled | Schedule | Deferred processing on a schedule |
| Listener | Listener | Incoming events from external services |
| Stop | Stop | Completion of a placement mailing |
| Moderate | Moderate | Moderation (only for indirect channels with moderation enabled) |
Each subsection contains a JSON editor. By default — an empty array [].
The Listener subsection additionally has a Response body field — a string with which the tracking service will respond to incoming requests.
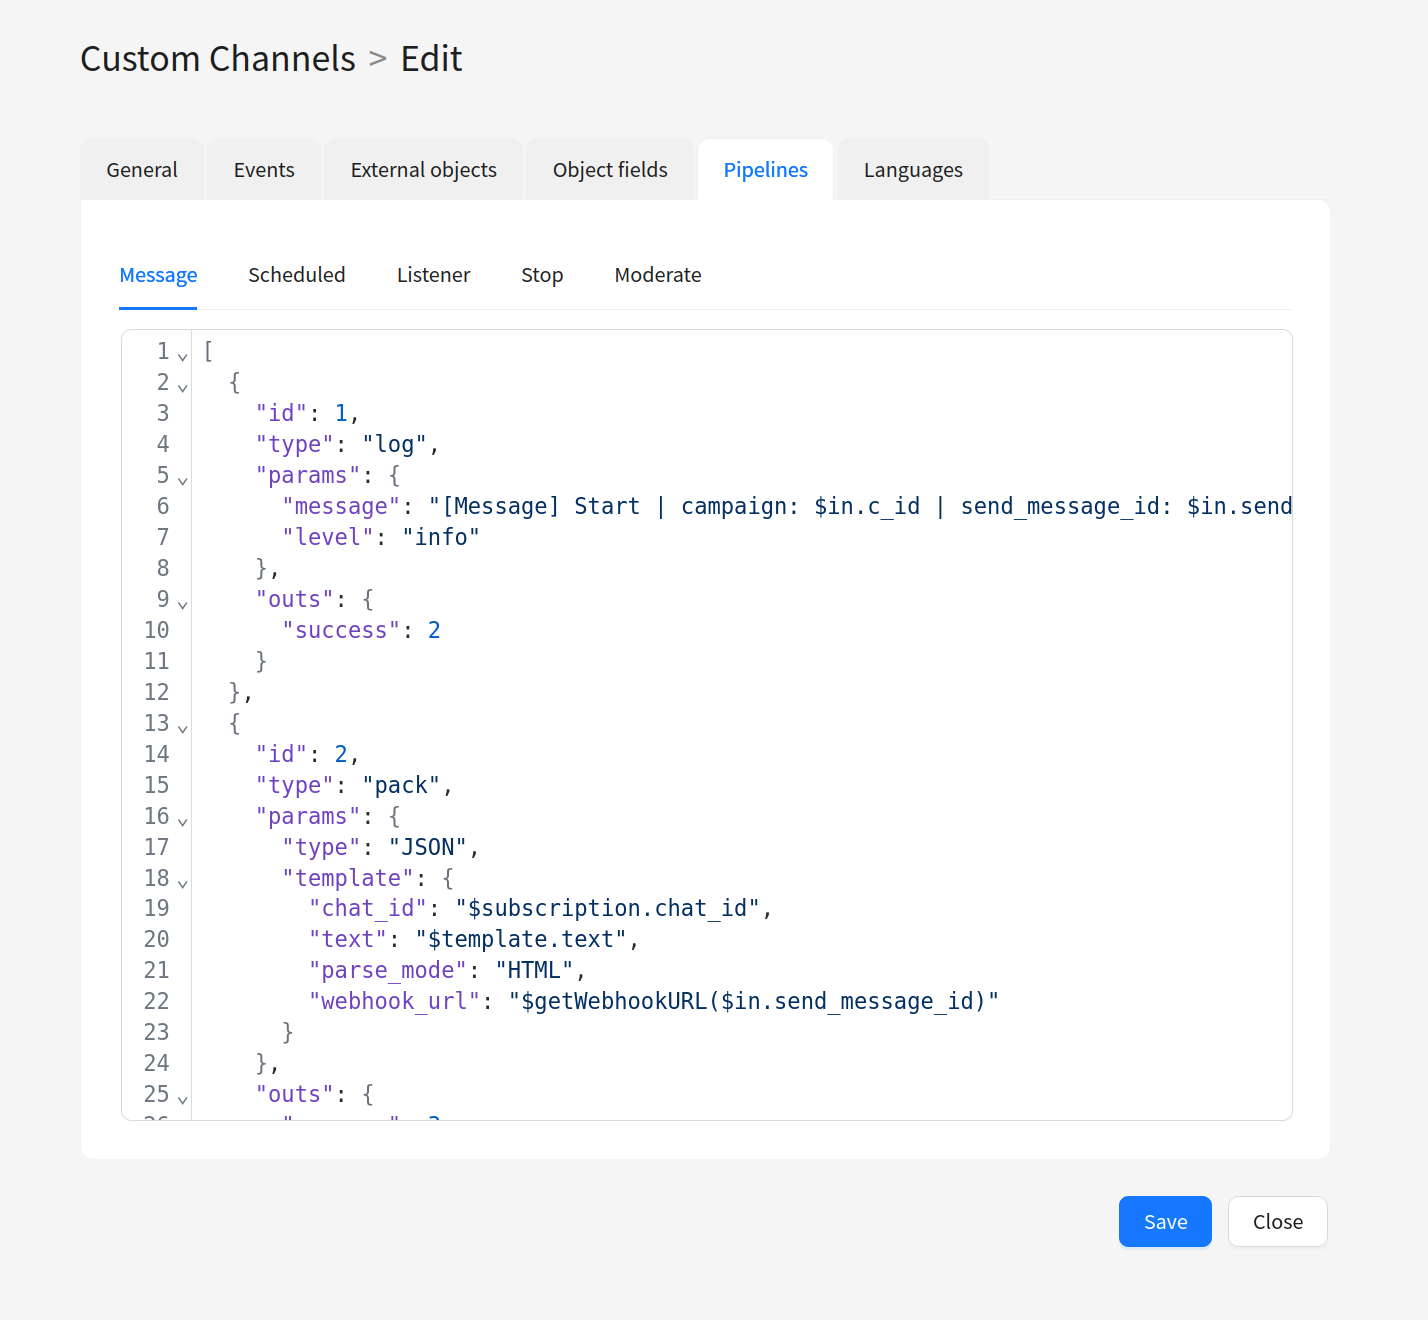
For a detailed description of pipelines and pipes, see the Pipelines section.
Languages
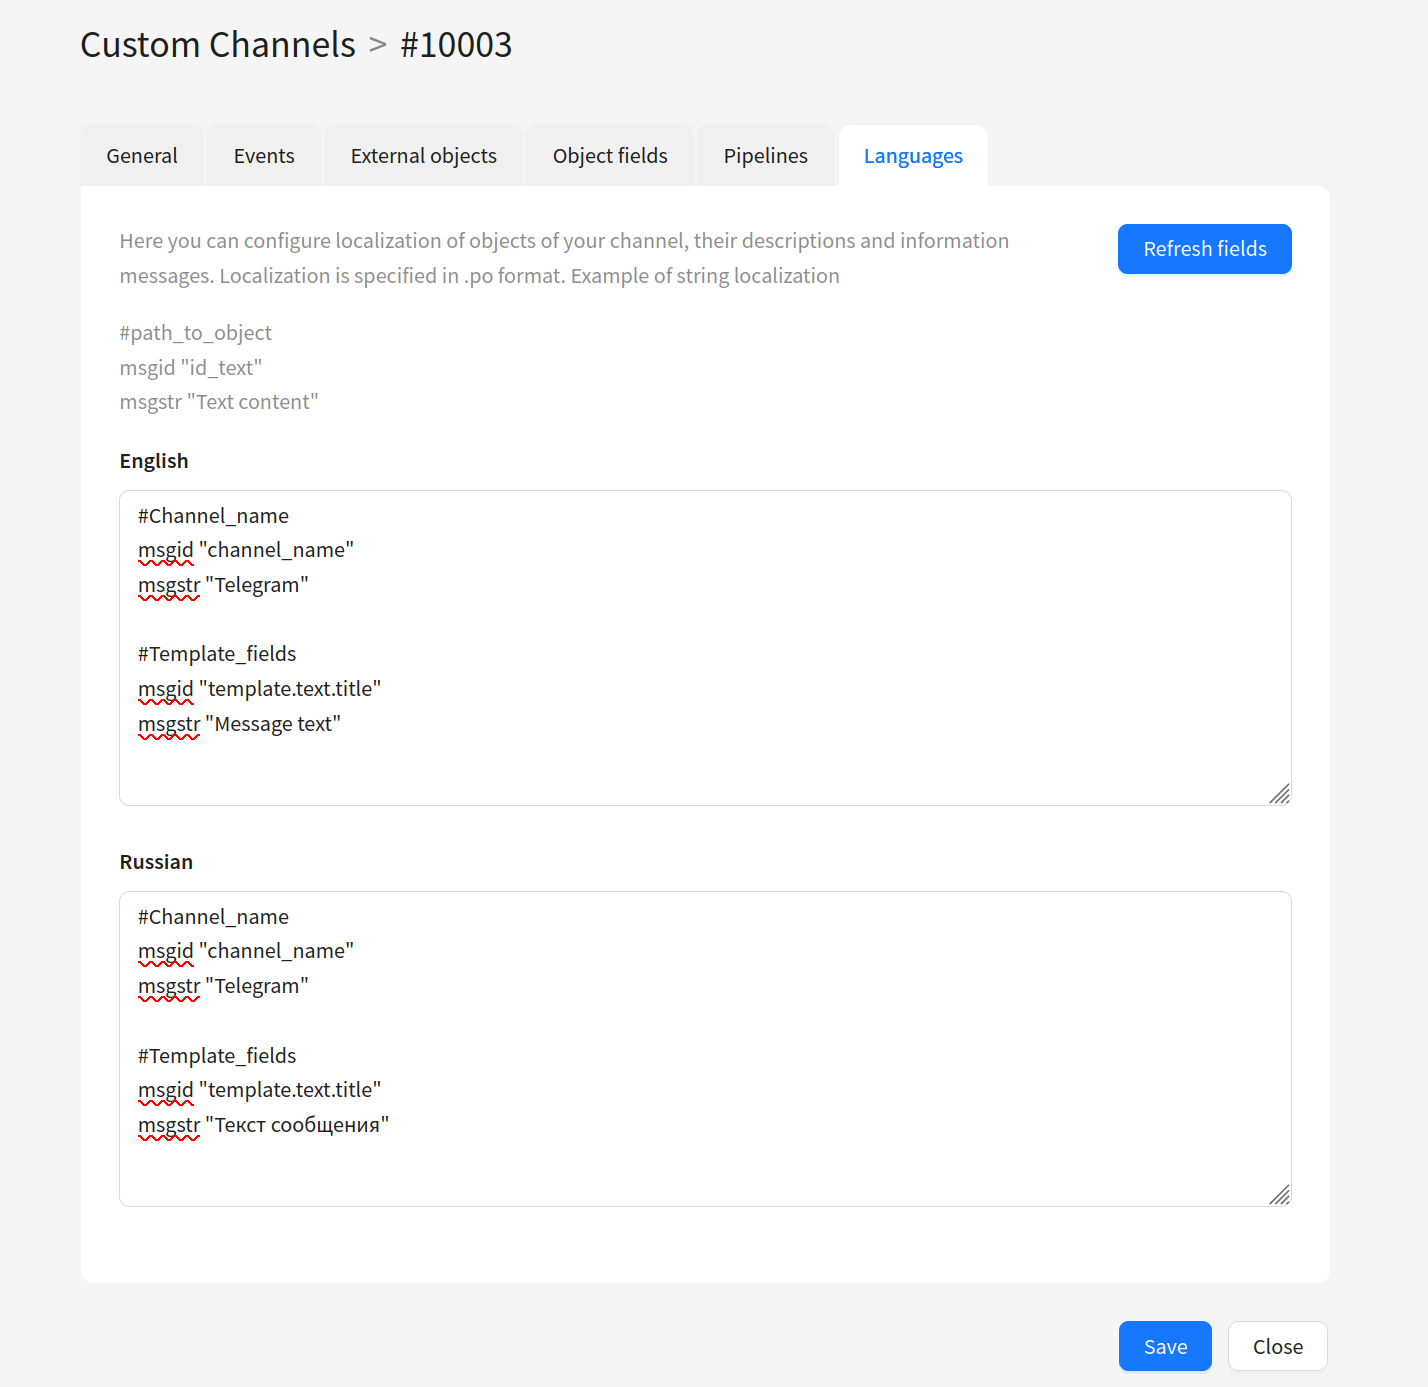
On this tab, localization of field names and channel interface elements is configured.
Text areas are available for each language (English, Russian). Field editing becomes available after saving the channel.
Saving
After configuring all tabs, click Save in the bottom right corner of the page. The channel is ready for use.
End-to-end example: Telegram channel
Let us consider creating a channel for sending messages to Telegram. This is a direct channel: each message is sent to a specific subscriber.
Step 1. General
| Field | Value |
|---|---|
| Name | Telegram |
| String ID | tg |
| Types of campaigns | broadcast, regular, trigger |
| Communication type | Direct |
Step 2. Events
Create three system events:
| Event ID | Title | String ID | Event type |
|---|---|---|---|
1 | Telegram Send | send | send |
2 | Telegram Delivered | deliv | deliv |
3 | Telegram Undelivered | undeliv | undeliv |
Step 3. Object Fields
Template — message content:
| Title | Shortname | Type |
|---|---|---|
Message text | text | text |
Subscription — subscriber identifier:
| Title | Shortname | Type |
|---|---|---|
Chat ID | chat_id | string |
Sender — API data:
| Title | Shortname | Type |
|---|---|---|
Bot Token | token | string |
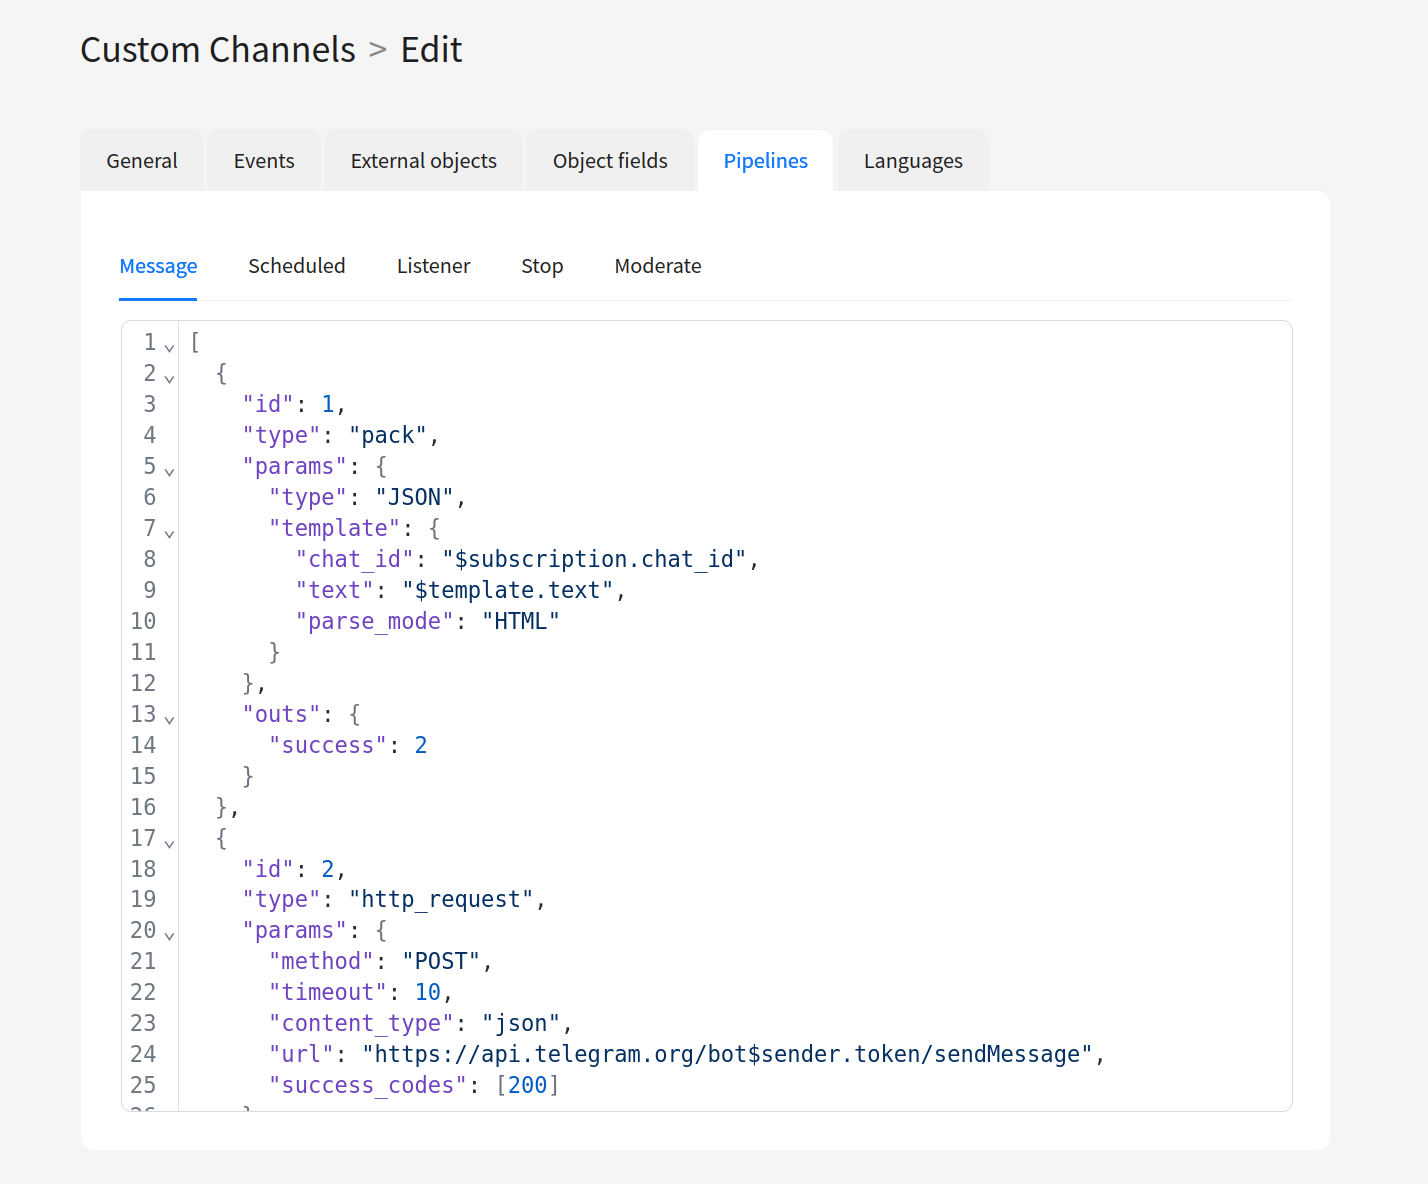
Step 4. Pipelines — Message
Minimal pipeline of 4 pipes:
- Pack (
id: 1) — forms the JSON request body - HTTP Request (
id: 2) — sends POST to the Telegram API - Eventer (
id: 3) — registers thedelivevent on success - Eventer (
id: 4) — registers theundelivevent on error
[
  {
    "id": 1,
    "type": "pack",
    "params": {
      "type": "JSON",
      "template": {
        "chat_id": "$subscription.chat_id",
        "text": "$template.text",
        "parse_mode": "HTML"
      }
    },
    "outs": {
      "success": 2
    }
  },
  {
    "id": 2,
    "type": "http_request",
    "params": {
      "method": "POST",
      "timeout": 10,
      "content_type": "json",
      "url": "https://api.telegram.org/bot$sender.token/sendMessage",
      "success_codes": [200]
    },
    "outs": {
      "success": 3,
      "error": 4
    }
  },
  {
    "id": 3,
    "type": "event",
    "params": {
      "channel_id": 10001,
      "action_type": 100001,
      "event": {
        "send_message_id": "$origin.send_message_id"
      }
    }
  },
  {
    "id": 4,
    "type": "event",
    "params": {
      "channel_id": 10001,
      "action_type": 100003,
      "event": {
        "send_message_id": "$origin.send_message_id"
      }
    }
  }
]
Here:
- Pipe
1(Pack) takes data from the subscription ($subscription.chat_id) and the template ($template.text), packs it into JSON. - Pipe
2(HTTP Request) sends a POST request to the Telegram API. The bot token is taken from the sender ($sender.token). - Pipe
3(Eventer) registers the delivery event (deliv, action_type100001) on HTTP 200. - Pipe
4(Eventer) registers the non-delivery event (undeliv, action_type100003) on error.
Step 5. Verification
After saving the channel, perform the following steps:
- Create a template with message text for the Telegram channel
- Create a sender with the bot token
- Create a subscription with chat_id
- Create a test mailing and send it
- Check the logs (
procpiper.log) — entries from Log pipes should appear (if added) - Check events in profile history — a
sendorundelivevent should appear
If the message was not delivered, check:
- Correctness of the bot token in the sender
- Correctness of chat_id in the subscription
- Error logs in
$error.codeand$error.message - Correspondence of
channel_idandaction_typein Eventer to the created events
Review the technical limitations and the Debugging section for custom channels.