Elements (steps) of the scenario
A scenario consists of elements, or nodes. Each element performs one action and then passes control to the next.
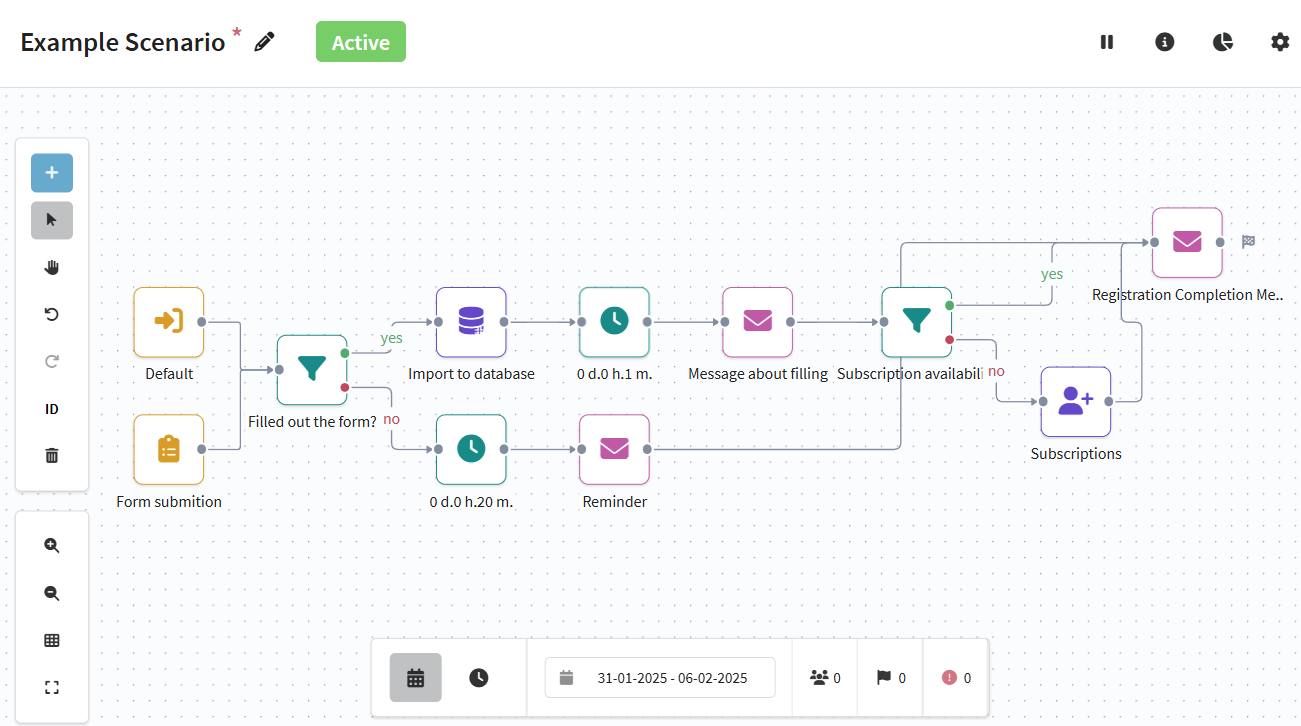
Any scenario must contain at least 2 elements: a starting element and a related element.
Element management
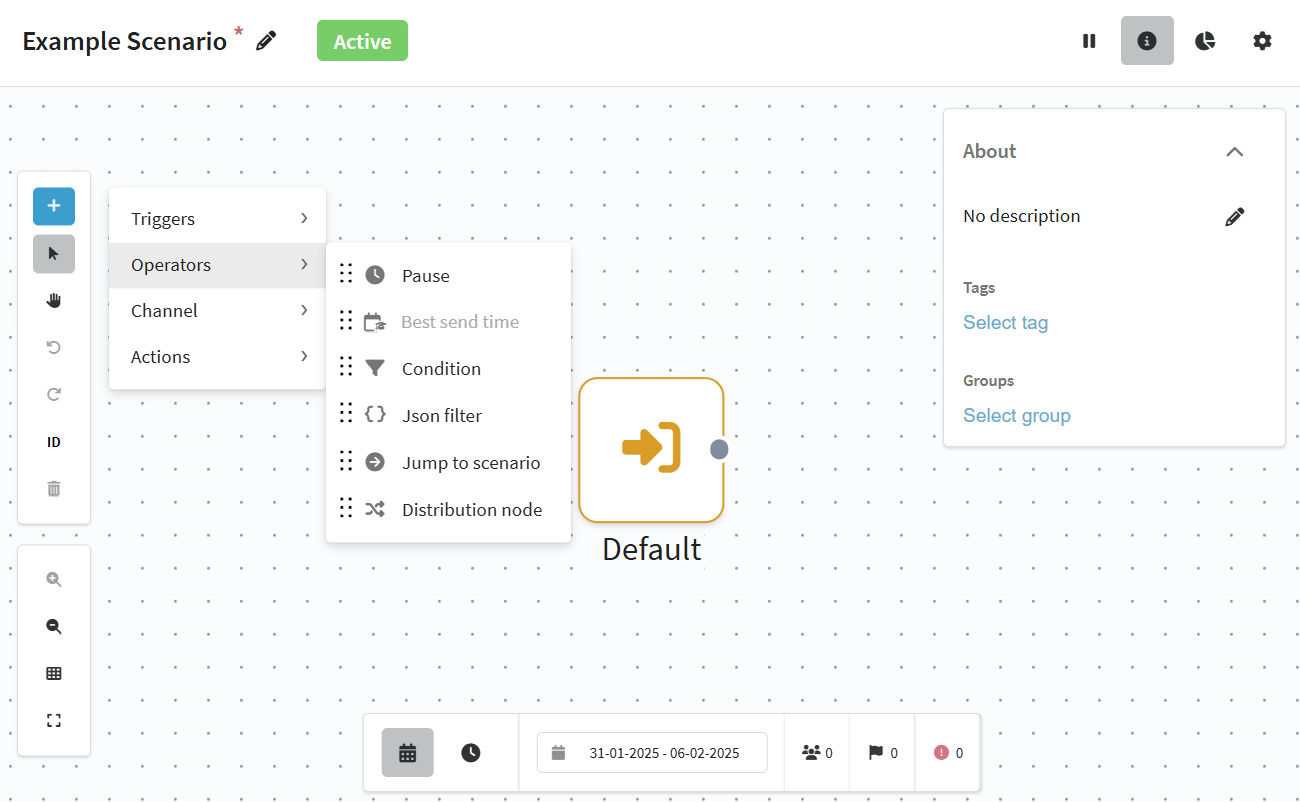
Adding an element
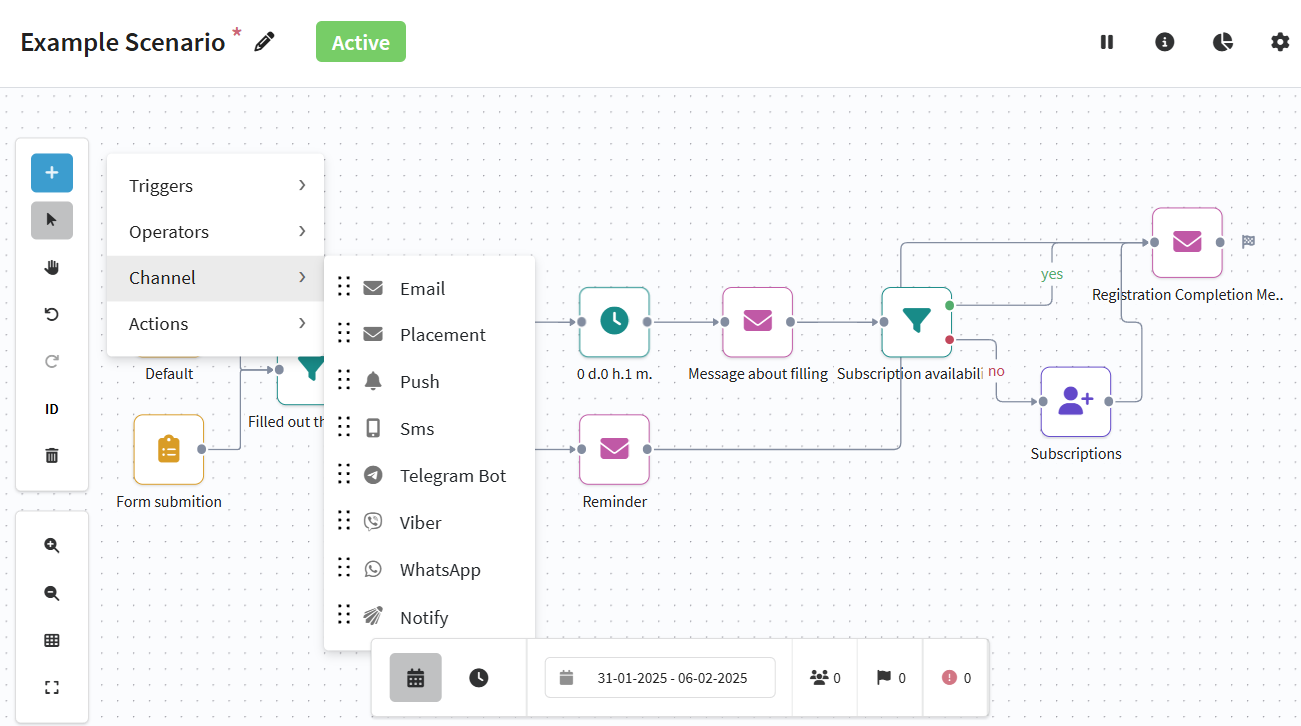
To add an element to the scenario, click the "+ Element" button on the toolbar. In the opened list, click on the required element or drag it to the workspace holding the left mouse button.
Setting up an element
Settings are set for each element of the scenario. To open the settings window, double-click on the desired element. To save the settings, click "Apply".
Adding a link between elements
Transition of a profile from one scenario element to another is defined using links. To link one element to another, draw a link between the elements:
Elements can be linked not only sequentially. With the help of links it is possible to organize multiple passing of one and the same scenario section by a profile or switching to an alternative sequence of actions:

Deleting an element
To delete an element or a link between elements, select an object by clicking on it, and then click the trash can icon or Delete/Backspace. It is possible to delete multiple elements, including links between them.
If you have deleted an element from the scenario, you can restore it. To do this, click the "Bin" button in the lower left corner. A list with all deleted elements will appear. Select the element you want to return to the scenario. After restoring the element, it will retain its previous settings.

You can also irrevocably remove all elements from the bin by clicking the "Empty bin" button.
If you remove an element that has profiles, those profiles will be taken out of the scenario. If there are no profiles in the element, they will keep following the updated scenario.
Cloning of an element
To clone an element, select it and left-click ![]() or use the Ctrl + C key combination. You can also clone multiple elements, including the links between them.
or use the Ctrl + C key combination. You can also clone multiple elements, including the links between them.
To select several elements of the scenario, activate the Select tool. Then hold down the left mouse button and select the area with the desired objects or hold down the Crtl key and successively select the desired objects with the left mouse button.
Toolbar

Tools for managing elements
![]() — activate the "Select" tool. It is used to control elements of the scenario: move, connect, select, etc.
— activate the "Select" tool. It is used to control elements of the scenario: move, connect, select, etc.
![]() — activate the "Hand" tool (Space + drag). It is used to move around the scenario workspace.
— activate the "Hand" tool (Space + drag). It is used to move around the scenario workspace.
![]() — undo the last action (Ctrl + Z).
— undo the last action (Ctrl + Z).
![]() — revert the last canceled action (Ctrl + Shift + Z).
— revert the last canceled action (Ctrl + Shift + Z).
![]() — open the “Bin”. The “Bin” contains all items deleted from the scenario.
— open the “Bin”. The “Bin” contains all items deleted from the scenario.
![]() — display the ID of each element instead of the name.
— display the ID of each element instead of the name.
Tools for setting up the scenario
![]() — show scenario information (description, tags and groups for the scenario).
— show scenario information (description, tags and groups for the scenario).
![]() — show scenario settings (mode of profile re-entry into the scenario, etc.).
— show scenario settings (mode of profile re-entry into the scenario, etc.).
![]() — to activate the scenario.
— to activate the scenario.
![]() — to deactivate the scenario.
— to deactivate the scenario.
![]() — view scenario analytics in a channel report.
— view scenario analytics in a channel report.
Tools for workspace management
![]() — zoom into the workspace (Ctrl +).
— zoom into the workspace (Ctrl +).
![]() — downscale the workspace (Ctrl -).
— downscale the workspace (Ctrl -).
![]() — apply alignment. The elements are aligned relative to each other within the workspace.
— apply alignment. The elements are aligned relative to each other within the workspace.
![]() — adjust the view. The scale changes to the optimal scale, allowing you to see all elements within the workspace.
— adjust the view. The scale changes to the optimal scale, allowing you to see all elements within the workspace.
List of elements
All elements of the scenario are divided into four categories:
- Triggers - elements that define the way of capturing a profile into a scenario.
- Operators - elements affecting the profile movement through the scenario.
- Channels - elements, by means of which a message is sent to the profile.
- Actions - elements that trigger a certain action in the platform at the moment of profile entry.
Triggers
A trigger is an element that starts a scenario. You can configure one or several triggers. The maximum number of triggers in one scenario is 10. One type of trigger cannot be used more than once in one scenario.
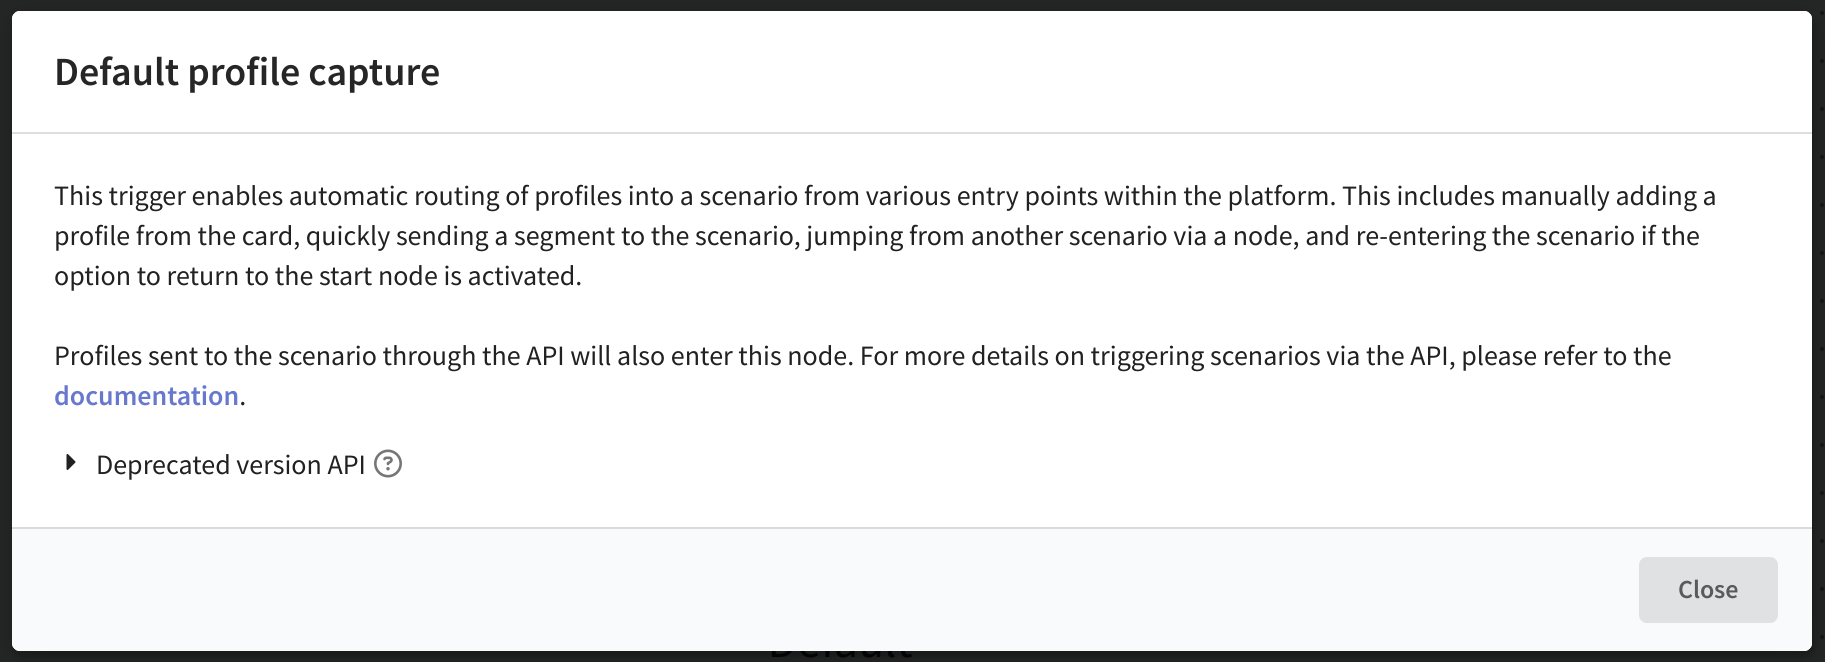
Default profile capture
 | This element is a built-in feature of the scenario and can't be removed. With the "Default" element, profiles can enter the scenario from different points in the platform. |
Read More
This element captures profiles after following actions:
- Sending a profile to the scenario via API. When the scenario is saved, the item window will display a URL that can be used to run it. However, it is recommended to use a newer version of the API. Go to the documentation for more information.
- Adding a profile to a scenario manually.
- Sending a segment to a scenario through quick actions panel.
- Jumping through the element from another scenario.
Action execution
 | Activated when the subscriber performs the desired action in the message. Description of available actions can be found in this article. |
Read More
From the drop-down list, select action in one of the submission channels, and specify the template in which you want to track this action:

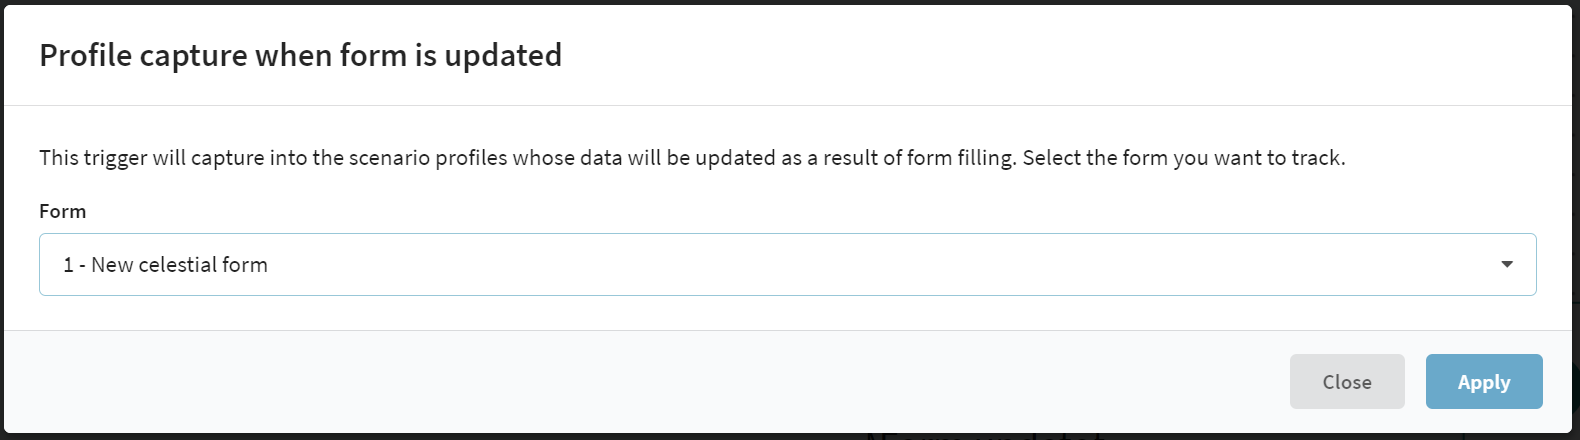
Form update
 | The trigger captures the profiles whose data will be updated as a result of filling out the form into the scenario. It is triggered only when updating existing profiles. |
Read more
In the drop-down box, specify the form to which the trigger will be bound:
Subscription add/update
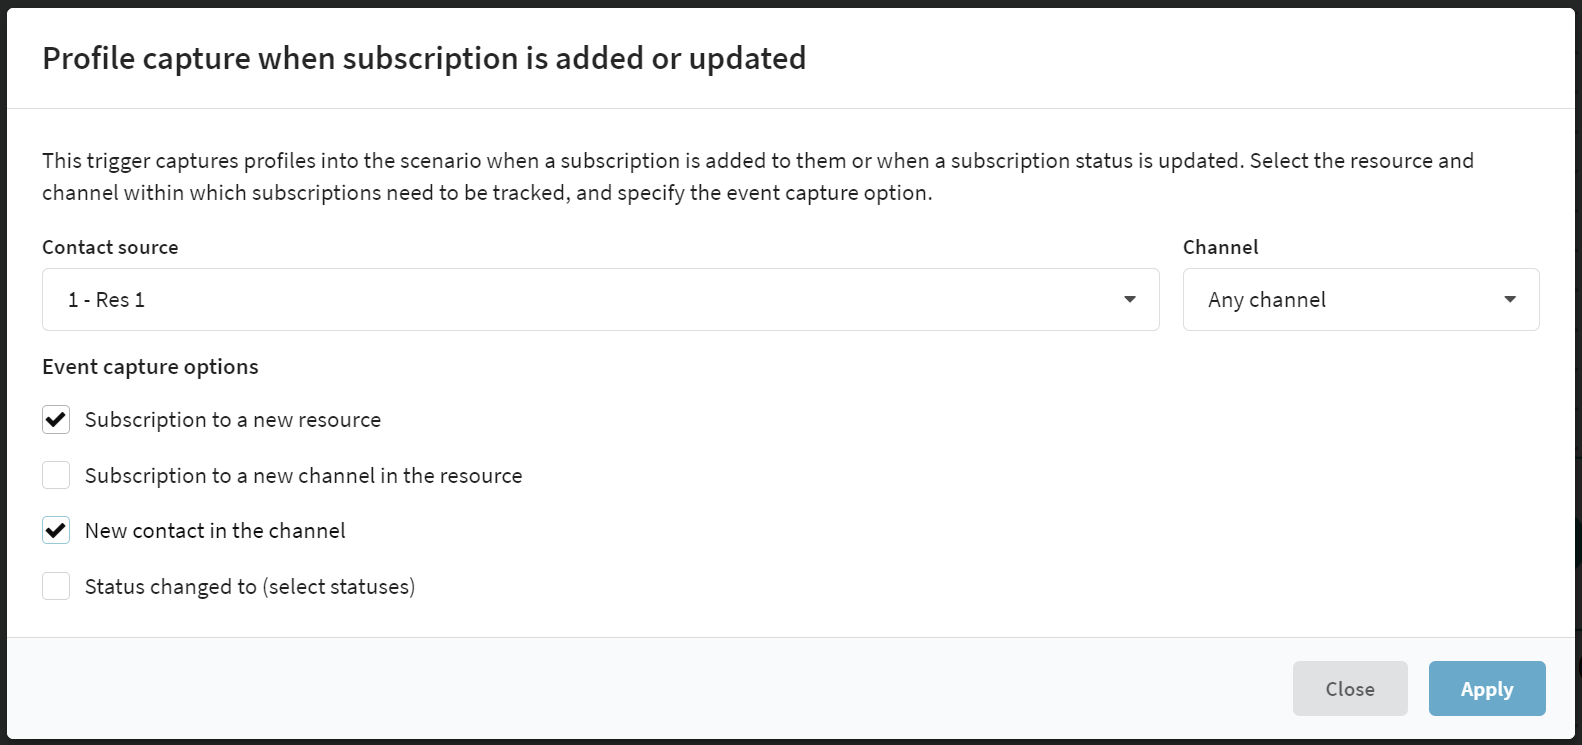
 | Trigger is activated when a new subscription is added to a profile or the status of an existing subscription is changed. For the trigger, you can separately specify Resource and Channel for which changes will be tracked. Otherwise, the campaign will expect changes for all channels of the selected resource, for all resources for the selected channel, or for any subscriptions of the profile. |
Read more
-
Subscription to a new resource — condition will work only for the first subscription to the resource specified in the campaign. Adding other subscriptions to the same resource will not activate the scenario.
-
Subscription to a new channel in the resource — subscription to a new (for the profile) channel in the resource was added. In other words, there was a subscription to email newsletters, now there is also a subscription to SMS or Push.
-
New contact in the channel — activates the trigger each time a new subscription appears. The first subscription to a channel is also considered a "new contact in the channel".
-
Status changed to (select status) — will run when the subscription status changes to those selected from the drop-down menu.
-
The first three items are selected — the trigger will fire with each new subscription.
-
All the boxes are unchecked — nothing will happen.
Subscriptions that are added with a status other than “Subscribed” will not be activated by the trigger.
Scheduled segment
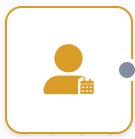 | A group of profiles that meet certain conditions is put into the scenario on a set schedule. |
Read more
First, you need to configure a capture schedule. Select a schedule type and configure the time when the scenario will run for the segment.
Additionally, you can Deactivate the schedule after a certain date or change the time zone for the start time.
Once changes have been made, a table with the next runs of the scenario will be displayed below the schedule.
Setting up a schedule is described in detail in separate article.
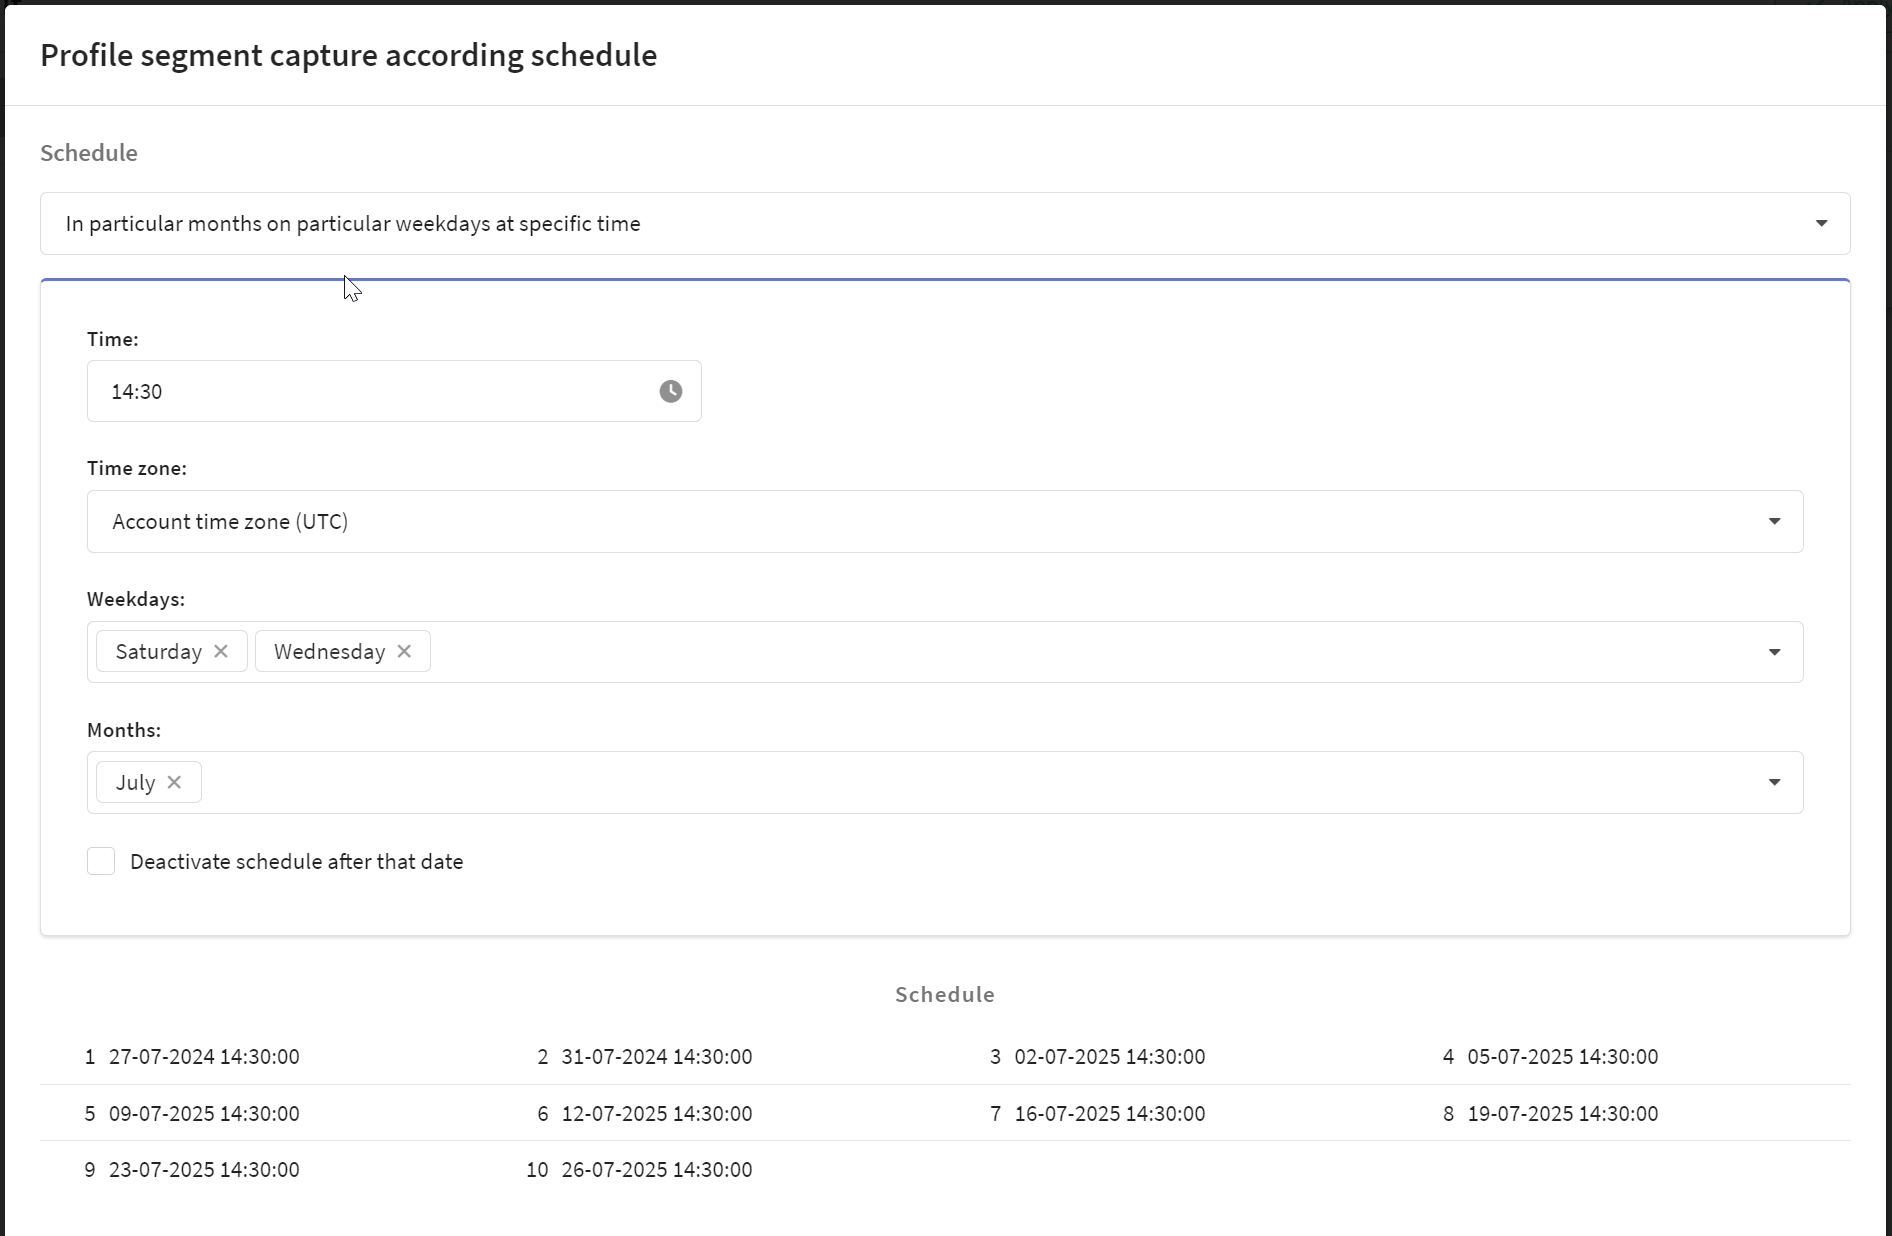
Next, configure segmentation profiles. Build a segmentation query against the database by adding rules or groups of rules. Available segmentation by:
- basic profile data
- activity history
- subscriptions
- and other parameters.
Segmentation is described in more detail in relevant documentation section. You can optionally set the limit of the resulting sample as a percentage.
Scheduled scenario is launched in the same way as a regular campaign. The customer segment is calculated dynamically at each launch.
With the help of such scenarios, you can organize a sequence of communications for customers who are about to expire: the scenario by segment (in the example below) will select every day only those customers who have 1 month left before the expiration date.
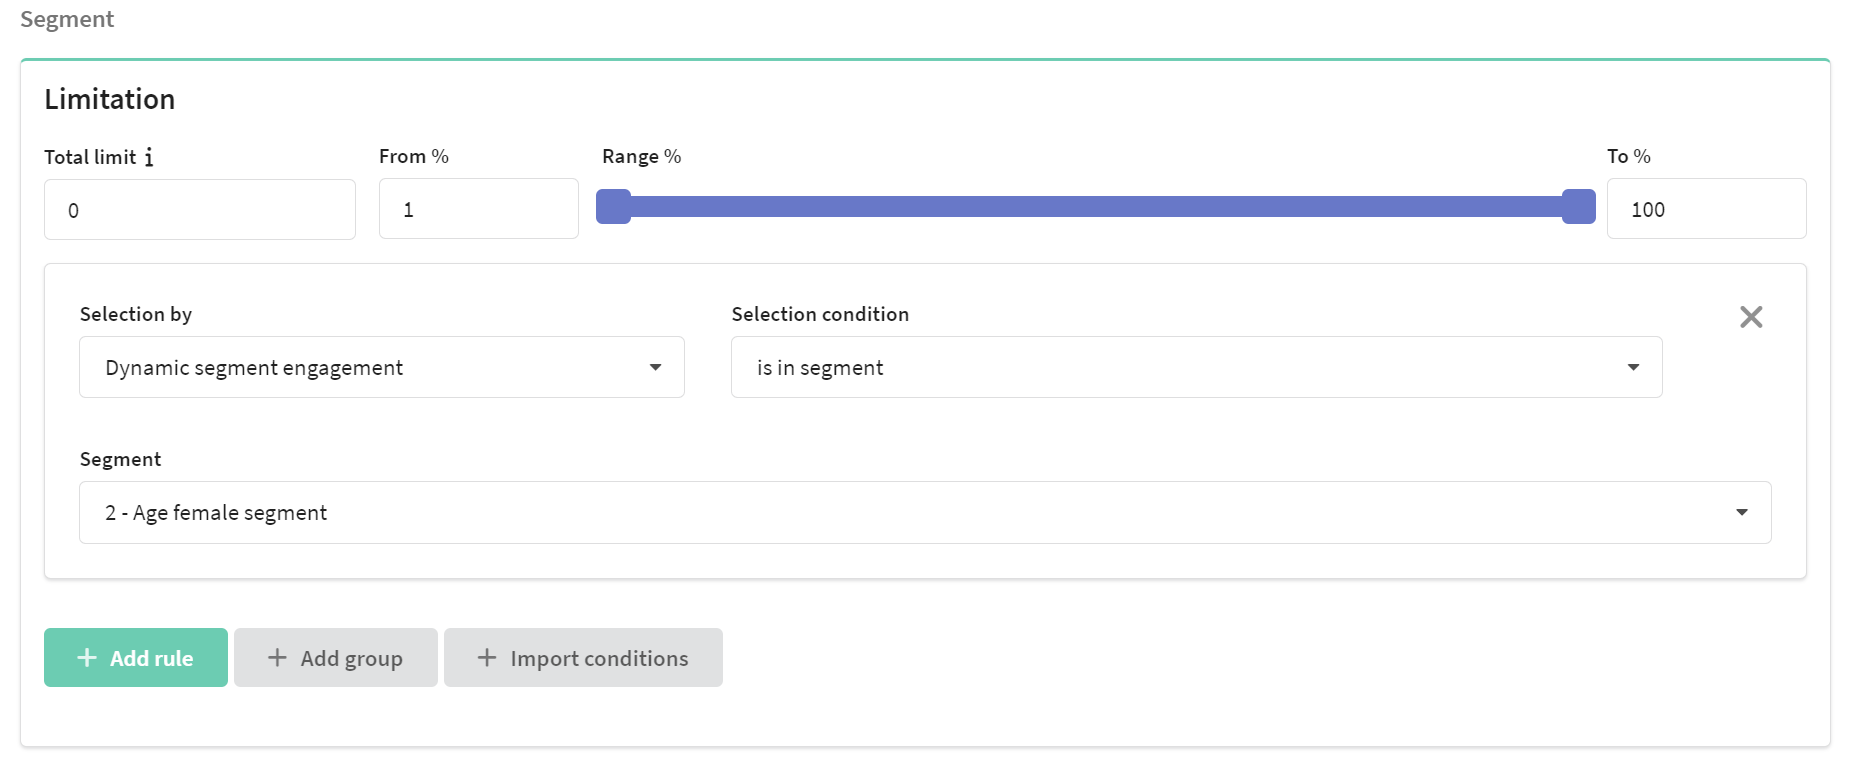
Static segment modify
 | Trigger is fired when there is a change in static segment: a profile can both enter and exit the specified static segment. |
Read more
In the drop-down box, select the action (entering or leaving a static segment) and the segment you want to monitor:
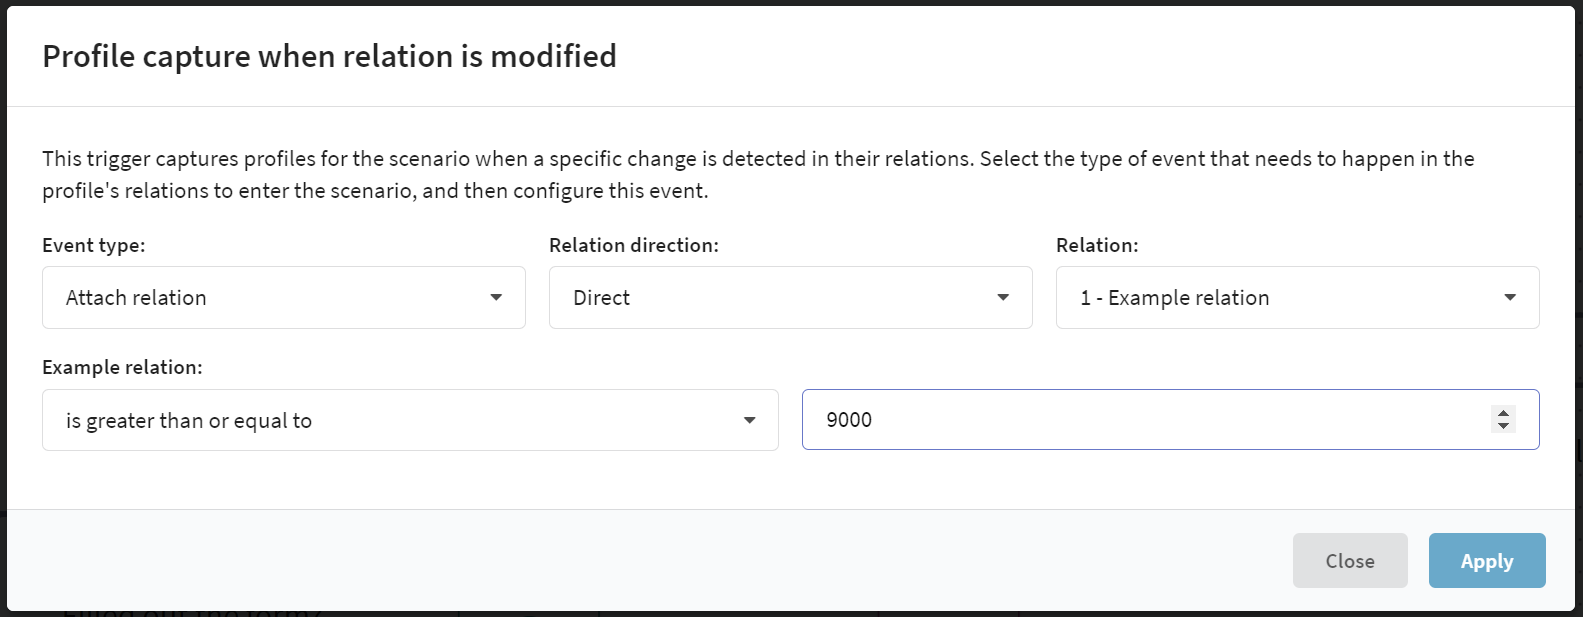
Relation modify
 | Trigger is started when link between profiles changes: both forward and backward. The occurrence, change or deletion of a link can be taken into account, as well as the link property reaching the value set in the trigger.Delete/Backspace |
Read more
To configure a trigger, specify:
- relation,
- the type of event attached to it,
- relation direction,
- link property,
- property value.
API import
 | The trigger is activated when a new profile is added to the database via API query. The profile must add to the database selected for the scenario. |
Read more

If you select the "Any Import" method, this trigger becomes unavailable.
Any import
 | The trigger is activated when a new profile is added to the database in any way: via API request or manually, from the profile card. |
Read more

If you select the "Any Import ” method, the other import triggers become unavailable.
Manual import
 | The trigger is activated when a new customer profile is manually added to the database. |
Read more

If you select the "Any Import" method, this trigger becomes unavailable.
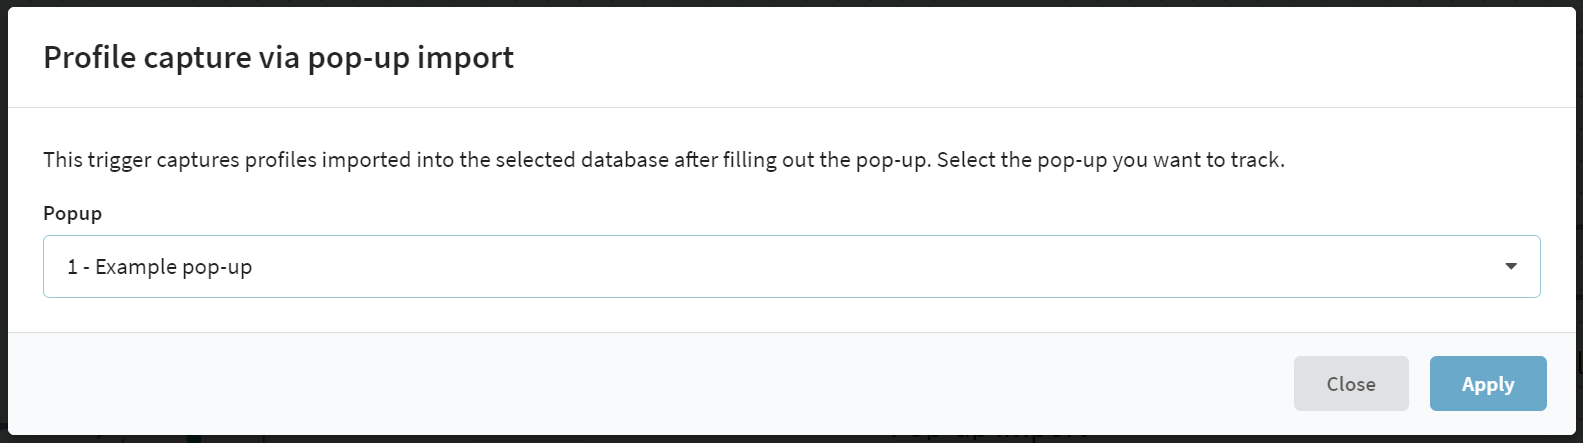
Pop-up import
| The trigger will work if a new profile is created in the database as a result of a user filling out and submitting a form in a pop-up window. |
Read more
Pixel activation
 | The profile enters the scenario when the pixel is activated. |
Read more
Select the required pixel in the drop-down box:
![]()
This trigger can keep track of the default pixel triggering:
![]()
If you are required to track only certain events, you can set up a trigger to register a specific target. To do this, check the "Filteing by additional target fields" box and configure the required selection parameters.
With the help of such a trigger, the pixel will record only those events that are related to a specific target. For example you can set up filtering so that only profile registrations, purchases or other key actions are tracked.
![]()
For more precise customization, you can use a combination of several selection rules. This is required by checking the "Filtering by additional target fields" box, clicking "Add rule" and configuring two or more selection rules.
Use "AND" when you want an event to strictly fit both conditions. Use "OR" when you want the event to fit at least one of the conditions.
![]()
You can also filter profiles by additional fields. Values of additional fields transferred via API request.
If the trigger does not activate in campaigns or scenarios, although the trigger conditions are met, it is recommended to check pixel trigger interval.
![]()
Form import
 | The trigger will work if a new profile is created in the database as a result of a user filling out and submitting a form. |
Read more
To use this trigger, you need to activate the "Profiles import" option on the "Actions" tab when configuring the form. The import must take place in the same database that is used in the scenario.
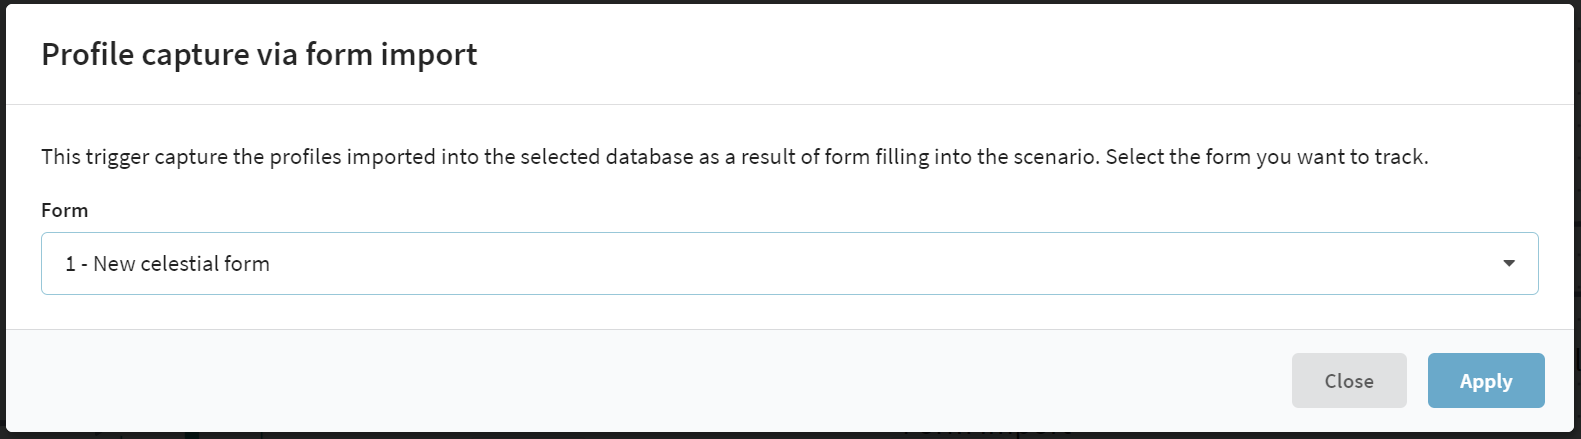
If you select the "Any Import" method, this trigger becomes unavailable.
Form submition
 | Trigger will be activated only if the form was filled out on the transition from the email. |
Read more
In the drop-down list, specify the form whose completion you want to track:
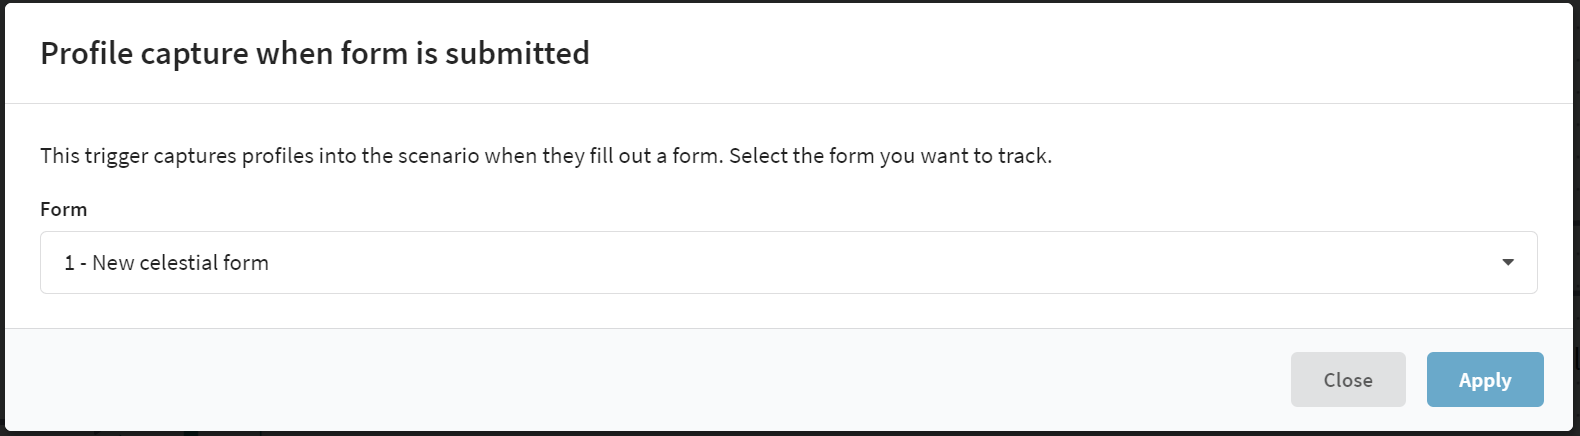
Read more about how to send a profile a link to the form in this article.
Order modify
 | This trigger captures profiles into the scenario when a specific change in the order is detected. The trigger is activated whena sales channel linked to the database selected for this scenario is configured. |
Read more
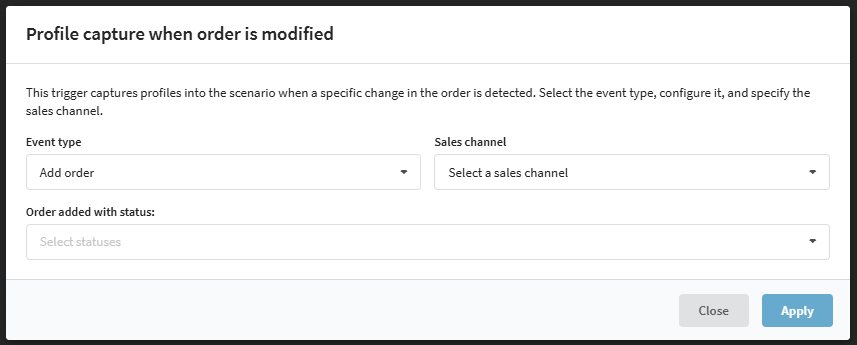
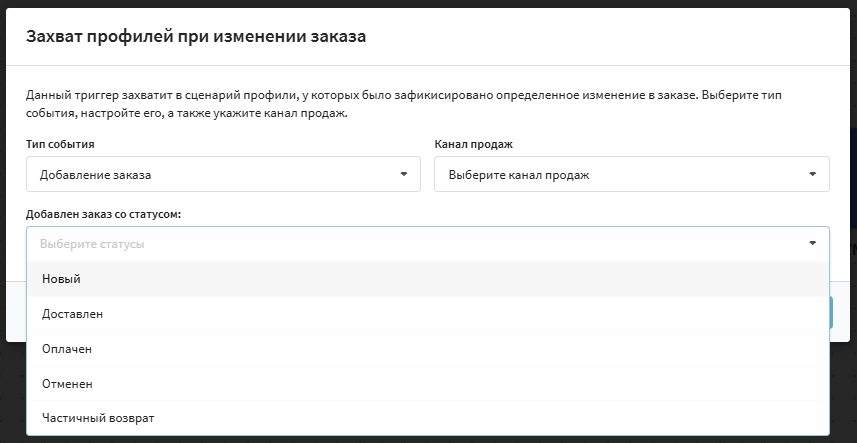
In the drop-down list slect the event type, sales channel and order status.
The following variants of event types are available:
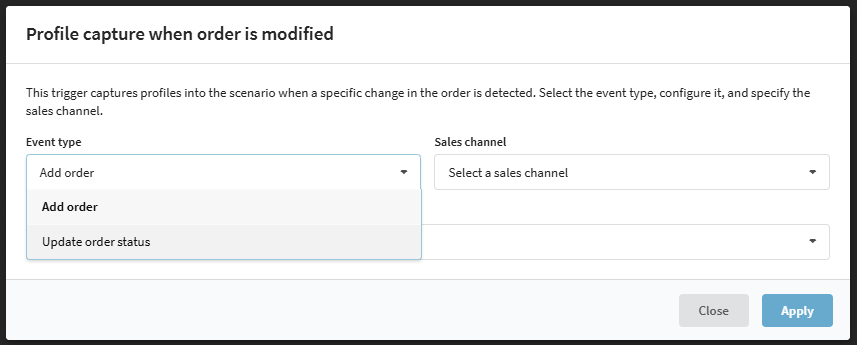
Add order — the trigger will activate when an order with one of the specified statuses is added to the market.
Update order status — the trigger will activate if the status of an existing order changes to one of the selected values.
You can select one or more order statuses that result in a trigger:
Read more about how to customize orders in this article.
Field value update
 | The trigger is activated when the specified profile field takes the desired value. |
Read more
Select the profile field, condition, and expected value:
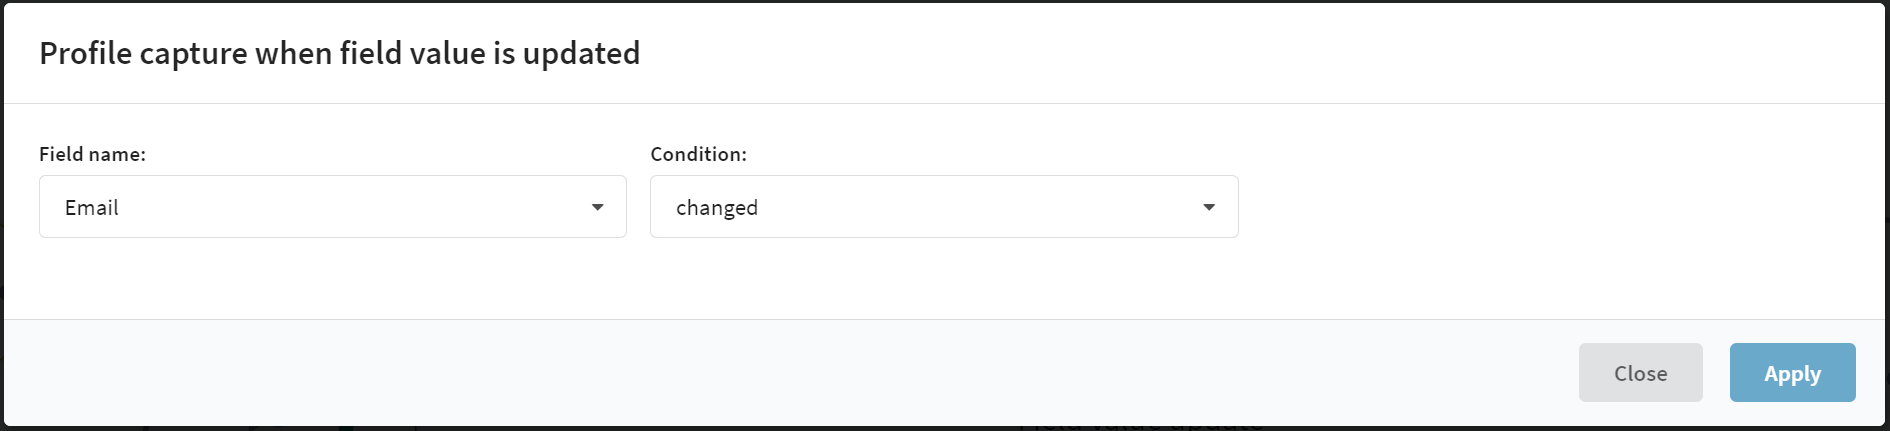
Conditions vary depending on the type of field:
| Condition | Field type | Description |
|---|---|---|
| changed | all | Any change in the profile field |
| equal | all, except tags, object, array of objects | The new value is equal to the expected value |
| not equal | all, except tags, object, array of oblects | The new value is not equal to the expected value |
| not empty | all, except tags | The field received any non-empty value |
| empty | all, except tags | All values are removed for the profile field |
| added any tag from the list | tags | The list is defined in the trigger |
| removed any tag from the list | tags | The list is defined in the trigger |
| property changed | object | The path to the object key is specified. If the value of the key changes, the trigger will be activated. |
| property is equal | object | The object key path and expected value are specified. If the value of this key takes the expected value, the trigger will be activated. |
| property is not equal | object | The object key path and expected value are specified. If the value of this key does not take the expected value, a trigger will occur. |
| element property has changed | array of oblects | Specifies the path to an array element. If the property of this element changes, the trigger will fire. When selecting the path to the element property, you also select the data type to which the compared value should be converted. The following data types are available for comparison: string, int, float, and bool. Comparison of complex data types (object, array) is not possible. In the example below, you will not be able to track changes to the properties of the key_1 and key_4 elements.[Note that the drop-down list contains available paths to the field property, but the index of any element is 0 by default - $[0].key_3. To set the path to the desired element, enter the index manually in jsonpath format - $[1].key_3. |
| element property is equal | array of oblects | The path to the array element and the expected value are specified. If the property of this element takes the expected value, the trigger will be activated. |
| element property is not equal | array of oblects | The path to the array element and the expected value are specified. If the property of this element does not take the expected value, a trigger is activated. |
| element added | array of oblects | A new element is added to the array. |
| element removed | array of oblects | An element is removed from the array. |
This type of trigger can be used with links in templates that are set to Update profile fields. Note that if there are other triggers attached to link jumps in addition to the field update, they will also be triggered.
Operators
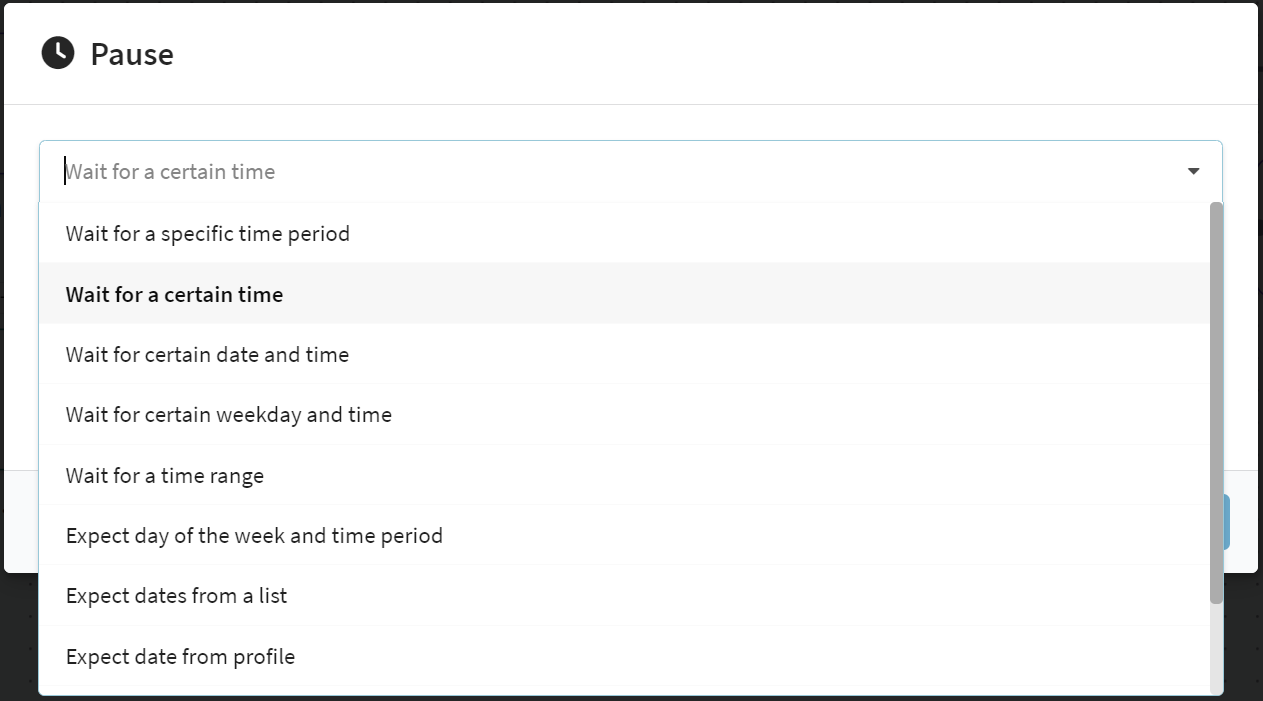
Pause
 | Sets the intervals between scenario actions. With this element you can configure the start time of the element that follows. This allows, first of all, a more delicate approach to the issue of communication time with the client. The element can also wait for certain events: the start of a promotion, a holiday, etc. |
Read more
The following options are available:
Pause relative to the previous action
To wait a specific amount of time after a scenario has captured a customer profile or after a previous action has been performed, select the "Wait for a specific time period" option:
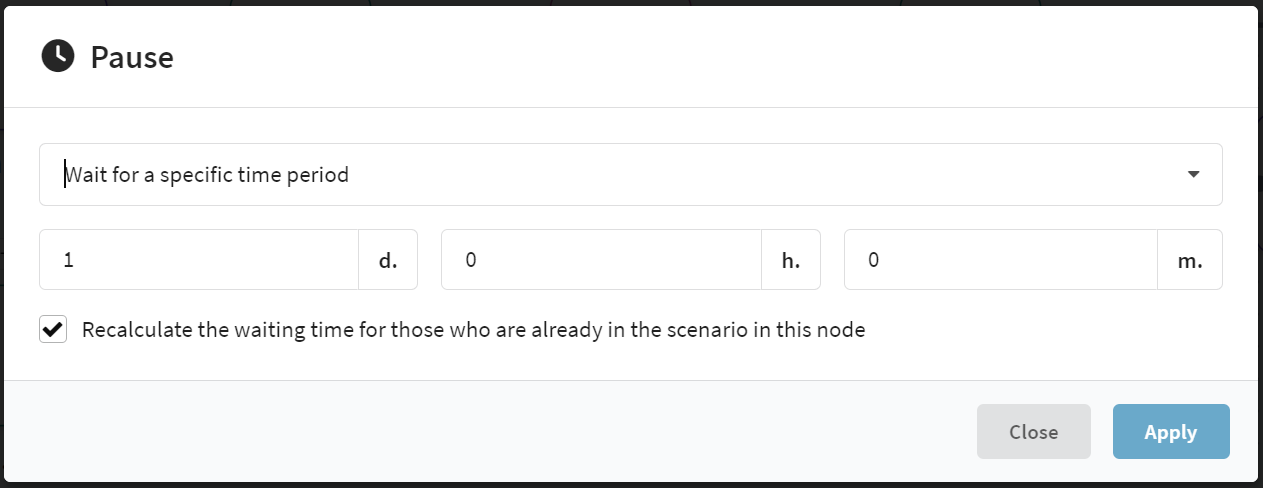
When using the waiting time recalculation feature, the platform will recalculate the pause duration for those who are already in this Scenario element. For example, you initially set a pause with a duration of 10 days and then increase the waiting time to 20 days. In that case, a profile that is captured in the scenario after you make the change will wait 20 days. As for a profile that was already in the element for 8 days before the change was made, the wait time would be another 12 days, not 20.
If the feature is disabled, changing the "Pause" element will not recalculate the waiting time.
Pause until a certain time
These options pause the scenario until a certain time of day - at the nearest selected time, on a specific date, on the nearest day of the week. And if the time zone of the profile is known, it can also be taken into account.
Wait for a certain time — the exact time of profile transition to the next element is specified.
Wait for a certain date and time — indicates the exact time and date of the transition to the next element.
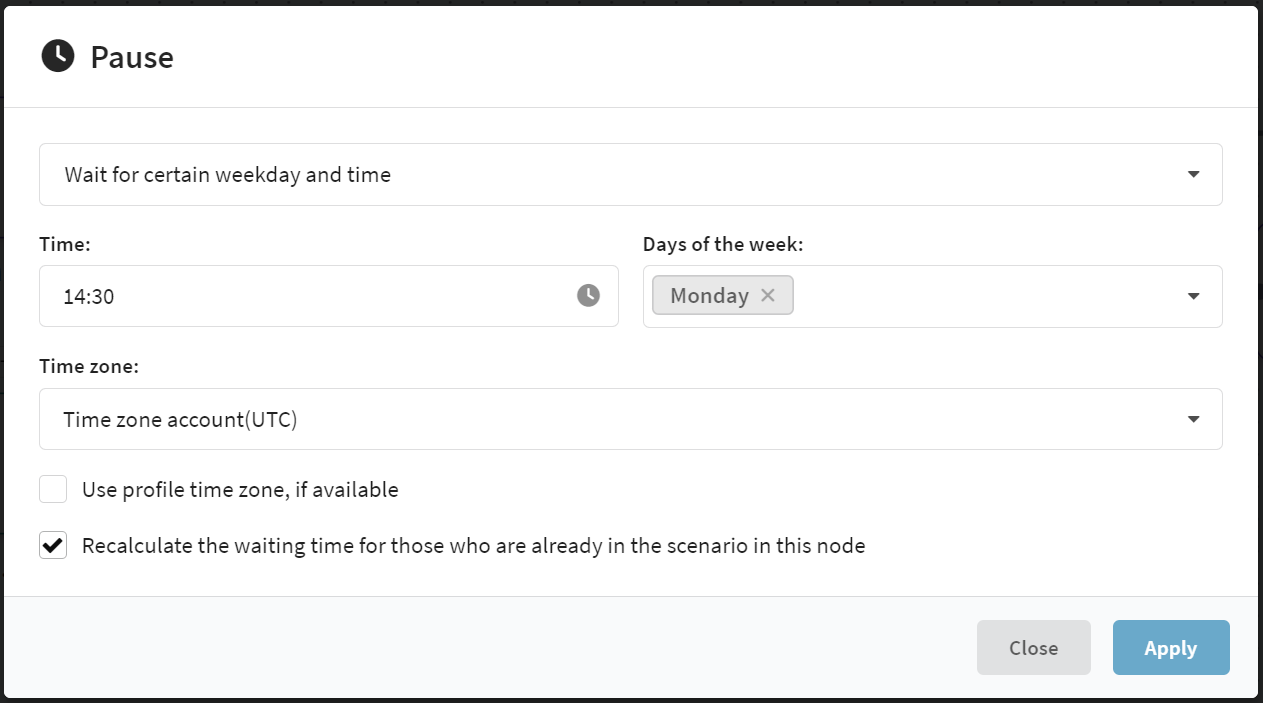
Wait for certain weekday and time — the exact time and one or more days of the week are set up
Expect days from a list — selects the exact time and multiple dates when the profile moves to the next element. Each profile, upon entering, "stops" until the nearest date from the list.
Here’s an example of how the date list works in the "Pause" element.
Suppose you set the following dates: "2023-02-01", "2023-07-01", and "2023-10-01". If a profile reaches the element on January 1, 2023, it will continue through the Scenario on February 1. If a profile reaches the element on March 1, 2023, it will proceed on July 1. If a profile reaches the element in August, it will wait until October 1. Each profile waits only once until the nearest date relative to the moment it enters the element.
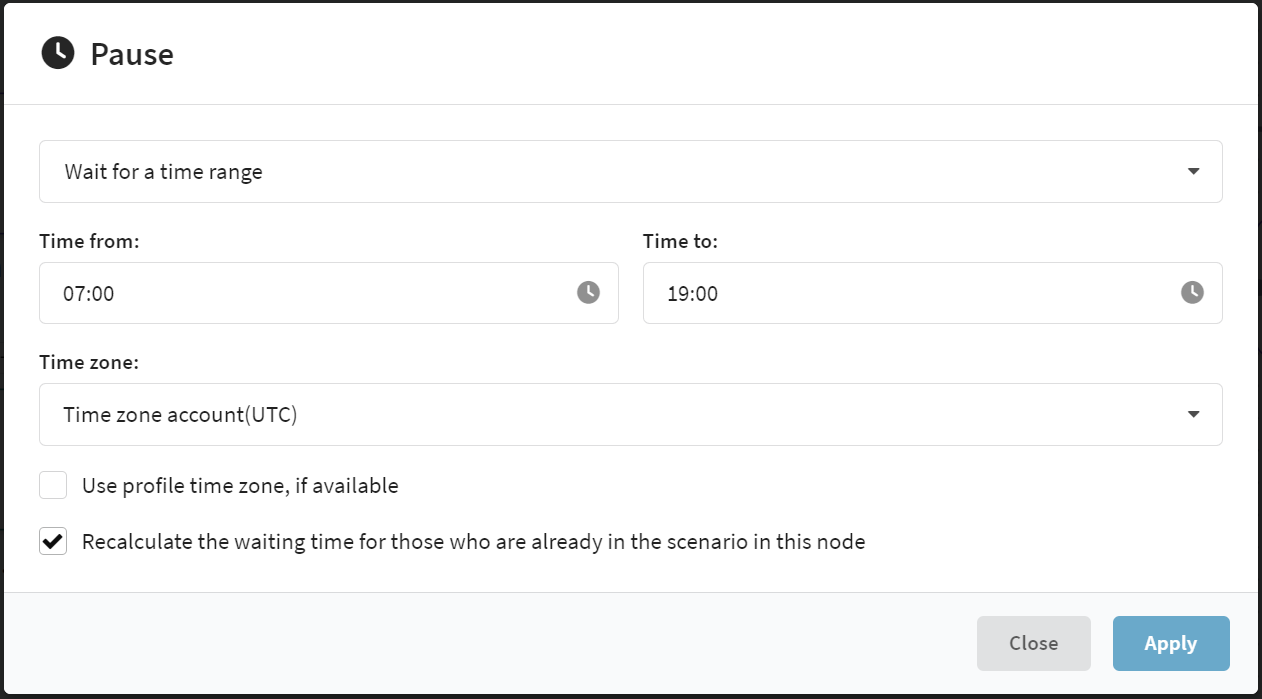
Pause until a certain period of time has elapsed
The "Wait for a time range" option sets the activity hours for the next element of the scenario. For example, if you want a certain campaign to run from 9am to 9pm:
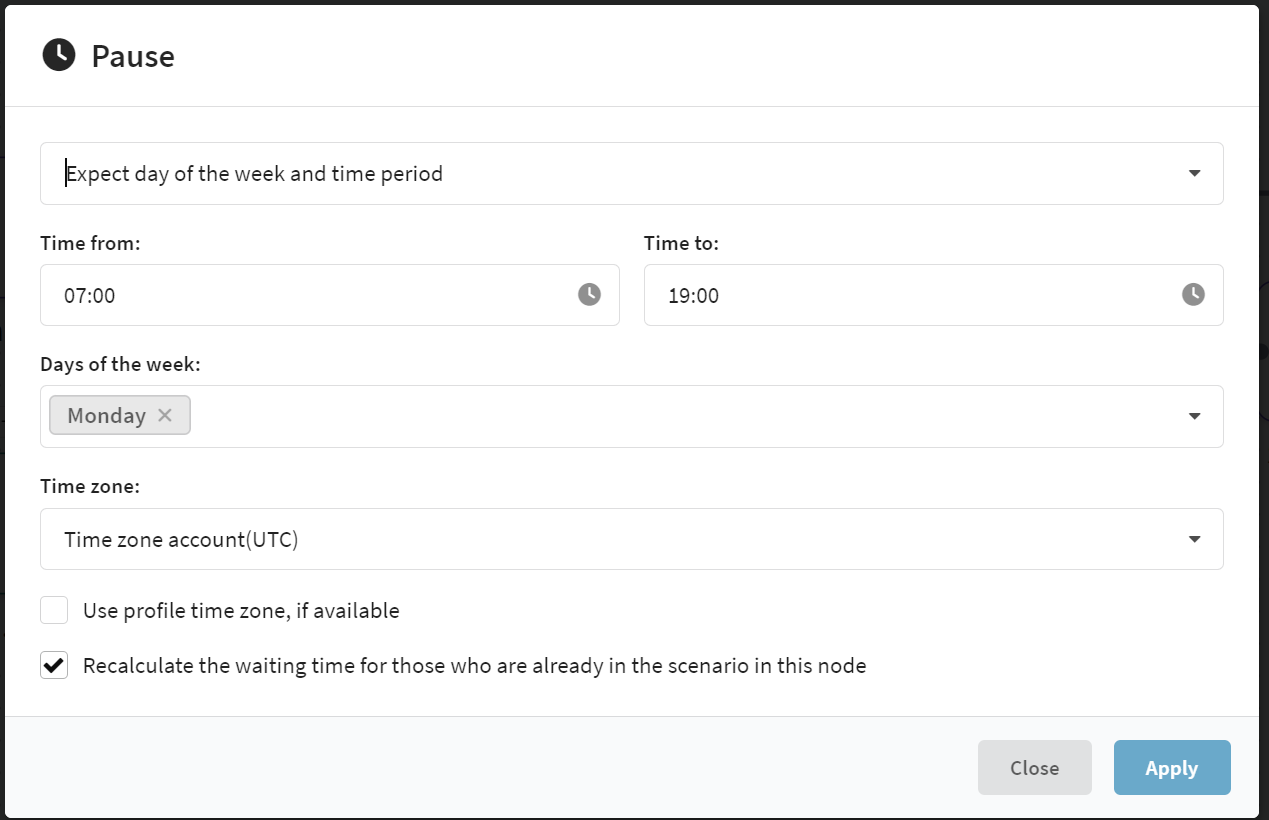
The "Expect day of the week and time period" option sets the days and hours of activity for the next element of the scenario. For example, if you want a certain campaign to run only on Saturdays and Sundays from 10 to 12.
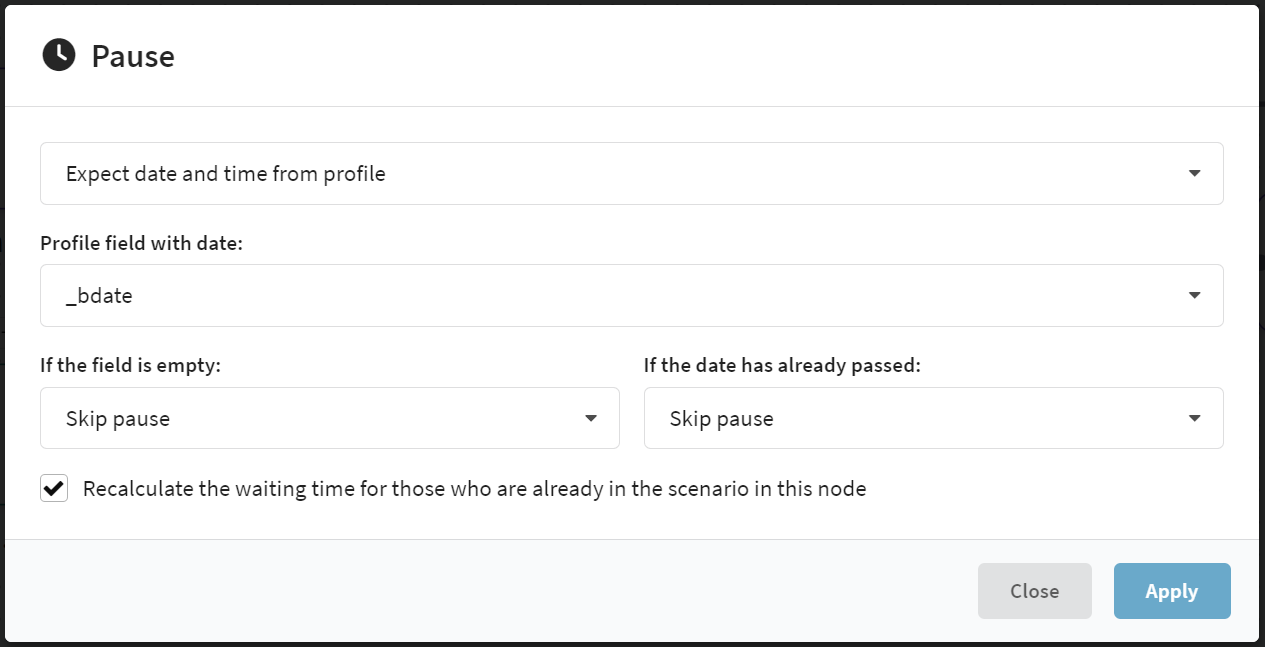
Expect date and time from profile
These settings will pause the scenario until the date or time specified in one of the profile fields:
-
Expect date from profile — the profile will move to the next element when the date specified in the selected field and the time specified in the "Pause" element settings occur.
-
Expect time from profile (date-independent) — profile will move to the next element when the time specified in the selected field occurs. The date may not be the same as the current date.
-
Expect date and time from profile — the profile will move to the next element when the dates and times specified in the selected field occur.
Select a field in the database with the required data. It can be date of birth (_bdate), date of registration in the system (_regdate) or any custom field with the "Date" type (for example, date of a scheduled event).
Next, configure the scenario to work if the selected field is not filled in for the profile:
Skip pause — the profile will immediately move to the next element without waiting for a certain time.
Abort a script for a profile — the profile will leave the scenario.
If the date specified in the profile field has already passed, you can either drop the profile immediately to the next element of the scenario, ignoring the pause, interrupt the scenario for the profile, or move the date to the next year.
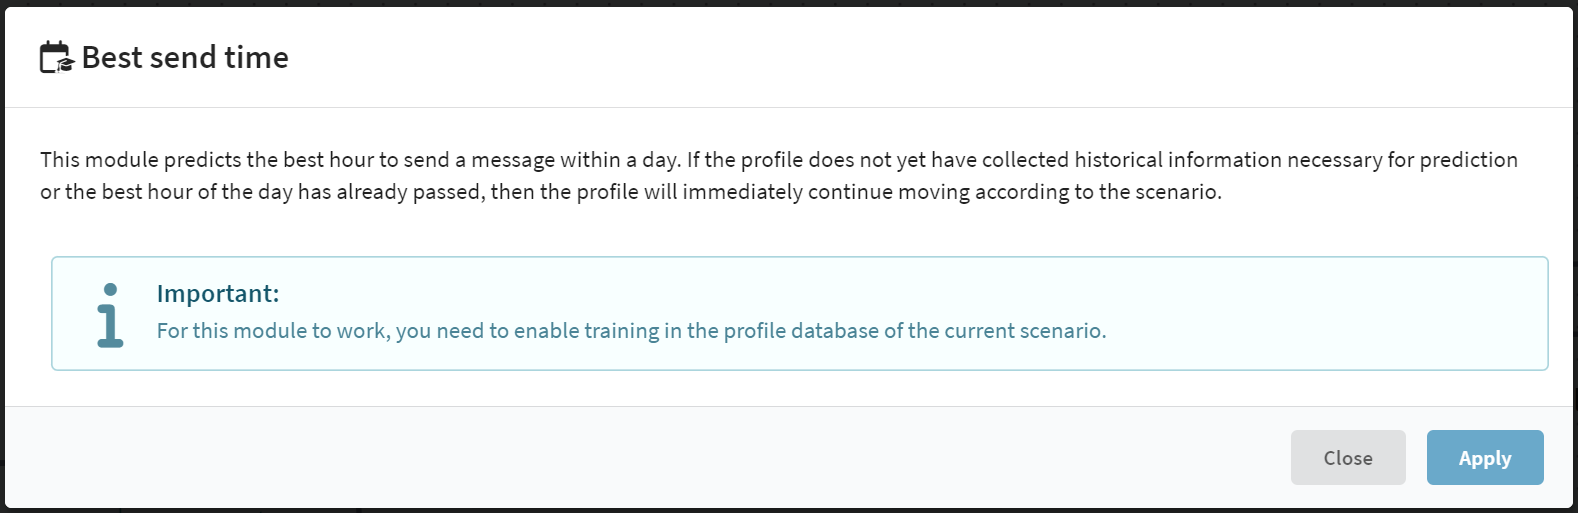
Best send time
 | Sets a pause before the next element of the scenario, The optimal way to work is to add an element from the "Channels" category after the "Waiting for best send time" element. The campaign will then send the profile a message at a time that is most convenient for them. | |
Read more
The calculation of the best time is done through machine learning algorithms. ML service determines the best hour when the probability of a profile opening a message is the highest, and selects an array with several good sending hours.
The element is available if the profiles captured in the scenario come from a database for which machine learning is enabled.
The profile will move to the next element when its best sending hour arrives.
If the best hour has already passed when the profile hits the element, the element will wait until the next good sending hour. If the good hour has also passed, the profile will immediately move to the next element.
If a profile that has no data on the best sending hour enters the element, it will also be immediately forwarded to the next element.
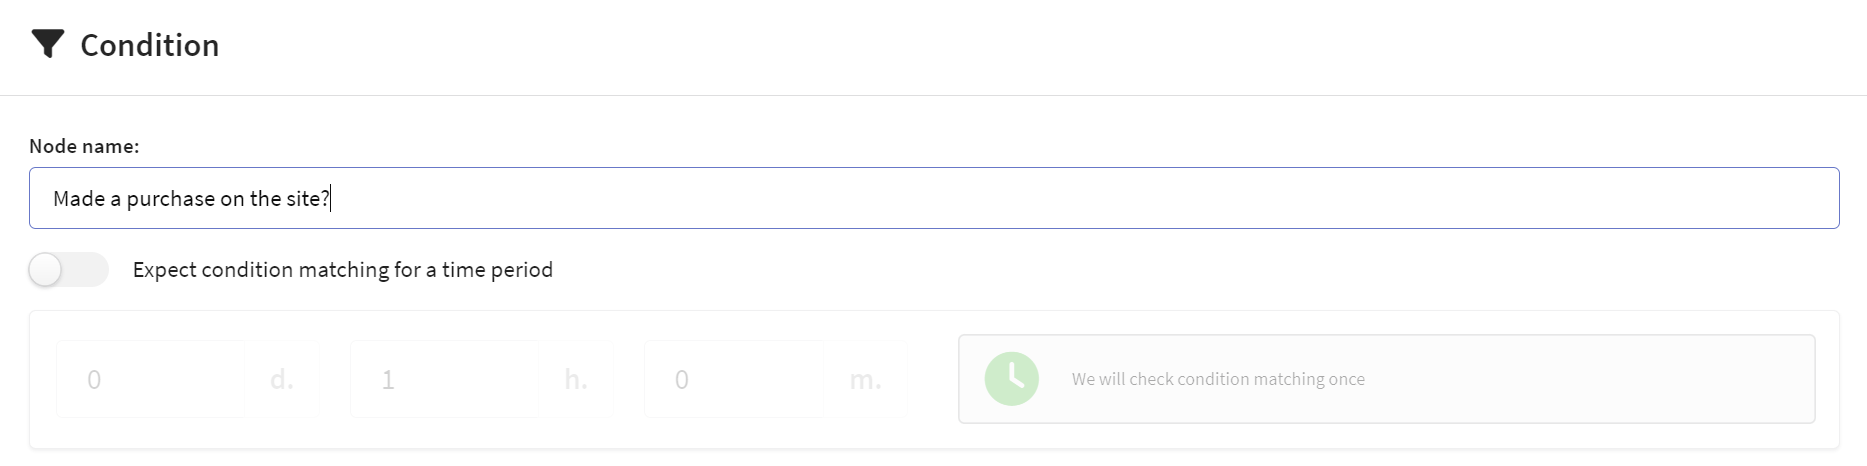
Condition
 | Realizes logical selection of the next step of the scenario for customer profiles. The selection condition is defined by Segmentation rules. If the condition is met, the client profile will continue to move to the right in the scenario. If the condition is not met, the profile will move down the scenario and an alternative sequence of actions can be configured for it. An element can also wait for the condition to be met for a certain amount of time. |
If you link several "Condition" elements vertically, you can create several alternative chains in one - depending on the results of the checks.
Read more
General settings
Enter the name of the element to be displayed in the scenario.
If you want to dynamically check if the condition is met, enable the "Expect condition matching for a time period" option. In this way the check will be performed several times. If the waiting time is fixed, do not enable this option, but instead add the "Pause" element before the condition.
Rules for fulfilling the condition
The condition is composed by rules and rule groups similar to Segmentation rules. Subscribers can be categorized by personal data, subscription data, action history:
JSON filter
 | If you call a scenario via API, you can pass a special |
Read more
JSON filter works in the same way as a normal condition. You can repeatedly use this element to build complex schemes.
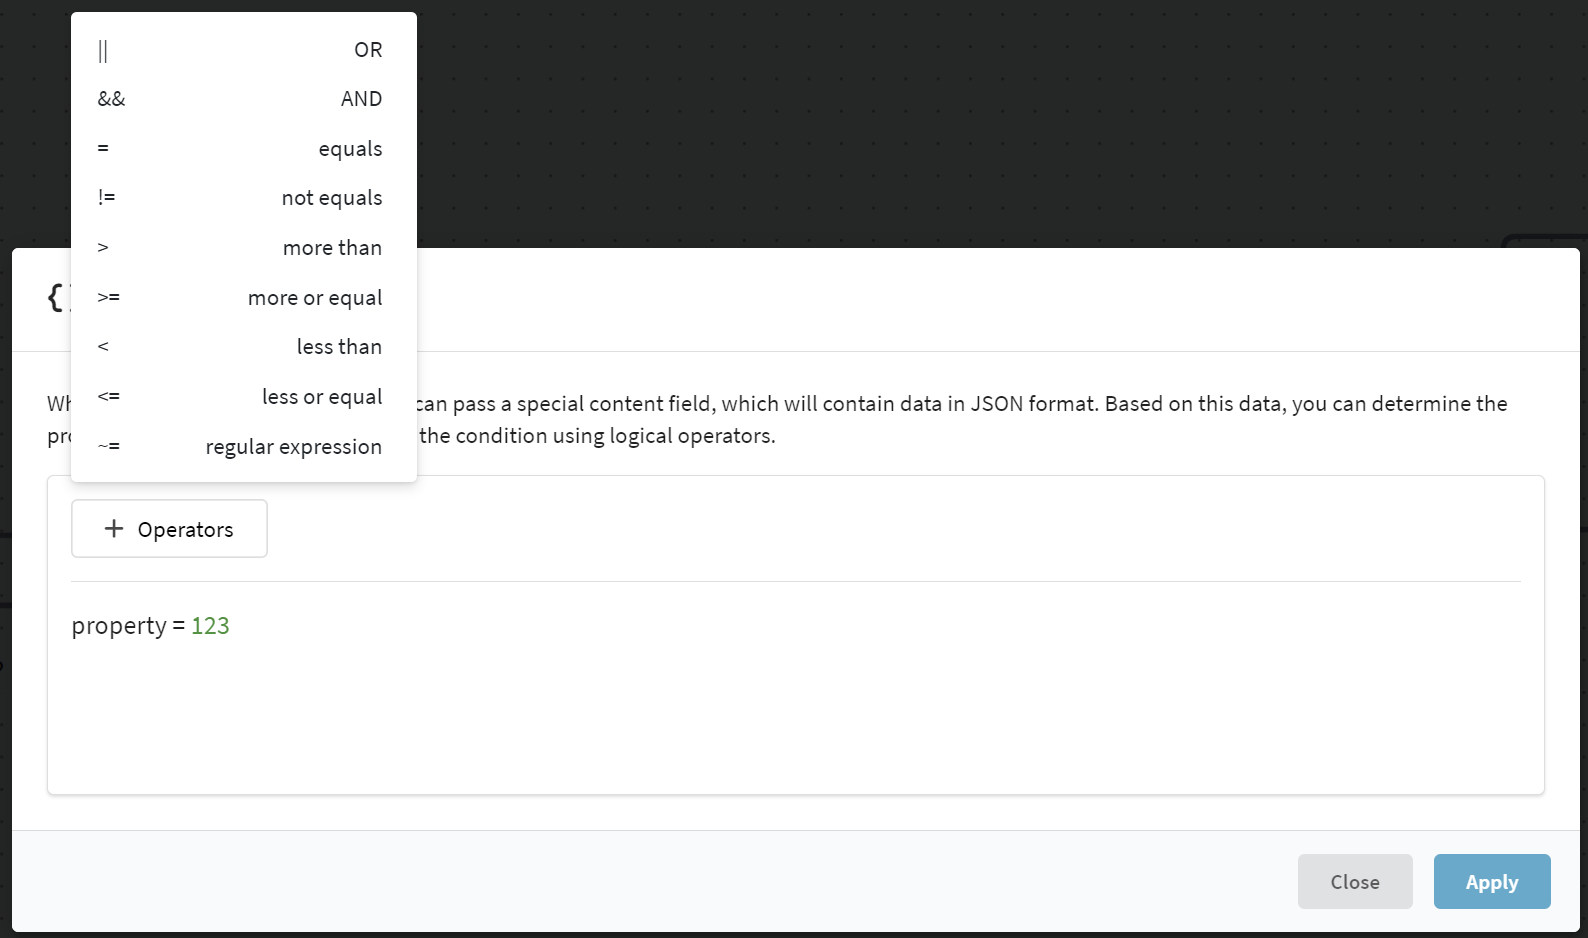
You can set conditions in the code editor using logical operators and expressions.
An example of a "content" field in an API request:
{
  "content": {
    "customer_id": "12345",
    "total_purchases": 5,
    "last_purchase_amount": 250,
    "average_purchase_amount": 100,
    "preferred_category": "electronics",
    "loyalty_points": 300,
    "membership_status": "premium",
    "discount_coupons_used": 2,
    "active_coupon": "win0513",
    "promo": null
  }
}
Note, the JSON object key is specified without quotes (e.g., membership_status="premium").
| Operator | Example | Description |
|---|---|---|
|| Or | (preferred_category = "electronics") || (preferred_category = "computers") | The condition will be fulfilled if the customer is interested in the “Electronics” or “Computers” categories. |
&& And | (total_purchases >= 5) && (average_purchase_amount >= 100) | The condition will be fulfilled if the customer has made 5 or more purchases and the average check exceeds 100. |
= Equal | membership_status = 'premium' | The condition will be fulfilled if the client has premium-status. |
!= Not equal | membership_status != 'standard' | The condition will be fulfilled if the client does not have a standard-status. |
> More than | last_purchase_amount > (2 * average_purchase_amount) | The condition will be fulfilled if the customer's last purchase amount exceeds twice the average purchase amount. |
>= More than or equal | last_purchase_amount >= 250 | The condition will be fulfilled if the amount of the last purchase equals or exceeds 250. |
< Less than | loyalty_points < 500 | The condition will be fulfilled if the number of bonus points is less than 500. |
<= Less than or equal | loyalty_points <= 500 | The condition will be fulfilled if the number of bonus points is 500 or less. |
~= Regular value | active_coupon ~= '^win' | The condition will be fulfilled if the promo code starts with "win". |
!~= Opposite regular value | active_coupon !~= '^win' | The condition will be fulfilled if the promo code does NOT start with "win". |
+ Addition | (loyalty_points + bonus_points) < 200 | Arithmetic addition operator. |
- Subtraction | (loyalty_points - penalty_points) > 100 | Arithmetic subtraction operator. |
* Multiplication | (bonus_points * years) > 360 | Arithmetic multiplication operator. |
/ Division | (total_purchase / 365) > 5 | Arithmetic division operator. |
% Modulo division | (total_sum % 15) = 5 | Operator for calculating the remainder of division. |
^ Exponentiation | (promotion_points ^ 3) > 360' | Operator for exponention a number to a degree. |
is defined Checking the existence of a field | promo is defined | The condition will be fulfilled if the "promo" field exists, regardless of whether a value is specified for it or not. |
isnot defined Field absence check | promo isnot defined | The condition will be fulfilled if the "promo" field is not present in the code. |
is null Checking empty field value | promo is null | The condition will be fulfilled if the "promo" field has no value (its value is null). |
isnot null Checking the field value | promo isnot null | The condition will be fulfilled if the "promo" field has any value (equal to anything other than null). |
contains Checking if the value on the right contains the value on the left | String: "hello" contains "he" Array: [1, 2, 3] contains 2 | The condition will be fulfilled if the field "hello" contains the value "he". |
in Checking if the value on the left is contained in the field or array on the right | String: "he" in "hello" Array: 2 in [1, 2, 3] | The condition will be fulfilled if the value 2 is contained in the array [1, 2, 3]. |
notin Checking if the string or array does NOT contain the value of the field on the left | "bye" notin "hello" | The condition will be fulfilled if the "hello" field does NOT contain the value "bye". |
To access a nested field of an object, use the following syntax: object.field.
To access elements of an array by index, use the following syntax: array.[0].field.
Examples of usage:
// Object:

{
  "content": {
    "customer_id": "12345",
    "total_purchases": 5,
    "promo_campaign": {
      "tickets": 115
    },
    "tickets_info": [
      {
        "ticket_id": "T001",
        "price": 50,
        "date": "2024-08-30"
      },
      {
        "ticket_id": "T002",
        "price": 75,
        "date": "2024-08-31"
      }
    ]
  }
}

// Accessing a nested field of the object:

promo_campaign.tickets >= 100

// Accessing the first element of the array:

tickets_info.[0].ticket_id
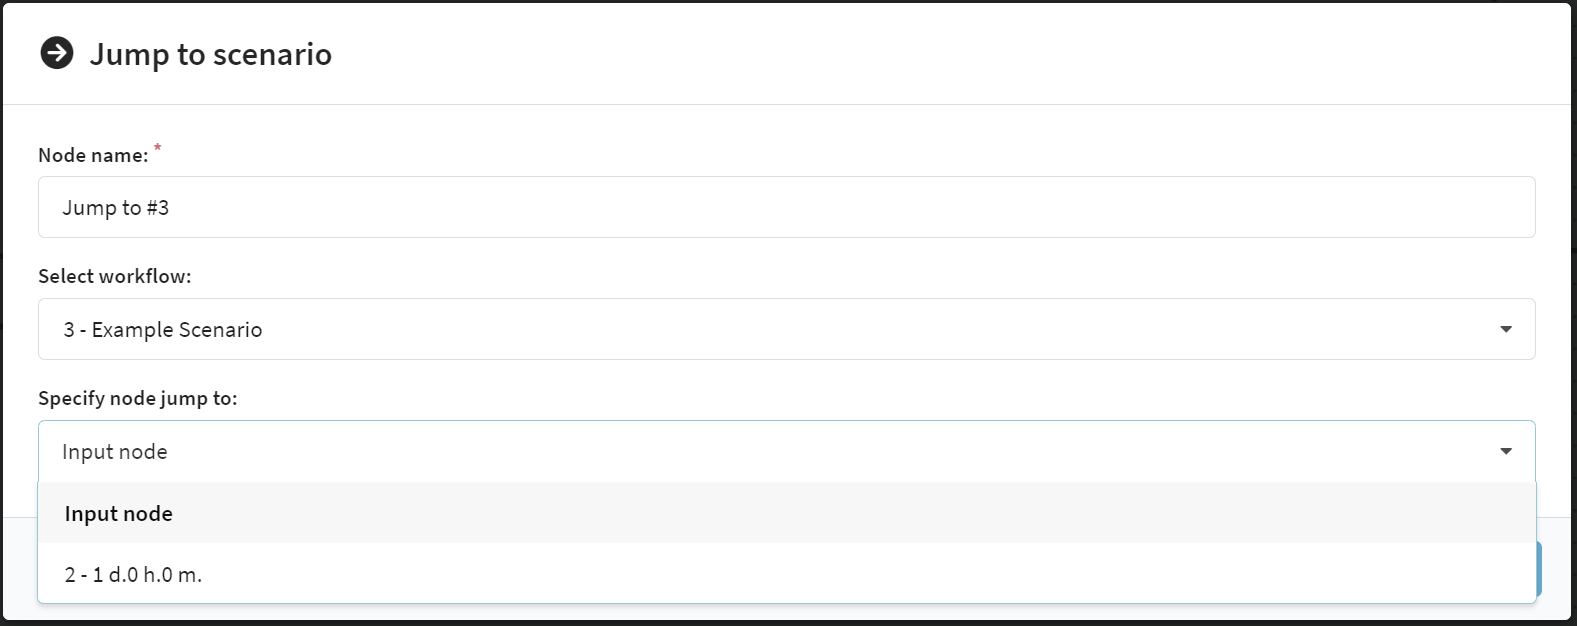
Jump to scenario
 | Sends the profile to the beginning of another scenario or to a certain element of another scenario. In this case, the current scenario and the scenario to which the profile moves must use the same database.If the chain in the scenario continues after the transition element, the profile moves to another scenario and at the same time continues to move through the current scenario. |
Read more
Enter the name of the element. Select the scenario to which you want the profile to be sent. If you want the profile to jump to the beginning of another scenario, select input element as the element to jump to. If you want the profile to go immediately to a specific element in another scenario, select that element from the list.
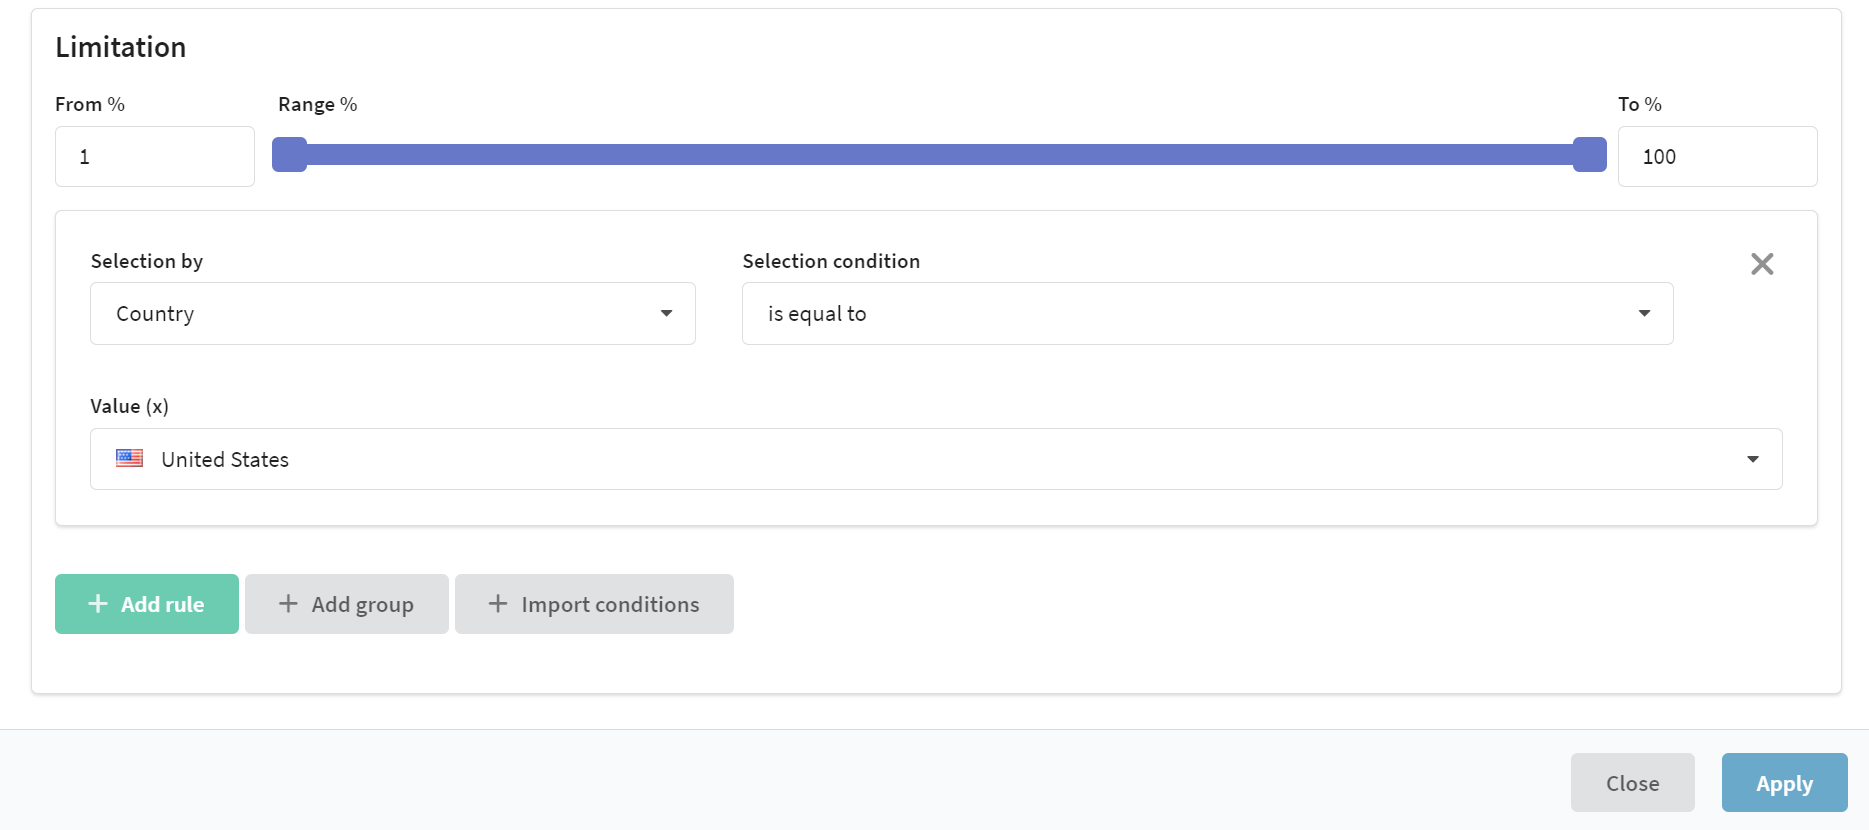
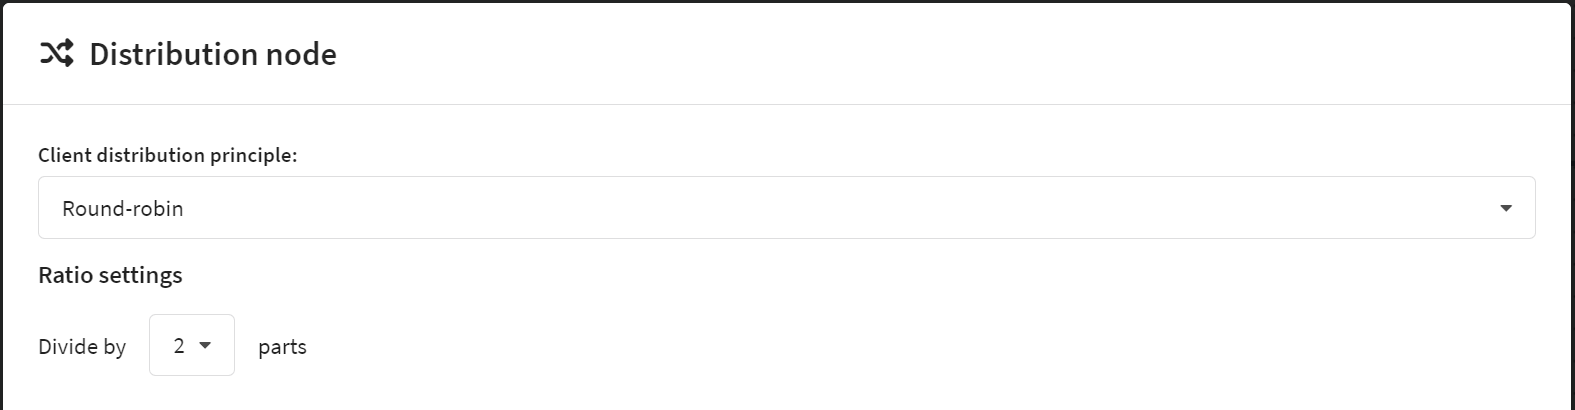
Distribution node
 | Creates multiple elements that separate scenario options for customer profiles regardless of any conditions. Both brute force and static distribution are available. |
Read more
General settings
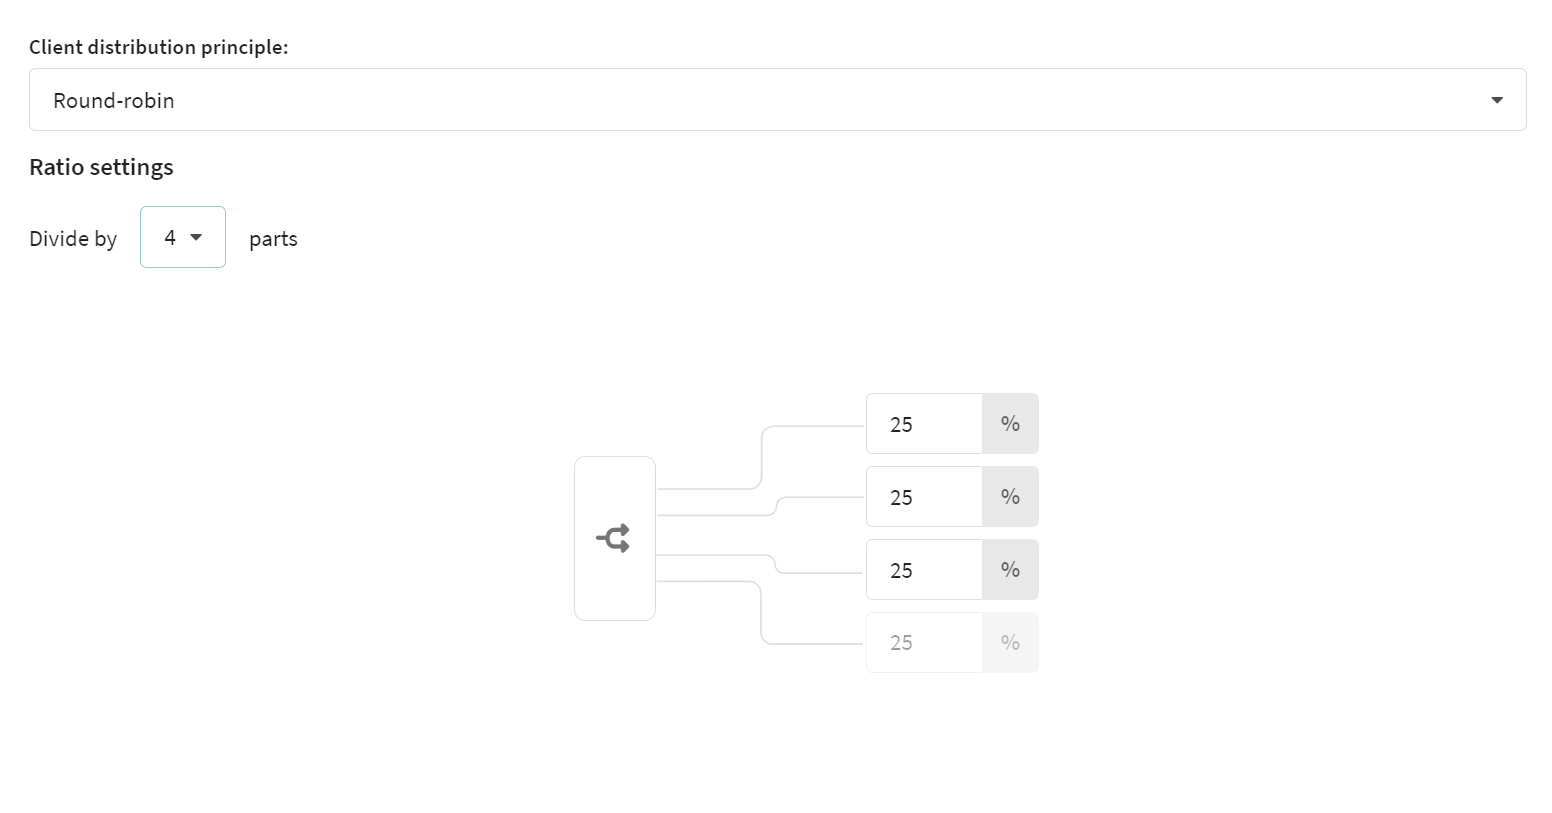
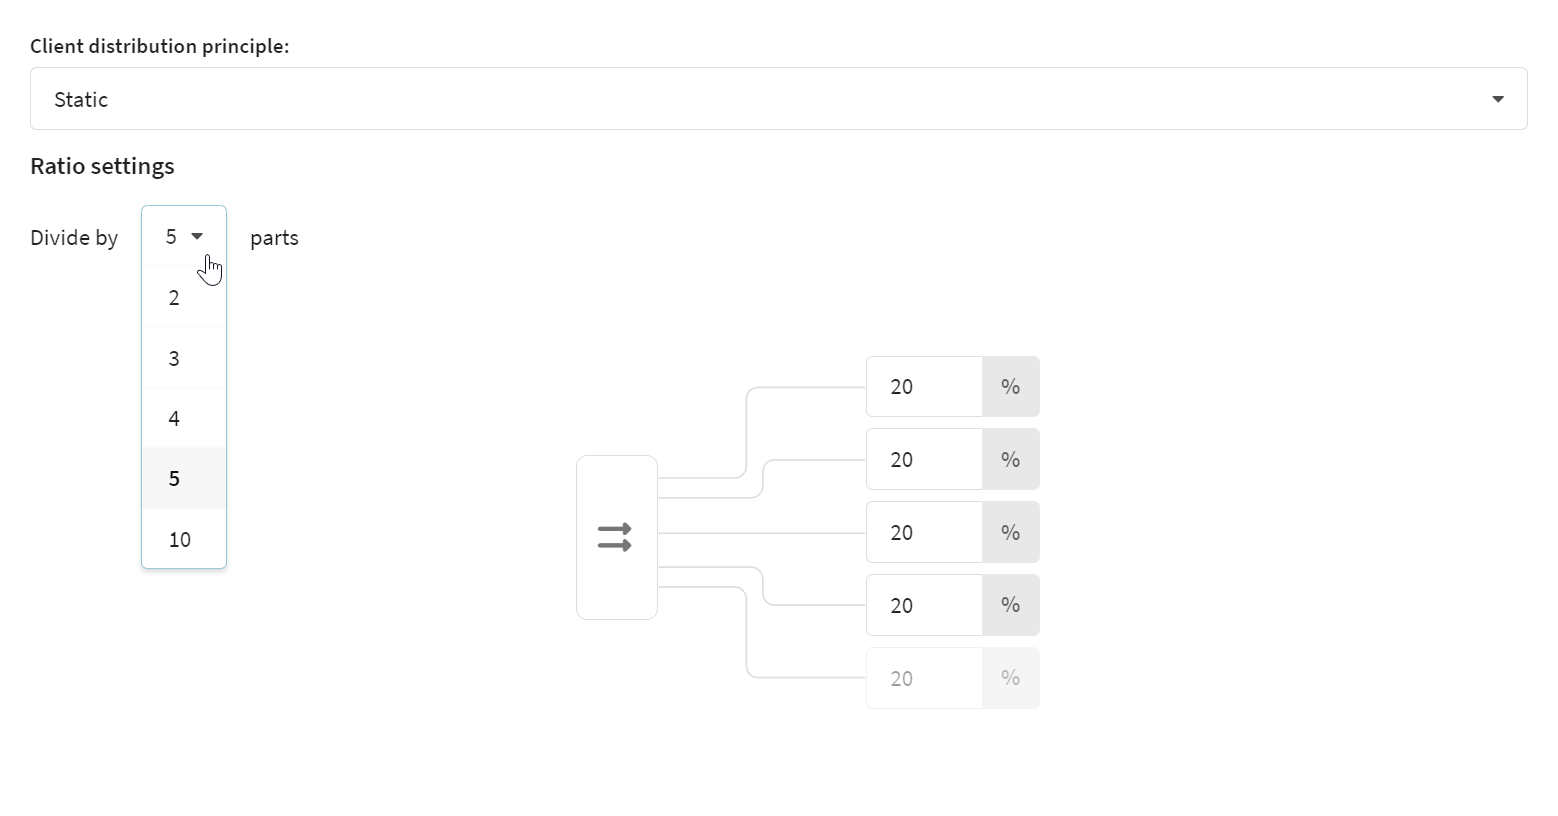
Select the distribution principle and the number of parts into which the audience will be distributed. You can change the percentage by editing the distribution elements.
Distribution by round-robin
Profile distribution takes place at the moment of hitting the scenario element according to the specified proportions. It is based on the mechanism of Smooth Weighted round-robin balancing.
Static distribution
When using static distribution, the profile will always fall into the same distribution percentage, which cannot be changed. Static distribution is not recommended for a small number of profiles (up to 10,000).
Channels
Elements in this category launch a trigger campaign through a specific channel. A new campaign is created directly in the element editor.
The "Placement" element allows you to launch a placement campaign in a scenario. Setting up such a campaign is described in this article.
Read more
General settings
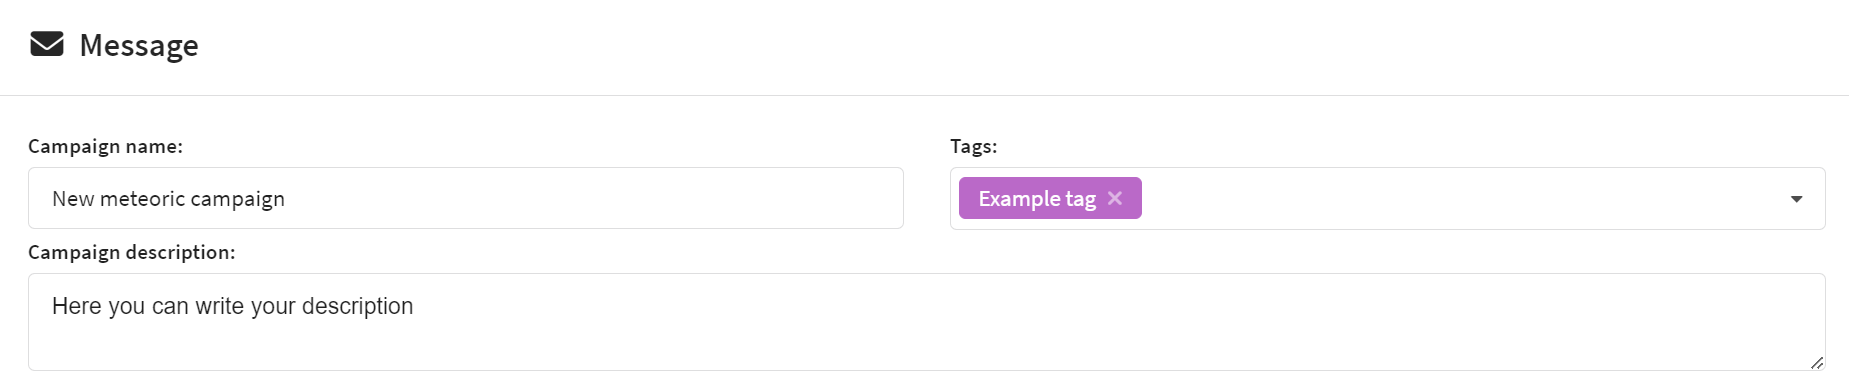
Enter a name for the new campaign, add a description if necessary. Here you can also set custom tags and set highest priority sending:
Campaign settings
On the first settings tab, select a communication channel: each campaign can only be sent via one channel.
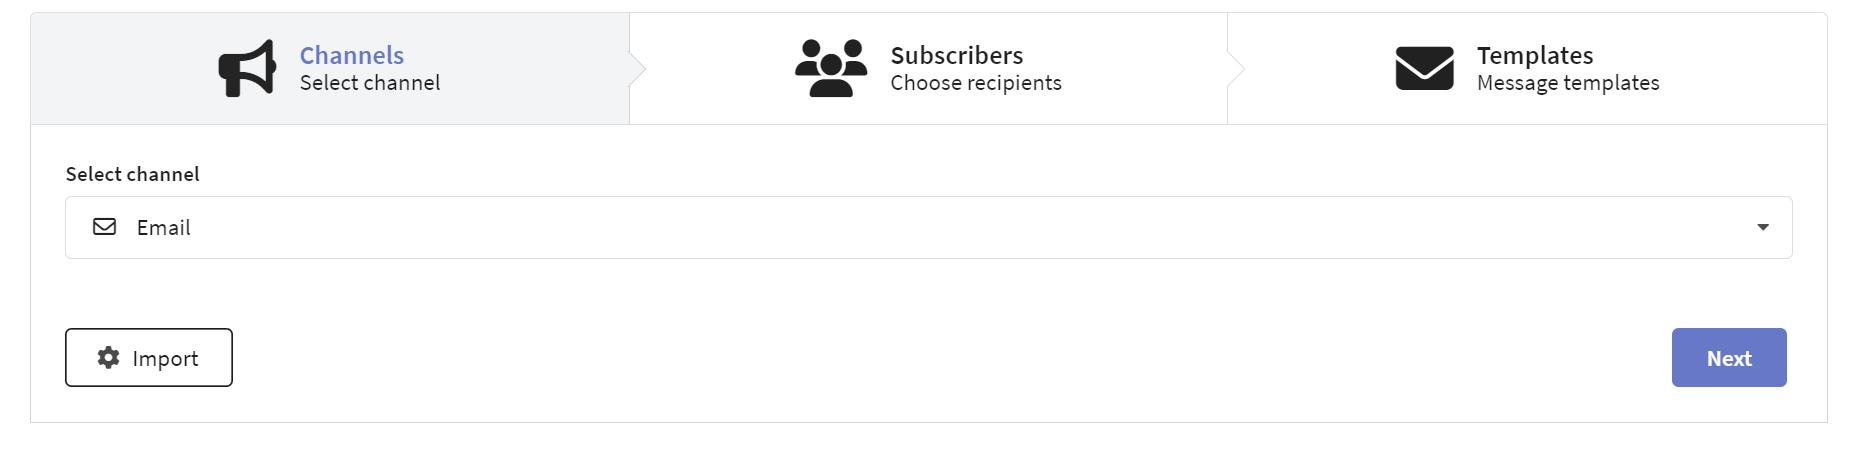
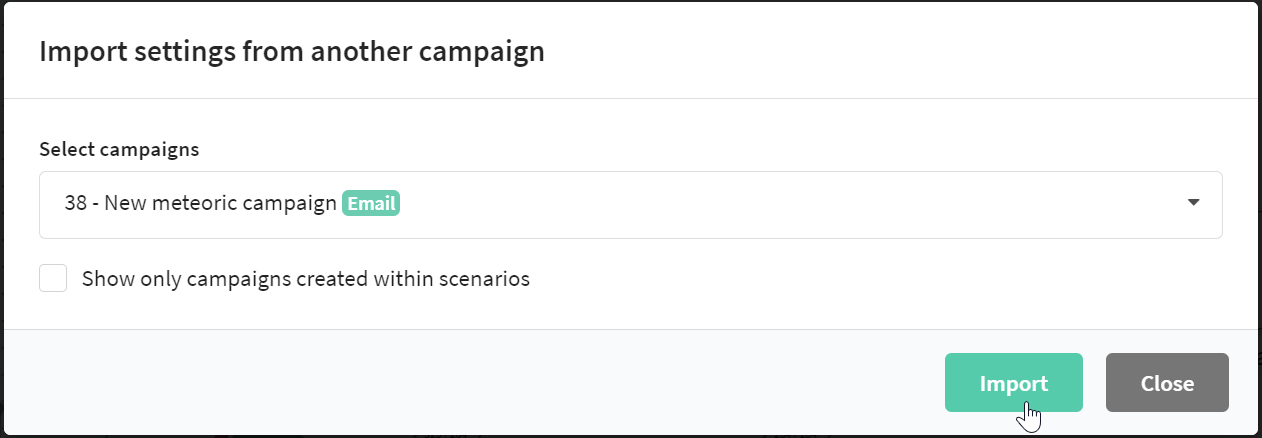
On the same tab you can import an existing campaign into the element. This can be a single campaign or a campaign included in other scenarios:
Subscribers
The trigger in the chain will use the contact details of subscribers of one of your resources. Choose a resource that your target audience subscribes to and proceed to the next step:

Additionally, you can filter by custom channel fields. To create a filter by fields, select the standard or optional subscription field. In the "Selection condition" field, select a logical operator and, if necessary, specify a value.
Content
On the third tab, select Message Template that you want to send to subscribers. It is possible to select several templates at once (up to 16 templates in one campaign). In this case they will be sent in random order. Just like when creating a campaign, you can open a preview of the desired template and edit it, if necessary:
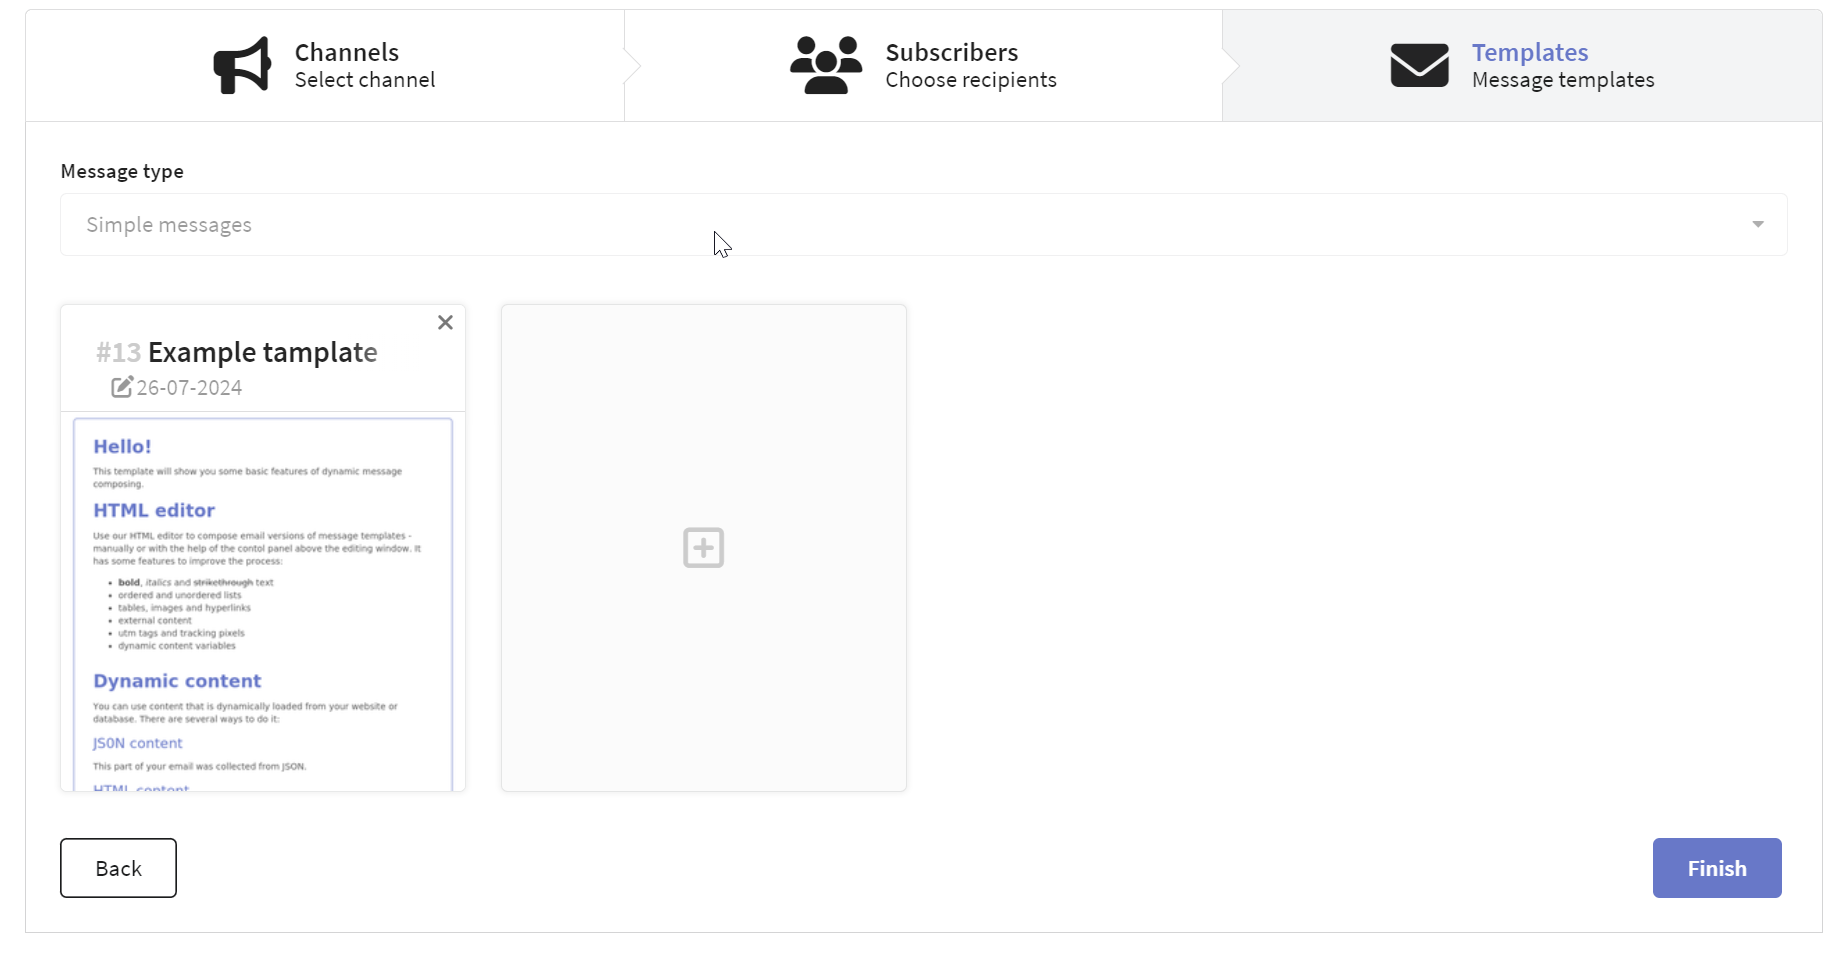
After selecting the template, click the "Finish" button. The campaign settings will be displayed in one tab, and you can make the necessary changes at any time by clicking the edit button:
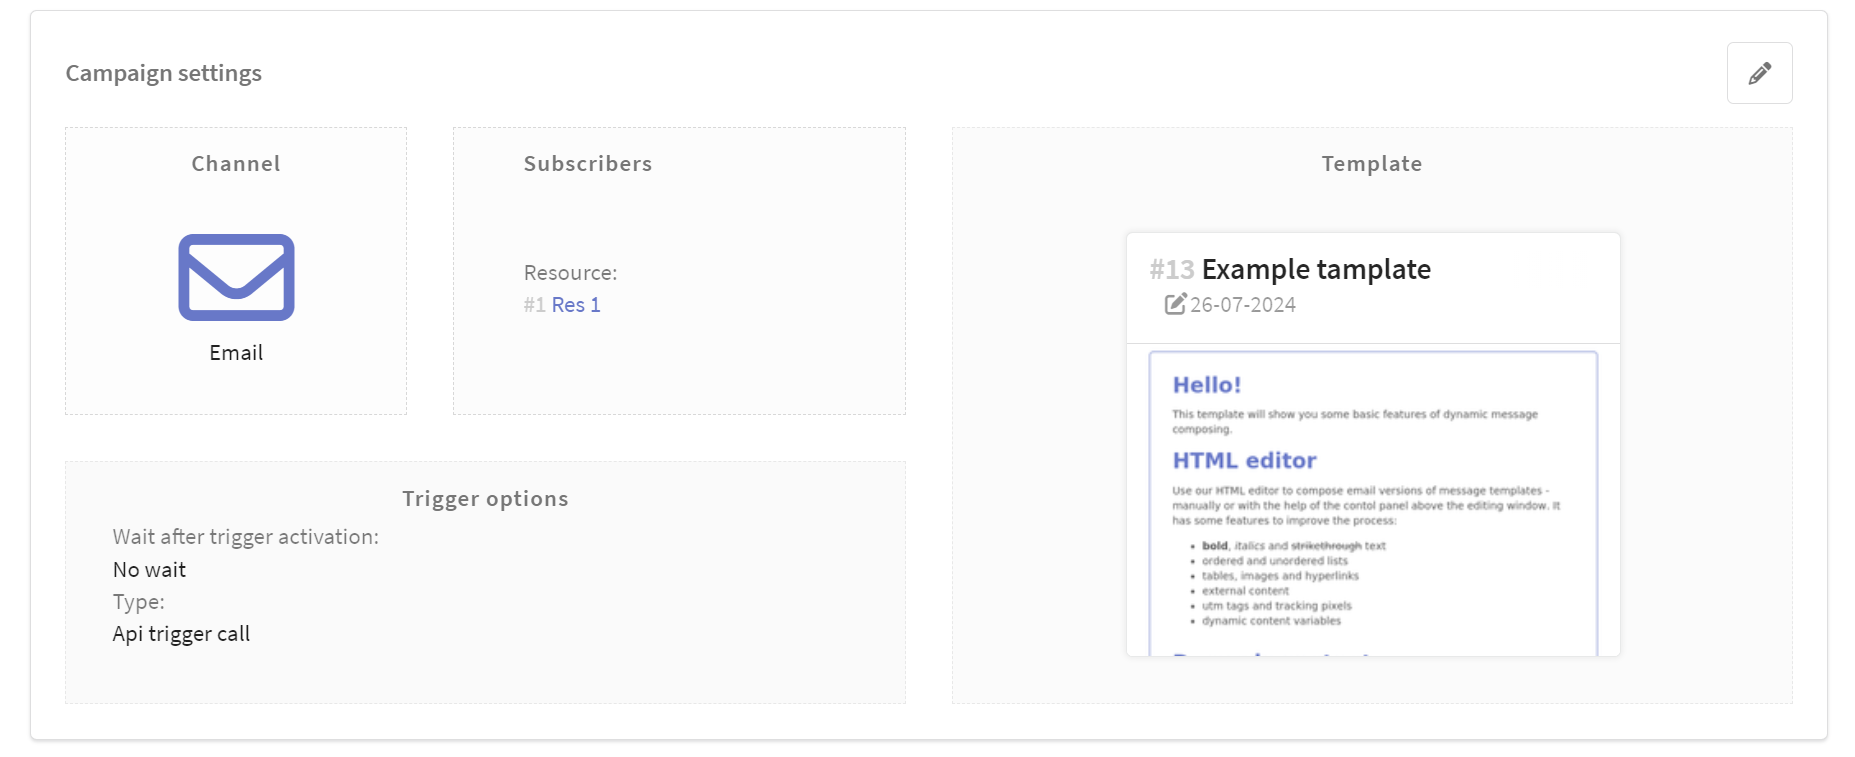
Mailing Limitations
In this opening block, you can set send policy of the campaign. By default, the policy of the selected resource or the global account policy is applied:

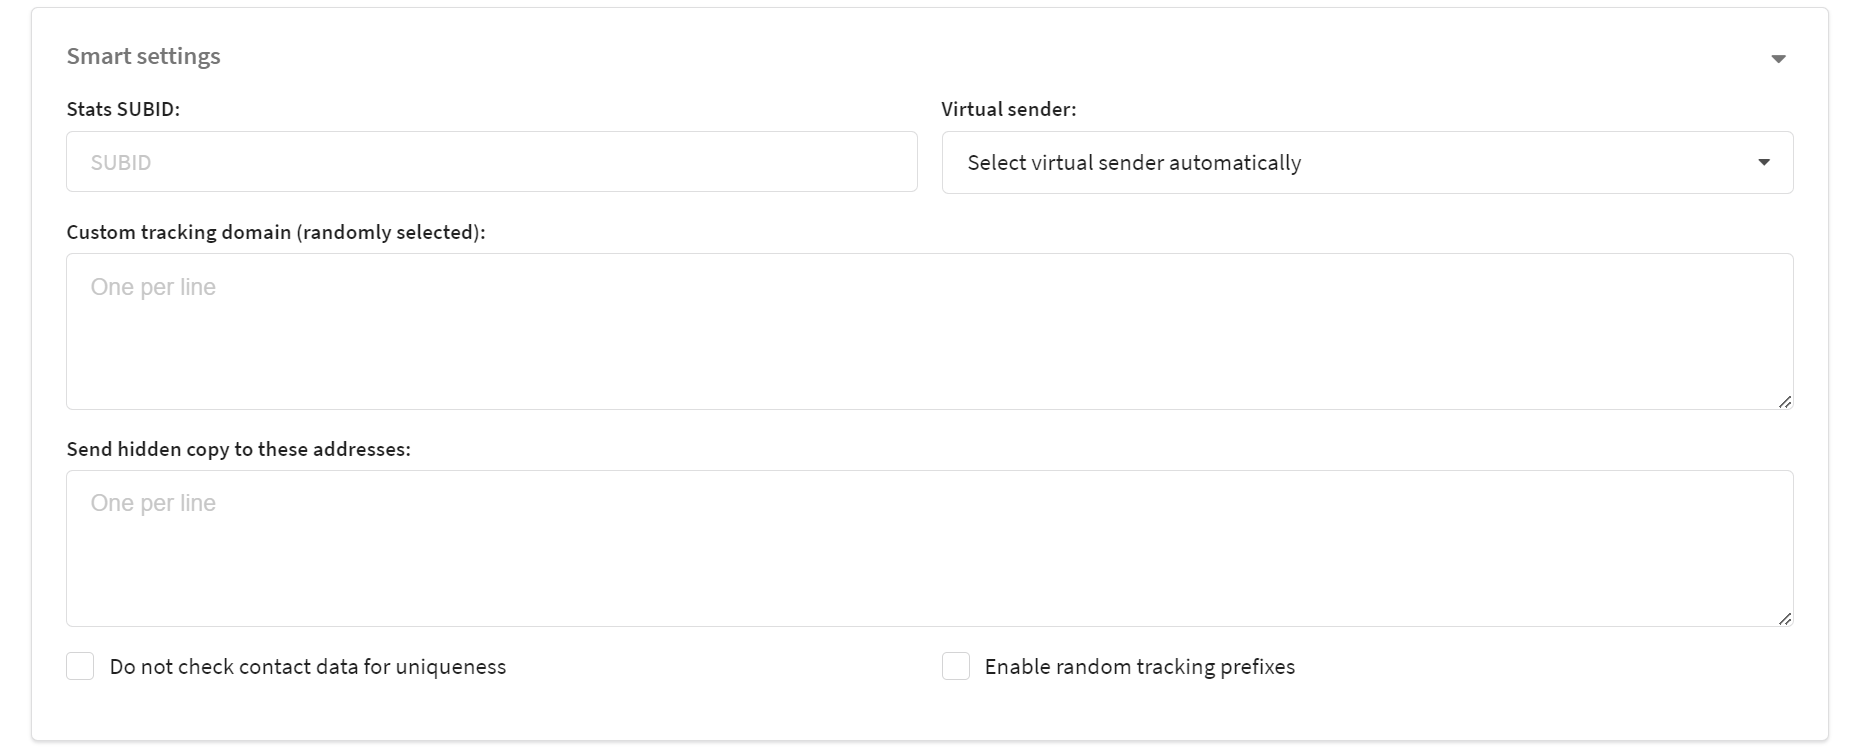
Smart settings
In smart settings, you can additionally customize the campaign:
- SUBID statistics
- Selecting a virtual sender
- Custom domains for event tracking (in addition to the one configured in the resource)
- List of addresses for hidden copy to sent e-mails
- Other options depending on the platform configuration
If there is an error when sending a campaign, the profile will continue to follow the scenario.
Actions
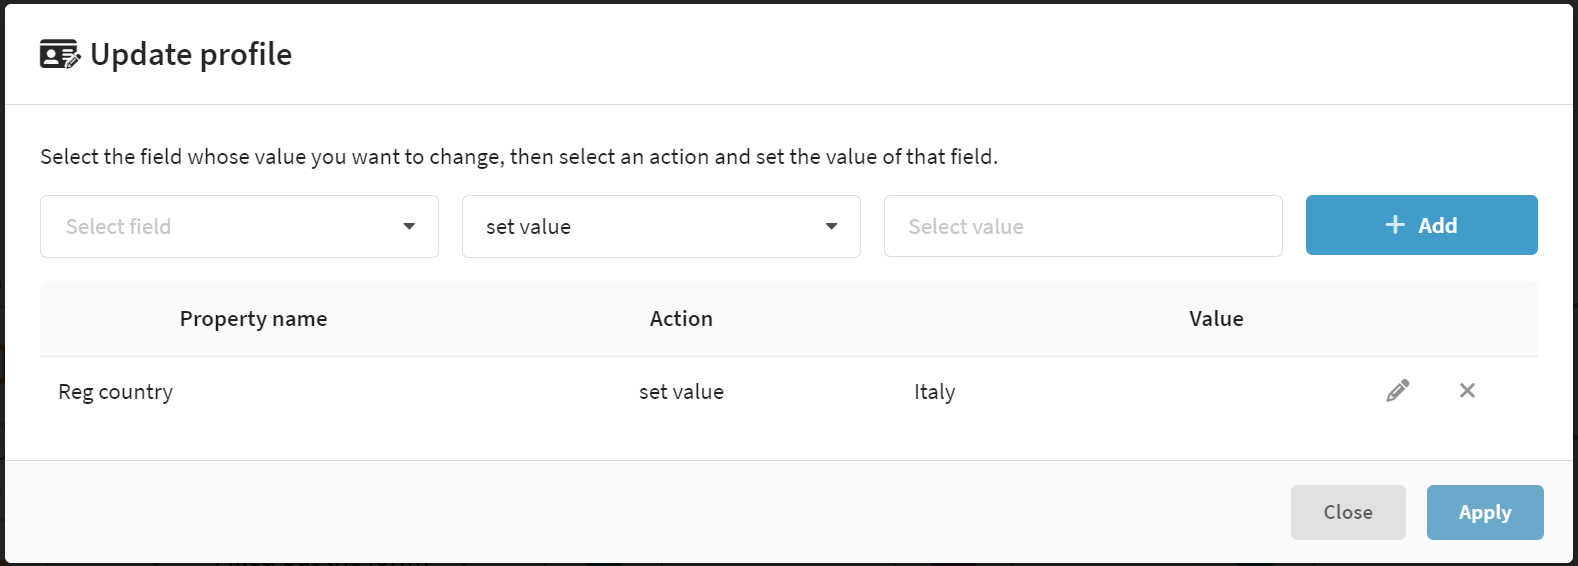
Update profile
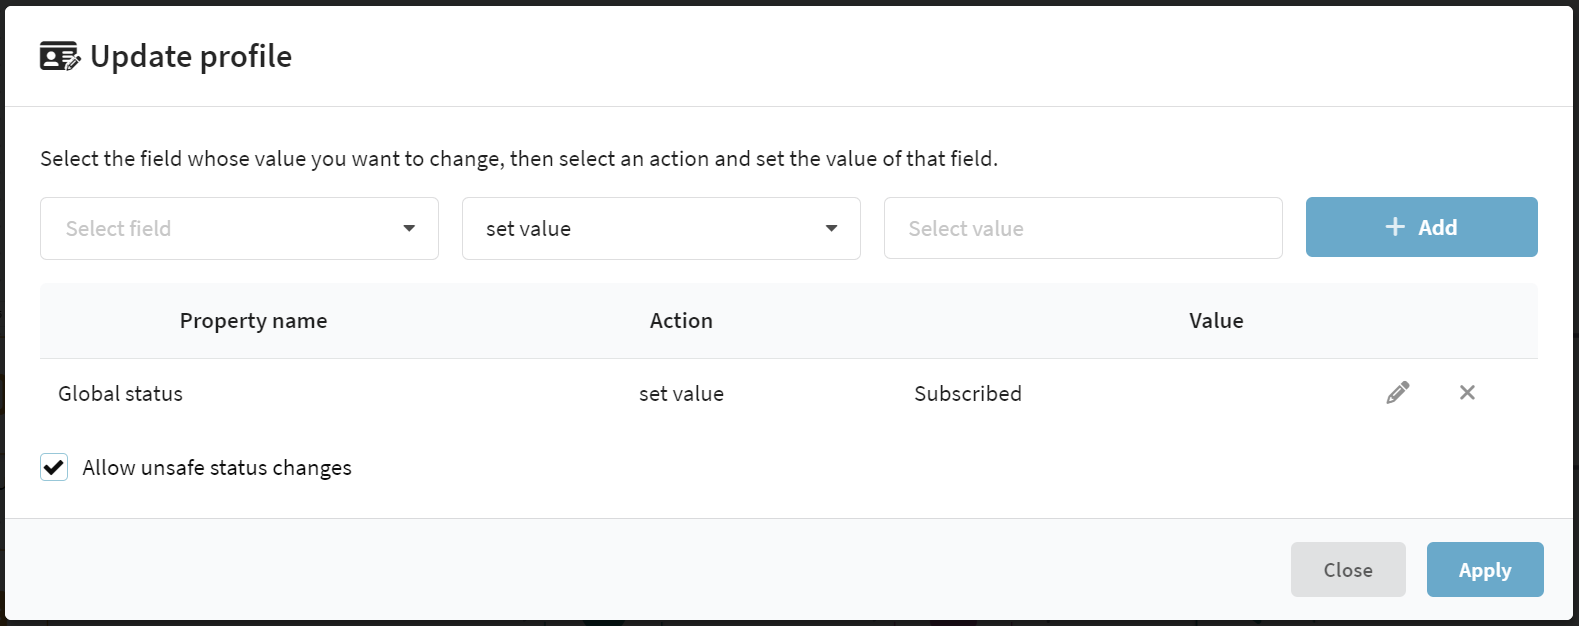
 | Updates the data of selected fields of the subscriber profile or deletes values in these fields. Related actions are available for different field types. The element can add tags, change field values with selectable options and numeric fields. |
Read more
From the drop-down list, select the field you want to update. Then select the action and set the value of that field. Press "+ Add". The added field can be edited by clicking on the pencil icon, as well as deleted from the element.
| Action | Field type | Description |
|---|---|---|
| Set value | All | The new value of the field is specified manually. For fields of the List (Enum) type, the value is changed to one of those specified in the list, for example, the selected service package. For fields of Boolean type the value is changed to Yes or No. |
| Remove value | All | Deletes the value from the selected field. |
| Take the value from the field | All | The value is taken from the apicontent field. It is used together with "API call" element, which is able to save the request result into apicontent object. |
| Increase by | Integer | Increases or decreases the value. To decrease a value, you must enter a negative number. |
| Add element | Tags | Write another tag in the field. |
| Remove element | Tags | Remove one of the existing tags from the field. |
With this element you can also change the global status of a profile. If you allow unsafe status changes, the element will update profiles with statuses other than “Subscribed”.
When referring to the sequence number of an array element from apicontent, the % sign must be used. Counting in such arrays starts from zero. For example, we have the following object with an array:
{
    "results": [
        {
            "objectId": "12asd34",
            "name": "Company 1"
        }
    ]
}
In order to get the name of the first organization, we need to use the following query res.results.%0.name, where res is the field to store the response from the API Request element.
Import to database
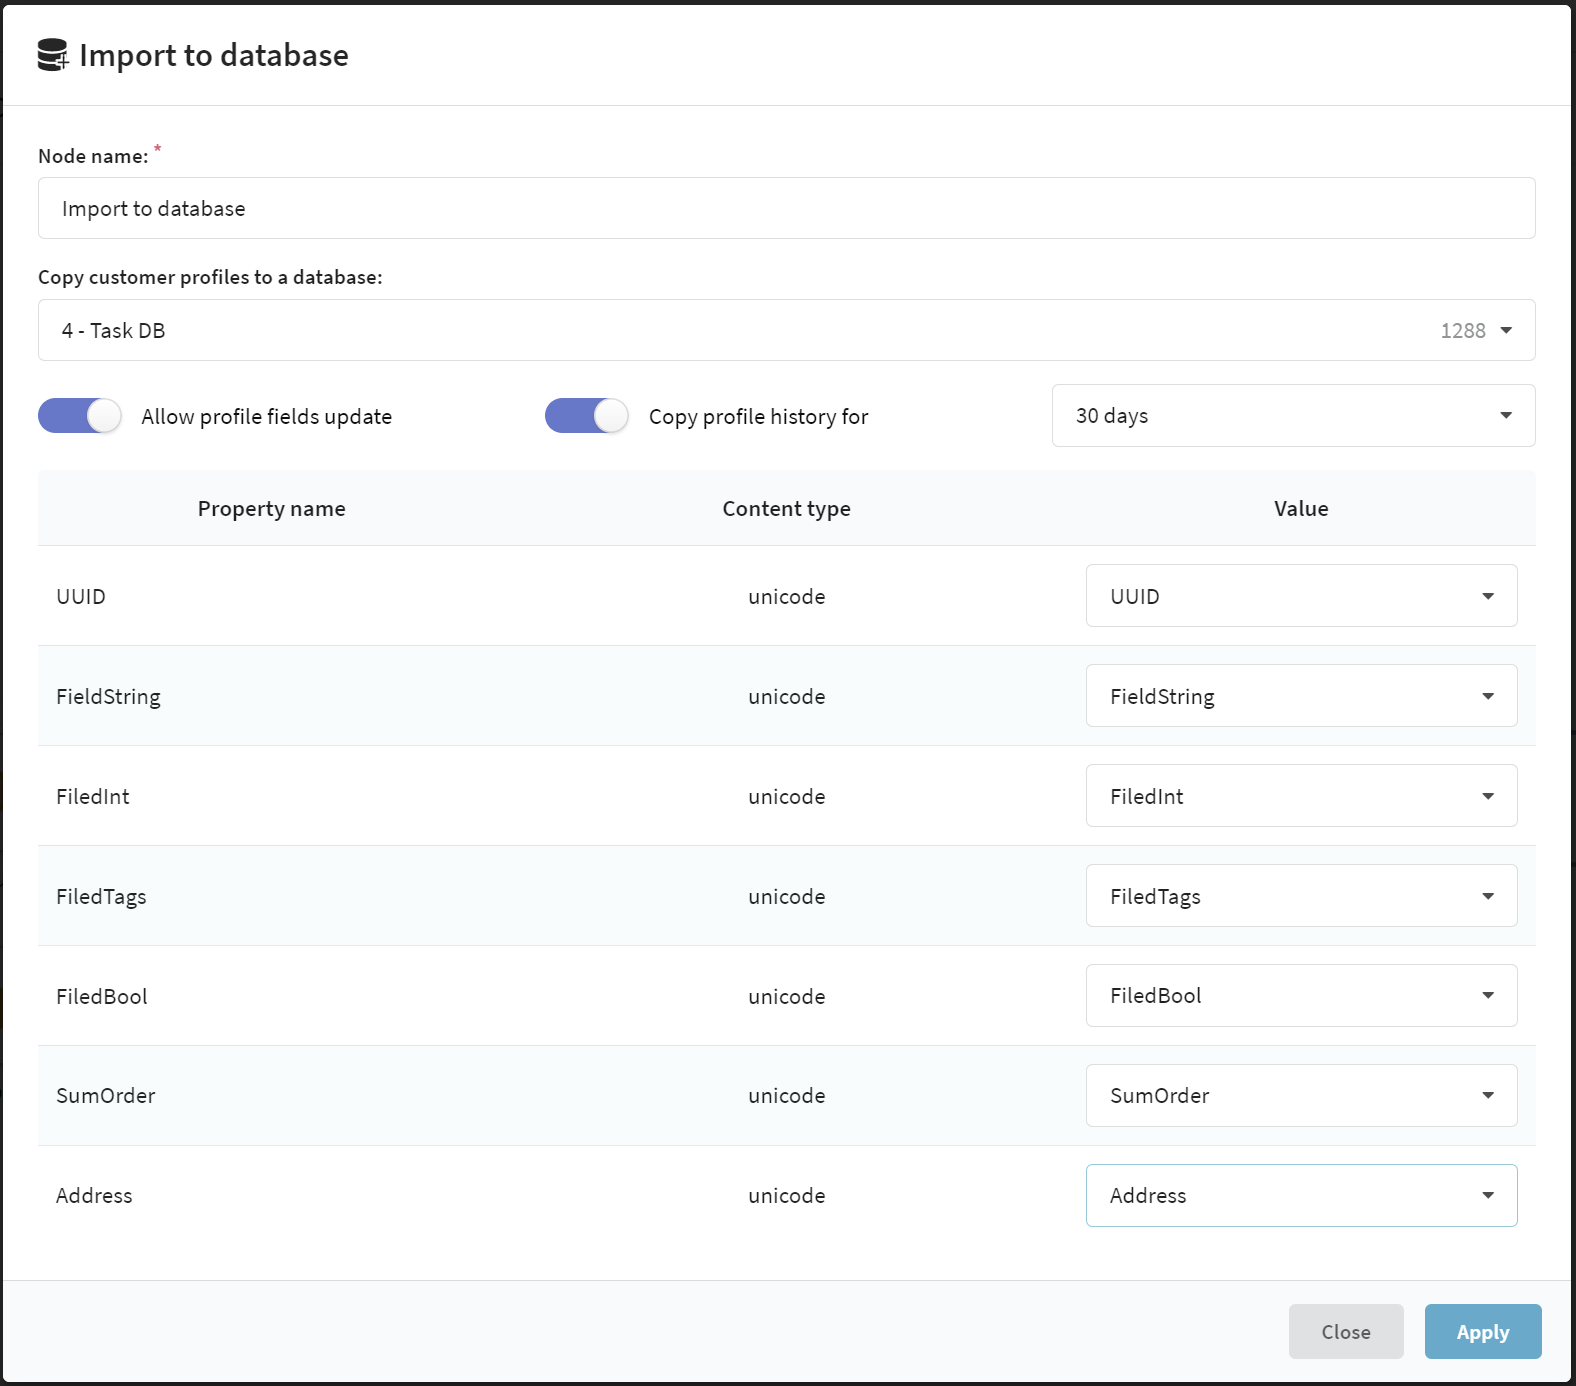
 | Copies a subscriber's profile from the profile database for which the scenario was created to another one. You can also copy profile history for a certain period and transfer custom profile fields. |
Read more
Enter the name of the scenario element and select the profile database to which you want to copy the customer profile. If you want to update the data of a profile that already exists in the target database - activate the "Update subscriber fields if it already exists" option. If there are additional fields in the source database, their data can be written to fields of the appropriate type of the target database. To do this, customize the field matching.
You can also transfer the profile history from the source database to the target database. To do this, use the "Copy profile history for" option and select the period of data you want to transfer. Profile history includes campaign actions (sends, opens, clicks, etc.), subscription events, imports, pixels, promotion code assignments, and participation in static segments.
API request
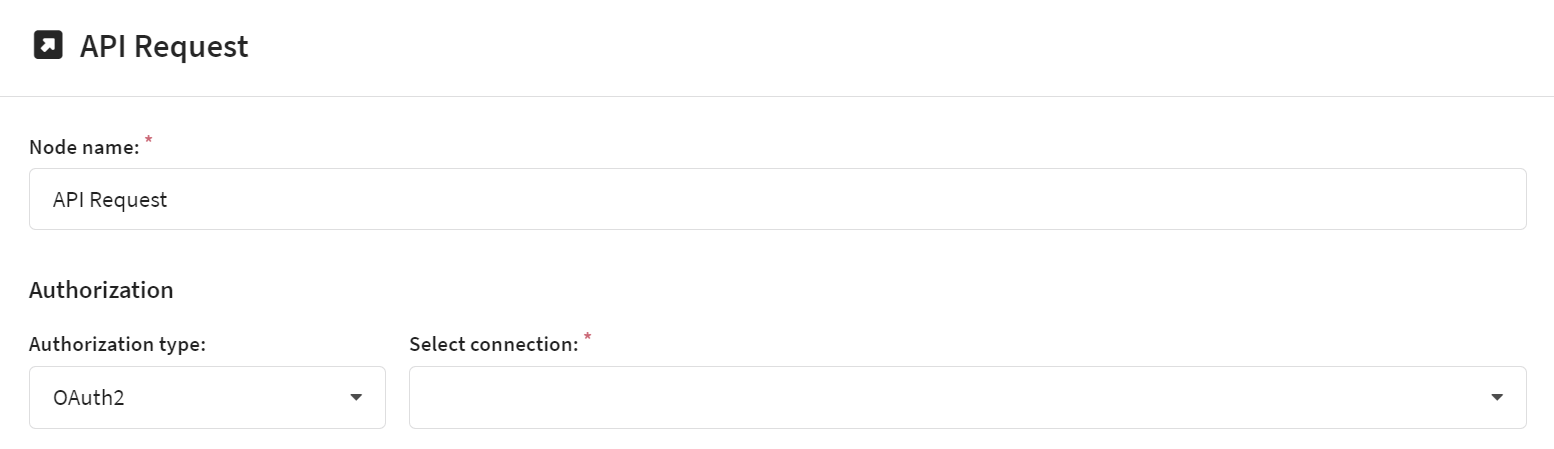
 | Send a GET or POST request to another system. You can add parameters to the request with static data or taken from a subscriber. Used for integration with other systems. |
Read more
Enter the name of the element.
If necessary, change authorization type to OAuth2. This way you will be able to pass profile data to external services that use OAuth 2.0 protocol as an authorization method. To use this authorization method, you must first associate the external service with Altcraft platform via connection and then select it when configuring the element:
Select type of request to the external system. In the URL field enter the address of the service receiving the data:
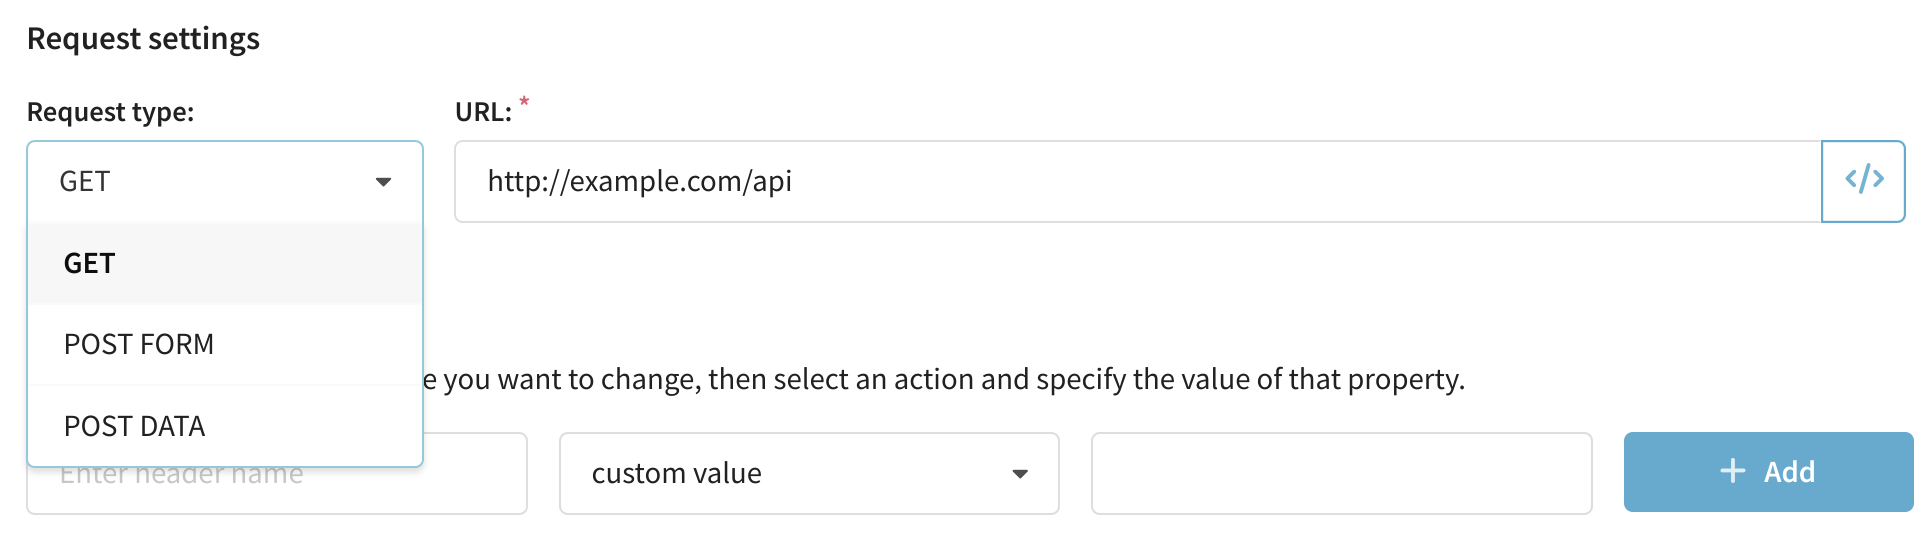
The request URL also uses variables. Click </> or enter a value manually. Example of using a promo code in the request URL:
http://www.example.org/api/?Promocode={loyalty.black_friday.promocode}
If desired, you can add a custom header to your request. Specify a name for the header and select a value source for it, for example, one of the customer profile fields or your own arbitrary value:
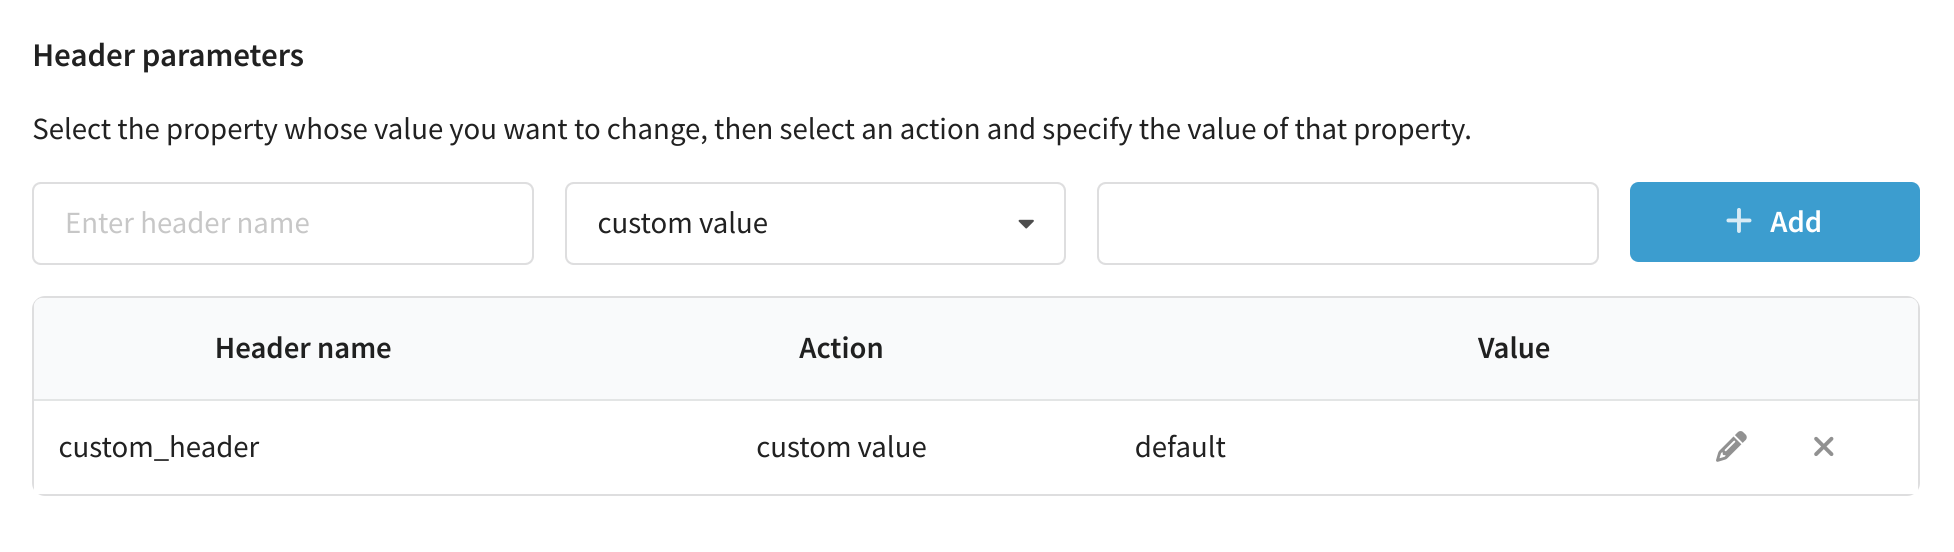
Keep in mind that the user cannot add some system headers as this will cause the scenario to malfunction. Such headers include:
- "Accept"
- "Accept-Encoding"
- "Authorization"
- "Cache-Control"
- "Cookie"
- "Connection"
- "Content-Type"
- "Content-Length"
- "Host"
- "Referer"
- "User-Agent"
- "X-Forwarded-For"
- "X-Requested-With"
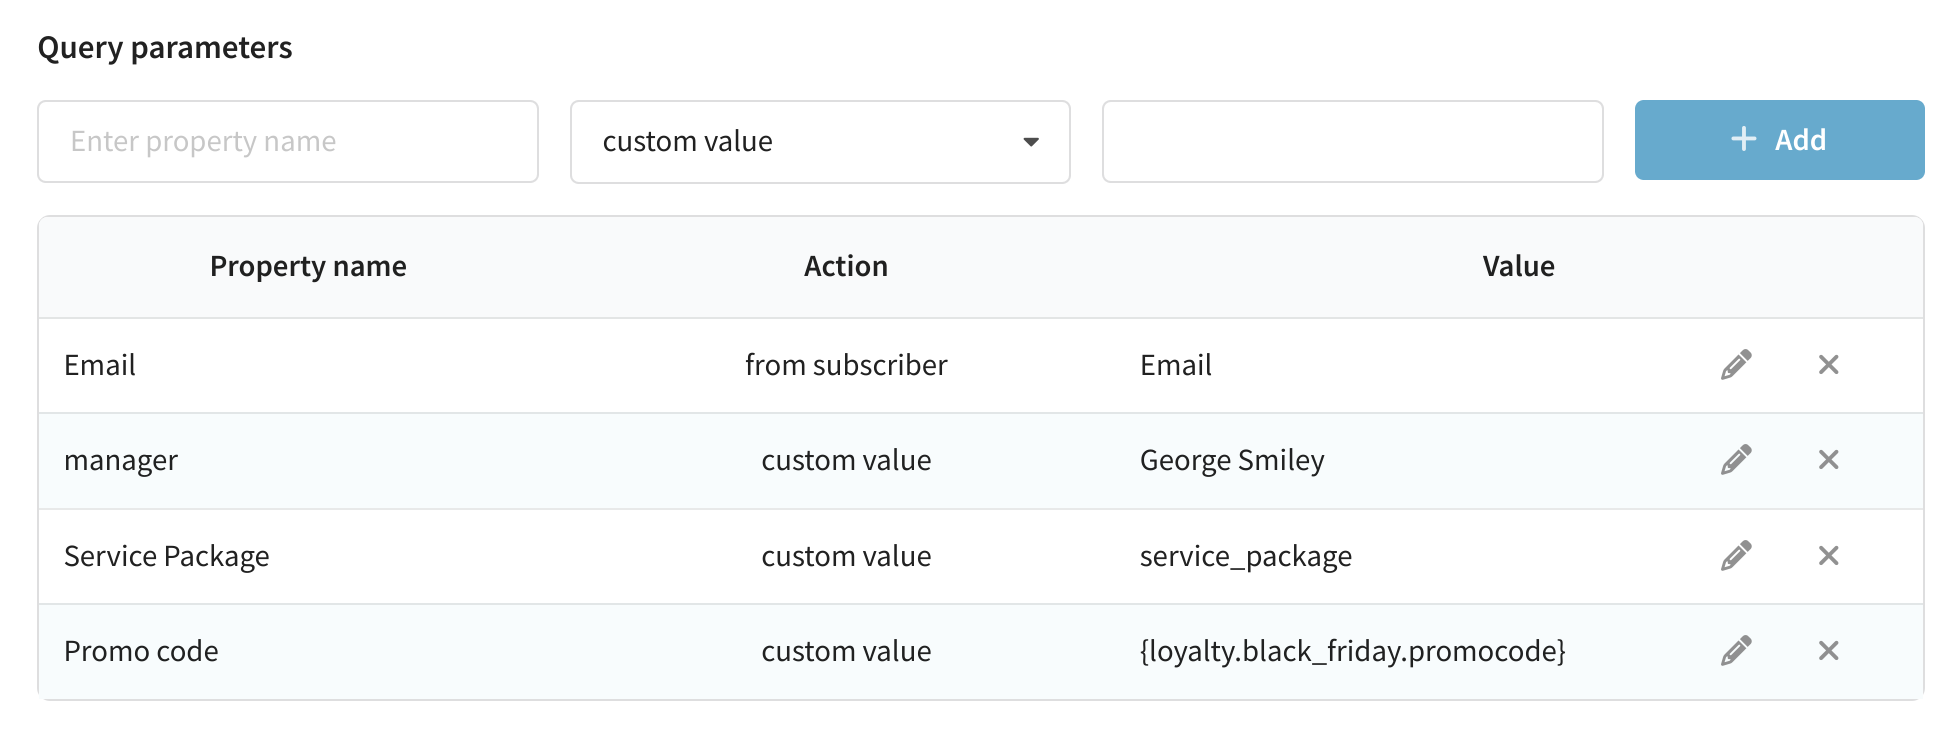
The body of the request consists of parameters. To add a parameter, click the corresponding button and the source of the value (just like when adding a header).
If you select "Custom value" in the query parameter, you can use variables associated with the profile. For example, promocodes of loyalty programs. If no promocode from the selected loyalty program is linked to the profile, the request will return an empty string "code": "". It can look like following:
{loyalty.<'Template name' from the settings of the loyalty program>.promocode}
If for some reason a request to the server fails, the platform proceeds to execute repeated requests. You can configure the maximum number of retry requests, as well as specify the frequency of their sending to maintain a uniform load on the server. Retries will be fulfilled until the request is successful.
A successful request is a request that matches the condition specified in the element:
Status 200 — the server returns HTTP response code 200.
Plain — the response from the server should go into the specified Regex.
Parsed — is used if the server returns a JSON or XML object. The path to the to the field name and the expected value must be specified. The value can be empty.

After calling the API, you can save the received response (e.g. JSON object) to the {apicontent} variable and use this data in the next steps of the scenario. To do this, activate the option "Save http-response in the field {apicontent}". However, when used in other scenario elements, the apicontent prefix is not needed, only the field name is required.
Enter the name of the field to which the object will be written. This name will be used when substituting the variable into the message template. For example, if you specify the field name - field_name, then in the template the reference to the JSON-object will look as follows: {apicontent.field_name}.

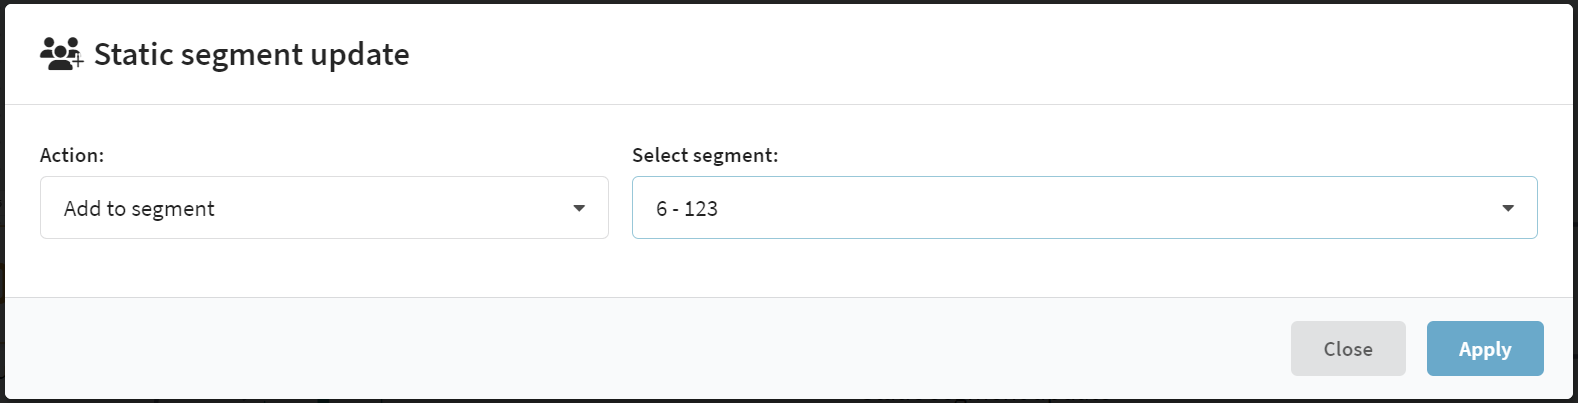
Static segment update
 | Adds a customer profile to the static segment of the audience or removes it from the segment. |
Read more
In the element settings, select add or delete and the available static segment:
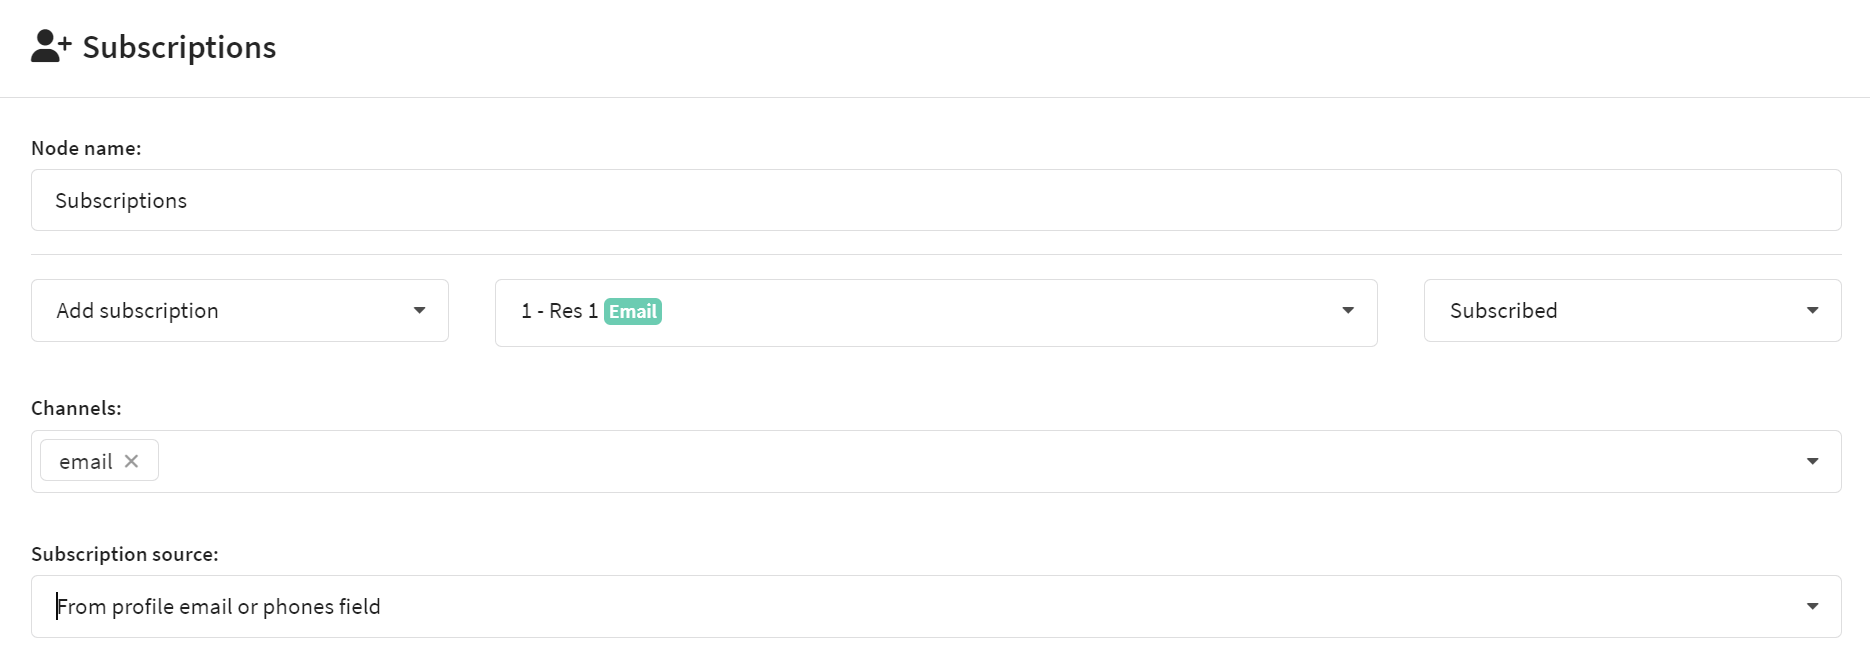
Subscriptions
 | Subscribes a client to a specific resource or updates existing subscription data. Profile data or subscription data for another resource can be used as a subscription source. |
Read more
Enter the name of the element. A subscription can be added if the customer is not yet subscribed to the resource, or change its status. For example, when confirming a subscription or using custom unsubscribe scenarios.
Select the **subscription resource from the drop-down menu and the available communication channels. Change the subscription status if necessary. Select Email and Phones profile field data or subscription data from another resource as the subscription source when adding.
For subscriptions to Push notifications, you can only use subscription data from another resource that contains client device IDs to send Push.
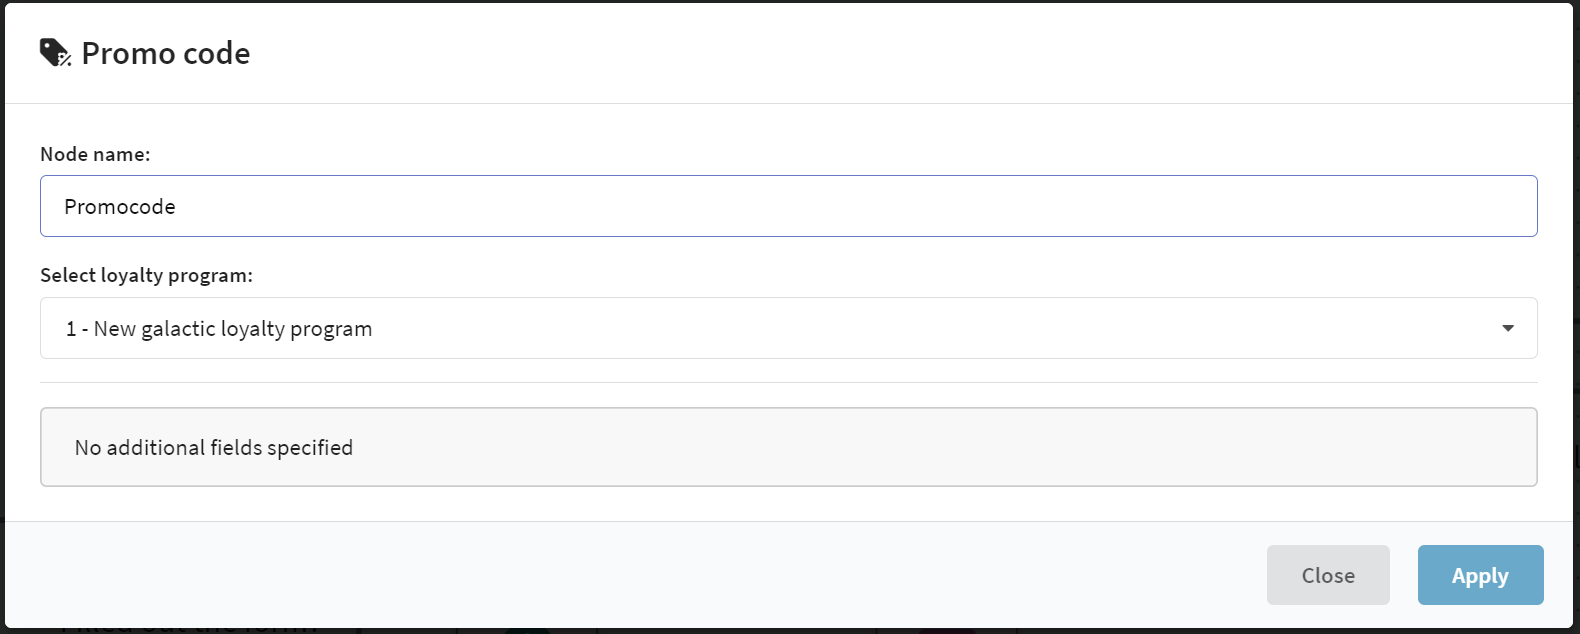
Promocode
 | Assigns a promocode from the selected loyalty program to the customer profile. The promocode can then be sent to the customer via one of the elements in the “Channels” category or used to calculate personalized offers. |
Read more
Enter the name of the scenario element and select the required loyalty program. The program must generate a sufficient number of promocodes or the option of creating promocodes by scenario must be active.
If the profile already has a promocode for this loyalty program, the scenario will be fulfilled.
If a promocode cannot be assigned for one of the reasons below, the scenario will end on that element:
- promocode limit has been reached
- loyalty program is not active
- the loyalty program has no free promocodes, and its option "The scenario can create promocodes if there are not enough of them" is disabled
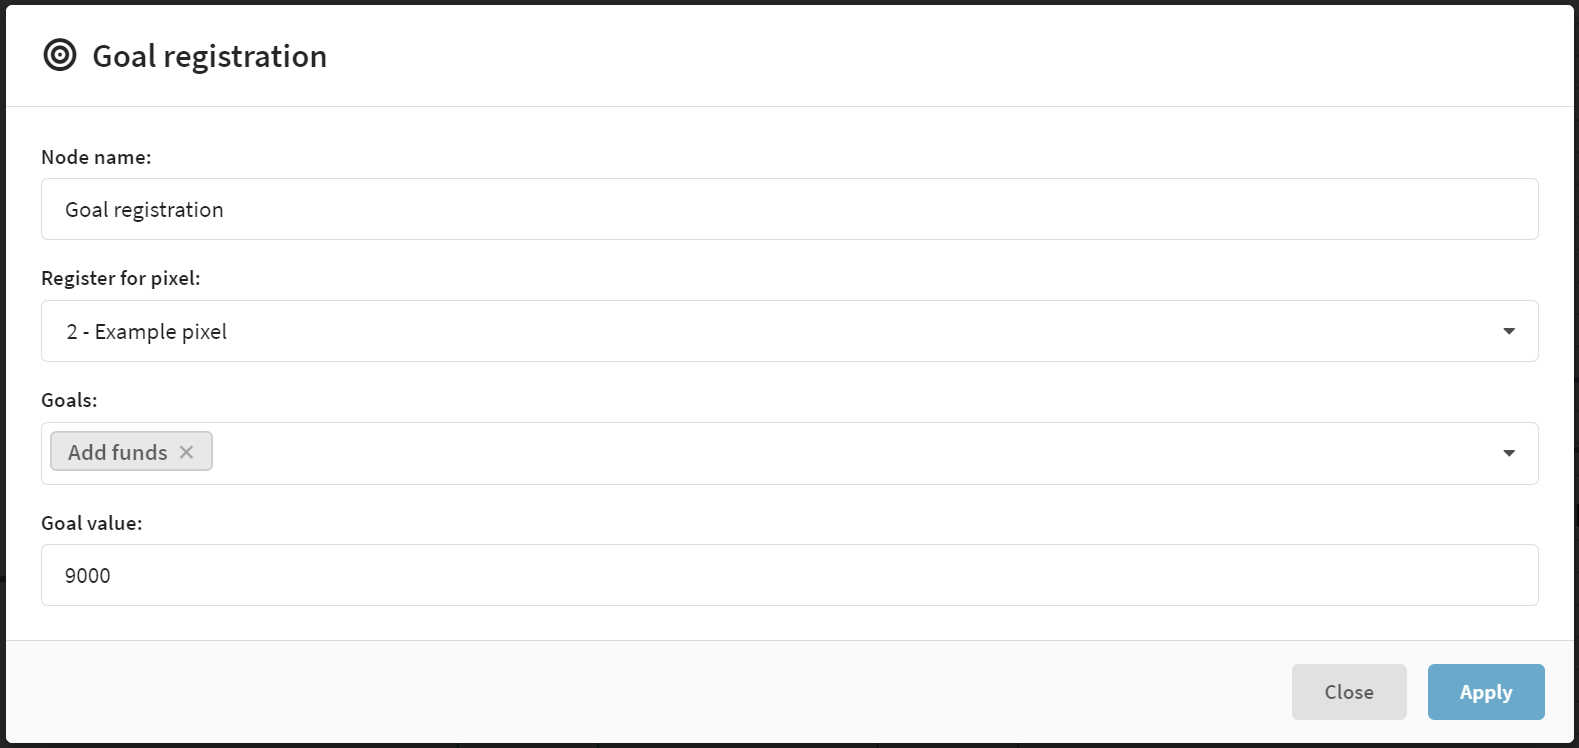
Goal registration
 | Records in the client profile the achievement of a certain goal and the associated cost of the action. Can be used for scoring subscribers, LTV and RFM segmentation, in reports on conversion and profit. |
Read more
Enter name of element and pixel to which the target will be bound. Registration of identical targets for different pixels can be used in affiliate programs or for A/B testing of the interface of your site or other resources.
Below, select existing targets or add new ones. Specify the value to be transferred for the targets.
The value for ALL targets will be written as a single value. If multiple targets with different values are to be passed, add several such elements - one after the other, with different targets.
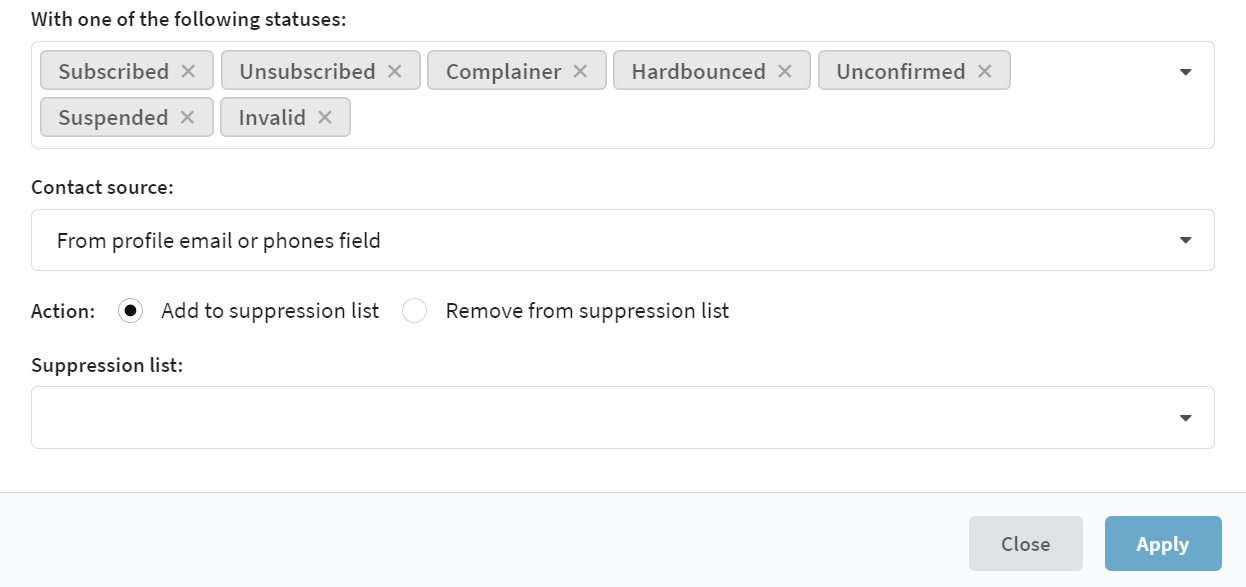
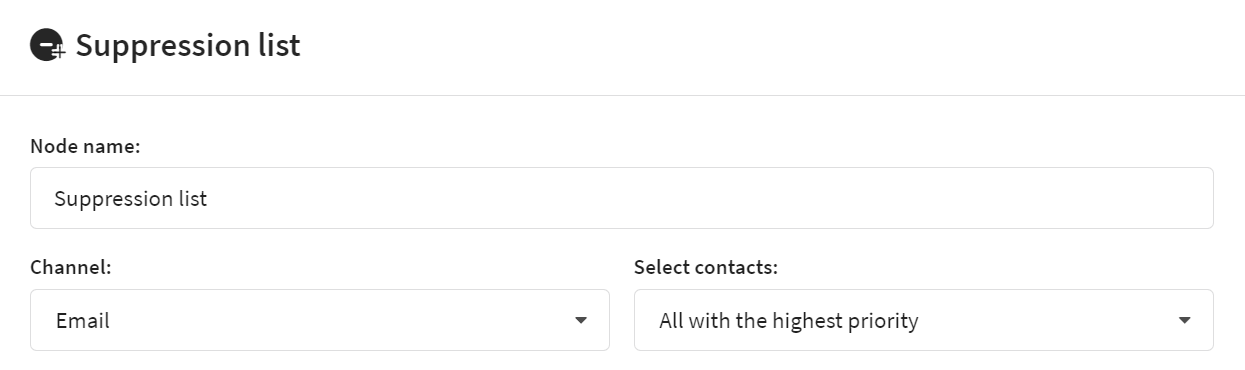
Suppression list
 | Adds certain client contact details (email address and phone number) to the stop list of the platform. Communication with the customer using this data will be blocked. Or vice versa, removes contact details from the stop list, restoring the ability to communicate with the client. |
Read more
Enter the name of the element to be displayed in the scenario. Next, select which subscriptions contact information you want to block or restore. Select the communication channel and priority of subscriptions to change:
Select the resource and subscription statuses whose contact information you want to add to the suppression list or remove from the suppression list. At the bottom of the form, select the suppression to add or remove: