Tutorial: My First Mobile Push Campaign
 | This tutorial will help you to create and launch your Mobile Push campaign in the Altcraft Platform from scratch. Mobile push notifications are displayed in your customers' mobile device message centre — in the upper part of the screen most commonly. They are allowed by default on application installation. That's why you can start engaging your customers right away and increase your app conversion. Push notifications are much more profitable than SMS, because sending them practically costs nothing. |
Step 1: Configure a Domain to Work with Push
If you use an Altcraft Marketing cloud account, please give the information to the support team at team@altcraft.com. They will help you to connect the integration.
If the Altcraft Marketing platform is installed on your equipment (On-Premise), contact your platform administrators. Or just contact our support team!
Make sure your website is running over HTTPS. In addition, web pixels must be configured in the Altcraft Marketing system.
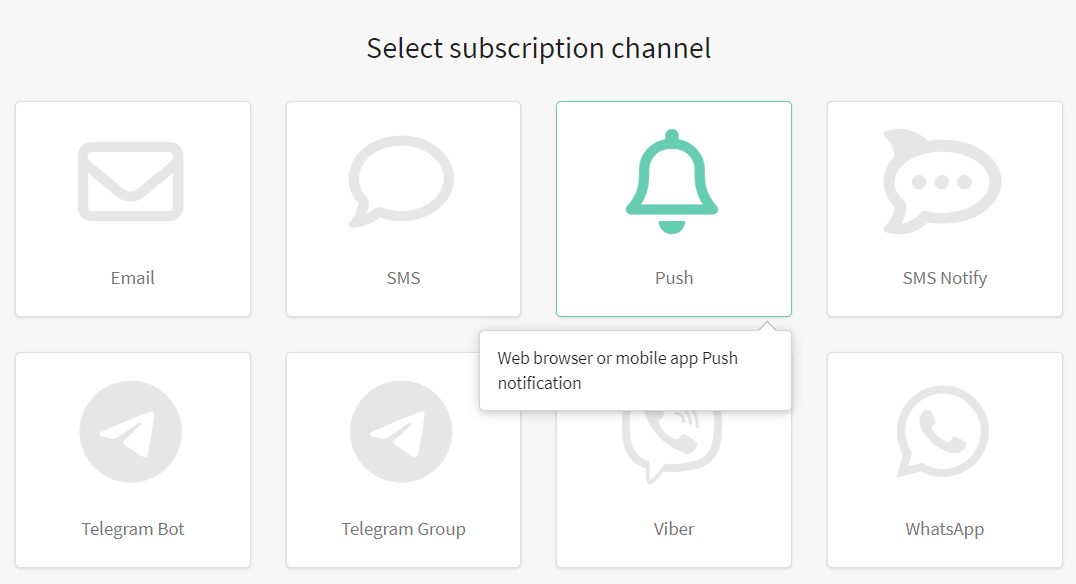
Step 2: Subscribe customers to the Push channel
Profile databases and subscription resources
Altcraft Marketing mailings are received by your subscribers. Subscriber profiles are stored in profiles databases.
When you start your Push campaign, you use profile subscriptions to resources. This way, you can send notifications to different devices or to different browsers. Each client profile can be subscribed to one or more resources.
What can be a resource? A specific marketing area, a site, an application, or the type of content.
Select the section "Resources" in the main menu, then create a new resource or select an existing one. Select the Push channel for your new resource:
In the general settings, add the necessary databases. If it's necessary, assign a sending policy and specify the Default tracking domain. This domain will process your customers' clicks on links in messages:

In Push settings, select the browsers to which you are going to send notifications to clients and set them up:
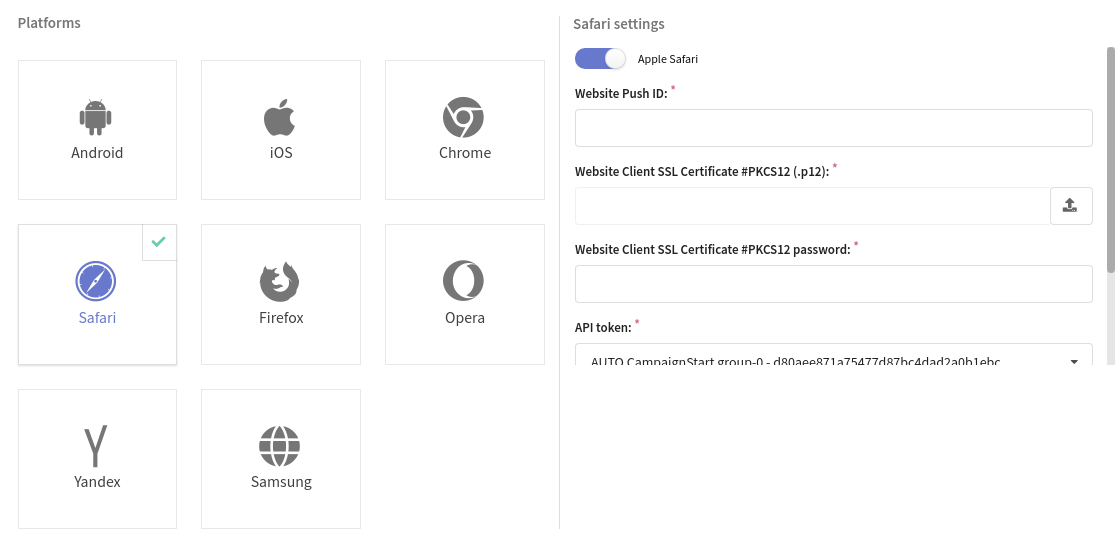
In Altcraft Marketing there are 5 mobile push options:
- Google Firebase Cloud Messaging — for both Android & iOS
- Apple Push Notification Service — iOS apps only
- Yandex.AppMetrica — for both Android & iOS
- Huawei Mobile Services — for both Android & iOS.
- RuStore — for Android apps only.
Don't know how to configure each platform? Take a look at this tutorial.
Customer profiles and subscription to the resource
So, we've just configured the profiles database and subscription resource. Now it's time to import customer data into the platform. For each client, Altcraft Marketing creates a single digital profile that includes personal data, history of actions and subscriptions to your resources.
Existing subscriber database
If you already have the database full of tokens for your customers, you can upload customer data to the platform and use it for mailings: one at a time, in a list, or from a table file. Different import methods are described in this article.
You can also set up automatic import of client profiles:
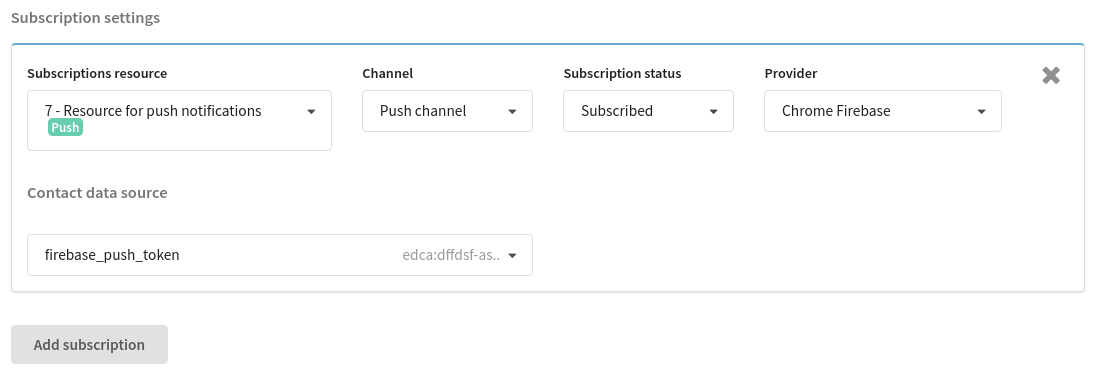
When you import data, sign clients to the previously prepared resource. To do this, in the "Subscription settings" section, select Push as a communication channel, select a notification provider, in the "Contact data source" field, specify the column with device tokens:
If you already have a profiles database, add them a subscription to a new resource. There are two options:
- if customers have subscriptions to another resource with up-to-date email addresses — use bulk profile update
- if you need to upload to the platform SMS phones for subscription, use the profile import in the "update only" mode
New push subscribers of your website
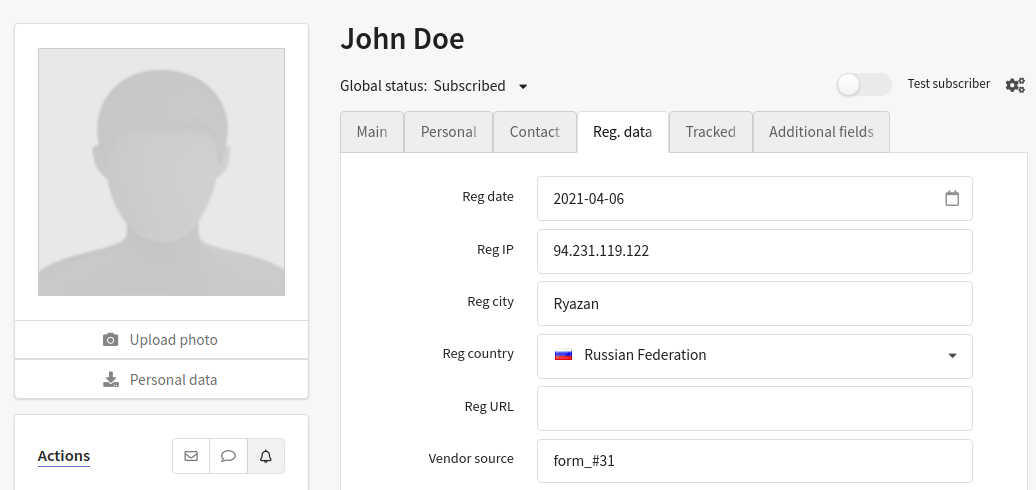
Altcraft Marketing imports the profiles of your website visitors when they allow push notifications. At the same time, information about the subscriber's device, IP address and geolocation determined by it are recorded in the profile:
Go to the next step to configure the import of new push subscribers.
Step 3: Add Push SDK to your app
If you're going to launch push mailings, your app must have a toolkit for working with push. This toolkit is SDK of the sending platform you plan to use.
Contact the developers of your app and give them the token of the previously configured resource. How to get it? Go to the resource settings and look at the screenshot below:

Subscriptions for app notifications are assigned to users with API request from the application: Add push subscription to database.
Altcraft Platfrom has its own SDK, Altcraft mSDK. It is implemented on Firebase for the Android platform and on Firebase and APNs for the iOS platform. To access the SDK you can contact our support team. You can learn more about Altcraft mSDK features here.
A subscription to Yandex.AppMetrica can be added automatically to users of the app that has the connected metric service. Read more in the article "Integration with Yandex.AppMetrica".
Step 4: Prepare content for sending
The content for your Push campaigns is created in Message Templates. The templates contain content for all available channels. When you create a new template, select the Push channel or add it for an existing one.
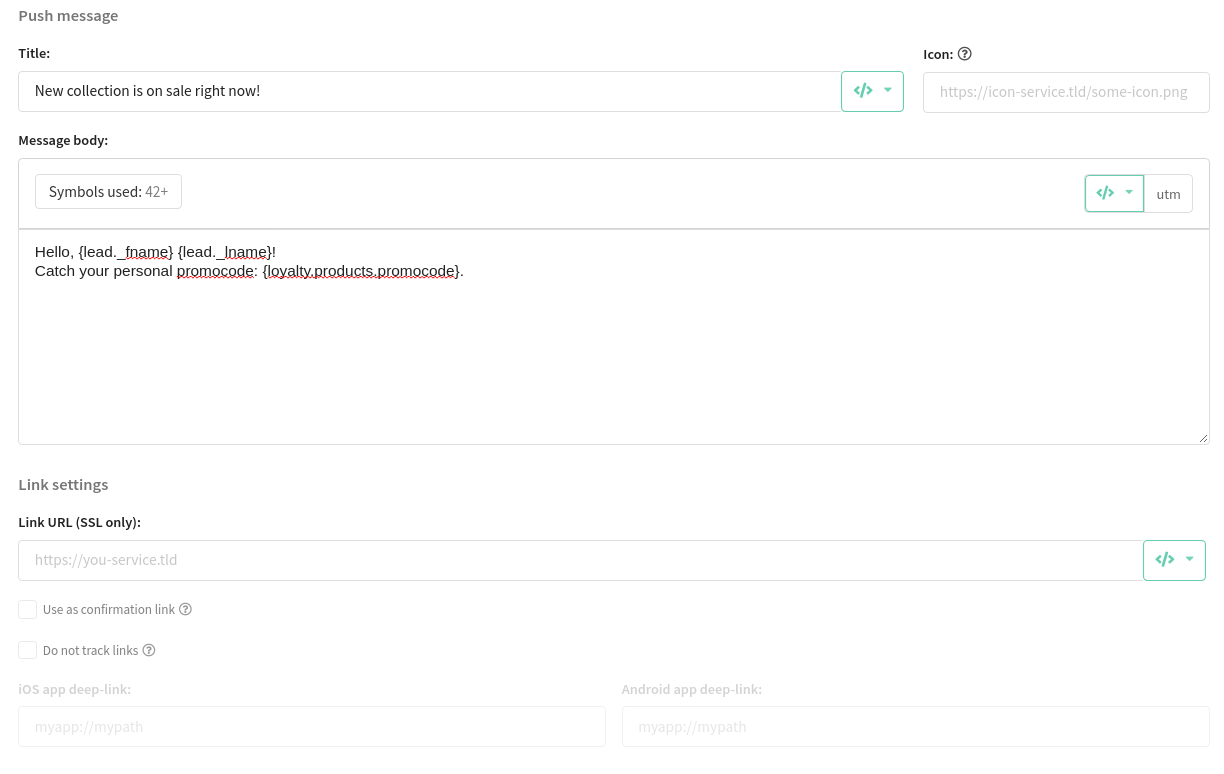
The template of the push notification can contain:
- A title that is similar to email subject
- Notification body is the main text part of the message
- An image or an icon that will be displayed in the notification
- A clickable link is the link that the subscriber will follow when he clicks on the push notification.
To the title, link and body, you can add the data of a specific client, as well as dynamic text content from external sources:
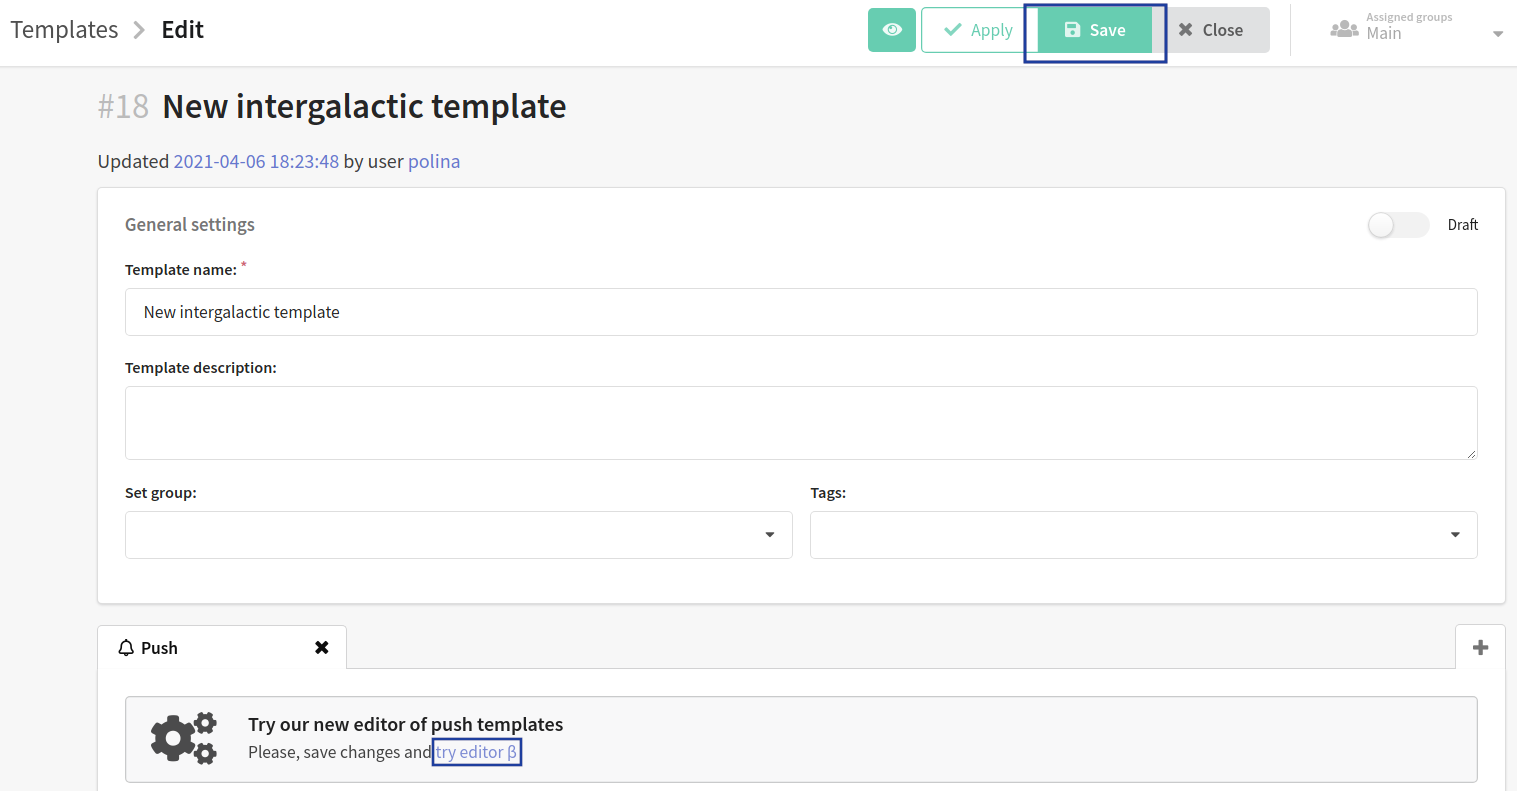
If you send not just push, but Rich push notifications, you'd better take a look at the special editor to create a template. In Rich push notifications, you can add not only a text and an icon, but also buttons, images, banners, and even audio and video files. What's more, the new editor will allow you to individually customize the notification for a specific OS, as well as add adaptive links and deeplinks.
To open the Rich push editor, you need to make an initial version of a push message in the usual template editor at first. We've just described how to do this above. Then click Save. Now go back to the created template and click "try editor β" to launch the new editor.
Step 5: Select a campaign type
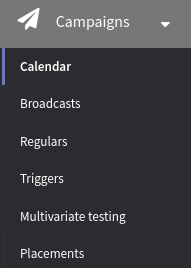 | If you want to send an SMS message, you need to use such a tool as a Campaign. Do you want to send out a one-time mailing to all profiles
of the database or to the audience of the specific segment? Choose Broadcasts. If the mailing is periodic, your choice is a Regular campaign. In the main menu select Campaign and open Calendar. This is where you'll find all scheduled mailings. |
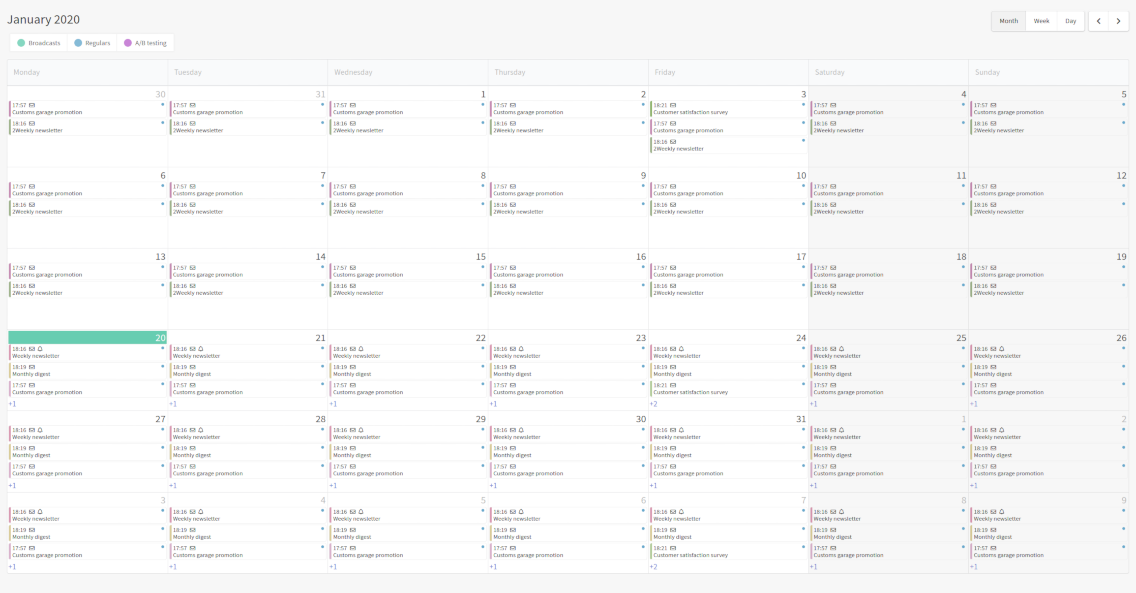
Decide on a date and create a campaign of the required type:

You can find details about how to set up Broadcast on this page.
You can find details about how to set up Regular campaign on this page.
Once you're done with the general campaign settings, you need to:
- Select Push as the communication channel
- Select providers and sending mode. There are two sending modes - fanout, sending to all subscriptions, or last, sending to the subscription with the most recent creation date. If there are several of these (created at the same time), then one subscribtion will be selected randomly. If campaigns have filters by provider, custom fields or categories, then the filters are first applied, and then the most recent subscription is choosen;
- Select the subscription resource you've just configured and the audience of recipients;
- Add a message template to your message;
- Set a schedule. For example, for a broadcast the option "On specific date at specific time" is available.

Once the campaign is set up, save it. Later you can find it in the list of campaigns of the corresponding type. There is a quick action menu on the right side of each campaign. Use it to test the campaign — and if everything is successful, activate it:

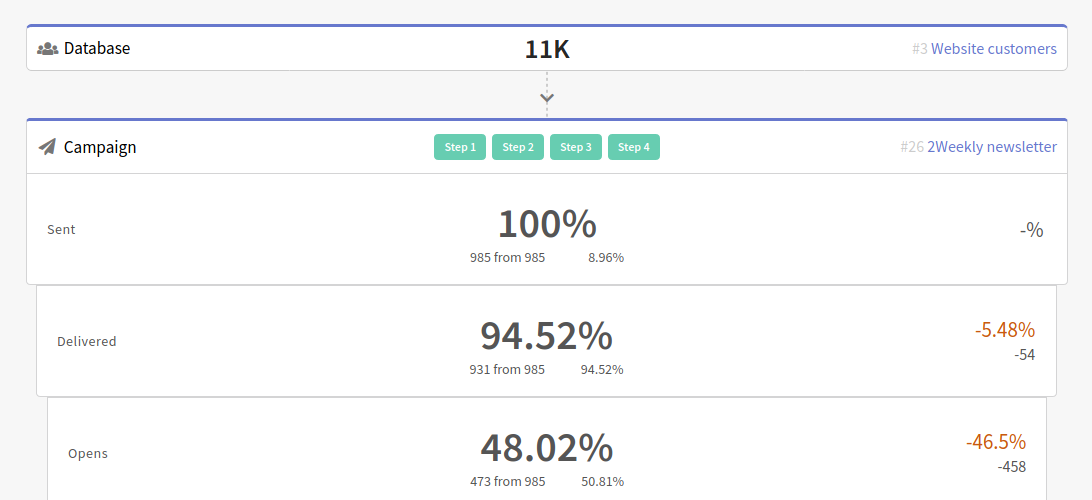
Step 6: Assess the campaign effectiveness
Do you want to assess the effectiveness of your mobile push campaigns? Go to the section Analytics in the main menu of the platform.
The channel report provides analytics for one or several campaigns, for one or several communication channels. For grouping, you can select "Report on " Push:
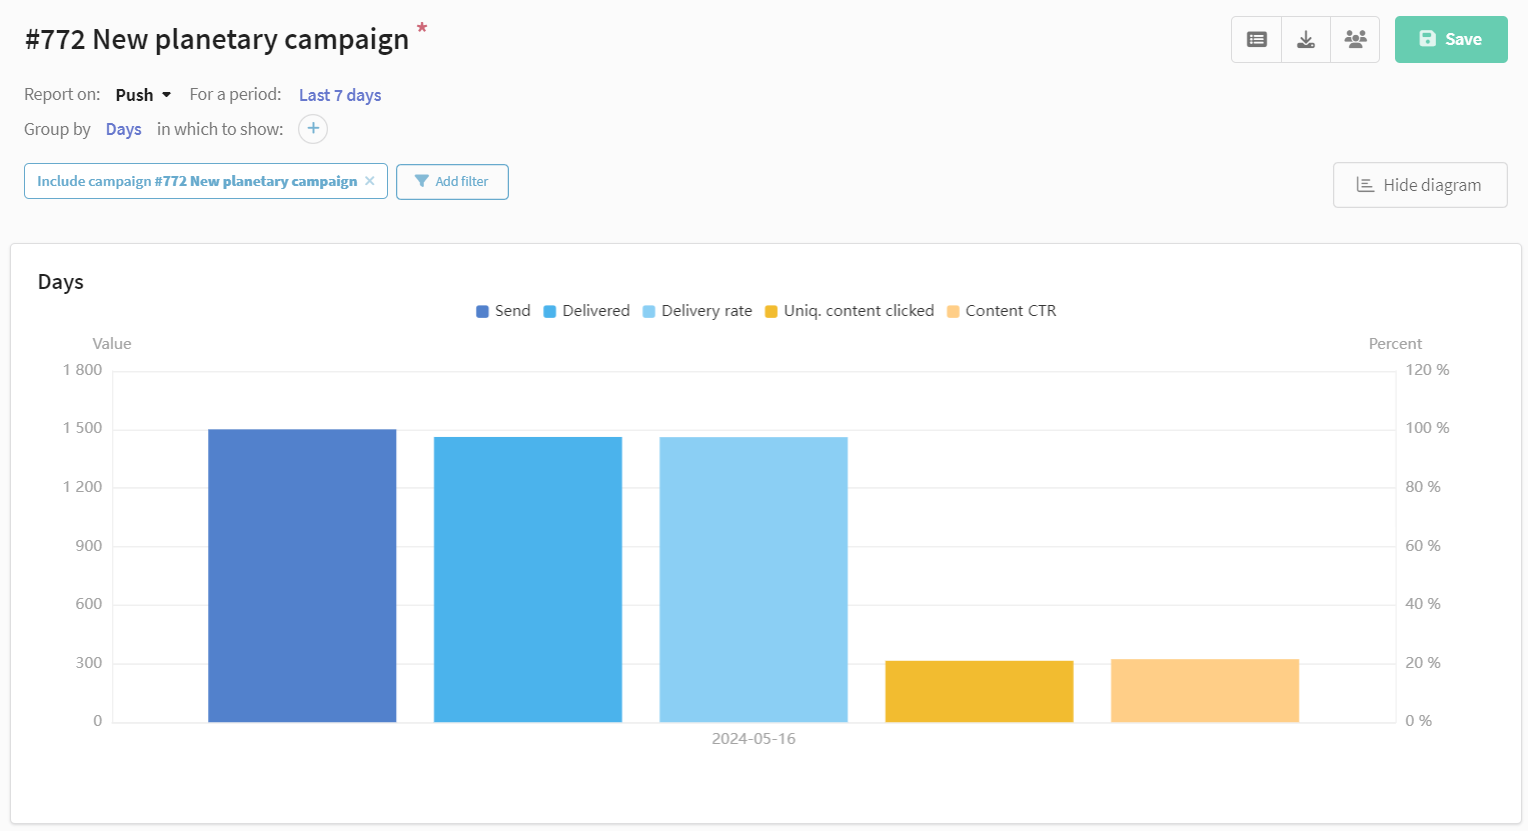
You can also go to the channel report for a specific campaign by following the link in the campaign editor:

Actions in the Push campaign or in the template can turn into steps in the interactive conversion funnel: