Migration from OneSignal
Step 1. Get VAPID keys from OneSignal service
Skip the step if you are migrating subscriptions configured for the Safari browser.
Request the keys from OneSignal technical support. Both private and public keys are required .
VAPID keys and Application Server keys are the same thing.
Step 2. Import the VAPID keys into your Firebase project
Skip the step if you are migrating subscriptions configured for the Safari browser.
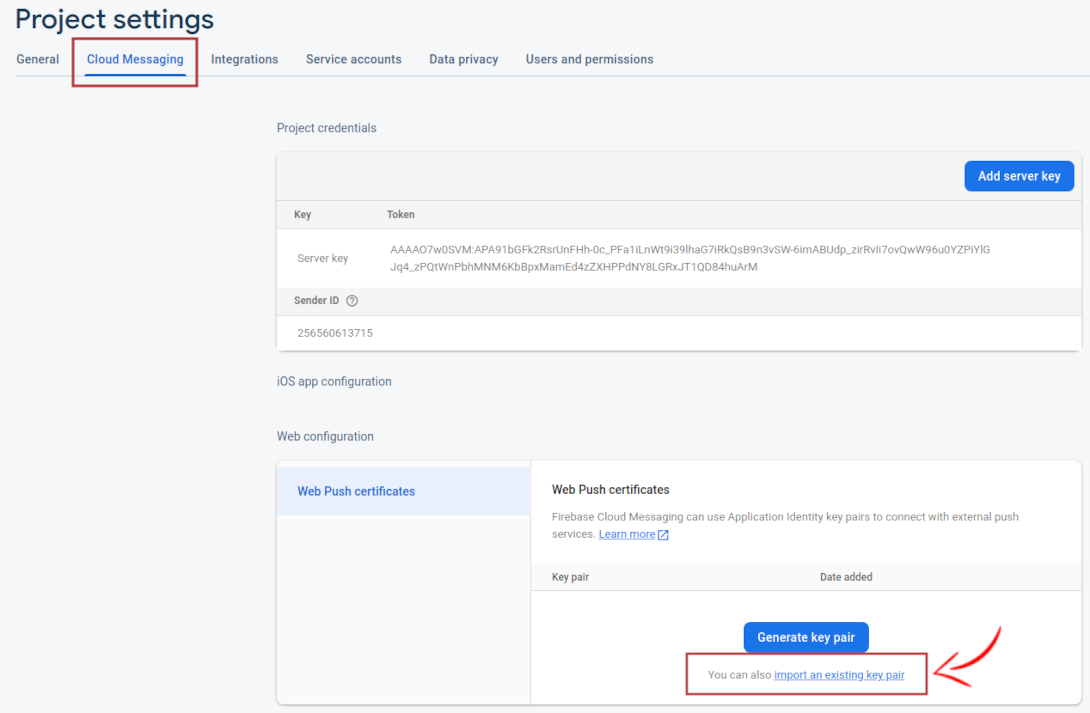
Go to project settings in Firebase and go to the Cloud Messaging tab. At the bottom of the page, you will see the Web Configuration section. Here you can generate keys yourself, but we do not need this, since you have already received VAPID keys from your service. Click "import an existing key pair" at the very bottom of the section.
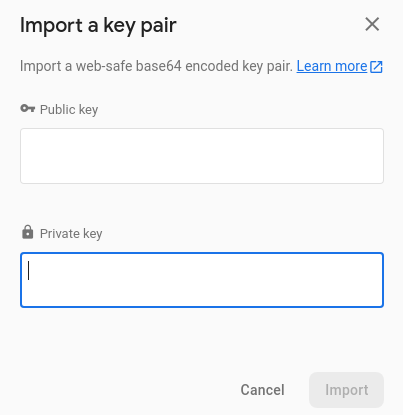
In the new window enter Public key and Private key that you've got from OneSignal technical support.
Step 3. Configure the resource
For information on configuring a resource for Web push notifications, see Web push: settings and implementation.
Please note that resource settings differ from browser to browser.
Step 4. Export subscriptions
Exporting subscriptions involves creating a CSV file that contains all of your current user data.
Use the Curl utility to make a POST request. The request will generate a URL that to can use to download a compressed CSV file (.csv .gz).
The file may take several minutes to generate depending on the number of users in your app.
You can test if it is complete by making a GET request to the csv_file_url value.
If the file is not ready, a 403 error will be returned. Otherwise the file itself will be returned.
Below is an example of the request that can be run in the terminal.
curl -X POST -H "Authorization: Basic YOUR_REST_API_KEY" -H "Content-Type: application/json" -d '{
    "extra_fields": ["web_auth", "web_p256"],
    "last_active_since": "1469392779", "segment_name": "Active Users"
}' "https://onesignal.com/api/v1/players/csv_export?app_id=YOUR_APP_ID"
The request requires your OneSignal App's REST_API_Key and APP_ID. You can find this data on the OneSignal service. Go to Settings and then - to the Keys & IDs tab.
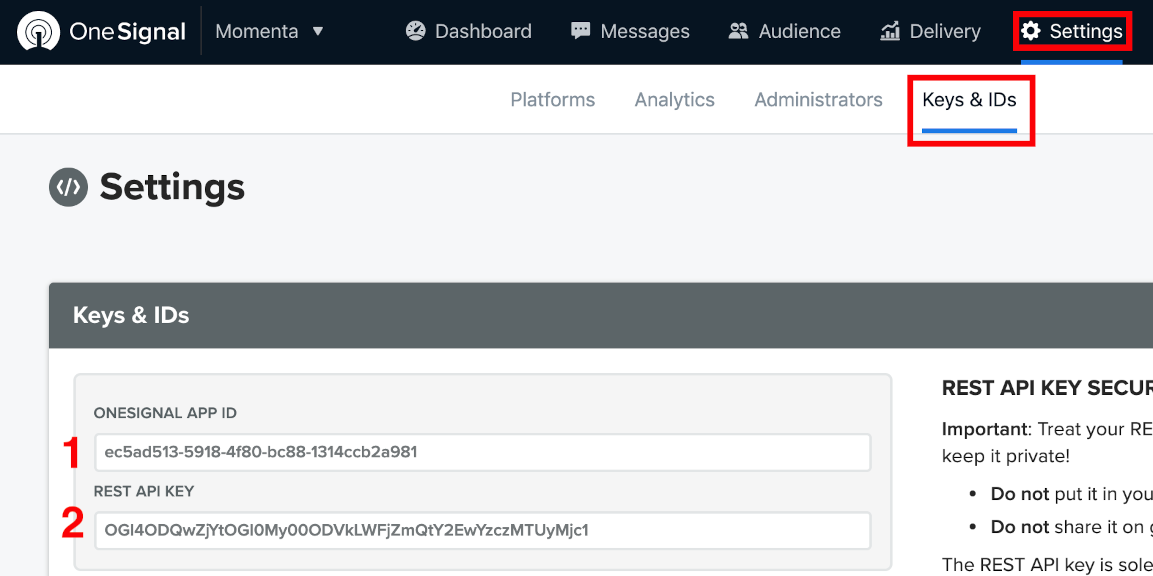
The following parameters must be passed in the request body:
| Field | Description |
|---|---|
| "extra_fields" | Additional fields that you wish to include. Currently supports location, country, rooted, notification_types, ip, external_user_id, web_auth, and web_p256.In our case, you must specify web_auth and web_p256. |
| "last_active_since" | Export all devices with a last_active timestamp greater than this time. |
| "segment_name" | Export all devices belong to the segment You can use this field to export only the segments you are interested in. More details about segments in OneSignal: https://documentation.onesignal.com/docs/segmentation. |
You can get more information on exporting subscriptions from OneSignal here: https://documentation.onesignal.com/reference/csv-export.
Step 5. Provide the csv file with these fields to the administrator or Altcraft support service
Skip the step if you are migrating subscriptions configured for the Safari browser.
If the Altcraft platform is deployed inside your business (On-Premise solution), transfer the generated csv file with subscriptions to the platform administrator.
If the platform is installed on the cloud (SaaS solution), transfer the csv file to Altcraft support.
Step 6. Take the processed csv file from the administrator
Skip the step if you are migrating subscriptions configured for the Safari browser.
Step 7. Import profiles
Now you can import profiles into Profile Database from a csv file. During the import a subscription to the required provider will be created.
In addition, you have the opportunity to update the database by creating a subscription to the same provider. Please note that in this case it must be one of the Firebase providers.
The provider identifier allows you to find out which browser the subscription belongs to and through which service it was created. Examples of providers: Chrome Firebase, Apple Safari, Mozilla Firefox.
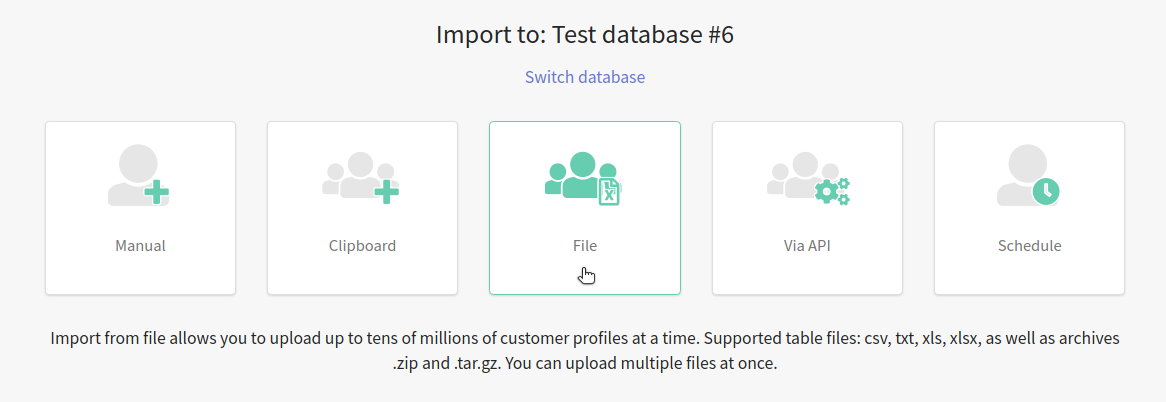
So, create or select a database and click Import customer profiles in the drop-down list.

Select the import method - File. Upload the required csv file with subscriptions.
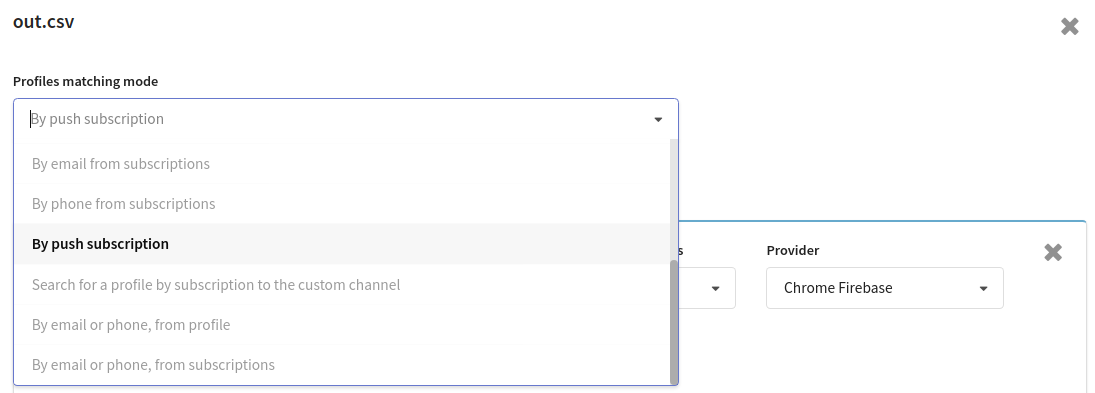
Click Profiles matching mode and select By push subscription in the drop-down list.
If your csv file contains any data that can be used to configure correspondences between profiles ("match users"), then before the import process, select the appropriate profile search mode.
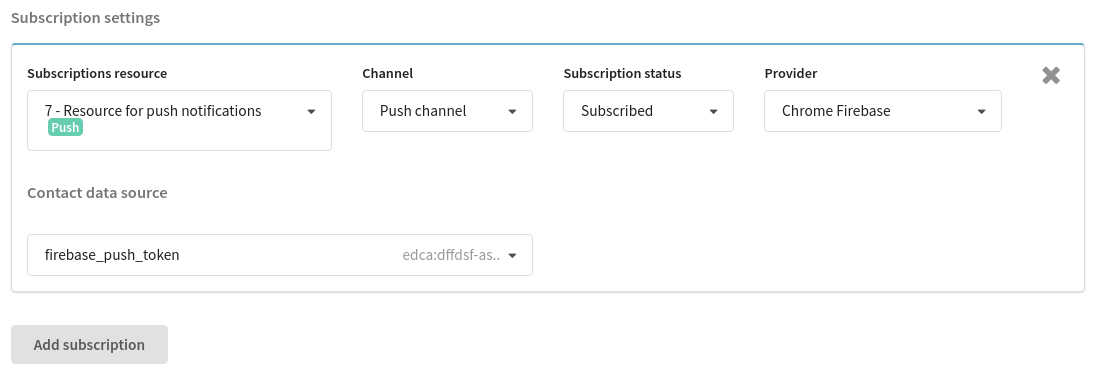
Click the "Add subscription" button and then configure the subscription:
- Channel is Push channel;
- Provider is the browser through which the subscription was made. If the user signed up using the Safari browser, then specify Apple Safari. If you don't know the subscription browser, you can import the subscriptions with the Chrome Firebase provider.
- Contact data source is the subscription id field from csv file. If the user signed up through the Safari browser, then you need to define this field yourself. For other browsers, you need to specify firebase_push_token here.
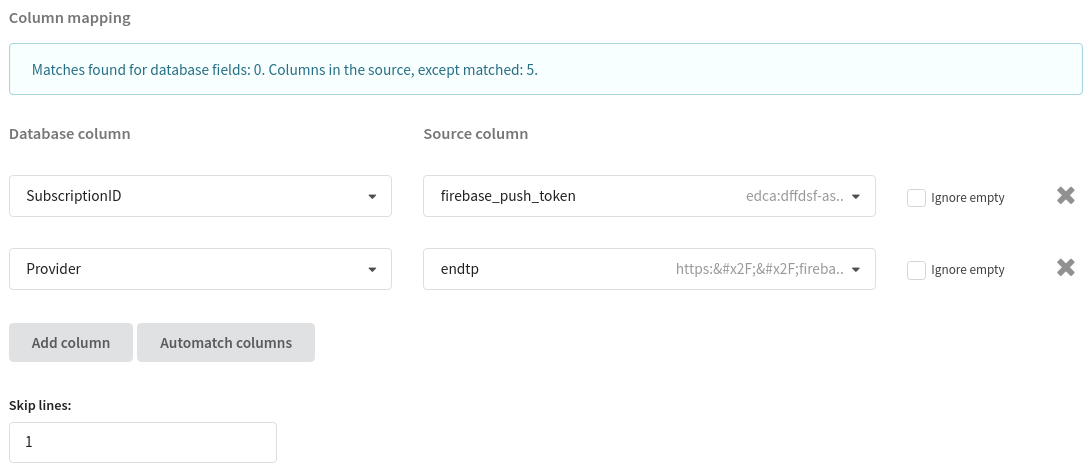
Now it's time to configure column mapping:
| Field | For Safari | For other browsers |
| SubscriptionID | Subscription ID field from csv file | firebase_push_token |
| Provider | If the Altcraft provider identifier field is missing in the csv file, then specify the same field as in the SubscriptionID. This will create a new subscriber for each subscription. | |
In the Skip Lines field, enter "1" if the file contains headers. Otherwise, the headers will be captured on import.
After you click the Import button in the upper right corner of the screen, the process of importing new profiles into the Database will begin.
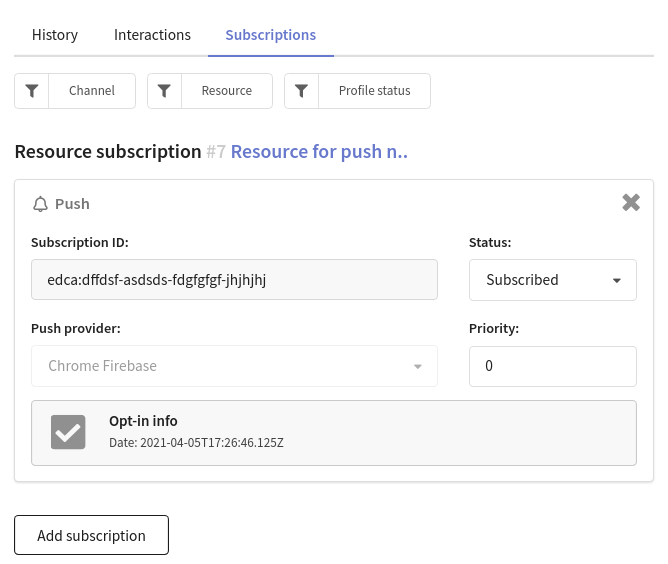
Once the profiles have been successfully imported, you can check them in the selected Profiles Database. Open the Subscriptions tab to see the new profile subscription for push notifications and information about it.
