How to transfer push subscriptions configured for Safari
If you want to transfer push subscriptions that are configured for the Safari browser, you need to have the Developer extension in your Apple account. In addition, the transfer is possible only if they were created with a certificate and a key from this account.
Step 1. Configure the resource
For information on configuring a resource for Web push notifications, see Web push: setting and implementation.
Step 2. Create a csv file with subscriptions
Unload identifiers of Safari subscriptions from external service in csv file format.
Step 3. Import profiles
Now you can import profiles into Profile Database from a csv file. During the import a subscription to the required provider will be created.
In addition, you have the opportunity to update the database by creating a subscription to the same provider. Please note that in this case it must be one of the Firebase providers.
The provider identifier allows you to find out which browser the subscription belongs to and through which service it was created. Examples of providers: Chrome Firebase, Apple Safari, Mozilla Firefox.
So, create or select a database and click Import customer profiles in the drop-down list.

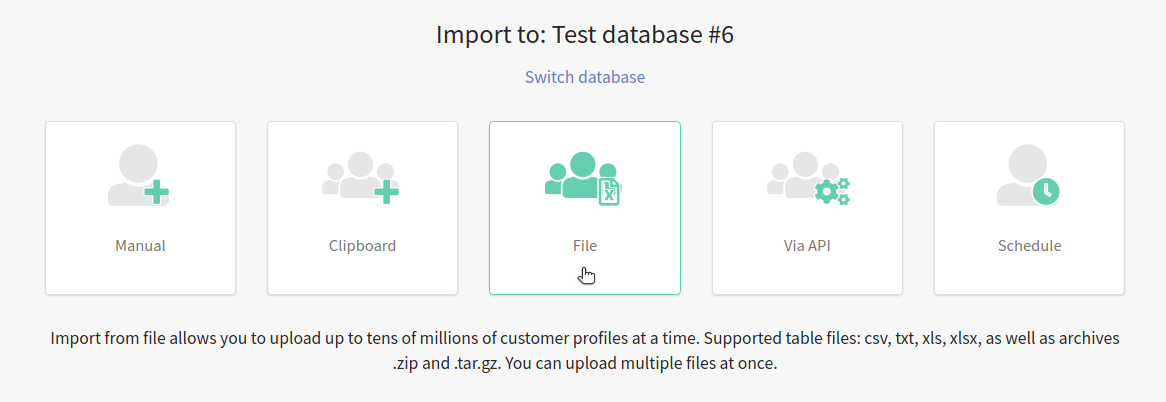
Select the import method - File. Upload the required csv file with subscriptions.
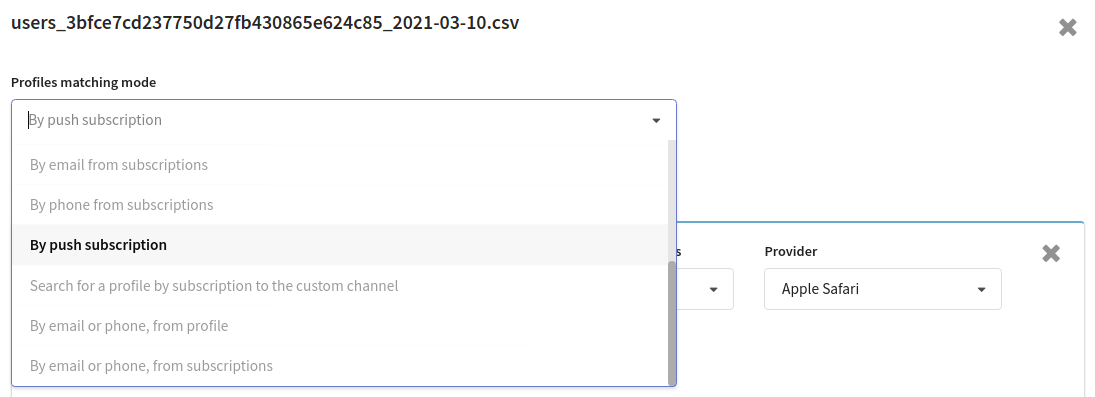
Click Profiles matching mode and select By push subscription in the drop-down list.
If your csv file contains any data that can be used to configure correspondences between profiles ("match users"), then before the import process, select the appropriate profile search mode.
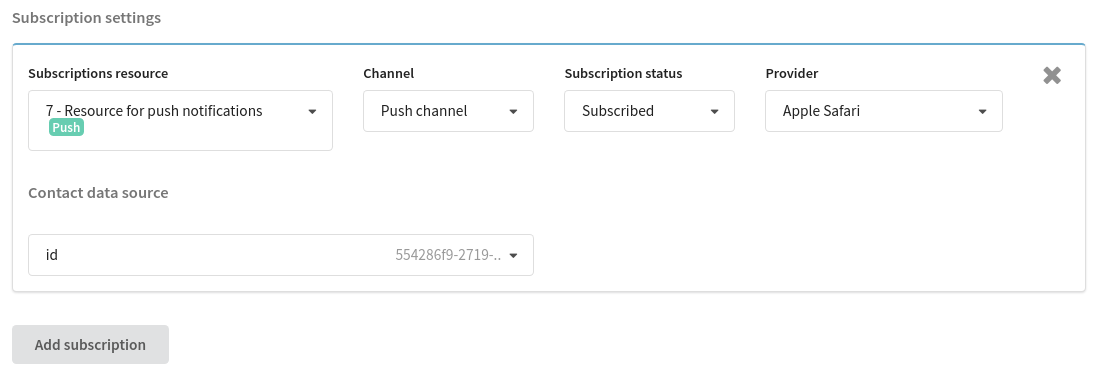
Click the "Add subscription" button and then configure the subscription:
- Channel is Push channel;
- Provider is Apple Safari;
- Contact data source: you need to specify the subscription identifier field from the file.
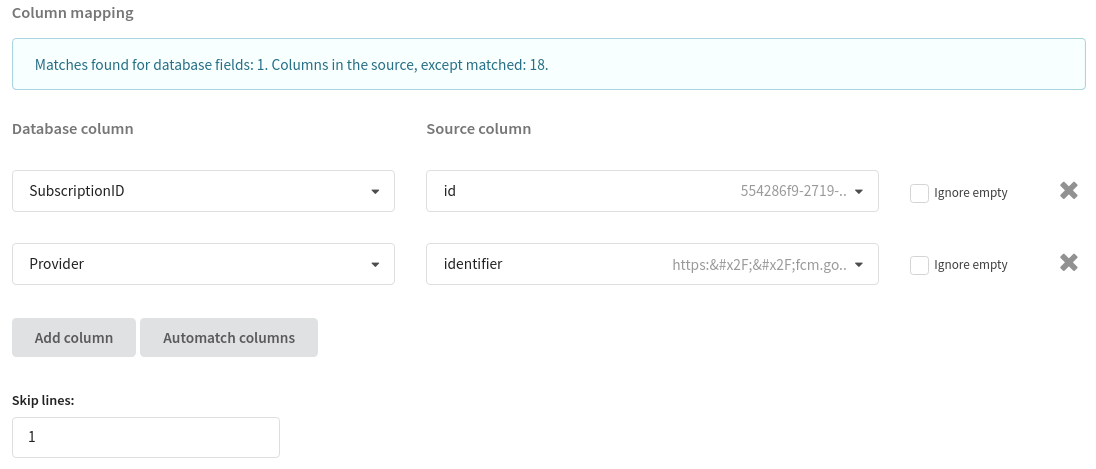
Now it's time to configure column mapping:
- SubscriptionID: subscription identifier field from the file;
- Provider: Altcraft provider identifier field;
If the Altcraft provider identifier field is missing in the csv file, then specify the same field as in the SubscriptionID. This way you'll create a new subscriber for each subscription.
In the Skip Lines field, enter "1" if the file contains headers. Otherwise, the headers will be captured on import.
After you click the Import button in the upper right corner of the screen, the process of importing new profiles into the Database will begin.
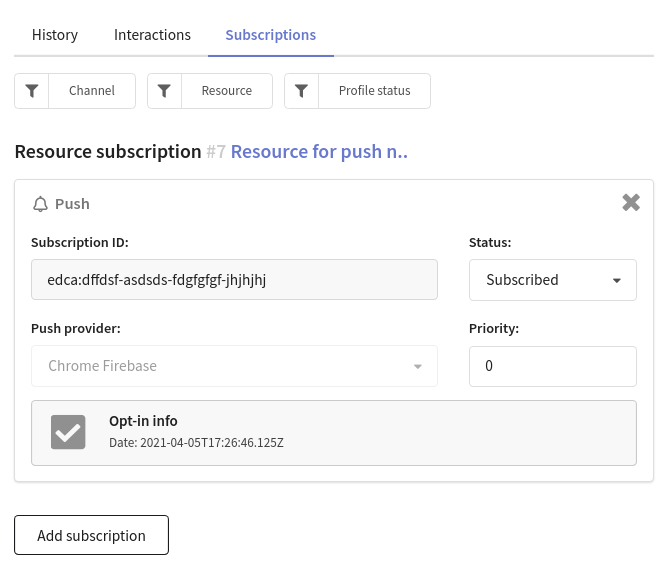
Once the profiles have been successfully imported, you can check them in the selected Profiles Database. Open the Subscriptions tab to see the new profilesubscription for push notifications and information about it.
