Rich Push Editor (Beta)
Step 1. Open the rich push editor
Go to the template editor. At first, you will see only the old editor. Make an initial version of the push message here. The initial version includes the next steps:
give a name to the template;
specify a title for the push message;
specify the path to the icon that will be displayed in the message;
fill in the body of the message (the main text of the message).
After all this click "Save". Now go back to the created template and click "try editor β" to switch to the Rich Push Editor.

Step 2. General settings
Now you are in the new editor. Enjoy it!
In the section "General settings" such fields as title, the path to the icon and message body are filled in. Of course, if you need, you can make some changes to these fields.
Don't forget to add some emoji to the title and body of your message. They will make your notification more interesting.

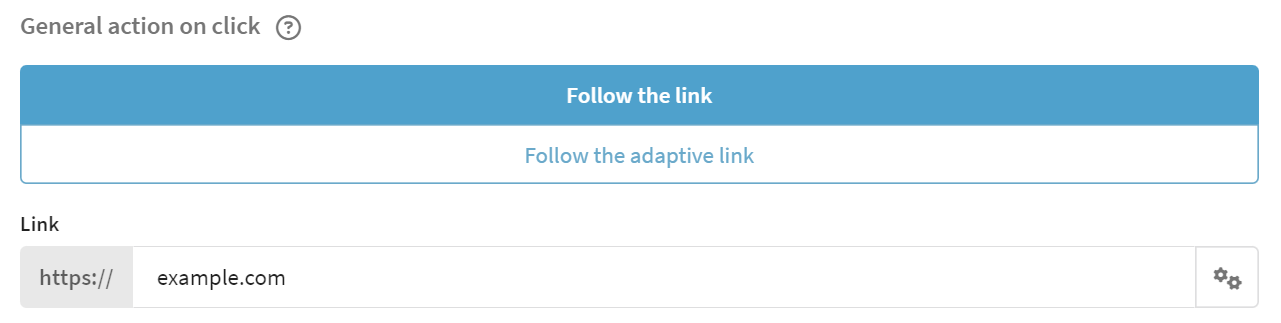
Step 3. General action on click
Next, you need to specify a general link to click on. It is the link that the user will follow when clicking on the push notification. Users will follow the general link unless a unique link is specified for different browsers and OS. The unique link is set below in the "Advanced Settings" section.
In the rich push template editor you can use 2 types of links:
- common link
- adaptive link

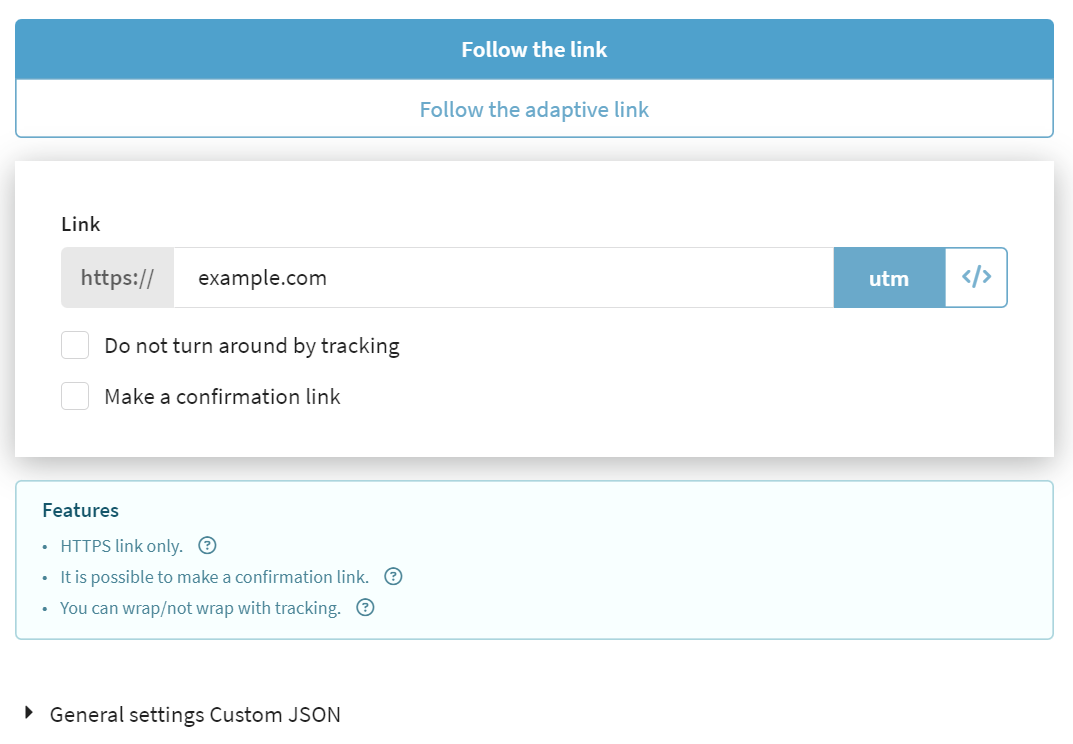
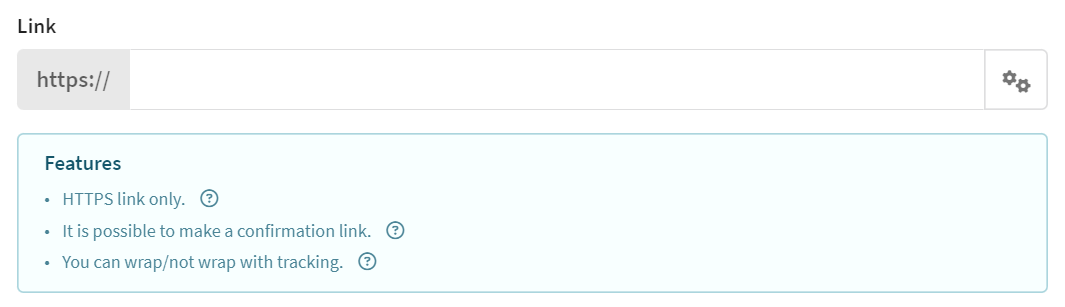
Common link
- Specify the URL for the link. Only use HTTPS links, meaning the link should lead to a website that operates on a secure SSL connection.
- Insert the variables by clicking the
</>button. - Add UTM tags to track subscriber traffic. Click "utm" and in the opened window, configure the tags, then click "Set utm."
- If needed, activate the "Do not wrap with tracking" field. This will disable redirection to tracking when clicking on the link, and click statistics will not be collected.
- If you activate the "Make it a confirmation link" field, you can use the template with this link for subscription confirmation. When clicking on the link, the profile status will update:
Unconfirmed→Subscribed.
Adaptive link
Adaptive link is a link to redirect the user to different URLs, depending on the device he uses to open the push notification (desktop, Android or iOS).
- Web link: If the user opens a push notification from a desktop device, he will follow this link.
- IOS link: If the user opens a push notification from an iOS device, he will follow this link.
- Android link: If the user opens a push notification from an Android device, he will follow this link.
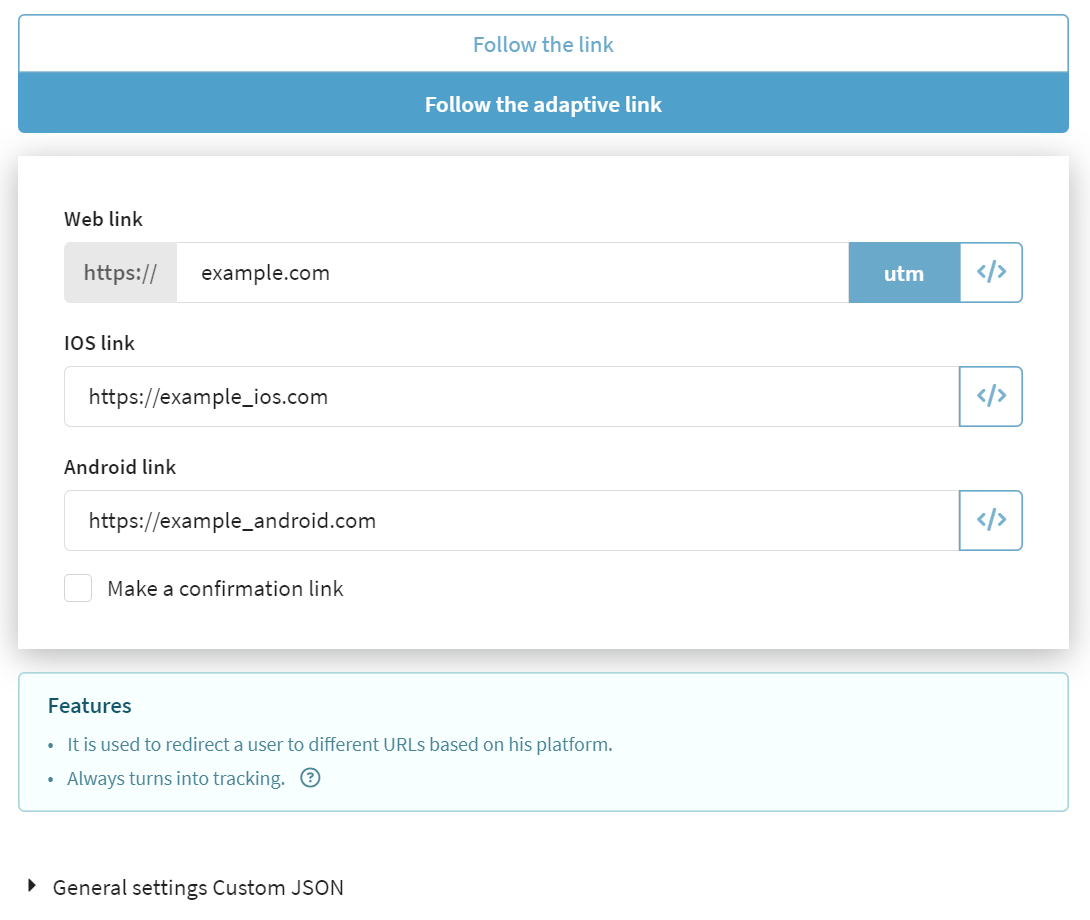
Additional settings:
- Make it a confirmation link — a template with such a link is used for subscription confirmation. When clicking on the link, the subscription status of the profile will change from
Not confirmedtoSubscribed. - Add variables to the link using the
</>button. - Add UTM tags. To do this, click the "utm" button, and in the opened window, configure the tags, then click Set utm.
Step 4. Advanced settings
The advanced version of the push notification editor allows you to create push messages for different OS and browsers. Switch between OS and browsers in the top bar and set up a push message for each of them.
By the way, on the left, you can see a preview of push messages in real-time.
You can also specify a test subscriber to see exactly how the generated push message will be displayed on his device.
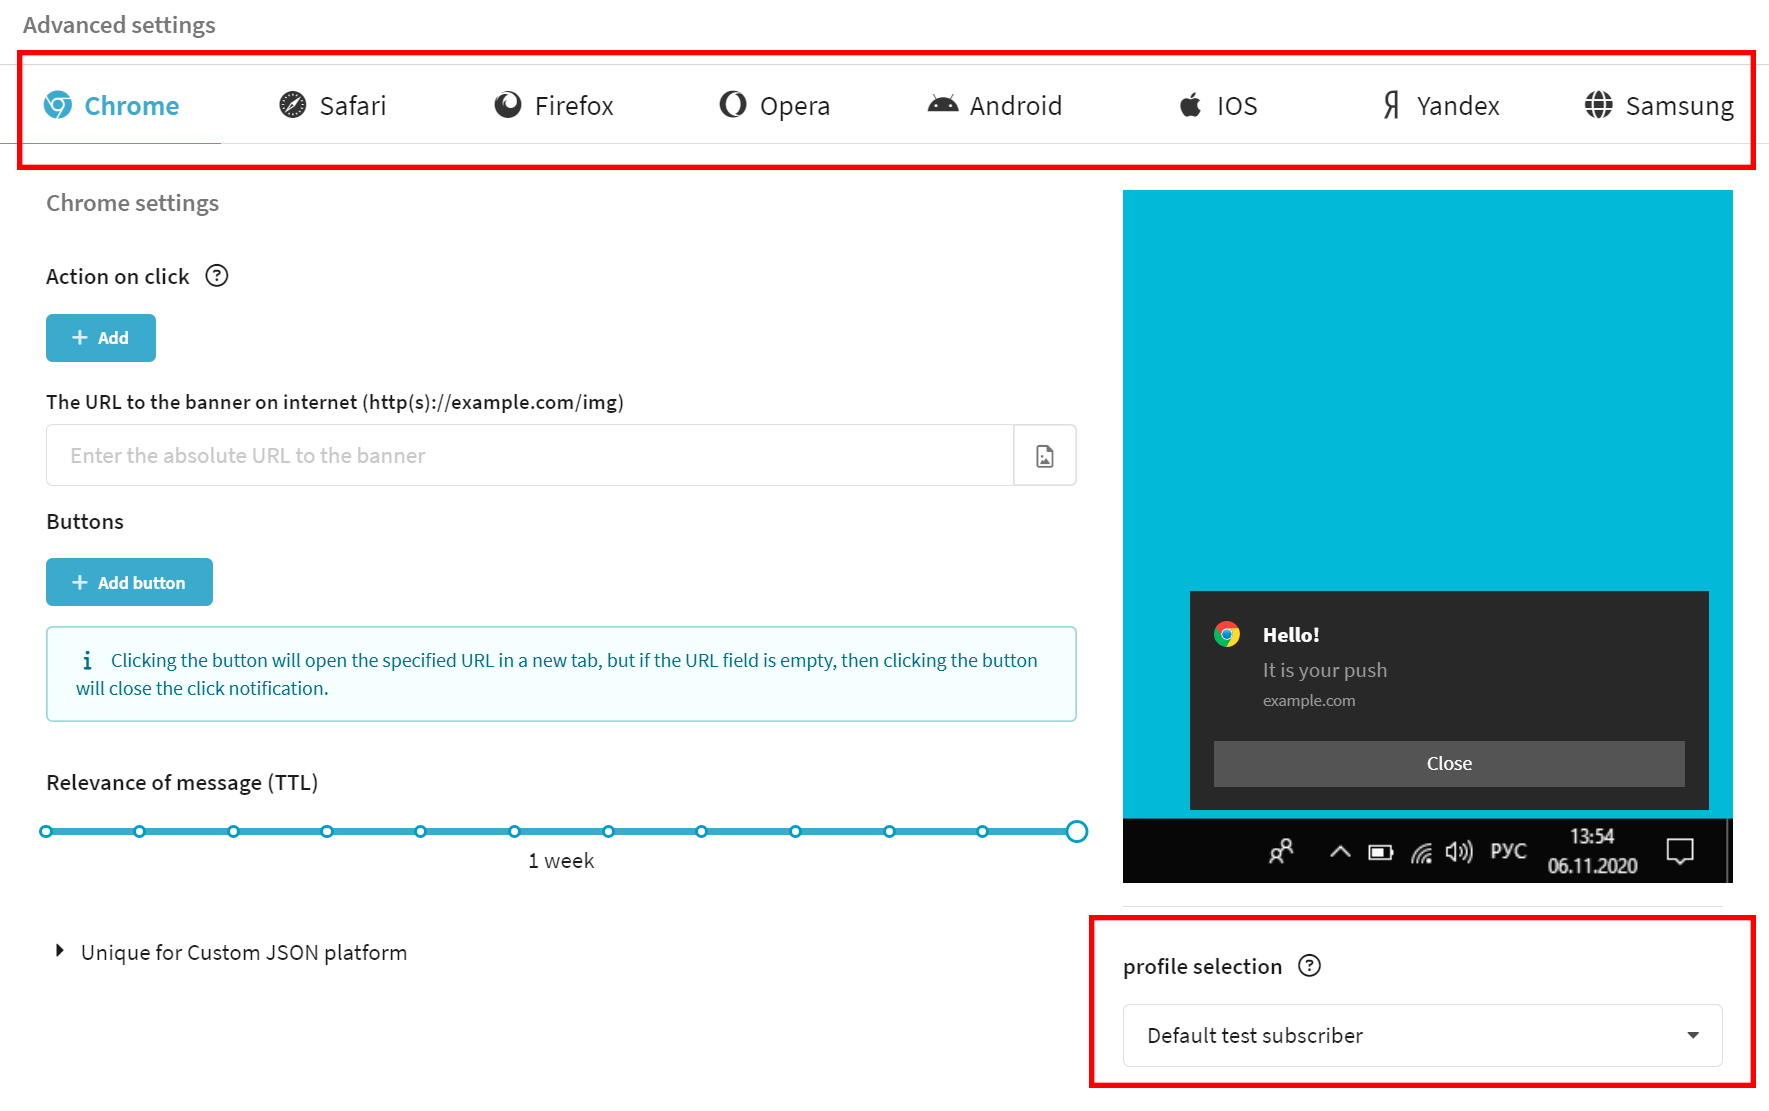
Individual push settings are available for 6 browsers and 2 OS. Most of the settings are the same.
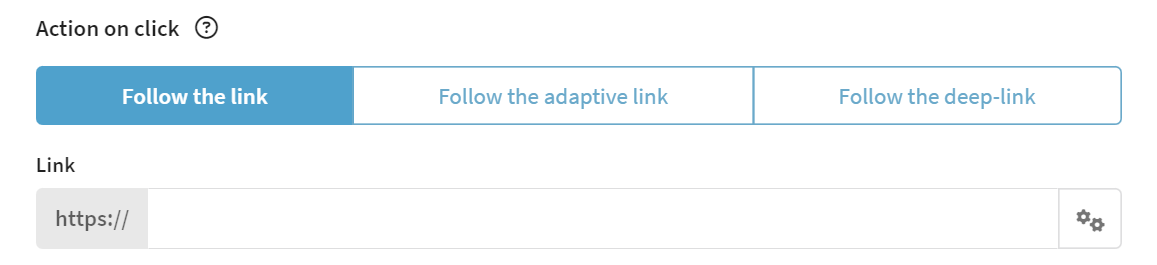
Action on click
For each browser and OS, you can add a click link. We remind you that it is the link that the user will follow when he clicks on the message.
How to set up the click link?
1. Click Add.

2. Choose the type of the link:
- Common link
- Adaptive link
- Deep-link

3. Enter the URL and set it up.
Please note that the click link you enter for each platform "override" the general link to click on.
General link to click on
Unique platform link
If you leave the field "Click link" ("General link to click on") empty, at the moment the user clicks it, he'll just close the push notification.
Even if you leave the unique link for the platform empty, it will override the general link you've set up earlier.
Banner
Provide the image URL. If the URL is correct, the banner image will appear in the preview. You can also add an image from the gallery.

Buttons
Click "Add button". In the window, enter the button text and the link the user can follow at the moment he clicks the button. If you still don't know how to set up the click link, scroll up.
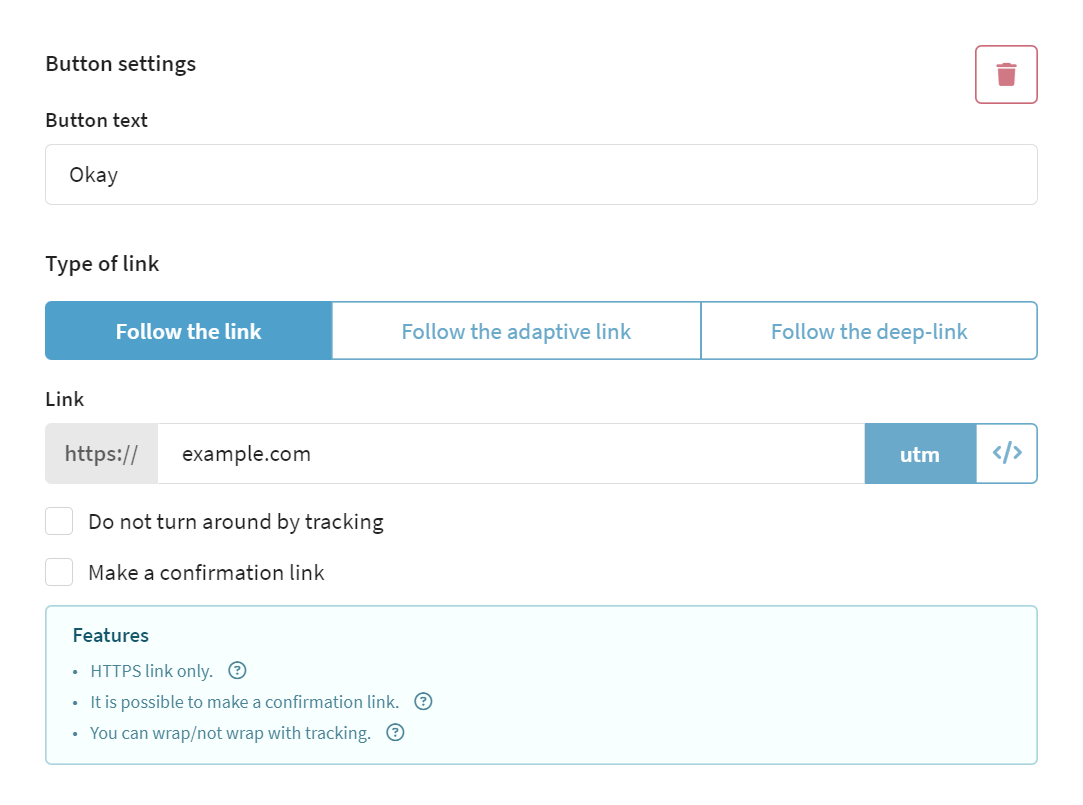
If the "Link" field is left empty, then when the user clicks on the button, the he will close the push.
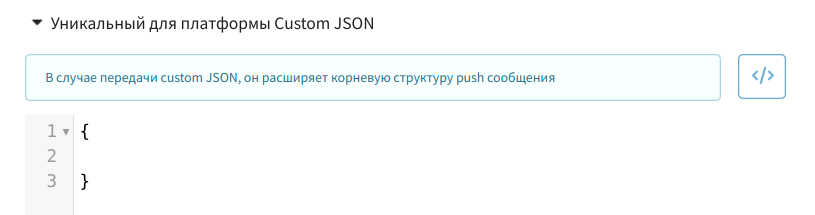
Platform unique JSON content
You can pass additional JSON fields into the message to extend the root structure of the push message.
Message TTL
TTL («time to live») determines how long the system will monitor a recipient's device status so that a push notification can be delivered. As soon as a recipient is online during the TTL period, the system will deliver the notification. ... Once the TTL period has ended, no more deliveries will be made.
Move the slider to set the push message lifetime:

Push settings for Chrome
The following settings are available:
| Field | Description |
|---|---|
| Action on click | The link a user will click on when they click on a push message |
| Banner image | Link to banner image |
| Buttons | When the user clicks on the button, the user will perform a certain action |
| Message TTL | The time during which the service monitors the device's connection to the network to deliver the message, after which the notification is deleted |
| Platform unique Custom JSON | Additional fields in JSON format to extend the root structure of the push message |

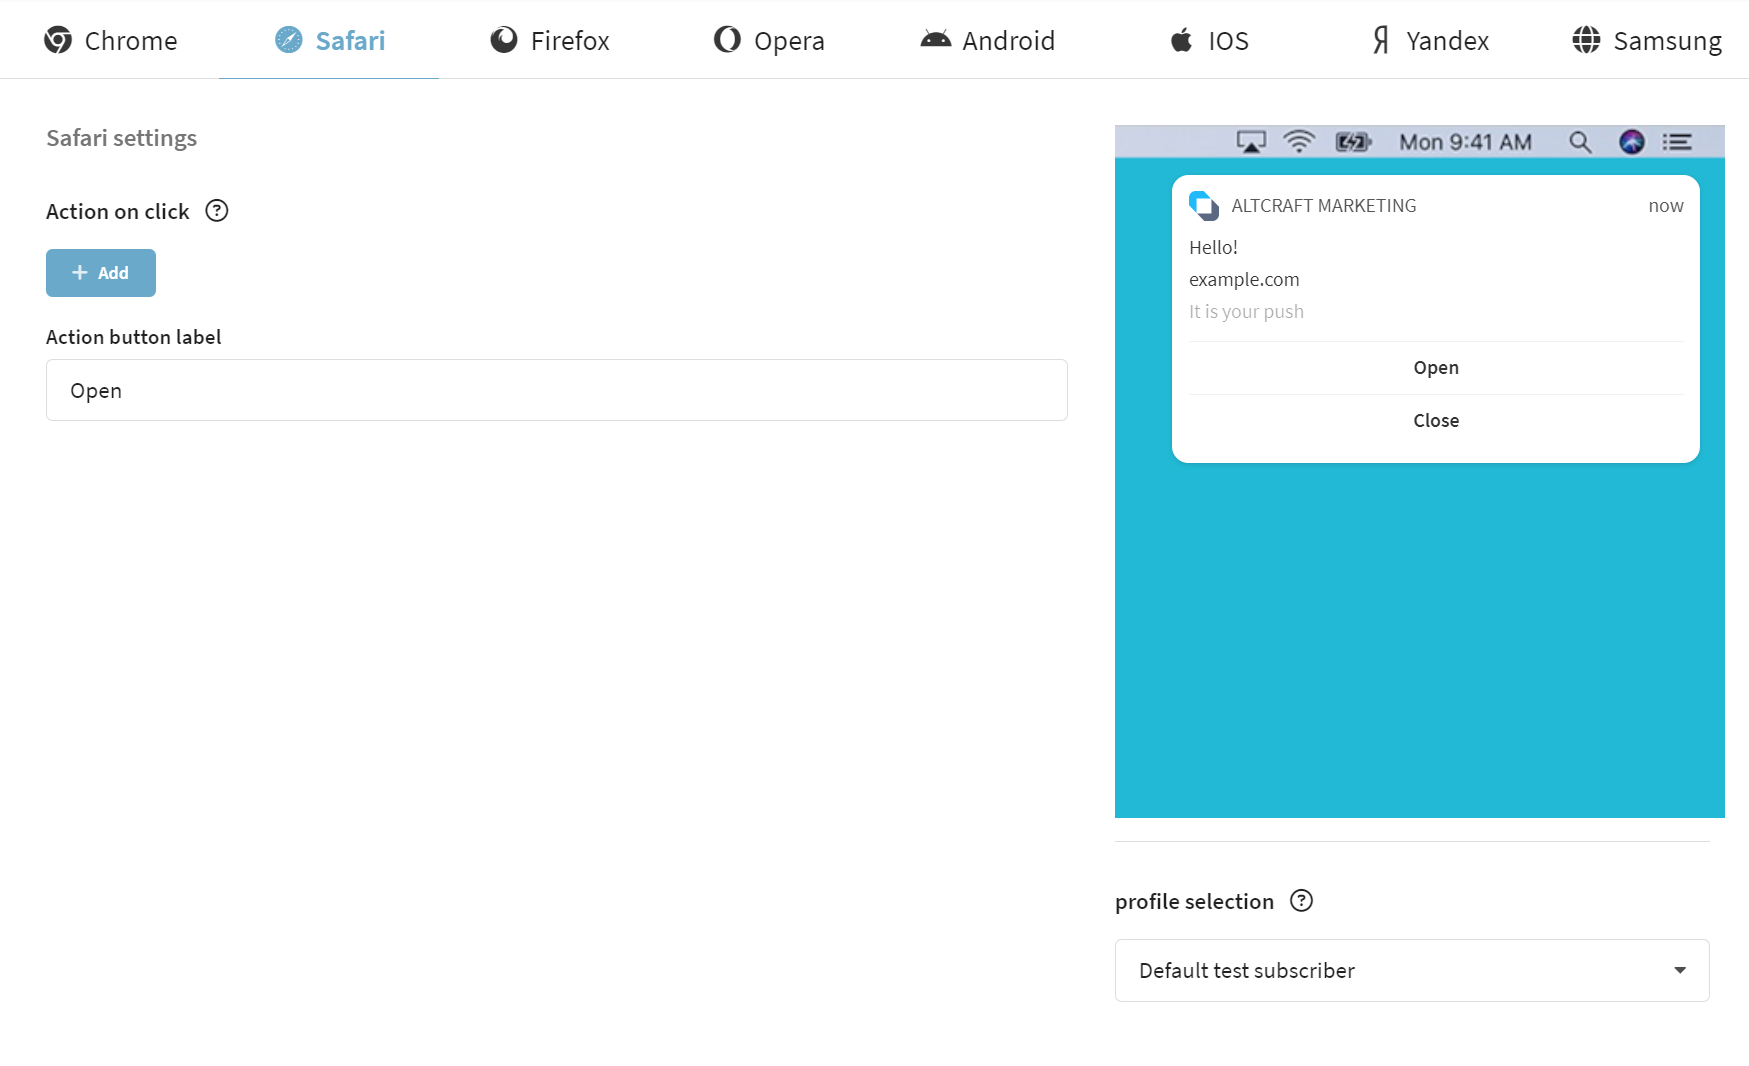
Push settings for Safari
The following settings are available:
| Field | Description |
|---|---|
| Action on click | The link a user will click on when they click on a push message |
| Action button label | When the user clicks on the button, the user will perform a certain action |
Push settings for Firefox
The following settings are available:
| Field | Description |
|---|---|
| Action on click | The link a user will click on when they click on a push message |
| Platform unique Custom JSON | Additional fields in JSON format to extend the root structure of the push message |

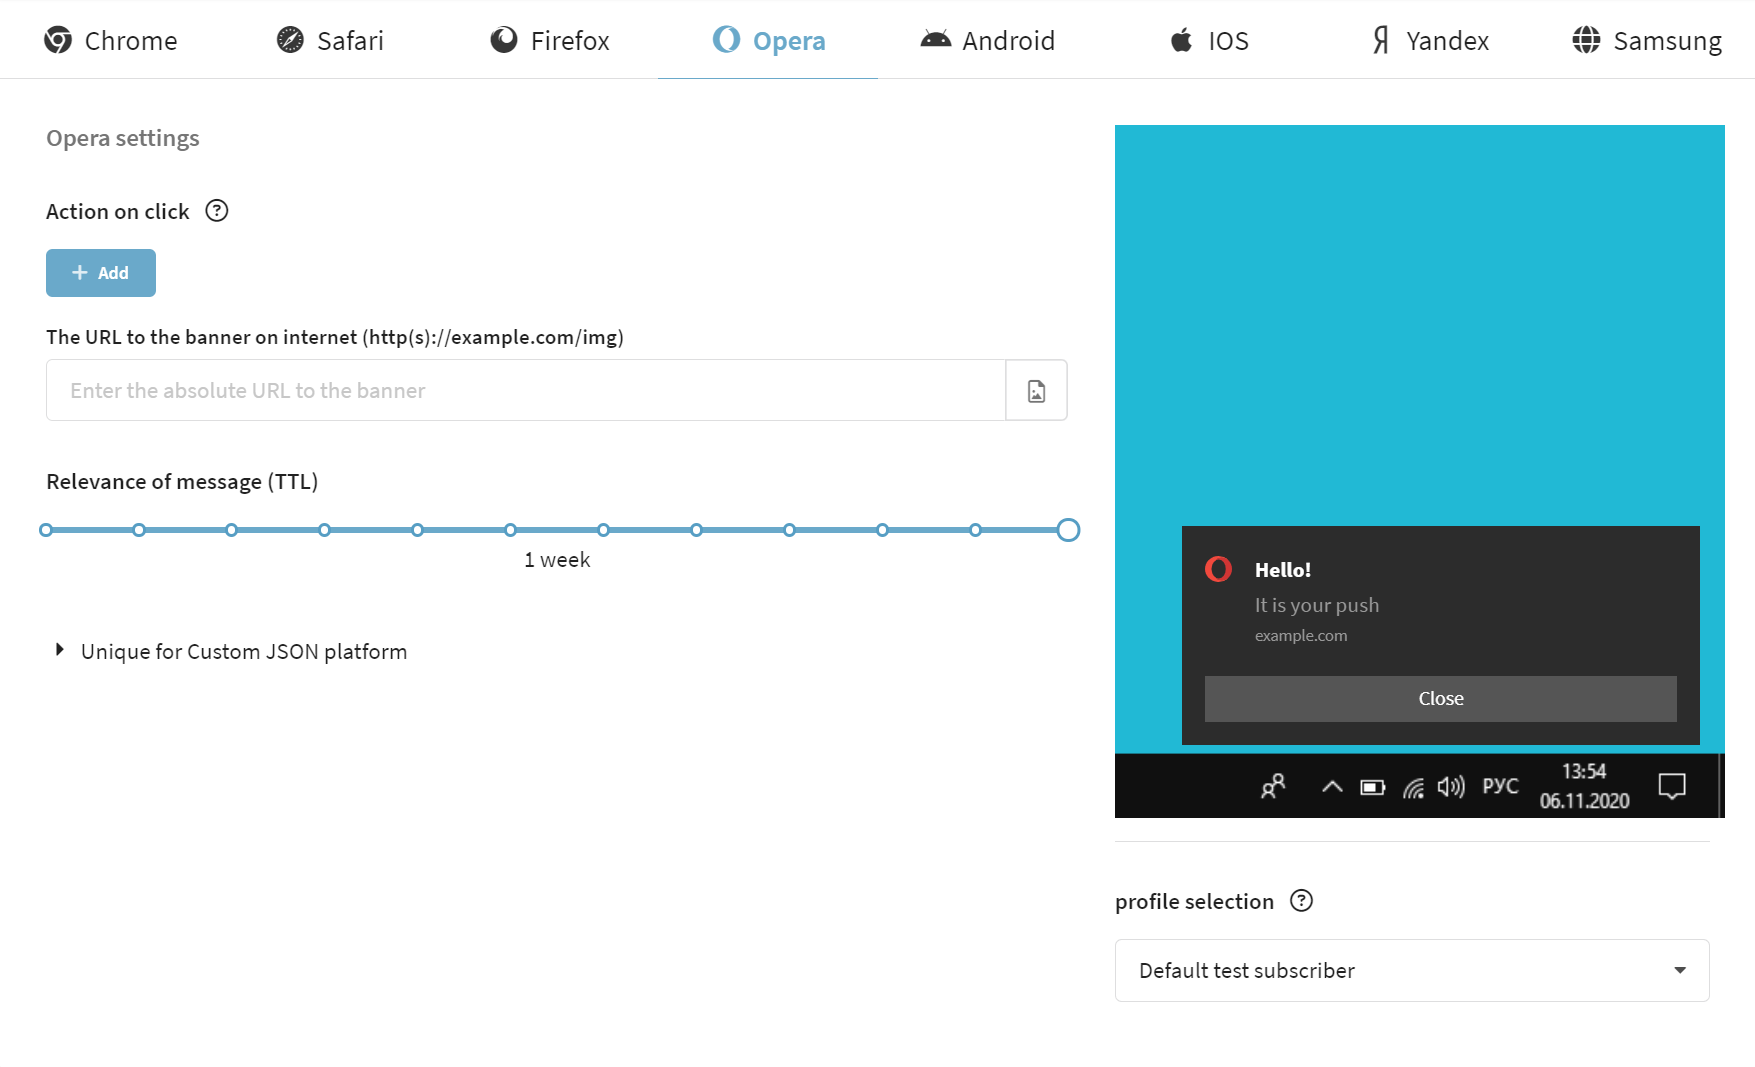
Push settings for Opera
The following settings are available:
| Field | Description |
|---|---|
| Action on click | The link a user will click on when they click on a push message |
| Banner image | Link to banner image |
| Message TTL | The time during which the service monitors the device's connection to the network to deliver the message, after which the notification is deleted |
| Platform unique Custom JSON | Additional fields in JSON format to extend the root structure of the push message |
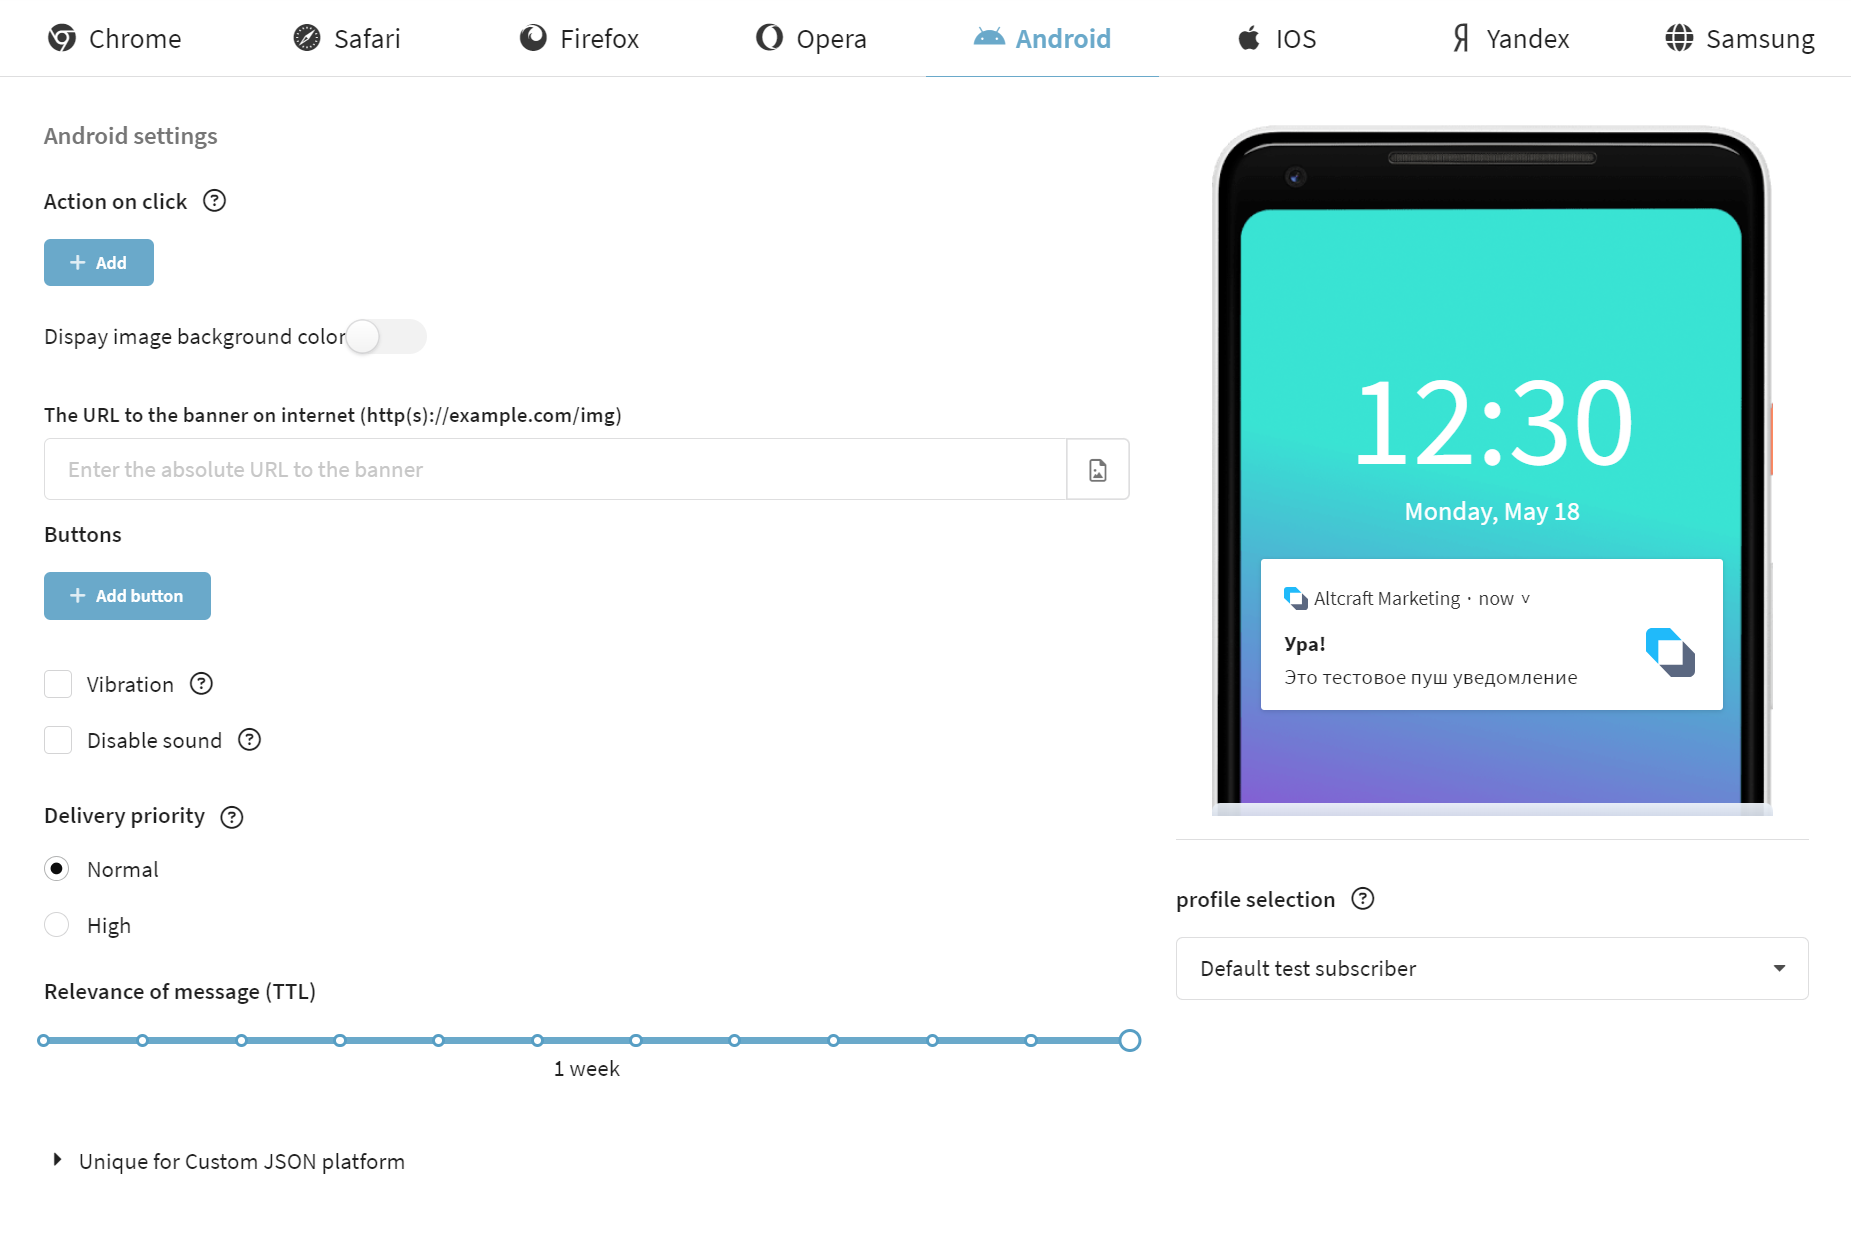
Push settings for Android
The following settings are available:
| Field | Description |
|---|---|
| Click link | Enter the link that the user will follow when he clicks on the push message |
| Display image background color | Select the background color of the push message |
| Banner | Enter the link to the image |
| Buttons | When the user clicks on the button a certain action will be performed |
| Vibration | Activate the mode if you want the subscriber's device to vibrate every time it receives a push message |
| Disable sound | The push notification will not play sound and vibration when delivered to your device |
| Delivery priority | Normal priority messages are delivered immediately when the app is in the foreground. When the device is in Doze, the delivery may be delayed to conserve battery. High priority messages are delivered immediately, allowing the service to wake a sleeping device when necessary and to run some limited processing (including very limited network access). |
| Message TTL | The time during which the service monitors the device's connection to the network to deliver the message, after which the notification is deleted |
| Platform unique Custom JSON | Additional fields in JSON format to extend the root structure of the push message |
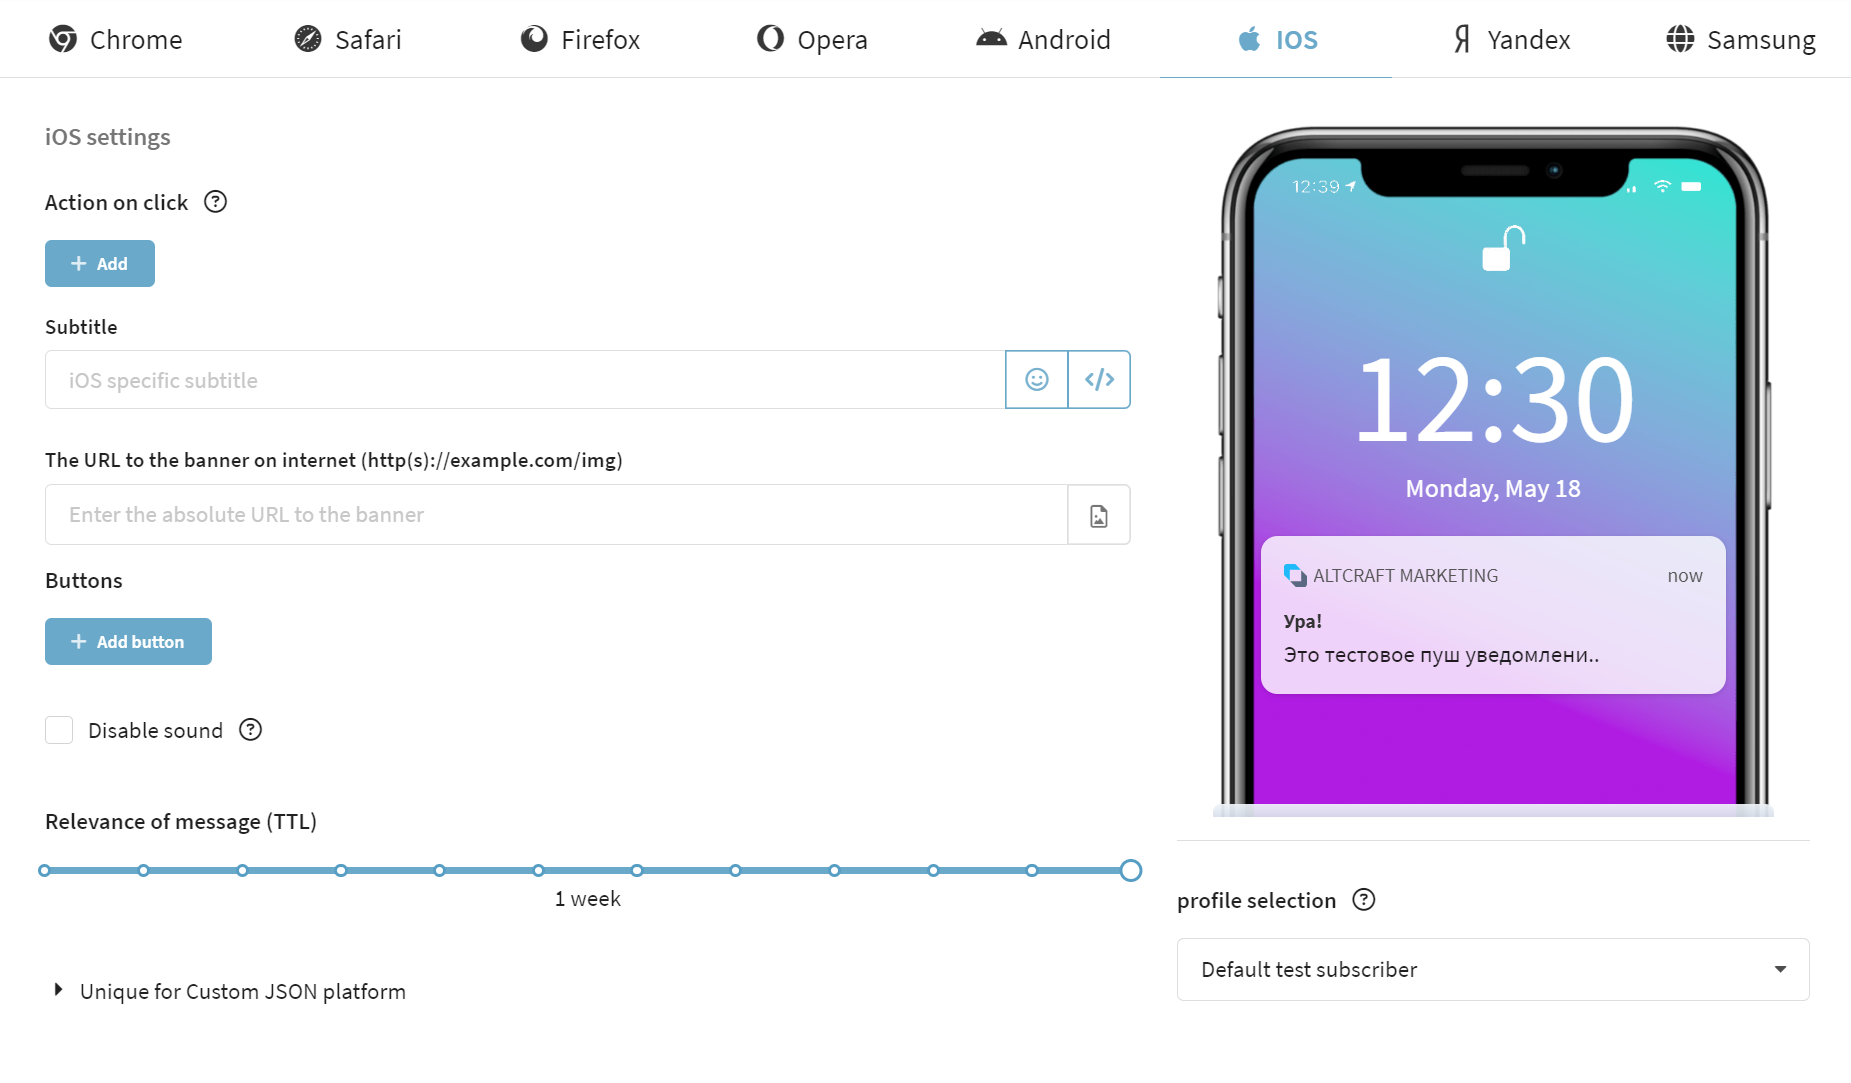
Push settings for iOS
The following settings are available:
| Field | Description |
|---|---|
| Action on click | Enter the link that the user will follow when he clicks on the push message |
| Subtitle | IOS specific subtitle |
| Media Attachment | Attached image or video |
| Buttons | When the user clicks on the button a certain action will be performed |
| Disable sound | The push notification will not play sound and vibration when delivered to your device |
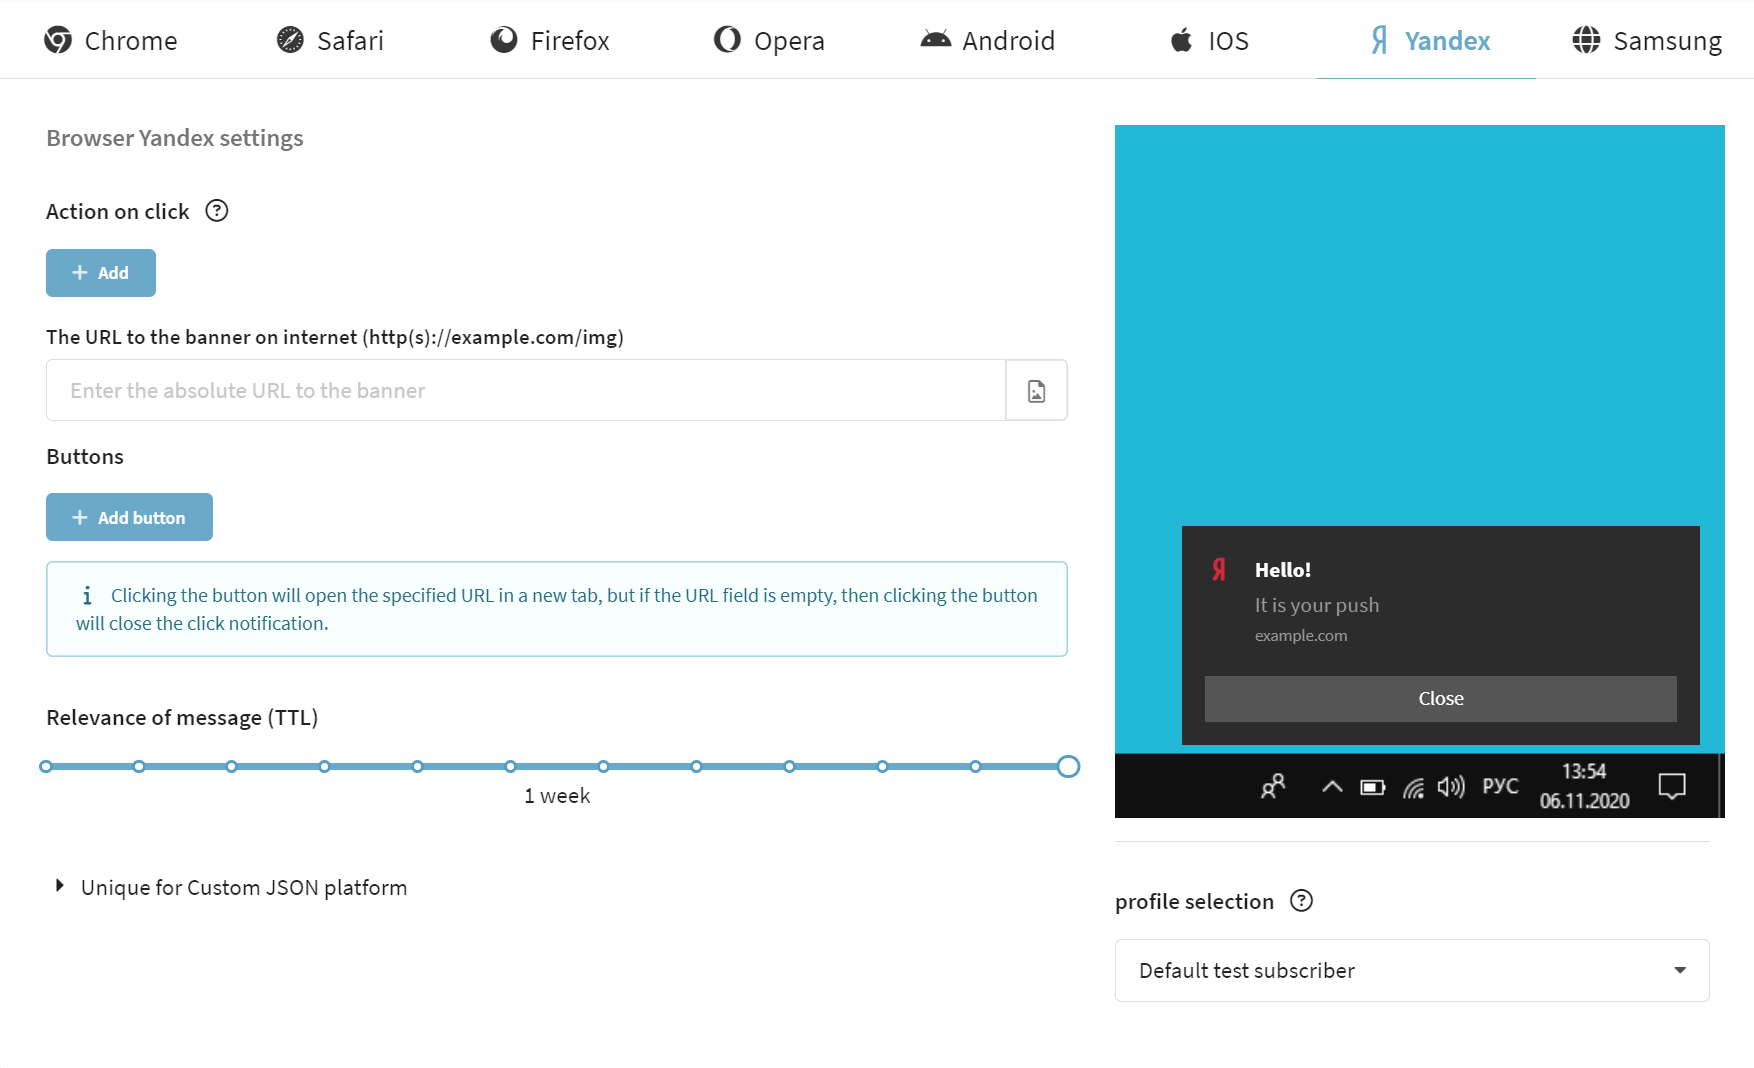
Yandex
The following settings are available:
| Field | Description |
|---|---|
| Action on click | The link a user will click on when they click on a push message |
| Banner image | Link to banner image |
| Buttons | When the user clicks on the button, the user will perform a certain action |
| Message TTL | The time during which the service monitors the device's connection to the network to deliver the message, after which the notification is deleted |
| Platform unique Custom JSON | Additional fields in JSON format to extend the root structure of the push message |
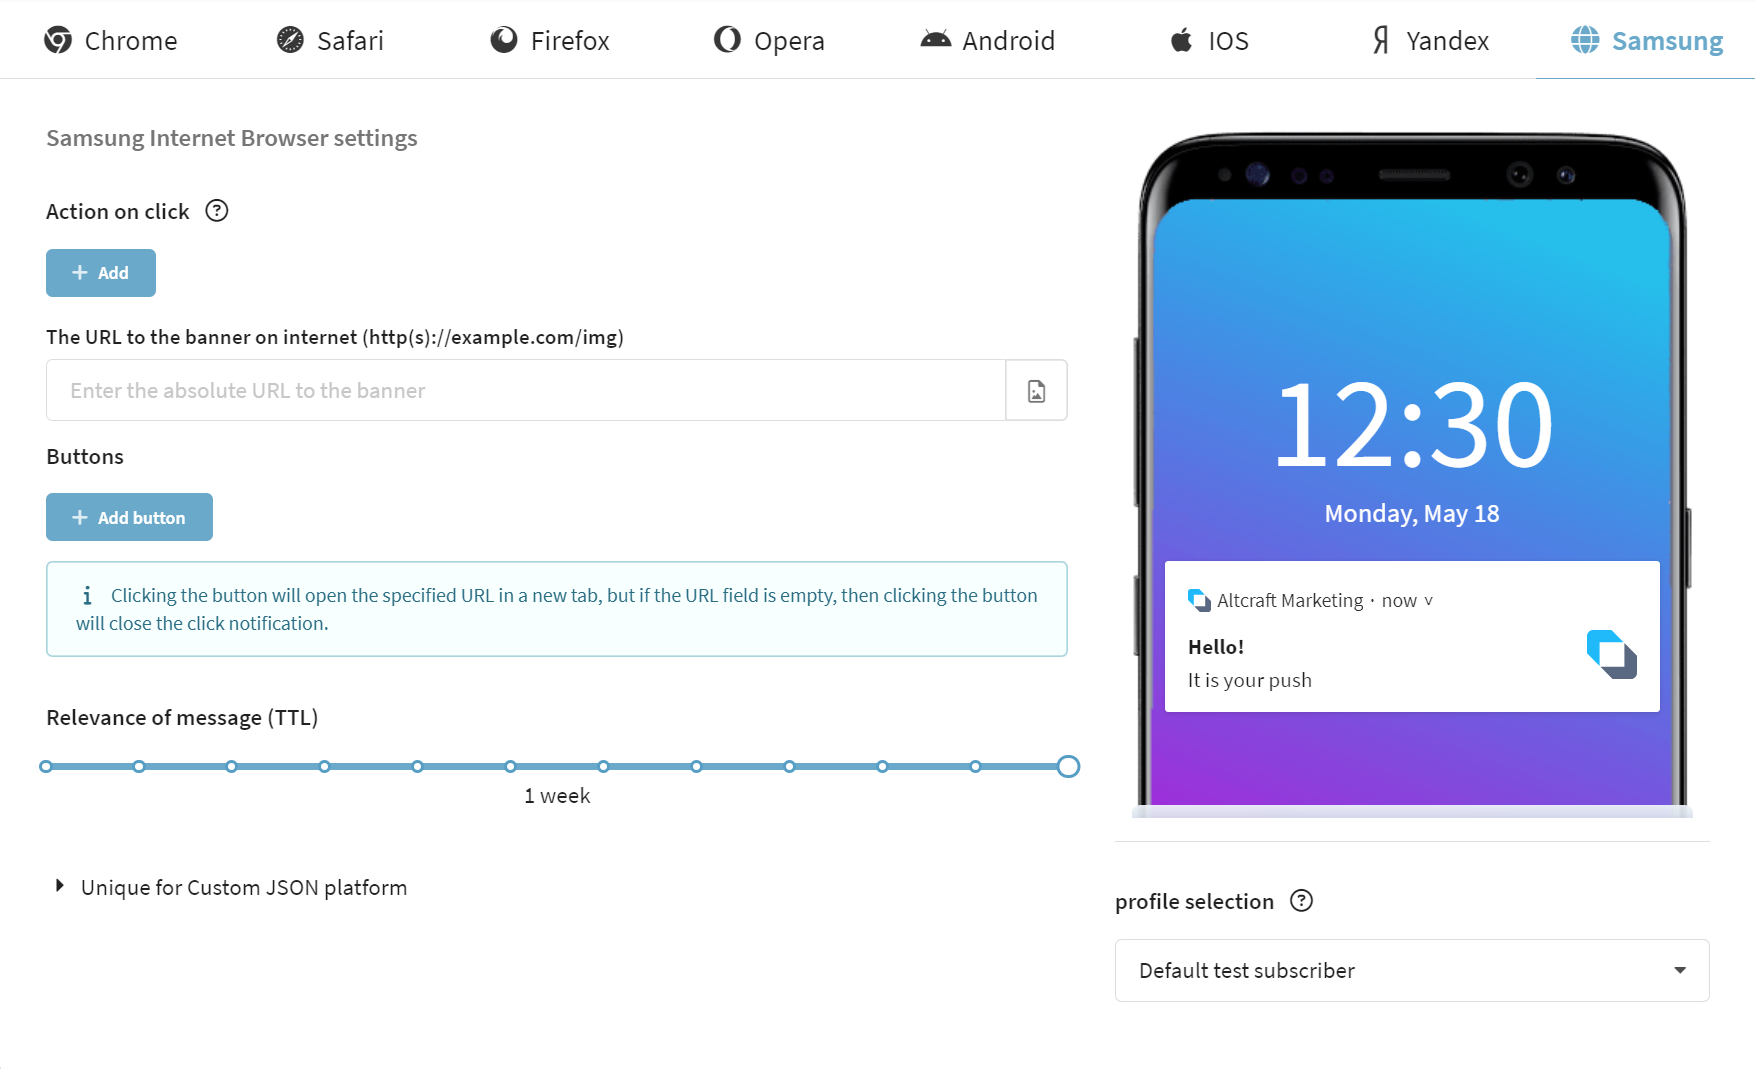
Push settings for Samsung
The following settings are available:
| Field | Description |
|---|---|
| Action on click | The link a user will click on when they click on a push message |
| Banner image | Link to banner image |
| Buttons | When the user clicks on the button, the user will perform a certain action |
| Message TTL | The time during which the service monitors the device's connection to the network to deliver the message, after which the notification is deleted |
| Platform unique Custom JSON | Additional fields in JSON format to extend the root structure of the push message |
Step 5. Save the template
Once you have done with all the necessary settings for your template, save it by clicking on the "Save" button in the upper right corner of the screen:

If you made any mistake in the template fields, it will be displayed at the top of the screen. Correct the indicated error and save the template again.
Now you can use this template to send Rich Push notifications. Don't know how to do it, read this article: "Web push: settings & implementation".