Launching the welcome scenario using Albato
Albato allows you to configure data transfer from an external service to the Altcraft platform. Using a special API request (for more information see the developer guide section), which comes from Albato, the platform decides what to do with the client's data.
The platform can:
- update the data in the client's profile by importing
- add a profile to a segment
- send the client to the scenario
In this article, we will know how to use Albato to add a client profile to a private scenario.
Create a new automation in Albato
A automations in Albato consists of two components: a trigger that start the transfer of data from an external service to Albato, and an action that occurs after the trigger is started.
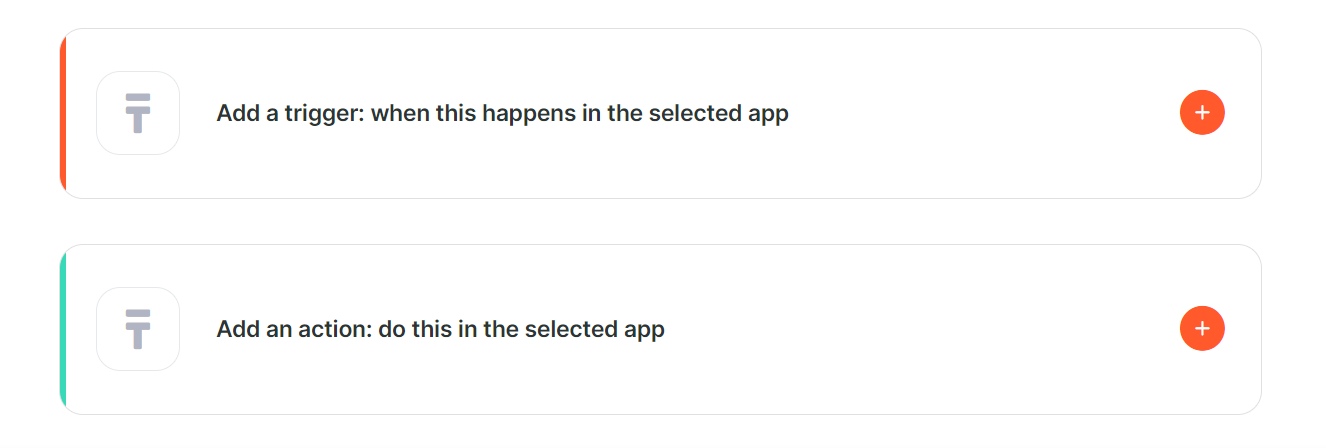
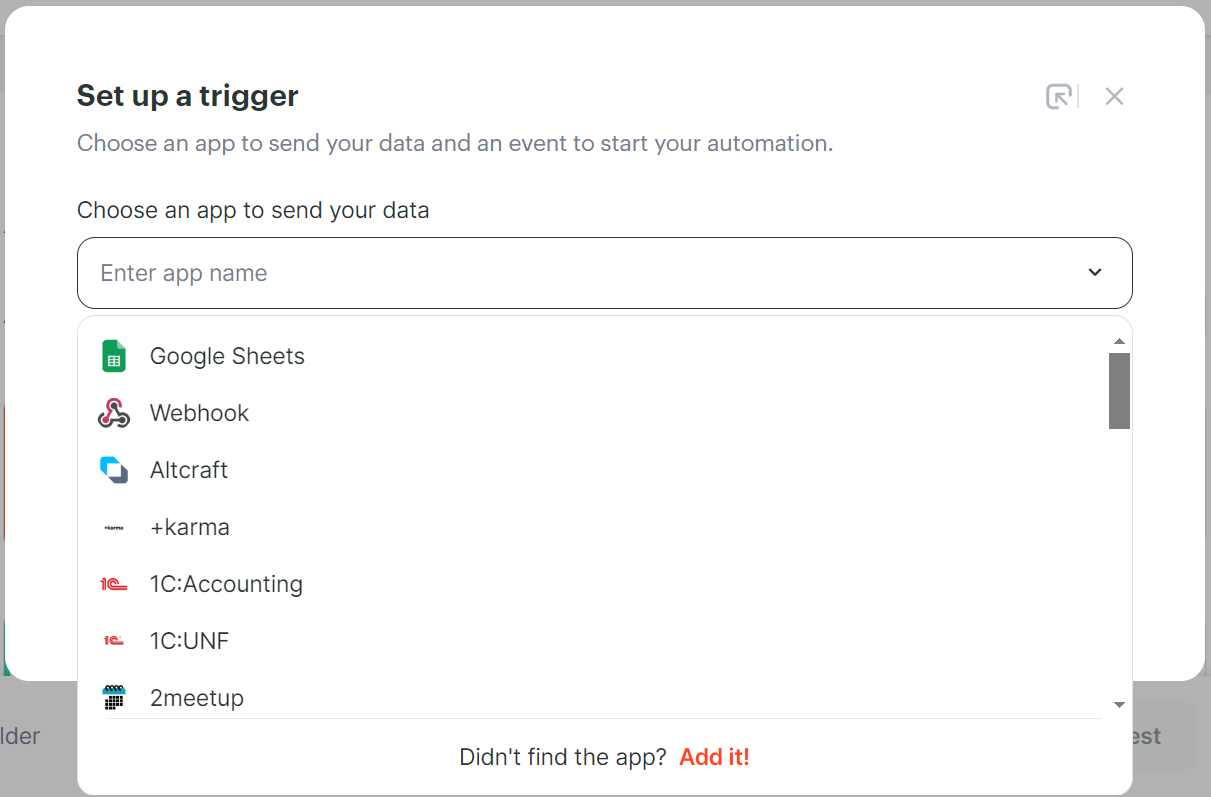
Add a trigger
Select the service from which Albato will receive data:
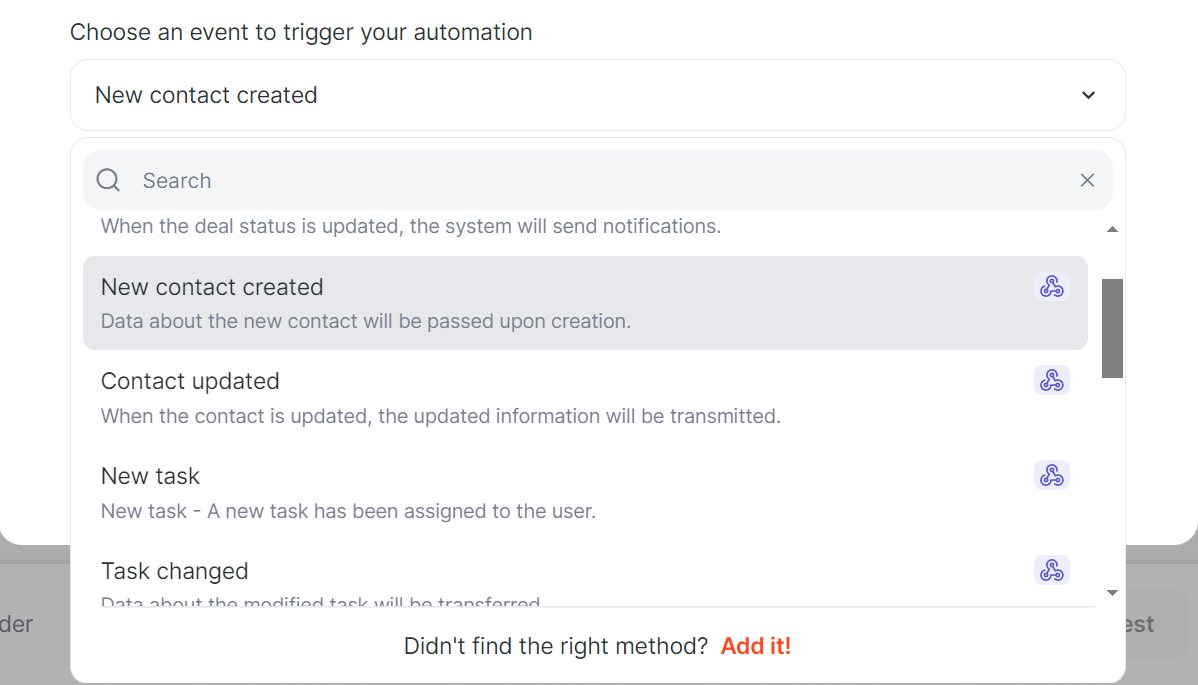
Select the event that will trigger the data transfer. In our case, the action will be "New contact created".
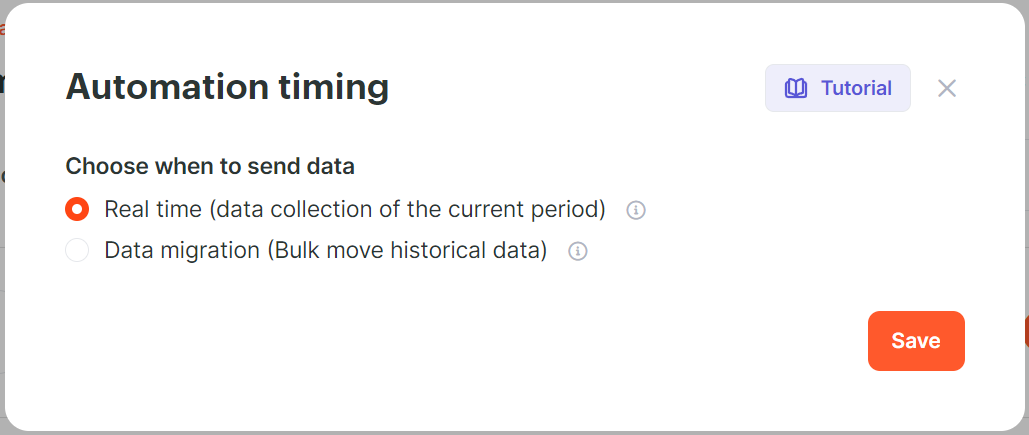
Select the mode of operation of the automations: data can be sent to Altcraft in real time or specify for which period to collect it.
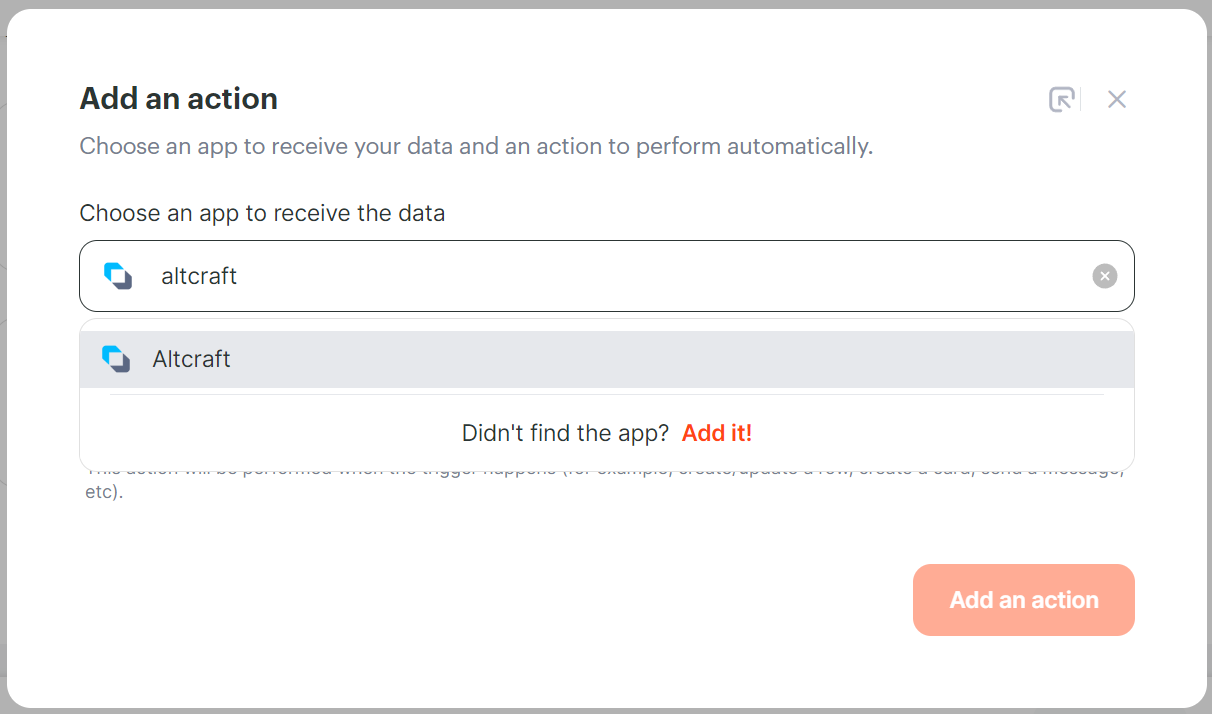
Add an action
Select the Altcraft platform as the server that will receive data from service.
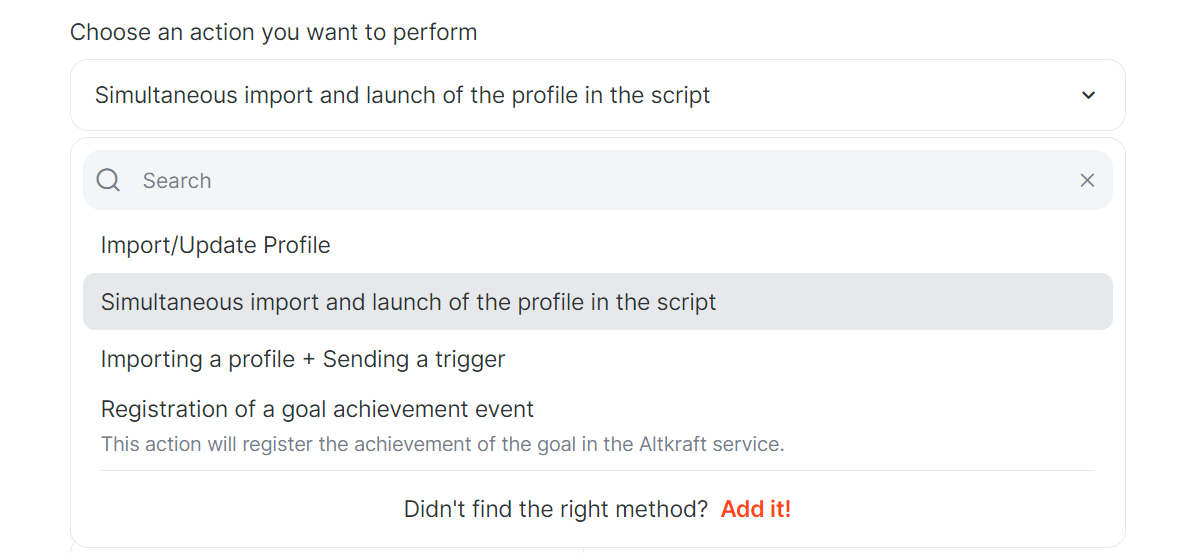
To import or update client data and transfer the profile to the scenario, select "Simultaneous import and launch of the profile in the script".
Connect an Altcraft account and specify the database for interaction. Click "Add an action".
Сonfigure the fields
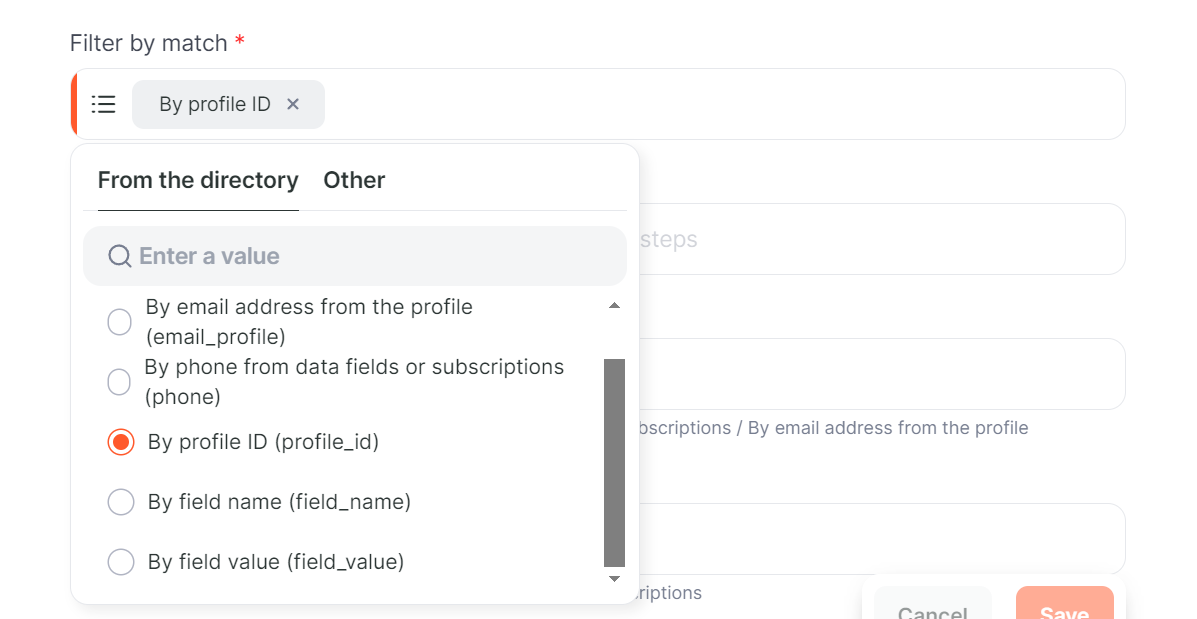
Specify the filter by which the profile will be searched in the database.
Specify the ID of the scenario to which the profile will be sent.

Depending on the selected filter for matching, specify the field by which the search will be performed.

Optionally, specify additional fields to match. After setting up, you can test or run the automations.
Working with the scenario on the platform
After creating a automations, customer data will be transferred via Albato to the platform when a trigger event occurs. The client's profile will be included in the previously prepared welcome scenario.
You can read more about how events are registered on the platform to return data to Albato in the next article.