Pixels
Tracking Pixels are a tool for collecting data about user actions on a website. A pixel is a small piece of code, usually a JS script or a transparent image, invisible to the visitor. It can be linked to a page load or any interactive element — a button, form, or pop‑up window.
When a user triggers the pixel through their actions, a request with event information is sent to the platform’s tracking server. A pixel can be used to track:
- the geography of impressions and clicks (country, city, region) determined by IP;
- the browser and device platform;
- subscriber activity on the site before and after subscription;
- the URL of the page from which the user navigated;
- subscriber interests and preferences.
This data is collected from request headers. Additionally, a pixel can transmit business information via goals and their values. A goal is any target action on the site (for example, a product purchase), and a value is a numeric quantity associated with that goal (for example, the purchase amount). Goals and values are defined manually according to your needs.
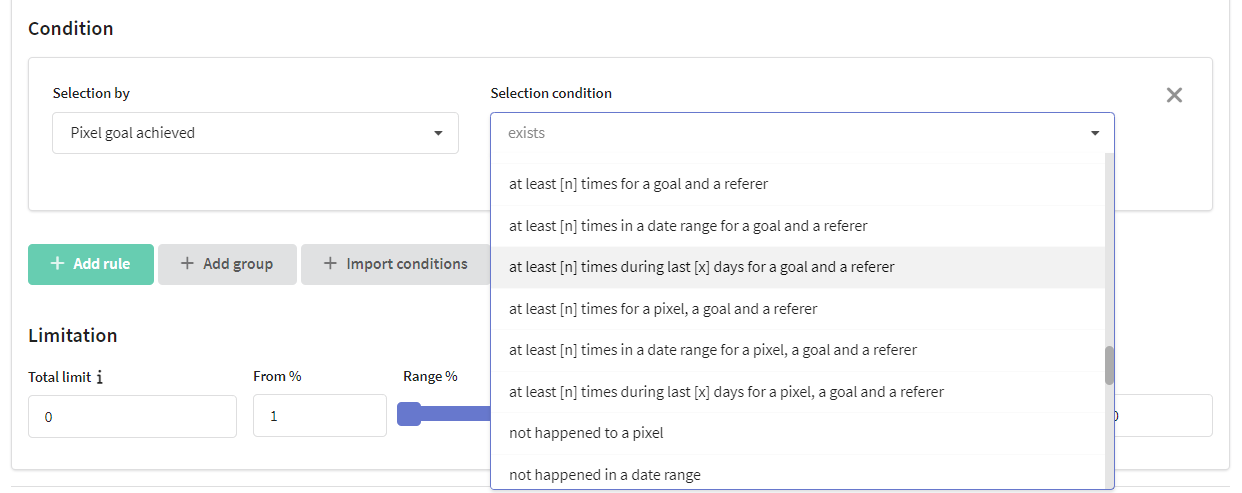
The collected data is stored in the user’s profile in the database if the platform can identify the user. Later, this information can be used for segmentation, scenario building, and triggering automated mailings. For example, when creating a profile segment based on events, you can use pixel goals, website addresses, time intervals, and the number of pixel activations:
Pixel technologies also take a great part in keeping your databases up to date by refreshing profile location and device information.
Pixel goal achievement can be monitored via Goals report.
More details about using pixels you can see in this article.
Enabling pixels
When using Altcraft Marketing On-premise on your hardware, Pixels must be first enabled in platform administrative panel by ticking "Enable pixel" in account settings. note To use pixels, you need to configure HTTPS protocol for both your website and the platform. After activation you'll see the new section "Pixels" in the platform interface. |
Creating pixels
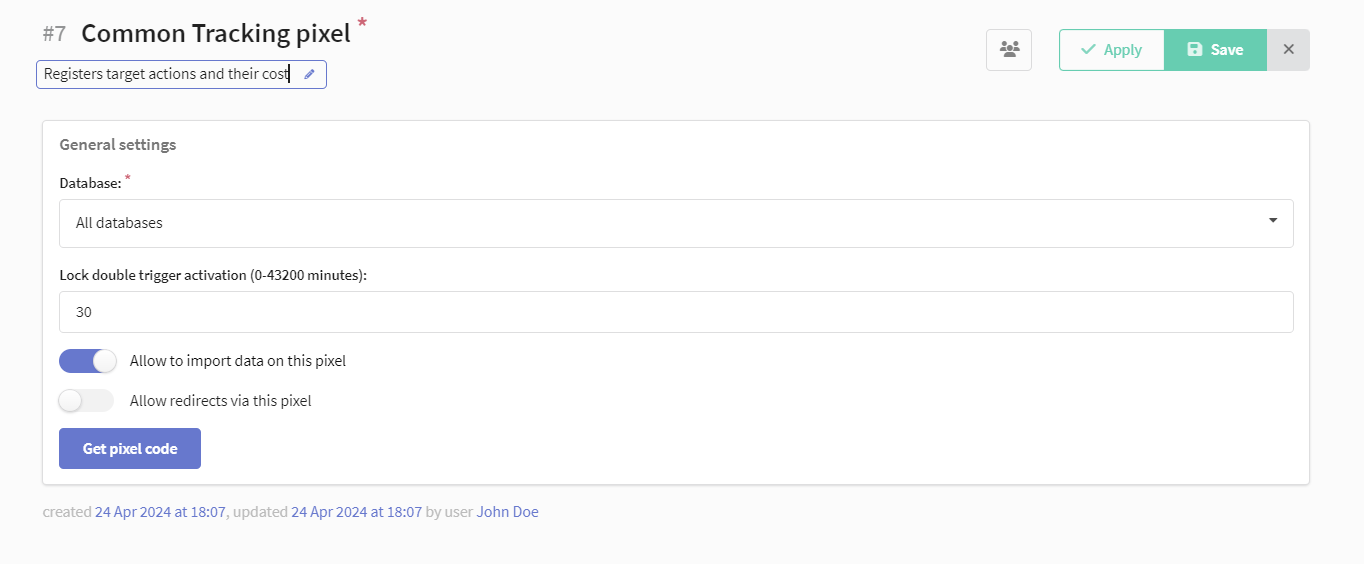
Let's create a new pixel script. First of all, you have to give it a name, write a description, set access groups and a database to process.
If you'd like to prevent unwanted pixel double activation, limit the time before another activation in the Lock double trigger activation field.
The trigger will be blocked for each specific goal rather than for the entire pixel. This means you can use the same pixel indefinitely, but with different goals for tracking.
If the trigger does not activate in mailings or scenarios, although the trigger conditions are met, it is recommended to check pixel trigger interval.
![]()
Allow to import data on this pixel — use this field to enable customer profile import at the moment your customer activates a tracking code.
Pixels can update your existing profiles or create the new ones, including for anonymous website visits:
-
HTML pixels (image and URL redirect) use your customers' session data (cookie) for matching profiles. If a profile with the same cookie (e.g. pened mail from the same device) is not found - a new anonymous profile will be imported.
-
JavaScript tracking codes can use both cookie data and customer profiles information. If a profile is found, its data will be updated; if the profile isn't found, a new profile will be created with the data you can specify.
JS pixel import is described further on this page.
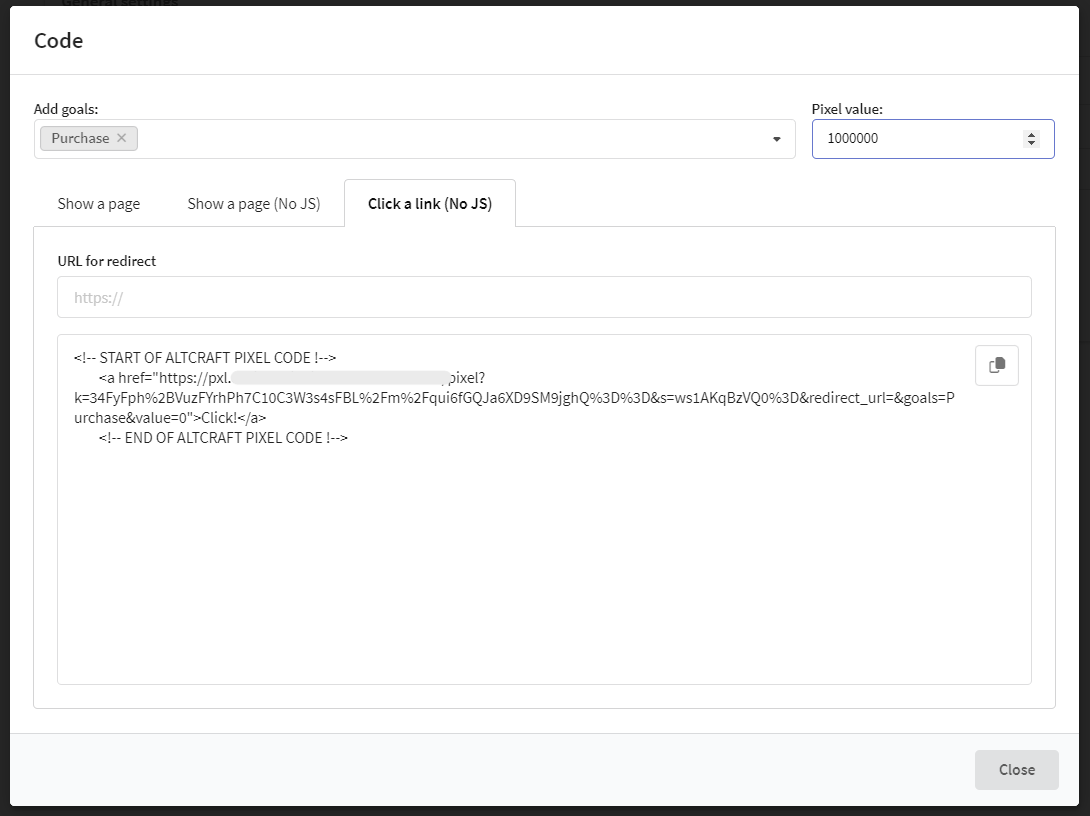
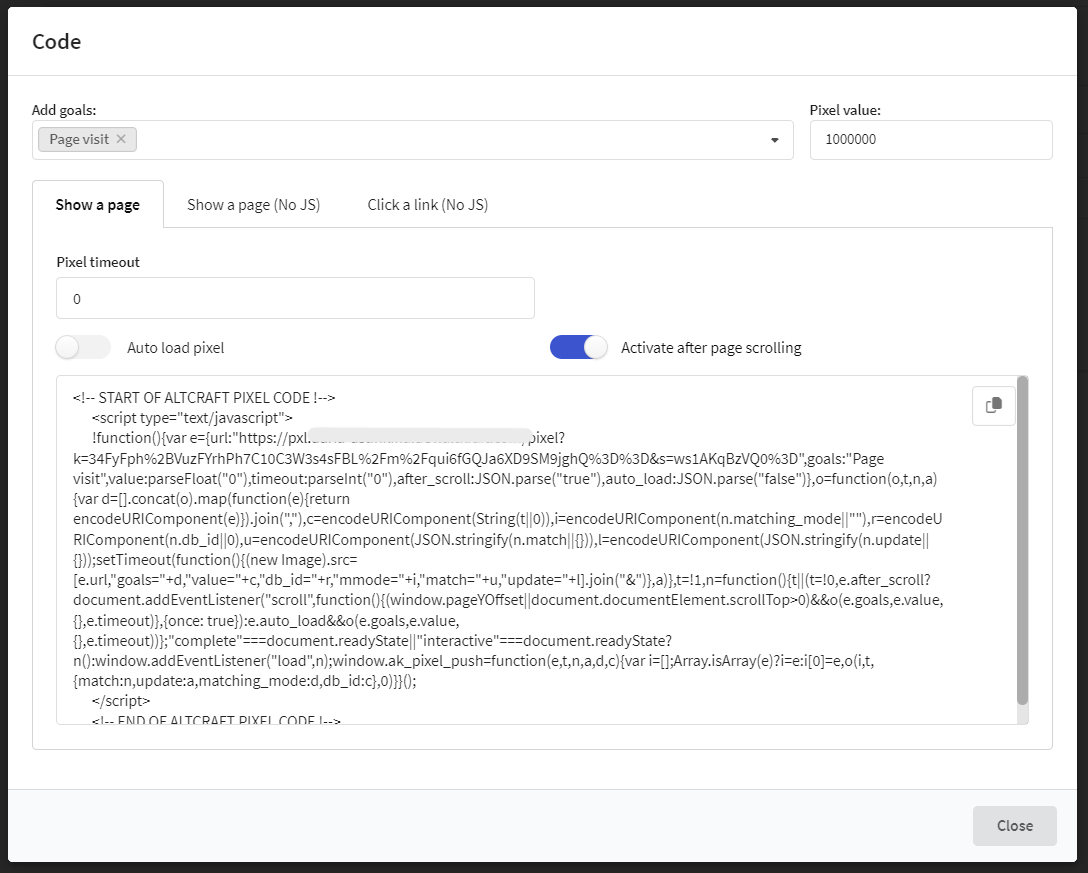
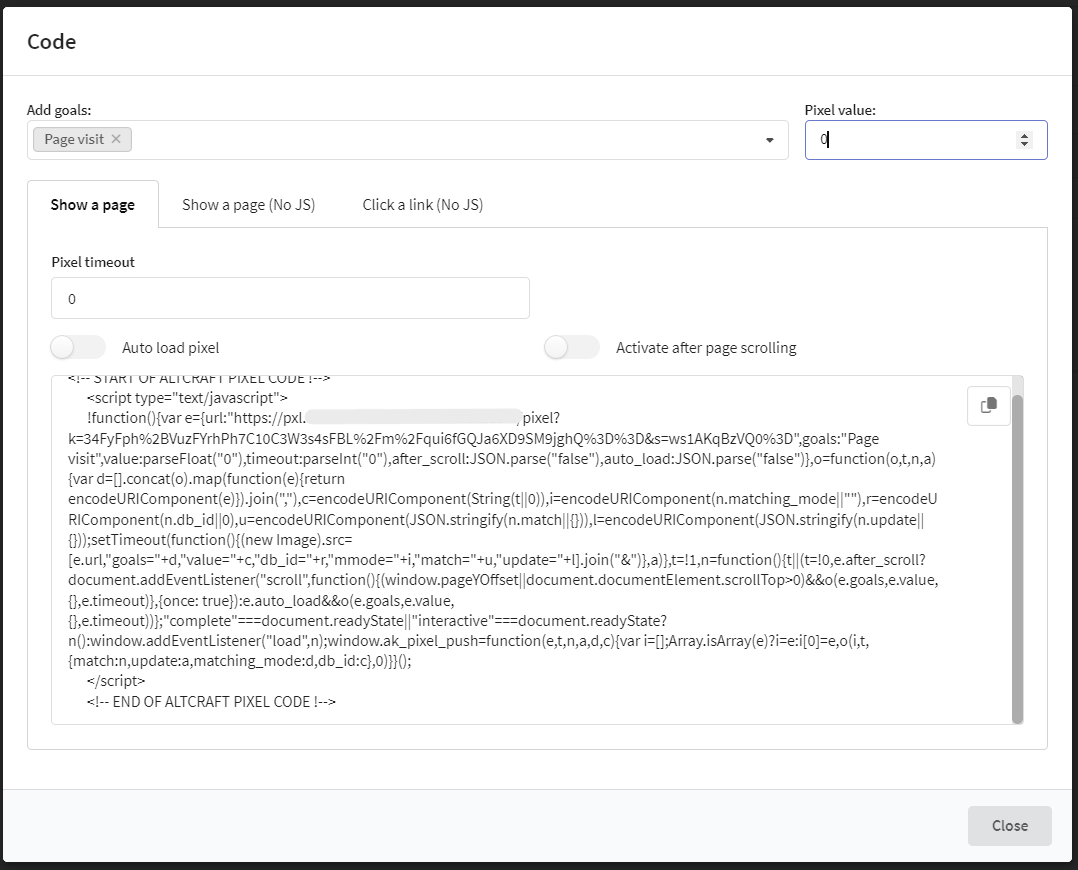
After you save a new pixel, you'll be able to open Get pixel code interface. The first thing is to decide upon tracking technology you need:
Show a page — a JavaScript code that can be customized to detect user actions like scrolling a page within a specific time period.
Show a page (No JS)— this is a somewhat classic pixel technology, representing a transparent image wrapped in a tracking HTTP request. It can be used for both your website and messages — no JavaScript required.
Click a link (No JS) — this technology is a hyperlink wrapped in a redirect tracking request. It can be used in social networks and any external resources.
For all pixel types you can set goals and goal values:
When a pixel code is created, give it to your website developers to implement it into your web site or application code — and it will start tracking your customers' actions.
For each script, you can select several goals and a common value for them (cost).
When placed on the page, the code will register the specified goals, no additional action is required. Each code created in a pixel will associate goals with that particular pixel. This logic can be used to compare conversions across different landing pages, websites, and data collection forms.
Pixel SID is a service string identifier of the pixel. The SID is generated automatically after the pixel is saved and is displayed in the pixel editor. It is used by the platform to register events and is not required for standard website tracking.
![]()
The SID may be required when configuring mobile events via mSDK.
Web page tracking
Configuring the code
The script is placed on those pages where you want to track your customers' actions. When a user visits the page, pixel will record goals you specify in pixel settings (Add goals). You can record one value for these initial goals.
Symbols available for use in goal names:
- letters of the Latin and Russian alphabet (upper and lower case)
- spaces and tabs
- currency symbols
! # $ % & * + - . , : ; '= ? @ ^ _ ( ) [ ] / \ |
The maximum length is 128 characters.
Below you can set to activate pixel at once when the page is loaded, or to wait for page scrolling to exclude random website visitors from the query.
After you configure a new pixel, give its code from the Show a page tab to your website developers along with the information from this page.
Recording goals via API methods
On the web page with the script implemented you can track any of your customers actions based on browser events. For example, these can be a mouse focus on a specific banner — or a popup activation — or leaving a page. On these events you can record customer's target actions and their values. For commercial actions you can register both profit and fees, if any.
For the page elements and browser events use the following method - ak_pixel_push():
These arguments are used to record target actions:
tags — goal name or names. Can contain a string value or an array of strings.
value — value or price for the goals. Can contain positive and negative floating point values.
| Description | Method |
|---|---|
| Simple call | ak_pixel_push() |
| Goal registration | ak_pixel_push("click") |
| Goal and value registration | ak_pixel_push("click", 100) |
| Several goals with a negative value. One value will be recorded for all the goals | ak_pixel_push(["click", "cars"], -100.40) |
Customer profiles import and update (JS)
If customer profiles import is enabled in pixel settings, you can add arguments for searching an existing profile to update and for adding profile data: ak_pixel_push(tags, value, match, update, matching_mode):
- match — this one is used for profile search. It is an object with one or two properties: "search field": "field value" и "db_id": "profile database ID" — in case a database is not specified for the pixel.
db_id can be ignored when a profile database is specified in pixel settings.
-
update — can contain any customer profile data including subscriptions.
-
matching_mode - can contain any type of matching.
matching_mode can be ignored when searching by custom fields.
Example of goal registration with profile import
Below are examples of goal registration with different type of matching:
- email_profile
- custom
- phone
ak_pixel_push(
  "click",
  100,
  {
    db_id: 1,
    email: "user@mail.ru"
  },
    {
        "_fname": "John",
        "_lname": "Doe",
        "subscriptions": [
            {
                "resource_id": 1,
                "channel": "email",
                "email": "john.doe@example.com"
            }
        ]
    }
);
ak_pixel_push(
  "click",
  100,
  {
    db_id: 1,
    email: "user@mail.ru"
  },
    {
        "_fname": "John",
        "_lname": "Doe",
        "subscriptions": [
            {
                "resource_id": 1,
                "channel": "email",
                "email": "john.doe@example.com"
            }
        ]
    },
  "email_profile"
);
ak_pixel_push(
    "click",
    100,
    {
      db_id: 1,
      field_name: "client_id",
      field_value: 1,
    },
    {
      _fname: "John",
      _lname: "Doe",
      subscriptions: [
        {
          resource_id: 1,
          channel: "email",
          email: "john.doe@example.com",
        },
      ],
    },
  "custom"
);
ak_pixel_push(
    "click",
    100,
    {
      db_id: 1,
      phone: "+79000000000"
    },
      {
          "_fname": "John",
          "_lname": "Doe",
          "subscriptions": [
              {
                  "resource_id": 1,
                  "channel": "email",
                  "email": "john.doe@example.com"
              }
          ]
      },
    "phone"
);
Redirects via pixel settings
If you allow redirects via the pixel, the user will be redirected to the URL you specified at the moment he hits your pixel.
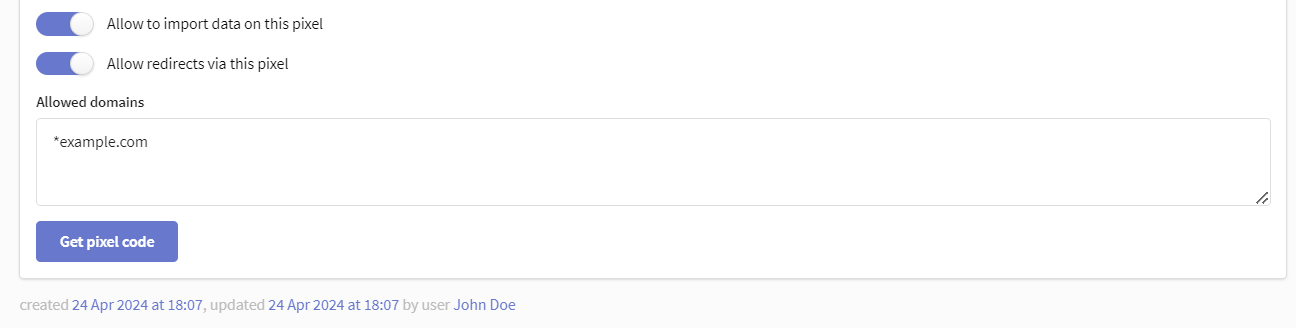
Redirect links can be used for fraud by sending phishing message with redirect_url. To avoid this, pixel in Altcraft MP does not support redirect by default. To engage this option, you need to activate this flag:
When flag is activated, you can enter domains list allowed for redirect, in the field below

After these settings, redirect in messages with pixel will be available on for enlisted domains. Redirect for other domains will be restricted.
Setting up Altcraft pixel goal registration using Google Tag Manager (GTM)
For the convenience of placing the Altcraft pixel on the site pages, you can use the Google Tag Manager containers (if it's installed on the site).
If you want to manage all tags and pixels centrally without using third-party services, check out the built-in Altcraft Tag Manager. You can learn more about working with it in the article Linking a Pixel and Tag Manager
For this:
1. Create a new pixel and set basic settings: pixel name, description, access groups and associated databases.
2. After saving the pixel, the tracking code configuration interface will be available. Copy the pixel code from the "Show a page" tab.
Before copying the pixel code, uncheck the "Auto load pixel" box. Only this way you can use the tracking code as a library.
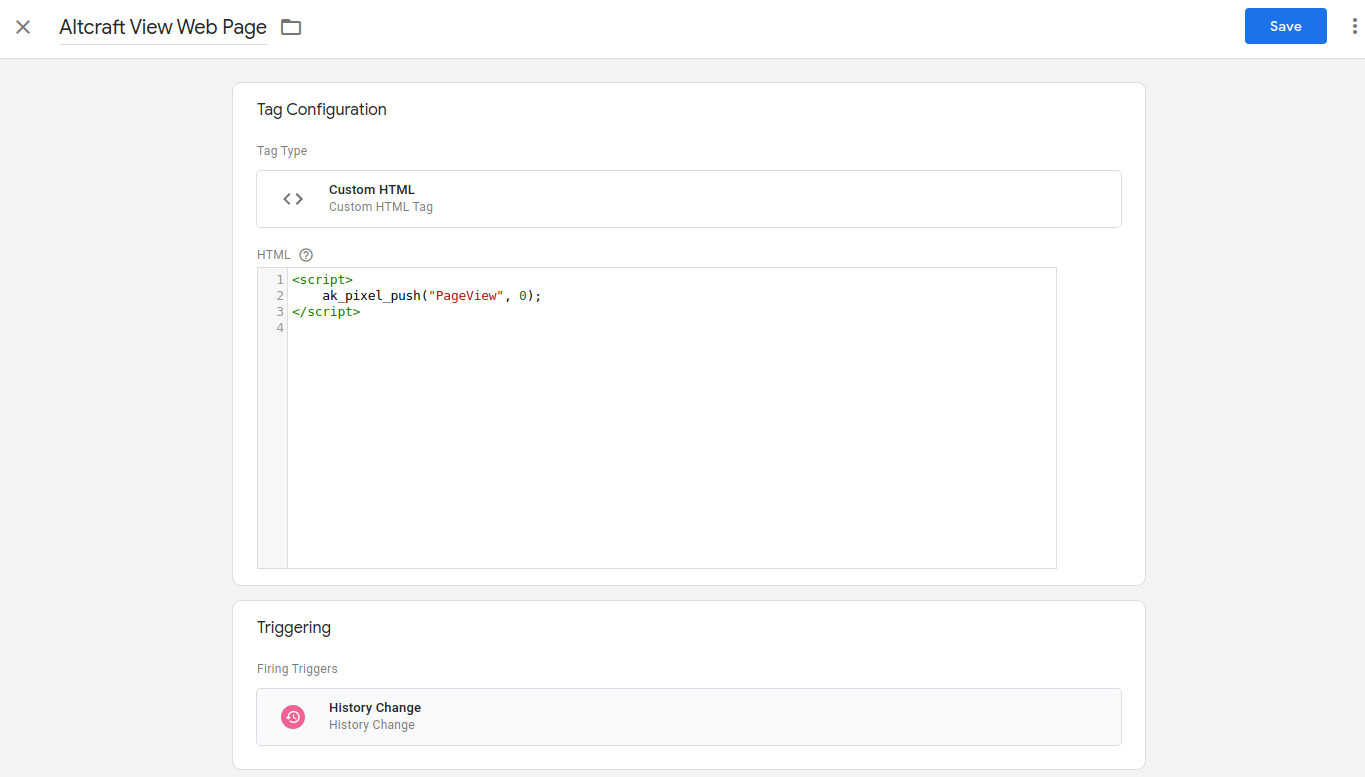
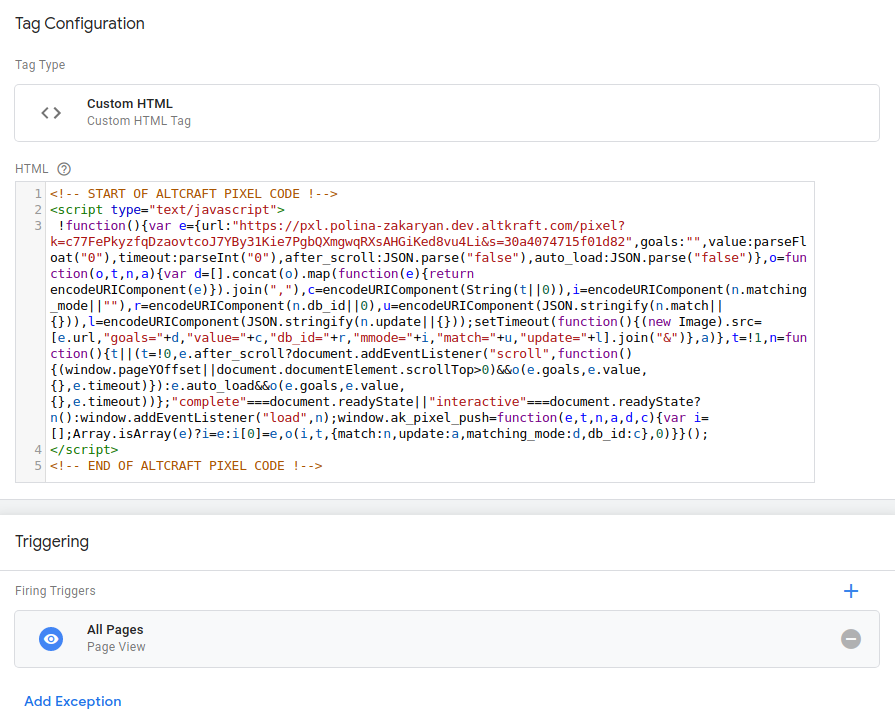
3. Your next step is to go to the GTM workspace and create a new tag. Choose Custom HTML as a tag type.
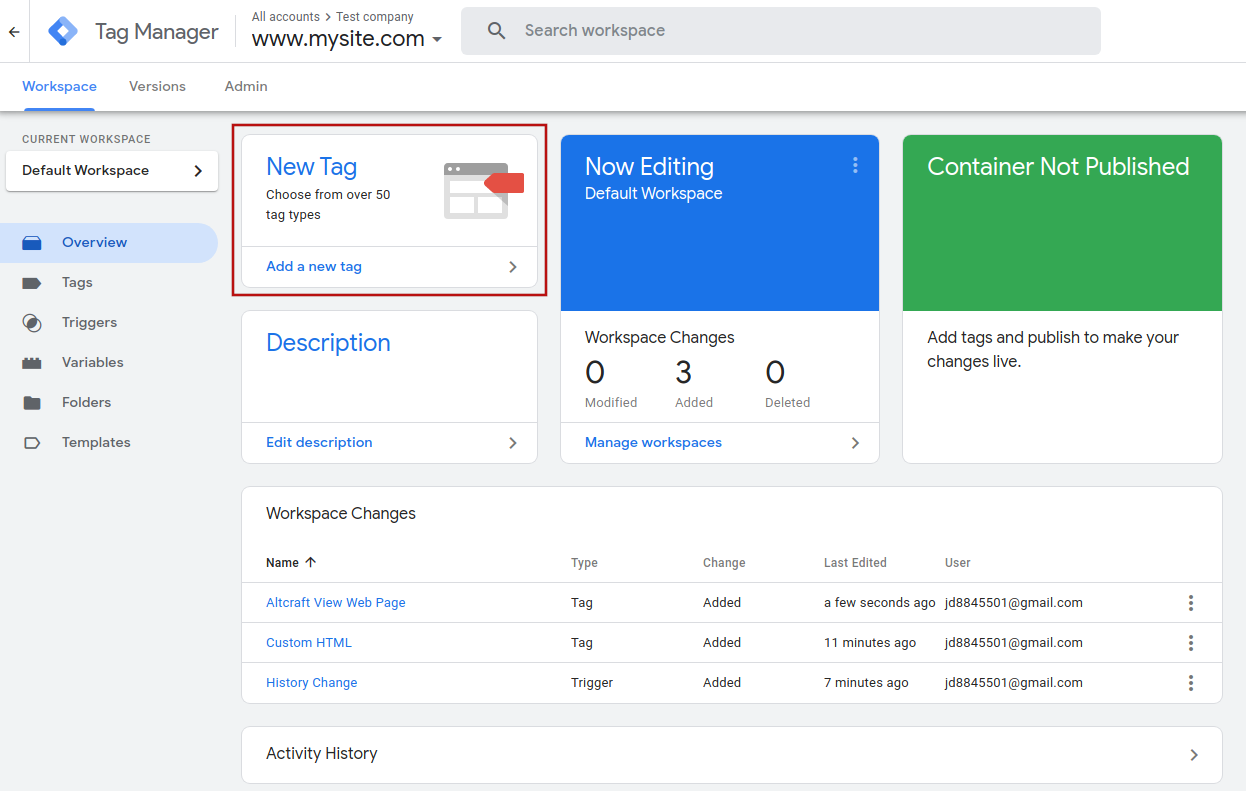
4. Add the Altcraft pixel code to the HTML field in the Tab Configuration window. Choose All pages in the Triggering tab. Save it.
When you submit the changes, the container with Altcraft pixel code will be loaded on all pages of your site.
5. Now, to transfer goals and, if necessary, their values to Altcraft, add the required number of Custom HTML Tags configured for the Triggers you need.
<script>
	ak_pixel_push("PageView", 0);
</script>
Arguments are added by analogy with Recording goals via API methods.