Configuring mSDK for iOS via APNs
Connect the project to APNs
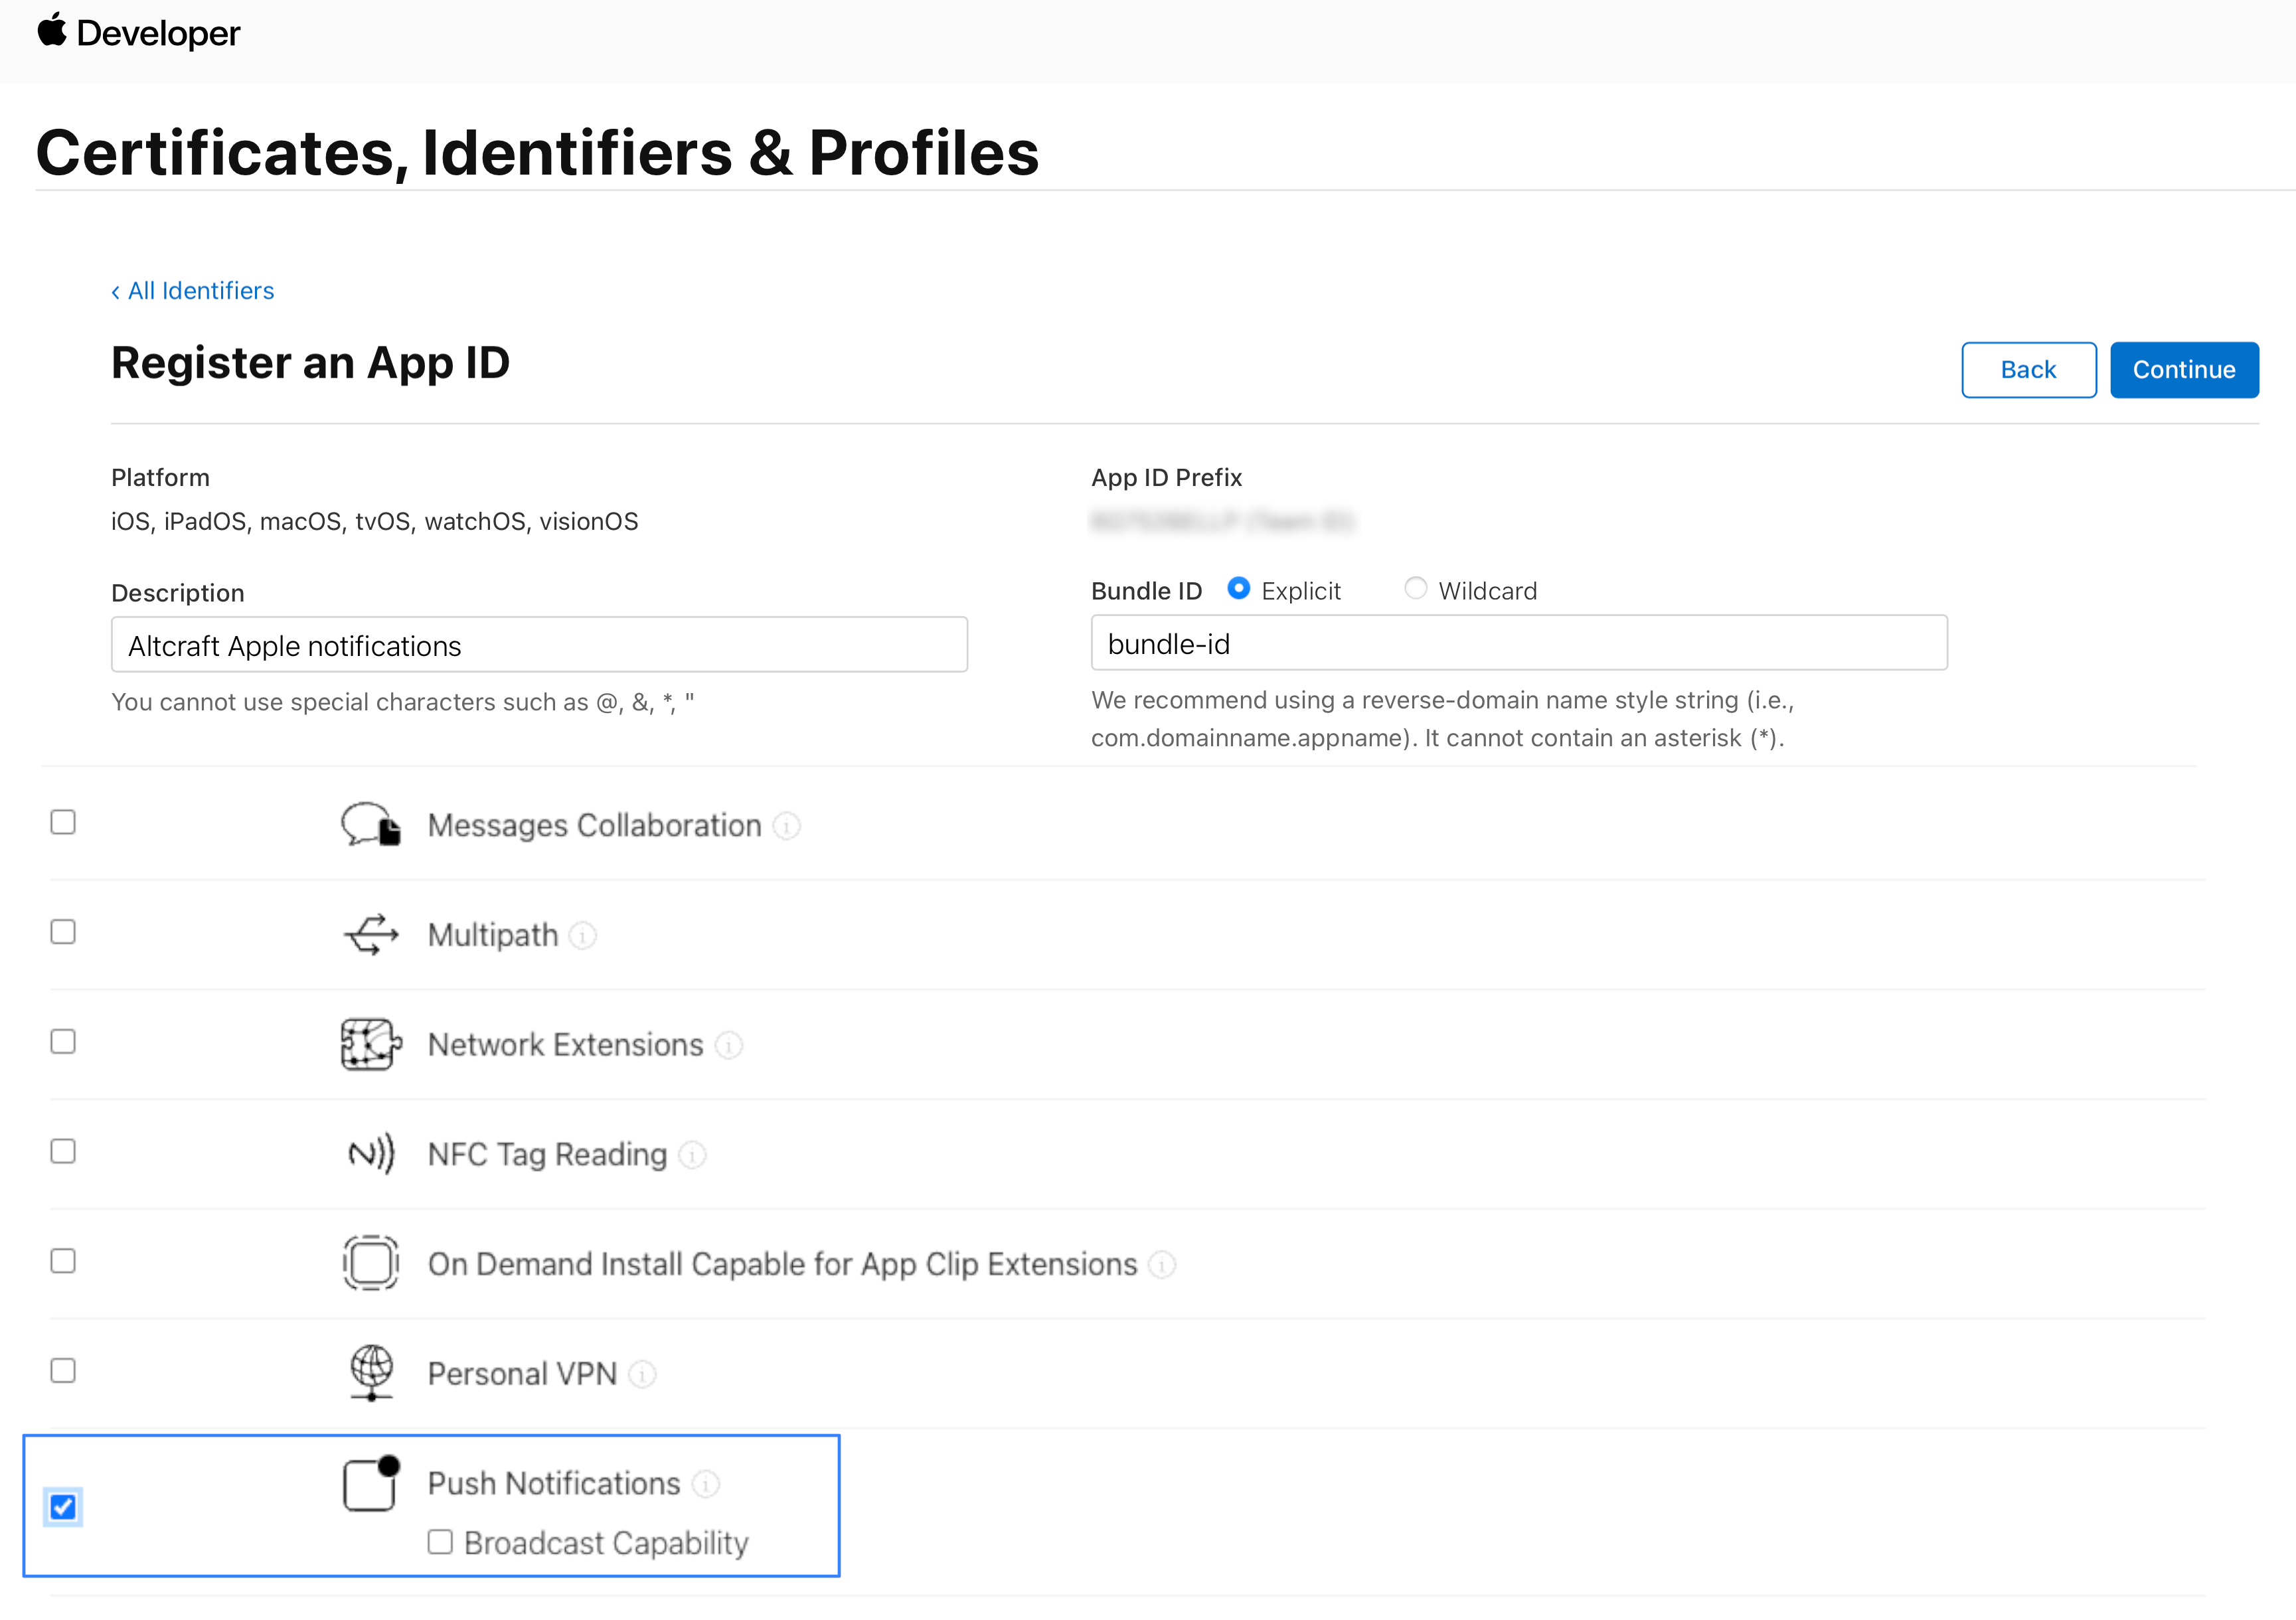
Go to the Apple Developer website to "Account " — "Certificates, Identifiers & Profiles" — "Identifiers". Create a new identifier. Select the App IDs option, then App. Enter a title in the Description field, specify the Bundle ID of the application in the appropriate field, select the Explicit option, then select Push Notifications from the list below and register the ID:
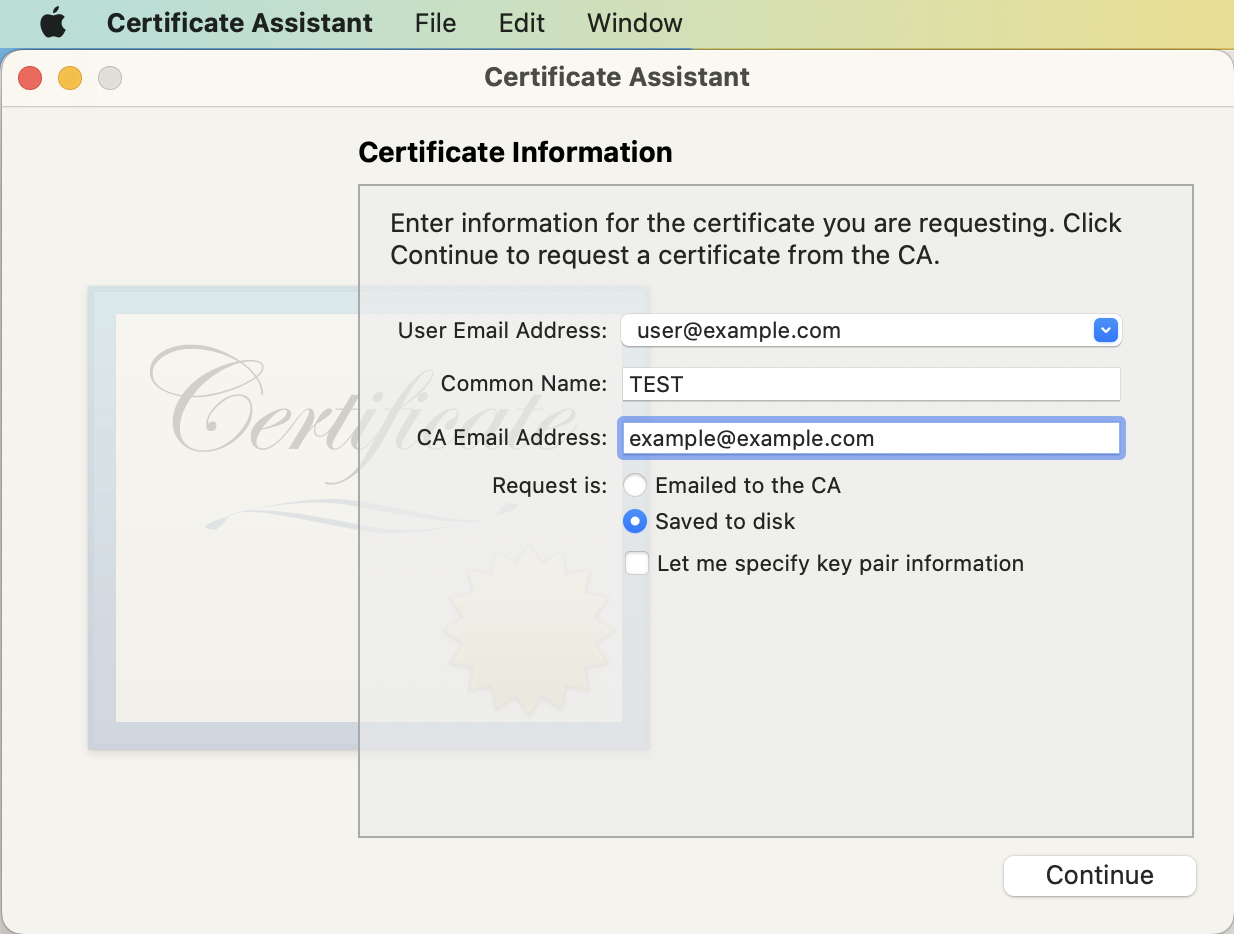
Open the "Keychain" application on your device. Go to "Default Keychains" — "Login", select "Certificate Assistant " — "Request a Certificate From a Certificate Authority" from the menu:

In the window that opens, fill in the required fields and select "Saved to disk". Save the certificate on the device:
Go back to "Certificates, Identifiers & Profiles " — "Certificates " on the website. Create a new certificate. In the Services list, select Apple Push Notification service SSL (Sandbox & Production). In the next item, find your application in the AppID drop-down list. Upload the certificate you created earlier into the appropriate field. Save the resulting Apple certificate to your device:

Double-click it to make it appear in the Keychain application. Open it and select "Always Trust" in the certificate usage options:

The next steps depend on whether you want to use token or certificate authentication.
- Token authentication
- Certificate authentication
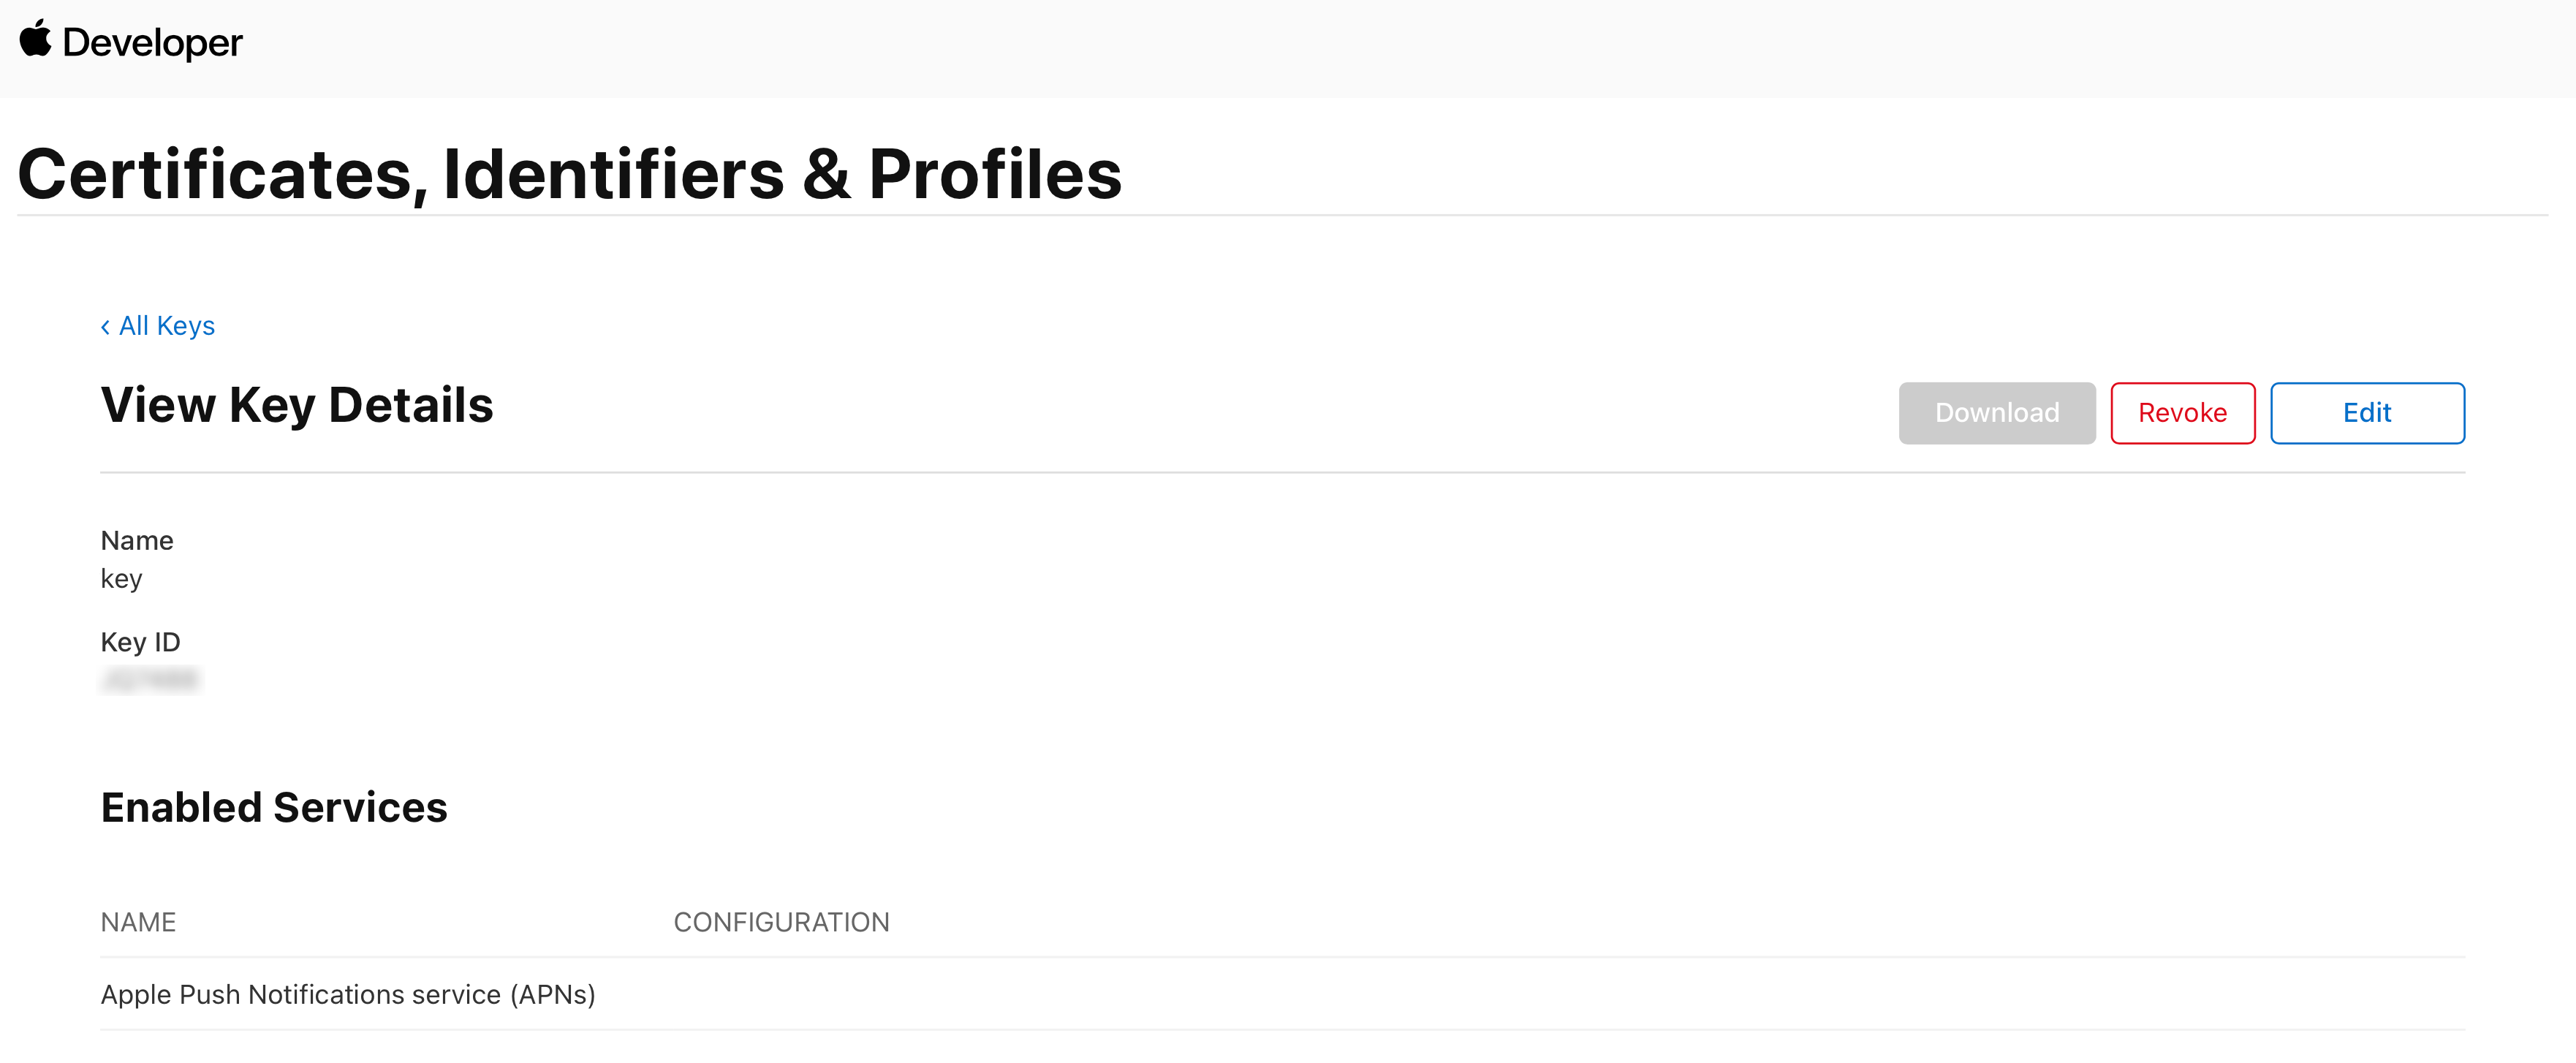
On the Apple Developer site, go to "Certificates, Identifiers & Profiles" — "Keys". Create a new key. Specify the name of the key and its type — APNs, click "Continue", then "Register". Make a note of Key ID, it will be required to configure the resource on the platform:
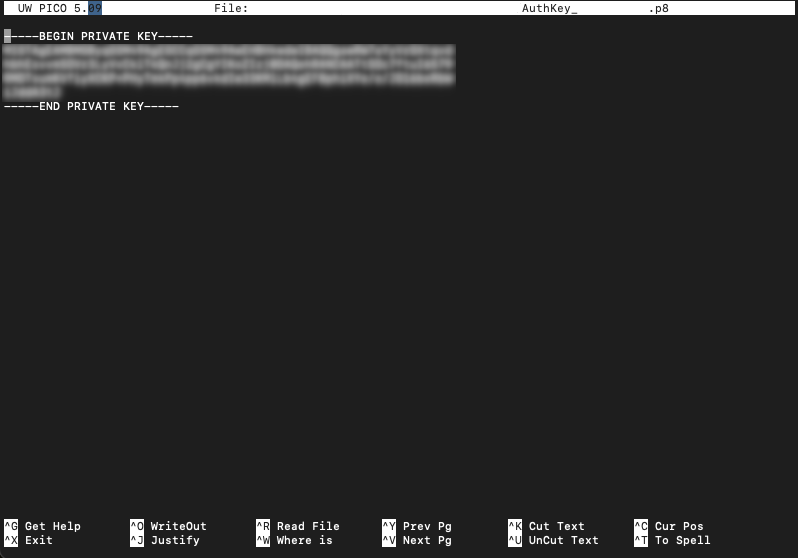
Download the key to your device. You need to open it with any text editor. The signature key is contained inside. You will need to specify it in the appropriate field when configuring the resource.
The key can only be downloaded one time. If you can't download it now, click "Done" and come back when you can.
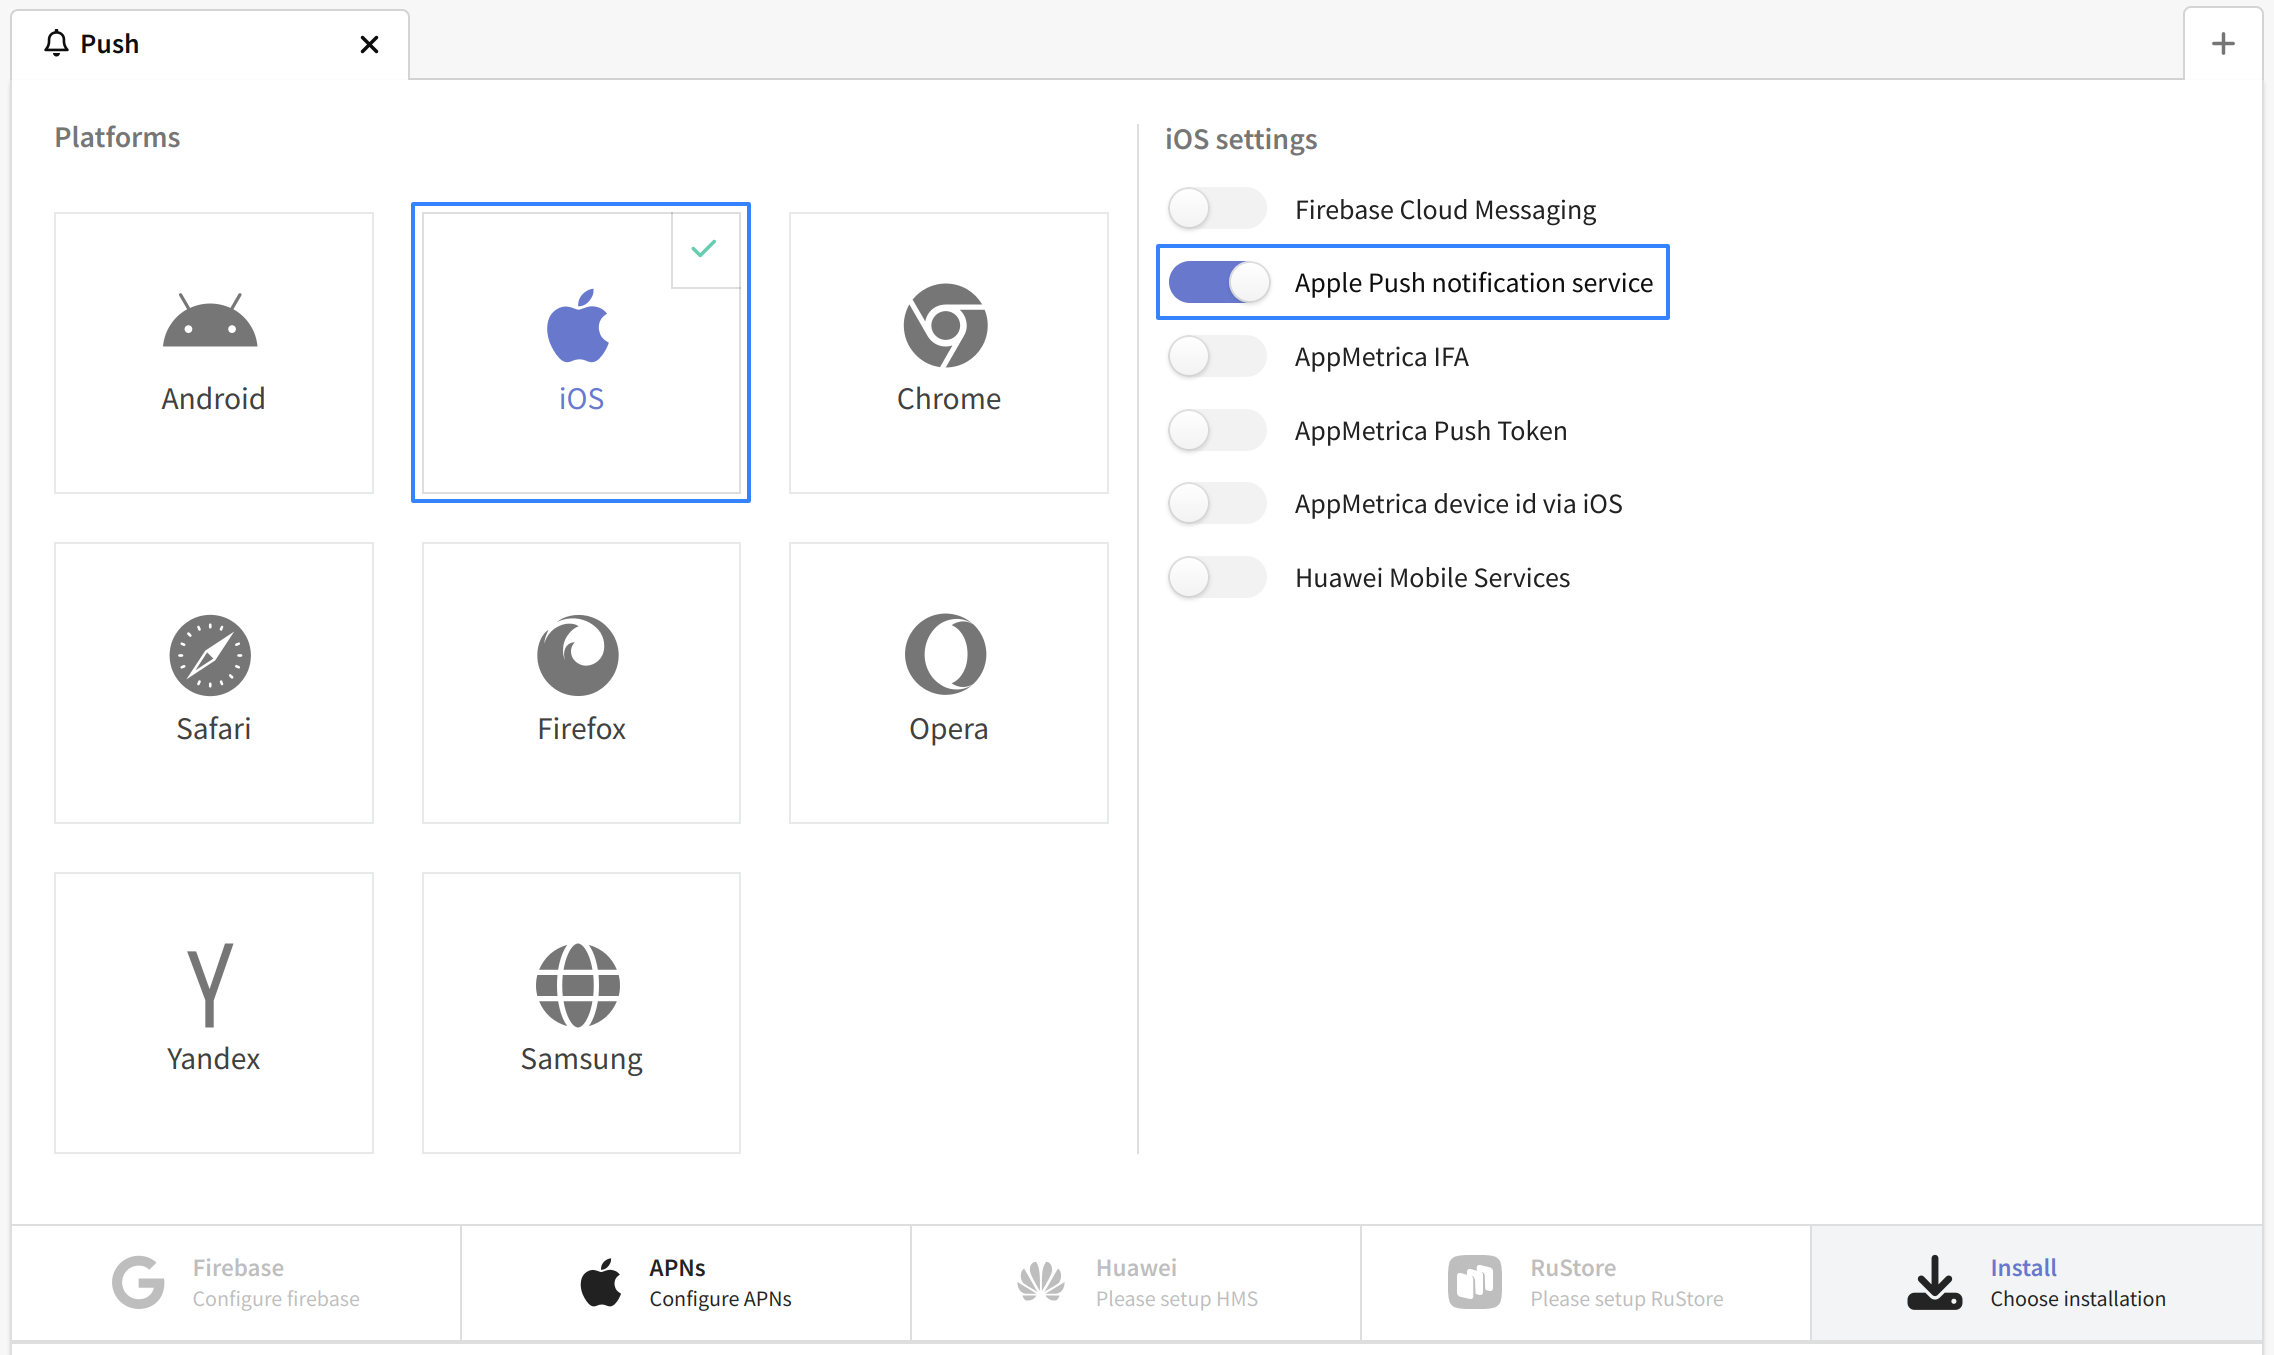
On the Altcraft platform, create a resource for the push channel, select the iOS platform and enable the Apple Push Notification service switch:
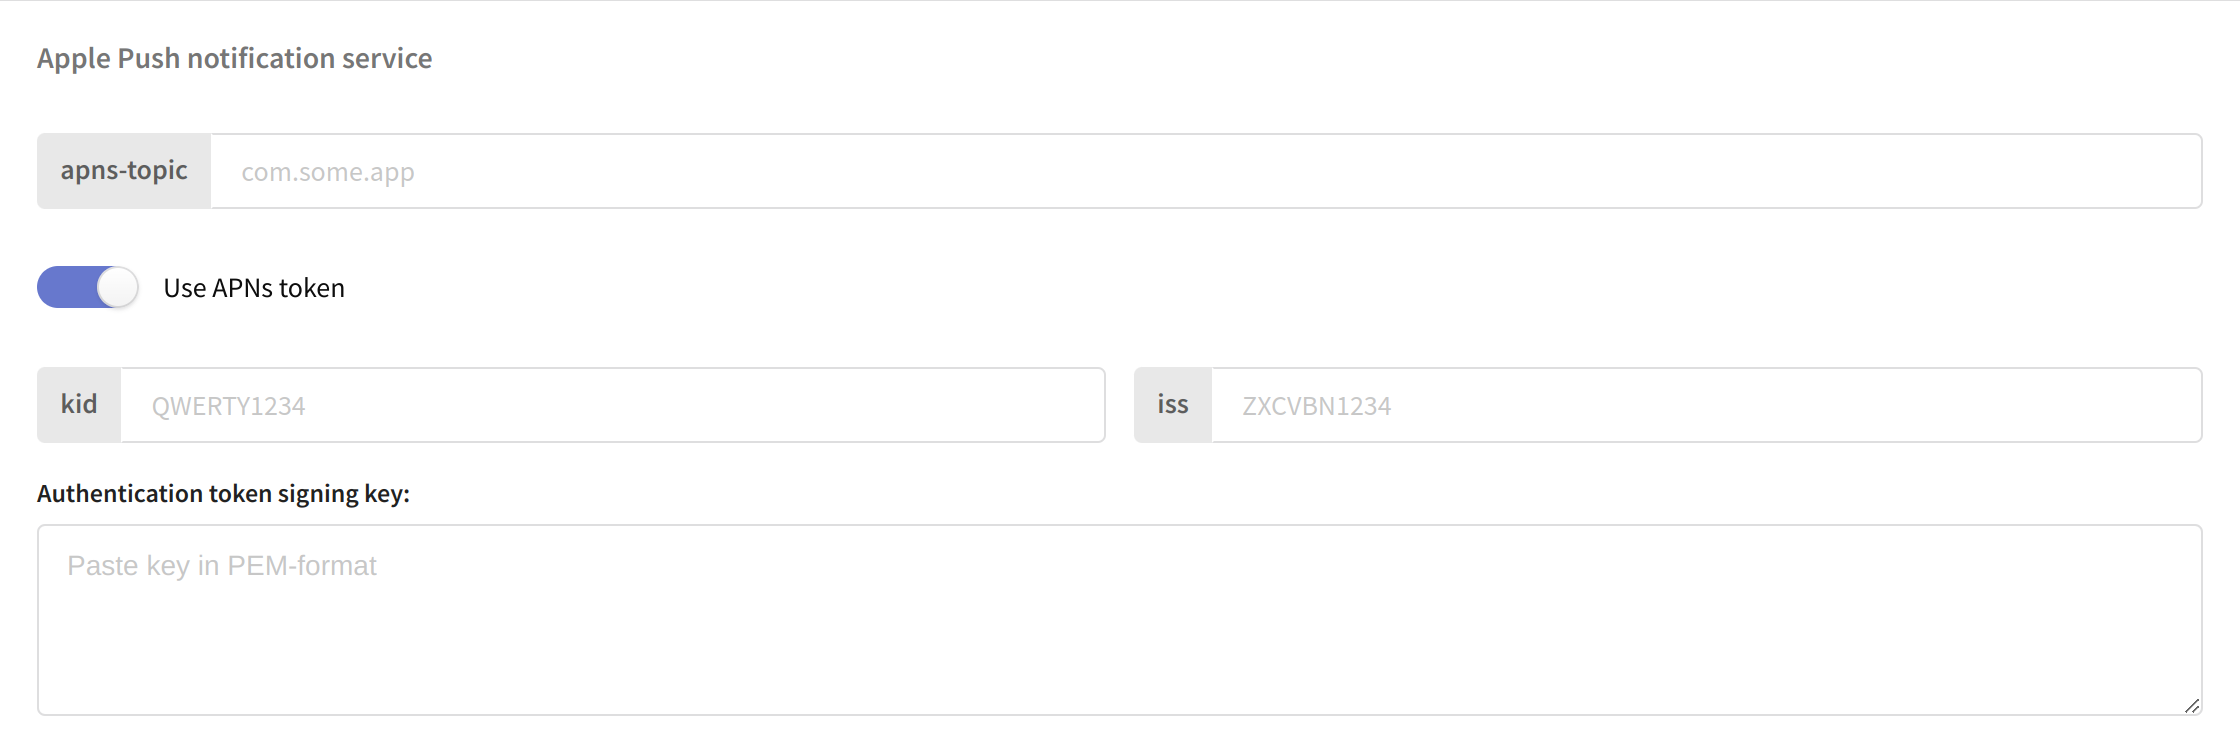
Activate the "Use APNs token" switch in the settings below. Fill in the following fields:
- apns-topic — Bundle ID of the application.
- kid — KeyID value of the key.
- iss — Team ID, usually found in the developer account on the Apple Developer site.
- Signature Key — The contents of the key file downloaded earlier.
Save the configured resource using the buttons at the top of the page. The platform is ready to send notifications using APNs.
In the Keychain application, right-click the created certificate and export it. Select the .p12 format. If necessary, set a password for the certificate:
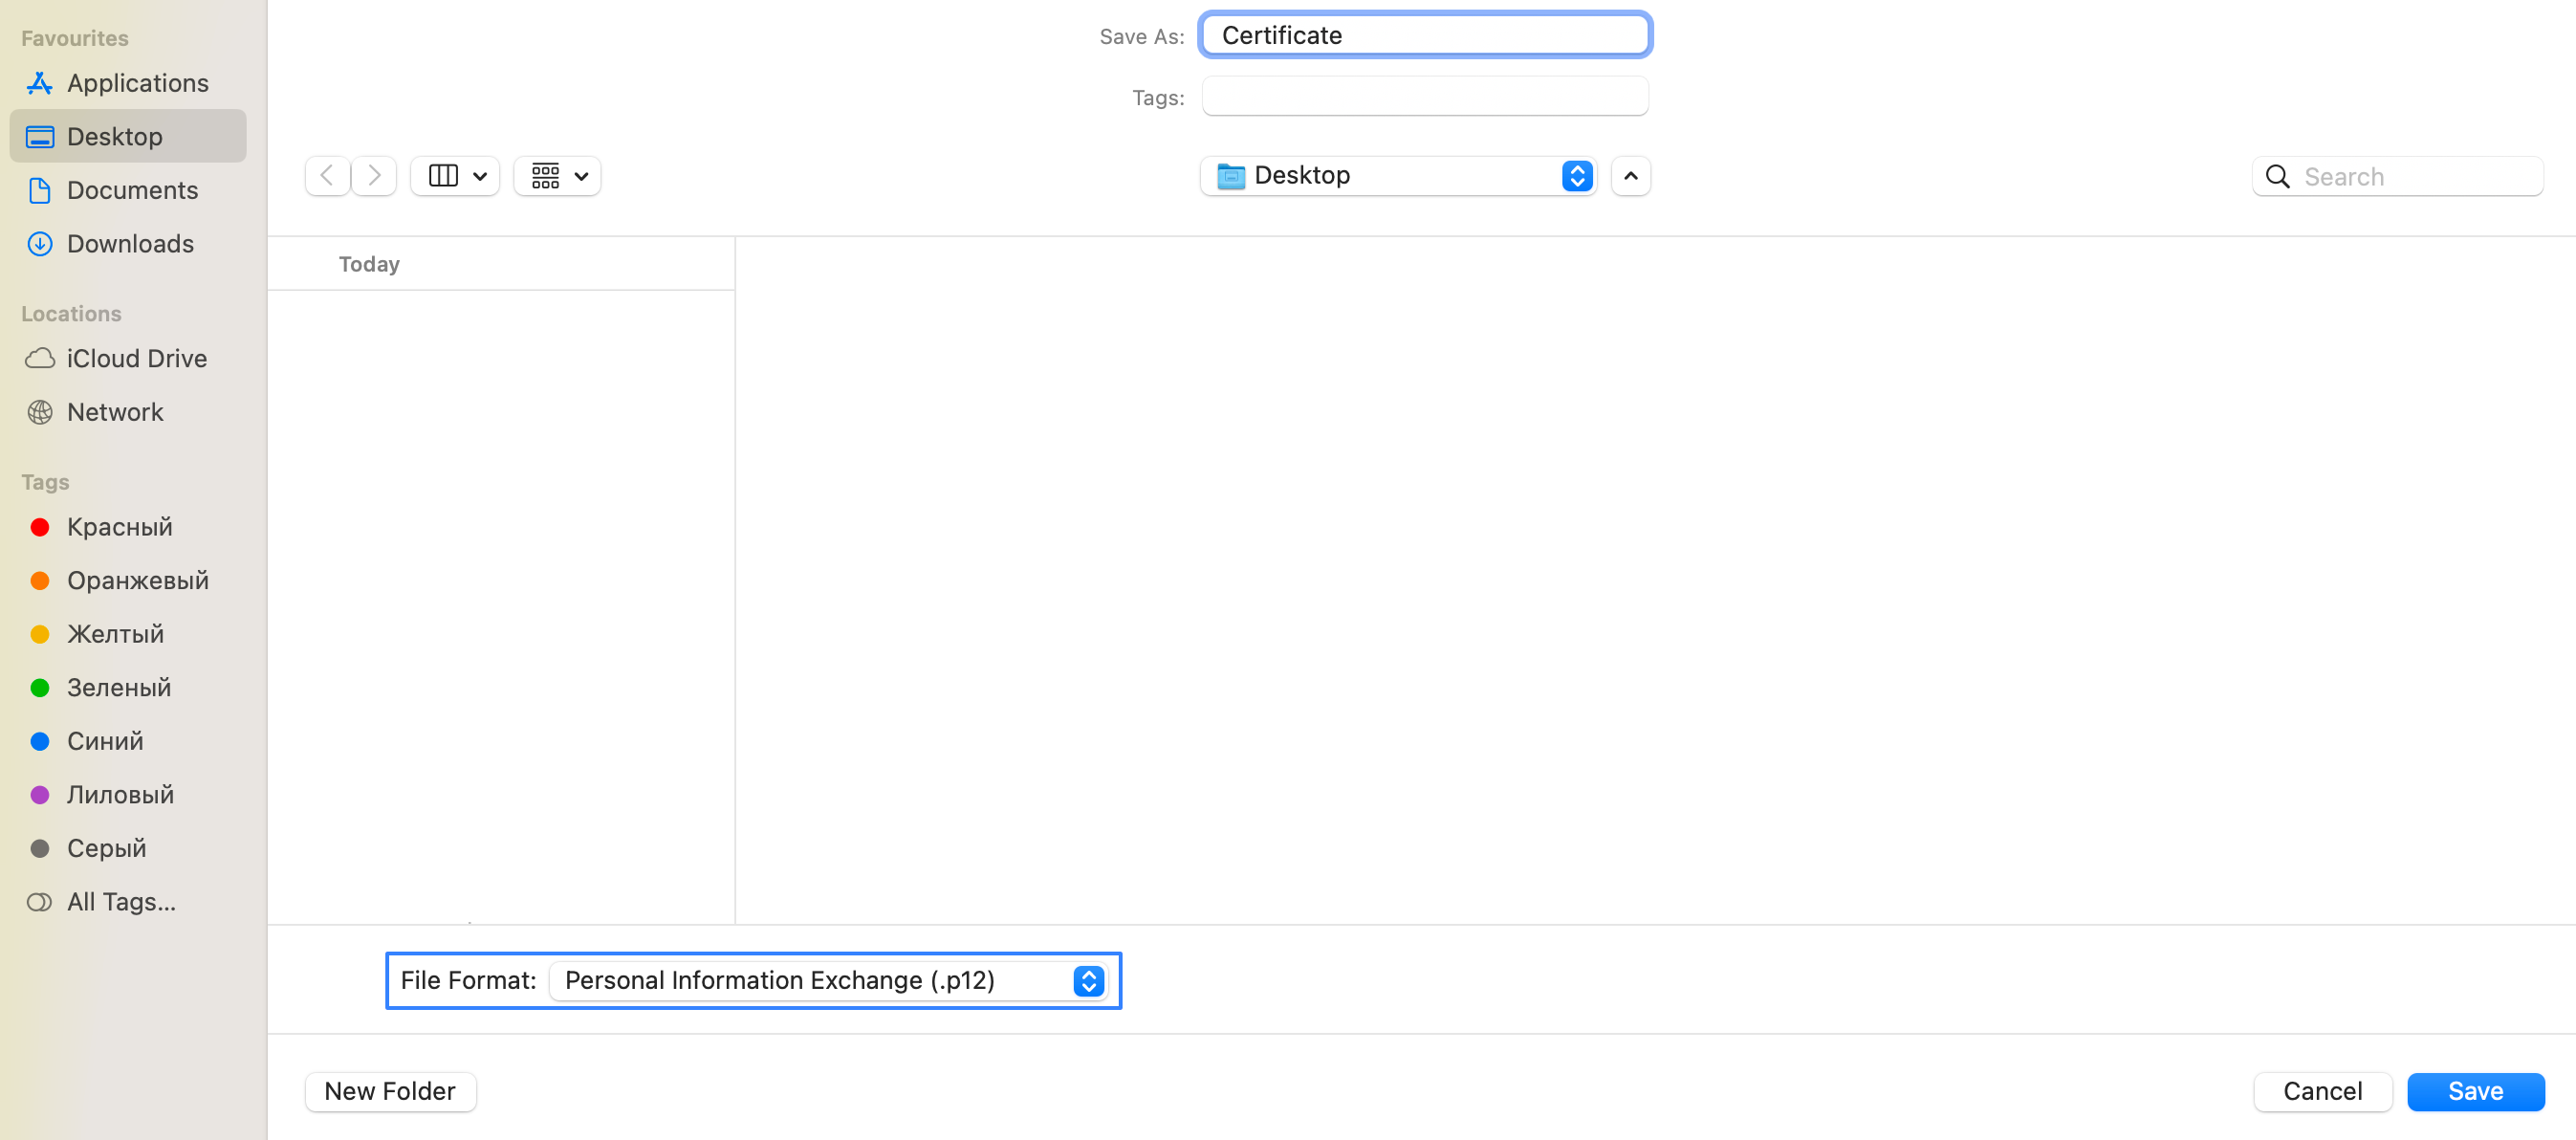
Using terminal navigate to the folder where you exported the certificate. Create a pem key using the command openssl pkcs12 -in filename.p12 -out filename.key.pem -nocerts -nodes, where filename.p12 is the name of the exported file and filename.key.pem is the name of the key pem file to be created.
Without closing the terminal or navigating to other folders, create a pem certificate using the openssl pkcs12 -in filename.p12 -out filename.crt.pem -clcerts -nokeys command similar to the command above (filename.p12 is the source file, filename.crt.pem is the destination file).
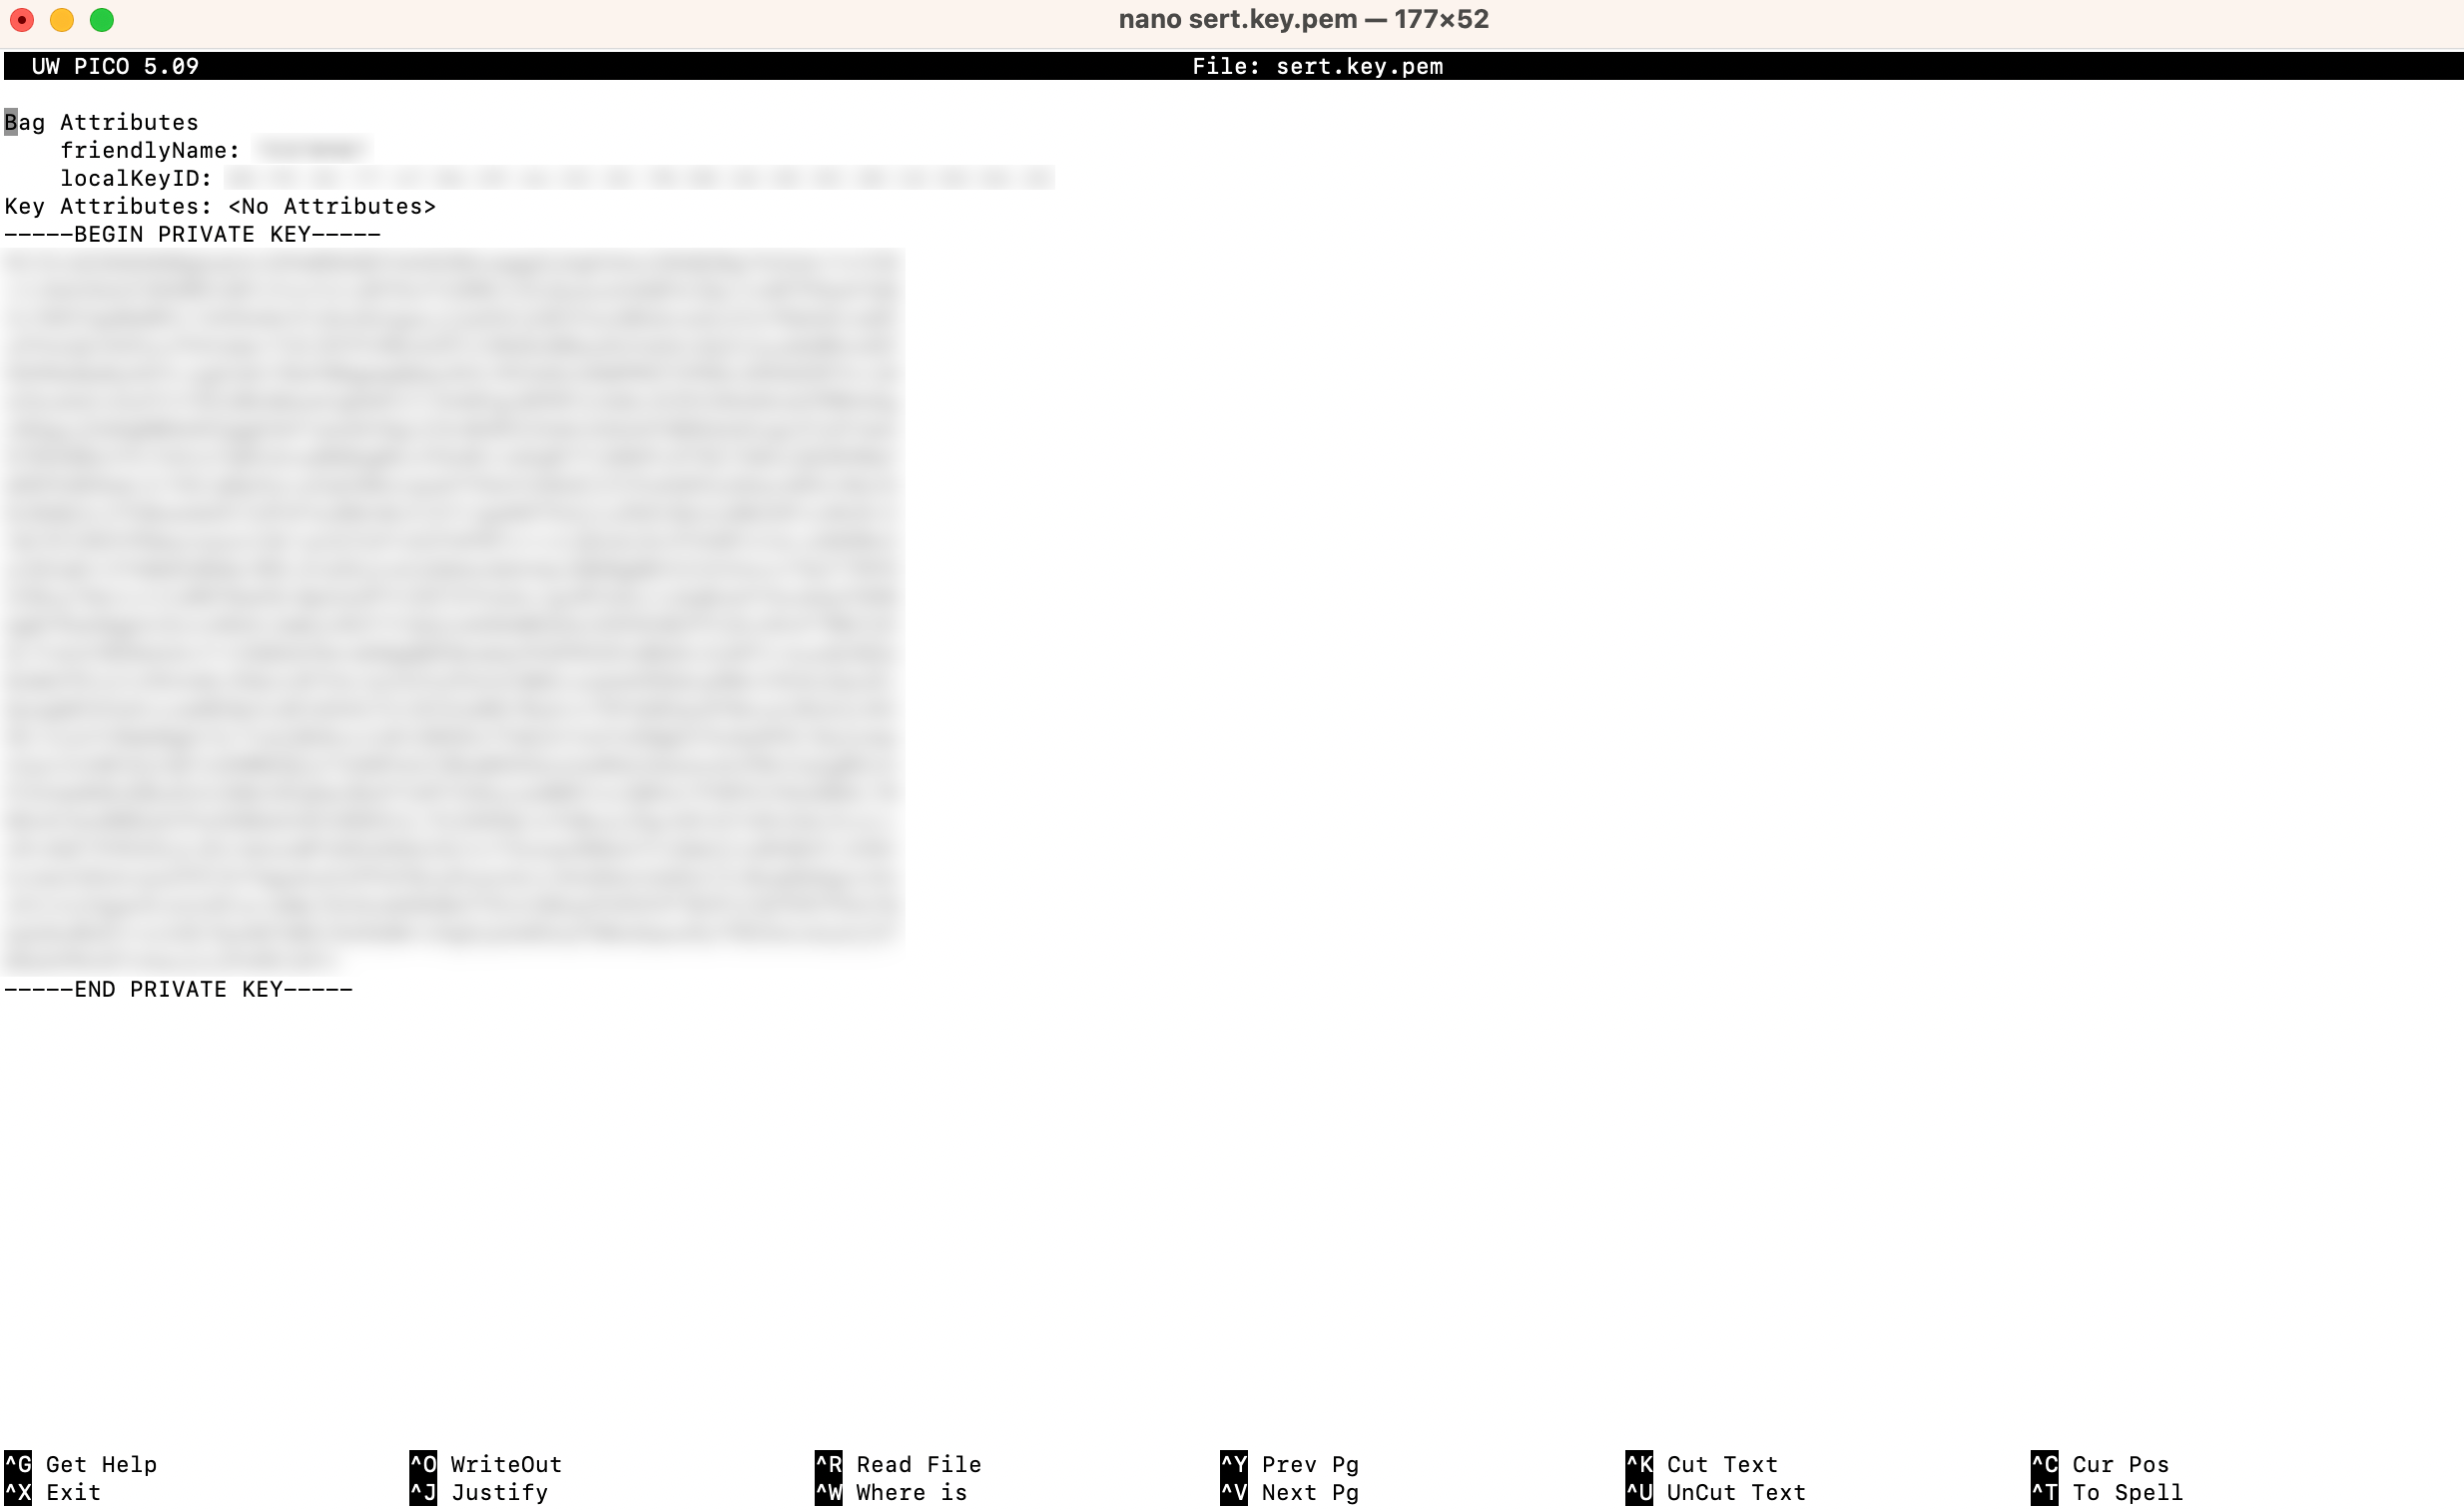
Open these files with the nano editor and copy the key and certificate value:
On the Altcraft platform, create a resource for the push channel, select the iOS platform and enable the Apple Push Notification service switch:

Activate the "Use APNs certificate " switch in the settings below. Fill in the following fields:
- Certificate — the value of the pem certificate you created.
- Private Key — the value of the pem key you created.

Save the configured resource using the buttons at the top of the page. The platform is ready to send notifications using APNs.
Prepare the application
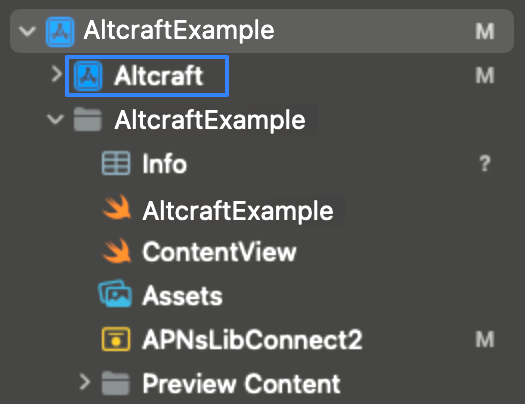
1. Place the Altcraft.xcodeproj file flush with the application folder in the project:
2. Make the target settings for the application:
-
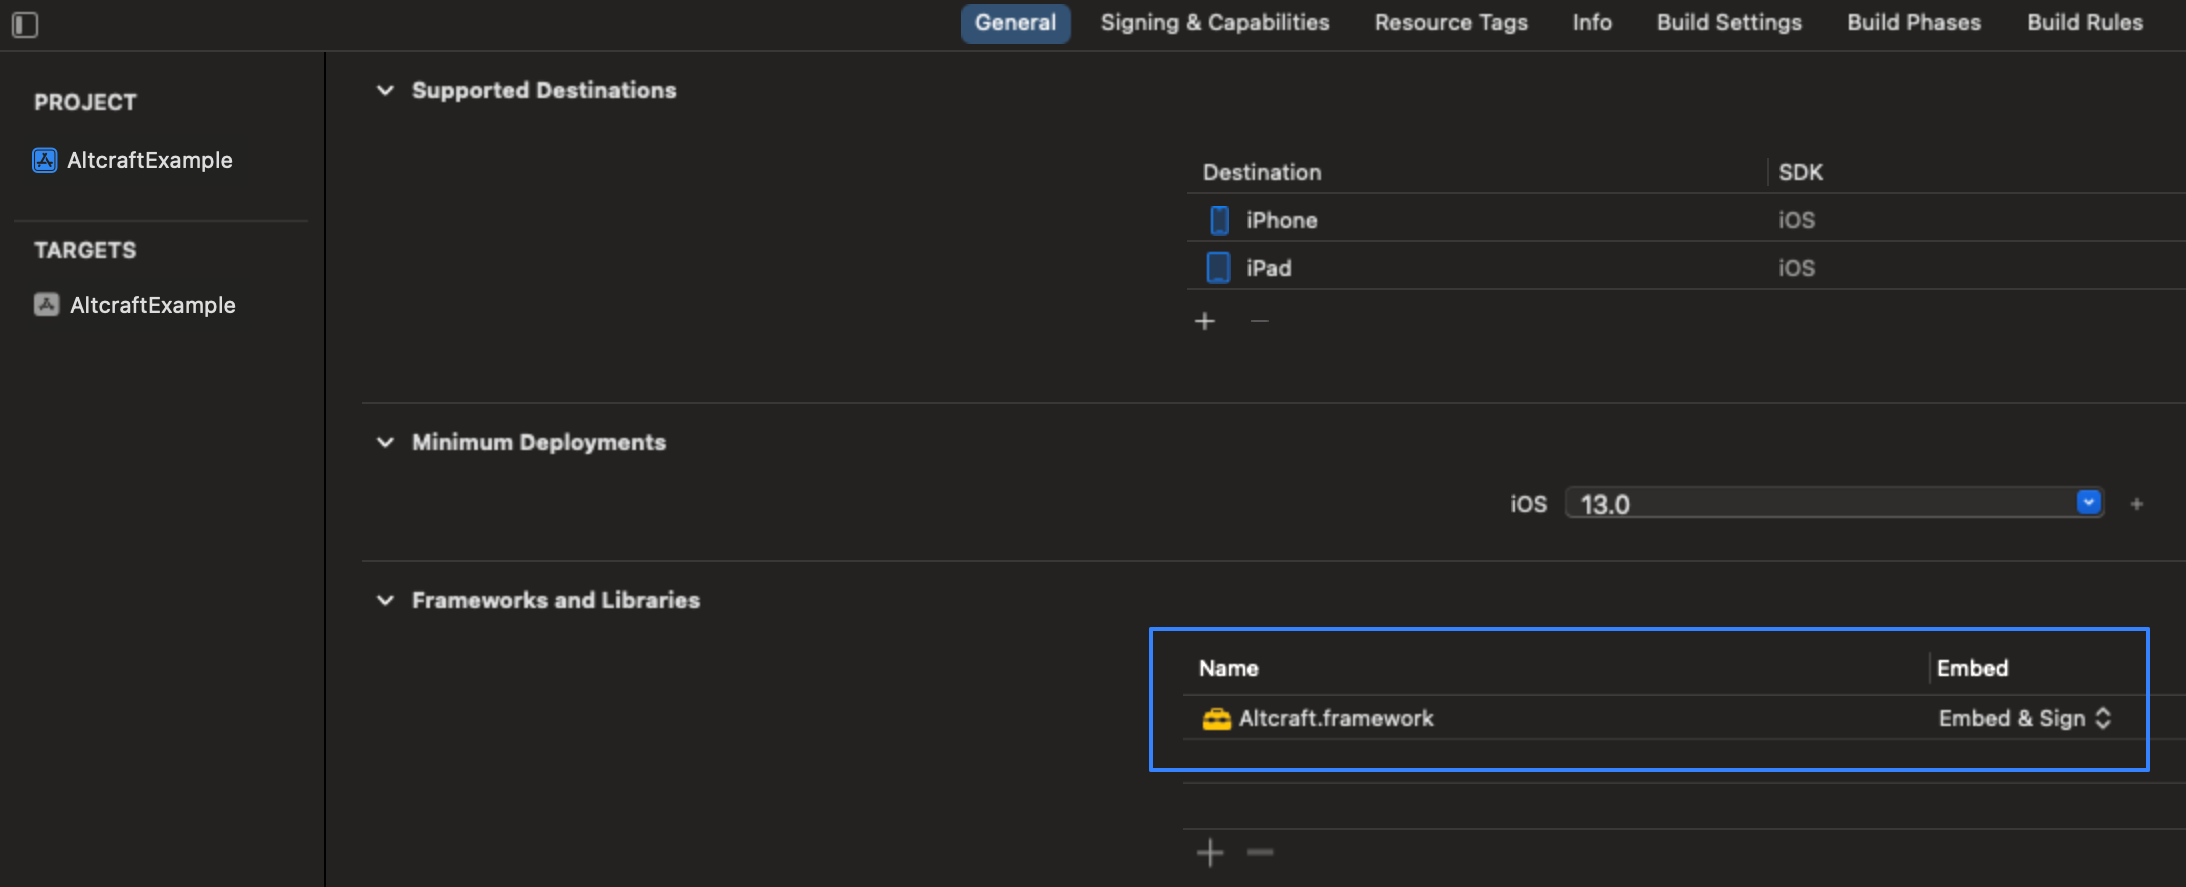
General section:
Add the Altcraft framework under "Frameworks, Libraries and Embedded Content ".
-
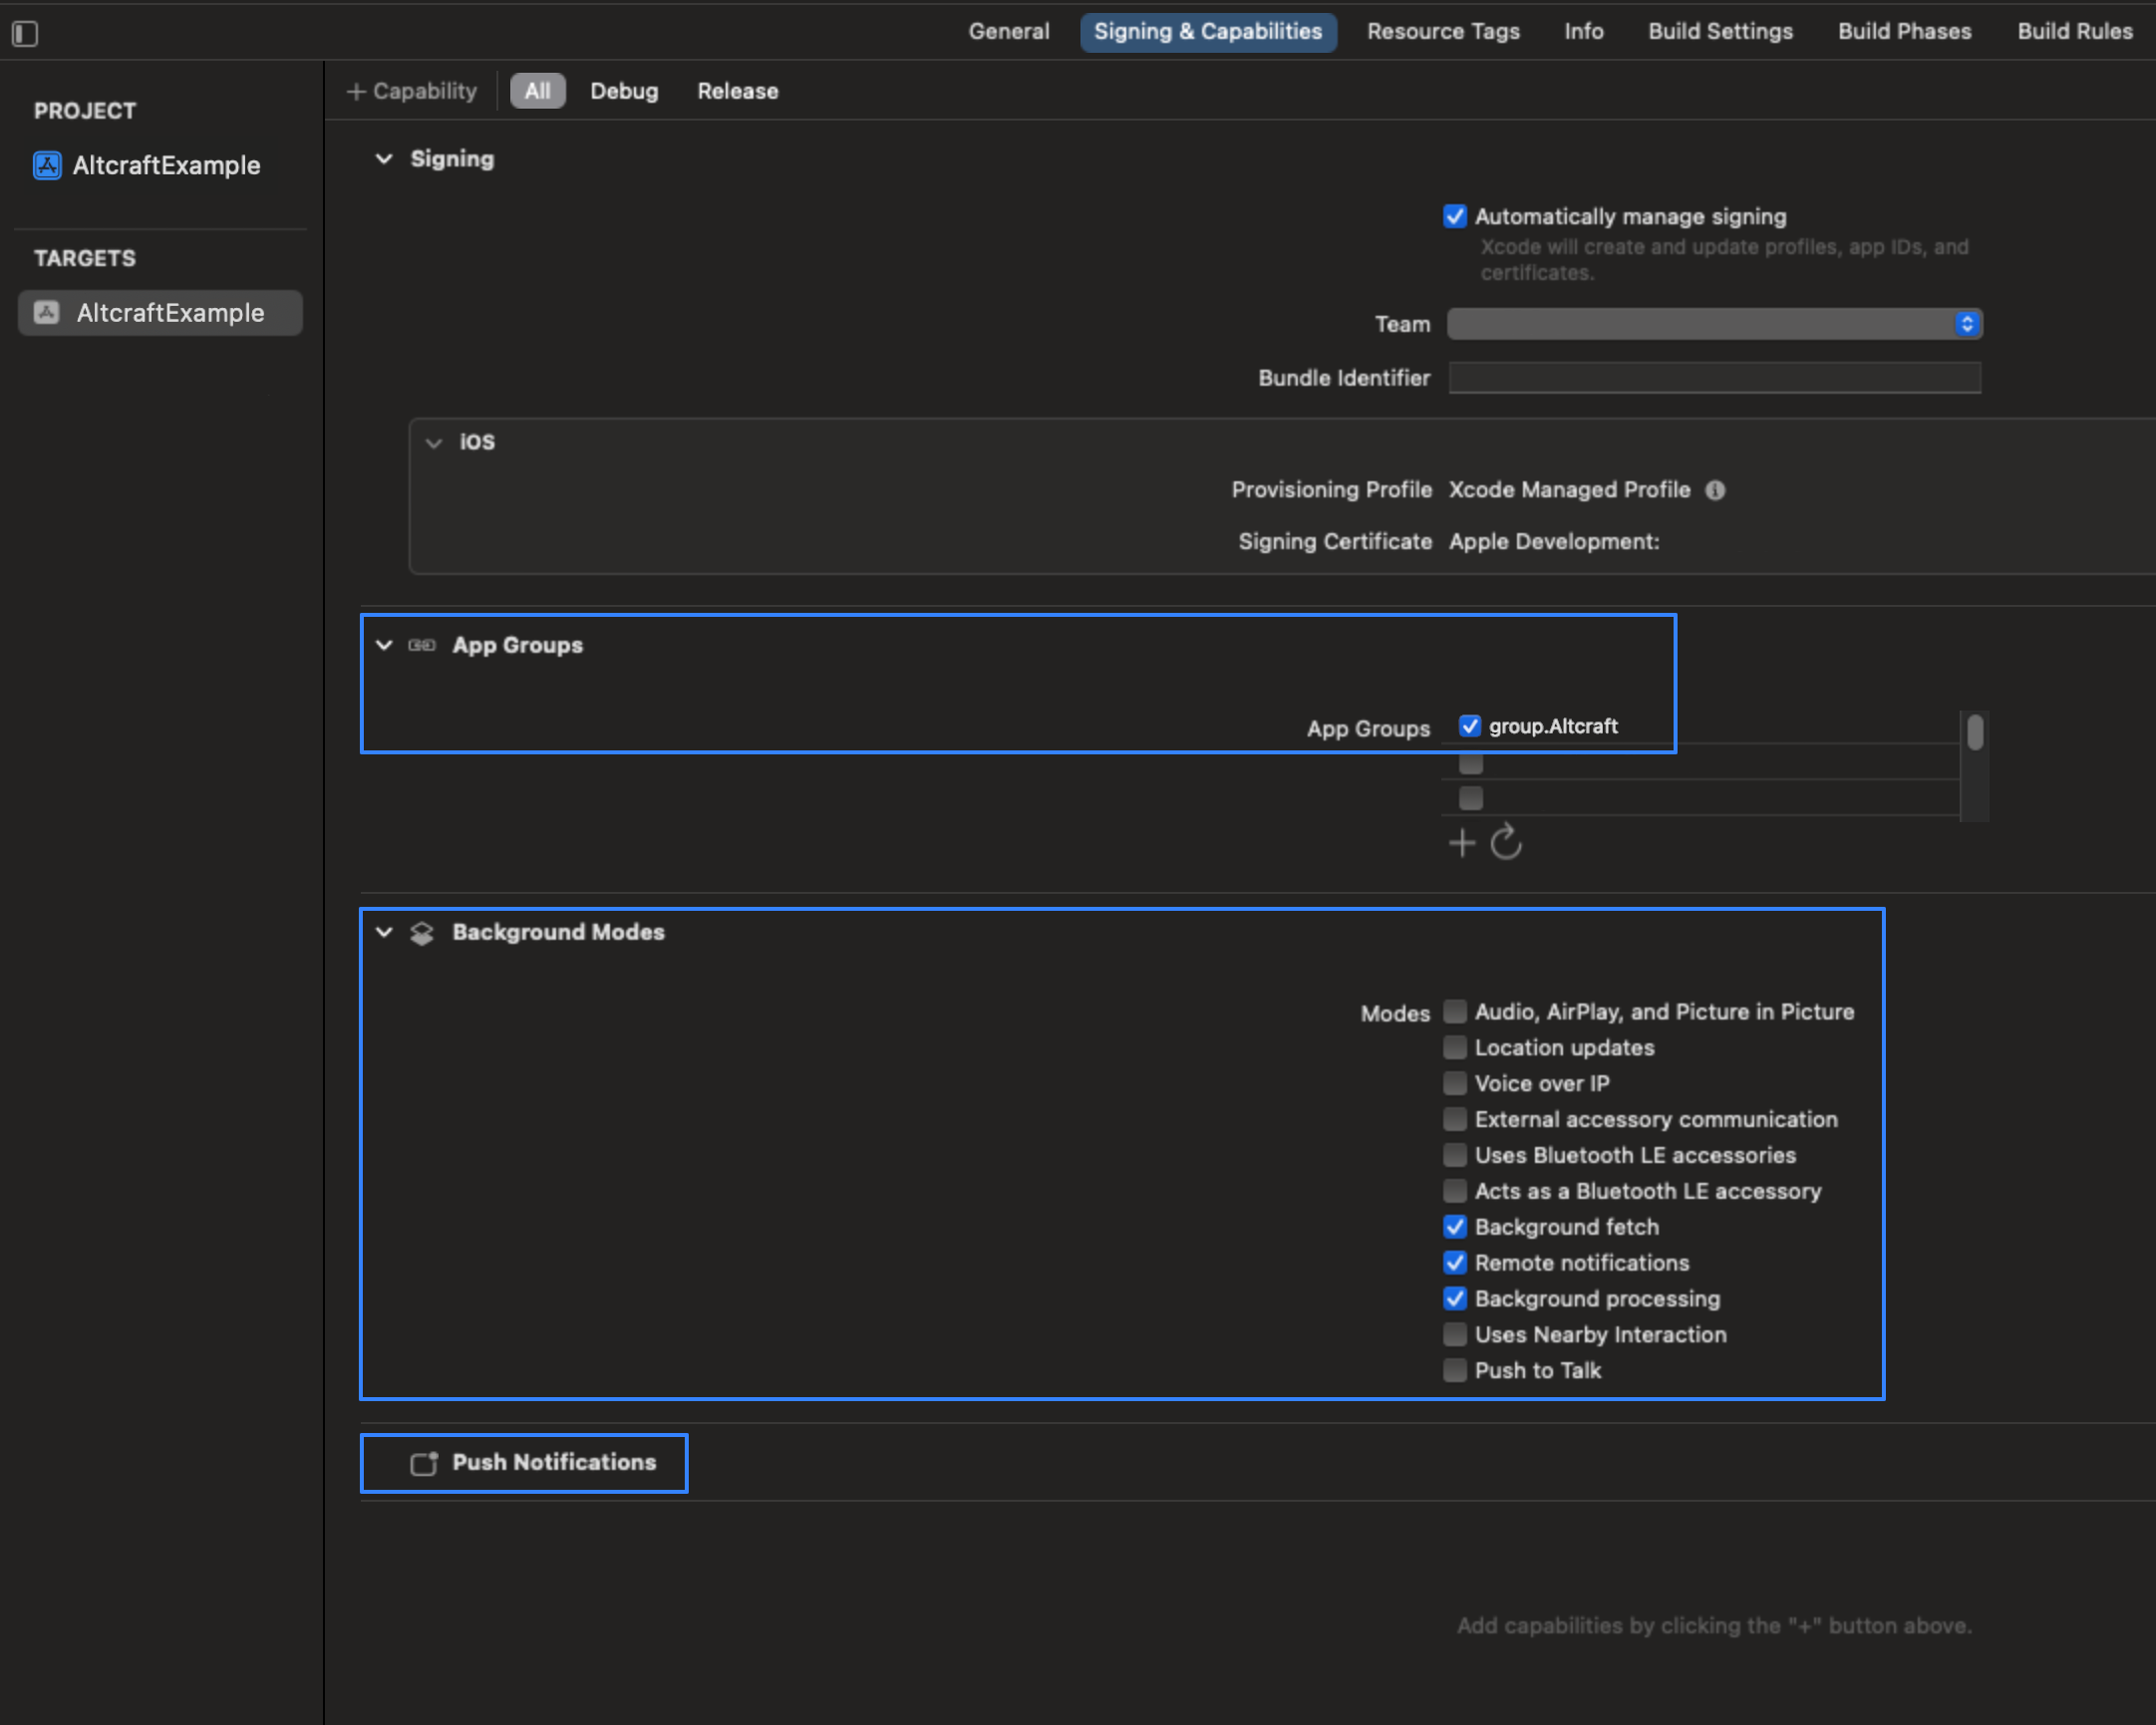
Under Signing & Capabilities, add the following Capabilities:
- PushNotifications;
- AppGroups - In this parameter, specify a name for the group to be used later. Adding AppGroups is necessary to pass information to the Notification Service Extension;
- Background Modes - select Background fetch, Remoute notification, Background processing.
-
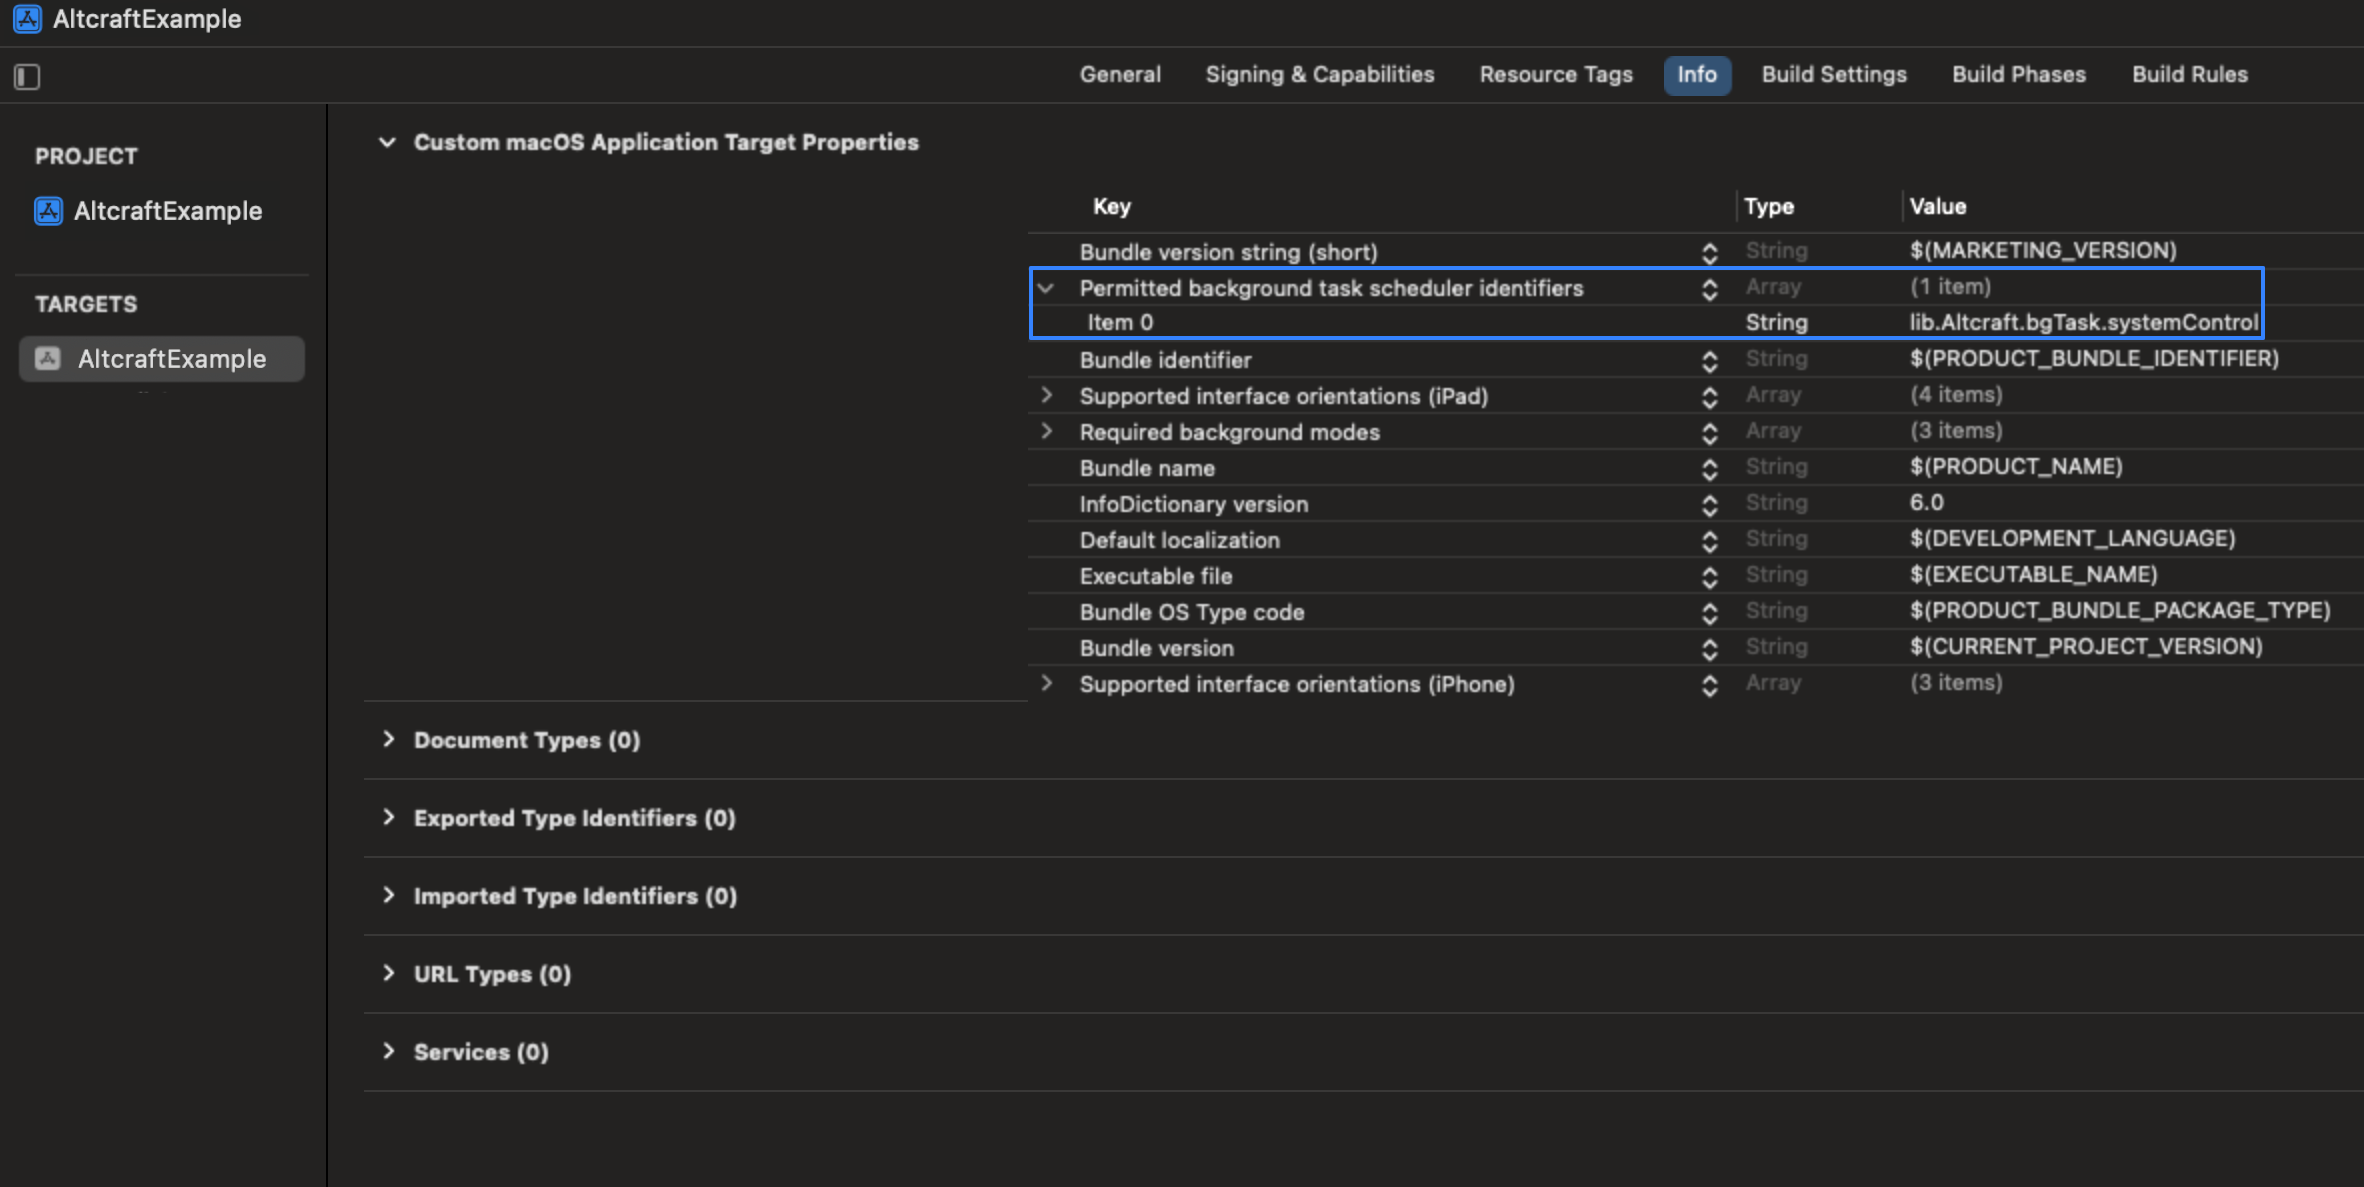
Info section:
Add a key "Permitted background task scheduler identifiers" and a value "lib.Altcraft.bgTask.systemControl" for it. This is necessary to register a bgTask that will perform a replay of failed requests to the server in Background mode;
Preparing AppDelegate
- Import the Altcraft SDK dependency Altcraft SDK to the Swift file containing the AppDelegate class:
import Altcraft
- Add the necessary functions to the AppDelegate class. It should contain the following functions and variables:
class AppDelegate: NSObject, UIApplicationDelegate {

    /// groupName: This is the identifier that is used in App Groups
    private let groupsName = "group.you_name"

    /// apiUrl:  The URL to the Altcraft API endpoint.
    private let apiUrl = "apiUrl"

    /// resToken: The unique identifier of the Altcraft resource.
    private let resToken = "resToken"

    func application(_ application: UIApplication, didFinishLaunchingWithOptions launchOptions: [UIApplication.LaunchOptionsKey: Any]?) -> Bool {

        /// - important! The call to setGroupsName() must be made before initializing all other sdk objects in the didFinishLaunchingWithOptions method.
        StoredVariablesManager.shared.setGroupsName(value:groupsName)

        let config = AltcraftConfiguration.Builder()
            .setProvider(Constants.ProviderName.apns)
            .setApiUrl(apiUrl)
            .setResToken(resToken)
            .build()

        AltcraftSDK.shared.initialization(configuration: config)
        AltcraftSDK.shared.periodicBackgroundTasks.registerBgTaskForSystemFunctionControl()
        AltcraftSDK.shared.notificationServiceFunction.registerForPushNotificationsWichSubscription(for: application)
        return true
    }
    func application(_ application: UIApplication, didRegisterForRemoteNotificationsWithDeviceToken deviceToken: Data) {
        AltcraftSDK.shared.pushModule.pushModuleControl(deviceToken: deviceToken)
    }
}
To connect AppDelegate in SwiftUI, use adaptor:
@UIApplicationDelegateAdaptor(AppDelegate.self) var delegate
Key AppDelegate Properties
1. Be sure to specify a proprietary AppGroupsName:
private var appGroupsName = "group.you_name", where "group.you_name" is the name of the group you created. It must match the name specified in Signing & Capabilities:

2. Perform a appGroupsName save before initializing any other Altcraft objects:
StoredVariablesManager.shared.setGroupsName(value: appGroupsName)
3. Create a configuration variable:
    let config = AltcraftConfiguration.Builder()
            .setProvider(Constants.ProviderName.apns)
            .setApiUrl(apiUrl)
            .setResToken(resToken)
            .build()
-
Constants.ProviderName.apns is a constant containing the name of the service for sending
ios-apnsmessages -
apiUrl - URL address of platform pixel domain
-
resToken - Altcraft resource token.

4. Execute the initialization function of the AltcraftSDK class:
AltcraftSDK.shared.initialization(configuration: config), where configuration is the configuration variable.
5. Register a task of class BGTask, a task executed in the background:
AltcraftSDK.shared.periodicBackgroundTasks.registerBgTaskForSystemFunctionControl()
6. Execute a request for permission to show notifications from the user. If so, an automatic subscription to Altcraft push notifications will be performed:
AltcraftSDK.shared.notificationServiceFunction.registerForPushNotificationsWichSubscription(for: application)
If you want to trigger a request for permission to show without subscribing to Altcraft push notifications, use the registerForPushNotifications(for: application) function:
AltcraftSDK.shared.notificationServiceFunction.registerForPushNotifications(for: application)
7. To make a separate function call that adds a subscription to Altcraft push notifications, use the following code:
AltcraftSDK.shared.pushModule.subscribeToAltcraftPush()
This function will perform the subscription if:
- permission to show push notifications is granted
- SDK is initialized
- device token is available and received
Prepare Notification Service Extension
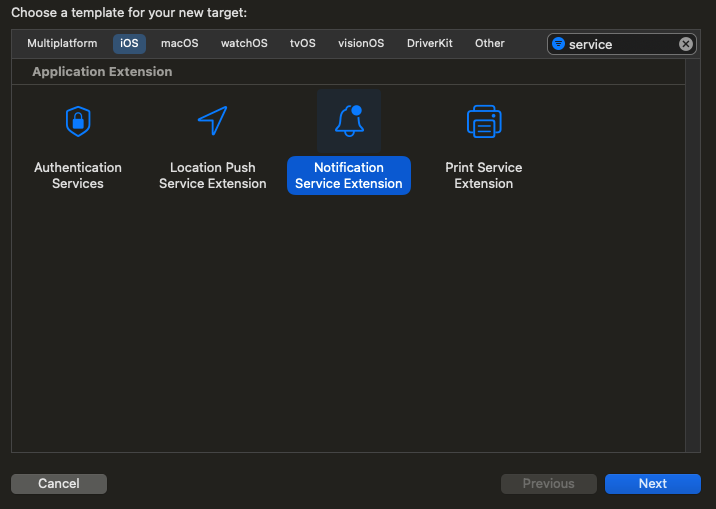
1. Create a new Notification Service Extension target:
- Click File - New - Target - Notification Service Extension
- Select a Product Name for the target.
- Activate it
2. Configure the Notification Service Extension application targeting:
-
Under General:
-
Specify Minimum Deployments;
-
Add the Altcraft framework under "Frameworks, Libraries and Embedded Content".
-

-
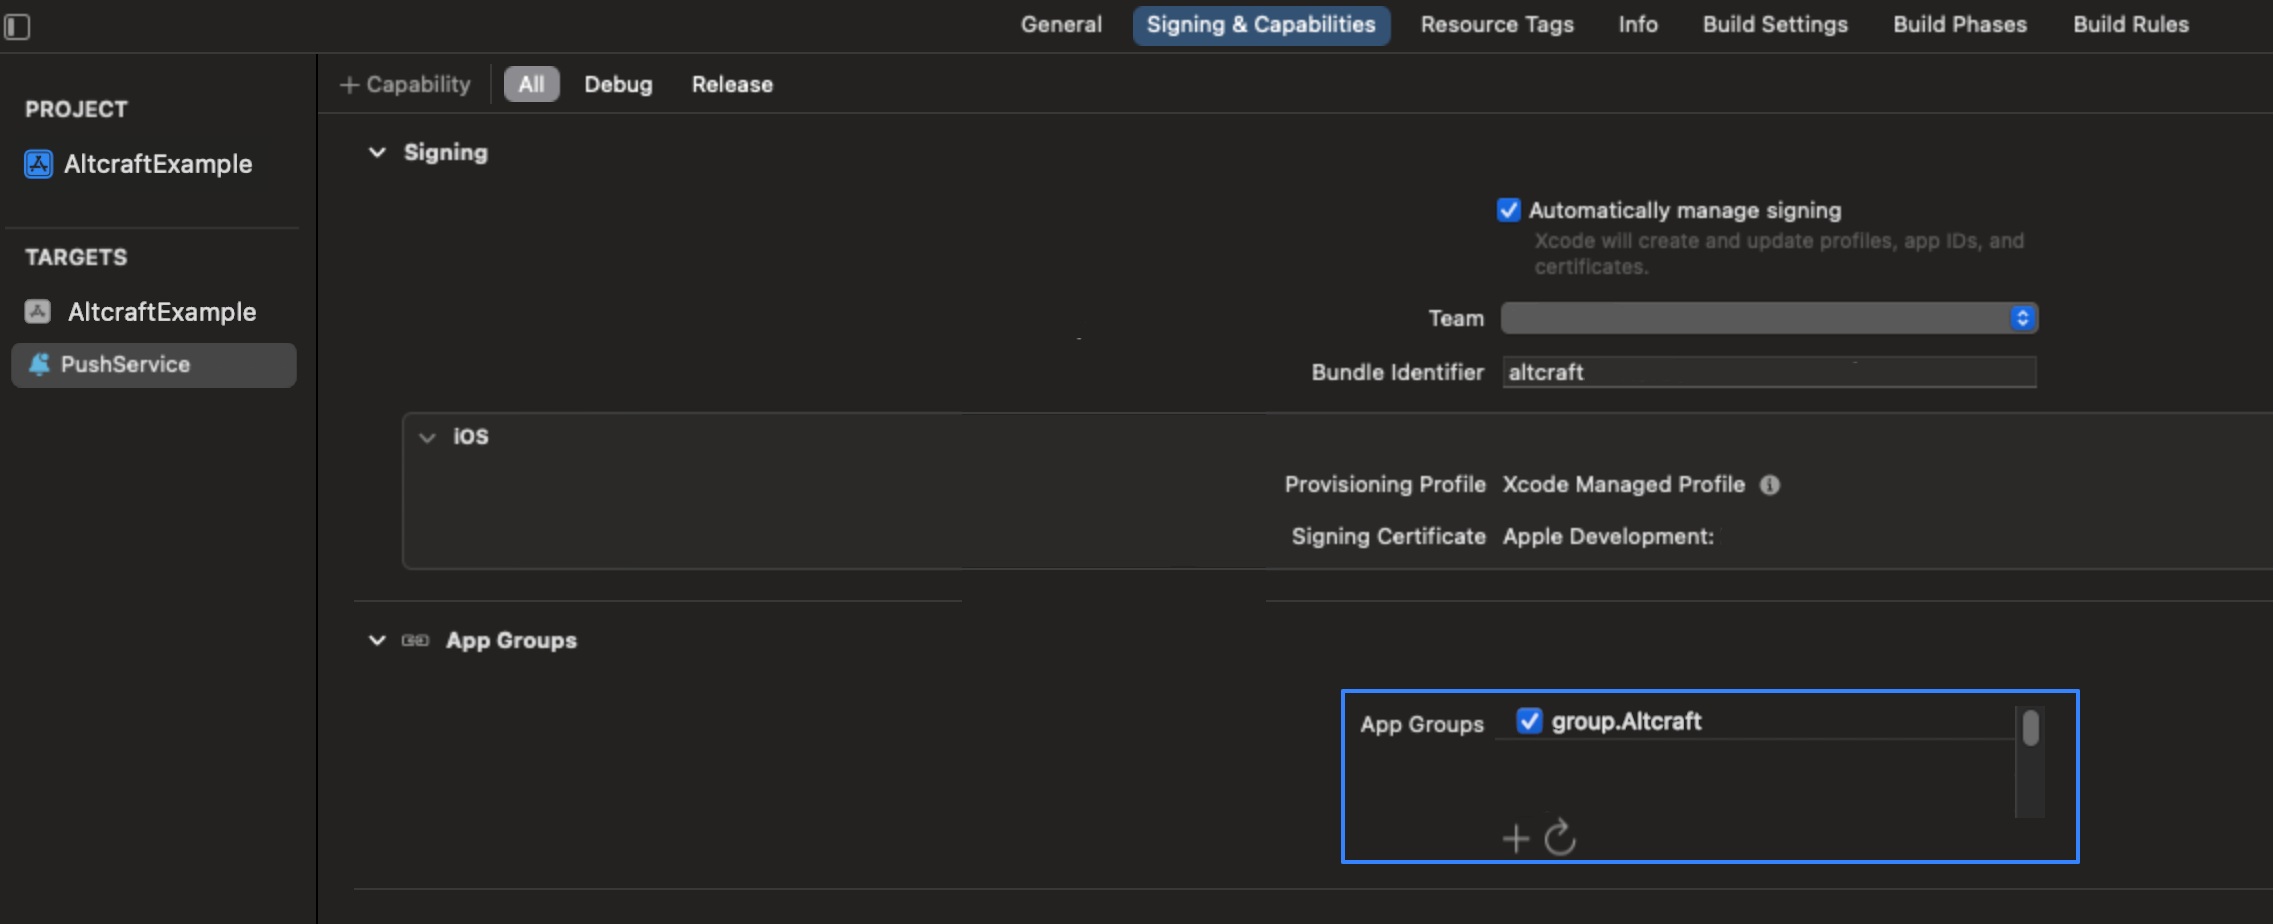
Under Signing & Capabilities:
- Under Capabilities, add AppGroups. Specify the same name for it as in the application's target.
3. Replace all automatically generated class code with the following:
import Altcraft
import UserNotifications

class NotificationService: UNNotificationServiceExtension {

    /// - important! Set app groups name.
    var appGroupsName = "group.you_name"

    var service = AltcraftNotificationService()

    override func didReceive(_ request: UNNotificationRequest, withContentHandler contentHandler: @escaping (UNNotificationContent) -> Void) {

        if isAltcraftPush(request) {
            StoredVariablesManager.shared.setGroupsName(value: appGroupsName)
            _ = AltcraftSDK.shared.coreDataManager
            self.service.didReceive(request, withContentHandler: contentHandler)
        } else {
            contentHandler(request.content)
        }
    }

    override func serviceExtensionTimeWillExpire() {
      service.serviceExtensionTimeWillExpire()
    }
}
Be sure to include your AppGroupsName:
private var appGroupsName = "group.you_name", where you must specify the AppGroups name from Signing & Capabilities instead of "group.you_name".