Configuring mSDK for Android via Firebase
Preparing of the application
Setting up the Firebase Cloud Messaging connection
If you don't already have a project created in Firebase, create one. Next, from the Android Studio main menu, select Tools - Firebase from the panel at the top of the screen. In the side menu that opens, select Cloud Messaging - Set up Firebase Cloud Messaging:
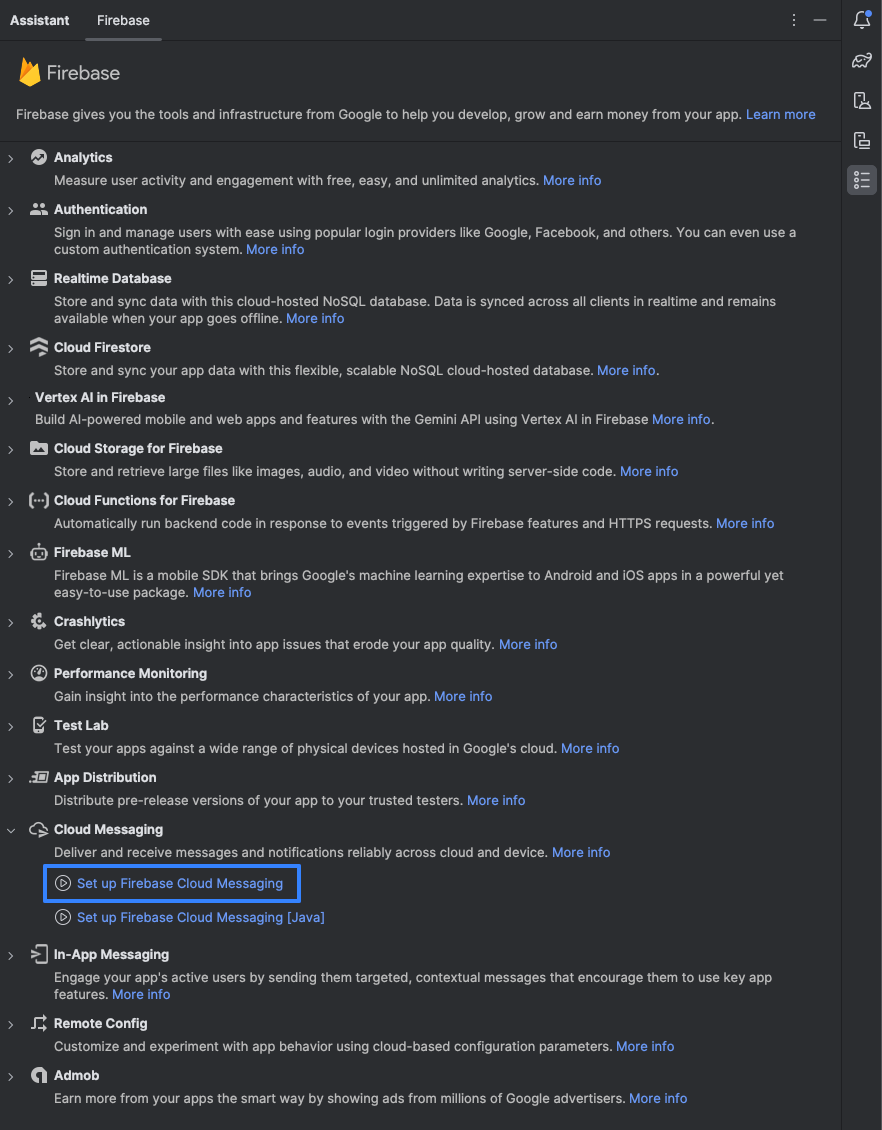 .
.
Click Connect to Firebase:
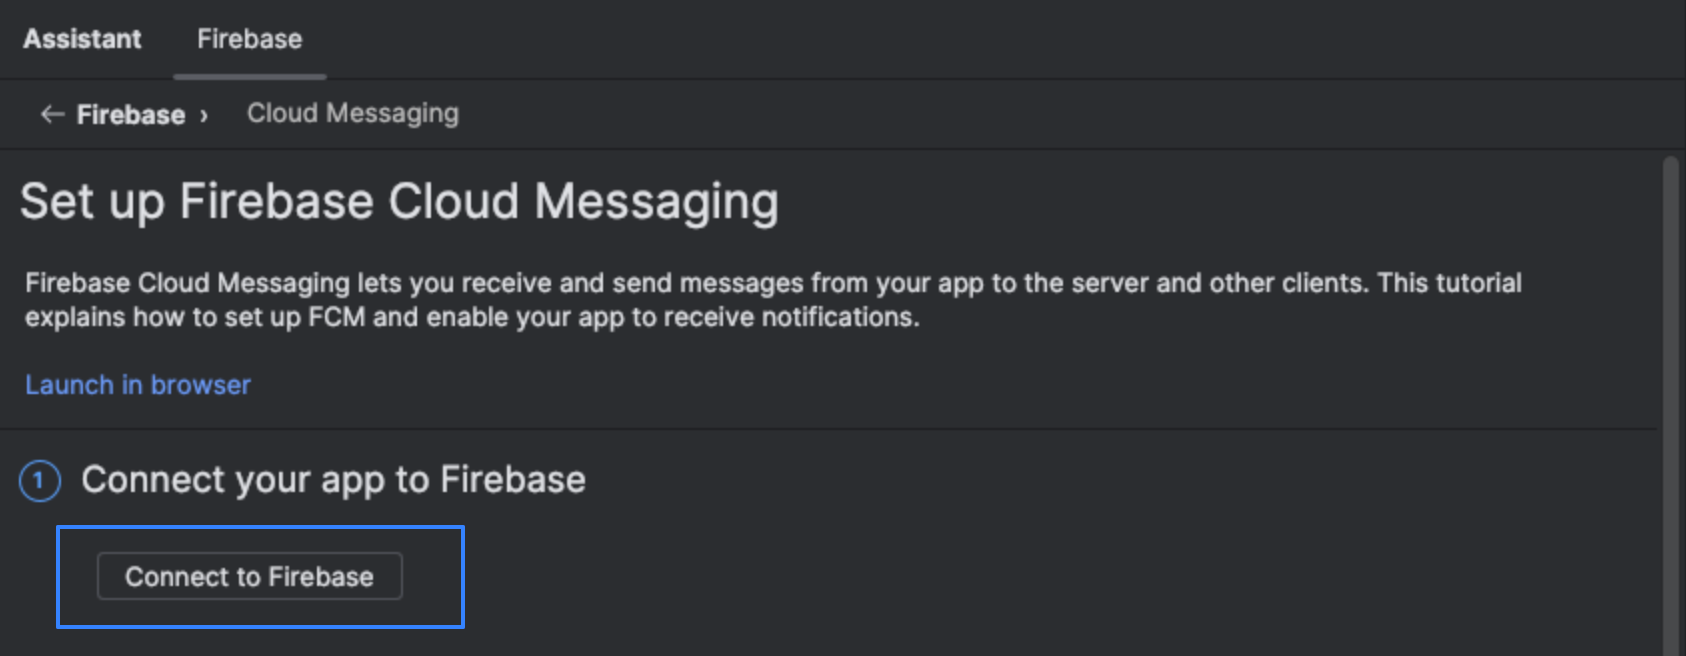
Once clicked, you will be redirected to the Google account selection page, and then to the Firebase project page. On this page, you will see Connect. Click on this button:
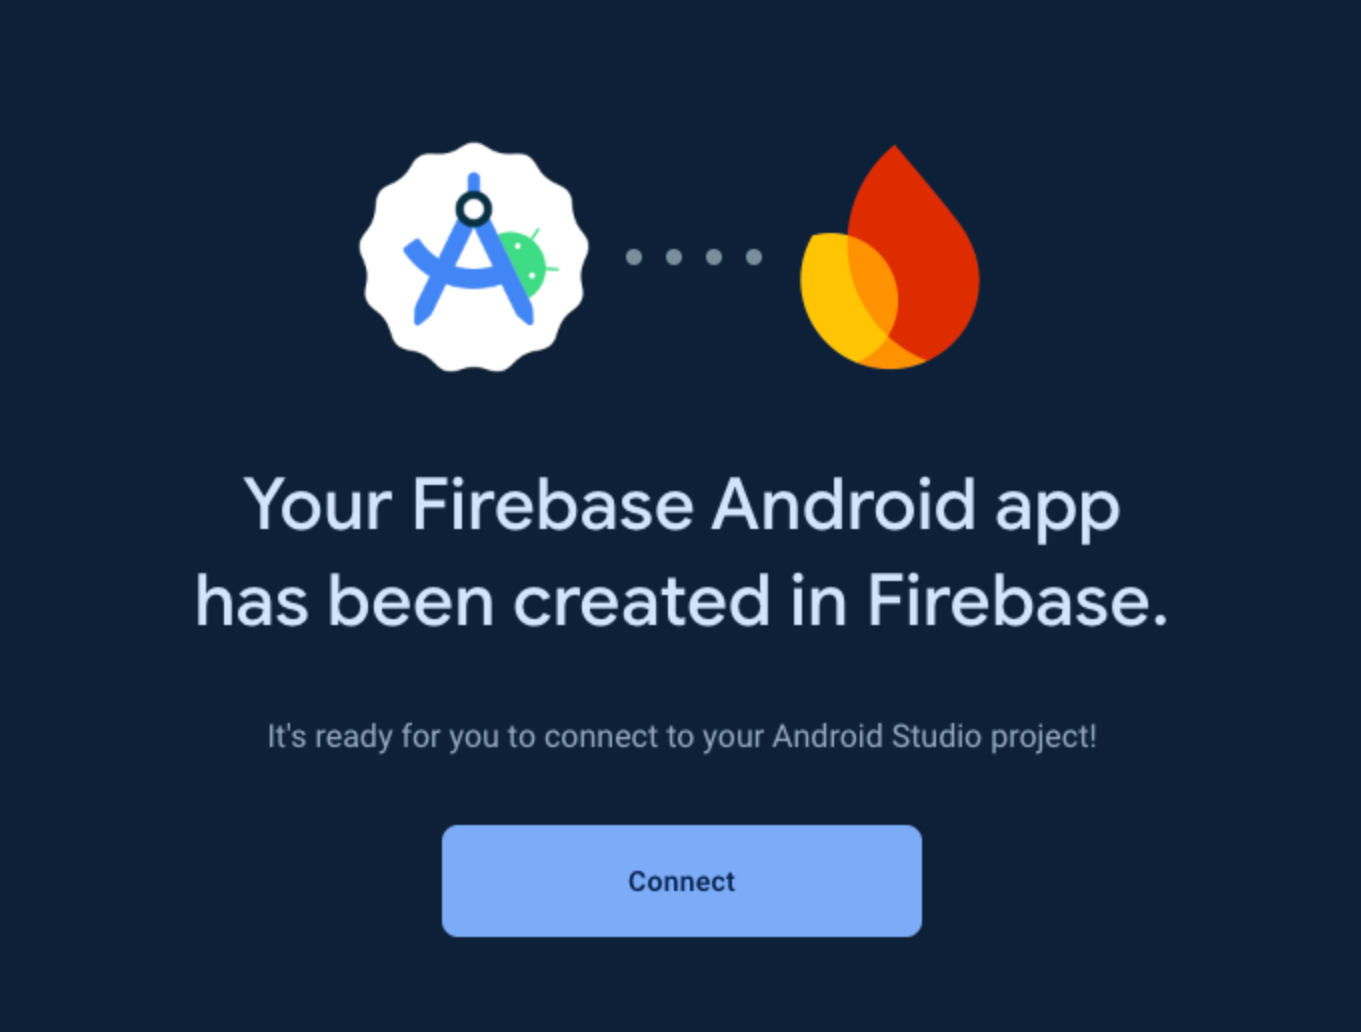
Uploading google-service.json to the "app" project folder should happen automatically. If it didn't - do the google-service.json download yourself from the Firebase website and add the file to the folder:

In Android Studio, in the Firebase panel, select Add FCM to your app:
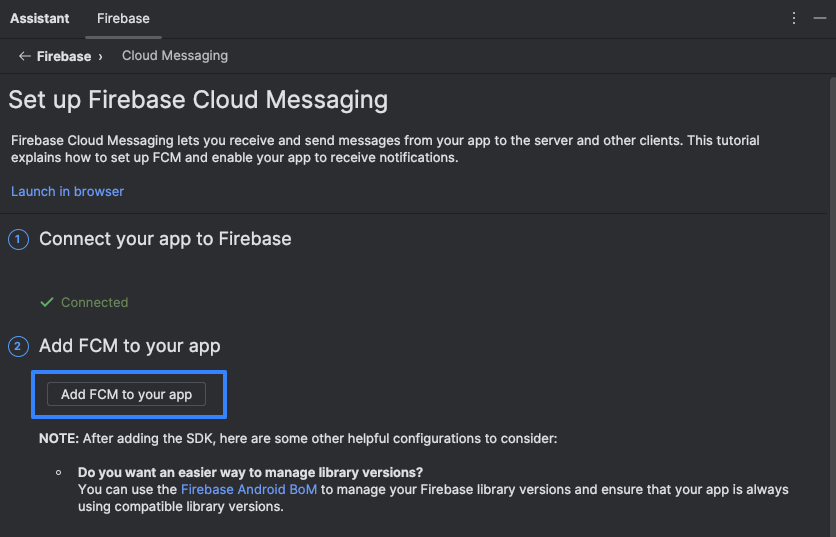
After clicking this button, a confirmation window will open to confirm the download of the Firebase Cloud Messaging dependencies. Confirm the download:
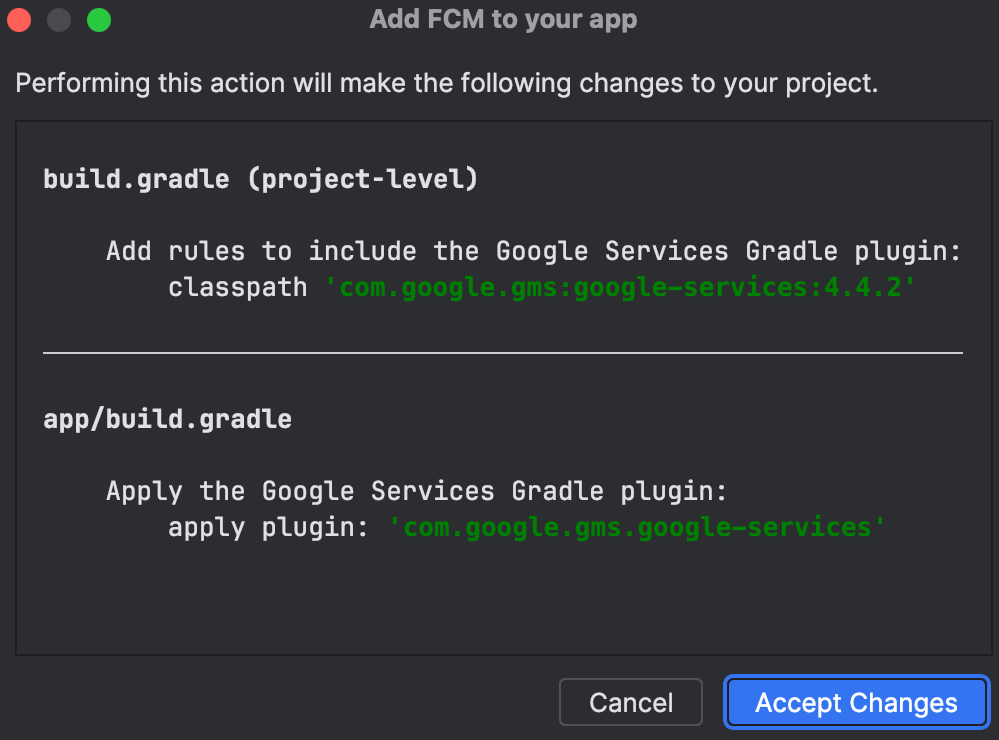
Check that FCM dependencies and plugins have been added correctly
- The project level build.gradle must contain the google.services dependency:
buildscript {
dependencies {
classpath(libs.google.services)
}
}
- The build.gradle file of the application layer must contain the com.google.gms.google-services plugin:
plugins {
id(“com.google.gms.google-services”)
}
- also the build.gradle application level must contain the firebase.messaging dependency in the dependencies block:
dependencies {
implementation(libs.firebase.messaging)
}
Add permissions to the AndroidManifest app
To add permissions to the application, paste the following code into the AndroidManifest file:
<uses-permission android:name="android.permission.POST_NOTIFICATIONS" />
<uses-permission android:name="android.permission.VIBRATE" />
<uses-permission android:name="android.permission.INTERNET" />

SDK Integration
Add the altcraft-sdk library folder to the project folder in Android Studio at project level. In the setting.gradle.kts file, add the library module using the command:
include(":altcraft-sdk")
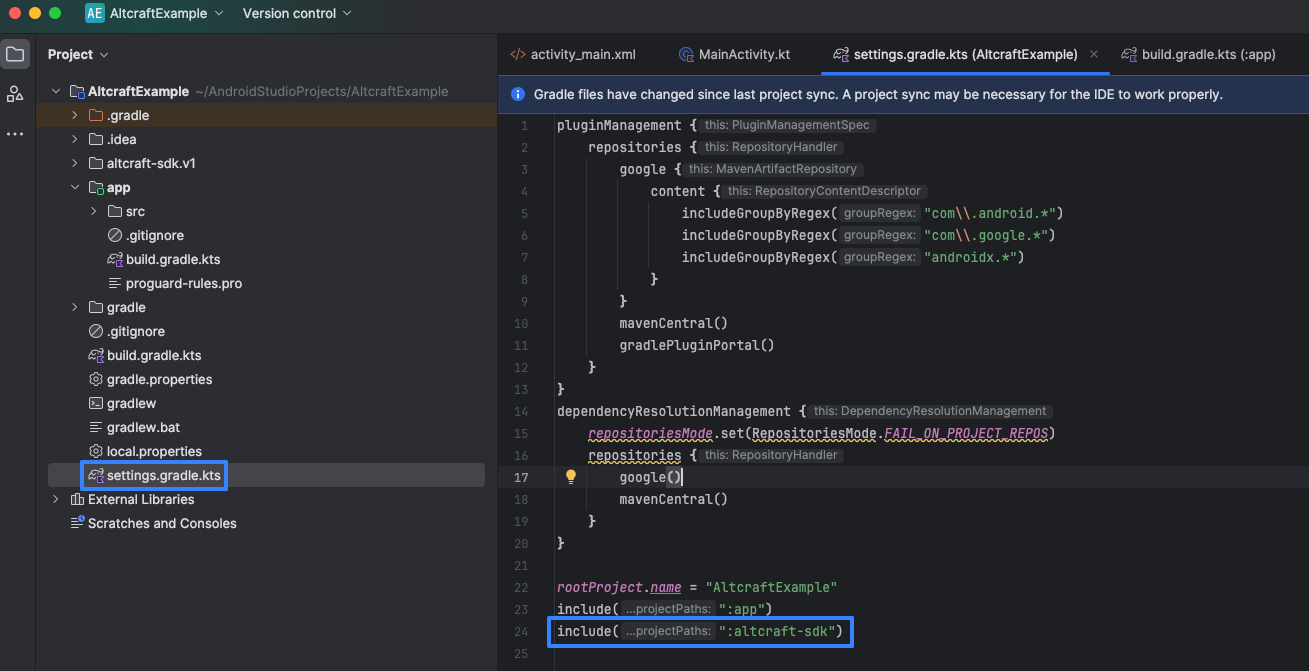
In the build.gradle.kts file of the app module (in the dependencies block), add the library dependency using the command:
implementation(project(":altcraft-sdk"))

Then do sync by clicking the appropriate button at the top of the screen:

SDK Initialization
Creation of a configuration variable
Add the following variable:
 val config = AltcraftConfiguration.Builder(
            apiUrl: String,
            resToken: String,
            icon: Int,
            usingService: Boolean

        ).build()
In this variable, specify the following parameters:
-
apiUrl - URL address of platform pixel domain
-
resToken - Altcraft resource token
-
icon - identifier of the Drawable image resource to be used as a notification icon
-
usingService - boolean value for the parameter that allows or disallows the use of foreground services during the execution of push notification subscription and subscription token update. The use of foreground services ensures that functions are completed in situations where the user has closed or minimized the application before the subscription or update process is complete. The operation of the foreground services is accompanied by the display of a notification to inform users that the program is running in the background.
-
serviceMessage - string value used to specify the message text that will be displayed in the notification when frontend services are enabled. The default value is "null". If the use of front-end services is enabled and the serviceMessage value is "null", the service notification will indicate “background process”.

Execution of the SDK initialization function
Execute the following function:
AltcraftSDK.init(context: applicationContext, configuration: config) with the following parameters:
-
context - application context
-
configuration - configuration variable.
Adding configuration and SDK initialization is recommended to be done in the class extending Application() or in the main Application Activity.
![]()
Subscription to Altcraft push notifications
Starting with API 33, user permission is required to show notifications. Prior to API 33, adding permission to the manifest file automatically authorizes the display. The Altcraft notification subscription function will only be executed if permission to show notifications has been granted, there is a saved SDK configuration, and the initialization process is complete.
Once permission to show notifications has been granted and the SDK has been initialized, execute:
AltcraftSDK.pushModule.subscribe(context: Context), where context is the context of the application.
Processing and receiving notifications in an application
To process and retrieve notification data values in an application, you must override the PushService class of the library that extends FirebaseMessagingService(). To do this:
- In the application, create a class that extends PushService():
class AppPushService : PushService() {
    override fun onNewToken(token: String) {
        super.onNewToken(token)
    }
    override fun onMessageReceived(message: RemoteMessage) {
        super.onMessageReceived(message)
    }
}
- Add the service code to the application's AndroidManifest file in the application section:
        <service
            android:name="service class name"
            android:directBootAware="false"
            android:enabled="true"
            android:exported="false"
            android:usesCleartextTraffic="true">
            <intent-filter>
                <action android:name="com.google.firebase.MESSAGING_EVENT" />
            </intent-filter>
        </service>
Once the notification is received, the onMessageReceived function will access the message object of the RemoteMessage class, from which the values of message.data["key"] can be retrieved, where "key" is the required key.
The call super.onMessageReceived(message) inside the onMessageReceived (message: RemoteMessage) function allows displaying a push notification using the SDK builder method. Excluding the call to super.onMessageReceived(message) cancels the display of the push notification using the library's builder method, delegating this function to the application developers.
Receive SDK events in the application
SDK events are string objects containing event code. Events are added to a list of events to be listened to. Use the following code to access the list of events in the application:
 AltcraftSDK.eventsList.addListener { eventsList ->
     // events List - list containing SDK events.
}
When the list is changed, the addListener function closure will be triggered and the eventsList will be updated.
The decoding of the codes is provided in a separate file. (it is good to give a link to the file or its name)
SDK data cleanup
SDK data cleaning includes:
- Cleaning up SDK database objects
- Cleaning up
SharedPreferencesSDK data - Terminating existing
WorkManagerSDK tasks.
To clear SDK data, execute the clearCache function of the Altcraft object:
AltcraftSDK.clearCache(context: applicationContext) {}, where context is the application context.
The clearCache closure is triggered after executing the function.
Data clearing is required to subscribe to push notifications after changing configuration data if there are existing subscriptions.