How to send API request with RabbitMQ
Description
In this article, you will learn how to send API requests using RabbitMQ.
info
A unique parameter request_id is sent to identify requests.
Queues
When working with API in RabbitMQ, two queues are used:
api_req — queue for incoming requests;
api_resp — the queue that receives responses to requests (only if request_id is specified).
Structure of the sent JSON message
| Parameter | Type | Example | Required | Required |
|---|---|---|---|---|
| request_id | string | "abcd1234" | Yes, if the response to the request is necessary | Request ID |
| request | string | api/v1.1/campaigns/triggers/import_and_start_batch | Yes | API request path |
| body | JSON object | "body":{ | Yes | API request body |
Structure of the received JSON message��
| Parameter | Type | Example | Required |
|---|---|---|---|
| body | JSON обьект | "body": | Request response body |
| request_id | string | "abcd1234" | Request ID |
How to send API requests in Go
You can send an API request using a script that calls RabbitMQ:
- Write and execute a script
Example
package main

import (
	"encoding/json"
	"log"

	"github.com/streadway/amqp"
)

const accID = 1
const resourceID = 3
const dbID = 23
const msgID = 17
const segmentID = 85
const amountOfPushMsgs = 1
const emailDomain = "example.com"

const req = `{
	"account_id": 1,
	"request_id": "db1894e4-1a2c-4021-8233-9cca0b96b79e",
	"request": "api/v1.1/campaigns/triggers/import_and_start_batch",
    "body": {
		"format": "json",
		"trigger_id": 240,
		"skip_triggers": false,
		"detect_geo": true,
		"matching": "custom",
		"field_name":"CustomF",

		"custom_data":{
			"some":"some0"
		},
		"content":{
			"someCont":"someCont0"
		},
		"data": [
			{
				"data":{
					"_fname":"NUMBER13",
					"_lname":"Lambert",
					"phones":"790000000013",
					"email": "profile1@example.com",
					"CustomF":18
				},
				"custom_data":{
					"some":"some1"
				},
				"content":{
					"someCont":"someCont1"
				}
			},
			{
				"data":{
					"_fname":"NUMBER14",
					"_lname":"Hard",
					"phones":"790000000014",
					"email": "profile2@example.com",
					"CustomF":14
				}
			}
		]
	}
}`

func failOnError(err error, msg string) {
	if err != nil {
		log.Fatalf("%s: %s", msg, err)
	}
}

func main() {
	var err error

	var conn *amqp.Connection
	conn, err = amqp.Dial("amqp://example:abcdefghijklmnopqrstuvwxyz127.0.0.1:5672/")
	failOnError(err, "Failed to connect to RabbitMQ")
	defer conn.Close()

	var ch *amqp.Channel
	ch, err = conn.Channel()
	failOnError(err, "Failed to open RabbitMQ channel")
	defer ch.Close()

	qUeueImport, err := ch.QueueDeclare(
		"api_req", // name
		true,      // durable
		false,     // delete when unused
		false,     // exclusive
		false,     // no-wait
		nil,       // arguments
	)
	failOnError(err, "Failed to declare RabbitMQ queue")

	for i := 0; i < amountOfPushMsgs; i++ {
		var bodyMap = make(map[string]interface{})
		err = json.Unmarshal([]byte(req), &bodyMap)
		failOnError(err, "Failed json.Unmarshal to bodyMap")

		for k, v := range bodyMap {
			log.Println(k, v)
		}

		body, err := json.Marshal(bodyMap)
		failOnError(err, "Failed to json.Marshal bodyMap")

		err = ch.Publish(
			"",               // exchange
			qUeueImport.Name, // routing key
			false,            // mandatory
			false,            // immediate
			amqp.Publishing{
				ContentType: "text/plain",
				Body:        []byte(body),
			})
		failOnError(err, "Failed to publish a message")
	}

	log.Printf("[v] Sended %d requests to %s", amountOfPushMsgs, qUeueImport.Name)
}
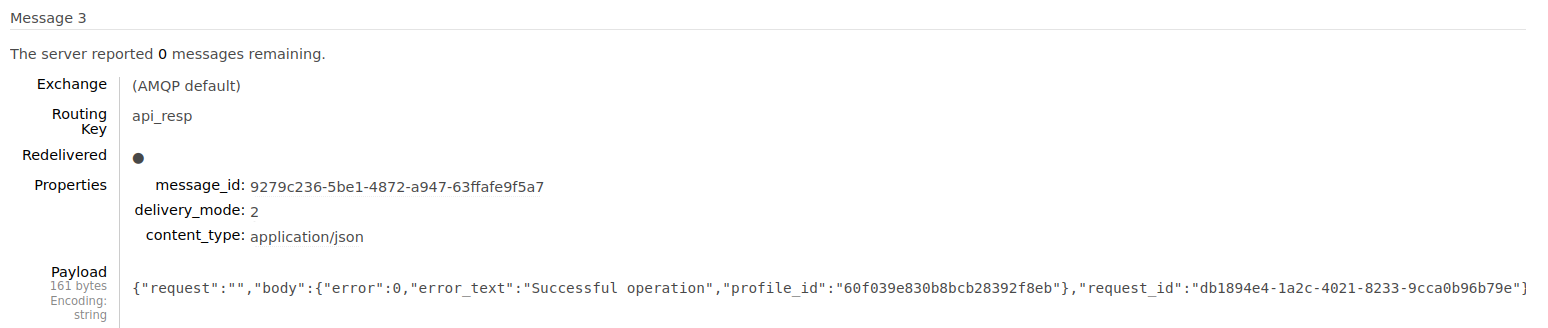
- After executing the script, go to RabbitMQ —> Queues
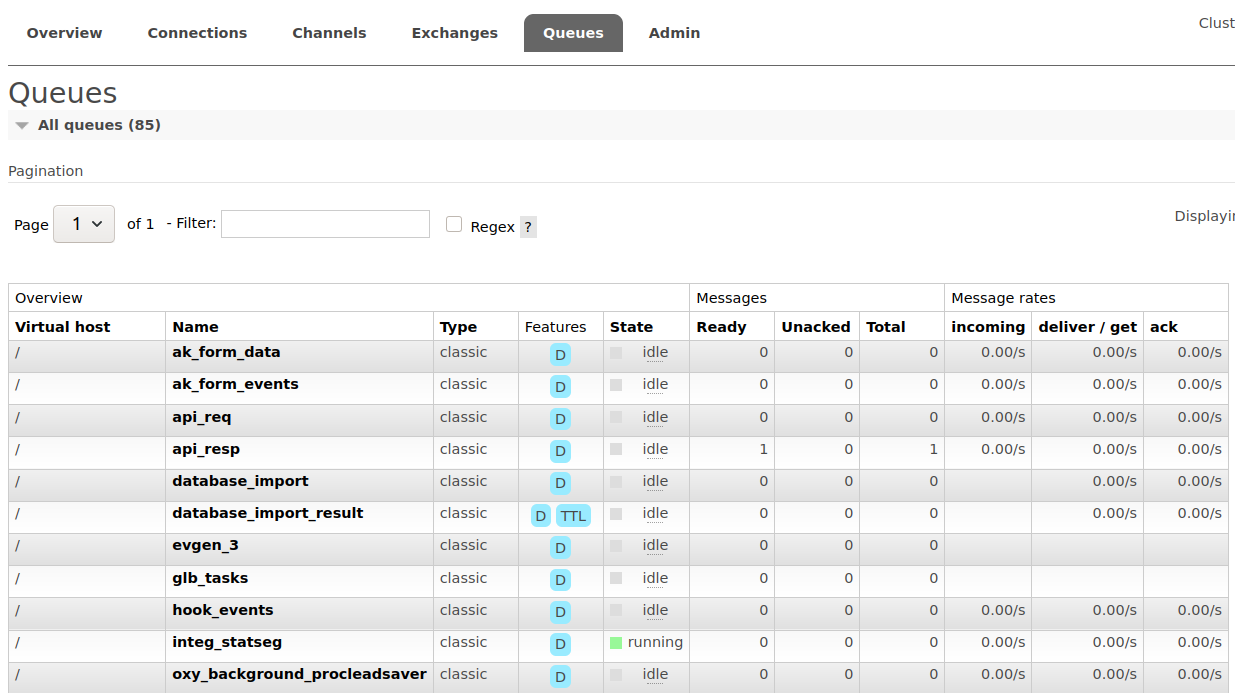
Choose api_resp and get a response to the API request
How to send API requests via RabbitMQ Management Plugin
You can send an API request directly to RabbitMQ via api_req:
Go to RabbitMQ —> the Queues tab. Then select api_req and Publish message.
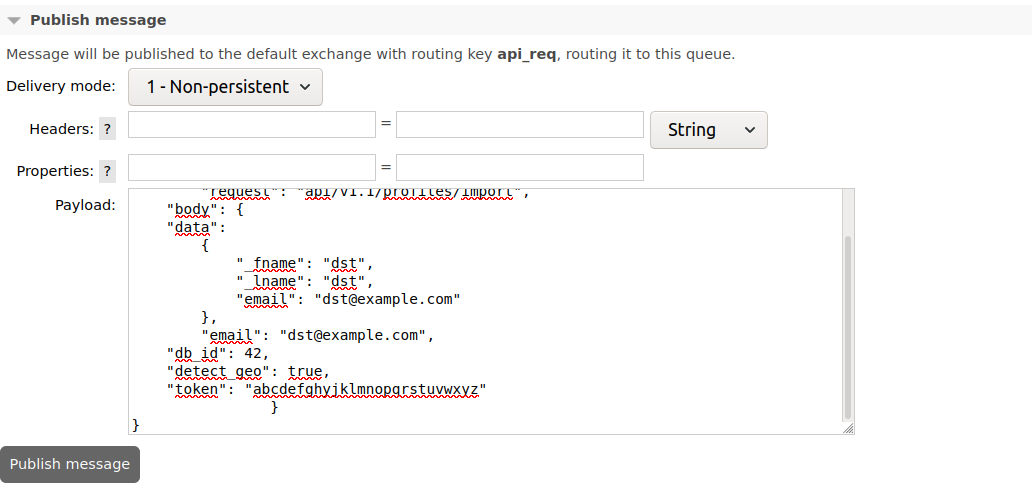
- After the request is sent, you can see its result in the same way as in the first method.