Altcraft Docs LogoAltcraft Docs Logo
User guide iconUser guide
Developer guide iconDeveloper guide
Admin guide iconAdmin guide
English
  • Русский
  • English
Login
    Getting StartedAdministrator documentationFunctional characteristics
      Technology descriptionarrow
    • Architecture OverviewComponent Description
        Deployment schemesarrow
      • Basic schemeFail-safe schemeTypical Placement in Infrastructure
    System requirements
      Admin Panelarrow
      • Account areaarrow
        • Accountsarrow
        • Account UsersAccount Virtual SendersAccount Database Indexes
        TariffsExternal data configurationLDAPTasksSchedule JobsGlobal Stop ListsWebversion Store Policies
        Settingsarrow
      • Databases
          Accessarrow
        • AdminsAPI tokens
        Notifiers
          MTAarrow
        • Default rulesRetry rulesLock rulesBounce patternsStrategiesKeysISPsPools
      Nodes
        Sendersarrow
      • EmailSMSEvent generatorIntegration with SendsayENS: настройка сендера
        Reportsarrow
      • Audit JournalData Usage
        Toolsarrow
      • ARF decoderURL decoderSMID decoderLicense
      Platform installationarrow
    • Automatic installationManual installationRunning the platform in a Docker container
      Platform configurationarrow
    • Configuration fileDomain settingsLDAP access configurationSending Email via SMTP relayPixel and push domain configurationCluster and Replication SetupSystem notifications configurationProcesses UNIX sockets configurationHTTPS ConfigurationMigrating from MongoDB Community Edition to Percona Server for MongoDBAdding sender IP addressesDeduplication request settingsPostgreSQL database for account dataProxy server settingsKeycloak Integration with AltcraftGetting HTTP service statusesConfiguration MongoDB logs rotation
        Configuration of system constants and directoriesarrow
      • Filtering bot actionsDirectory of gender markers
      Platform maintenancearrow
    • Personnel requirementsPlatform maintenance processesPlatform updatingPlatform service monitoringBackup and recoveryTransferring the platform to a new serverCreating, deleting, and populating tables for statistics in ClickHouseUsage of the aktool utilityUsers and directories engaged by the platform
      Custom channels guidearrow
    • OverviewCreating and configuring a channelEntity field configurationTemplate languageEntities
        Pipesarrow
      • Pipe: Basic ConceptsResultErrorsLogPackUnpackHTTP RequestStore SetStore GetSelectorSQLEventerScheduler
        Pipelinesarrow
      • Pipeline: Basic ConceptsMessageScheduleListenerModerateStop
      Extraarrow
    • System page customizationSend Message IDИнструкция по миграции истории в ClickHouseInstructions for migrating history to ClickHouseUtility for importing push subscriptions to Firebase projectUtility for importing push subscriptions to Firebase project
    Processing HTTP/HTTPS traffic
      Administrator APIarrow
      • Accounts admin apiarrow
        • Restricted accessarrow
        • Account Activation and DeactivationAccount Freeze and Unfreeze
        Get accounts listAdd a new accountDelete the account
        Account usersarrow
      • Update an Existing AccountAdd a new accountDelete a userGet a list of usersSending a Welcome Email
        Nodesarrow
      • Synchronize node MTA configurationGet nodes listGet node MTA statusActivate node MTADeactivate node MTA
        Senders admin apiarrow
      • Create or update AKMTA senderGet AKMTA sender informationAssign account to senderGet senders listDelete senderRestore sender
          Sender queuearrow
        • Get sender queue informationHold sender queueRelease sender queueClear sender queue
        Virtual sendersarrow
      • Get virtual senders listGet virtual sender informationCreate virtual senderUpdate virtual senderClone virtual senderDelete virtual sender
    Documentation Archive
  • Custom channels guide
  • Entity field configuration

Entity field configuration

Description​

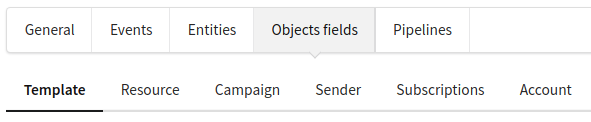
For each platform object associated with channels, you can set the following fields:

Layout is responsible for the arrangement of fields on forms. You can select several options for one-, two-, three- and four-column displays. Each line can have its own set of columns.

Layout elements​

When you click to add an element to Layout, you can select its type.

  1. Layout element is a field of this type does not store data, but simply helps to group or describe the main fields. Available elements of this type:
  • message;
  • header;
  • divider.
  1. Field that directly store data. They are accessed through the keyword of a specific entity using a template language. Types of fields:
  • int;
  • string;
  • bool;
  • json;
  • text;
  • html;
  • file;
  • enum;
  • color.
caution

The set of available field types may vary depending on the entity.

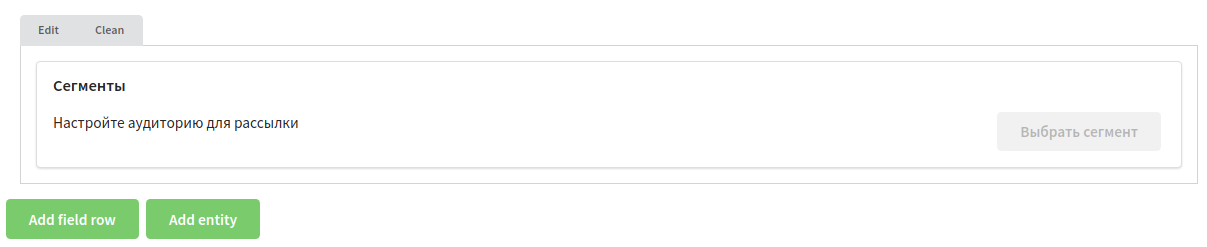
The Entity field is configured separately. Layout has an Add entity button. It allows you to add a field with an external entity attached. It takes up the entire line in Layout. Setting up the external entity itself is described here.

Setting up a field with an associated entity​

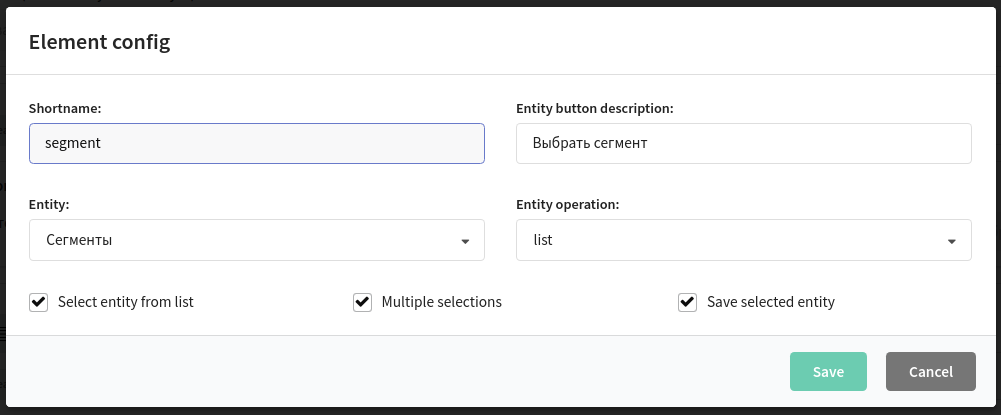
Shortname is the name by which the data of the external entity in the pipeline will be accessed. (template language).

Entity button description is the name of the button that opens editing of the external entity in the interface.

Entity is an entity that is bound to a field.

Entity operation is a selection of entity operation (Entities), the result of which will be written to this field.

Select entity from list is available only for the List operation. If set, you will need to select from the list which data to save. Activates the Multiple selection and Save selected entity options for configuration.

Multiple selection is available only for the List operation. Turns multi-select mode on or off. If disabled, only one element can be selected.

Save selected entity is available only for the List operation. Sets whether to save data in a field while setting it up or to automatically load fresh data when a mailing is launched.

For example, for the field configuration in the screenshot above, let's assume that the List operation returned the following array of objects:

[
{
"id": 1,
"name": "Segment 1"
},
{
"id": 2,
"name": "Segment 2"
},
{
"id": 3,
"name": "Segment 3"
},
{
"id": 4,
"name": "Segment 4"
}
]

In the interface with this setting, the field will look like this (provided that the output form of the List operation is configured accordingly in the entities):

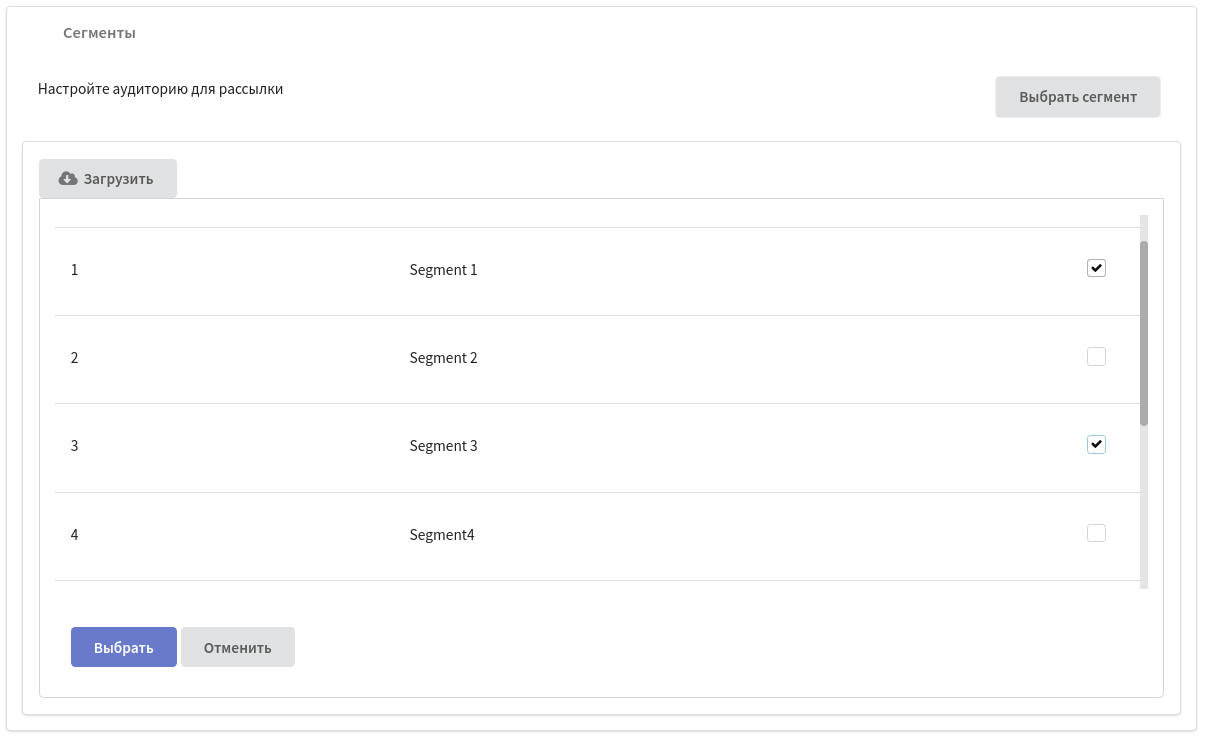
The screenshot shows that 2 segments are selected: Segment 1 and Segment 3. Then the following data array will be saved in the field:

[
{
"id": 1,
"name": "Segment 1"
},
{
"id": 3,
"name": "Segment 3"
}
]

In a Pipelines, for example, if a field is configured in Mailing, it will be possible to access the stored data (template language). For example, like this:


Templates:

"$mailing.segment.%1.name"
or
"$mailing.segment"
or
"$$mailing.segment[some_field]": ["[$]id"]

Result:

"Segment 3"

[{ "id": 1, "name": "Segment 1" }, { "id": 3, "name": "Segment 3" }]

["13"]

If the Select entity from list option is disabled, the data list cannot be edited. All data will be recorded in the field.

Last updated on Nov 9, 2023
Previous
Creating and configuring a channel
Next
Template language
  • Description
  • Layout elements
  • Setting up a field with an associated entity
© 2015 - 2026 Altcraft, LLC. All rights reserved.