Appearance
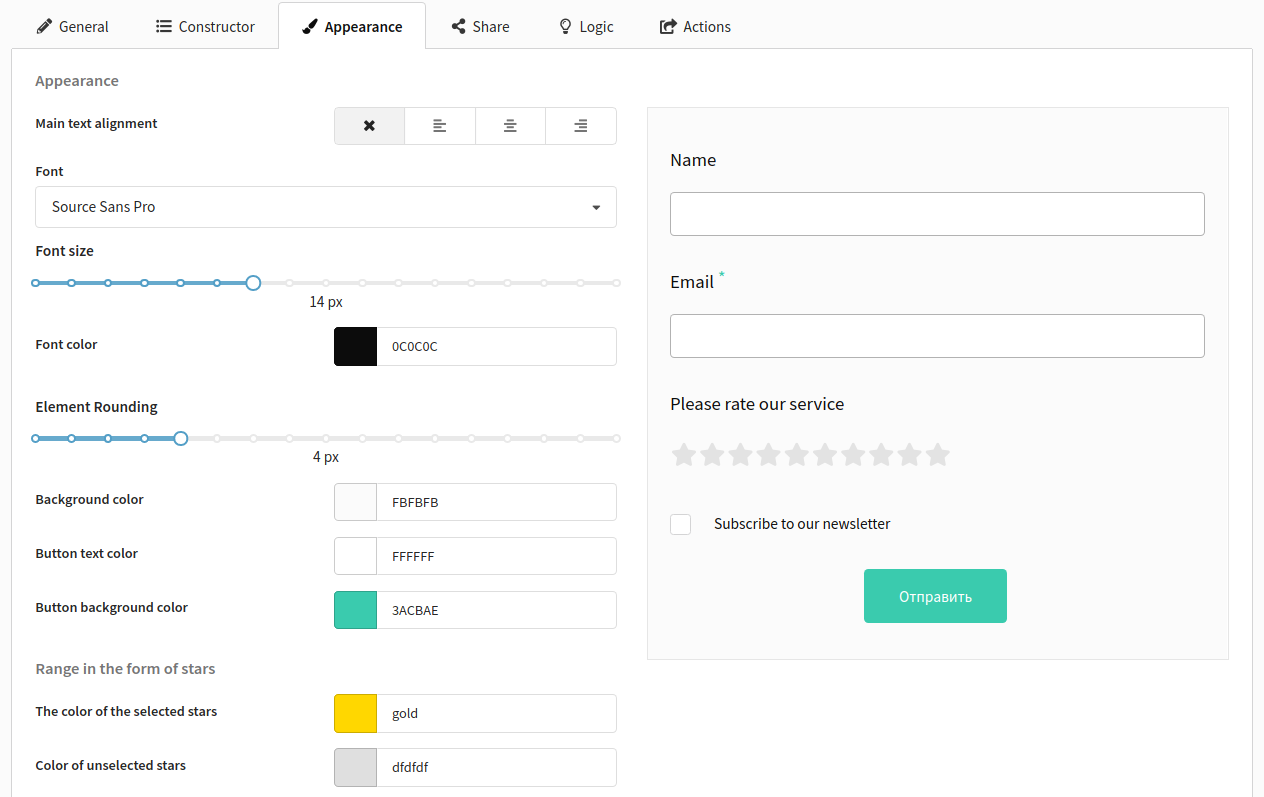
The next tab is Appearance. You can customize the appearance of the form here:
- fonts (font family, size)
- colors (text, background, buttons)
- alignment (no alignment, left/right, center)
O the left side a preview of the form is displayed in real-time.
The available form buttons:
- "Submit" (to send the form)
- "Previous" (to go to the next page of the form)
- "Forward" (to go to the previous page)
- Button to go to the final page
Button to go to the final page
If you leave the field with the button text empty or on the "General" tab in the settings of the final page do not specify a link to go after filling out the form, then the button will not be displayed.
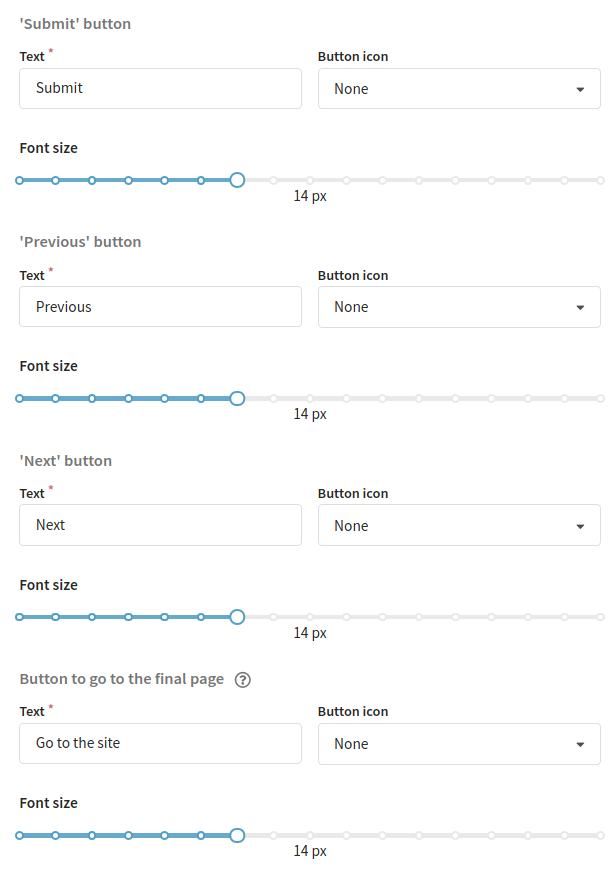
For each button, you can specify:
- the text that will be displayed in the button
- font size (pixels)
- an icon

So you've set up the basic settings of your form, the structure of the fields and the form appearance. Now save the form. Only then the form will be activated and you'll such options as to set up action settings and to publish the form.
The next tab is Appearance. You can customize the appearance of the form here: fonts, colors, buttons. At the same time, on the left side a preview of the form is displayed in real time.
The available form buttons:
- "Submit" (to send the form)
- "Previous" (to go to the next page of the form)
- "Forward" (to go to the previous page)
- Button to go to the final page
Button to go to the final page
If you leave the field with the button text empty or on the "General" tab in the settings of the final page do not specify a link to go after filling out the form, then the button will not be displayed.
For each button, you can specify:
- the text that will be displayed in the button
- font size (pixels)
- an icon
So you've set up the basic settings of your form, the structure of the fields and the form appearance. Now save the form. Only then the form will be activated and you'll have such options as to set up action settings and to publish the form.